Raheela

Meet Raheela, your friendly neighborhood content wizard, armed with over four years of experience in the realm of writing. An enthusiast of all things tech, lifestyle, chemistry, dyes, paints, spray paints, interior design, and exterior design, Raheela crafts articles that are both informative and engaging. Dive into the world of knowledge and creativity with Raheela's articles, where every piece is thoughtfully curated to bring you insights and a dash of inspiration.

can you spray paint leather

Can You Spray Paint Leather – Top 3 DIY Leather Spray Paints

As a busy mom of two young girls, my life is always on the go. Between school drop-offs, playdates, and sports practices, I rarely have a spare moment. However, despite my hectic schedule, my profound love for all things creative keeps me even more occupied in transforming old items around my home. 

And one way I like to update things in little to no time is through spray painting! Because of their versatility and minimum time needed, I am hooked to spray painting fabrics, old vases, picture frames, and lamps to give them a fresh look without spending hefty amounts on buying new items. Read my article on spray painting denim if you want to up your jeans game.

Once, I stumbled upon an old purse, and that’s when I thought if I could spray paint leather. After a bit of research and trial and error, I discovered that not only is it possible to spray paint leather, but it’s also a fun and creative way to update worn-out leather items.

You can spray paint leather with the right tools and techniques. Spray painting leather is an inexpensive and easy way to revamp old leather items, such as shoes, jackets, or furniture. However, using spray paint for leather is important, as regular spray paint may crack or peel over time. 

Whether you’re a busy mom like me or someone who loves DIY projects, I hope this article inspires you to spray paint leather and breathe new life into your old items. 

Can You Spray Paint Leather

As we already know by now that it’s possible to spray paint leather, but there are certain things to consider to help you put the best foot forward. 

Here are some factors to keep in mind:

  • Type of leather: Not all leathers are suitable for spray painting. Leather with a smooth surface and tight grain is the best choice. Avoid suede, nubuck, or patent leather, as they are unsuitable for spray painting or have specific requirements to repaint. 
  • Leather condition: Before spray painting, the leather must be clean, dry, and free of any oils or conditioners that may prevent the paint from adhering to the surface.
  • Surface preparation: Proper surface preparation is essential for successful spray painting. Sanding the leather with fine-grit sandpaper will help the paint adhere to the surface.

What Do You Need to Get Started

The right tools and equipment will make your job easier and offer professional results. Below are some basic things you need to get started:

1. Leather Preparer

Before starting the spray painting process, it is essential to prepare the leather surface properly. The leather preparer helps to remove any dirt, oil, or wax buildup that could affect the adhesion of the paint. Using a leather preparer ensures that the paint will penetrate properly and the finished product will be long-lasting. Angelus Leather Preparer & Deglazer is my personal favorite as it gives a professional finish, even if you’re an amateur at leather painting.  

2. Fine-Grit Sandpaper

Sanding the leather surface with fine-grit sandpaper helps remove smooth or shiny finishes allowing the paint to penetrate the leather more effectively. Sanding creates a rougher surface that provides more grip for the paint, ensuring better adhesion. 
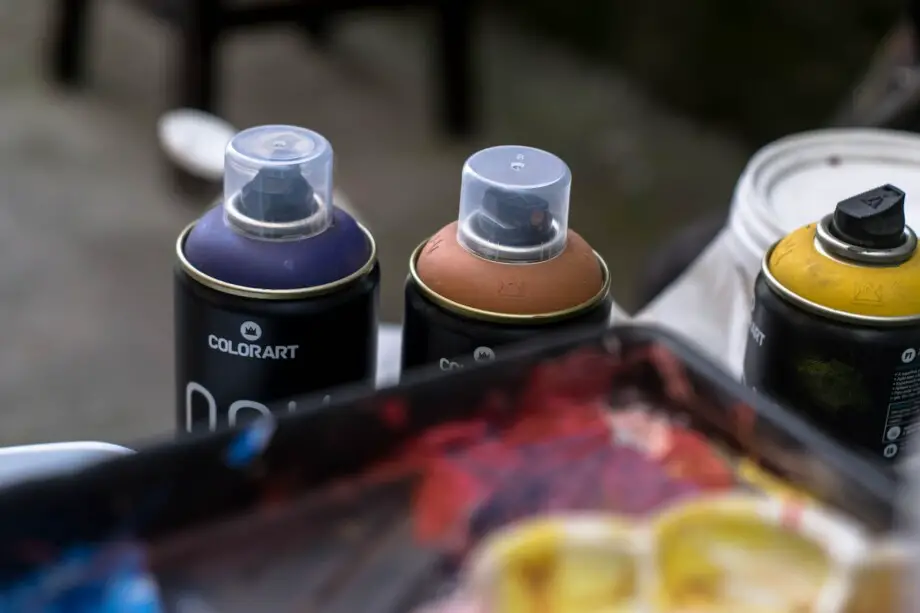
3. Leather Paint

Well, duh! Leather paint is specially designed for use on leather surfaces. It is a flexible, water-resistant, and durable type of paint that provides excellent coverage and color retention. Leather paint ensures the color will not fade, crack, or peel over time, even with regular use.

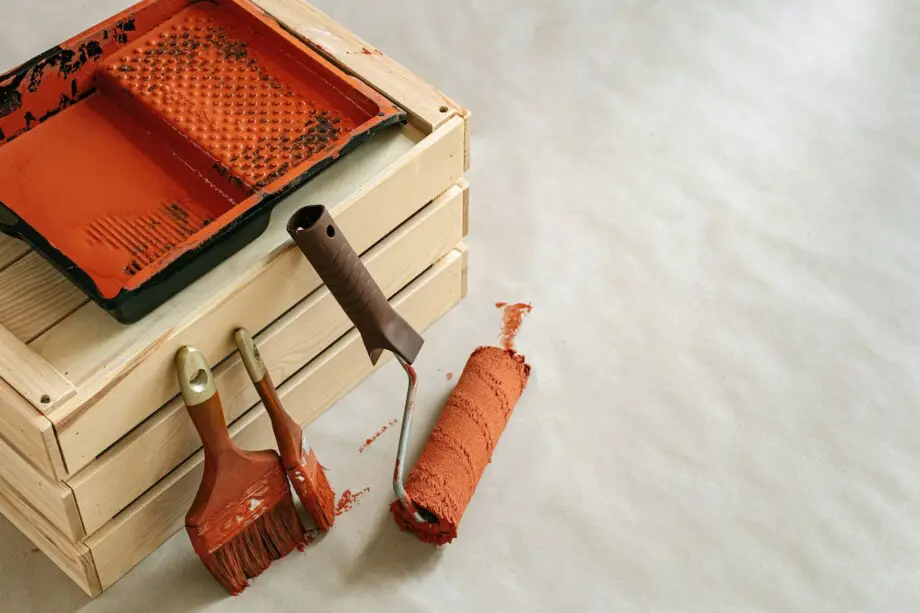
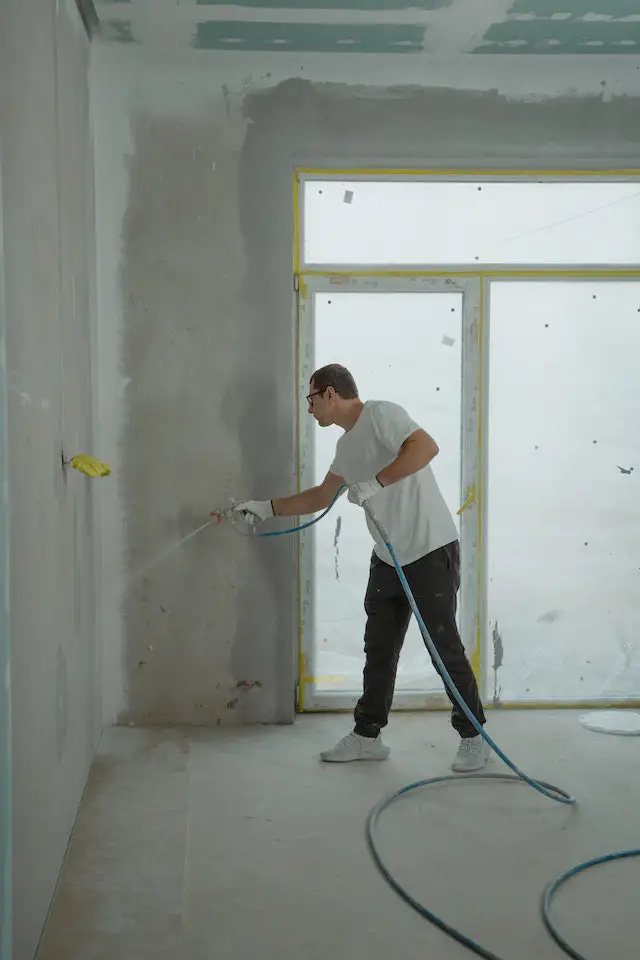
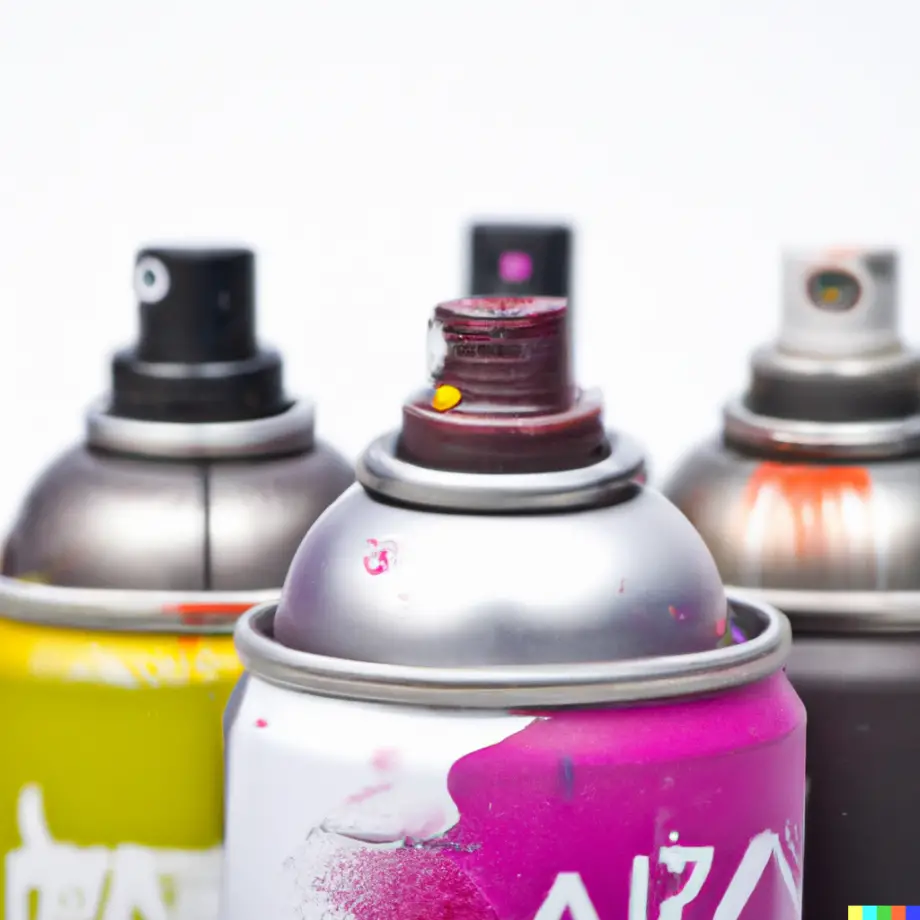
4. Paint Sprayer or Spray Paint Can

Depending on the size and shape of the leather item you are painting, you can choose between a sprayer or a spray paint can. A paint sprayer is a more professional tool that provides better control and coverage, but it can be more expensive and requires more setup time. A spray paint can is a more convenient and affordable option, but it may not provide as much control or coverage. Choosing the right tool for your project to achieve the desired results is important.

5. Painter’s Tape

Painter’s tape masks any areas you do not want to be painted. It can be used to create clean lines and sharp edges, and it can also help to protect the leather from overspray. Using painter’s tape ensures the finished product looks neat and professional. ScotchBlue Original Multi-Surface Painter’s Tape is perfect for damage-free removal and gives value for money. 

Steps to Spray Paint Leather

Here are the steps to follow when spraying painting leather:

Step 1: Prepare the Leather Surface

The first step in spray painting leather is to prepare the surface. Use a leather preparer or rubbing alcohol and a clean cloth to clean the leather thoroughly, removing any dirt, oils, or waxes that may be present. Allow the surface to dry completely before moving to the next step.

Step 2: Sand the Leather Surface

Using fine-grit sandpaper, gently sand the leather surface to create a textured surface for better paint adhesion. Be sure to sand evenly, covering the entire surface of the item. Once complete, use a clean cloth to remove any dust created during the sanding process.

Step 3: Mask off Areas

Use painter’s tape to mask any areas that need not be painted. This includes hardware, zippers, buttons, or any other areas you want to protect from the paint.

Step 4: Apply the Leather Paint

Apply the leather paint using a spray paint can or paint sprayer. Be sure to consistently hold the can or sprayer from the surface, typically around 6-8 inches, and apply in thin, even coats. Avoid oversaturating the leather with paint, leading to drips or runs in the finish. Allow each coat to dry completely before applying the next one. Typically, 2-3 coats are sufficient for complete coverage.

Step 5: Finish and Seal

After the final coat of paint has dried, allow the surface to cure for 24-48 hours before using the item. You can also apply a clear coat or sealant to the painted surface for extra protection and durability.

Tips and Safety Measures for Spray Painting Leather

  • Always use spray paint specifically designed for leather surfaces to ensure the best results.
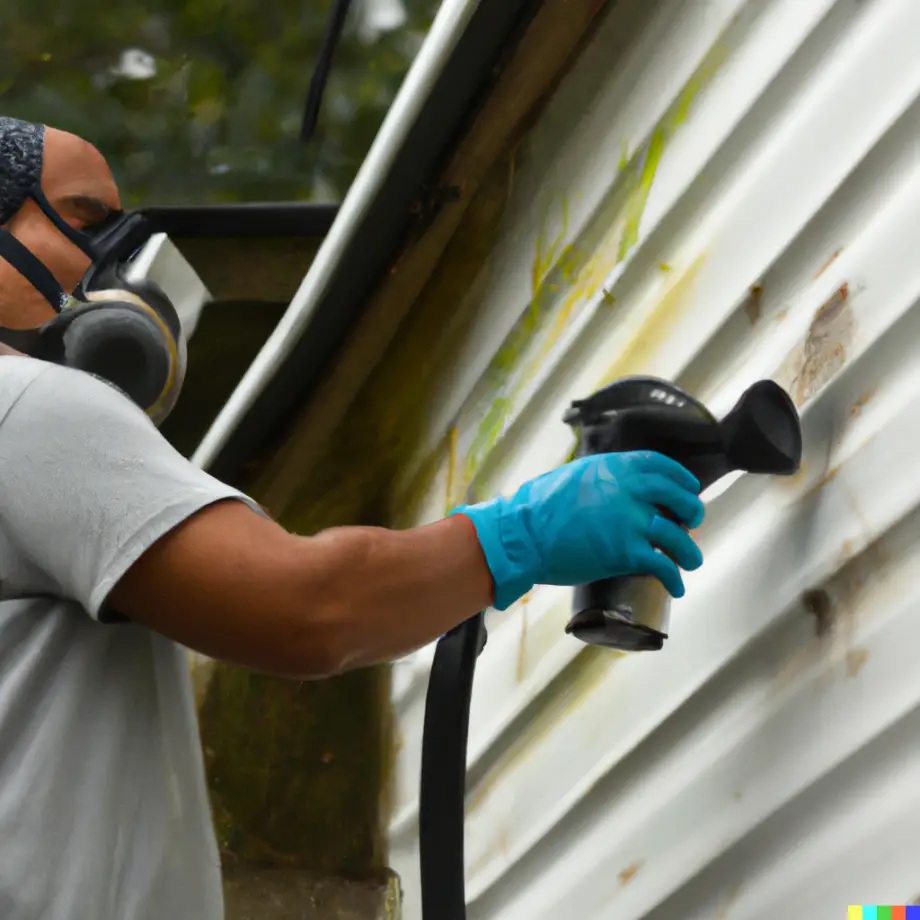
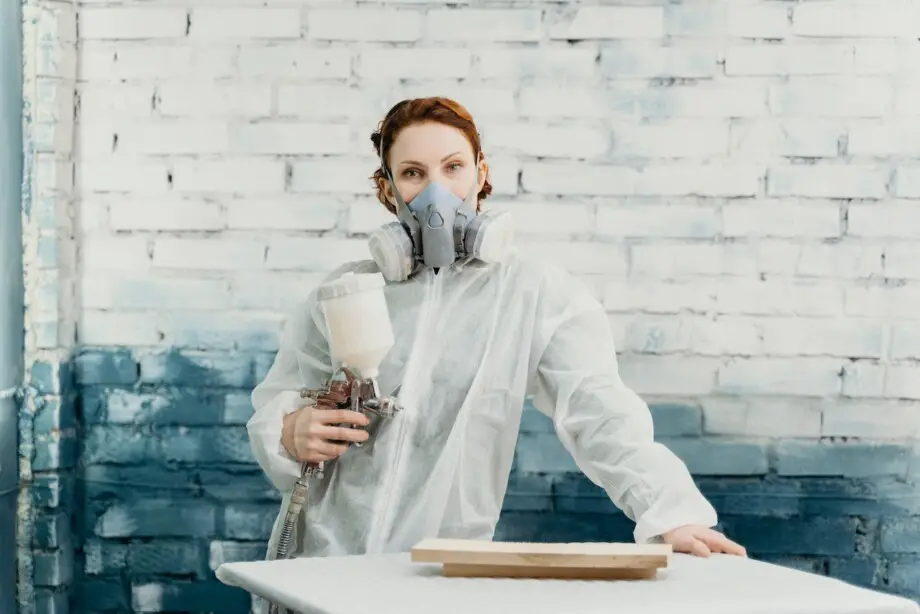
  • Work in a well-ventilated area and use a respirator mask to protect yourself from paint fumes.
  • Wear gloves to protect your hands from the paint.
  • Do not apply paint in a humid or excessively hot environment, affecting the finish. You can read more about how temperature affects the permanency of spray paints.
  • Be sure to follow the manufacturer’s instructions for application and drying times.
  • Keep the spray can or sprayer moving at all times to avoid oversaturating one area with paint.
  • If using a paint sprayer, ensure it is properly cleaned after each use to prevent clogging or damage.

Aftercare for Spray Painted Leather

After completing the process of spray painting leather, it’s essential to take proper care of the painted surface to ensure its longevity and prevent any damage. Here are some tips for taking care of spray-painted leather:

1. Avoid Abrasive Cleaners

When cleaning a spray-painted leather surface, avoid using harsh or abrasive cleaners. These can damage the paint and cause it to peel or flake off. Instead, gently clean the surface with a soft cloth or sponge with a mild soap solution.

2. Wipe Spills Immediately

Wipe off the spills immediately, as leaving them on the surface for an extended period can cause them to seep into the paint and leave a permanent unwanted stain. Saphir Medaille d’Or Super Invulner is a premium waterproof and anti-stain spray for all leather shoes and bags. 

3. Keep Away from Direct Sunlight

Direct sunlight can cause the paint to fade or crack over time. It’s best to keep spray-painted leather items away from direct sunlight or use UV protection products to reduce the effects of sun exposure.

4. Moisturize the Leather

Spray-painted leather surfaces can become dry and brittle over time, leading to cracking and peeling of the paint. To prevent this, it’s essential to moisturize the leather regularly using leather conditioners or oils.

5. Store Properly

When not in use, it’s crucial to store spray-painted leather items properly. Avoid stacking or placing heavy objects on top of them, as this can cause the paint to crack or peel.

Leather Items You Can Spray 

Here are the most commonly asked questions about leather items that can be spray painted. 

Can you spray paint leather couches – yes, you can!

Can you spray paint leather jackets – with the right tips? Sure, it’s possible.

Can you spray paint leather sofas – like all leather items, sofas can also be easily spray painted.

Can you spray paint leather chairs – yes, here’s an article to help you revamp your car seats while staying on a budget. 

Can you spray paint leather shoes – shoes are probably the most widely spray-painted leather item. 

Can you spray paint leather headboards – you need to take proper precautions and mask the surrounding of your headboards before spray painting them. 

Painting the leather white/gold/black/silver – Most leather spray paints come in various colors, so finding one that matches your desired shade should be easy. 

Top Three Picks for Spray Painting Leather Shoes 

When it comes to spray painting leather shoes, it is essential to choose a high-quality paint that is specifically designed for use on leather. Here are my favorite picks that can yield awesome results for your shoes:

Moneysworth & Best Brillo Nu-Life Leather/Vinyl/Plastic Color Renew Spray

It works like a charm for renewing or changing the color of your shoes. The waterproof formula repels stains, soil, and water keeping your shoes mark-free. Moreover, it also meets the California VOC standards, which means it’s low VOC and won’t cause harm to you or the environment.

Saphir Tenax Leather Dye

When it comes to spray painting shoes, Saphir Tenax can never go wrong. Not only is this a great spray paint for shoes, but you can use it on a variety of leather surfaces like purses, sofas, chairs, headboards, etc. The paint is available in over 30 colors, offering a wide selection. The high-quality finish and permanent coating work beautifully on even the most scuffed things. 

TRG Super Color Spray Leather

Whether you want to refresh your old pair of shoes or add a pop of color to a new pair, TRG is definitely worth checking out. From the classic black and brown to the very vibrant red, blue, magenta, and more, the color palette of TRG offers more than 50 whopping shades! So no matter how hard it is to find your color, this palette will definitely have something for you. 

FAQs

Will spray paint stay on the leather?

Yes, spray paint can stay on leather as long as the leather is properly prepared and high-quality leather spray paint is used.

Can fabric spray paint be used for leather?

Fabric spray paint should not be used on leather as it will not adhere properly. It is essential to use spray paint specifically designed for leather use. However, if you sand the shoe so much that its fabric shows up, you can then use fabric paint. 

What kind of paint will stay on the leather?

High-quality leather spray paints are designed to adhere to leather and are flexible enough to move with the leather without cracking or peeling.

Can you spray leather a different color?

Yes, you can spray paint leather a different color using leather spray paint in the desired color.

Can you permanently paint leather?

Yes, spray painting leather can create a permanent color change if the leather is properly prepared and high-quality spray paint is used.

Is leather paint just acrylic paint?

Leather paint is usually water-based, but it is not the same as acrylic paint. Leather paint is specifically formulated to adhere to leather and is flexible enough to move with the leather without cracking or peeling.

Final Word

Spray painting leather can be a fun and easy way to transform your old leather items into something new and exciting. However, it is essential to prepare the leather properly, choose the right type of paint, and take the necessary precautions to ensure that the paint sticks to the leather. By following the steps and tips outlined in this blog, you can create a unique and personalized item that reflects your style.

So, the next time you find yourself with an old leather item that could use a new look, don’t hesitate to try spray painting it. Who knows, you might end up with a beautiful, one-of-a-kind piece that you’ll love for years!

best paint brush sets for painting your home

9 Best Paint Brushes to Paint Your Home: Buying Guide

Most of us have played with paint and paintbrushes as a child, but there is an art to painting walls that goes beyond the most basic techniques! Painting your walls is a great way to add color and vibrancy to any room, transforming it in no time. With a paintbrush in hand, you can easily paint intricate designs, apply a new color to the walls, or even create personalized artwork.

Layering your wall is an easy and affordable way to give your home an instant facelift. So why not grab a paintbrush and start creating something beautiful today? You’ll be surprised by how easy and fun it can be.

We know that finding the right paintbrush can be a challenge. That’s why we’ve taken the time to curate a selection of paint brushes that are specifically designed for wall painting. Whether you’re a seasoned professional or just starting out, these paint brushes will help you get the perfect finish in no time!

OUR TOP 3 PICKS FOR BEST PAINT BRUSHES FOR YOUR HOME

Best overall

Presa Premium Paint Brushes

71znSANur+L. AC SL1500 9 Best Paint Brushes to Paint Your Home: Buying Guide
  • A total of 5 brushes that gives you variety to reach corners and trims 
  • Quality is the priority, no compromise
  • Durable SRT filaments give you a smooth finish 
  • Professional look, even beginners can easily get a premium finish on surfaces

budget friendly

Bates Paint Brushes

9 Best Paint Brushes to Paint Your Home: Buying Guide
  • Gives you great value for your money
  • Not just one but a pack of 4 brushes
  • Treated wood handle to be soft on your hands
  • Excellent choice for beginners and equally good for professionals

most versitile

Pro Grade Paint Brushes 5EA

9 Best Paint Brushes to Paint Your Home: Buying Guide
  • 5Ppk soft grip brushes
  • Comes in a pack of 5
  • Works with all paints and stains
  • Made out of synthetic and stainless steel

RATING CRITERIA – HOW DID WE FINALIZE THE PRODUCTS

As mentioned earlier, plenty of paint brushes are available in the market that claim to be user-friendly. Unfortunately, not all available products are up to par, either their quality is compromised, or the prices are.

To spare you from the hustle of searching for what’s best for you, we came up with strict rating criteria. Let’s get started with what we have got for you.

1. Affordability

The type of paint brushes you are using can create a big difference in driving your wall an exquisite look. Other than features, affordability is the first factor that comes into mind when purchasing a paintbrush.

We have gathered lists of paint brushes that are not only affordable but are best fit for the purpose you’re using them. All the selected products are value to money and fall under your budget range.

2. User friendly 

Besides full coverage and a perfect finish, a paintbrush must be easy to use and adaptable. If you buy a top-notch expensive paintbrush, but it doesn’t fit in your own hand, it is nothing but a waste of bucks.

Here, we have outsourced a list of products that aren’t only beginner friendly but also won’t be a punishment to your hands. Our selected paint brushes will not only let you control the paint on the surface but also produce pleasing results.

3. Project scope

Other than quality and value to money, a paintbrush must meet the scope of your project. It should not only provide smooth coverage to the wall but must be easy to handle. Our paint brushes are convenient to use and don’t let you struggle with handling these brushes.You can easily paint a broad & featureless expanse without facing any complexities dealing with your paint brushes.

9 Best Paint Brushes for your House

Looking for the perfect paintbrush to paint your wall? Look no further! Our mentioned list of paint brushes for wall painting can deliver outstanding results.

With their superior craftsmanship and thoughtful design, you’ll be able to paint quickly and easily without compromising on quality. So why wait? Get the paintbrush of your dreams today and start painting your wall like a pro! You won’t regret it.  

1. Presa Premium Paint Brushes – Best Overall

Key Features

  • Stainless steel ferrule
  • Equipped with flagged bristles
  • Very easy to clean
  • Multiple sizes of brushes

What do we like best?

Your house interior reflects your life standard as a whole, so compromising on your interior paint is not a choice.  The Presa brand came up with their set of 5 premium paint brushes to provide you with the best painting experience and finish within a confined budget.

These brushes have a SRT filament with flagged bristles which makes them very durable and makes the number of stray bristles almost nonexistent. Furthermore the unique filament allows the brush to hold at least 30% more paint than a regular brush which gives a premium finish to your interior walls.

To top it all of the brush has a stainless steel ferrule which not only makes it long lasting, but also gives it a very sleek and expensive look.

What needs to be improved?

The size of the brushes is quite small for large walls but it comes in very handy for small detailing and edgy surfaces.

Pros

  • Provides the most premium finish
  • Last for a long time
  • Reduces the number of coats
  • Steel ferrule gives it a fine look
  • Reduces the mess due to stray bristles

Cons

  • Brushes are small in size
  • A bit more expensive than other products

2. Bates – Paint Brushes – Budget Friendly

Key Features

  • Can hold more than ample amounts of paint
  • 4 different sizes and kinds of brushes
  • All brushes are light weight and easy on your hands
  • Filaments or bristles are very durable 

What do we like best?

Paint brushes can be quite expensive, and spending a huge amount of money to paint a single wall does not make much sense. To address this issue, Bates introduced its budgeted pack of 2 paint brushes. One is a normal 3’75 inch brush, while the other is an angled 2’75 inch brush.

Both brushes are very lightweight and easy to handle, which makes them easy to use for any beginner. They have a treated wood handle which is quite durable, and the fiber filaments are also very long-lasting.

The filaments are densely located, which helps the brush hold a large amount of paint at a time, reducing your project’s time and effort significantly.

What needs to be improved?

The filament, although densely populated, does not apply an even coating. So try using the brush with light colors so you don’t have to face this issue.

Pros

  • Comes with 4 different sizes of brushes
  • The brushes are easy to clean
  • Holds a lot of paint, reducing the project duration
  • Filaments are quite durable and long-lasting
  • Fits perfectly under your budget

Cons

  • Handles can break off after sometime
  • Uneven coats

3. Pro Grade – Paint Brushes – 5 EA – Most Versatile

Key Features

  • Both professionals and amateurs can use these paintbrushes easily
  • High-quality brushes that are strong-built
  • Angled brushes help to reach hard-to-reach areas.
  • It comes in multiple colors

What do we like best?

Having to buy multiple brushes for different tasks and surfaces is quite bothersome heavy on the pocket. To deal with this problem the pro grade brand introduced their 5 EA set of brushes which are very versatile in their use and also falls at a price point which makes it very cost effective.

Most brands which claim their brushes to be this versatile fall short in quality, but not this product. It works on almost all types of surfaces and reduces the streaks of paint which provides a professional finish. The angle stash brushes help the user paint crisp corner and edges with precision and reduce rough ends.  

Furthermore the SRT filament feature allows the brush to hold a large amount of paint at which allows to paint a concentrated color and reduce the number of paint coats.

What needs to be improved?

The comfort of the handle can be tiring for an untrained hand. The manufacturer can address this issue by introducing a soft padding on the handle to increase comfort.

Pros

  • Versatile in use for multiple surfaces
  • Provides professional finish to the edges
  • Less number of coats required for a smooth finish
  • Cost-effective product
  • Durable and long lasting bristles

Cons

  • Can be uncomfortable to use for untrained users
  • Biggest brush is 2 ½ inches, not very effective for wide coverage

Note: If you want a universal brush that works with almost all types of paint, jump to product number 8 on our list.


4. Amazon Basics Universal Decorating Brush – Best for Decors

Key Features

  • Both professionals and amateurs can use these paint brushes easily
  • It comes in mulitple colors
  • Angled brushes help to reach hard-to-reach areas
  • High-quality brushes that are strong-built

What do we like best?

Decorating your house is a really nice way to enjoy your time with something productive, but not every paint paintbrush is ideal for it. Many paint brushes do not have the precision or the finish needed for décor painting, but the Amazon basics universal decorating sets do. The set consists of 4 different brushes, all of which are perfect for decorating in their own way.

The brushes hold an ample amount of paint to provide a dense stroke which is necessary for wall decorations. The brush works on all kinds of surfaces, including interior and exteriors like stone tiles, bricks, and wood. The set also includes angle slash paint to provide perfect slopes on walls, ceilings, windows, etc.

Finally, the brushes are washable, which is rare in these products. Just wash the product and dry it using a wet towel before reusing it to get the best results.

What needs to be improved?

The bent angle brush is very low in quality and breaks after a few uses. But getting the other three brushes in this budget is still a very good purchase.

Pros

  • Includes 4 quite unique brushes
  • Best for interior decor of walls and objects
  • Provides a dense finish
  • Can be easily washed before reusing it
  • Holds ample amounts of paint

Cons

  • Few brushes needs more care or they can break
  • Not quite the right fit for intricate surfaces

Note: If you want a brush that works great with intricate surfaces jump right to the last product of the list, product # 9.


5. Chopand Paint Brushes – Best for Cabinets

Key Features

  • Comes in a pack of 2 and is for both: amateurs and professionals
  • Made out of chalk
  • Easily washable
  • Works great for waxing

What do we like best?

Cabinets and stencils are a basic part of every household. They make up most of the interior of your kitchen and add to its utility. But paining these cabinets can be quite problematic if one does not use the right product. This is where the famous Chopand brush brand enters the picture.

Chopand introduced it’s this product to help people paint their cabinets and stencils without any professional help. The brush has nylon and polyester bristles which are very durable and has a special filament formulation which holds a big amount of paint at a time that comes in very handy in tiring jobs like painting the inside of a cabinet.

The durable nylon bristles also allow to be used for waxing purposes and the steel ferrule is just the cherry on top of its already high durability.

What needs to be improved?

The set is a little expensive for having only two brushes. But its price is justified by its functionality and performance.

Pros

  • Holds a considerable amount of paint
  • Has got durable nylon bristles
  • Can be also used for waxing
  • Steel ferrule adds to durability
  • Easily washable and reuseable

Cons

  • Highly priced
  • Drying the brushes takes a long time

Note: If this brush is too expensive for you, go for our best budget product, product # 2, to have the most value-to-money experience.


6. PANCLUB Paint Brushes for Walls – Disposable

Key Features

  • Five brushes in the pack with flat tips
  • Disposable brushes 
  • Anti-rust feature helps in durability 
  • Quite lightweight but holds paint well

What do we like best?

Having to wash brushes after every project is the most frustrating part of the part of the job. The paint is stuck on its bristles and it requires a lot of effort to clean it. To address this issue Panclub came up with their disposable paint brushes which are economically priced and can be disposed of once you are done using them.

The brushes quality are not too bad either, the bristles are quite strong and holds a good amount of paint at a time. Furthermore these brushes are compatible with almost all types of paints including oil, latex or even varnishes. So a set of these brushes is enough to paint all the components of your project from scratch.

The brushes vary in sizes as well from 1 inch to 3 inches which comes in quite handy when you are painting on interior walls.

What needs to be improved?

The handle of the brush does not have a soft padding which can strain the hand of a new user.

Pros

  • Works with almost all variety of brushes
  • Best for varnishing
  • Holds high amount of product
  • Can be disposed off after using
  • High-end quality bristles

Cons

  • Do not have a soft padding
  • Do not last quite long

7. Paint Brush, Eco-Friendly Paint – Eco-Friendly

Key Features

  • Flat trim paint brushes 
  • Equipped with durable handles
  • It comes with 3 interchangeable bristles
  • Best for providing great ergonomics 

What do we like best?

Over 300 million paintbrushes go trash each year, which is hazardous to our environment. To reduce this unusable trash, Asyoren developed this eco-friendly paintbrush. The brush has interchangeable bristles, which extend its life and reduce the garbage in our environment.

Eco-friendliness aside, the brush is also phenomenal in painting. It has a long durable handle that is steady and provides great ergonomics. The brush is a flat-trim model, which makes it beginner friendly. The bristle fibers are also quite durable, which further extends the brush’s life.

The package comes with one handle and three changeable bristle brushes. So technically, you’re buying three brushes for the price of one and saving the environment at the same time.

What needs to be improved?

The brush is relatively easy to clean, but if you do not clean it right away, the paint will stick to the bristles as it dries up. Once it dries up, it will be very difficult to rinse the brush or comb the paint out.

Pros

  • Eco-friendly brush reduces pollution
  • Provides great value for money
  • Durable bristles in all three brushes
  • Flexibe handle – great ergonomics
  • Easy to use and therefore great for beginners

Cons

  • Paint can stick to it if not cleaned the right way
  • The size is too small for big projects

8. Genixart Multi-Angle Adjustable – Multi-Angle

Key Features

  • Comes in a pack of 3 variations in size
  • Works with a variety of paints
  • Easy to clean it up after use
  • Flexible neck to reach hard-to-reach places

What do we like best?

The most difficult part of painting a wall is when you get to the edges or corners. It is not only hard to properly paint those areas, but you can easily spill the paint onto the next wall. The only solution to this problem is angled brushes, and Genixart is providing 3 of them for the price of 1.

The brushes are 2” inches, 2.5”inches, and 3”inches in size, respectively. All three of them are angle adjustable but can also be used as normal flat brushes. The brushes work with a variety of paints, including water and oil-based paints, stains, latex, and even wallpaper paste.

The brush is perfect for masonry and wooden surfaces but also works quite well on interior walls. It is also easy to clean. Just simply rinse the brush in water and hang it out to drip dry.

What needs to be improved?

The brushes are all relatively the same size, as half of an inch does not make much of a difference. But as you have three, you can trim one down if you want small and minor touch-ups.

Pros

  • The package includes three brushes
  • All the brushes can work at different angles
  • Works best on masonry or wood surfaces
  • Washable and dries up quickly
  • Works with most types of paints

Cons

  • The size variation is not that significant
  • Not very long-lasting

Note: If you want a durable brush go for the first product on our list.


9. Wooster Brush Q3211-2 (Best For Intricate Surfaces)

Key Features

  • Comes in a pack of 3, 6 and 9
  • Brass-plated steel ferrules
  • Angled sash brush
  • Works best with acrylic paints

What do we like best?

Painting intricate surfaces seems an impossible job for a beginner, but with the right brush, it can become a relatively easy task. The Wooster brush Q3211-2 is the brush you must have around all the time because it is specifically made to paint intricate surfaces and without them your project is incomplete.

The brush has a small flexible sherpig handle which can be helped with just two fingers. The small handle provides great maneuverability, which enables you to expertly paint any type of intricate surface. The brush is also an angle stash, so painting on the edges is not much of an issue either.

The paintbrush is supported by brass-plated steel ferrule, which provides stability to bristles and significantly increases the ergonomics of your projects.

What needs to be improved?

The brush is not compatible with most types of paints. Its usability is very limited, so we recommend only using it with the stated finish type that is mentioned on the product.

Pros

  • Small handles make it highly maneuverable
  • Brass bristles provide extra stability
  • Angle stash is very convenient for painting on the edges
  • High-quality polyester bristles last a long time
  • The brush is relatively cheap in price

Cons

  • Not practical for longer projects
  • Limited in its compatibility with paint finishes

Note: if you want a universal brush that works with almost all types of paint choose product number 8 from our list.

What to Consider When Choosing the Paint Brush?

As the market is flooded with various types of products so it must be very hard to choose the best out of many available options. Be mindful that the brushes are not all the same; they come in a variety of materials and sizes to accommodate a diverse range of requirements.

Here is what to consider while purchasing a paintbrush:

1. Material

You can choose between natural and synthetic bristle brushes; the former is best for oil-based paint, while the latter works well with water-based paint.

  • Natural Bristles are made from animal hair, such as hogs or badgers, which have small fissures in their fibers that allow them to retain more substance and buff it out to a smooth finish. If you’re using an oil-based paint or top coat, a brush with natural bristles is your best bet. Moreover, you can achieve a good result by using a round natural bristle brush in the case of furniture wax.
  • Synthetic Brushes are made from man-made materials such as nylon or polyester, which makes them durable and long-lasting. They have bristles that hold more paint than natural hair brushes, so they’re perfect for large areas like walls.

Additionally, synthetic paint brushes are easy to clean – just a quick rinse with water will do the trick – a hassle-free option for busy homeowners.

2.     Size

When choosing paint brushes for wall painting, size matters. A paintbrush with too large of a head won’t be able to fit into tight corners and can lead to paint being unevenly distributed.

On the flip side, paint brushes with small heads may not be able to paint wide surfaces quickly enough. The best paint brushes for wall painting typically have a head size that’s somewhere in the middle – neither too small nor too large.

3.     Style of Brush

When painting walls, the paintbrush needs to have the right shape and bristles to paint solid lines, cover large areas quickly, and paint in corners. Here are the different types of paintbrushes available for wall painting:

  • Flat Brushes feature a flat or square head with long bristles that evenly distribute paint over walls in broad strokes. A flat paintbrush is best for painting wide areas and flat surfaces.
  • Angled Brushes feature an angled head with cut bristles that are designed for painting trims and skirting. They also come in a variety of sizes to fit different paint jobs.
  • Round Brushes have round or oval heads and long bristles that paint a smooth finish over walls. Round paintbrushes are best for painting edges, corners, and detailed areas.
  • Foam Brushes have a thick foam head with short bristles that paint in an even finish. They’re great for painting small details like window frames and doors.

4. Handle of Paint Brush

The handle material is an important consideration when selecting paintbrushes. Wood, plastic, and rubber are the most common materials used to make handles. Choose as per your requirement.

  • Wooden handles offer flexibility and durability, but they can be prone to splintering or cracking if exposed to paint removers, solvents, and other harsh chemicals.
  •  Plastic paint brush handles are lightweight and relatively inexpensive, but they don’t allow for much flexibility and may not last as long as other materials.
  • Rubber paintbrush handles provide the best balance of flexibility and durability, making them an economical choice for DIYers who paint frequently.

Wrapping Up

If you are somehow creative and like to play with colors, you must give a try to your home interiors. Paint them in a way you like.

But choosing the appropriate brush is more crucial than picking up quality paint colors. Otherwise, no matter how expensive or premium the fluid bucket you opt for, it will not provide smooth and long-lasting finishing.

To aid you in making a wise investment, we have produced a list of the top paint brushes currently available. The list is by no means exhaustive, but with our stringent selection standards and wide range of products, you are certain to find one that meets your needs.

paint brush or roller

Paint Brush, Roller, or Sprayer – Battle of Applicators

I love how effortlessly beginners can spruce up any object with a fresh coat of paint, but deciding the best paint applicator for their project can be a dilemma. There are three popular options: paint brush, roller, and sprayer, and each has its pros and cons. So how do you pick one?

Paint brushes offer greater control and precision and are preferred for painting smaller, harder-to-reach areas. Rollers and sprayers are ideal for when you want to cover more area in less time, but beginners may have difficulty mastering their application technique.

Some paint applicators are better suited for certain projects, but you don’t need to figure that out on your own. I will discuss each option in detail, along with side-by-side comparisons, so you can choose the applicator that meets your budget, coverage requirement, preferred finish, and project deadline.

Let’s jump right in!

Paint Brush vs. Roller: Which is better?

About the Paint Brush

A paintbrush is the oldest and most popular tool for painting because it’s small, flexible, and easier to control. These characteristics make it perfect for painting details, trims, and areas that are harder to reach with other tools.

While it is relatively easier to use, you require some expertise when using a paintbrush, or you may leave nasty streaks and traces.

Paint brushes are not recommended for large and smooth areas for several reasons.

If you’re a beginner, chances are you may leave too many streaks when painting with a brush; therefore, if you attempt painting a large wall, for instance, the result will not be aesthetically pleasing.

Another problem with using a paintbrush is that it doesn’t retain much paint; therefore, you have to dip it in paint repeatedly to paint a bigger surface, increasing the total time it takes to complete your project.

Finally, brushes generally use more paint than rollers, so the larger the surface area you need to cover, the more expensive your project will be.

Pros and Cons of Using a Paint Brush

Advantages of a PaintbrushDisadvantages of a Paintbrush
Better application controlIt takes more time to paint large surfaces
Excellent for detailed workRequires considerable skill to achieve even coats
It can be used to create a textured effectIt uses more paint
Various sizes and types are available for different surfacesExpensive for larger projects
It can look streaky on walls

Expert Tip: Use nylon or polyester brushes for latex (water-based paints) and natural brushes for oil-based paints, varnishes, and stains.

pexels pavel danilyuk 6764274 Paint Brush, Roller, or Sprayer - Battle of Applicators

Rollers

Professional painters love rollers because they provide thin, uniform, and even coats and are perfect for painting walls, ceilings, and large furniture.

If you’re wondering: Does a brush or roller use more paint? The answer is paintbrush!!

Rollers have a porous surface, allowing them to hold more paint at once, making the painting job easier and less time-consuming.

You can even experiment with different finishes with different types of rollers. For example, if you want a smooth finish, a smooth surface roller will help you achieve the desired result, but if you want a more textured finish, you can opt for fluffy surface rollers.

However, this option isn’t without downsides.

You must prepare your surface well if you plan to use a roller, as it accentuates every imperfection on the object. It’s also important to keep a light hand when applying paint with a roller because pressing it too firmly against the surface can create unpleasant streaks.

Pros and Cons of Using a Roller

Advantages of a RollerDisadvantages of a Roller
Provides even coverageNot suitable for small areas
Covers large areas quicklyRequires more prep work
Doesn’t use too much paint
More economical

Expert Tip: Use a plastic roller for water-based paints, a sponge roller for oil-based paints, and natural fiber for solvent-based paints.

How to use a paintbrush and roller for best results

Most DIYers want to know: Do professional painters use brush or roller? They actually use both, and you can too!

That’s because both tools serve different purposes, and if you can combine the powers of a paintbrush and roller, you can achieve a flawless finish!

Start by painting the corners, edges, and difficult-to-reach areas with the brush, then cover the large surfaces with the roller. This technique helps you save time and uses less paint, so it’s a win-win!

So the next time you’re confused about whether it is better to paint with roller or brush, simply buy both.

Paint Brush vs. Sprayer: Which one should you use?

The battle between a paintbrush and a sprayer is one between old and new technology. Everyone wants to pick the latest equipment with faster results but remember, the gains in speed come at a cost.

There’s honestly no faster way to apply paint than with an airless sprayer. All you need is a couple of minutes with the sprayer, and you have a freshly-painted wall ready for use. So, is spraying better than painting? Not always, because speed doesn’t equal quality.

The best thing about using a paintbrush is that even beginners can handle it. However, applying paint with an airless sprayer can be very challenging if you don’t have much practice. If you’re not careful, you can end up with an uneven coat, with some areas of heavy paint buildup and others where the paint is too thin.

Another drawback of using a sprayer is the lack of control. You not only have to prep your object but also cover all the surrounding areas thoroughly, or the over-spray will increase your clean-up time by many folds.

Then there’s a popular query: Do you use more paint with a brush or sprayer? The answer is sprayer!

Although a sprayer gets the job done quickly, it uses 2 to 3 times more paint than brushing or rolling, which means your cost of paint will be much higher if you use a sprayer.

Despite its drawbacks, the sprayer delivers smooth and even coverage if handled properly without any streaks or strokes, a problem that is quite common with a paintbrush.

Pros and Cons of Using a Sprayer

Advantages of a SprayerDisadvantages of a Sprayer
Super fast applicationUneven coverage
Single coat coverageIt uses three times more paint
Smooth finish without brush marksLong prep and cleanup time
Easily gets into hard-to-reach areasPoor adhesion
Difficult to paint on windy days

How to Use a Paintbrush and Sprayer for Perfect Coverage

If you’re still contemplating: Is painting with a sprayer better or paintbrush? Don’t overthink because you can use both simultaneously to enjoy the best of both worlds.

The best way to apply paint is by applying it with a sprayer and ‘back-brushing.’

Back-brushing is a simple technique where you dry brush over paint that has been applied by either roller or sprayer. To achieve good results, you’ll need a helper who can brush the surface quickly after you’ve applied paint with a sprayer.

This technique helps even out the coat, improves paint adhesion, and gets into hard-to-reach nooks and crannies.

Sprayer vs. Roller: Which option gives the best results?

Is it better to paint with a spray gun or a roller? The answer would depend on four factors:

  • Your skill and expertise with each applicator
  • The total time for your project
  • Your project budget
  • The surface you want to paint

Anybody can use a roller, whether they’re beginners or experts, but if you’re new to using a paint sprayer, the first time may not be as easy as it looks.

Beginners often struggle with runs, drips, and uneven coverage with a paint sprayer, so if you’re looking for a fool-proof applicator, go with a roller.

Sprayers are perfect for quick paint application, but the time you save in application is spent assembling the tools, masking the area, and post-paint clean up. So, if you compare that with rolling paint, the project’s total time comes out to be the same.

Then there’s the question, do you waste more paint with sprayer? The answer is yes! A sprayer uses up 33% more paint compared to rollers. Hence, rolling paint is definitely a more budget-friendly option.

However, using a sprayer also has upsides. With a sprayer, you can reach the narrowest of crevices, something you can’t achieve with a brush or roller. For example, a sprayer will deliver excellent coverage if you want to paint textured surfaces like popcorn ceilings, crown molding, brick walls, lap siding, and cornicles.

Since the risk of overspray is high, paint sprayers are best suited for outdoor projects or unoccupied indoor spaces. This way, you can save yourself from messy clean-ups.

But if you’re still unsure, is it better to spray or roll smooth walls? You can use both tools with the back-brushing technique to achieve an even finish.

pexels tima miroshnichenko 6474130 Paint Brush, Roller, or Sprayer - Battle of Applicators

Final Comparison

Factors of ComparisonPaintbrushRollerSprayer
Even coverage
Quick application
Beginner-friendly
Smooth finish
Long prep time
Long cleanup time
More paint usage
Better control
Suitable for small areas
Suitable for large areas
Budget-friendly 
Good for detailed work

FAQs

Is a roller better than a brush for touch-ups?

A roller generally offers superior quality and blending than a paintbrush, but if you’re working on small holes or noticeable marks, a brush will provide more control and allow you to get the desired coverage.

Is it better to spray paint or brush paint wood?

Spray painting wood is much quicker and less labor-intensive compared to brush painting, but the result may not stick for long. Therefore, applying paint with a brush on wood is best for lasting results.

Are paint sprayers good for interior walls?

Paint sprayers work well on interior walls, but they are messy to work with, so you need to mask off all the surrounding areas you don’t want the paint to end up on.

Conclusion

Painting is fun, no matter which applicator you select, and if you have been using one for a long, maybe it’s time to try something new.  Don’t be afraid to experiment with a paintbrush, roller, or sprayer because each has its upsides, and you never know; you might enjoy the final look of the new one more!

If you want to know the beginner’s technique for spray painting, then you can read our blog on it.

spray painting techniques for beginners

Spray Painting Techniques for Beginners – Learn the Basics

Spray painting is an increasingly popular art form that allows artists to create a wide range of effects on various surfaces. Personally, I was fascinated by spray paints, its color variety, its versatility and ease of use. The artwork produced by spray painting is always crisp and has amazingly bold and bright colors. 

If you are new to spray painting, it can be intimidating to get started. Here is how to go about it: 

Start with choosing the right paint and spray gun. Always prepare the surface by cleaning and sanding it. Practice your technique by spraying in a well-ventilated area and using thin coats. Allow each coat to dry before applying the next one. Experiment with different angles and distances to achieve the desired result.

Below is a detailed guide for all of you who you are new to spray painting. I know it can be intimidating to get started but by the end of this guide, you will have the knowledge and skills to create your own stunning works of art using vibrant and beautiful colors of spray paints. So let’s dive in and learn some spray painting techniques for beginners!

Materials Needed for Spray Painting

Having the right materials is essential to achieving the desired results if you want to be a pro at spray painting. Some of the materials that you will need to get started are:

Spray Paints: 

The type of spray paint you choose will depend on the surface you are painting and the desired effect. Spray paint comes in a range of finishes, including matte, gloss, and metallic, as well as different colors and textures. You should choose a spray paint that is suitable for the surface you will be painting, such as metal, wood, fabric or plastic.

Nozzles: 

Different types of spray paint nozzles can produce different spray patterns, including fine lines, broad strokes, and textured finishes. It is important to choose the right nozzle for your project to achieve the desired effect.

PS: Make sure to read about how to avoid spray painting nozzle from clogging

Protective Equipment: 

When spray painting, it is important to protect your eyes, nose, and mouth from the fumes and particles that can be harmful. You should wear a respirator or mask, safety goggles, and gloves to protect your skin.

PS: You should be extremely careful as using spray paints without protective equipment can be harmful as spray paints can be toxic and cancerous in some cases.

Surface Preparation Materials: 

Before you begin spray painting, you will need to prepare the surface by cleaning it and removing any rust, dirt, or debris. This can be done using sandpaper, steel wool, or a wire brush.

Primer: 

Using a primer before spray painting can help the paint adhere better to the surface and provide a smoother finish. You should choose a primer suitable for the surface you will be painting. Without it, you can paint, but you will not get a better finish and a better finished product lasts long.

Painting Tape: 

Painting tape can be used to mask off areas of the surface that you do not want to paint, such as edges or borders. This can help you achieve clean and straight lines when painting. For instance if you are painting shoes, you might need to cover the sole or the heal to avoid getting the spray paint on it.

You should choose a painting tape that is suitable for the surface you will be painting on and that can be easily removed without damaging the surface.

Drop cloth:

A drop cloth or tarp can help protect your workspace and the surrounding area from overspray and drips.

Pro Tip: Using petroleum jelly on the surface where you do not want paint while you spray on your project can also help as it can be readily cleaned off with a paper towel or a wash cloth once you are done.

Cleaning Supplies:

Once you are finished with your project, you will need to clean your spray paint can, nozzles, and any other equipment that you used. This can be done using a cleaning solution or solvent that is suitable for the type of spray paint you used.

Scrap Surfaces to Practice:

If you are new to spray painting, it can be helpful to practice on a scrap piece of material or cardboard before starting your actual project. This can help you get a feel for the spray paint and practice your technique before moving on to your final surface.

Pro Tip: Proper ventilation is important when spray painting to avoid inhaling fumes and harmful particles. It is recommended to work in a well-ventilated area or to use a fan or ventilation system to ensure proper air circulation.

Preparation For Spray Painting

pexels felicity tai 7951697 Spray Painting Techniques for Beginners - Learn the Basics

Proper preparation is essential For smooth, even and long-lasting results. Here are some steps you can take to prepare for your spray painting project:

1. Clean the surface:

Before you begin spray painting, it is important to clean the surface thoroughly. This can be done using soap and water or a cleaning solution, depending on the type of surface you are painting.

You should remove any dirt, dust, or debris that could affect the paint’s adhesion. Make sure that the surface is completely dry before the next step.

2. Sand the surface:

If you are painting a surface with a glossy or smooth finish, you may need to sand it lightly to create a rougher surface that the paint can adhere to. Use a fine-grit sandpaper and sand in a circular motion until the surface feels slightly rough.

3. Mask off any areas you do not want to paint:

If there are areas on the surface that you do not want to paint, you can use painting tape to mask them off. Apply the tape carefully to ensure that it is straight and secure.

4. Apply a primer:

Applying a primer can help the spray paint adhere better to the surface and provide a more even finish. Choose a primer that is suitable for the type of surface you are painting and apply it in a thin, even coat. Allow the primer to dry completely before moving on to the next step.

5. Protect your work area:

Spray painting can be messy, so it is important to protect your work area. Lay down a drop cloth or tarp to catch any overspray or drips, and make sure that the surrounding area is clear of any objects that could be accidentally painted.

6. Test the spray paint:

Before you begin painting your surface, it is a good idea to test the spray paint on a small, inconspicuous area. This can help you get a feel for the paint and adjust the nozzle or pressure as needed.

By taking these you can ensure that your spray painting project will be a success and you can achieve a smooth and even finish, preventing any unexpected mishaps.

Next step is to know the basic techniques for a perfect project.

Basic Techniques for Spray Painting

pexels luis quintero 11299105 Spray Painting Techniques for Beginners - Learn the Basics

There are several basic techniques and ideas that beginners should know of when starting with spray paint for achieving a professional look, even for an amateur artist. Here they are:

Maintain the proper distance: 

When using a spray paint can, it is important to maintain the proper distance between the nozzle and the surface you are painting. This distance will vary depending on the type of paint you are using, but generally, you should hold the can about 6 to 8 inches away from the surface.

Use a sweeping motion: 

When you start spraying, use a sweeping motion to apply the paint evenly to the surface using your dominant hand. Move the can from side to side, keeping your arm steady and using your wrist to control the direction of the spray.

Avoid over-spraying: 

Over-spraying can cause the paint to run or drip, so it is important to avoid applying too much paint in one area. Instead, use several light coats, allowing each coat to dry before applying the next one.

Mind the overlaps:

When using a sweeping motion, make sure to overlap each stroke slightly with the previous one. This will help ensure that the paint is applied evenly and smoothly.

Layering paint:

It is generally better to apply several light coats rather than one thick coat. This will help ensure an even finish. Give each coat a good 20 minutes of drying time.

Spraying technique:

There are several techniques you can use to apply spray paint, such as back and forth, circular, or sweeping motions. The technique you choose will depend on the desired outcome. For example, a back and forth motion can be used for large, flat surfaces, while a circular motion can be used for smaller, more intricate areas.

Shake the can often: 

Shake the spray paint can often, particularly if you are working on a large surface or if you have taken a break. This will help ensure that the paint remains mixed and that the nozzle does not become clogged.

Achieving Different Textures:

By adjusting your spraying technique, you can achieve different textures with spray paint. For example, holding the can further away from the surface will create a finer mist and a smoother texture, while holding it closer will create a thicker coat and a more textured finish.

You can also experiment with different types of spray paint, such as matte or glossy finishes, to achieve the desired texture.

Practice on a Test Surface: 

Before starting your project, it is a good idea to practice on a test surface. This can help you get a feel for the paint and adjust your technique as needed.

Let us also look at some advanced techniques that professionals use, if they can why can’t you!

Advanced Techniques for Spray Painting

pexels markus spiske 6577970 Spray Painting Techniques for Beginners - Learn the Basics

Once you have mastered the basic techniques of spray painting, you may want to experiment with some more advanced techniques to take your skills to the next level. Here are some advanced techniques to try:

Stenciling:

Stenciling is a great way to create intricate designs with spray paint. You can either make your own stencils using a cutting tool or purchase pre-made stencils. To use a stencil, hold it firmly against the surface and spray paint over it in a light, even coat. Once the paint has dried, carefully remove the stencil to reveal your design.

Blending Colors to Create Gradients:

Blending colors and the art of creating gradients with spray paint can create a beautiful and unique effect. To do this, choose two or more colors that blend well together and spray them onto the surface at an angle. Start with the lightest color at one side and gradually work your way down to the darkest color at the other side. Blend the colors together by lightly spraying over the area where they meet.

Using Different Nozzle Types:

Different nozzle types can create different spray patterns and effects. For example, a fan nozzle creates a wide, flat spray pattern, while a round nozzle creates a more concentrated spray. Experiment with different nozzle types to create unique effects and textures.

I am sure, once you get hang of these beginners’ and advanced techniques, you can take your spray painting skills to the next level and create beautiful, one-of-a-kind pieces of art. Remember that practicing this will get you close to perfection of your masterpiece, and the results are well worth it.

Troubleshooting

While spray painting can be a fun and rewarding activity, it’s not uncommon to encounter some mistakes or issues along the way. Here are some common mistakes beginners make and how to troubleshoot them:

Common mistakes:

  • Over-spraying: This occurs when too much paint is applied, resulting in drips or runs.
  • Under spraying: This occurs when not enough paint is applied, resulting in a patchy or uneven finish.
  • Holding the can too close or too far from the surface.
  • Spraying in adverse weather conditions (e.g. windy or humid weather) can affect the finish.

Fixing runs and drips:

If you notice runs or drips in your spray paint, don’t panic. The first thing to do is to stop spraying immediately and let the paint dry. Once the paint is dry, lightly sand the affected area with fine-grit sandpaper until it’s smooth. Then, you can repaint the area by applying a light, even coat of paint. Be sure to hold the can at the recommended distance and apply the paint in a sweeping motion.

Sanding and Repainting Mistakes:

If you encounter a mistake in your spray painting project that requires sanding and repainting, it’s important to follow the correct process. First, sand the affected area with fine-grit sandpaper until it’s smooth. Then, wipe the surface clean with a damp cloth to remove any dust or debris. Once the surface is dry, apply a coat of primer to ensure the new paint adheres properly. After the primer has dried, you can apply a light, even coat of paint.

Blotches or Uneven Finish:

If you notice blotches or an uneven finish in your spray paint, it could be due to a variety of reasons such as holding the can too close or too far, using the wrong type of paint, or spraying in adverse weather conditions.

To fix this issue, lightly sand the affected area with fine-grit sandpaper until it’s smooth. Then, wipe the surface clean with a damp cloth to remove any dust or debris. Once the surface is dry, apply a light, even coat of paint using the correct spraying technique.

Paint not adhering to surface:

If the paint is not adhering properly to the surface, it could be due to a dirty or greasy surface. To fix this issue, clean the surface thoroughly with soap and water, or a degreaser if necessary. Then, rinse the surface with clean water and let it dry completely before applying a light coat of primer. Once the primer has dried, you can apply a light, even coat of paint.

Clogging of the Nozzle:

If the nozzle of the spray can gets clogged, it can affect the spray pattern and the amount of paint being released. To fix this issue, remove the nozzle and soak it in a cleaning solution for a few minutes. Then, rinse the nozzle with water and dry it thoroughly before reattaching it to the spray can. Make sure to test the spray pattern on a scrap piece of material before resuming your painting project.

Save your time and effort by being aware of these troubleshoot tips. Remember to read the instructions on your spray paint cans and follow the techniques mentioned in this blog for best results.

FREQUENTLY ASKED QUESTIONS

Is spray painting easy to learn?

Spray painting can be easy to learn with practice and patience. Basic techniques such as holding the can and distance from the surface can be mastered relatively quickly.

How many coats of spray paint are necessary?

The number of coats of spray paint necessary depends on the surface being painted and the desired coverage. Generally, 2-3 thin coats are recommended for even coverage and better adhesion.

How do I get a smooth finish with spray paint?

To get a smooth finish with spray paint, use multiple thin coats and hold the can about 6-8 inches away from the surface. Sand lightly between coats, and apply a clear topcoat for added durability.

How long to wait after first coat of spray paint?

It’s recommended to wait 10-15 minutes between coats of spray paint to allow the first coat to dry. This can vary based on the type of paint and environmental conditions.

Is spray paint easier than a brush?

Spray paint can be easier than a brush for certain projects and surfaces, as it can create a more even and consistent finish. However, it may require more preparation and safety precautions.

In A Nutshell

Spray painting is a great way to add color and personality to any project that you love. While it may seem intimidating at first, practice and experimentation will lead to a better understanding of the craft and improved results.

It’s important to remember that spray paint can be toxic and potentially carcinogenic, so it’s crucial to always use protective equipment and follow safety precautions.

Overall, spray painting can be a fun and rewarding hobby, whether you’re a beginner or an experienced artist. With these techniques and safety guidelines in mind, you’ll be well on your way to creating stunning works of art and DIY projects in no time. So go ahead and unleash your creativity!

spray painting laws violation

Spray Painting Laws in California

Spray paints are all fun and exciting until you realize they can cost you serious legal trouble!

That’s right. Are you aware of spray paint laws in California? Because if you don’t, then you should, as ignorance of the law is no excuse. It is imperative to know that selling spray paints to minors or conducting graffiti has serious penalties under penal clauses of California state laws like fines and imprisonment or even both!

Let’s understand what spray paints are,

“Any spray device, can, or bottle that contains dye, ink, paint and a propellant which it dispenses under pressure through pumps in a fine mist or spray is known as spray paints.”

Spray paints are often considered fast-drying painting tools that provide even finishing; however, that’s not what spray paints are all about. Spray paints possess volatile organic compounds (VOCs), which contribute to environmental crises, human respiratory problems, and vandalism which is why California state laws regulates the possession and use of spray paint. Understanding these regulations is important to avoid potential legal trouble and fines.

Therefore, in this blog we will discuss California’s spray painting laws and penalties.

Why Implement Laws of Spray Painting

Spray paint is a type of aerosol paint that is used for a variety of purposes, including graffiti art, street art, and home decor. In California, however, spray paint is subject to strict regulations to prevent minors from using it for vandalism. Spray paint laws in California are designed to control the sale and possession of spray paint, particularly among minors.

California Spray Paint Laws

Spray paint laws falls into vandalism under California Penal Code Section 594 which deals with the sale and use of spray paint regulations and its legal consequences upon violation. The objective is to promote the minor’s safety and prevent them from using spray paint for graffiti and vandalism.

Here are a few key points of spray paint laws in California,

  • It is restricted to selling spray paint to buyers under 18.
  • The retailers are bound to display spray paints in a locked cabinet
  • The spray paint must contain a warning label directing the way to use it
  • It levitates all the legal penalties against the intent to deface other’s properties

Restriction on Selling to Minors

Under California state laws, the penal clause under section 594.1(a)(1)4 makes it illegal to sell spray paint to minors and defines it as,

“This subdivision shall not apply to the furnishing of six ounces or less of etching cream or an aerosol container of paint to a minor for the minor’s use or possession under the supervision of minor’s parents, guardian, instructor, or employer.”

Violation of this subdivision can result in fines and imprisonment of up to 90 days for first-time offenders.

Minors Cannot Possess Spray Paint.

As per section 594.1(5)(b) of California Penal Code,

It shall be considered unlawful and illegal for a minor to purchase and possess etching cream or an aerosol container of paint that is capable of defacing property.

Minors are often seen damaging and defacing public and private properties intentionally, not knowing it’s a crime. While it is imperative to know this act of defacing other’s belongings is called vandalism and is a serious offense punishable by spray paint laws in California.

In many cases, spray paints are associated with graffiti vandalism because it is cheap, easy to use, and spread quickly. Resultantly, it is used to leave a message or mark on buildings, bridges, and walls, which damages valuable public properties.

Considering rising destruction, the authorities discourage the possession of spray paints by minors, and therefore, strict laws have been imposed against them.

 References and Guides for a Quick Look for Spray Painting Laws in California

  1. California Legislative Information: Penal Code Section 594.3: This is the official California law that outlines the penalties for vandalism with graffiti or other inscribed materials, including spray paint.
  2. California Air Resources Board: Consumer Products Program: Information on the California Air Resources Board’s Consumer Products Program, which regulates the volatile organic compound (VOC) content of consumer products, including spray paint.
  3. California Retailers Association: Selling Spray Paint – A Retailer’s Guide: This guide provides information for retailers on the laws and regulations around selling spray paint in California, including age restrictions and storage requirements.
  4. Graffiti Hurts: Understanding Graffiti Laws in California: This website provides an overview of the graffiti laws in California, including those related to spray paint. It includes information on penalties for violating these laws and resources for preventing and cleaning up graffiti.
  5. California Courts: Criminal Penalties for Vandalism:  This page provides information on the criminal penalties for vandalism in California, including graffiti offenses. It includes information on fines, community service, and possible jail time for offenders

Penalties for Violating Spray Paint Laws in California

Graffiti vandalism is a serious offense that is dealt with under section 594 of the California Penal Code. According to this code,

Any property, signs, fixtures, or vehicles belonging to the public entity that is violated shall be penalized with imprisonment for up to 1 year. The fine shall be estimated according to the value of the damage.

For instance,

  • If the amount of damage is $400, the fine shall not be more than $10,000
  • If the amount of damage is less than $400, the fine shall not be more than $1000

Penalties Payable by Legal Guardian

If the minor is declared responsible for committing juvenile vandalism and is personally not able to pay the fine himself, the parent or legal guardian of a minor shall be liable to pay on his behalf and can even serve jail time as responsibility for juvenile crime up to 1 year, depending on the severity of the offense. However, the court may waive a fine upon showing good cause by the parent.

Exceptions to California Spray Paint Laws

While specific laws prevail regarding the selling and possession of spray paints to discourage vandalism and damage to public entities, there are some exceptions to it.

  • Individuals who are sound-minded, above 18 years old (adults), and have government identification are excepted by these laws. They can buy or use spray paints for official purposes.
  • People who require spray paints for legitimate purposes, such as painters and artists, are excepted from restrictions.
  • Spray paints have great consumption in the industrial sector, like marking, labeling, corrosion protection, and safety marking. Hence industrial and agricultural purposes are also excepted.

Examples of Spray Paint Exceptions

  1. A person who owns a garage and often requires spray paints for auto-mobile servicing is exempted from spray paint laws in California (unless they abuse the usage)
  2. Artists like to think out of the box by blending multiple colors, layering, achieving fantastic finishing, and creating a complex designs. And to achieve this goal, spray paint is a popular tool which makes it exempted from spray paint laws in California.
  3. Agriculture is another example of its exemptions; farmers require spray paints to mark the ears of cattle for their identification, or in some cases, they use spray paints for marking irrigation lines in fields.

Quick Review: Spray Painting Laws in California

  1. Minors under the age of 18 are prohibited from purchasing spray paint.
  2. Stores must keep spray paint behind the counter or in a locked cabinet to prevent theft.
  3. It is illegal to sell spray paint to anyone under the age of 18.
  4. Individuals who purchase spray paint must show valid identification.
  5. Certain locations, such as schools, religious institutions, and public buildings, prohibit the use of spray paint.
  6. Violating spray paint laws can result in legal consequences, including fines and possible jail time.
  7. The California Air Resources Board regulates the VOC content of spray paint under its Consumer Products Program.
  8. Graffiti or vandalism with spray paint is punishable under Penal Code Section 594.3.

CONCLUSION

California, home to world-famous attractions, is known for its alluring scenery of mountains, beaches, forests, deserts, and captivating infrastructure. And to maintain the beauty and protection of valuable public belongings, the state never settles for less. The spray paint laws in California are of its prime examples.

Moreover, the abuse of spray paints has a significant negative impact on the environment, natural habitats, and eco-system. For instance, graffiti on trees can harm plants and life of animals, while volatile organic compounds in spray paints can contribute to air pollution and respiratory issues among humans.

Therefore, to avoid legal penalties, promote public safety, and protect the environment, it is important to become a law-abiding citizen and contribute a positive role in society by following spray paint laws in California.

is spray paint toxic

Is Spray Paint Toxic – Debunking 5 Steps to Get Rid of Smell

Imagine this scenario: You’ve decided to tackle a DIY project over the weekend and are excited to start. You’ve picked out the perfect color and theme and are ready to pick your can. 

But wait…

In the back of your mind, you’re worried about your kids being exposed to toxic paint chemicals – BUMMER!

That is exactly the case with me!

As a parent of two young girls, I am constantly concerned about their health and well-being. The thought of exposing them to toxicity is so unsettling that I dug up the internet and thoroughly researched before embarking on my next DIY project.   

And if you are a concerned parent too, who’s wondering: is spray paint toxic, here’s is the answer:

“Spray paint can be toxic if inhaled or used in poorly ventilated areas. The chemicals in spray paint can irritate the eyes, nose, and throat, and prolonged exposure can lead to serious health problems. It’s important to follow the safety instructions and use protective equipment.”

The article further aims to shed more light on how you can achieve the same great results while keeping you and your loved ones safe. 

Keep reading to make an informed decision before picking that can up for your next DIY!

Let’s Talk About What’s in Your Spray Paint

Spray paint is a commonly used product for various purposes, from DIY projects to professional painting jobs. 

It’s convenient, effective, and adds perfect color and smooth texture to a surface. 

But it’s also important to know what’s in your spray paint to avoid potential health hazards.

Composition of Spray Paint

The main composition of spray paint includes solvents, propellants, pigments, and binders. Each serves a different purpose. 

  • Solvents – Used to dissolve the other paint components and evaporate quickly to leave a smooth finish. Examples of solvents include toluene, xylene, and acetone.
  • Propellants – Gases that push the paint out of the can and into the air. Propane, butane, and dimethyl ether are some commonly used propellants. 
  • Pigments – Give the paint its color and opacity. Some examples of pigments include cadmium, lead, chromium, and titanium dioxide.
  • Binders – Hold the pigments together and help them adhere to the surface. Acrylic, epoxy, and urethane are widely used binders in paints. 

Understanding Spray Paint Fumes 

Spray paints combine paint, solvents, and propellants in a pressurized can. When the nozzle is pressed, the air pressure inside the can changes. This leads to the propellant pushing the paint out of the can, forming a fine mist sprayed onto the surface. 

The mist results in spray fumes, a mixture of airborne particles and chemicals released into the air when the spray paint is applied. 

Spray paint fumes are a common concern for anyone who uses spray paint, whether for a small DIY project or a large-scale professional job. These fumes can be harmful to human health and the environment. 

Spray paint fumes can be inhaled or absorbed through the skin. These fumes can irritate the eyes, nose, and throat, as well as headaches, dizziness, and nausea. 

Prolonged exposure to spray paint fumes can lead to more serious health problems, such as damage to the central nervous system, liver, and kidneys, and even increase your risk of cancer. 

It’s important to understand the risks and take appropriate precautions.

Potential Health Hazards of Spray Paint Fumes

  • Spray paint can contain volatile organic compounds (VOCs) that can harm human health, especially in high concentrations or with prolonged exposure.
  • VOCs can irritate the eyes, nose, and throat, and cause headaches, dizziness, and nausea.
  • VOCs are also notorious for contributing to air pollution and climate change.
  • Certain pigments, such as lead and cadmium, can be toxic if ingested or inhaled.

Some of the most common VOCs used in spray paints are acetone, toluene, and xylene. These substances are associated with a high risk of potential health hazards and put our environment at risk. The below table lists the symptoms that occur after exposure to these substances and the organs that are affected:

VOCSymptomsAffected Organs
AcetoneIrritation of eyes, nose, and throat; headache, dizziness, depression of central nervous system; dermatitisEyes, skin, respiratory system, central nervous system
TolueneIrritation of eyes and nose; weakness, exhaustion, confusion, euphoria, dizziness, headache; dilated pupils, lacrimation; anxiety, muscle fatigue, insomnia; paresthesia; dermatitis; liver, kidney damageEyes, skin, respiratory system, central nervous system, liver, kidneys
XyleneIrritation of eyes, skin, nose, and throat; dizziness, excitement, drowsiness, incoordination, staggering gait; vacuolization of the cornea; anorexia, nausea, vomiting, abdominal pain; dermatitisEyes, skin, respiratory system, central nervous system, gastrointestinal tract, blood, liver, kidneys
Table showing Symptoms after Exposure to the Substances in Spray Paints

Many studies have also been conducted to prove that prolonged exposure to spray paints can cause cancer. 

The National Library of Medicine has a monograph that provides detailed information about the types of cancer and the chemicals that may cause them, especially in occupational painters. 

Certain cancers, such as lung, bladder, and childhood leukemia, have been linked to exposure to paint chemicals. 

Chemicals, such as Benzene, Formaldehyde, Toluene, Xylene, Ethylbenzene, Cadmium, and Lead, have been identified as possible causes of cancer.

To learn more about the association of spray paints with cancer, read our article, If Spray Paints Can Cause Cancer and 5 Ways You Can Avoid It.

DALL·E 2023 04 03 09.11.31 spray paints Is Spray Paint Toxic – Debunking 5 Steps to Get Rid of Smell

How Toxic is Spray Paint?

Now that we already know that spray paint fumes are toxic, the question arises – how toxic are they? 

The toxicity of spray paints depends on the type and amount of chemicals present in the paint. 

Moreover, it also depends on your exposure to these chemicals. The longer and more frequent your exposure to spray paint fumes, the higher the risk of experiencing adverse health effects. 

The level of toxicity also varies depending on the application method, with spray painting being more likely to release a higher concentration of harmful chemicals into the air than other methods. 

How Long Does Spray Paint Smell Last?

After painting, giving enough time for the paint to dry and the fumes to dissipate is essential to consider the area safe. 

The time required for spray paint to dry and become safe depends on various factors such as humidity, temperature, type of paint, and the surface being painted. 

If you live in a hot climate, you’re more likely to enjoy a quick drying time. 

In general, spray paint can take a few hours to several days to dry and become safe. To speed up the drying process, it’s recommended to apply thin coats of paint, keep the area well-ventilated, and allow ample time for each coat to dry before applying the next. 

Once the spray paint is dry, it’s advisable to wait an additional 24-48 hours before using or occupying the painted surface to ensure maximum safety.

However, as a rule of thumb, you can use the newly painted room after 3 to 5 days of the spray paint application. 

Is Spray Paint Toxic When Dry?

Fortunately, once the paint is dried completely, the toxic fumes dissipate, posing no health risks. 

However, if your paint contains cadmium or lead, it can be toxic even after it has dried, depending on the paint’s condition. 

Dry and undamaged paint is not a concern. But peeled and  cracked paint, and sanding dried paint can release dust particles containing toxic chemicals into the air. 

Lead and cadmium poisoning pose serious issues that can be irreversible in some cases. Some symptoms of heavy metal poisoning include abdominal pain, memory loss, joint and muscle pain, delayed growth in children, fatigue, loss of appetite, nausea, headache, dizziness, etc. 

How Do I Know I Have Spray Paint Toxicity

If you experience any of the following symptoms of spray poisoning, it’s essential to seek fresh air immediately and consult a healthcare professional if the symptoms persist or worsen. 

Here are some of the common spray paint toxicity symptoms:

  • Headaches
  • Dizziness
  • Nausea
  • Vomiting
  • Shortness of breath
  • Chest pain
  • Irritation of the eyes, nose, throat, and lungs
  • Skin irritation or rash
  • Loss of coordination
  • Fatigue
  • Confusion
  • Seizures

It’s important to note that symptoms can vary depending on the type, amount of chemicals in the spray paint and the individual’s sensitivity and exposure level.

How to Get Rid of Spray Paint Smell

Spray paint fumes’ side effects can be serious. To ensure safety, getting rid of the spray paint smell is optimal. You can use the following steps to get rid of the paint smell:

  1. Increase ventilation by opening windows and doors to allow fresh air to circulate.
  2. Use fans or air purifiers to help remove the fumes from the air.
  3. Place bowls of vinegar or activated charcoal in the painted area to absorb the odor.
  4. Use odor-neutralizing sprays or deodorizers specifically designed to eliminate paint smells.
  5. Clean surfaces with a mixture of water and baking soda or vinegar to help neutralize the odor.

Meanwhile, the above steps are crucial; avoid spending time in the painted area until the smell has dissipated entirely. Fumes can take a few hours to several days to dissipate, depending on the extent of the painting and the ventilation.

Precautions to Minimize Exposure to Spray Paint Fumes

  1. Always read and follow the safety instructions on the can of spray paint.
  2. Always use spray paint in a well-ventilated area, preferably outdoors or in a spray booth with adequate ventilation.
  3. Wear protective equipment, such as a mask and gloves, to minimize inhalation and skin contact with the chemicals in spray paint.
  4. Take frequent breaks and avoid prolonged exposure to spray paint fumes.
  5. Dispose of empty spray paint cans properly, following local regulations for hazardous waste.

Choosing Safer Spray Paint Options

  • Look for low-VOC (volatile organic compound) or zero-VOC nontoxic spray paint options. These products contain fewer harmful chemicals and are safer for both human health and the environment.
  • Water-based spray paints are also safer than traditional solvent-based spray paints. Learn our 7 Mind-Blowing Tips to Use Water-Based Paints on Wood

Environmental Impacts of VOCs

VOCs can greatly impact the environment, ultimately harming human health. 

  • VOCs cause air pollution, smog, and respiratory problems in humans.
  • They can damage crops and vegetation and worsen air quality.
  • VOCs create unpleasant odors in consumer products.
  • They contaminate soil and groundwater, affecting wildlife and human health.
  • VOCs contribute to climate change as potent greenhouse gasses.
DALL·E 2023 04 03 09.24.23 a person spray painting with protective gear Is Spray Paint Toxic – Debunking 5 Steps to Get Rid of Smell

FAQs 

Is spray paint toxic on the skin?

It’s common for spray paints to cause skin irritation, itching, and rash.

Is it safe to spray paint in the house?

You can safely spray paint your house if you have proper ventilation. Without optimal ventilation, the fumes can cause health issues when inhaled.  

Is spray paint toxic to dogs?

Is spray paint toxic to cats, dogs, and other pets is a common concern for every pet owner. The answer is, yes, if ingested or inhaled, spray paint fumes can result in health problems such as respiratory distress, vomiting, diarrhea, and other symptoms in animals.

Can you die from spray paint fumes?

Yes, exposure to high concentrations of spray paint fumes can lead to death from respiratory failure or other severe health complications.

Conclusion

To summarize, spray paint can be toxic and harmful to human health and the environment. The fumes released during spray painting contain chemicals such as volatile organic compounds (VOCs) and can cause short-term and long-term health problems. 

It is important to use spray paint in a well-ventilated area, wear protective equipment, and follow proper disposal procedures to minimize the risks associated with spray painting. 

Additionally, opting for non-toxic, low-VOC spray paint alternatives and reducing the use of spray paint altogether can help mitigate the negative impacts on our health and environment.

pexels cottonbro studio 7493876 Can Spray Paints Cause Cancer - 5 Ways To Avoid It

Can Spray Paints Cause Cancer – 5 Ways To Avoid It

Easy to use, fast drying, and even finish, isn’t this every DIY painter’s dream?  

And that exactly is the hype about spray paints! 

You press a nozzle; you have a fine mist of paint that coats your surfaces smoothly, and viola! 

The aerosol cans make painting oh-so-easy.  

However, with great convenience comes great responsibility. And that’s when the biggest concern arises: can spray paints cause cancer? 

To answer your question right away, here is what we know about spray paints causing cancer:

Spray paints may and may not cause cancer, depending on the composition of the aerosol paints. Various studies have been conducted to find the effects on the health of occupational painters. However, it is important to note that spray paints do possess health threats in some way or the other way.   

Below is a detailed overview of if spray paints can cause cancer. Read on to learn more before you dive into your next DIY project. 

A Brief Overview of Spray Paints 

Spray paints come in a canister and are applied using a spray nozzle. They are designed to be used on various surfaces, such as metal, wood, plastic, and fabric. 

Whether you need to revamp your old car or revitalize your wardrobe by painting denim, spray paints are a popular choice for both professionals and DIY enthusiasts due to their convenience and versatility.

How Do the Aerosol Cans Work

Spray paints contain liquefied paint and a propellant gas, typically compressed air or liquefied gas. 

When you press the can nozzle, the air pressure in the can changes transforming the gas and paint into tiny droplets. These droplets are sprayed out in fine mist. The mist then settles onto the surface, creating an even and smooth finish. 

But as we all know, this sprayed mist also releases paint fumes, which many people think are carcinogenic. 

Before diving into the conclusion, it is important to know what exactly in the aerosol can is responsible for causing cancer.

The Chemical Composition of Spray Paints 

The chemical composition of spray paints can vary depending on the specific brand and type of paint. However, most spray paints contain the following basic components:

  1. Pigments: These are the particles that provide color to the paint. Pigments can be organic or inorganic.
  2. Resins: These are the binding agents that hold the pigments together and help the paint adhere to surfaces.
  3. Solvents: These liquids help dissolve the resins and pigments and keep the paint in a liquid form. Solvents in spray paints are usually volatile organic compounds (VOCs), which can harm human health.
  4. Propellants: These are the gasses that create pressure to force the paint out of the can. Common propellants in spray paints include butane, propane, and dimethyl ether.
  5. Additives: Additives improve paint’s performance, such as drying time, viscosity, and resistance to weathering.

The Link between Spray Paint and Cancer

The potential carcinogenic effects of spray paint are thought to be due to the presence of volatile organic compounds (VOCs), heavy metals, and isocyanates. These chemicals release into the air when you spray the pain.

When inhaled, spray paint fumes’ side effects can be severe. They can enter the lungs and respiratory system, where they can cause irritation, inflammation, and damage to delicate tissues and cells. Over time, this damage can accumulate, increasing the risk of developing cancer.

Several types of cancer have been associated with spray paint exposure, including lung cancer, bladder cancer, kidney cancer, and leukemia.

Research studies have provided evidence to support the link between spray paint and cancer.

Below are some studies discussed:

  • A study was conducted on a 46-year-old non-smoking bumper spray painter who developed lung cancer after 15 years of work. Experts found high levels of hexavalent chromium in bright yellow paint and consider it a possible suspect in the crime. 
  • Another study found that men who have worked as painters at some point have a higher chance of getting lung cancer than men who have not worked as painters. This increased risk was the highest for painters who worked in construction and repair. They have an increased risk of lung cancer, including small and squamous cells. The risk is higher for men who have smoked and also worked as painters.
  • A case-control study was conducted in Northern Italy to assess the relationship between bladder cancer, occupation, and exposure to occupational agents. The study found that, along with other occupations, people associated with painting/spraying work reported more frequent cases of bladder cancer. 
  • Comprehensive data available online discusses in detail the types of cancer and the chemicals responsible for causing the disease. Some of the cancers mentioned in the data are lung, bladder, and childhood leukemia associated with maternal or paternal paint exposure. There are inconclusive data on cancers of the upper aerodigestive tract (oral cavity, nose, pharynx, nasopharynx, larynx, and esophagus), stomach, pancreas, liver, colon, rectum, kidney, brain, prostate, testis, ovary, and breast, and of melanoma and soft–tissue sarcoma. Some chemicals known or suspected to cause cancer are Benzene, Formaldehyde, Toluene, Xylene, Ethylbenzene, Cadmium, and Lead.

Can Spray Paints Cause Cancer?

Not all spray paints cause cancer, but some may contain harmful substances known as carcinogens. The risk of developing cancer from exposure to these substances depends on the level and duration of exposure, as well as individual factors such as age, health status, and genetic makeup.

Occupational exposures to spray paint are particularly concerning, as workers in industries such as painting, automotive repair, and construction may be exposed to high levels of spray paint fumes regularly. 

However, if you are using spray paint for personal projects at home, you may be safe with proper precautions to protect yourself from exposure.

can spray paints cause cancer

Preventing Exposure to Spray Paint

Let’s be honest – a little DIY project every once in a while won’t cause much harm and will satisfy your painting cravings. 

To minimize exposure to potentially carcinogenic chemicals in spray paint, you MUST take the following precautions.

  • Work in a well-ventilated area to allow fumes to disperse and minimize inhalation of toxic chemicals.
  • Wear appropriate protective gear, such as a respirator mask and gloves, to minimize skin and respiratory exposure to VOCs.
  • Use spray paint that contains low levels of VOCs and follow the manufacturer’s instructions for safe use.
  • Take breaks when working with spray paint to allow the fumes to dissipate.
  • Avoid working in enclosed spaces where fumes can accumulate.

What Happens if You Inhale Spray Paint Fumes

Inhaling spray paint fumes can be dangerous to your health. Symptoms of spray paint poisoning include headaches, dizziness, nausea, coughing, wheezing, and shortness of breath. 

If you have accidentally inhaled spray paint fumes, here are some steps you can take:

  1. Move to a well-ventilated area: If you are indoors, go outside or open windows and doors to get some fresh air. This can help to reduce the concentration of fumes you are breathing in.
  2. Seek medical attention: If you are experiencing any symptoms such as dizziness, nausea, or difficulty breathing, seek medical attention immediately. Call your local emergency number or go to the nearest emergency room.
  3. Drink plenty of water: Drinking water can help to flush out any chemicals that may have entered your system.
  4. Rest: If you feel lightheaded or dizzy, lie down and rest until you feel better.
  5. Take precautions in the future: When working on future projects, make sure to work in a well-ventilated area and wear a mask or respirator to protect yourself from inhaling fumes.

Frequently Asked Questions (FAQs)

Can I get cancer from spray paint? 

Yes, prolonged exposure to spray paint fumes can increase the risk of cancer.

What kind of cancer does paint cause? 

Spray paint exposure can increase the risk of lung, liver, and bladder cancer.

How long is spray paint fumes harmful? 

Spray paint fumes can be harmful for several hours after painting or up to a day after the paint is dried. Proper ventilation and air filtration can help to disperse the fumes quickly.

What are the dangers of spray paint? 

The dangers of spray paint include respiratory problems, liver and kidney damage, and an increased risk of cancer.

How to clear the lungs of spray paints?

The best way to clear your lungs of spray paint is to seek medical attention and follow the advice of a healthcare professional. Also, follow the steps discussed above. 

Can acrylic paint cause cancer? 

Acrylic paint does not contain the same harmful chemicals as spray paint and is generally considered safe to use.

What to do after inhaling paint fumes?

If you think you’ve inhaled spray paint fumes, go in a well-ventilated area, drink plenty of water, take rest, seek medical help if the symptoms feel worse, and make sure to follow precautions next time you spray paint. 

Conclusion

In conclusion to the query Can Spray Paints Cause Cancer, here’s our takeaway: Spray paint can cause health hazards, including the risk of cancer. It is crucial to take appropriate measures to protect yourself from exposure. Understanding the hazards and risks of spray paint is essential for minimizing exposure and controlling the associated risks. By following safety guidelines and taking appropriate precautions, you can enjoy spray paint’s benefits without risking your health.Want to know how you can take your spray painting projects to the next level? We have compiled just the right content for all YOUR needs! Spray paint your cars, renovate your homes and bathrooms, and upscale your wardrobe with everything you need to know.

pexels wallace chuck 5025303 Is Spray Paint Permanent - Will it Last Long or Wear Off

Is Spray Paint Permanent – Will it Last Long or Wear Off

As an artist and a DIY enthusiast, I love creating art that is unique and colorful, and the most convenient and pocket-friendly way is using spray paints. However, one question that often bothers me is: “is spray paint permanent?” It gets me thinking if my artwork made out of love will last. The question is important because I really want my unique creations to stay fresh and last long. 

The permanence of spray paint depends on various factors, such as the type of paint, surface, and environmental conditions. Some spray paints, like Acrylic, Enamel, and, Epoxy are designed to be permanent, while others, like chalk spray paints, may fade or chip over time. Proper preparation and application can improve the longevity of spray paint projects.

There is no definite answer to the question of the permanency of spray paint; however, I will explain to you in detail the different types of paint and the surfaces they are applied on.  We will also examine the environmental conditions and other external factors that can affect the longevity of spray paint. By the end of this blog post, you will have a better understanding of whether spray paint is permanent and how to ensure your spray paint projects last for years to come.

How Long Does Spray Paint Last

The average life span of spray paint is between two and ten years, depending on the spray paint type and method adopted.

Additionally, the span of spray paints relies on a combination of factors that need to understand efficiently. And the best approach to do so is to familiarize yourself with different types of spray paints coming ahead. 

Types Of Spray Paints

Acrylic Spray Paint

The first type we have on our list is Acrylic spray paint which is known for its quick-drying properties and durability. It can last from 2 to 5 years. Acrylic resin, solvents, and pigments are the main ingredients of acrylic spray which make it super resistant to fading and cracking.

With that said, the acrylic spray is best for customizing car paints using spray guns to get durable finishing on automotive parts like dashboards, leather car seats, car rims or wheels, or even the whole car exterior

Oil-Based Spray Paint

The following type is oil-based spray paint which gives a glossy finish on metal and outdoor wooden surfaces. Unlike acrylic spray paints, oil-based spray paints don’t have water-based solvents and are suspended with turpentine or mineral spirits. Due to these strong solvents, oil-based spray paints provide strong adhesions and longer durability for up to 10 years.

Since oil-based spray paints have a relatively very long life, you can use them on various types of surfaces. It’s great for wood, glass, concrete, metal as well as all kinds of plastic.

Oil-based spray paint is a petroleum-based solvent that eliminates the need for primer. It offers a glossy finish and is suitable for decorating and changing the outlook of your outdoor furniture.

Enamel Spray Paint

The interesting thing about enamel-based spray paint is that it comes in both water and oil-based formulas. This provides an excellent opportunity for a wide range of products. As per durability, enamel spray paints last up to 5 years; however, their water-based formula is less toxic and easier to clean up.

While oil-based enamel spray paint is known for greater durability and resistance against wear and tear, Enamel paint spray is considered ideal for protecting outdoor metal furniture against harsh weather. You can also use it on indoor items of furniture and appliances. 

Lacquer Spray

A quick-drying solvent-based lacquer is known as lacquer spray paint. You will find a great variety of colors in lacquer spray paints. On furniture, musical instruments, and accessories, you can spray lacquer paints for a perfect and factory-like finish. It may be applied to many different surfaces, including wood, metal, and plastic.

Lacquer spray paint dries quickly and offers a tough, long-lasting finish that lasts up to 7 years and is frequently used on furniture and other home furnishings. Although it dries rapidly, the best results take several coats.

Chalk Spray Paint

Chalk spray paints are used for getting a distressed and vintage look. This spray paint is synthesized with solvents, binding agents, and pigments in an aerosol can. Often it is used in craft projects and can be easily applied on ceramic, metal, and wood surfaces, and it will remain good for 3 good years

Chalk spray paint has a matte texture and is water-based. It is frequently employed for do-it-yourself jobs like painting furniture or decorative objects. The drying time of chalk paint is 15 minutes, as you would have already read from our blog about it, and it is not waterproof but water-resistant, even when used on outside furniture

Metallic Spray Paint

Little metallic particles in metallic spray paint give the finished product a reflective appearance. Although it can be used on other materials, it is frequently utilized on metal surfaces.

Metallic spray paint can last for several years, up to 10 years, if taken care of. However, if the weather is unpredictably bad with spells of high humidity and frequent heat spells, the longevity of metallic spray paint can be adversely affected to come down to as low as 1 to 2 years.

Textured Spray Paint

Spray paint with a textured finish can be used to add texture to a range of surfaces, including metal, wood, plastic, and more. When applied, the granules or particles in textured spray paint produce a textured or rough finish.

Textured spray paint gives surfaces a distinctive finish, like sand or stone, and is frequently used for ornamental purposes. Life after the application is about 5 years if maintained well; however, the paint may chip even before in harsh weather conditions. 

Epoxy Spray Paint

Epoxy spray paint type is distinctive from others and can withstand harsh environments efficiently. Epoxy resin is the main component of spray paint which works as an excellent adhesion and sticks to almost any surface, including plastic, concrete, metal, and wood.

A fun fact is when it comes to durability, the lifespan of epoxy coating is not measured in years but in decades, and epoxy spray paints have examples of up to 30 years or more. It’s one of the toughest paint materials used without primers, and once coated, it won’t take off easily.

PS: If you’re wondering how long spray paint takes to dry, have a look at our blog, which tells you details about the drying time of different types of paints.  

Summarized Table

is spray paint permanent

Factors Affecting Spray Paint Permanency

The permanency of spray paints can be affected by various factors, such as the quality of the paint, the surface preparation, and the environmental conditions during application and curing.

The quality of the paint can influence its durability and resistance to fading or chipping over time.

Proper surface preparation, including cleaning and priming, can also affect adhesion and prevent flaking.

The temperature and humidity during application and curing can impact the drying time and overall finish of the paint.

Additionally, exposure to UV light, moisture, and chemicals can cause the paint to degrade or lose its color. Therefore, choosing high-quality spray paints and ensuring proper surface preparation and environmental conditions can help to ensure the permanency of spray paints.

How does the Quality of the Spray Paint affect its Permanency

The quality of the spray paint can have a significant impact on its permanency. High-quality spray paints typically contain more durable and long-lasting pigments and binders, which can resist fading, chipping, and flaking over time. In contrast, lower-quality spray paints may contain lower-quality pigments and binders, which can lead to a less durable finish and a shorter lifespan.

Additionally, high-quality spray paints often have better adhesion properties, which can help to ensure that the paint adheres properly to the surface and does not peel or flake off. Overall, investing in high-quality spray paints can lead to a more permanent and long-lasting finish.

How does Proper Surface Preparation affect Spray Paint’s Permanency

The surface preparation is a critical factor that can affect the permanency of spray paints. Proper surface preparation can ensure that the paint adheres properly to the surface and does not flake or peel off over time.

Surfaces should be cleaned thoroughly to remove dirt, grease, and other contaminants that can interfere with adhesion. Priming the surface can also improve adhesion and provide a smooth and even surface for the paint to adhere to.

Additionally, proper surface preparation can prevent rust and corrosion, which can cause the paint to peel or flake off. Therefore, taking the time to properly prepare the surface before applying spray paint can significantly improve its permanency.

How do Temperature and Humidity affect the permanency of Spray Paints

Temperature and humidity are two factors that can significantly affect the permanency of spray paints. Here’s a breakdown of how each one impacts spray paint:

Temperature:

The ideal temperature for spraying is typically between 50-85°F (10-29°C). Temperatures outside of this range can affect the drying time of the paint, leading to inconsistent finishes and adhesion issues. If the temperature is too low, the paint will take longer to dry, causing it to become tacky or crack. If the temperature is too high, the paint will dry too quickly, leading to a rough and uneven finish.

Humidity

Humidity levels outside of the range of 40-60% can cause issues with spray paint permanency. High humidity can lead to moisture getting trapped between the surface and the paint, which can cause the paint to bubble or blister. On the other hand, low humidity can cause the paint to dry too quickly, leading to cracking or peeling. The ideal humidity level for spraying is below 85%, and it’s important to monitor the humidity level throughout the entire process, including during the curing time.

In summary, the temperature and humidity can have a significant impact on the permanency of spray paints, so it’s essential to consider these factors during the application and curing process.

How Does Exposure to UV light, Moisture, and Chemicals affect the Permanency of Spray Paints

Spray paints have become a popular choice for a wide range of applications, from graffiti to furniture refinishing. However, exposure to UV light, moisture, and chemicals can have a significant impact on their permanency. Here’s a breakdown of how each of these factors can affect the long-term durability of spray paints.

Exposure to UV light:

When exposed to UV light, spray paints can fade or even peel over time. This is because UV light causes the chemical bonds in the paint to break down, leading to the loss of color and adhesion. To combat this, it is recommended to use spray paints that contain UV-resistant additives or to apply a clear protective coating over the paint to shield it from UV rays.

Pro Tip: Spray paint can fade away over time if exposed to UV light; therefore, it is best to use Montana water-based spray paint that has UV inhibitors.

Moisture:

Moisture can cause spray paints to corrode, leading to rust or discoloration. This is particularly problematic for metal surfaces. To prevent moisture damage, it is important to ensure that the surface is completely dry before applying the spray paint. Additionally, using a rust-inhibiting primer before painting can provide an extra layer of protection.

Chemicals:

Spray paints can be vulnerable to damage from chemicals, including cleaners, solvents, and even certain types of paints. When exposed to chemicals, spray paints can dissolve or lose their adhesion, leading to flaking or peeling. To avoid this, it is important to choose spray paints that are resistant to chemicals or to apply a clear protective coating over the paint.

By selecting high-quality spray paints and taking proper precautions, you can help ensure that your painted surfaces remain durable and long-lasting.

The Two Types of Surfaces: Porous and Non-Porous

The permanency of spray paint can vary depending on the type of surface it is applied to. We shall now explore how permanent spray paint is when applied to porous and non-porous surfaces.

Porous Surfaces

1 Is Spray Paint Permanent - Will it Last Long or Wear Off

Porous surfaces, such as wood or concrete, have small openings or pores that can absorb the paint. When spray paint is applied to a porous surface, it can be more difficult to achieve a smooth, even finish. The paint may also be prone to chipping or flaking over time, especially if the surface is exposed to weather or heavy use.

To improve the permanency of spray paint on porous surfaces, it is recommended to use a primer specifically designed for porous surfaces before applying the paint. This will help the paint adhere better and create a more durable finish.

Non-Porous Surfaces

2 Is Spray Paint Permanent - Will it Last Long or Wear Off

Non-porous surfaces, such as metal or glass, do not have small openings or pores like porous surfaces do. This means that spray paint can adhere better to non-porous surfaces and create a more permanent finish. However, non-porous surfaces can still present challenges for spray paint, as they are often smooth and can make it difficult for the paint to stick.

To improve the permanency of spray paint on non-porous surfaces, it is recommended to use a primer specifically designed for non-porous surfaces before applying the paint. This will help the paint adhere better and create a more durable finish.

What is the Application Technique to Help Increase the Permanency of Spray Paints

Not only the right spray paint but the right application technique plays a crucial role in enhancing the durability of spray paint. Here are certain things to consider while dispensing spray.

Distance:

Keep a consistent distance while applying paint; move it swiftly.

Number of Coats:

To avoid peeling and chipping, apply multiple light coats than applying a single thick coat.

Drying Time:

Give each coat some time to dry before applying the next one, and this trick helps the paint last longer than usual.

Frequently Asked Questions

What to do if Spray Paint sticks to your hand?

Spray painting is fun until it covers your hair, nails, or skin! The best way to remove spray paint from skin is using acetone or nail polish remover.

How Long Does Spray Paint Last?

The paint spray paint, under optimal conditions, can last between two and ten years.

Does Spray Paint Wash Off?

Once you spray the paint and allow it to settle, it will resist water or other cleaning solution.

Are All Spray Paints Permanent?

Not every spray paint is permanent Chalkboard spray paint, and temporary marking spreads can be removed with a damp cloth if the surface is too porous or unclean.

Is Spray Paint Permanent on Metal?

If the surface is prepared well, it will stick.

Can Spray Pain Remove from Rims?

Yes, you can remove spray paint from rims by identifying the material of the rim and using a spray paint remover afterward. Brush it well with a brush and rinse with water

Wrap Up

The answer is that Spray paint has various circumstances, but if I have to sum up, it neither remains forever nor goes off completely. If the spray is applied while considering all the factors mentioned above, it will last between two and ten years which is a fair deal! Because obviously, you don’t want your spray to fade away before the season ends. You can last your Spray paint longer with the right product and technique.

pexels thanh tran 13035437 8 Best Primers for Exterior Walls -Buying Guide

8 Best Primers for Exterior Walls -Buying Guide

Exterior painting is the perfect way to enhance the appearance and protect the longevity of your home. A fresh coat of paint can completely transform the look of your property, adding curb appeal and increasing its overall value. Not only does it improve the aesthetics of your home, but it also serves as a protective barrier against weather elements such as rain, snow, and UV rays.

However, when it comes to exterior painting, a quality primer is essential to ensure a long-lasting and durable finish. The best paint primers are designed for exterior surfaces, providing excellent adhesion, moisture resistance, and flexibility.

With so many options, which primer should you select for your exterior?

So, to save you from the inconvenience, we scoured through the internet and came up with a list of the eight best primers for your exterior so you can paint over a smooth surface and remain in peace for a long time.

OUR TOP 3 PICKS OF BEST PRIMER FOR EXTERIOR WALLS

Best overall

ZINSSER White, Bulls Eye 1-2-3 Primer/Sealer

811+yX3C NL. AC SL1500 8 Best Primers for Exterior Walls -Buying Guide
  • Extra durable
  • Multi-surface – interior and exterior
  • Pocket-friendly
  • Primer and sealer
  • Stain blocking

budget friendly

INSL-X AP100009A-04

813hvctbaVL. AC SL1500 8 Best Primers for Exterior Walls -Buying Guide
  • Highly cost-effective
  • Easy to Apply
  • Quick drying
  • Flat finish type

most durable

THE ONE Paint & Primer

616+mwaP4SL. AC SL1500 8 Best Primers for Exterior Walls -Buying Guide
  • Most durable
  • Works great on furniture
  • Water-based formula
  • Comes in a variety of finishes

Rating Criteria

Not all products are built equal. Each primer enlisted on the internet has its pros and cons. Some may tend to one’s needs better than the other. To address this issue, we devised strict rating criteria, which allowed us to finalize 25 products from all over the internet and then finalize a list of the 8 best exterior primers for your exterior.

1. Coverage Area

Generally, we consider large-sized walls, floors, doors, or windows with a wide surface area when discussing exterior surfaces. That is why coverage area was one of our significant concerns while finalizing the list of best exterior primers. The primers we selected had to cover at least 300 sq ft per gallon, so you guys don’t have to buy a bucket load of primer with a ton leftover.

2. Cost

A primer is something other than what you account for in your monthly expense. So nobody would be willing to spend much of it to get a smoother surface. That is why we ensured that the selected products were the most cost-effective and provided the most value for money. This cost criterion will save you from the hustle of choosing between an expensive or a low-quality paint project.

3. Environmental Friendly

Finally, one of our primary concerns was to list down environmentally friendly products. To do that, we ensured that the products emit either zero or ultra-low VOC levels in the atmosphere. On top of that, we also eliminated any products that can cause irritating fumes or odors that will cause inconvenience for the users.

8 Best Primers For Exterior Surfaces

Now that we have explained our strict rating criteria and our top 3 picks for you, you can fully trust our choices. The products mentioned below are the best in the market, with good to great customer reviews. So let’s dive into the list of 8 premium primers that will make your exterior surface as good as new.

1. ZINSSER Bulls Eye 1-2-3 – Best Overall

Key Features

  • Water-based formula
  • Works as both primer and sealer
  • Matt-type finish
  • Provides a wide area for coverage


What do we like best?

The Zinsser Bulls Eye 1-2-3 is all you want in a primer for your exterior walls. The product comes from a trusted brand and is easy to use, even for beginners. The product works as a primer and a sealer, reducing your effort and keeping your surface stain free for a long time. This exterior primer also covers a large surface area of 82 to 110 square feet per quart, which reduces the overall cost.

The bull’s Eye 1-2-3 has a water-based formula allowing it to cover even the most complex surfaces without prior sanding or thorough cleaning. The water-based formula is also the reason behind its long-term durability and weather resistance. Finally, the primer dries up in 35 minutes and is ready for the top coat in an hour which is a cherry on top for such a dynamic product!

What needs to be improved?

The water-based formula can have adherence problems on glossy surfaces. The product is relatively thin and spills directly off, so this issue needs to be addressed to make the product a universal primer.

Pros

  • It covers a large surface area
  • Works as both primer and sealer
  • Dries up relatively quickly
  • Lasts very long in harsh conditions
  • Provides a matt-type finish to the surface

Cons

  • Can prove to be costly on a smaller project
  • Does not work well on glossy surfaces

2. INSL-X AP100009A-04 – Budget Friendly

Key Features

  • Acrylic type paint
  • Provides mildew resistant coating
  • Not recommended to use on floors
  • Covers up to 400 to 450 sq ft per gallon

What do we like best?

Spending a hefty amount to prime your exterior surfaces does not seem prudent for most people. To get around this budget constraint, INSL-X came up with the AP100009-04. Despite a relatively lower price, the product stands out from its competitors due to its strong adhesion and large application area.

This primer also has its fair share of features, including a quick drying ability that allows you to paint a second coat in just over an hour. The primer is easy to apply and sticks very well to wooden surfaces and windows. It provides a flat type finish to the surface, which works wonders if you are looking to smoothen out your rough or chalky exterior walls.

What needs to be improved?

This product is not recommended to be used on floors, limiting its usability and forcing you to buy a different one if floors are included in your project.

Pros

  • Provides most value for money
  • Elementary to apply even for beginners
  • Flat type finish smoothens outs the surface
  • Coating is mildew resistant and even resists minor stains.
  • Strong adhesive abilities

Cons

  • Can cause issues with temperatures of over 40 degrees
  • Limited in its use

Note: If you want paint and primer together, it is next in the list at # 3. It is also odorless and has a non-toxic formula.  

3. THE ONE Paint & Primer – Most Durable

Key Features

  • Non-toxic formula
  • Odorless application with low VOC
  • 2 in 1 paint and primer mix
  • Available in vibrant colors

What do we like best?

Sometimes money is not your concern; all you need is a high-quality primer to save you the trouble of painting every few years. If that is your need, then One Paint and primer is your go-to choice. The product is highly durable, and it is a 2 in 1 paint and primer mix, so it will also massively reduce the time and effort of your project.

The product is multifunctional and dynamic; this primer can be applied to exterior and interior furniture. It also applies on brick walls with almost no prep, making it well-disposed. Finally, the product has a non-toxic water-based formula, which makes it long-lasting despite ultra-low VOC emissions.

What needs to be improved?

The primer is not self-leveling, which can cause problems if one has no prior experience with painting. The primer surface can be left with stroke marks if the paint is applied by an unequipped hand.

Pros

  • Highly durable and long-lasting
  • Works on walls, and furniture
  • Requires little to zero prep work
  • Nontoxic formula with low VOC emissions
  • Odourless application makes it user-friendly

Cons

  • No self-leveling feature
  • Price is slightly higher

4. KILZ Adhesion Primer – Best for Glass Surfaces

Key Features

  • Gloss-type finish
  • Oil-based formula
  • Specifically made for hard-to-adhere surfaces
  • Can be painted through a spray gun

What do we like best?

When it comes to priming, the job’s most challenging and frustrating part is to coat a glossy surface (mainly glass and vinyl). These surfaces are slippery, making it hard for the paint to adhere to them. To counter this problem, KILZ developed their Adhesion primer, a unique latex-based formula that allows the primer to stick right to these surfaces without running off.

The product can be applied in multiple ways, including coming through brushes, rollers, and even paint guns, making it very convenient to use. The company recommends a half or quarter-inch tip with a 2500-3200 psi paint gun to get the best priming results on your exterior walls.

Moreover, the product’s usability is limited to glossy surfaces and provides excellent results on rough areas like wood or metal windows.

What needs to be improved?

This primer requires thorough prior cleaning before application. Although inconvenient, this prior prep is vital in all products used on these rigid surfaces, so it is not a make-or-break deal.

Pros

  • Works best on harsh surfaces
  • Strong latex-based formula increase adhesion
  • Can be applied through a paint gun
  • Dry-to-touch in an hour
  • Works excellent on other chalky and rough surfaces

Cons

  • Requires prior cleanup
  • Doesn’t give you the best coverage area

Note: If you want an odorless paint with non-toxic formula jump straight to our product number 6

5. KILZ 3 Premium Primer -Best Stain Blocking

Key Features

  • High stain-blocking capabilities
  • Matte type finish 
  • Highly stain-resistant formula
  • Self-leveling feature

What do we like best?

If you have kids at home likely to stain your exterior surfaces, get the KILZ 3 premium primer. KILZ is one of the leading brands in the market, known for making high-end products. This specific primer has a specialized water-based formula that acts as a strong sealer and prevents most stains from coming to the surface.

The KILZ 3 premium is a high-end primer with a formula that emits no harmful VOCs into the environment. The product requires a minor prior clean-up and can smoothen even the most uneven and masonry surfaces by following their little imperfections. The primer also has a self-leveling feature, making it very easy to use, even for a beginner.

What needs to be improved?

This product has an application area of about 300 square feet per gallon which is okay, but it is relatively little less than other water-based primers in the market.

Pros

  • Prevents most types of stains
  • Self-leveling provides uniform finish
  • Does not emit any harmful VOCs in the environment
  • Works well in humid environment
  • Works great on masonry surfaces

Cons

  • Smaller coverage area
  • Slightly pricey

Note: If you want a primer best fit for metal surfaces, jump straight to number 7.

6. KILZ Klear Primer – Best for Clear Coats

Key Features

  • Provides a clear coat to the surface
  • Best for wood and aluminum surfaces
  • Alkali resistant feature
  • Dries up very quickly

What do we like best?

As someone who prefers the classic wooden look of my exterior instead of a different vibrant paint, finding a primer that does not change the classic color was challenging until I came across this KILZ Klear primer. As the name suggests, this product provides a clear coating over your surface while filling all its pores and making it as smooth as possible.

This clear primer has a specialized alkali-resistant formula perfect for masonry and chalky exterior surfaces that can release alkaline chemicals in hot water. The clear coat provided by this product is breathable and flexible, which increases its long-term durability and increases the adhesion of the product. The primer requires minimum soap and water cleanup. This primer can be sprayed through a paint gun and dries up quickly, reducing the overall project time and making it very convenient.

What needs to be improved?

This primer is only applicable in a limited temperature, which can be troublesome in areas with extreme weather conditions. But once applied, the product will stand in any weather conditions for an extended period.

Pros

  • Provides a clear breathable coat on the surface
  • Dry-to-touch in less than 30 minutes
  • Alkaline resistance makes it perfect for cement surfaces
  • Preserves the classic color of wooden exteriors
  • Can be sprayed, which reduces time and effort

Cons

  • Needs proportionate mixing before use
  • Limited in application in extreme weather areas

7. Rust-Oleum 7780502 – Best for Metals

Key Features

  • Rust and corrosion resistant
  • Dries in 2 to 4 hours
  • Strong oil-based formula
  • Provides a clear flat finish

What do we like best?

No prime list of paint products is complete without the mention of Rust-Oleum. They are one of the most trusted brands regarding metallic and masonry surfaces. This specific Rust-Oleum 7780502 primer is tailor-made for exterior metal surfaces by providing a flat solid base finish.

This product has a robust oil-based formula which is the reason behind its strong adhesion to metal surfaces. In addition, the product also features a non-corrosive paint base perfect for restoring old and dingy metal door surfaces or even roofs. Finally, the product’s ultra-wide coverage and extreme weather resistance separate it from its competitors in the primer market.

What needs to be improved?

This oil-based primer requires at least 2 to 4 hours to dry to touch (varying due to weather conditions). But the benefits it provides in return are more than enough to make for some extra few hours of effort.

Pros

  • Prevents the metal surface from rusting
  • Withstands extreme weather conditions
  • Provides a flat white base for a smoother top coat
  • Lasts for a very long time
  • Works well on wooden surfaces as well

Cons

  • Very long drying time
  • Can be tricky to spray through a gun

Note: If you want a primer that can be used with a spray gun, scroll up and checkout number 4

8. KILZ Restoration Primer – Odor resistant

Key Features

  • Odor blocking ability
  • Provides matt finish
  • Resists a variety of hard stains
  • Water-based formula

What do we like best?

Finally, this product is for all pet owners worried about their homes smelling bad. The KILZ restoration primer is one of the most dynamic products in the market due to its highly advanced water-based formula that acts like an oil-based formula by sealing the surface and providing super adhesion without the long dry-up time.

This primer has many special features, but its stain-resisting and odor-blocking capabilities are perfect for painting a dog house outside your home. Despite being so durable, the product has a water-based formula that lowers the dripping time and increases the coverage area by many folds compared to other-based competitors. Finally, the product dries hard, providing a straightforward surface to coat with the paint.

What needs to be improved?

This primer requires a sanded and properly cleaned surface which can take time and effort. But the quick drying time and hard finish make up for these shortcomings quite well.

Pros

  • Completely seals off any type of odors
  • Reduces heavy water and smoke stains
  • Super adhesion makes it durable
  • Dries up in no time.
  • Provides a hard finish to paint on.

Cons

  • Requires prior sanding and cleaning
  • Product can harden up if left uncovered for a long time

HOW TO CHOOSE THE RIGHT PRIMER FOR EXTERIOR WALLS

All the products mentioned above are best at one thing or another. But that does not mean each will satisfy your needs equally. Many beginners make the mistake of buying our best pic or most budget-friendly option without realizing the specifics of their project. To save you the trouble, we will provide a buying guide to help you identify which product will suit your project the best.

The Type of Surface

Even the best product will not work if applied on the wrong surface. Every surfacer is different. A primer made for masonry surfaces will not work on a metal surface (it will drop off). Similarly, a glossy primer will not work on a wooden surface, so whenever you buy a primer, make sure it applies to your required surface.

Tintability

A primer is not the final coat on your surface. Instead, it provides a base for your top coat. A tintable primer will provide a much more uniform and rich color. On top of that, buying the right level of tintablity will also do wonders for your project by reducing the number of paint coats significantly if you change from a dark color to a lighter one.

Drying Time

Drying time is one of the most critical components of a project. Most people are unwilling to paint their patio or exterior furniture for multiple days. That is why whenever you are buying a primer, note the drying time carefully, and if you have a limited time ( a day or two), buy a primer that dries up in an hour or so you can complete the project as soon as possible.

Conclusion

We have provided you with a list of the 8 best primers for your exterior, and our strict rating criteria are more than enough to justify the credibility of these products. 

But keep in mind this list is by no means exhaustive. There are hundreds of products in the market, and one may suit your project better than any on our list. That is why we have provided you with a buying guide to help you identify your specific primer so you can paint on an accessible surface and have peace of mind for a long time.

So, What are you waiting for now? Pick up that brush and start painting and enjoy the whole process!

You can also check out the article of 6 best primers for interior walls and see the common ones so you can use them on both surfaces. 

pexels charlotte may 5824519 1 Can You Use Wall Paint On Wood Furniture - A Valuable Guide

Can You Use Wall Paint On Wood Furniture – A Valuable Guide

Wood furniture is an excellent investment as the material is durable and very long-lasting. The only downside is that wood accents can become boring after a few years, and you feel tempted to make changes to liven up your space.

That is when spray paints come to your rescue! They provide an inexpensive way to transform your wood furniture’s appearance and breathe new life into old pieces.

But can you use wall paint on wood furniture? Or is the project impossible without furniture paint? I have the answer you’re looking for!

Yes, you can use wall paint on furniture, whether it is wood or laminate. All you need to do is ensure the surface is primed and sanded before applying wall paint to it. Both water-based and oil-based wall paints can be used as long as the primer you select is compatible with the medium.

Wall paints are formulated for surfaces other than furniture, so using the right painting technique is important if you want good results on wood surfaces. Rest assured, I will discuss types of primers, paints, and correct techniques to help you achieve lasting results from wall paints on wood furniture.

Benefits of Using Wall Paint on Furniture

If you ask a professional, ‘What paint to use on furniture?’ they would answer furniture paint! You’d never hear them recommend wall paint for your furniture because both paints are designed differently.

However, you can use wall paint on furniture regardless. Just make sure to read up on some details about applying wall paint to furniture before you begin.

Using wall paint on furniture means you can achieve a more colorful finish, thanks to the pigments in its formula. Moreover, since there are so many color options available in wall paints, you can create unique pieces with the choices.

Secondly, wall paints are usually stain-resistant and easy to clean. So, if you apply it on furniture, you can maintain its appearance for longer by cleaning away grease and stains effortlessly.

Drawbacks of Using Wall Paint on Furniture

The biggest drawback of wall paints is that they aren’t designed for furniture. Hence, they provide weaker adhesion on wooden surfaces. Its inability to stick to the surface properly results in premature chipping and peeling away of the paint.

This is why you often notice hairline cracks and chipped spots on painted furniture.

Luckily, there’s a way to work around this problem and get lasting results with wall paint regardless of the material of your furniture. All you need is a suitable primer to prep the surface before applying the color coat. The primer allows the wall paint to bond to the surface correctly and offers a lasting finish.

 Are water-based wall paints better than oil-based paints for painting wood furniture?

Oil-based paints have been around for many years and are considered ideal for woodwork. Whether you want to work on an indoor wooden surface or repaint metal furniture for the outdoors, oil-based paints deliver excellent color pay-off along with durability.

These paints have received much criticism lately due to their high VOC level. With people becoming more aware of these harmful gases, paint manufacturers decided to improve the performance of water-based paints to match their oil-based counterparts.

Simultaneously, oil-based paints were reformulated to ensure safer levels of VOCs. Hence, now both variants deliver durable and safe results.

Water-based paints dry much faster and retain their original color for longer (oil-based colors may turn yellow). However, the paint does have a few drawbacks. For example, it generally needs more coats and exhibits poor adhesion when applied over oil-based paints.

So, if you’re confused about which paint to use on your furniture, let the surface dictate your ultimate choice.

If you’re coloring a surface that has been painted previously, check the original paint type. If it was oil-based paint, then use the same type again. But if the surface hasn’t been painted before, I recommend using water-based wall paint.

What paint to use on wood furniture?

If you plan to use wall paint on your wood furniture, it must be compatible with your working material. While oil-based paints offer excellent adhesion and brilliant results, they aren’t beginner-friendly. In contrast, water-based alternatives are more forgiving in terms of application and clean-up.

Here are two water-based paint options you can use on wood furniture:

Acrylic Paint

Acrylic paint is a water-based latex derivative that offers the best of both worlds. The acrylic resins provide high-intensity pigment and awesome durability, while the water in the paint’s formula makes messy cleanups effortless.

However, applying a primer before using acrylic paint for furniture is best since the paint typically requires a single layer to adhere to the wood.

Acrylic paints have the ability to contract and expand with changing temperatures without cracking up. This quality makes it an excellent candidate for painting wood furniture. In addition, the acrylic formula creates a layer on the furniture, preventing water from seeping into the wooden surface.

Like other water-based variants, acrylic paint effectively wards off mildew and maintains a vibrant color despite extended sun exposure.

Acrylics work best on previously unpainted wood, but if you’re repainting a piece, you should remove the old layer of paint before applying a fresh acrylic coat. Check out my blog for more tips on painting wood with water-based paints.

Pro Tip: Invest in a good brush when working with acrylic paint, as it lacks the flow of an oil-based paint and may leave prominent brushstrokes. You can even add a conditioner, enamel, or other paint additives to reduce brushstrokes.

Latex paint

Latex-based paints work really well on wood furniture and are ideal for painting large surface areas, such as cabinets and shelves. The paint delivers a durable finish that resists chipping, peeling, and fading.

Many latex-based wall paints can be used on both interior and exterior surfaces. So, if you want to paint outdoor furniture, rest assured, as the paint’s formula can easily withstand environmental pressures like rain, wind, snow, etc.

Using exterior wall paint on indoor furniture might not be a great idea. But if you’re determined to use it, learn more about using exterior paint inside before you begin.

If you have a flat and satin finish latex wall paint, I recommend using a topcoat at the end to add some vibrancy and sheen to the color. The clear coat will also make your furniture pieces more resistant to water and help in quick cleanups.

However, you can skip the topcoat altogether if you have a semi-glossy or glossy finish paint.

Pro Tip: Latex paint is notorious for apparent brushstrokes, so if you’re a beginner, it’s best to use spray paint instead for a flawless finish.

Paint suggestions

Here are a few paint suggestions to help get your project started.

Krylon COLORmaxx Acrylic Latex Paint

71XwU0XXebL. AC SX300 SY300 QL70 FMwebp Can You Use Wall Paint On Wood Furniture - A Valuable Guide

The Krylon COLORmaxx is an excellent choice because it’s suitable for various surfaces, including drywall, masonry, wood, metal, and wicker. In addition, the paint’s formula delivers lasting results on outdoor and indoor surfaces, which means you can use this variant for several purposes.

Rust-Oleum Painter’s Touch Latex Paint

71wNd1JcTFL. AC SX300 SY300 QL70 FMwebp Can You Use Wall Paint On Wood Furniture - A Valuable Guide

Rust-Oleum’s paint is available in numerous unique colors, so if you’re in the mood to get creative with wall paint, this is the right choice for you. This formula is fade-resistant, odorless, and suitable on indoor and outdoor surfaces like wood, plaster, and masonry.

Krylon Acrylic Spray Paint

71kA8vV4BaL. AC SX300 SY300 QL70 FMwebp Can You Use Wall Paint On Wood Furniture - A Valuable Guide

If you prefer the ease of an aerosol, then the Krylon spray paint can be an ideal choice. This acrylic paint is smudge-proof and moisture-resistant with quick drying properties. You can use it on wood, metal, plaster, and ceramic without worrying about chipping or fading. I have picked up the gold metallic shade but Krylon has a variety or range you can check out.

Which primer works best on wood furniture?

Although it can be tempting to skip primer when finishing a DIY painting project, I advise you to prime your piece before applying paint.

That’s because primer helps create a layer on the wood’s surface, allowing the paint to bind to the surface thoroughly. It also helps to prevent bleedthrough stains and offers better coverage.

Since wood contains grain texture naturally, you need to give the paint something to stick to, and that’s where primer comes to the rescue.

Now that we’ve established the importance of primer in your project let’s move on to the different kinds available in the market.

Shellac Primer

Shellac primer on BIN blocks stains and smells on the surface present previously while forming a protective layer on the furniture to avoid future stains and bleed through.

Bleedthrough is common in wood, and it often occurs right after sanding. So, if you plan to paint a light color over a wood surface, Shellac would be a good choice.

You can try the Rust-Oleum Shellac Primer for your project, as it offers ultimate stain-blocking abilities and effectively seals knots, sap, and tannin. This high-hiding bright white primer sealer creates a smooth canvas for paint, regardless of how light the final color coat may be.

Can You Use Wall Paint On Wood Furniture - A Valuable Guide

Clear Primer

As the name suggests, a clear primer leaves a transparent protective layer on wooden surfaces. The best time to use this variant is when you want to expose some of the original wood texture of your furniture through the paint coat.

The Rust-Oleum Clear Binding Sealer has a water-based formula to help prepare your wooden surfaces for water-based wall paint. The formula effectively binds cracking, chalking, and peeling paint, gluing down any cracks or gaps in old paint for a flawless surface.

61CUpYRjzEL. AC SX300 SY300 QL70 FMwebp Can You Use Wall Paint On Wood Furniture - A Valuable Guide

Pro Tip: If you want a piece to show off some of the wood, prime and paint it normally. But after the paint has dried, dip a cloth into warm water and rub it along the paint to take some of it off. This will create a unique wet distressed look.

Can you use wall paint on laminate furniture?

Most wall paints are highly versatile, allowing them to adhere to different surfaces, including wood. But if you’re planning to paint a laminate surface, it’s best not to skip a crucial step: Prime the piece!

The problem with painting laminate furniture is that the paint can bead up on the surface or end in a splotchy, uneven finish. Most of the time, the first coat starts peeling as soon as you try to paint the second one.

A suitable primer can reverse this problem and create a base to which your color coat can stick. Just remember to pair your paint with the right primer for lasting results.

Pro Tip: Use a water-based primer for latex wall paint, but if you’re working with oil-based paint, make sure to select an oil-based primer!

What paint is best for veneer furniture?

Painting veneer furniture can quickly elevate its appearance without spending a hefty replacement amount. But the process can be tricky since the material is very thin.

Commonly, veneer ranges from 0.9mm to 2.5mm, and although you can find 4mm thickness, too, it’s a rare sight.

Sanding is important if you want to achieve a smooth base for the paint layer, but if you sand the veneer with a coarse grit or exert too much pressure, you might just sand through the veneer.

So, if you’re a beginner, maybe opting for a paint formula that doesn’t require sanding should be ideal. This is where chalk paint can come to the rescue!

Chalk paint for furniture is a durable option that allows you to experiment with unique colors and create statement pieces. But more importantly, it can be applied directly to veneer surfaces without sanding.

Another great option is milk paint, which has similar properties to chalk paint. However, it contains a protein, ‘casein,’ that acts as the binding agent in the formula and delivers more lasting results.

Pro Tip: Seal the chalk paint with furniture wax to prevent its color from fading. But if you don’t mind the shine, choose a clear sealant for better paint performance.

Can you use wall paint on MDF?

You can easily use wall paint on MDF if the surface is correctly prepared. 

MDF or Medium-Density Fibreboard combines sawdust and resins, making the material inexpensive and convenient to work with. It has 150 grit on the front and back sides, but the edges are rougher, making them more porous. Hence, the paint will sink into the surface if you don’t prep the edges properly.

To counter the porous characteristic of MDF, an oil-based paint performs better than water-based alternatives. However, if you have water-based wall paint, remember to prime and seal MDF furniture for lasting results.

FAQs

What kind of paint can you use on furniture without sanding?

The best paint options for furniture without sanding are chalk, milk, mineral, and enamel paints. 

Can Dulux wall paint be used on wood?

Yes, Dulux water-based paints can be used to color wood surfaces such as furniture, skirting boards, window, and door frames.

What happens if you use regular paint on cabinets?

Cabinets are usually high-touch surfaces that require a specially formulated paint. Therefore, using regular paint on cabinets may result in a soft and tacky finish that doesn’t last.

Can you use wall paint on wooden doors?

Yes, you can use wall paint on wooden doors, but it’s best to seal the surface with a top coat afterward to make it last.

Conclusion

Replacing wooden furniture is expensive, but fortunately, you can upgrade its look by applying a fresh paint coat. I recommend that you use furniture paint for your wooden pieces, but if you want to use wall paint instead, make sure to follow the tips mentioned above for near-professional results.