Spray Paints

pexels teona swift 6850541 Does Spray Paint Wash Off Clothes - Paint Removers That Work!

Does Spray Paint Wash Off Clothes – Paint Removers That Work!

Spray paint DIYs are fun as long as you don’t accidentally get some paint on your clothes. Once that happens, your focus shifts from getting the perfect finish to cleaning the stains quickly. Luckily, you can get spray paint off of clothes using items already stored in your cabinets.

Wet paint is easier to remove from clothes than dry paint. If some paint sprays on your clothes, act quickly and place paper towels on the stain to absorb as much of it as possible. For water-based paint, clean the surface with dishwashing liquid and water. For oil-based paint, a solvent like acetone or hairspray will work better.

While your first instinct is to toss the soiled clothes in the washing machine, it is recommended to pre-treat the stain before going down that road. I will explain what gets spray paint out of fabrics and how you should treat wet and dry paint for the best results.

Will spray paint come out of clothes?

Spray paint sticks to clothes differently compared to smooth objects, and this is because paint settles into the fabric and sinks in the weaves. So, while you can quickly strip away paint from metal surfaces and other smooth objects, clothes are not so forgiving.

Water-based paints come off easily from clothes compared to oil-based variants. However, you should keep in mind that some color may stay on your clothes even if you remove the stain completely. And if you try to scrub the surface too much or use a strong chemical paint remover, you will end up ruining your clothes.

Light-colored clothes are easier to treat than darker colors because there are fewer chances of discoloration due to paint removal treatments. Fortunately, small paint stains are less noticeable on dark-colored clothes.

Effective ways to remove spray paint from fabric safely

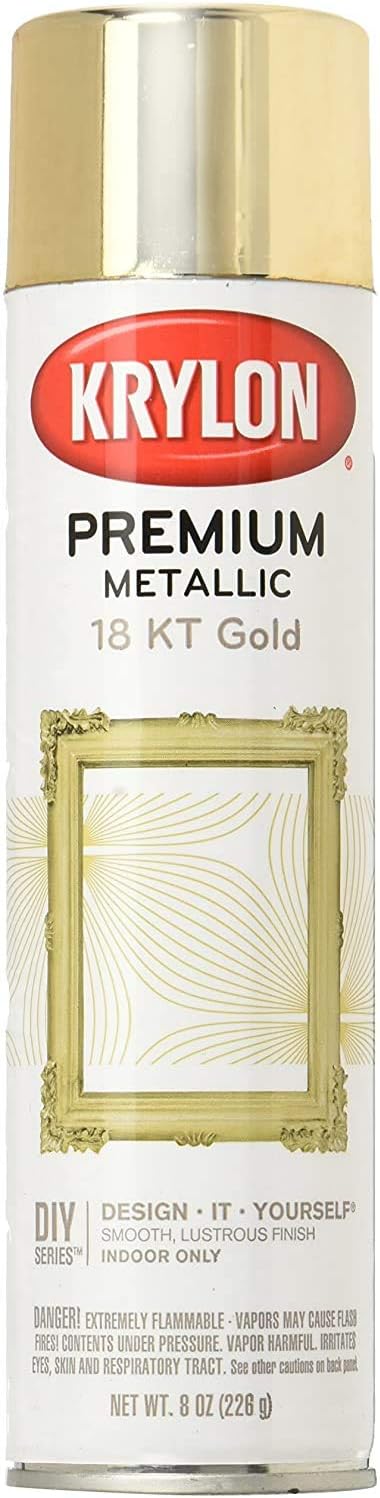
Before attempting to clean a paint stain, check the label of the spray paint can to find out whether it’s water-based or oil-based. Both types of colors are removed using different products; therefore, it’s important to know what kind of stain you’re dealing with.

Bleach and chemical paint thinner are quick ways of removing stains, but they can damage the fabric for good. Instead, use safe products that remove the paint without ruining your clothes.

For water-based paints like acrylic and latex, washing the soiled area with dish detergent and warm water can do the trick. If the color is oil-based, using an oil-based remover has a better chance of effectively removing the stain.

Before using any paint remover, patch test a small area of the garment to ensure it doesn’t cause any damage to the original color.

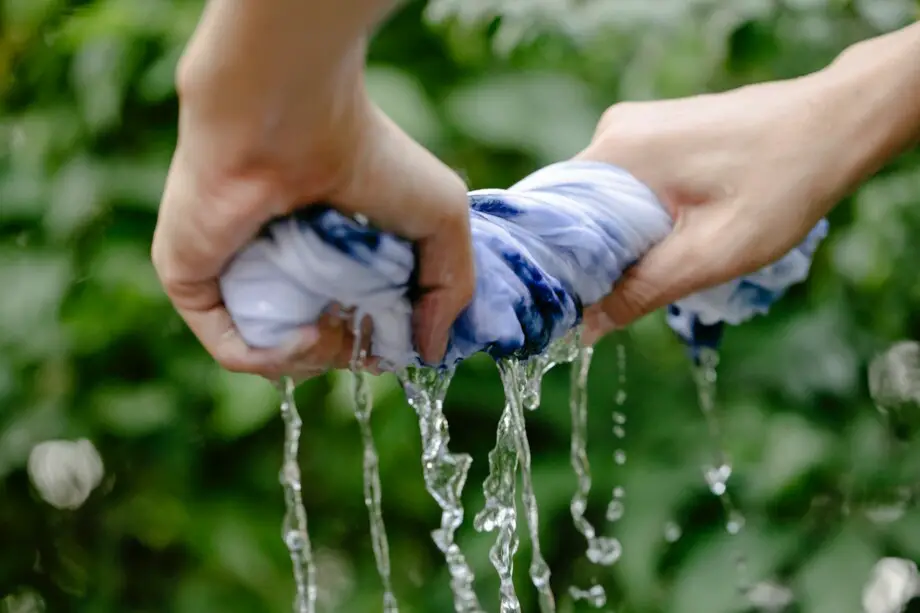
Whatever you do, avoid putting the garment through the washing machine until you’ve treated the paint first. It may spread on other items in the load or color the insides of your washing machine.  

How to remove wet paint from clothes

Customizing your fabrics with spray paint is one thing, but accidental splashes can ruin the appearance of your clothes.

Removing wet paint takes less effort, so if you see a stain while you’re spray painting, clean your clothes before it dries completely.

Here are a few steps to get wet paint off your clothes without spoiling them.

1. Blot up the excess paint

When the paint is wet, avoid rubbing it, as that may cause the color to spread to other areas. Rubbing the spot might also cause the paint to sink deeper into the fabric.

Instead, place paper towels on both sides of the material to absorb the excess paint. Keep replacing the soiled paper with a fresh one to remove all the extra color.

2. Apply a stain remover

Once you have cleaned the wet paint from your clothes, it’s time to treat the stain with a paint stain remover.

For water-based paints, you can apply dish soap to the area and gently scrub the stain with a brush. Rinse the clothing with warm water and repeat the process if necessary. If dish soap doesn’t get the paint off, you can use other products to break down the stain a little more.

For oil-based paints, use a product that has solvent in its composition. You can apply turpentine by soaking a rag cloth in its solution. Leave the remover for 10-15 minutes to react with the bonds of the paint and break them down. You can also add some scrubbing action to the equation for better results.

Rub the soaked fabric with a clean cloth, preferably one you can discard later. The paint should start coming off onto the rubbing cloth. When it gets saturated, replace it with a new one and keep scrubbing the stain. Continue the process until you’ve removed as much paint as you reasonably can.

If the paint doesn’t come off with turpentine, you can try WD-40 or even hairspray.

3. Place it in the washing machine

After you have removed as much paint as you can, toss the garment into the laundry to clean the after-effects of the paint remover you’ve used.

How to remove dry spray paint from clothes

Dried spray paint stains can look intimidating, and you may be resigned to throwing your clothes away. Fortunately, you can get rid of dry paint from your garments and save them from the trash.

Here is a step-by-step guide to help you remove dried paint from your clothes.

1.      Scrape off the dried paint

The first step is removing as much dried paint as possible. You can use a paint scraper or a butter knife to scrape the excess paint away from the stain. The more you remove from the surface, the higher chances of the paint remover reaching the paint that has soaked into the fabric.

2.      Clean the stain with an alcohol-based solution

Your best bet for removing acrylic-based spray paint stains is alcohol-based cleaners such as acetone or hairspray. Apply the cleaner so it sinks into the stain, and allow it to soak for 10-15 minutes. These cleaners should break the bond between acrylic plastic.

Since dried paint is difficult to remove, an alcohol-based cleaner might only remove some of the stain. In this case, you may need to use a heavy-duty paint remover.

Please be warned that paint removers contain harsh chemicals that can strip down the fabric’s original color. Therefore, they should be used as the last resort.

3.      Wash the fabric

Whether or not you were able to remove the paint stain completely, put the fabric in the washing machine to clean the paint remover thoroughly.

What gets spray paint out of fabric?

Sometimes one paint-removing method may not get the job done. Therefore, we have listed a few products that can help you remove paint stains from clothes.

Dish soap

If the paint is wet and water-based, dish soap can work on the paint stain. If it does not remove it entirely, it should help get rid of the top layer. You can then use another product for the paint that’s bonded to the fibers.

Rubbing alcohol

Rubbing alcohol is an effective paint stain remover whether you’re using oil-based or water-based paints. It works better on wet paint, but you can always give it a shot for dried stains. Your best bet would be to use rubbing alcohol that’s 90% or stronger.

Just remember to do a patch test to ensure it won’t damage the material.

Vinegar

Vinegar is a good option for removing paint since it’s acidic. While it may not work as well on large stains, you can definitely try it on smaller areas. The good news is that it can be used for both types of paints, water and oil-based. You can also use vinegar on wet and dry stains, which helps take the guesswork out of which surface is better suited to this product.

Check the material with a spot test before applying it liberally over the stain. Do not pour it on top of the paint; instead, saturate a cotton ball with vinegar and apply it to the fabric until the stain is soaked. Allow it to sit for 15-20 minutes before washing it with warm water.

Turpentine

Turpentine is an effective way to remove paint as it is primarily a paint thinner. You can use it on wet and dry oil-based paint, but it doesn’t work as well on water-based paint stains.

The only downside is that turpentine can strip the original color of your clothing. For this reason, you should only use it on white or light-colored fabrics.

Just like vinegar, you shouldn’t pour turpentine directly on the stain but soak the paint with a spare cloth dipped in the solution. Let it sit for 15-20 minutes, and then wash the area with some dish soap and warm water.

Turpentine has a strong smell, so you should make sure your room is adequately ventilated. In addition, you may need to soak the fabric in a solution of water and vinegar for a few hours to get rid of the odor from your clothes.

WD-40

WD-40 works on oil-based paint when it’s still wet. It contains degreasers and solvents that help break down oily substances, but the solution doesn’t work on dry spray paint.

While it is an effective solution, WD-40 is not recommended as it can create an additional stain on the fabric if applied too liberally. If you decide to use it, spray just the paint and not the area around it.

Let it soak for some minutes before rinsing it with warm water and dish soap.

Hairspray

Hairspray contains alcohol that can help break down the paint and remove it from your clothes. You can use it for oil-based spray paint stains, whether dry or wet.

As with other paint removers, hairspray can also leave behind a stain on the fabric. Therefore, it’s best to test on a hidden area of the garment first before spraying it on the paint.

Once the hairspray has passed the patch test, spray it on the stain and gently rub the stain with a clean cloth. The paint remover is working if the paint starts transferring on the dry cloth.

Acetone

Acetone works best with oil-based spray paint, regardless of its state. It is the primary chemical used in nail polish removers, so it should also work the same way on spray paint stains.

While acetone doesn’t leave a stain, it can break down synthetic fibers, so always test it beforehand.

What can you do if nothing works?

There is always a possibility that nothing works to remove the paint stain altogether. In that situation, you can take it to a professional dry cleaner who has had better luck removing spray paint from clothes.

The other option is to cover the stain with a fabric-colored pen designed for masking paint marks. Visit an arts or fabric store to find the shade that best matches your clothes.

FAQs

Does spray paint permanently stain clothes?

Spray paint can be removed from clothes if you act fast and clean the stain while it’s still wet. Things get difficult once the paint dries down and binds with the fabric.

Can thinner remove paint from clothes?

A paint thinner helps loosen the bonds between paint and the fabric; therefore, it is an effective solution for removing paint from clothes. You can wash the garment later to get rid of its smell.

Can alcohol permanently stain clothes?

Using alcohol on clothes can result in permanent stains and discoloration, especially on woolen fabrics.

Can you use baking soda to remove dried spray paint?

Yes, you can apply a paste of baking soda and hot water on your dry spray paint stain. Let it sit for 15 minutes, and scrub the fabric to remove the paint.  

Conclusion

Removing spray paint from your clothes can be tricky, especially when the paint has dried. However, that doesn’t mean that your garments are beyond repair. You can try removing spray paint from your clothes using the products and methods mentioned in the article. Don’t be discouraged if one remover doesn’t work; there’s always hope with the next one!

pexels cottonbro studio 6153898 Can You Spray Paint Jewelry- Revive Old Trinkets At Home

Can You Spray Paint Jewelry- Revive Old Trinkets At Home

We all have a box filled with old, tarnished jewelry that has seen better days. While some have the heart to throw them away, the rest keep them stored just in case they might wear them someday. The good news is you can breathe new life into your old accessories with a single can of spray paint!

You can easily spray paint jewelry to make it as good as new. All you need is a can of primer and colored paint. Start by cleaning your trinkets with rubbing alcohol to remove any dirt and grime. Remove any parts you don’t want to paint or cover them with painter’s tape. Apply primer, followed by two coats of spray paint.

Colorful jewelry can elevate the look of any outfit, but even though spray painting is a quick way to spruce things up, you need to ensure the results also last.

How to spray paint jewelry

Although using spray paints is pretty straightforward, a few little tricks can make the process easier and also help you get the perfect finish. Check out the instructions below to transform your old jewelry pieces.

Step 1: Remove anything you don’t want to paint

Start by removing or covering any hardware you don’t want to paint. It will help you save hooks and clasps that still look fresh. You can also experiment with different color combinations and designs to create two-toned looks with painter’s tape.

Step 2: Wash with water and soap

It’s no news that old jewelry is usually dusty and dingy-looking. You can prepare the surface of your jewels by cleaning them with soap and water. The baubles need to be clean for the paint to stick to the surface and deliver even coats.

Step 3: Clean with rubbing alcohol

Dirt is one of many things you need to remove from old jewelry. When you don’t wear pieces for some time, it accumulates grime and oils. Rubbing alcohol is the best way to get rid of impurities to reveal a clean surface ideal for painting.

Step 4: Prime the surface

Priming the jewelry is essential as it protects the paint from chipping and forming uneven layers. Remember, your trinkets are not something you place on a table and touch occasionally. Instead, you wear them for extended periods, often bringing them in contact with your skin, water, and other environmental factors.

For this reason, you want to ensure the paint job lasts through wear and tear and remains looking fresh throughout.

Apply a coat of primer using a light hand. Make sure to cover all of the sides of the jewelry, so the primer doesn’t collect in a single spot. Keep the primer spray can moving for an even coat. Allow the surface the dry for at least an hour before you start painting.

Check the label on the can to determine exactly how long you should wait for the primer to dry.

Step 5: Start painting

When painting smaller objects, it can be challenging to achieve an even layer. If you spray for too long in a single spot, the paint will collect and result in an uneven finish. Hence, constantly move the can in a sweeping motion so that the coat is thin and even.

Apply two coats of paint to ensure your jewelry is covered from every angle but remember to leave enough time between coats to let each layer dry.

If you’re painting a beaded necklace or bracelet, move the beads around for after an hour to ensure they don’t stick to each other because of paint.

Enamel spray paint takes a long time to cure and fully harden, so you may need to wait for at least 48 hours before you start using the painted jewelry. You will be amazed by the paint’s durability once it has had enough time to cure.

Step 6: Seal the deal with a top coat

While using a top coat isn’t absolutely necessary, applying a sealer is better to make your spray paint extra glossy. The top coat protects the paint from rubbing or wearing off due to contact with the skin. It also keeps the surface safe from scratches and nicks, increasing the life of your newly painted jewelry.

How to paint fake gold jewelry?

Gold has a timeless charm that’s hard to beat, but not everyone can afford gold jewelry. The solution? Faux gold jewelry!

Fake gold trinkets can sometimes look as great as the real deal, but when it gets old, the color transforms into a sad copper, silver, and green mess. Luckily, there’s a way to get your fast-fashion or costume jewelry bright and shining again.

Here’s a quick guide to help you revamp your worn-out fake gold jewelry.

Step 1: Wash the jewelry

Clean your jewelry using warm water and soap to remove any dust, oils, and grime. You can even use an old toothbrush for a thorough clean-up.

Step 2: Tape off areas you don’t want to paint

There might be gems or clasps that you want to avoid spraying. Therefore, it would be best to cover them with painter’s tape to avoid painting them accidentally.

Step 3: Use a metal primer

A primer will help you achieve an even and lasting finish. Apply a thin layer of primer designed for metal surfaces to get the job done.

Step 4: Paint the surface

Spread your necklaces, bangles, etc., on a big piece of cardboard and start the painting process by spraying on a thin layer of gold paint. Depending on your preference, you can choose between a high-gloss gold finish and matte gold. Make sure to pick quality paint formulated for metal surfaces and gives a gold-like finish.

Allow the first layer to dry for 15 to 30 minutes before applying a second one. When it is dry to the touch, flip the jewelry and repeat the same process on the other side.

The Krylon Spray Paint and Primer in Metallic Gold is a popular choice for spray painting gold jewelry. Rust-Oleum’s All Surface Pure Gold is another excellent pick for this job.

Step 5: Apply a Finishing Coat

Apply a final coat of clear enamel spray paint to seal the deal and protect the paint from rubbing off.

You can use the same process to refresh your old silver jewelry. All you need is silver metallic spray paint instead of gold.

What do you spray jewelry with?

Once you decide to refresh your old jewelry, the first question that comes to mind is: what kind of paint do you use on jewelry? The answer would depend on the material of your jewelry.

If you want to paint metal pieces such as bangles and rings, you need something that works well on metals. However, when painting plastic jewelry, you can opt for a paint designed for plastic surfaces.

Another factor that you have to consider is the finish you’re after. Do you want a high-gloss metallic finish, or would you prefer a matte pastel color? Honestly, it’s all about your personal preference.

Spray paints for Jewelry

1. Krylon Premium Metallic Spray Paint

If you’re looking for a stunning finish that mimics shiny, high-end metals for your jewelry, this metallic spray paint is a great choice. It is available in various colors, including 18K gold, copper, gold foil, chrome, plum purple, white copper, and sterling silver.

The paint can transform both plastic and metal jewelry so that it resembles actual metallic plating. So, if you want an on-trend finish at home, choose the Krylon metallic paint for your DIY project.

2.      Rust-Oleum High Performance Enamel Spray Paint

This is another great spray paint option if you want to experiment with different colors and finishes. From gloss black to aluminum, hunter green, regal red, and flat red– there are over 15 hues to choose from. The paint’s formula works well on wooden and metal surfaces and also protects against rust.

It’s a high-quality, durable oil-based formula that dries to the touch in 15 minutes. This means you can quickly refresh the paint on your old jewelry in a day.

3.      Rust-Oleum Painter’s Touch 2X Cover

Do you prefer matte colors for your jewelry makeover? Try the Rust-Oleum ultra-matte spray paint to give your trinkets a no-shine, vintage appearance.

The paint works on wood, plastic, and metal surfaces, and the oil-based formula offers long-lasting protection. You can try more than 10 exciting colors, including rustic pink, slate, grape, golden leaf, deep teal, etc.

FAQs

What paint can I use for jewelry?

Enamel paint is best suited for painting jewelry. Just make sure that the color you select is compatible with the surface you’re about to paint.

Is spray paint permanent on metal jewelry?

Spray paint lasts a few years on metal jewelry, provided you prepare the surface correctly. Using a primer and top coat helps increase the life of your spray-painted jewelry.

Can you spray-paint a chain necklace?

Yes, you can renew the color of your chain necklaces with spray paint. Remember to buy paint designed for metal surfaces to ensure it sticks properly to the surface.

Is gold spray paint waterproof?

Most enamel spray paints used for painting gold jewelry are waterproof and don’t need any primer or top coat. The only type of enamel paint that’s not waterproof is acrylic enamel paint. However, by layering it with a primer and top coat, you can make it withstand water.

Conclusion

Spray painting old jewelry is a quick and budget-friendly way to add a new life to your worn-out accessories. As long as you use the right paint and follow the complete process, you should end up with statement pieces that make you proud. 

pexels victoria akvarel 4130508 Can You Spray Paint In Cold Weather - How To Beat The Odds

Can You Spray Paint In Cold Weather – How To Beat The Odds

Spray painting is not just fun but also an excellent option to save money. However, many DIY enthusiasts struggle with painting when the temperature drops. If you’re wondering, ‘Can I spray paint in cold weather?’ You’re not the only one.

Winters can present a challenge for spray painting projects, nevertheless, you can always paint in cold weather as long as you follow specific steps. Controlling the temperature is the best way to get good painting results, but adequately prepping and priming the surface is equally important.

If you want to beat the odds and start a spray paint DIY job when the temperature is below 50 degrees Fahrenheit, follow my tips and tricks to get the desired results.

How cold is too cold for spray paint?

The best temperature for spray paint is between 50 and 90 degrees Fahrenheit, and anything below 50 degrees is considered too cold for spray painting outside. However, there are ways to tweak the conditions and make them favorable for your project.

What are the problems you can expect when spray painting in cold weather?

Cold weather painting can result in the following problems:

  • Color difference
  • Cracking of paint
  • Water spots on latex paints
  • Bubbles and bumps on the painted surface
  • Uneven and erratic spraying

Before we get into the details of ‘how do you spray paint in the winter,’ let’s understand the problems you must overcome in cold weather.

1. Difficulty in paint adhesion

Your spray paint’s performance is affected by temperature and moisture. The first problem will be paint adhesion when it’s too cold outside. If the paint inside the can and the application surface are both cold, you can expect to run into problems.

2. Longer drying time

Colder temperatures are often accompanied by fog which means excessive moisture in the air that you can’t control. Your paint will take much longer to dry in winter than in summer. Fortunately, there are ways to speed up the paint’s drying time.

3. Changes in paint consistency

If your spray can is stored in a cool place, it is likely that the paint has become much thicker due to the temperature or has frozen altogether. For this reason, you may not get the same finish from the color as you’d get in a warmer temperature.

4. Spray paint nozzles clog up

Winter is the perfect time for spray paint nozzles to get clogged. If you’ve not stored your cans in a warm place or cleared the nozzle and tube before storing them away, there are high chances of the nozzle clogging up.

Here is how to avoid spray paint nozzle from clogging up for a better understanding to avoid getting into this situation in the first place.

How to paint in cold weather

While warmer temperature is ideal for spray painting, it doesn’t mean you must give up painting altogether when it gets chillier. You can follow these steps to get a uniform paint finish despite the weather.

Step 1- Clean the surface

One of the major reasons spray paint isn’t recommended in winter is that it doesn’t adhere to the surface properly. Another factor that hinders paint’s ability to stick to the object is dirt and grime. Therefore, clean the surface thoroughly to improve your chances of a good paint job.

Prepare the surface by washing and sanding it to remove dust, grime, or a glossy finish. However, make sure that you dry it before moving on to the next step to get the maximum benefit from the clean-up.

Step 2- Check your paint’s condition

Cold weather affects paint in many ways—the lower the temperature, the thicker the paint’s consistency.

If the paint is too thick, its spray mechanism might not work well.

Always check your paint’s temperature before you start painting. If it feels cold to the touch, try to make it warmer with a paint heater. In case you don’t have one handy, you can fill a bucket with warm water and place the can inside it.

Raising the temperature of the spray paint can help preserve the contents in their original state. The additional warmth won’t cause your paint to solidify, even if you use it outdoors.

Step 3- Check the surface’s temperature

Since cold weather can create problems for paint adhesion, you should rely on a surface thermometer to check the surface temperature before applying paint. If it is below 35 degrees, wait for the weather to get slightly warmer. Ideally, the temperature should be above 35 degrees for two consecutive days, even after the paint job.

However, if you’re dealing with smaller objects, you can tweak their surrounding temperature by painting and drying them inside the house.

Step 4- Apply a primer

It may not be necessary to prime the same surface in summer, but skipping the primer in cold weather is a recipe for disaster. Remember to apply two to three coats of primer on the surface to help with paint adhesion.

Some paints are advertised as self-primers, but you should use a separate primer to increase your project’s chances of success. Think of it as a protective layer for the painted surface that allows the paint to stick better and dry quickly.

Step 5- Start spraying

Check the temperature of your spray paint and test it on a piece of cardboard to ensure the spray quality before proceeding with the final surface. This will also help reveal if the spray paint nozzle is clogged or good to go.

Choose a well-ventilated area for the project. Keep a good distance and start spraying your surface in fluid motions. If the can is warm enough, you should not have a problem with the paint’s consistency. Thin and even layers will dry quickly in cold weather so remember to keep the can moving to avoid over-saturation at any point.

Step 6- Dry the Surface

When the temperature is over 50 degrees, you don’t have to worry about drying your surface because nature will do that job. But cold weather warrants special attention when it comes to the drying time of the object.

Usually, when you want your paint to dry properly, you avoid moving the object too much when it is wet but in this case, giving it the ideal temperature is more important. You should move your painted surface into a temperature-controlled environment to reduce its drying time.

There are other ways to make spray paint dry faster, so you should definitely give them a try to finish the job quickly.

If you’re working on a project outdoors, the weather might not be ideal for the paint to cure on its own. Therefore, you will have to heat the surface manually.

Step 7- Clean your equipment

Although this step is necessary regardless of the weather conditions, it should not be overlooked at all in winter. As the paint in the can quickly harden because of cold temperatures, cleaning your equipment with just soap and water might not work.

You should remove any hardened paint from the spray paint can’s exterior and nozzle with an alcohol-based solvent or paint thinner. Turn the can upside down and keep spraying until clear air starts coming out. This is a sign that the can’s tube is clean and there are no chances of paint getting stuck in the nozzle or tube.

Finally, how you store your spray paint cans greatly affects their consistency and longevity. You can always look for ways to prevent your spray paint nozzle from clogging and store them properly.

Tips for spray painting in low temperatures

Following the correct procedure is important, but the tips mentioned below will help you through the painting process.

  1. Keep your paint and object indoors until just before use

You need an adequately ventilated area to spray paint an object, but that doesn’t mean you should take the object and the paint outdoors even before you start working. Instead, keep them stored inside at room temperature until immediately before painting.

  1. Bring the object inside after every coat

We have talked about bringing your object into a temperature-controlled environment after you’ve painted it. This means you should take it indoors after every coat of paint, not just the final one. While it may seem like a lot of work initially, it is the best way to dry your painted object.

  1. Heat the work area

Depending on the surface you want to paint, you can look into options to heat your work area. Creating a warm environment during spray painting will help the paint perform better and speed up its drying time. Consider setting up a tent around your project or renting a large air replacement unit to increase the temperature of the area you will be painting.

  1. Choose a paint that works in cold weather

Generally, spray paints are designed to work in temperatures north of 50 degrees, but you can always search for other options that have more forgiving surface temperature needs when being applied.

  1. Account for weather changes

Always remember to take into account weather patterns before you start a project. The sun, wind, and rain can easily affect your project’s drying time, so make sure to check the forecast beforehand. If your paint is rated 50 degrees and the temperature gets lower, you should wait until you have a few days of above 50 degrees weather.

The best spray paint for cold weather

Lower temperatures and higher humidity levels can extend paint’s drying time; therefore, selecting a color that takes little time to dry in cold weather is crucial. Water-based paints don’t perform well under extreme weather conditions, whereas oil-based paints are less sensitive to cold weather.

Water-based paints can freeze at temperatures below 32 degrees, and their chances of adhering to a cold surface are relatively low. On the other hand, solvent-based paints do not freeze at low temperatures and are more likely to be able to stick to a cold surface.

Hence, oil-based paint products are generally better suited for cold-weather spraying.

FAQs

What happens if you spray paint below 50 degrees?

If you spray paint in lower temperatures, there are chances that:

  • The paint layer will crack
  • Color will not be uniform
  • The paint will not stick to the surface
  • It will look like a poor touch up

Can you let the spray paint dry in cold weather?

Cold weather is not ideal for drying spray paint; therefore, you need to increase the temperature around the surface to speed up the drying process. Leaving the wet surface in cold weather would prevent the paint from drying completely.

Is spraying primer in cold weather necessary?

The problem with spray painting in cold weather is that the paint doesn’t adhere to the surface properly, resulting in the paint cracking and peeling. The best way to avoid it is by using a primer before the paint application and increasing the chances of a successful cold-weather paint job.

Are 35 degrees too cold to spray paint?

A temperature of 35 degrees is too cold for spray paint. Moving your object and spray paint to a warmer location (indoors) or a temperature-controlled area would be best.

Conclusion

Spray painting in the cold comes with its unique set of challenges. You need to be mindful of the weather forecast and make sure you have the right supplies and techniques to paint your desired surface. Remember that excess moisture, ice, or snow in the air can significantly increase the paint’s drying time. Therefore, plan ahead to make your painting job easier and more fun.

pexels mat brown 549362 Can You Spray Paint Car Bumper- Car's Facelift At Home

Can You Spray Paint Car Bumper- Car’s Facelift At Home

Your car’s bumper witnesses its fair share of wear and tear when you’re on the road. From scratches to discolorations, there are several imperfections that ruin its appearance over time. Luckily, there is an easy way to hide the flaws on your car’s bumper and make it look as good as new: spray paint!

You can spray paint your car’s bumper and restore its original form without visiting an auto repair shop. Start by removing the bumper and cleaning it thoroughly. Strip the previous paint and sand the surface for an even base. Follow it with a primer and color coat before reattaching it to the car. 

DIYs can quickly go south if you don’t prepare the surface you want to paint thoroughly. Remember to select a paint compatible with your bumper’s material and spray paint it following the correct procedure.

Can you paint a bumper without removing it?

Yes, you can paint your car’s bumper even without removing it, but you must ensure that all the surrounding areas are thoroughly covered. Simply secure the parts you don’t want to paint with some paper and painter’s tape.

Whether you remove the bumper or not- you must prep its surface for maximum paint adhesion.

Can you paint a plastic bumper?

Absolutely! Car bumpers are either made of metal or plastic; the good news is that you can find spray paints for both surfaces. However, you should check the material of your bumper before buying the color.

Painting plastic on your car is very different from painting metal parts. This is because plastic is more sensitive to chemicals; therefore, the paint that works on automotive bodies might not stick to plastic the same way.

Painting plastic car bumpers usually involve fillers and adhesion promoters, but the kind of filler you use will depend on the plastic your bumper is made of. You can check the material by removing the bumper and looking at the back for stamped initials.

The plastic types TPE and PP smear easily when machine-sanded, while PUR and TPUR will turn to powder if you sand them.

How to paint a metal car bumper

Before starting the preparation, ensure you’re working in a well-ventilated area. Take the bumper outside and work under the sun if it’s not too hot or cold.

metal bumper

Step 1- Remove the bumper

You can prep the surface while it’s still mounted to the car, but we recommend removing the bumper to make the painting process easier.

Step 2- Clean the surface

Wash the bumper thoroughly with soapy water and a clean rag. Use microfiber towels to wipe the surface dry when you’re done.

Step 3- Strip the existing paint

Using a paint stripper, remove the existing paint from the bumper. Apply a layer of paint stripper and allow it to sit for 10 to 15 minutes. Once it has had time to soak into the paint, start scraping the paint with a plastic scraper. Keep going until all the paint is removed.

You can use any paint stripper designed for metal. The Smart Strip Advanced Paint Remover and Citristrip Paint & Varnish Stripping Gel are excellent options for this step.

Step 4- Sand the surface

Use 220-grit sandpaper to roughen the surface and remove any waxes, oils, or other residues.

Step 5- Wipe the bumper with mineral spirits

Take a lint-free cloth and soak it in mineral spirits to wipe the bumper thoroughly. We want the surface to be spotless for the primer and paint to adhere properly. Therefore, repeat the cleaning process until you’re satisfied with the result.

Step 6- Apply primer

Select a primer that works well on metal surfaces and spray a light coat on the bumper. Allow the primer to dry for 3-5 minutes before going in with another coat. It’s recommended to spray three to four layers of primer.

You can opt for the Rust-Oleum Automotive 2-in-1 Filler & Sandable Primer, as it creates a rust-resistant base coat for metal surfaces.

Step 7- Wet-sand the surface

Take 220-grit sandpaper and roughen the surface after the primer has dried completely. Remember to wipe the bumper with mineral spirits to remove any sanding residue.

Step 8- Apply paint coat

Using a back-and-forth motion, spray on a light coat of paint on the bumper. Allow the first layer to dry for 4-5 minutes before spraying on the next coat. Continue layering until you’ve sprayed at least three to four coats.

Step 9- Wet-sand the surface again

Wet sand the bumper’s surface again using 220-grit sandpaper. You can even use 1500-grit wet sandpaper for a smoother finish.

Step 10- Apply top coat

This step is optional and can be skipped if you like the rough look. However, if you prefer a glossy appearance, you can top off the paint with a clear coat for a high-shine look.

How to paint a plastic car bumper

Here is a step-by-step guide to help you achieve an excellent paint finish on your car bumper.

pexels erik mclean 9661356 Can You Spray Paint Car Bumper- Car's Facelift At Home

Step 1- Remove the bumper

You can paint your bumper if it’s attached to the car, but the process can get a little messy. That’s why we recommend removing the bumper for better results.

Step 2- Wash thoroughly

Wash the surface thoroughly with a degreaser and water. The idea is to remove any dirt or oil that may be stuck to your bumper. You can complete this step using a clean cloth and soapy water or a cleaner designed specifically for plastic surfaces, like the Mothers Surface Prep spray.

Step 3- Sand the surface

You may notice some damaged areas on the bumper that need fixing before the paint coat. Sand the entire surface on the bumper while paying particular attention to any cracks you find.

Step 4- Wipe the bumper clean

Using a clean microfiber cloth, wipe away the sanding dust from the surface. Clean the area further with some water to remove any traces of the surface cleaner. Use a dry towel to wipe the bumper at the end and leave it until it becomes completely dry.

Step 5- Fill in the cracks

Use a filler to fix the cracks on the bumper’s body. The type of filler you use will depend on the kind of plastic your bumper is made of. You can find the right one by asking for product recommendations at an auto repair store.

Mix the filler and hardener in equal amounts and apply them using a putty knife on the cracks. Use a generous amount because the filler shrinks as it dries, and you want to make sure the gaps remain filled when that happens.

Allow the filler to dry for 20 minutes before moving on to the next step.

Step 6- Sand the filler

Once the filler has hardened completely, sand it to a level using sandpaper. Begin with 80-grit sandpaper and gradually move to 120-grit paper. Finish the process with wet sanding and 400-grit paper to achieve a smooth finish.

Clean the surface using a rag cloth and remove any residue from the sanding.

Step 7- Apply an adhesion promoter

Painting a plastic surface is not the same as a metal surface; therefore, you need an adhesion promoter to ensure the spray paint stays on the bumper. You can use one compatible with plastic, such as the Universal Adhesion Promoter by U-Pol.

Apply a thin coat of adhesion promoter to create a solid base for the primer to stick to.

Step 8- Spray on the primer

Spray two to three thin layers of primer on your bumper’s surface. Hold the can about 12 inches away and spray using steady, sweeping motions.

The Rust-Oleum Plastic Primer Spray is ideal for plastic surfaces, including your car’s bumper.

Step 9- Sand the surface smooth

Wet sand the surface with 1500-grit sandpaper once the first layer of primer dries. Wipe away the sanding residue with a clean cloth.

Step 10- Repeat the above two steps

Apply another layer of primer and wet-sand it once it has dried. Repeat the process 2-3 times for an even finish. Remember to wipe the bumper with a clean cloth every time you sand it.

Step 11- Apply the paint in multiple coats

Allow the final coat of primer to dry for 10 to 20 minutes before applying paint to the bumper’s surface. Spray the color coat in thin and even layers, giving it adequate time to dry in between. It is recommended to wait 10 to 20 minutes after each layer, but you can refer to the instructions printed on the spray paint can’s label to determine how long you should wait.

The paint you select must be designed for plastic as the material has flexibility; therefore, a formula that works on surfaces like metals might crack on a plastic bumper.

Several finishes are available in the market, but you should choose the one closest to the bumper’s original color. The Rust-Oleum Automotive Enamel Spray Paint and the Rust-Oleum Automotive Paint for Plastic Spray are good options for this project.

FAQs

How much does it cost to spray paint a bumper?

A professional spray paint bumper cost can be anywhere between $150 and $1,000, but if you paint it at home, the supplies may cost around $150 to $300.

How long does it take to respray a bumper?

Repainting your car’s bumper at home should take you at most 3 days. However, you can speed up the drying time of the paint by tweaking the temperature around the surface.

How many cans of paint does it take to paint a bumper?

If you’re using 12 oz. cans, you will need 4 to 5 spray paint cans. It’s better to err on the side of caution and buy an extra one to achieve the best possible coverage.

Is it cheaper to repair or replace a bumper?

Replacing a bumper is definitely the quickest way to upgrade your car’s appearance, but it’s more costly than repairing it.

Can you spray black plastic bumpers?

You can spray paint your car’s black bumper using high-quality automotive paint designed for plastic surfaces. Remember to prep the area with sanding and priming before applying the black color coat.

Conclusion

What are you waiting for! Save your money by coloring your worn-out bumper or spray painting your entire car yourself than hiring someone else to do the job. 

You can even experiment and try customization by spray painting your car’s hood as well.

All you need the right materials and processes to complete the project in a day or two.

pexels mike b 191327 Can You Spray Paint Car Emblems - A Step-by-Step Guide

Can You Spray Paint Car Emblems – A Step-by-Step Guide

Car emblems certainly add a bit of personality and panache to your car’s exterior. The only problem is that factory-manufactured signs can look generic and lack character most of the time. Fortunately, you can spray paint your car emblems to make them look unique and stand out from their counterparts.

Yes, you can absolutely color your car emblems with spray paints. With all the variety of colors and finishes available online and in home stores, you can quickly customize the signs to suit your personality and current mood.

Spray painting your car’s emblems is easy as long as you follow the correct procedure. You should select a paint designed for the sign’s surface and prep and prime it for maximum adhesion. Remember, if you want it to stand the test of time, don’t skip any process steps.

How to choose spray paint for car emblems?

Spray paint is a quick way to upgrade the look of any object, including your car’s badges. Before you visit the home store to pick a can for this project, make sure you understand the surface you want to paint.

Car emblems are either made of metal or ABS plastic. Factory-manufactured signs are mostly made of metal; therefore, select a spray paint designed especially for that surface.

The next point of consideration is the color and finish you’re looking for. Do you prefer to paint them a matte color, or would you rather go for a metallic finish?

Also, keep in mind that painting any object requires a primer, so if you don’t have the budget to buy it, you should look for a 2-in-1 paint that contains both primer and color coat.

pexels mike b 195636 Can You Spray Paint Car Emblems - A Step-by-Step Guide

How do you paint a car emblem- A detailed guide

Everyone loves the versatility that spray paints offer- no matter what surface you want to repaint or customize, there’s a variant available in the market. Once you have the right paint, you must follow the steps below to color your car’s badges.

Step 1- Remove the Emblem

While it is possible to paint the emblem while it’s installed on your car, it’s better to remove it for superior results. Check how the emblem is attached to your car- it could be bolted or held in place with clips. Remove the nuts or clips from the inside of the car’s body.

Some modern cars have their badges glued on, in which case a hairdryer can do the trick and melt the glue enough to remove the emblem.

Step 2- Sand the surface

Sanding any surface before spray painting helps the paint stick to the object better. Take 220-grit sandpaper and give the emblem a nice rub.

Step 3- Clean with Spirit

After sanding, clean the badge using mineral spirits and a rag cloth. Remember to wipe it with a clean cloth once you’re done.

Step 4- Spray on Primer

A primer helps create a solid base for the color coat. Apply 2-3 layers of primer, allowing a few minutes to dry between coats. When the final primer coat is on, leave the badge to dry for at least an hour.

We recommend you use the Rust-Oleum Automotive Universal Bonding Primer Spray for paint to adhere better to the emblem.

You can skip this step if you’re using a 2-in-1 color coat spray paint.

Step 5- Apply the Color Coat

Start spraying the color coat in thin and even layers, making sure the emblem is covered entirely. Apply 2-3 coats of color to achieve uniform coverage and leave it overnight for the final layer to dry.

Step 6- Re-install the Emblem

Once the paint has fully cured, re-install the car badge the same way you had removed it.

How to paint car emblems without removing them?

Although removing the car badge before spray painting is recommended, you can always paint while it’s still attached to the car. Here are a few quick steps to guide you on the right track.

  1. Wash the emblem with soap and water. Rinse well.
  2. Wipe the area with a clean try towel to remove all the water.
  3. Clean the badge with mineral spirits to remove grease, oil, or wax.
  4. Use newspaper and painter’s tape to cover all the areas around and inside the emblem.
  5. Spray 2-3 coats of primer, waiting 5 mins between each coat.
  6. Wait for at least an hour before going in with the color coat.
  7. Spray the color coat in thin layers. Remember to hold the can at different angles to ensure complete coverage of the emblem.
  8. Apply 2-3 layers of paint with 15 minutes of drying time between each coat.
  9. Remove the tape and newspaper once the paint has thoroughly dried.
pexels jim fawns 756789 Can You Spray Paint Car Emblems - A Step-by-Step Guide

Is Plasti Dip good for car emblems?

Plasti Dip works well for car emblems, especially when you don’t want to remove them from the car’s body. Since the formula easily peels off, you don’t have to worry about paint getting on the inside of the emblem’s letters, or designs.

How to Plasti Dip car emblems

Plasti Dip works more or less like regular spray paint, but there are some differences that you should be aware of. Let’s try to understand the formula first. Unlike other spray paints, Plasti Dip offers a thick rubber-like finish that can be peeled off effortlessly.

Since the formula is thick and peelable, you must ensure that you apply it in thick layers on the emblem. This way, you will achieve good coverage and also peel the extra paint easily.

Spray paint at different angles so the edges of the emblem are properly covered. If you fail to do so, the color will not peel off entirely, and you will be left with a sloppy-looking car badge.

When you tape off the area around the emblem, make sure to leave enough space between the edges of the badge and the tape. This will help peel off the extra paint effortlessly later.

Finally, you can use two toothpicks to peel off the paint on the inside of the emblem for a professional-looking finish.

What kind of paint can you use on car emblems?

Here are a few picks that you can use for this project.

Krylon Premium Metallic Spray Paint Resembles Actual Plating

This paint is perfect for a sleek, metallic look and is suitable for most surfaces, including metal, plastic, wood, etc. The high-gloss finish paint is available in seven metallic shades: gold, chrome, copper, rose gold, gray, copper foil, and silver.

Plasti Dip Peelable Paint Multi-Purpose

The Plasti Dip spray paint dries into a thick plastic-like film that adheres well to car emblems. It is a durable, long-lasting paint that doesn’t crack, chip or become brittle over time. Another benefit of using this variant is that you can easily peel off the paint when you want to change the color or finish of your emblem again. The formula allows for quick peeling without affecting the underlying finish.

Rust-Oleum Universal All Surface Spray Paint Metallic

Another great choice for a metallic finish is the Rust-Oleum metallic paint. This paint contains primer and color coat all in one and works on most surfaces, including metal, plastic, fiberglass, etc. The oil-based formula is available in a whopping 21 shades, so you have plenty of choices for your car’s emblems.

Rust-Oleum Universal All Surface Spray Paint Matte

Try this variant of Rust-Oleum paint if you prefer a matte look for your car’s signs. It is an oil-based formula that doesn’t require a separate coat of primer to save some time in the painting process. This paint is available in twenty shades, including some pastel hues that can add a lot of character to the car’s exterior.

FAQs

How long does spray paint last on emblems?

The spray paint on emblems can easily last three to four years without retouching if you choose the proper paint and spray multiple coats on the surface.

Does Plasti Dip come off when you wash your car?

No, you can hand wash your car with soap and water even after you’ve used Plasti Dip on your car. Rest assured, the formula doesn’t come off with water.

Can you change the logo on your car?

Yes, you can change the logo on your car by either replacing it with a new one or spray painting it for a brand-new look.

What paint to use on a Chrome emblem?

Any spray paint that works on chrome surfaces can be used to paint Chrome emblems. Just make sure to use a primer and sealer with adequate sanding action for the best results.

Conclusion

Nothing beats the excitement of adding personal touches to your car. Whether you want to customize your car’s badges, paint the entire hood of the car, or revamp the color of your leather seats, spray paint offers easy and lasting results. With my tips and tricks, you will be able to personalize your car’s emblems quickly and at a minimum cost.

pexels rfstudio 3817684 Can I Use Wall Paint On Canvas - All You Need To Know

Can I Use Wall Paint On Canvas – All You Need To Know

While cleaning my closet, I came across some beautifully painted canvases by me. The nostalgia called for a painting day. I quickly grabbed the new canvases lying around in the house for years. I also managed to sneak out some paint brushed from my daughter’s stationery set. The only thing I fell short of was paint. I recalled we had leftover paint from last month when I painted my interior. So it was time to give house paints a try on canvas.

You can use wall paints on canvas if you have no canvas paints available. However, wall paints are designed to last a couple of years, generally on a concrete surface. In contrast, canvas paints are specific to cloth and last way longer. Therefore, using wall paints on canvas will not produce as brilliant outcomes as canvas-specific paints.

Using wall paint on canvas helped me save money as I did not have to purchase new colors for canvas. However, the colors were not as bright, and they started peeling off from the surface as they dried up. To utilize your leftover wall paint on canvas, you must know what you’re getting yourself into.

Using Wall Paints On Canvas.

Art has no boundaries. You can use any paint in any form on any surface you want. That is what has been taught to us over all these revolutionary years in painting. However, the outcomes of each type of paint will vary based on the quality of the color, its elasticity, binding ability, and the texture of the paint. 

Quality

The paint quality varies when comparing a brand with another or one type of paint with the other type. Quality refers to the kind of pigment added to the paint and its consistency. High-quality paint has higher solid content, which makes the paint more concentrated, denser, and more durable. 

On the other hand, low-quality paints have a lower solid concentration, which means they are less dense, thus, are easier to peel off. Wall paints generally have a low-quality formula and are intended to last a couple of years only. 

Acrylic paints are specifically manufactured for canvas painting have a high-quality recipe. They give off radiant colors that last years.

Binding Ability 

The binding ability of a paint is the strength the paint holds to adhere to a surface. It also measures how the pigments are held together in the base. 

Wall paints bind strongly to hard surfaces such as wood, bricks and concrete. This means that they are not designed to last long on cloth. 

In contrast, acrylic paints have a strong binding ability to bind to primed canvas cloth. The binding ability of acrylic paints ensures that the acrylic colors stay on the canvas for decades. 

You can use wall paints on canvas; however, they will begin peeling off in some time due to their chemical buildup.

Elasticity

Elasticity in paint is its ability to withstand changes in external pressure and temperature without cracking. It is a measure of how flexible a paint is. This information is utilized when designing paints for specific purposes. 

Acrylic paints have higher elasticity and are more suitable for painting on cloth, which is a soft surface. However, wall paints aren’t as flexible as they are designed to stay intact on concrete walls and do not require flexibility.

Price of the Paint

Another important factor is the money involved. Usually, higher-quality paints cost more than lower-quality paint. The difference in prices is mainly due to the top-notch quality of ingredients and dyes used in the manufacturing process. 

Acrylic paints require better-quality pigments to last longer. Acrylics also need high elasticity and binding ability specific to soft surfaces like cloth, so they are sold cheaper. 

On the other hand, wall paints are more affordable than acrylic paints. Thus there will be a difference in the vibrance and longevity of the results.

Moreover, an established brand will always charge more than an emerging paint brand.

mcgill library FeqoBC1meok unsplash Can I Use Wall Paint On Canvas - All You Need To Know

Famous Artists That Have Used Wall Paints on Canvas

Despite the compositional difference in both paints, wall paints are widely used in canvas painting. In addition, professional artists have been using wall paints to create their art on canvas over time.

Pablo Picasso is known to be one of the first artists in history to use house paints in his artwork. A study conducted in 2013 showed that Picasso used the inexpensive “Ripolin” house paint back in the 20th century to give his paintings a glossy surface.

Another famous artist, Jackson Pollock, has used oil-based gloss enamel house paints in his drip paintings. According to him, enamel paints have the perfect consistency for action painting which he used to create his masterpieces. 

Contemporary artists like Sarah Morris, Damien Hirst, and Gary Hume also have their fair share of using house paints for their art pieces. In addition, they have used gloss paints to reflect lifestyles, advertising, and consumerism both on a large and small scale. 

Joe Pagac also uses wall paints instead of acrylics for his famous mural art, which has earned him the title of “Mural Joe” around the globe. 

Making use of wall paints in the artwork is a great way to reduce the cost of paintings and make them more affordable for the public. 

Pros and Cons of Using Wall Paint on Canvas

Everything comes with its fair share of advantages and disadvantages. Let’s look at what the wall paints offer on the canvas and at what cost.

PROSCONS
Readily available in your garageNot so long-lasting
Environment friendly – promotes saving resourcesLacks elasticity
Easy on the pocketVariable consistency

Frequently Asked Questions

Here are some questions that might arise in your mind regarding canvas painting:

Can I use House Paint For Art?

You can use any paint to create art. However, it is not recommended to do so. Household and art paints are formulated for different purposes and should not be used interchangeably. 

Pigment concentration, blending ability, and the number of additives in both paints vary, creating differences in durability and appearance. Hence, using house paint for fun art activities is alright, but not if you are working on professional projects. 

Is wall paint the same as acrylic?

No, wall paint is water-based latex paint, while acrylic paint is chemical based. While latex paints are easier to scrub and clean, they are not designed to handle temperature fluctuations and cracks efficiently. On the other hand, acrylic paints offer more durability and elasticity and can withstand peeling and cracking. 

Can you use wall paint for acrylic pouring?

Wall paint can be used as a cheaper alternative to acrylic pouring. However, there are a few downsides that you must face if you choose to use Wall paint instead of acrylic. 

Wall paint has a shorter lifespan as compared to its acrylic counterparts. This is because they do not have the elasticity and durability that acrylic paints possess and hence chip and fade away quickly.

birmingham museums trust HEEvYhNzpEo unsplash Can I Use Wall Paint On Canvas - All You Need To Know

The Final Verdict

Canvas-specific acrylic and wall paints are different kinds of paints manufactured for different purposes. If you’re looking for budget-friendly options to use on canvas, you can go ahead with wall paints. However, acrylic paints produce better results and should be your first choice.

car hood spray paint

Can You Spray Paint Car Hood- Car Painting 101

Regardless of how well you take care of your car, the hood can eventually fall victim to fading, chips, and dents. As the saying goes, Place your best foot forward, many people struggle with a shabby-looking car because of the imperfections visible on the hood.

Fortunately, you can repaint your car’s hood and make it as good as new by arranging a visit to the auto shop or a DIY spray paint job. If you don’t want to overspend your budget on professional car painting, you can easily do the same at home with spray paints!

But before you start painting, it’s imperative to understand the process so you can achieve the best results. From selecting a suitable spray paint to prepping the hood’s surface, you must follow all the steps for a lasting finish.

Can You Paint A Hood With Spray Cans?

Yes, you can paint your car’s hood with spray cans if you choose the right paint. As you know, several variants of spray paints are available in home stores, but not every paint is suitable for your car.

When selecting paint to color your car’s hood, you should look for formulas designed specifically for automotive metal surfaces.

How To Paint Your Car Hood

Spray painting your car’s hood is the best way to refresh your car’s look without spending big bucks at an auto shop. You can follow the steps below to achieve a near-professional finish at home.

Step 1- Clean the Hood

The first step is to clean the surface you want to paint thoroughly. You can start with a simple water bath and follow it with a car wash solution. Using a wash mitt, rub the hood and eliminate any traces of dirt and grime.

Step 2- Use a Sanding Sponge while the Hood is Wet

While the hood is still wet, run a sanding sponge on the surface to cut into the paint. This will help the new layer of paint to stick to the hood properly.

Step 3- Dry The Area

Don’t leave your car directly under the sunlight, and wait for the water to dry. Instead, use microfiber towels and wipe the surface dry to avoid water spots.

Step 5- Time to Sand the Hood Again

Take low-grit sandpaper and scrub the hood’s surface in a back-and-forth motion. This will help remove any rust spots and create a solid foundation for the next step. You can also use a grinder in place of sandpaper if you have it handy.

Step 6- Wipe The Area

Once you have sanded the hood down to its bare metal, take a damp cloth and clear away any sanding residue. Just make sure the cloth isn’t too wet because we want the surface to remain dry.

Step 7- Tape Off Areas You Don’t Want to Paint

Using painter’s tape and plastic sheets, cover the areas surrounding the hood. This will ensure that you don’t accidentally spray paint on surfaces near the hood.

Step 8- Apply Primer

The next step is to apply primer to the hood using thin, even layers. Don’t forget to wear a respirator mask while working with aerosols, as the fumes can be hazardous to health.

Hold the spray can 8 to 12 inches away from the hood’s surface and spray in a fluid motion. Apply 2 to 3 layers of primer and wait for 5 minutes between each coat. Once the final primer layer is on, allow it to dry for at least 24 hours.

You should ideally pick a formula designed for automotive use, like the Rust-Oleum Painter’s Touch Flat White Primer or Rust-Oleum Stops Rust Automotive Primer.

Step 9- Apply The Color Coat

Start spraying the color coat onto the hood in slow, straight lines. Keep your hand steady to achieve even coverage. Begin at one end of the hood and move across slowly, releasing the plunger as you reach the hood’s edge.

You may need up to 3 coats of paint for good coverage. Just remember to wait for 10-15 minutes between coats for professional results.

Allow the final layer to dry for at least 4 hours, but it’s okay if you want to wait longer.

Step 10- Buff The Area

As a final step, complete your paint job by buffing the freshly-painted hood using circular motions. You can even use a rubbing compound for a glossy finish.

Types of Automotive Spray Paints You Can Use to Paint Your Car’s Hood

The paint application and final result of your car’s hood can differ because of variations in car spray paints’ formulas. Two deciding factors make up the composition of different paints.

Different Paint Bases

Professional spray paint for cars can vary because of its base.

  • Water-based paints

Water-based paints are a popular choice in car shops and industry practices. This is because it is the best automotive paint for the environment compared to other chemical formulas. The only downside is that this variant isn’t readily available in consumer markets.

  • Acrylic-enamel paints

Enamel solvent-based paints are most commonly used for DIY car painting jobs because they can be easily purchased online or from home stores. They are highly durable and can be heated to increase toughness and longevity.

  • Acrylic-urethane paints

Acrylic-urethane paints are also durable, like acrylic-enamel paints. If you’re looking for an even paint application, this variant can be poured into a spray gun or aerosol spray can for excellent results. One shortcoming of acrylic-urethane paints is that it takes longer to dry than the previous two.

Different Paint Stages

There are two types of paints: single-stage paints and two-stage paints.

Single-stage paints go beyond standard automotive paints. They usually include a primer, color coat, and top coat, so you don’t need to buy separate spray cans to complete the layering. Single-stage paints make the application much easier for the user and are considered the best spray paint for a car’s hood to get the job done efficiently and quickly.

Two-stage paints usually require the user to purchase a primer, a top clear coat, and the base color. While using this paint type increases the cost of the overall project, it produces more professional-grade results.

Other Considerations Before Buying Car Paint

As you plan to paint your car’s hood, you need to make sure the color you choose perfectly matches the rest of your vehicle. That’s the first factor that differentiates a good paint job from a DIY disaster.

Spray paints come in a variety of colors, so you’ll have plenty of choices when selecting a paint can for your car’s hood.

The same is true when searching for spray paint for your car’s interior. You want it to look exactly like the original factory finish. If you want to know how to paint your car’s dashboard, you can read my step-by-step guide for the best results.

Another thing you should decide on before ordering your spray paint is the final finish you’re after. While it may not seem like a big deal initially, a finish that differs from the original can look very obvious and ruin the illusion of a professional-looking paint job.

Best Spray Paint For Cars

Now that we’ve discussed paint formulas, colors, and finishes; you are in a better position to pick a spray paint can that matches your requirement perfectly. If you’re wondering which spray paint is best for cars, here are my picks to get you started.

Rust-Oleum Automotive Spray Paint

This general-purpose paint can be used on various surfaces including metal, plastic, and wood. It is a single-stage paint and primer that offer excellent coverage and adhesion. The all-in-one paint dries to the touch within 20 minutes and gives a glossy finish.

You need to be careful when using the paint though. If you place your spray can too close to the surface, you will have to deal with drip marks. But other than that, this is an excellent option for your car’s hood.

Krylon Fusion All-in-One

Another single-stage spray paint that delivers excellent adhesion, durability, and rust protection. It can be used on metal surfaces without sanding or priming which cuts your project time by half. It is available in five finishes: hammered, gloss, satin, flat, and matte so you have plenty of choices to choose from.

Amazon users rave about this spray paint because it sticks to the surface flawlessly and lasts through wear and tear and other environmental stressors.

Dupli-Color Custom Wrap Effects

An ideal choice for your car’s exterior, the Dupli-Color perfectly mimics original factory-painted finish. Apart from offering excellent adhesion, it effectively resists wear and tear of daily driving, including rain, snow, and UV exposure.

The paint features EZ peel technology so whenever you want to change the color of your vehicle, simply peel it off and choose another hue from the 26 colors available in this variant.

Rust-Oleum Automotive Premium Custom Lacquer Spray Paint

If you’re looking for a quick way to customize your car’s hood, this is a great option to try. It has a fast-drying formula that provides lasting coverage that can be recoated at any time. The matte spray dries to the touch within 20 minutes and resists smudging on auto body parts.

The paint offers various finishes including rugged, chrome, metallic, gloss, and clear coat. The durable formula of the spray paint withstands weathering and keeps your hood looking its best for longer.

PJ1 16-GLS Epoxy Spray Paint

The PJ1 Epoxy Paint offers a high-gloss finish to metal surfaces that is both chip and scratch-resistant. It also guards the car’s hood against rust and corrosion.The only downside to using this paint is that it takes a long time to dry but there are ways to speed up the drying process of spray paints; so you can definitely try that.

FAQs

How many spray cans do I need to paint a hood?

You will need around 5-7 spray paint cans to paint your car’s hood.

How much does it cost to spray paint a car hood?

The cost to spray paint your car’s hood at home should cost you between $50 and $150. On the other hand, a professional paint job costs around $200 to $1000.

What is the best way to paint a car hood?

The best way to paint your car’s hood is with an all-in-one spray paint. The benefit of using one is that you don’t need to buy a primer and color coat separately, which gets the job done quickly within a tight budget.

Will spray paint last on a car?

If you compare the lasting power of a professional paint job with a DIY, the former stays fresh for over 10 years with maintenance, while an at-home paint job lasts for 3 to 5 years.

Can spray paint remove scratches on the hood?

Spray paint offers a quick solution for covering up scratches on the hood without shelling out a lot of money. You can sand the surface prior to painting for a more lasting result.

Conclusion

Revamping your car’s appearance by painting its hood is an easily achievable DIY project. In fact, you can even spray paint your car entirely by following my instructions. All you need is some courage and a few spray paint cans.

jared rice PibraWHb4h8 unsplash Can You Spray Paint A Bathtub - Spruce Up Your Bathroom

Can You Spray Paint A Bathtub – Spruce Up Your Bathroom

The bathtub is the focal point of your bathroom, so if it’s covered with marks and the paint looks old and shabby, it’s time for a change. There are two solutions: a professional reglazing of the tub or a replacement. Both options are on the pricier end, but luckily, there’s an easier way to refresh your bathtub at a fraction of the price: Spray paint!

Yes, you can spray paint a bathtub, provided you use spray paints designed specifically for bathtubs and tiles. It’s imperative to select a paint that can withstand humidity and moisture, which is common in bathrooms.

Remember that painting a bathtub requires more than just a tub and tile spray paint. You must ensure that the surface you’re painting is adequately prepped to make the paint last. Let’s discuss the nitty-gritty details of spray painting your bathtub.

What Kind Of Paint Do You Use On A Bathtub?

Your bathtub isn’t a regular object on which you can use any spray paint. Instead, it requires specific paint that is completely waterproof and resistant to cleaning products. You must look for a variant designed to stick to the bathtub’s surface properly.

Most bathtubs are either made of cast iron, acrylic, or fibreglass. Before you begin the painting project, find out what the material of your bathtub is so you can choose a paint that adheres to that surface.

Bathtub spray paint kits like the HT HOMETINKER Tub, Tile and Shower Repair Kit, and Rust-Oleum Tub and Tile Refinishing 2-Part Kit are popular options for refinishing bathtubs that need some TLC. Most kits include everything you need for a DIY bathtub paint job.

Epoxy acrylic paint formula mimics porcelain coating and can be used on different bathtub materials. You can either buy it in a kit or purchase it separately. If you decide to go down this route, you will need a bonding agent to be used as a primer.

The Rust-Oleum Specialty Tub & Tile Spray Paint is a good option if you have a ceramic, porcelain, or fibreglass bathtub. It is a one-step epoxy acrylic formula that withstands humidity and extremely hot temperatures.

Is It Better To Roll Or Spray Paint Your Bathtub?

The method you ultimately choose will depend on your personal preference and budget. Using a brush or a roller to paint your bathtub means there will be less cleanup after you finish. However, spray guns and paints generally give the most professional-looking finish.

Spray paints and guns can cost more than rollers and brushes, so if you’re on a budget, you can go the other route. However, you should remember that professional reglazing is much more expensive than spray painting your bathtub.

Therefore, spray paint is a better option for the job if you want results that look good and last.

How To Prepare Your Bathtub For Spray Painting

The secret to a perfectly painted bathtub is preparation. So, before you start spraying, it’s essential to get the surface ready for maximum adhesion.

1.      Remove the tub’s hardware and old caulk

Remove the old caulk using a caulk removal tool. If you don’t have a specific tool, a spackling knife can also do the trick. Next, remove the drain hardware and any fixtures you don’t want to paint along with the tub.

2.      Ventilate the bathroom properly

Before you start cleaning the bathtub, open the windows and run the bathroom’s exhaust fan to create adequate ventilation. The reason is that chemical cleaning agents have strong fumes that can be harmful to health.

3.      Clean the tub thoroughly

Now you need to clean away any grime, mildew, and soap scum from the rub. You can start by washing the tub with 10% bleach in a water solution. Rinse well after you’re done, and follow with an abrasive bathroom cleaner like Soft Scrub or Comet.

Once you’ve scrubbed the tub’s surface clean, rinse the cleaner thoroughly. Next, use a solvent such as acetone or paint thinner to wipe the entire area so that any remaining grease or cleanser residue comes off.

4.      Fill in scratches and chips

If there are any chips or scratches on the tub’s surface, fill them up with an epoxy putty or any other tub repair product. Allow the putty to dry completely.

5.      Sand the surface of the bathtub

After the putty is dry, sand the entire surface of the tub with wet/dry sandpaper. Start with 400-grit paper and follow up with the finer 600-grit paper. Sanding the surface will rough up the gloss on the tub and create a base for better paint adhesion.

6.      Give the bathtub a final rinse

After the previous step, it’s essential to clean the bathtub thoroughly with water and remove any sanding dust and debris. Wipe the surface with a clean towel or rag to speed up its drying process. Allow it to air-dry fully before moving on to the painting part.

It’s Time To Start Painting the Bathtub!

How do you spray paint an old bathtub? Follow the instructions below to get near-professional results and transform the color of your worn-out bathtub.

Step 1- Cover the area around the bathtub

Spray painting can get messy, so you should cover the area around the bathtub with old towels and drop cloths. It will help protect your floors and other nearby surfaces from accidental paint splashes.

Before you move on to painting the bathtub, create adequate ventilation by opening a window and switching on the exhaust fan.

It is recommended to wear a respirator or mask because spray paint has a very strong odor, and the fumes can be detrimental to health. Since bathrooms usually cover a small area, painting your tub inside can make breathing difficult without a mask.

Step 2- Tape off areas you don’t want to spray paint

Apply painter’s tape to any fixture or places you don’t want to paint. Remember to tape off the floor around the bathtub to ensure clean paint lines.

Step 3- Start painting the bathtub

Now that you’ve thoroughly prepped the tub’s surface and covered the surrounding areas start spray painting the tub. Make sure to keep your hand moving with a consistent speed. You should aim for thin coats of paint rather than a single thick layer.

Begin by spraying the inside of the tub at the top in one corner and slowly work your way across and down to the other side. After you’ve painted the interior completely, move onto the outside walls of the tub.

Allow the first coat to dry before going in with the second one. You should apply at least two layers of paint for an even coverage.

Step 4- Remove the tape from surrounding areas

Allow the final coat of paint to dry for at least 24 hours. Although, it would be best to wait 48 hours or more before using the tub. Once the paint has had enough time to cure completely, remove the tape from surrounding areas and enjoy a warm bath in your freshly-painted bathtub.

How To Maintain The Look of Your Painted Bathtub

Now that you’ve successfully painted your bathtub and given it a brand-new look, you need to ensure that it’s properly maintained for lasting results. Here are a few ways you can extend the life of your spray-painted bathtub.

  • Clean your tub on a regular basis to prevent the build-up of soap scum.
  • Avoid using harsh cleaners or abrasive cleaning materials, as they can damage the tub’s surface.
  • Don’t use cleaners containing ammonia or bleach.
  • If you need to clean the drain, use a funnel to pour the liquid drain opener and avoid spilling the product on the tub.
  • Fix any chips immediately to maintain its new look.
  • Do not leave metal items on the tub, as it can cause surface rust.
  • Be careful not to drop heavy items in the shower to evade chips and dents.

FAQs

Does painting on a bathtub last?

Yes, spray painting on a bathtub delivers lasting results that stay the same for 3-5 years if cared for properly. Just make sure to follow the correct procedure to prep and paint its surface.

What kind of paint do you use on a bathtub?

The paint should be designed specifically for bathrooms because it must withstand moisture and humidity. Do not use regular spray paint on the bathtub, as the result will not last.

Is painting a bathtub a good idea?

Painting your bathtub is an excellent idea if you’re on a budget and don’t want to spend on remodeling your bathroom or replacing the tub.

How can I change the color of my bathtub?

The aesthetic appeal of your bathroom is very important, and your bathtub can make or break its overall appearance. You can easily change the color of your bathtub to match your current mood with a DIY spray paint job.

How do I know if my bathtub is acrylic or cast iron?

The best way to check the material of your bathtub is to take a magnet and place it on it. If the magnet sticks, it is made of steel or cast iron. But if it doesn’t stick, the material must be acrylic or fibreglass.

Conclusion

Repainting your bathtub is the best way to refresh its appearance and change the overall feel of your bathroom. The process outlined above should clear any confusion about ‘can you paint your bathtub?’ and ‘how to paint your bathtub?’

Be confident and give your bathroom a budget-friendly remodel.

spray painted car

Can You Spray Paint Your Car – Achieve Professional Results

Whether your car shows too many signs of wear and tear or you want to change its look with a brand new color, spray painting your car is the perfect way to upgrade your vehicle. However, without proper planning and prep work, you can end up with a DIY disaster.

You can spray paint your car and get good results if you follow the correct process. Start by washing your car and sanding the surface to achieve a smooth base for your car paint. Next, cover the areas you don’t want to paint with painter’s tape and apply a primer. Finally, use the color coat to complete the look.

A good paint job can add a new lease on your car’s life. Just be sure to prepare your base properly for maximum paint adhesion and a flawless finish.

pexels hyundai motor group 11158817 1 Can You Spray Paint Your Car - Achieve Professional Results

Can You Paint Over Existing Paint?

Yes, you can paint over existing paint, but the results will not be as good as expected. Suppose your car’s existing color is red, and you want to paint it steel gray. If you don’t sand the existing paint properly before spraying on the new color, chances are that some of the red color will peek through.

However, if you sand and prime the car’s surface correctly before spraying a new color, you will get an even coverage. This is especially helpful when changing the color from a darker to a lighter hue.

How To Paint a Car From Start To Finish

Painting a car from scratch can seem daunting, but if you know all the steps in the process, you should be able to get the job done nicely.

Step 1- Wash your Car

Starting with a clean surface always makes sense. You can wash the car by hand or take it to the car wash to make it squeaky clean.

Step 2- Dismantle Components

It would save you a lot of work if you dismantled the components you don’t want to paint. Remove parts like the lamp, antenna, washing nozzle, hubcap, side rod, wiper, door handle, etc. Another benefit of doing this is that you can identify any defective components and change them after you’ve painted the car.

Step 3- Start Sanding

Use 600-grit sandpaper to sand away the metal surface of your car. Rub the sandpaper thoroughly over all the areas to remove the existing paint coat. When you notice that most of the paint has come off, switch to 1500-grit sandpaper and keep the momentum going. Make sure you remove any rust on the car to create a smooth and clean base for your color coat.

Step 4- Repair Holes and Dents

You may notice holes in the metal from places where you’ve removed rust. Use a putty specifically designed for metal to fill in those holes. You should also fill up any scratches on the car at this point with the putty.

Squeeze the putty directly onto the areas you want to fill. Once the hole is completely covered, smooth the surface with a putty knife and remove any excess.

Allow the filling to dry for at least an hour before sanding again with 1200- grit sandpaper.

You can also use the spray paint for car scratches: Rust-Oleum Automotive 2-in-1 Filler & Sandable Primer to fill minor surface imperfections at this step.

Step 5- Clean the Surface

Use a rag, mineral spirits, or denatured alcohol to meticulously wipe your car’s surface. It will help clean any oil residue, wax, or sanding dust and prepare the surface for the next step.

Make sure you’re working in a well-ventilated area, as the fumes from the cleaner can be toxic.

Step 6- Cover the Areas with Painters Tape

Start covering any areas you don’t want to paint accidentally with painter’s tape and paper. This step will not take too long if you’ve dismantled most components. However, if most parts are still attached to the car, carefully tape pieces of paper to cover them completely.

Step 7- Spray On the Primer

Now that you’re working with aerosols protect yourself from the paint fumes and wear proper safety gear to avoid a mishap.

Select a primer designed for automotive purposes, like the Rust-Oleum Stops Rust Automotive Primer. The primer will ensure a long-lasting and durable coating while offering a flat finish that allows the top coat to adhere to the surface.

Hold the primer can 25 centimeters away from the car’s surface and start spraying the entire area using back-and-forth strokes. Keep your hand moving steadily to achieve an even coat. Once the first layer of primer is on, wait for 15 minutes so it can dry down before applying the next one. Apply at least 3 coats of primer for a solid foundation.

After the third layer of primer has been applied, leave the vehicle for 24 hours so it can dry completely.

Step 8- Sand the Surface Again

Use 1200-grit sandpaper to rub the surface in a back-and-forth motion. The purpose of this step is to smoothen the primer and make it as even as possible. Remember to clean the surface with a cloth after sanding the area. You can even use warm, soapy water at this point to clean the car.

As you can see, prepping the surface thoroughly is key to a good DIY paint job.

Step 9- It’s Time to Paint!

Finally, it’s time to start painting. Make sure you’ve selected a paint suitable for metal surfaces and perfect for automotive use. The Dupli-Color Black Perfect Match Automotive Paint is a good choice for this task because it seamlessly duplicates the original factory colors.

Shake the can for a good 5 minutes before you begin. This will help re-combine the pigments in the paint that separate over time. Position the can parallel to the surface and start spraying using horizontal strokes. Keep your hand moving to avoid thick layers, and spray the paint in thin overlapping coats.

Wait for 10 minutes to allow the coat to dry completely before spraying the second one. You may need multiple layers to achieve full coverage. 

Allow the final layer to dry for at least 30 minutes before moving on to the next step.

Step 10- Apply Clear Coat

It’s time to seal the deal with a coat of clear paint. You can either choose a matte-finish variant like the Dupli-Color Acrylic Enamel ClearCoat or opt for a high-shine finish.

Use the same technique to apply clear paint as you did with the color coat. Allow your vehicle to dry for 24 hours before you start using it.

After the top coat has cured entirely, remove the painter’s tape from the areas, you had sectioned off previously. Also, reassemble any components that you had removed in the beginning.

Now, take a step back and appreciate the beauty in front of you!

pexels khunkorn laowisit 5233262 Can You Spray Paint Your Car - Achieve Professional Results

Best Spray Paints for Cars- Urethane or Acrylic?

When choosing spray paint for your car, you will come across two popular options: urethane car paint and acrylic car paint. You should remember that there are other factors to consider other than the aesthetic appeal of the paint when making the final selection.

Durability 

Urethane paints are the industry’s standard for automotive paints and are preferred by automakers around the world. It is hailed as the most durable auto paint that is also chip-resistant. Many car restorers argue that urethane paints outlast most acrylic paints if maintained properly.

Toxicity 

Urethane paints are solvent-based, while acrylic paints are water-based. So, if you compare the health hazard of the two, acrylic will emerge as the winner because it’s far less toxic than urethane.

Drying Time

The paint application process also varies between the two. Acrylic paints need more time to dry (around 24 to 48 hours) before the second coat can be applied. On the other hand, urethane paint dries much faster and allows you to finish the project quickly.

Budget Friendly

Another factor you will need to consider is the cost of the paints. If you’re working on a budget, acrylic enamel auto paint is more affordable than urethane or acrylic lacquer. But if you want a professional-like finish, the urethane will offer better results.

Ultimately, the best spray paint for your car depends on your desired finish and the budget you’ve set aside for the job.

FAQs

What happens if you don’t sand your car before painting?

Failing to sand your car before the paint job will result in an uneven finish, making the paint vulnerable to chipping and peeling in the long run.

How many spray paint cans are required to paint the car exterior?

You will need around 20 aerosol cans of spray paint to cover the entire surface of your car. You may need more if you’re painting a larger vehicle like an SUV, truck, etc.

Is spray painting your car a good idea?

Spray painting your car is an excellent idea if you don’t want to spend too much money on a professional paint job. However, you should begin with realistic expectations because no matter how well you spray paint, it can’t match the perfection of a professional paint gun.

How long will spray paint on a car last?

Acrylic lacquer or acrylic enamel paint should last 5-10 years, depending on the severity of the environmental elements it’s exposed to.

Final Verdict

You can definitely spray paint your car to revamp its look but always maintain reasonable expectations from the project as it can’t compete with a professional paint job. However, if you decide to paint the car yourself, make sure to follow the process mentioned above for a solid finish. 

You can also customize your car by just spray painting your car’s hood if you do not wish to paint your whole car.

If you want to refresh your car seats with spray paint, check out our article on how to spray paint leather car seats. Another way to enhance your car’s interior would be to spray paint your car’s dashboard, do give this a read and let us know your thoughts about it.

jason leung DmD8HVOjy4c unsplash Can I Spray Paint Jeans - Revitalize Your Demin Wardrobe

Can I Spray Paint Jeans – Revitalize Your Demin Wardrobe

Being a mother of two young girls is one of the most beautiful things you’d experience unless they tell you they need to wear painted jeans to school for tomorrow. For the love of my daughters, I started looking in the garage to find some paint I could use on denim. All I could find was a couple of spray paints. It did wonders on jeans. 

You can spray paint jeans to bring life to an old pair of jeans. Or upgrade your wardrobe with trendy bottoms. Even though regular spray paint works on denim, fabric spray paints are long-lasting. They come in plain, glitter, and glow in the dark.

My daughters came back with smiling faces, and that made my day. Listed below are all the dos and don’ts of spray painting jeans. Learn from my experience to get a solid outcome on your first attempt.

DIY spray paint your jeans- Steps to follow

In my first attempt, I, too, was confused about how to go about it. Here’s what I followed. I hope it helps you out! Each step is essential since it serves a specific purpose.

Step 1: Wash the jeans 

The first thing that you need to do is wash your jeans. Washing the jeans beforehand ensures that no dirt particles are left behind. Spray paint adheres better on clean surfaces than dirty ones. 

Step 2: Prepare the work surface

Lay down a tarp or an old cloth piece before you paint your jeans. Spraying can leave paint marks on surfaces around it, so it is better to take this precaution.

Step 3: Choose the colors

Next, choose which spray paint you are going to use. Fabric spray paints are the best for painting jeans and other clothing items. 

Decide on the colors you want to paint and gather all material in front of you before you begin to paint.  

Step 4: Use your denim canvas 

Once you have gathered all your supplies, you can start spray painting. If you need to use any stencils, place them carefully on the jeans. Cover other exposed parts to prevent the paint from spreading in unwanted places.  

Step 5: Leave it to dry

Lastly, let the paint dry for about 48 hours. Spray paint usually dries in about a day but leaving it for 2 days ensures no paint comes off when you wear it. 

Things to keep in mind: 

  • Make sure the jeans are completely dry before you start painting them. 
  • Do not use spray paint other than the fabric paint on your jeans.
  • Always use spray paint in a well-ventilated area.
  • Hold the can 6-8 inches away from your jeans. 
  • Spray short, even strokes. 
  • Paint light colors first and then move on to dark colors. 
  • Fit cardboard strips inside the jeans to prevent paint from seeping to the other side.
  • Wait for at least 30 minutes before applying a second layer. 

Pros and cons of using spray paint

Spray can be a cheap alternative to getting a new pair of fancy pants, but it also comes with its cons. Let’s have a look at both sides.

PROSCONS
Spray painting offers more coverage than brush strokesSpray paints contain toxins 
They are more durable than water-based paints Strenuous work (fingers can cramp)
Creates less mess than oil or water paints 
Spray paint is cheaper than other kinds of paints 
Pros and Cons of Spray Painting Jeans

Best spray paints for jeans

If you’re a first-timer, having numerous questions in your mind is justified. The most common question I get is; what spray paint should I use?” Here are some top picks on which almost all fabric spray painters agree. They are easy to use, readily available in stores and online, and last permanently.

Dupli-Color Vinyl & Fabric Spray

51fgHs9FzwL. AC SL1000 Can I Spray Paint Jeans - Revitalize Your Demin Wardrobe

The Dupli-Color Vinyl and Fabric spray does not chip or peel easily. Available in 13 colors, you can use it on multiple surfaces, including fabrics and vinyl automobile interiors. There is no need for a primer as the paint adheres well enough. 

One disadvantage is that the paint is highly flammable and should only be used between 70 and 90 degrees Fahrenheit.

Krylon COLORmaxx

41IuCnw HEL. AC SX300 SY300 QL70 FMwebp Can I Spray Paint Jeans - Revitalize Your Demin Wardrobe

The Krylon spray paints are ideal to use on a variety of fabrics and has shown great results on jeans and demin outfits. Krylon COLORmaxx provides full coverage and is fast drying and durable. 

Along with this, It also protects the surface as it is infused with a primer. It is also available is many different colors that would be just perfect for showing off your creative side. 

Tulip Permanent Fabric Spray Paint

71+85MP8w6L. AC SY300 SX300 Can I Spray Paint Jeans - Revitalize Your Demin Wardrobe

The fabric spray paint from Tulip Permanent is non-toxic and environmentally friendly. It comes in 7 brightly colored spray bottles and can be used on any fabric.

The nozzle provides precision in strokes, making it ideal for customizing jeans and other clothing items.    

Neon Nights Glow in the Dark Paint 

Can I Spray Paint Jeans - Revitalize Your Demin Wardrobe

This Glow in the Dark Spray Paint will make your jeans stand out everywhere. It gives off a bright neon glow in the dark. Moreover, the high-quality pigments are visible during the day as well. 

Neon Nights Glow in the Dark Paint can be used on any shirt, pants, canvas, or shoe. Also,it is resistant to washing and does not peel off too soon.  

Montana Cans Hologram Glitter Effect Spray 

91jsbvtvMUL. AC SL1500 Can I Spray Paint Jeans - Revitalize Your Demin Wardrobe

Last on our list is the Montana Cans Hologram Glitter Effect Spray. Its holographic particles glitter under the sun giving off different rainbow colors at different angles. It is an excellent choice for customizing party-wear clothes. You can use it both as a base coat and a top coat. 

The paint does not contain any CFCs and is 100% lead-free.

What to do if spray painting goes wrong?

Since this could be your first time using fabric spray paints, there is a high chance that the results of your painting are not what you expected. No need to panic as I’ve worked my way around a fix to that too. You can clean your jeans and redo them the way you like.

Spray paints are wash-resistant, but here are a few ways to remove the color marks altogether. 

Using alcohol swabs

Alcohol swabs are found in first aid boxes at home easily. If you mess up your paint or a few strokes, go in another direction to what you intended them to be on. You can easily remove them by using an alcohol swab. Make sure to rub over the desired area gently until it has faded enough to be repainted.

Hair spray 

Hair sprays contain solvents like ethanol that work great in dissolving oil-based paints. Since spray paints are oil-based paints, hairspray can help you fix what went wrong. We’re sure you have a spray paint can lying on your dressing table. It’s time to make use of it more than just hair.

Nail paint remover

To remove spray paint from jeans, another household item you could bring to use is a nail paint remover. Nail Paint contains acetone that effectively works on oil-based spray paints. Dab a cotton swab dipped in nail paint remover over the pants. We suggest you stay patient as the process takes time.

Turpentine 

Turpentine makes stronger bonds with oil than paint pigment. This way, dubbing turpentine will help remove the paint from your jeans. However, Ensure that the space you are working in is well-ventilated. You must be wearing gloves. Ensure to rinse the pants multiple times before working on them.

Dishwashing liquid

Dishwashing liquid can do wonders on jeans. Even when detergents give up on removing the permanent spray paint, a teaspoon of dishwashing liquid goes a long way. Pour it on the affected area, add a couple of drops of water and rub in circular motions. Rinse the pants with water, let them dry, and you can begin painting.

Industrial spray paint remover 

Going to a hardware store and asking for an industrial spray paint remover is what most people would do. Industrial spray paint remover has been designed to remove spray paint from jeans and other surfaces so you can clean the canvas again.

If you do not want to go through the hassle of removing the spray paint, you can get your jeans dyed to their original color. You also have a choice to use any other fabric dye and customize the jeans to the color of your choice. You can spray paint on it again or wear it just like that. 

Frequently asked questions

What kind of paint can I use on the jeans?

Both acrylic paint and fabric spray paint can be used on jeans. But the best kind of paint is fabric spray paint. It is explicitly designed for clothes because it adheres well to the fabric without causing any damage. 

How can I permanently paint my jeans?

After completely drying the paint on your jeans, use an iron to heat the painted area. Heat therapy locks in the spray paint in the denim fabric, letting you paint your jeans permanently. The paint will now stay on the jeans longer without fading.

How do you spray paint jeans?

Spray painting jeans is quite simple. All you need to do is place your stencil on the jeans, cover any exposed parts, and start painting. Make sure your jeans completely dry after being washed, and you’re painting in a well-ventilated area.  

How to bleach paint jeans?

Take water and liquid bleach in equal parts. Mix them. Now fill it up in a spray bottle if you want to bleach-paint your jeans in a freestyle pattern. You can even splash the water and bleach mixture. Submerge the jeans in a tub of water containing equal parts of water and bleach; if you would like to bleach-paint it all.

Considering All Of The Above – Never Be Afraid To Be Creative!

Customizing jeans using spray paints is a great DIY way to upgrade your denim wardrobe. It is cheaper and more durable than regular water-based paint. However, you must be careful while using spray paints as they contain toxins that can harm your health.