Spray Paints

pexels erik mclean 5158181 Can You Spray Paint Leather Car Seats - Being On A Budget

Can You Spray Paint Leather Car Seats – Being On A Budget

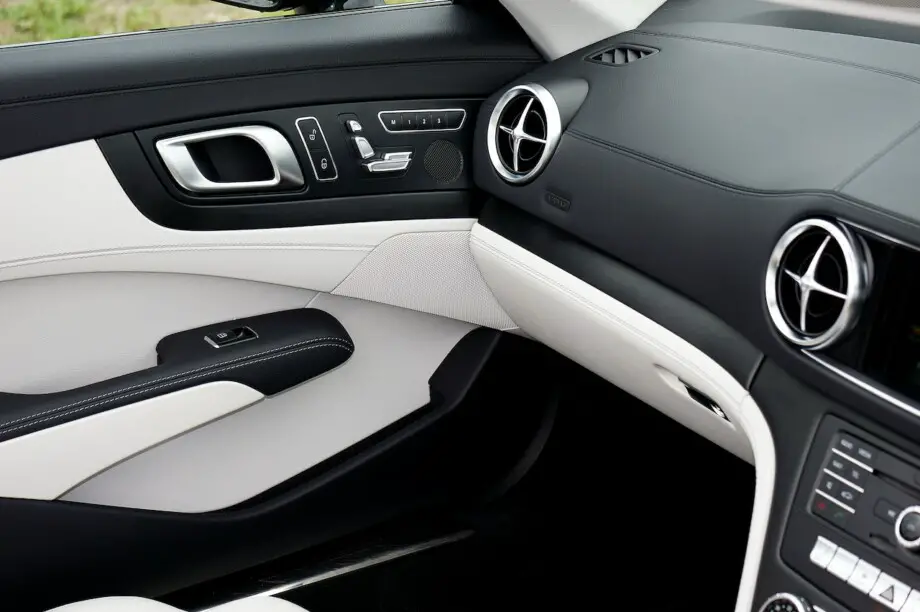
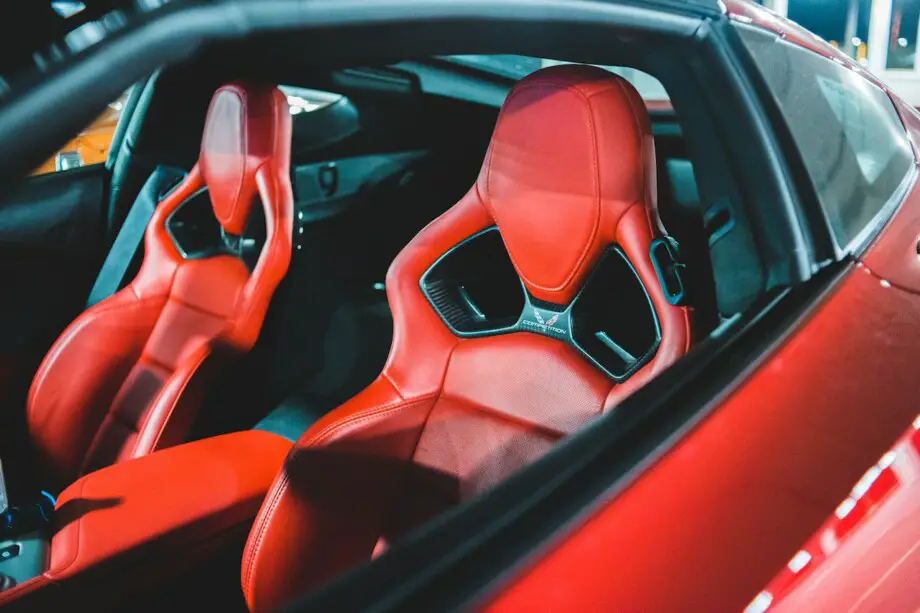
Leather car seats are the most durable in terms of appearance and sturdiness. The only downside is that regular wear and tear can make it look faded and old. Fortunately, you can spray paint on your leather car seats to refresh their aesthetics. You can even change its color entirely to match your mood without overspending your budget.

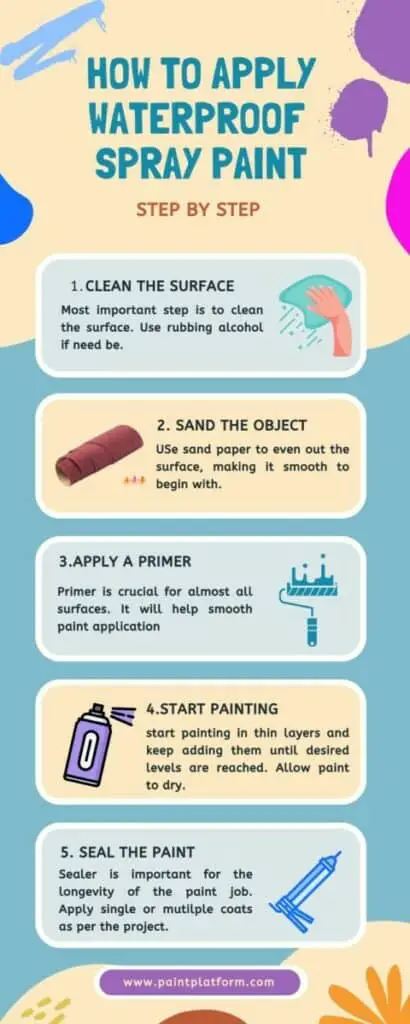
Yes, you can spray paint leather car seats. You must start by cleaning the surface and wiping away any oils with an alcohol cleaner. Prep the surface by filling in cracks and creating a smooth base. Apply a primer, ensuring all the seat seams are adequately covered, and finish with a color coat.

Painting your car seat should be easy if you have the right leather spray paint and a set of tools. But you must make sure that the surface is thoroughly prepped before you start painting, or else the results might be disappointing.

Which paint can you use on leather car seats?

To achieve the best results, it’s important to use paint that’s designed especially for flexible surfaces like leather car seats. Choosing the correct paint variant ensures that the color doesn’t slide off, crack, or peel once it has dried. It also helps make sure that the final result is durable and lasting.

You can either buy a leather coloring kit from your local auto retail store or invest in spray paint like the Rust-Oleum Automotive Enamel Fabric & Vinyl Spray formulated for leather car seats.

What will you find in a leather coloring kit?

If you opt for a leather coloring kit, you will get leather prep, a palette knife, an abrasive pad, finishing sprays, a spray unit, gloves, and sponge applicators. These kits are available in multiple colors, so check them beforehand to confirm it has the color you want.

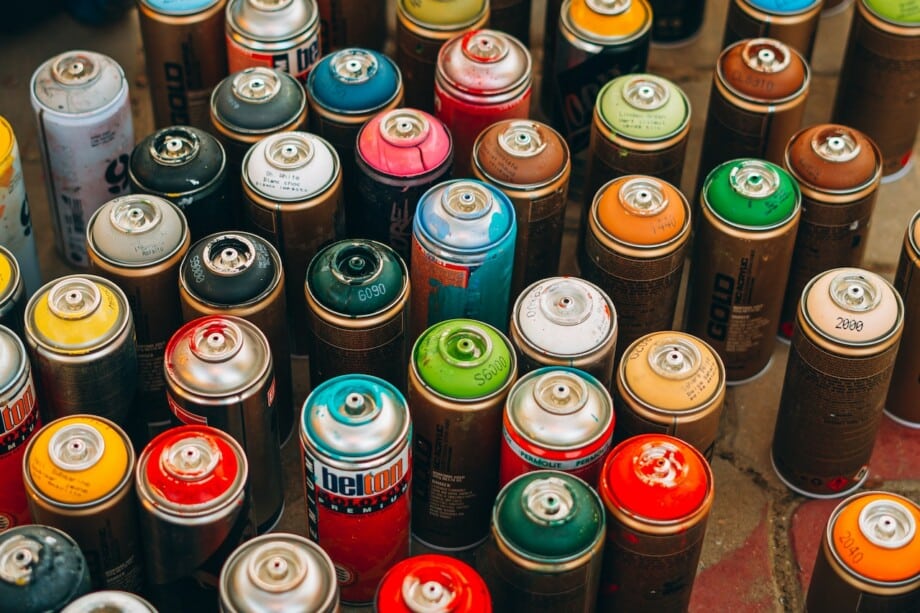
Which spray paint is ideal for leather seats?

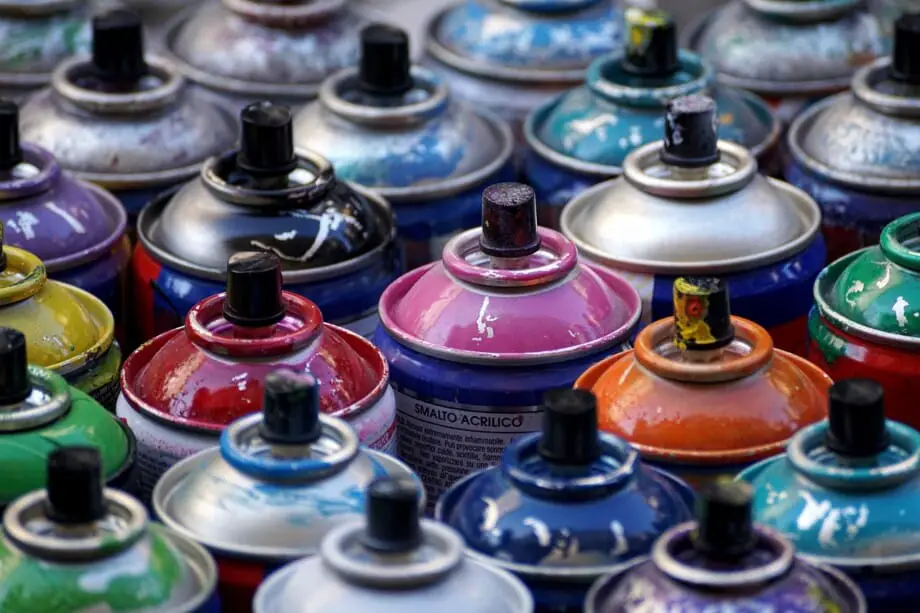
You can choose from several quality spray paint brands in the market, like SEM, ColorBond, and Rust-Oleum.

I personally think the ColorBond Leather, Vinyl & Hard Plastic Refinisher Spray Paint is a good option for leather car seats as it seals the color into the surface. Moreover, it doesn’t crack, peel, or flake, making it a complete package.

If you plan on using a spray gun or an airbrush for paint application, you can even go for Angelus Acrylic Leather Paint. The best thing about Angelus paints is the wide variety of colors you can find to work with.

612kb+LXtNL. AC SL1500 Can You Spray Paint Leather Car Seats - Being On A Budget

In case you decide to buy an individual spray paint, you will need a primer like the SEM Clear Plastic Prep Aerosol to create a clean and smooth base to work on.

81Kwkqu4WdL. AC SL1500 Can You Spray Paint Leather Car Seats - Being On A Budget

Once you have created a solid foundation for spray paint, you can choose between different brands and colors to find the one that meets your needs.

How to paint your car seat with a leather coloring kit?

Here is a step-by-step guide on ‘how to paint leather car seats’ with a leather coloring kit.

Make sure to buy a kit that is nonflammable and non-toxic. Also, ensure that you’re working in a well-ventilated area, as leather paints contain fumes that are hazardous to health.

Step 1- Remove the Car Seats

Remove your car seats and set them up in a well-ventilated area. Before you start, disconnect your car’s battery and any electrical wires attached to it.

If you’re unsure about taking out your front and back seats, refer to the car’s manual for instructions. Take off any plastic components attached to the seats or cover them with masking tape.

Step 2- Clean the Leather

Before you start the prepping process, you should clean away any dust or debris on the seats. Brush each portion of the seat with a soft-bristled brush to remove food crumbs, dirt, or dust.

Next, vacuum your seats with a hose attachment to clean them thoroughly.

Step 3- Prepare the Leather

Use the abrasive pad provided in the kit to remove the transparent manufactured finish from the leather. As you scrub the top layer, some color will also come off, which is how it works.

When you see the old color removed from an area, take it as a sign that you have successfully cleared the transparent finish, and you should move on to the next spot.

As your top layer disappears, so does the shine, which is an indicator that your leather is prepped correctly.

The reason your leather seats look old most of the time is because of the cracks that develop on their surface. It is actually the paint that cracks and not the leather itself. So, when the painted layer is taken off, most of the cracks are removed in the process.

Step 4- Wipe with Alcohol Cleaner

Use an Alcohol Cleaner to wipe away any waxes, oils, or silicones that may be on the leather. This helps prepare a base for good paint adhesion.

Step 5- Fill in the Cracks

At this stage, inspect your leather seats closely and identify any small cracks on the surface. Fill in the gaps with a palette knife and Flexifil. You should apply the filler in thin layers, allowing 5- 10 minutes for each coat to dry.

Keep filling the cracks until they align with the leather’s surface.

 Step 5- Sand the Surface

Take 1200-grit sandpaper to the leather and make the surface smooth for paint application. Remove the sanding debris with a clean cloth.

Step 6- Sponge on the First Layer Of Color

Apply the first layer of your car leather seat paint with a sponge. This will help you cover hard-to-reach areas and also reduce later spray applications.

Don’t apply too much pressure, and gently wipe the colorant onto the leather using a sponge. Allow the first coat to dry for 5 minutes before moving to the next step.

Step 7- Spray On The Colorant

Use the kit’s airbrush to spray the Leather Colorant onto the seats. Start from around the edges of the piping towards the center, covering the hard-to-reach areas first.

Spray on the colorant in thin layers and allow the previous coat to dry before spraying more on top.

Apply the Leather Finish at the end to seal in the color. Once your paint job is complete, wait for a day before installing and using your leather seats.

How to Paint Leather Car Seat with Spray Paint?

While it’s easier to paint with a leather kit, there’s no reason why you can’t work just as well with individual spray paint. Here is an easy guide to help you achieve even paint coverage on your leather car seats.

Step 1- Remove the car seat

Removing the car seat ensures that you don’t miss any narrow spots and also protects your car’s interior from accidental splashes. You can check your car’s manual for instructions on unscrewing the seats.

Step 2- Clean the Seats

Clean the car seats with a stiff brush, making sure all the dust and food particles are adequately removed. You can even attach a thin nozzle to your vacuum cleaner to reach between the seams and other narrow areas.

Step 3- Wipe with Alcohol Cleaner

Clean any oils, waxes, or grime from the leather seats using an alcohol cleaner.

Step 4- Fill in the Cracks

Fill in any cracks on the leather using Flexifil and a palette knife. Prepping is key to achieving an even and lasting finish, so take your time and follow the process.

Step 5- Sand the Surface

Use sandpaper to slough away the top coat of the leather. Only apply a little pressure, or you may end up damaging the surface. Wipe the seats clean once you are done sanding with a clean microfiber cloth.

Step 6- Apply Primer

Spray on the leather primer in thin, even, and overlapping coats. Make sure to give each coat ample time to dry before moving on to the next one. You may need more coats of primer (5-6x) if the old color is dark or bright. Keep spraying layers until you have achieved a solid base to work on.

The primer enhances the adhesive effect and makes it easier for color to stick to the surface. It also prevents the leather from absorbing the pigment color, which can eventually make it hard and plastic-like.

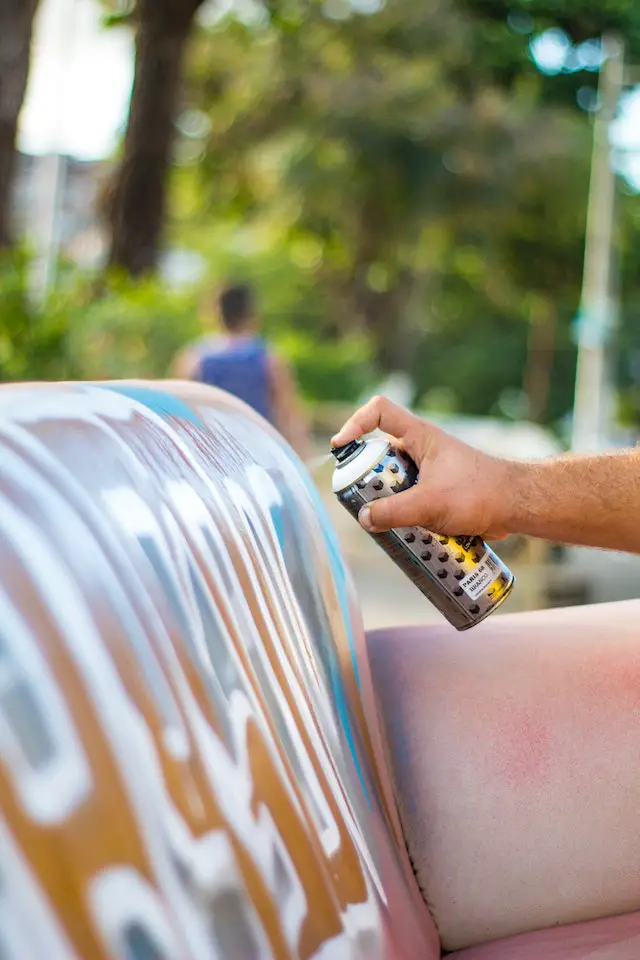
Step 7- Start spraying the Color

Start with a thin coat of paint and slowly build the pigment with additional layers. Pay attention to the seams and other areas that might get ignored during the painting process. Wait 15-20 minutes between each coat, allowing it enough time to dry.

You may need to apply 3 to 5 layers of paint to achieve an even and pigmented coverage.

FAQs

Does spray paint stick to leather?

Spray paints designed for flexible surfaces adhere properly to leather and vinyl. You can amplify the results by prepping and priming your leather surfaces adequately.

Which spray paint is best for leather seats?

The best leather paint for car seats is acrylic paint. It is water-based and can adhere to leather without cracking over time. As they respond well to changes in temperature, acrylic paints are perfect for use on your car’s interior.

Is it better to dye or paint leather?

Dyes are usually less pigmented than spray paints; therefore, they can’t be used to lighten the color of dark leather. On the other hand, spray paints are more pigmented and versatile and can be used to change the color of leather from dark to light and vice versa.

Can I lighten the color of my leather seats?

You can easily lighten the color of your seats by using a leather primer and full-coverage leather spray paint. Just make sure to apply adequate coats to achieve a good result.

Final Word

Changing the color of your leather seats is a quick way to refresh your car’s interior and breathe new life into it. The right spray paint and technique can give you excellent results and a durable finish.

If you are interested in spray painting your car’s exterior, check out our blog on how to spray paint your car, and you can go through all the steps in detail. Let us know what you think.

pexels mike b 14165572 How To Spray Paint Car Dashboard - Refresh Your Car’s Interior 

How To Spray Paint Car Dashboard – Refresh Your Car’s Interior 

Many people prefer customizing their car’s interior as it adds a personal touch to the vehicle. Some opt for aftermarket interior modification parts which can be expensive, while others search for DIYs that fit perfectly into their budget. Lucky for car owners, spray paint is an easy and effective way to spruce up their dashboards.

Before you start painting your dashboard, you should remove or cover any parts that you don’t want to paint. Clean the surface with soapy water and some rubbing alcohol, followed by sandpaper to achieve a smooth base. Apply thin layers of primer and color coat, sealing the paint with a lacquer finish at the end.

Whether you want to improve the aesthetics of your car’s interior or repair signs of wear and tear in the dash, painting your car’s dashboard is a great idea. Make sure to use the right equipment and follow the correct procedure to get near-professional results in no time.

The Materials You Need To Paint Your Dashboard

If you want your car’s interior to look as good as new but are still wondering, ‘can you paint a dashboard?’ the answer is yes, you can! All you need is a few materials mentioned below, and you’re ready to start your paint project.

Preparing Your Dashboard

Unlike other surfaces, a dashboard is surrounded by several parts, most of which you don’t want to paint. Therefore, you are left with two options: you can either remove those parts or cover them thoroughly to prevent the paint from spraying on them accidentally.

How To Remove Dashboard Parts

If you are going to paint smaller trim pieces, such as the ones around the air vents and stereo, it would be best if you removed them from the dashboard and painted them out in the open. Removing them is still advisable if it’s the other way around and you want to paint the dashboard but not the trims.

You can follow these steps to remove any dashboard parts safely.

  1. Ensure the car’s ignition is off, and then disconnect the car battery before removing any parts.
  2. Refer to the car’s manual for guidance on how to remove trim pieces. While you may be tempted to take the screwdriver and start disassembling the parts on your own, it’s better to consult the manual to ensure you’re removing the parts correctly.
  3. Take out snap-in dashboard parts with a screwdriver or trim removal tools.
  4. You can unscrew other pieces that are fixed on the dashboard.
  5. Disconnect any wiring behind the parts you remove.
  6. Store the parts safely.
  7. Save the screws for re-installation after the paint has dried.

Step-by-Step Guide for Painting Your Dashboard

Painting your car’s dash is a straightforward process, and if you follow all the steps outlined below, you can achieve a finish you will be proud of.

Step 1- Clean the Surface

Before you start painting, you want to make sure the surface is free from dirt and grime, and the best way to do that is by cleaning it with soapy water. You can use any tack cloth dampened with soapy water to wipe all the dashboard components. Allow the surface to air dry.

Step 2- Wipe with Rubbing Alcohol

After all the components you have washed with water and soap have dried completely, take a microfiber cloth and wipe the dashboard with isopropyl or rubbing alcohol. This helps you get rid of oily residues left behind by fingerprints.

Step 3- Sand the Surface

Take a scouring pad or 1500-grit sandpaper to scrub the surface of the dashboard. Be careful to apply only a little pressure and sand in a circular motion. Roughening up the surface will help the primer adhere to it better.

Once you are done, wipe away any sanding dust with a clean microfiber cloth.

Step 4- Cover Surrounding Areas with Tape

Cover any areas or parts you don’t want to paint using painter’s tape. You might need to use multiple strips to cover the area completely. You can also protect the steering wheel by placing a plastic bag over it and securing the ends around the base of the steering column with tape.

Since many parts surround your dashboard, take your time making sure all the areas around the dashboard are shielded with plastic, tape, or paper. This includes the car’s vents, knobs, windshield, front seats, floorboards, and so on.

Step 5- Put on your Vapor Mask and Gloves

Auto spray paints contain potentially hazardous fumes, so you should always work in a well-ventilated area. Put on a vapor or respirator mask and wear proper eye protection gear to protect yourself.

You can paint outdoors as long as it’s not too hot or humid and the temperature is between 65 to 85°F. It’s better to avoid painting under direct sunlight as it may hamper the drying process.

If you’re working in the garage, make sure to keep the main door and windows open. Setting up box fans also helps to exhaust air and fumes out of the area.

Plastic parts absorb skin oils very easily, which means your fingerprints can cause spots or fisheye. Wearing powderless latex or vinyl gloves when handling the components can help avoid these marks.

Step 6- Apply Primer

When painting your car’s dashboard, your best bet is a plastic primer like the Rust-Oleum Automotive Universal Bonding Primer Spray. It helps adhere the top coat on automotive surfaces and creates an ideal surface for the next step.

Shake the can well for about a minute and start spraying the dashboard while maintaining a distance of 6-8 inches. Keep the can moving in a steady back-and-forth motion to avoid thick layers. Apply 2 to 4 layers of primer to achieve an even and durable finish. You should wait at least 5 minutes before the second layer, but if you can wait for 10 to 15 minutes, that would be even better.

Step 7- Spray Paint the Dashboard

You should chose a paint designed for automotive plastic parts for this project. The SEM Paints Color Coat Aerosol is a good dashboard spray paint as it offers Elastometric Coating that doesn’t crack. You can also use any other quality vinyl dashboard paint for the job.

Shake the can thoroughly and spray the color coat in thin, even layers. Spray in quick bursts and keep a steady hand. You should apply 3 layers of paint at the least, but it is recommended to spray 5-8 layers for more durability. Wait for 5 minutes between coats to avoid saturating wet paint.

Step 8- Finish with Lacquer

Applying lacquer is an optional step, so you can skip it if you want. However, a top coat greatly improves the durability of your paint job.

You can choose between a glossy or matte finish for the lacquer, and it should be applied the same way as the primer and color coat.

Step 9- Re-install removed parts

You should give your paint job more than 4 hours to dry completely before you touch the surface. Let it cure for 24 hours if you can. Once the paint feels dry to the touch, peel away the painter’s tape from all areas you have covered and re-install any trims and panels you removed.

What is the Best Paint for a Car Dashboard?

Using the correct paint for your dashboard can significantly impact its finish and resilience. Here are my top picks for achieving excellent results:

Dupli-Color High-Performance Vinyl and Fabric Spray

61UcN lz0aL. AC SX300 SY300 QL70 FMwebp How To Spray Paint Car Dashboard - Refresh Your Car’s Interior 

This paint is perfect for vinyl and fabric coating; whether you want to restore your interior vinyl seats or customize dashboards, consoles, and door panels. As it’s formulated with a maximum adhesion promoter, you can skip the primer and still achieve a smooth finish. 

Colorbond Plastic Refinisher Spray Paint

71rX+IjpOjL. AC SL1500 How To Spray Paint Car Dashboard - Refresh Your Car’s Interior 

The spray paint is a multi-surface car interior paint that provides a urethane solvent-based coating. It offers a brilliant and lasting finish that doesn’t flake, peel, or crack.

Rust-Oleum Automotive Vinyl Spray Paint

How To Spray Paint Car Dashboard - Refresh Your Car’s Interior 

This paint provides excellent adhesion without rubbing off, cracking, or peeling. It is fitted with a comfort tip that allows you to spray at any angle and cover any hard-to-reach areas.

FAQs

Can you paint a dashboard with a brush?

Yes, you can paint your dashboard with a brush. However, you should keep in mind that using a brush to paint small surfaces leaves brushstrokes that might not look as appealing as the even finish you can get with spray paint.

Can you spray paint a car dashboard without removing its components?

You can definitely paint a dashboard without removing its components, but you need to make sure all the surfaces, trims, and fixtures you don’t want to paint are adequately covered with painter’s tape, plastic, or craft paper.

How to recolor a dashboard?

If your car’s dashboard requires paint repair, you can easily cover any scratches and recolor them using a combination of plastic primer, color coat, and lacquer.

How do you paint plastic dash panels?

You can quickly paint plastic dash panels with automotive plastic spray paint. You can achieve lasting results with quality paint if you prepare and prime your surface correctly.

Conclusion

Spray paint allows you to repair and refresh the appearance of a worn-out and dull dashboard. You can even get creative and try different colors or masking patterns to customize your car’s interior. As long as you follow the process outlined above and use a suitable primer and paint coat, you should be able to get the job done perfectly. 

spray painting art

How To Avoid Spray Paint Nozzle From Clogging

You feel excited and pumped up when you start a new painting project. Unfortunately, this excitement quickly fizzes out when you find that your spray paints won’t work because of blocked nozzles. But there are different ways to keep your spray paint nozzles clean, so whenever you pick up a can, it’s ready to paint.

To avoid your spray paint cans from clogging, clean the nozzle after each use. You can achieve this by spraying the paint can upside down for a while before storing it in a warm place. Apart from the nozzle, keeping the tube inside the can clean also helps your nozzle from getting blocked. 

Here are a few tips to keep the spray paint nozzle from clogging.

Tip 1- Spray the can upside down

Once you’ve completed painting a surface and it’s time to put the spray paint can away, turn the can upside down and spray until the paint stops coming out. This way, you can be sure that all the leftover paint in the tube and the valve system of your can has emptied.

When the tube inside the can is clean, the chances of paint drying inside it or on the nozzle are minimal.

Tip 2- Clean the nozzle after each use

After you have sprayed the paint can upside down, you might notice traces of paint on the nozzle’s exterior. Don’t leave any paint marks on the nozzle because once it hardens fully, it will end up blocking it.

You should allow any leftover paint on the nozzle to dry slightly and simply pick it off with your fingernail or a sharp tool before you store the can away. The paint should come off quickly without much hassle.

Tip 3- Store your paint cans upside down

Have you noticed the goopy texture of spray paint when you start painting? That’s because when you leave paint sitting for too long, the pigment separates from the liquid agent and sinks to the bottom. So when you start using a paint can, the collected pigment enters the tube first and may end up clogging the nozzle.

However, if you store your paint cans upside down, the tube inside will not pick up the thick pigment first. So, give the can a good shake whenever you want to use it and spray away.

Tip 4- Use a large nozzle to get the paint can started

If you are using a spray paint can after some time, check the nozzle size before you begin painting. If the nozzle is too narrow, the initial pressure inside the can may be too much to handle. You may end up clogging the nozzle in the process.

Instead, use a large nozzle in the beginning so it can increase the pressure within. Once your spray paint can is running smoothly, switch the nozzle back to the narrow one and start creating your masterpiece.

Tip 5- Store your paint cans in a warm place

Storing your paint cans in a warm spot can make all the difference in maintaining their formula, finish, and spray mechanism. If you allow your paints to sit in the cold for long, they will freeze. While they will eventually thaw, the nozzles might not be as forgiving as the paint’s formula.

Therefore, store your spray paints in a warm area to keep the nozzle from clogging up. Trust me you will never get yourself into a ‘my spray paint can won’t spray’ situation.

How To Unclog A Blocked Nozzle?

Aerosols are brilliant when they work, but once the spray paint stops spraying, it can get more and more frustrating by the minute. The tricks mentioned above will help you keep your spray paint nozzle from getting blocked. However, other elements, such as storage temperature, and paint type, can also affect the spray paint’s usability.

If you encounter a blocked paint nozzle, the first thing you should try is shaking it vigorously. This should jump-start your nozzle in the following cases:

  • The paint is too thick, and the pigment has separated from the liquid part
  • The spray paint was stored in a cold area which affected its consistency
  • The can hasn’t been used for a while

Shake the can for a good 2 to 5 minutes to mix its contents with the propellant and try spraying. If it still doesn’t spray, you can take a look at how to unclog a spray paint nozzle and let us know if that works for you.

Keep Spare Nozzles Handy

While it is deeply satisfying to unclog a nozzle and watch it spring back to action, sometimes, you are pressed for time and want a quick solution. It always helps to keep extra spray paint nozzles handy if the need arises.

You can either buy spare nozzles of different sizes and add them to your paint DIY arsenal or save the nozzle of empty spray paint cans.

If you plan to reuse a nozzle, remember to clean it thoroughly before storing it away because the last thing you want when looking for a replacement is another clogged nozzle.

FAQs

Should you store spray paint upside down?

Always store your spray paints upside down. It helps clear the can’s tube and prevents the nozzles from clogging up.

Why is spray paint clumping?

Spray paints have propellants that need to be mixed properly before you spray. If they are not evenly distributed, the color can come out in varied proportions causing your paint to clump.

How to fix chunky spray paint?

Sometimes, paint can get clogged in the nozzle causing your spray to spit out the paint in chunks. You can avoid this by cleaning your blocked nozzle or replacing it with a spare one that works.

Should you warm up the paint can before painting?

Ideally, your spray paint should always feel warm to the touch. You can warm up the can by placing it in warm water or heating it with a hair dryer.

Conclusion

A blocked spray paint nozzle can be a bummer when artistic inspiration strikes. The best way to avoid running into one is by storing your paint cans properly and cleaning the nozzle after each use. 

spray paint nozzle

How To Unclog A Spray Paint Nozzle – 8 Easy And Useful Ways

I love spray paint DIYs because they are easy, fun, and provide excellent results. So, it’s no wonder I have many different spray paints stored away in my garage. However, I realized that most of my cans wouldn’t spray when I tried to use them for a recent project, and the culprit was: a blocked nozzle.

You can unclog a spray paint nozzle by soaking it in warm water, vinegar, alcohol, or paint thinner. Giving it heat with a hairdryer can also do the trick, but you must be careful not to melt the plastic. If nothing else works, you could also use a needle or an aerosol lubricant to clean the nozzle.

I knew I had to unclog the nozzle of my spray paint cans to make them usable again, so I searched for different ways to clean them. Let me share with you what I found and how I unclogged my spray paint nozzles.

What Causes Spray Paint Nozzle to Clog?

The main reason spray paint can nozzles become clogged is due to dry paint. The nozzle can get clogged if it isn’t properly cleaned after a paint job, and the excess paint dries up inside it. As the build-up hardens, it blocks the passageway of the paint, and it can get difficult to spray.

Sometimes, the nozzle can get blocked while you’re spraying. This usually happens when the paint has not been mixed properly, or when they are new. Thicker substances get stuck in the nozzle as you start spraying. The best way to avoid a blocked nozzle is to shake your spray paint can thoroughly for 5 to 10 minutes before you start.

How To Unclog A Spray Paint Nozzle – 8 Simple Ways

When I was unclogging my spray paint nozzles, I discovered 8 simple tricks that got the job done. They are very easy to implement and give quick and effective results. Here are my picks:

1. Give It Heat With A Hairdryer

hair dryer

An efficient way to soften the paint on your nozzle is to apply some heat to it with a hairdryer. Place the can on a newspaper or cardboard to avoid unnecessary mess inside the house, or take it out in the open. Next, position the nozzle over the exhaust and turn on the hairdryer. If the dried paint isn’t too much, it should quickly melt off.

In case the hairdryer doesn’t clear out the nozzle completely, you can take the nozzle off the spray paint can and blow hot air into it from the rear end. Whichever method you use, make sure the nozzle and the valve don’t touch any hot object directly. Also, keep changing its position as the plastic material can melt due to prolonged heat exposure.  

2. Use A Needle

When people realize their can of spray paint is clogged, the first thing they reach out for is a needle. That’s because a needle, safety pin, or wire hanger is readily available in every household.

lisa woakes 5FTXPrP2k3c unsplash How To Unclog A Spray Paint Nozzle - 8 Easy And Useful Ways

You can use a needle to gently scrape off dried paint that you can visibly see on the outside of the nozzle. If that effectively removes the blockage, your can is ready to spray paint, but if it doesn’t work, you will have to insert the needle into both ends to dislodge the dried paint.

You must proceed cautiously at this stage because the needle’s sharp edge can damage the nozzle. If you’re not careful, you could end up ruining the nozzle entirely.

Although this method works to unclog spray paint nozzles, it is not recommended every time as it may cause more harm than good.

3. Immerse In Paint Thinner

61ZFHb3JYHL. AC SL1500 How To Unclog A Spray Paint Nozzle - 8 Easy And Useful Ways

Another trick that works most of the time for cleaning clogged nozzles is using paint thinner. All you have to do is separate the nozzle from the spray paint can and place it inside a bowl filled with paint thinner.

Make sure the nozzle is completely immersed in the thinner solution, so you don’t miss a spot. Allow it to soak for 2 hours to let the dry paint melt away. Don’t keep it dipped in the paint thinner for too long, though, since the nozzle can get damaged.

Once the paint thinner has worked its magic on the nozzle and softened all the paint, use a needle to remove any residue. Don’t use a lot of pressure when using the needle, as it could ruin the nozzle’s mechanism.

4. Dip It In Warm Water

Warm water is one of the easiest ways of unclogging a nozzle. Take a bowl of warm water and soak the nozzle in it until the water loses heat. You can also take a rag soaked in warm water and wrap it tightly around the nozzle.

The heat from the water will help soften the dried paint and make it easier to clean the nozzle with a needle. However, there is a downside to this method– it doesn’t always work on the first go, so you might have to repeat the process until you get the desired results.

5. Soak The Nozzle In Vinegar

41KgsbsdkOL. SX300 SY300 QL70 FMwebp How To Unclog A Spray Paint Nozzle - 8 Easy And Useful Ways

If you’re wondering ‘how to clean spray paint nozzle,’ another trick that worked for me was soaking it in vinegar.

Fill a bowl with vinegar and allow the nozzle to soak for 24 hours. Once you remove it from the vinegar solution, clean it with warm water and then try spraying again.

While vinegar is an effective way to dislodge any dried paint, repeated contact with the solution can cause damage to its plastic exterior. It can cause your nozzle to become brittle over time and break apart. Therefore, use vinegar sparingly for nozzle clean-ups.

6. Clean It With Rubbing Alcohol

31IpqGdHHjL. SY445 SX342 QL70 FMwebp How To Unclog A Spray Paint Nozzle - 8 Easy And Useful Ways

If you’re facing trouble with your spray paint not spraying, you can clean its nozzle with running alcohol and try again. The cleaning method is similar to vinegar; you must soak the clogged nozzle for a couple of hours in a bowl of rubbing alcohol.

Rinse the nozzle with warm water and return it to the spray paint can. If it still doesn’t start spraying, repeat the steps until all the dried paint is removed.

Rubbing alcohol can denature any type of paint, so you should be careful when you attach the nozzle back to the spray can. Let it air dry completely, or use a hairdryer to speed up the process.

7. Use an Aerosol Lubricant

71SGBuGkFXL. AC SL1500 How To Unclog A Spray Paint Nozzle - 8 Easy And Useful Ways

An aerosol lubricant is a valuable addition to your spray paint arsenal as it’s a great tool to unclog nozzles.

You will need to replace the nozzle on an aerosol lubricant can with the blocked one from the spray paint. Press the nozzle to force the lubricant through it. You can try this a few times until the clog is completely gone.

If that doesn’t work, you can try another method. Remove the nozzle from the can and spray the lubricant directly into the nozzle. Make sure to cover both ends of the nozzle openings. Once the nozzle is entirely lubricated, place it again on the aerosol lubricant can and press it a few times. This should help clean up any blockage.

An aerosol lubricant is usually very oily and greasy; therefore, wear gloves to avoid staining your clothes or other fabrics.

8. Replace The Nozzle

81eyZAwpJqL. AC SL1500 How To Unclog A Spray Paint Nozzle - 8 Easy And Useful Ways

If none of the methods work, the final solution to ‘how do I unclog a spray nozzle’ is to replace the nozzle of your spray paint can with a new one. If you have an empty can lying around in your garage, you can simply remove its nozzle and place it on the other can. It always helps to have a few spares if a situation arises.

When replacing the nozzle, you should make sure that you pick one from a similar brand and type of paint because different paints have varying viscosities.

FAQs

Why does my spray paint keep clogging?

The nozzle can keep clogging up when you don’t shake your spray paint can thoroughly before you start spraying. It can also be the result of a spray paint nozzle block.

Is it okay to store spray paint in the garage?

It is okay to store your spray paint cans in the garage as long as the temperature is between 55 and 80°F. Higher or lower temperatures can affect the formulation of the paint and deteriorate its quality.

How do you store spray paint after use?

If you haven’t finished all the paint in a spray, you can store it in a flammable safety cabinet in your garage. Make sure the spot you choose is not too hot or cold.

Final Word

It can be frustrating to find your spray paint nozzle clogged when you want to start a new project. But with some patience, you can easily unclog it with the methods mentioned above.

If you are interested in how to avoid this problem from the beginning, click here to check out our blog on “How To Avoid Spray Paint Nozzle From Clogging.”

spray painting metal

Can You Spray Paint Galvanized Metal- A Detailed Guide

Galvanized metal is a highly durable material, making it an ideal choice for several objects such as car bodies, bicycles, piping, playground equipment, etc. The only downside is that it doesn’t look aesthetically pleasing, but luckily, you can spray paint it to make it more attractive.

You can spray paint galvanized metal to increase its lifespan and improve its aesthetic appeal. However, spray painting directly on a galvanized surface will cause it to peel, so you should treat and prime the surface thoroughly before you start painting.

Spray painting on galvanized metal isn’t that simple, but if you follow the correct procedure, you can get flawless coverage without professional help at home. Let me share with you what I have learned through my experience of painting on galvanized metal.

What Are The Challenges Of Painting Galvanized Metal?

A question I get a lot is, ‘Can you spray paint zinc-plated steel?’ The reason many people feel don’t feel confident spray painting galvanized metal is that it doesn’t stick to the surface, and they end up wasting their time and energy.

Metal surfaces are coated with a thin layer of zinc to prevent rusting. That is why when you try painting zinc-plated steel directly, it reacts with the paint’s binding agents and causes the paint’s layer to crack and peel.

When you paint on a galvanized metal surface that has not been adequately prepped, the paint will have trouble adhering. Therefore, cleaning the surface and preparing it following the correct process will help you achieve lasting coverage.

Why Do You Need to Paint Galvanized Metal?

We know that galvanized metal surfaces are well-protected from short-term and long-term corrosion. This brings us to the question, ‘why do we need to paint a galvanized surface in the first place?’

The reason is that even though the material is highly durable, it is still vulnerable to environmental elements such as acidic rain, sulfur dioxide, and other reactive substances. Also, if the surface comes in regular contact with salty water, its corrosion rate would increase, reducing the lifespan of the metal.

Painting galvanized metal increases the surface’s longevity and enables it to withstand environmental stressors. In addition to providing supplementary protection, the paint helps the object look more aesthetically pleasing.

Which Paint Should You Use to Paint Galvanized Steel?

While preparing the surface properly is crucial, choosing the right spray paint that sticks to galvanized surfaces without cracking or peeling is equally important.

Alkyd or oil-based primers and paints aren’t a good fit because their chemical composition creates an unfavorable reaction with the zinc coating, resulting in the formation of a film on the surface.

This film prevents the paint from adhering to the metal as the paint dries, often leading to problems like chipping, flaking, bubbling, and peeling. Instead, you can buy oil-based and alkyd paints and primers specially designed for galvanized metal to avoid the mentioned issues.

A better option is to choose water-based primers or paints created for metals specifically. Water-based paint versions don’t react with the zinc coating or form a film on the surface, which means there will be no adhesion issues as you paint.

If you’re wondering, ‘will Rustoleum paint stick to galvanized metal?’ The answer is yes! The Rust-Oleum Galvanizing Compound is a great option for painting on galvanized surfaces. Apart from adhering well to galvanized surfaces, the paint dries to the touch within 20 minutes.

Equipment You Will Need To Paint Galvanized Metal

Here are a few supplies you will need to start your metal painting project:

  • Chemical degreaser
  • Vinegar/ Ammonia solution
  • 240- grit sandpaper
  • Primer for zinc-coated metal
  • Spray paint for galvanized metal
  • Lint-free tack cloths

How To Spray Paint On Galvanized Metal Surfaces

Painting on galvanized metal objects is a multi-step process, and if you follow every step carefully, you can get excellent coverage that lasts. So, if you want to know how to paint over zinc plating, here is a step-by-step guide to help you through the process.

Step 1- Clean and Degrease The Surface

Before you start cleaning, remember that our purpose is to clean the zinc coating thoroughly, not remove it.

A simple clean-up with hot soapy water will suffice if you work on a newly galvanized surface. You will follow a similar cleaning method if the surface is fully weathered. However, if the galvanized metal is partially weathered, you must remove the surface oxide, hydroxide film, and debris.

The best way to clean a galvanized surface is to use a chemical degreaser. The degreaser helps eliminate grease, grime, and other debris without affecting the zinc coating. Simply spray the solution over the surface and use a lint-free cloth to scrub it clean.

Step 2- Wipe With Vinegar

Galvanized metal isn’t an ideal surface for painting because it is difficult to make the paint stick. However, you can improve its adhesion by wiping it with a white vinegar solution. The acid in the vinegar reacts with the metal surface and provides a more agreeable surface to paint on.

You can also use an ammonia solution instead to prep the surface but only in well-ventilated areas. So, if you’re working on a project outdoors, an ammonia solution can work well to prep the surface for spray painting.

Step 3- Allow The Metal To Dry Completely

After wiping the surface with vinegar or ammonia solution, give it enough time to dry out completely. If you’re working on a roof, it might take a few hours, depending on the weather, but an indoor project would take less time.

Step 4- Begin Sanding

Take your 240-grit sandpaper and put it to good use by sanding the metal surface thoroughly. 240-grit sandpaper is ideal for galvanized metal because it can prepare the surface well without gouging the zinc coating.

You must be careful about how much pressure you apply while sanding. Keep a steady hand and try not to overdo it.

You can remove any attachments, like bolts, etc., at this stage so you can sand the entire surface properly. After you’re satisfied with the sanding results, wipe away any debris created during the process with a clean, dry cloth.

Step 5- Apply Primer

As discussed earlier, avoid using oil-based primers when painting galvanized metal. Instead, use one designed especially for painting on zinc-coated surfaces like the Rust-Oleum Flat Primer.

You should use a primer with a water-based formula that provides a solid base for excellent paint adhesion. If you are painting a surface for outdoor use, invest in a multi-purpose primer designed for outdoor use.

Allow your primer to dry completely before you move on to the next step. If the primed surface feels tacky to the touch, let it dry for longer because painting over wet primer is not recommended.

Step 6- Start Painting

The paint application of galvanized metal is pretty straightforward. Make sure to use spray paint that’s ideal for galvanized surfaces, and apply the paint in thin layers, allowing plenty of time between coats for the paint to dry.

Spray paint usually takes 10 to 20 minutes to become touch dry on galvanized surfaces, but it can take up to 24 hours to fully cure. Refer to the paint’s label to check the recommended time so you know how long you should wait between coats.

 You can read how long it take the spray paint to dry on our website too.

Six steps for painting galvanized metal
6 Steps to Paint Galvanized Metal

Can You Paint Rusted Galvanized Metal?

It is possible to paint rusted galvanized metal, but it requires more prep work. If you don’t clean all the rust before painting, it will eventually spread and ruin the surface. Therefore, scrub off any rust with a wire brush or sandpaper first and then apply the primer.

Some spray paints are designed to stop rust from spreading and turn any existing rust into a non-rusting surface. However, you should sand the surface thoroughly, so you have a smooth base to paint on, regardless of the type of paint you use.

FAQs

Will paint stick to zinc-plated metal?

Paint doesn’t stick to the zinc-plated metal if the surface hasn’t been prepped properly. Using a primer before you paint also helps the paint adhere to the metal.

Can stainless steel be zinc plated?

Stainless steel can be zinc plated, offering excellent corrosion protection and a smooth, clean finish.

What spray paint can I use on galvanized metal?

Cold-galvanizing spray paints work well on galvanized surfaces. You can also use acrylic latex paint or water-based paints formulated for zinc-coated metal.

Can you spray paint over rust on metal surfaces?

No, you cannot. If you want the spray paint to apply evenly and stick to the surface, you must clean the rust and sand the object before painting.

Conclusion

Hopefully, you now know the answer to ‘can you spray paint galvanized steel.’ If you use the correct primer and paint while following all the steps outlined above, you shouldn’t have any trouble painting on a galvanized metal surface.

pexels suleyman seykan 6068821 1 Does Spray Paint Expire - Can it go Bad Before Expiry Date

Does Spray Paint Expire – Can it go Bad Before Expiry Date

Last month I decided to spray paint the new ceramic pots I bought for my Purple Heart plants. Since I already had a can of ice blue spray paint that I purchased 4 years ago, I decided I didn’t need a new one. But as I started painting, I realized the color was much darker, and the nozzle kept giving up on me. That’s when I realized that my spray paint had expired.

Yes, usually spray paint expires in 2-3 years, but the duration varies between brands. The best way to determine whether your spray paint has expired is to check the expiration date on the bottom of the can.

Sometimes, you will find that your paint hasn’t expired, but it’s still not giving the same results as before. That’s because spray paints can go bad even before their expiration date if not stored properly. With my help, you can learn how to get the most out of your spray paint investment.

Does Paint Have An Expiration Date?

Many DIY enthusiasts have different colors of spray paint lying around in their garages. However, before you start using them for a new project, you should check their expiration date.

Every spray paint has an expiration date that you can check at the bottom of the can. Usually, every can has two dates: production and expiry, and if you look closely, you can easily identify both. The expiry date is generally written as Month/ Day/ Year. So if your paint expires on July 1, 2023, it will be printed as 7/1/23.

How To Know If Spray Paint Is Expired?

The spray paint expiration date is the most effective way to determine if your spray paint has gone bad. However, inappropriate storage conditions can also cause an adverse chemical reaction in the paint and affect its consistency.

The following are telltale signs that your spray paint can has expired:

  • The paint has turned a different color than when it was new.
  • The nozzle of the can is clogged or rusty.
  • The paint has started to separate.
  • The application is not smooth, and the nozzle keeps clogging up as you spray.

Does Spray Paint Go Bad Before Expiry?

If you’re wondering, ‘does spray paint expire if not opened?’ the answer is no. Storing your sealed paint in ideal conditions can make it retain its original position for years. Sometimes, you may notice that the can has developed a hard lid, but that can be easily reversed by softening it with hot water or a hairdryer.

The lid usually hardens when the solvents inside the paint have evaporated, but that doesn’t mean it’s unusable.

After you’ve opened a spray can, environmental stressors, such as high heat, humidity, etc., can cause the paint to go bad.

Especially if the paint has been sitting for a long time, it’s possible that its propellant has evaporated or the nozzle is clogged. At times, the formula of the paint changes or its potency reduces over time, which means it may not deliver the same results as when it was new.

What Causes Paint to Go Bad?

Several factors can affect spray paint’s formula and mechanism. If you’re not careful enough, the following factors can reduce spray paint’s shelf life and affect its quality.

Extreme Temperature

Any area that receives too much heat or cold is not an ideal storage place for spray paint. The paint inside will dry and crack if the can is exposed to high temperatures. So, when you press the nozzle, nothing will come out.

Placing it in a cold spot will also affect the paint’s quality, making it go bad before the expiration date.

Exposure to Direct Sunlight

Direct exposure to sunlight can be harmful for your spray paints. If you keep your spray paint cans where they are exposed to direct sunlight, the chemicals in the paint’s formula will break down, causing it to become dry and brittle.

The paint will also lose its color if it’s wrongly stored directly under the sun.

Humidity Levels

Too much moisture in the air can upset the composition of the spray paint. This can make the paint inside sticky and lumpy. If you are not careful about high humidity levels in the storage area, your paint can go bad and become unusable.

Reduced Aerosol Pressure

If you open a spray paint can but don’t use it frequently, the aerosol pressure inside the can reduces over time. In this case, the paint’s formula is usable, but because there’s no pressure in the can, the spray mechanism won’t work.

Environmental Impurities

Whenever you use spray paint, environmental impurities such as dirt, oxygen, and ultraviolet rays enter the can through the tube. When these impurities get mixed with the chemicals inside, it causes an adverse reaction that makes the paint go bad even before its expiration.

Can You Use Paint That Has Gone Bad?

Sometimes, your spray paint can go bad even before its expiration date, but that doesn’t mean you should toss it away immediately. You can follow the tricks below to revive your old can and make it work.

1.      Shake It Well

If you’re using an old can and nothing is coming out, try giving it a thorough shake for 2-3 minutes and use it again. Most of the time, this acts as a ‘jump start’ for spray cans as it’s jolted back to life after sitting on the shelf for too long.

Shaking the can also help mix the color pigments that get settled at the bottom due to infrequent usage.

2.      Immerse In Warm Water

If you find that your spray paint is coming out too thick, you can immerse it in warm water to thin it out. Once the paint returns to its normal consistency, the application will become smooth and even.

3.      Decant the Paint If the Aerosol Isn’t Working

Loss of aerosol pressure is common in spray paints, but why throw the can away if the paint inside is usable?

Simply decant the paint by gently making a small puncture near the top of the can. Once the remaining pressure has escaped, you can cut the can open and transfer the paint into a sealable jar or a spray gun jug.

It would be best to stir the decanted paint before using or storing it to help release any gas or propellant that may still be inside.

FAQs

Does spray paint expire or go bad?

Spray paints usually expire in 2 to 3 years, but if they’re not properly stored, they can go bad before expiration.

How to dispose of spray paint safely?

A safe way to dispose of empty spray paint cans is to puncture a hole and recycle it as scrap metal.

How long does unused spray paint last?

An unopened can of spray paint has a shelf life of 2-3 years from its production date if stored properly.

What happens if you use expired spray paint?

If you use expired spray paint, the result will be vulnerable to drying and cracking. Also, its application and color may be different.

Final Word

It can be frustrating to find your spray paint can unusable after you have prepped the surface. Therefore, you should check your old cans’ expiry and test them before starting a new project to avoid any surprises. 

graffiti 1467768 1280 How Long Does it Take the Spray Paint to Dry - Expert Advice

How Long Does it Take the Spray Paint to Dry – Expert Advice

There are so many different types of spray paints that deciding how long you should wait until the surface is ready for the next layer of color can be pretty perplexing. With my help, you will know precisely how long spray paint takes to dry, considering the type of paint and the surface it is used on.

Individual spray paints dry at different times; for example, water-based paints usually take 30- 60 minutes to become touch dry, while oil-based spray paints can sometimes take up to 24 hours to fully dry. Curing can go upto as much as a week. The duration also varies with the type of paint used and the surface it is applied to.

Before you start a spray paint DIY project, make sure to know the type of paint you’re using, whether it’s oil-based, water-based, acrylic, enamel, or latex. Also, learning how porous your surface is will help you determine how long the paint will take to dry. Let’s take a look at what we need to know. 

What Is The Difference Between Drying and Curing Time?

If you are a spray paint DIY regular, you may have experienced that after painting a surface, it feels dry to the touch, but it still registers signs of wear. This is especially true with fast-drying spray paints. Since they become dry in a matter of minutes, you feel a false sense of security that the object is good to use.

However, there’s a difference between dry time and cure time. While your paint may feel dry when you touch it, the surface remains vulnerable to damage until it is fully cured.

This will help you understand the four stages to spray paint’s drying process:

Surface DryPaint’s solvent evaporates, but it feels sticky to the touch.
Touch DryThe paint feels dry when you touch it.
Hard DryThe top layer of the paint, hardens but still takes fingerprints.
Fully CuredThe surface is completely dry, and the object is ready for use.
Four Different Stages of Spray Paint Drying

Different types of spray paint dry and cure at different times. For example, oil-based paint takes the longest to dry. Its surface dries in thirty minutes, but the paint doesn’t dry to the touch for approximately 8 hours. And you should wait for 24 hours before applying the second coat. In contrast, acrylic spray paint needs 10- 30 minutes to become surface dry and 8 hours to fully cure.

If you’re wondering when to apply the second coat of spray paint, you should wait until the previous layer is touch dry before adding the next coat. You don’t need to wait for it to cure completely.

Spray painting being done on street walls

How Long Does It Take Different Spray Paints To Dry?

Spray paints usually take a few hours to dry completely, after which you can apply the next coat. If you’re using fast-drying spray paint like the Rustoleum 2x coverage, you can expect it to dry within 20 minutes, depending on the surface. Knowing how long your spray paint will take to dry helps you apply multiple coats without saturating the surface and causing the paint to crack or peel. 

The formula of the paint is only one deciding factor, the surface, temperature, humidity- everything plays an important role in how quickly the paint dries. If you want to know how to reduce spray paint’s drying time, you can read this article.

The following details will help you decide how long you should wait between coats.

Enamel Spray Paint

Enamel spray paints have a hard, glossy, and opaque finish. They are available in two variants: water-based and oil-based, and each has a different drying time.

Water-based enamel spray paints touch dry within an hour, while oil-based paints need almost eight hours to reach the same dryness level. Also, oil-based enamel paint takes about 24 hours to dry enough for a second coat.

Some fast-drying enamel paints, like the Rust-Oleum Professional High Performance Spray Paint, take 15 minutes to dry and can be reapplied within an hour. Temperature and humidity significantly affect drying time, so make sure to pick days with ideal weather conditions to start your spray paint project.

Acrylic Spray Paint

Acrylic spray paints are water-based and non-toxic. Since they have a quick drying time, they are widely used in the arts and crafts industry for painting various surfaces like plastic, glass, canvas, wood, paper, etc.  

It takes around 10- 20 minutes to become dry to the touch but can take almost an hour to fully dry for applying a second coat.

Lacquer Spray Paint

Lacquer spray paint offers a protective, durable and hard finish that is scratch-resistant. While it gives excellent results on most surfaces like wood, metal, plaster, etc., users avoid it because it requires multiple layers of paint to achieve good coverage.

The paint requires three hours to dry but around 48 hours to cure enough for the next coat. Water-based lacquer paints are more popular because their drying time is less, and you only need to wait around three hours to apply the second coat.

Epoxy Spray Paint

Epoxy paint is perfect for a durable, water-proof coating that resists household stains and grease. It can be applied to various surfaces like wood and concrete as it easily weathers up to cleaning materials.

Epoxy spray paint dries very quickly– in around five minutes, your surface becomes dry to the touch. The paint requires approximately an hour to cure so you can apply the next coat. Some fast-drying epoxy spray paints like the Rust-Oleum Appliance Epoxy only need a 30-minute cure time between coats.

Oil-based Spray Paint

Oil-based is a popular choice among DIY enthusiasts because it provides excellent coverage and is highly resistant to chipping and corrosion. In addition, this paint is very versatile, so you can use it on various surfaces, including terra cotta, plastic, metal, wood, ceramics, laminate, etc.

It takes eight hours to dry to the touch, but you must wait for around 24 hours to let it cure enough for another coat.

Polyurethanes Spray Paint

Polyurethanes are a preferred finish in wood working. It effectively protects surfaces from water, spills, and fading due to excess sunlight exposure. This paint is available in oil and water-based options, both of which deliver a solid surface finish.

Water-based Polyurethane spray paint becomes dry to the touch in about one to two hours, whereas oil-based paint takes five to twelve hours to dry. It takes about 24 hours to become properly cured before applying the second coat of paint.

How Different Surfaces Affect Spray Paint Drying Time

Regardless of the spray paint you use, your project’s surface influences its drying time. Some materials may be porous or more prone to damage from paint than others; therefore, you need to treat them accordingly.

Here are a few common materials usually used in DIYs and the time they take to dry.

Metal

Metal is a flat, non-porous surface that is easy to color using spray paints. If you choose ideal weather conditions to start a metal painting project, you can expect it to dry within ten minutes.

Plastic

Another favorite among DIY enthusiasts, plastic is one of the easiest materials to paint on. It takes around 30 minutes to become dry to the touch, but you should wait for at least 3 hours before reapplying a coat.

Wood

Spray painting on wood is a quick way to spruce up wooden furniture and objects- especially with the wide range of paints available; you can create something unique in no time.

Since wood is a porous surface, its drying time is about one hour, but you should wait for 24 hours to allow it to cure completely.

Cardboard

Cardboard is a soft material that’s vulnerable to accidental damage. Luckily, it has a fast drying time of 15 minutes if you’re working in a well-ventilated space.

Glass

Painting glass is tricky because if you’re not careful enough, you can easily end up with a runny, dripping, or steaky surface. Spray paint needs around 24 hours to dry on glass surfaces completely, but you can apply a second coat of paint in 15 minutes.

Rubber

Rubber is a highly-porous material which means it requires more drying time. You need to wait 30 minutes before applying another layer of paint, but if you want the surface to become fully dry, it would require 24 hours to get to that stage.

Fabric

If you’re using fabric spray paint, you can expect it to become dry to the touch within an hour and safe to handle in another. However, it requires 24 hours to dry completely, and you should avoid washing it for at least 72 hours.

FAQs

How can I make spray paint dry faster?

If you want to make spray paint dry faster, apply thin coats and work in a well-ventilated area. You can also alter the temperature, humidity, and airflow around your project to speed up its drying time. You are most welcome to read in detail about it too. 

Does spray paint dry faster with heat?

A warmer temperature is ideal for spray painting projects, and increasing the heat helps reduce the drying time of most spray paints.

Why is my spray paint not drying?

A common reason spray paint remains sticky and tacky is thick paint application. It can also be caused by extremely humid, cold, or hot weather.

Conclusion

DIYs might seem simple at first, but if you don’t research and plan ahead, the results can be way below your expectations. A good paint application is crucial if you want perfect coverage without streaks and drips, and knowing how long to wait between paint coats is a stepping stone toward a flawless spray paint project.

pexels rodnae production How To Make Spray Paint Dry Faster - Practical Tips and Tricks

How To Make Spray Paint Dry Faster – Practical Tips and Tricks

Spray painting is quite an exciting DIY which can quickly transform the appearance of various surfaces and objects. However, handling our spray painting objects would mean we need to wait for it to dry and can be a long wait, not to mention the wait between two or more coats. Luckily, there are ways to make spray paint dry faster, so you can enjoy your finished projects earlier than the recommended time.

Using a fast-drying spray paint for your project will reduce the drying time to just 20 minutes. Also lowering humidity, increasing room temperature, and improving ventilation can significantly reduce the drying time of your spray painted projects. Wax-based furniture polishes have also proven quite effective in drying paint faster to apply the next coat.  

The drying time of spray paints varies with the surface it’s applied to. You can know more about spray paint drying time and read the details. Similarly, a method that speeds up paint drying time on one surface might not work on the other. Therefore, I will explain how you can dry spray paint quickly on different surfaces.

Best Ways To Dry and Cure Spray Paint Faster

When you start a spray painting project, waiting time is inevitable. However, it is possible to reduce it so you can flaunt your finished work to your loved ones. 

Well, first you must know what are different stages of drying while spray painting so have a look as it is very important to know that before you proceed here

Let’s go over some easy and practical tips in detail.

 1.   Spray Thin Coats

If you keep layering on the spray paint, it will take longer to dry completely. Instead, apply the paint in thin layers, making sure to avoid overlapping, so the coat dries down quicker. 

Don’t spray too close, or you may end up saturating the surface. Start by standing 10 inches away, then decide if you need to move in closer. 

Also, use your entire hand to move the spray can and not just your wrist as you paint the surface.

2.   Increase Airflow

Whenever you’re working with spray paints, it’s better to choose a well-ventilated area. This serves two purposes: good ventilation ensures that you don’t breathe the VOCs in spray paint, and it allows your spray paint project to dry quickly. Therefore, work in an area with plenty of fresh air circulation.

If you want your spray paint to dry faster, you can increase the airflow by opening windows or using a fan to circulate air. Don’t get too excited with the fan, though and place it at a safe distance from the painted object so that the entire surface gets equal air pressure.

Caution: Don’t use the fan if you’re working in a dirty room, or else dirt and debris will stick to your paint.

3.   Increase the Temperature

A warm temperatures between 65 and 85 ℉ is ideal for a spray painting project. You can plan according to the weather forecast and pick days when it’s not too hot or humid. Painting outside on a warm and sunny day can help your paint dry faster.

However, Mother Nature doesn’t always stick to plans, and you may not find the ideal weather to work on your project. So, if you’re working indoors but want to speed up the paint’s drying process, you can increase the room’s temperature with a heater. Not only will it raise a few degrees, but also improve air circulation to cut the drying period by a few hours. 

You can even try drying spray paint with a hairdryer for smaller surfaces, as it works the same way as a heater. Just avoid getting it too close to the wet painted surface. 

4.   Decrease Humidity

Moisture is paint’s biggest enemy– especially when wet, too much moisture in the air can significantly increase drying time. High humidity levels also increase the chances of paint drips and dust contamination. Therefore, always pick days with low humidity, between 40% – 70%, to paint.

If you want your spray paint coat to harden quickly, decrease the humidity in the room by opening windows and doors. You can also use a dehumidifier or portable heater to reduce the moisture content in the air.

5.   Add Paint Thinner to the Paint Mix

You can add a paint thinner to your spray paint to make it dry faster. The solvents in the thinner dissolve paint and reduce its thickness to allow nice and smooth application of paint. A thinner paint means even thin paint layers that dry more quickly than thick ones.

Make sure not to add too much thinner to the paint as it can cause the color shade to be lighter than desired, just appropriate enough to get the desired consistency.

6.   Use Furniture Polish

Another effective way to dry spray paint faster is to apply wax-based furniture polish on the surface. While the product is not an easy-find, the polish can make spray paint dry instantly. 

Simply spray the wax-based polish over wet paint and allow it to dry for 5 minutes before adding a second layer. Wipe off the extra polish with a soft dry cloth.

Depending on the surface, you may need multiple thin layers to make the paint dry completely.

7.   Cure Spray Paint in the Oven

You can make spray paint dry faster on smaller objects by placing them in the oven. Since it delivers a combination of high temperature and airflow, curing spray paint in the oven is a trick that works all the time. 

However, you should not use a traditional oven as the paint releases harmful chemicals and VOCs as it dries, which can get absorbed by the food cooked in the oven later on. Instead, use an oven toaster that’s only used for paint-drying purposes.

You can place the object in a toaster oven when the spray paint is dry to the touch. Set the heat to 250 ℉ and leave it inside for around 2 hours. Before using this technique, make sure the paint is safe to cure in an oven by checking the label, as some may crack or bubble at high temperatures.

8.   Use a Heat Gun

You can use a heat gun to reduce spray paint drying time, but you must be careful and follow safety precautions. 

Hold the gun 2 inches away from the surface and move around the surface so the entire area is covered evenly. 

Caution: Always use the heat gun on a low setting because if you set it too high, you might remove the paint instead of drying it.

Does sunlight make spray paint dry faster?

There’s a common assumption that when we place a freshly painted object outside, the sun makes the paint dry faster, but the wind actually works its magic.

While painting outside has benefits, doing so directly under the sun is not advised. This is because the sun can cause the paint to dry too quickly, increasing the chances of paint cracks. So, if you find yourself in a similar situation, you will have to remove the top layer and start over again.

Temperatures above 50 degrees are ideal for painting, but excessive heat can make your paint peel and leave marks even though it will dry faster.

How To Make Spray Paint Dry Faster On Different Surfaces

As discussed earlier, different surfaces have different drying times depending on how porous it is. Let’s look at how you can make spray paint dry faster on various surfaces.

How To Make Spray Paint Dry Faster On Metal

Metal is a smooth and fast-drying material. If you’re spray painting metal in ideal weather conditions, it can become touch dry within 5 to 10 minutes. However, you can also lower the humidity and rise the temperature to make the paint dry faster. Try placing a heater and fan together near the surface to get the desired result.

How To Make Spray Paint Dry Faster On Plastic

Spray paint on plastic takes around 30 minutes to an hour to become touch dry. But if you want to hurry up the drying process, you can take your project outdoors in the sun and let Mother Nature work its magic. 

For indoor projects, you can increase the air circulation in the room and use a heater to raise the temperature. 

Caution: Don’t give a plastic surface too much heat, though or it may warp and lose shape. This means no curing in the oven or drying it with a heat gun.

How To Make Spray Paint Dry Faster On Wood

Wood is a porous surface that usually needs multiple paint coats to achieve the final result. Spray paint takes one to two hours to become touch dry on most wooden surfaces. 

If you’re working with water-based paints, you can expect them to dry faster than oil-based counterparts. 

By now, you know that heat is your best friend for speeding up paint’s drying time. So, paint on a sunny day when the temperature is between 65 and 85 ℉ or use a heater or heat gun to make your wooden surfaces dry faster.

How To Make Spray Paint Dry Faster On Cardboard

Cardboard, like wood, is another porous surface that needs to be dealt with care. If you spray on a thick layer of paint at once, you could ruin the surface; therefore, thin layers of paint are ideal for cardboard projects.

If you want the paint to dry soon, increase the ventilation by opening windows or placing a fan near it for quick results. Like plastic, cardboard cannot withstand high heat, so keep it away from heat guns, but you can use a hair dryer instead.

How To Make Spray Paint Dry Faster On Fabric

Spray painting on fabric requires a different technique– from pre-washing the material to the actual paint application. When you spray paint on the cloth, you have to do so in a continuous motion, or else you will produce splatters that will ruin the final look.

If you want the painting design to last on the fabric, you should leave it for 72 hours before washing. You can speed up the drying process by placing your project outdoors but not under direct sunlight. You can speed up the process by using a hair dryer set to at medium heat, keeping it at a distance of at least 10 to 12 inches from the surface.

Ironing the reverse fabric on low heat can also add an extra layer of protection to the design once the paint has dried up.

Plus, it is so much fun to spray paint your old pair of jeans. Here is a sneak peak into how to do that!

FAQs

How long does spray paint stay tacky?

Epoxy and polyurethane spray paints remain tacky for 5 minutes, but lacquer spray paints need a few more minutes to become dry to the touch. Latex and enamel paints take the longest time to dry and stay sticky for 60- 90 minutes.

How many coats of spray paint is too much?

You should apply 2-3 light coats of paint to achieve good coverage. Some surfaces may need more layers for a deeper color though. A primer will help achieve better finish with less coats of paint. 

Why is my spray paint not drying?

There can be two main reasons for spray paint not drying: you applied a thick layer of paint or didn’t give the first coat enough time to dry before applying the second one. 

Why is my spray paint soft?

If your spray paint is soft, it could be because you applied a thick layer of primer or sealer. Sometimes, not giving sufficient drying time between undercoat and topcoat can also cause this problem.

Long Story Short

You can speed-up the drying time and handle your DIY spray painting projects by improving ventilation and temperature and reducing humidity of the surrounding. If you want to know what are the exact drying times of different spray paints then you can read it here

If you want to know more about anything else regarding this topic, please leave a comment below and we will be happy to give you a response. 

pexels felicity tai 7951238 How To Apply Waterproof Spray Paint- A Step-by-Step Guide

How To Apply Waterproof Spray Paint- A Step-by-Step Guide

Poor preparation and paint application can make even the best waterproof spray paint fail at withstanding moisture. As a DIY enthusiast, I can guide you through my research and experience in achieving the best results with this particular question: how to apply waterproof spray paint?

Applying waterproof spray paint is easy. Firstly, wash and sand the surface to get a smooth surface. Cover the surface with a primer to ensure the paint adheres properly. Next, apply the paint evenly in thin layers, and once the final coat is ready, you can finish it with a sealer.

Weather-proof spray paint is an effortless way to spruce up different surfaces and keep them looking as good as new. But, if you don’t follow the application process correctly, you may end up with a paint job that washes off with the next rain. So, let me reveal how you can achieve excellent results with waterproof spray paint.

Tools/ Equipment You Will Need

The success of a DIY paint job depends on the tools and equipment you use. Here are a few things you should keep handy before you begin.

  •  Soft bristle brush- for cleaning the surface
  • Soapy water
  •  Paint thinner or rubbing alcohol (if needed)
  •  Fine grit sandpaper
  • A rag cloth
  • A primer
  • A waterproof sealer

Steps To Get Waterproof Results With Spray Paint

Most spray paints have high levels of volatile organic compounds (VOCs) that can be detrimental to health. Hence, wearing protective gear such as a face mask or respirator is necessary before you begin spray painting.

Also, make sure that the paint you’re using for the project is waterproof and not just water-resistant. If you are unsure about the difference between them, you can read our blog on Is spray paint waterproof to get a better idea.

Now, let’s get started.

Step 1: Clean the Surface

It is always better to paint on a clean surface as it ensures a smooth finish without any dust particles trapped underneath. Clean the surface with soap, water, and a soft bristles brush.

If you are working with highly saturated items or plastic, paint thinner or rubbing alcohol can help speed up the cleaning time. Allow the wet surface to dry completely before moving on to the next step.

 Step 2: Sand the Object

To ensure your spray paint adheres to the surface properly, removing any dust or debris is essential. You can use fine-grit sandpaper to achieve a smooth and even surface. Don’t forget to wipe away the sanding residue with a clean rag or tack cloth afterward.

Step 3: Apply A Primer

While a primer is not necessary for all spray paint projects, you should always prime furniture and outdoor items. In addition, a primer is crucial when using water-based spray paints as it helps the paint stick to any surface and keeps water and moisture from breaking the color down over time.

Apply a primer compatible with your selected paint, following the instructions on the label.

Step 4: Start Painting

The paint application is a critical part of creating a waterproof surface. Start spraying paint in thin, even layers, ensuring the entire surface is covered. Any missed spots mean that water may get beneath the painted surface and result in cracks. You want to avoid spraying on the paint too thick and allow plenty of drying time between coats.

You may need two to three thin coats of paint to achieve your desired color and finish. Don’t forget that dry time is critical, so it’s better not to rush the process.

Step 5: Seal the Paint

While you don’t need to seal all types of spray paints, it is recommended to use a sealer for longevity. A clear and waterproof spray paint sealer can help preserve the paint color and make the coat more durable.

If you’re using waterproof spray paint, skipping the sealer for indoor projects is okay, but if the paint is only water-resistant, the sealer is necessary to protect surfaces from water and moisture damage.

five steps to apply waterproof spray paint
Steps to apply waterproof spray paint

FAQs

How do you waterproof spray paint?

If you want the paint to be weather-resistant, it’s best to apply waterproof spray paint. You can also use a waterproof sealer on top of regular paint to make it last through rain and snow. While a single coat of sealer may be enough, you can add multiple layers depending on your project’s vulnerability to moisture.

Can you make spray paint last on metal?

Yes, you can make spray paint stick to metal and also last by using a primer underneath. For permanent results, it’s recommended to use water-based acrylic paints or oil-based paints. Don’t forget to apply a sealer at the end to make the project waterproof.

How long does spray paint take to harden fully?

Different types of paints have varied drying times. Water-based paints harden more quicker than oil-based paints. Lacquer spray paint is the quickest to dry, with only 20 to 30 minutes of drying time.

Lastly

A spray paint DIY takes time and energy, so why not make it waterproof while you’re at it? With the right tools and technique, you can achieve a flawless finish and also make your project last longer with techniques that that explain how to apply waterproof spray paints.

spray paint waterproof

Is Spray Paint Waterproof – Insightful Detailed Guide

Spray paint is probably the easiest way to paint an object, making it a preferred addition in most DIYs. However, many worry if it will last or simply wash away with water. I will help you debunk misconceptions about different kinds of spray paints and reveal the answer to the most common question: “is spray paint waterproof?”

In general, spray paints are not waterproof, but they are water-resistant. However, exterior-grade spray paint is waterproof and can withstand weather elements like rain and snow. You should read the label carefully before buying spray paint to ensure it can resist moisture.

Several types of spray paints are available on the market, but if you know what you’re looking for, selecting the perfect one for the job gets easier. With my help, you will be able to identify which spray paint is waterproof the next time you walk into a paint shop.

Is Spray Paint Waterproof or not?

Some types of spray paints are waterproof, while others are not. Most of the options you will find are water-repellent but not completely waterproof.

However, exterior spray paints are formulated to endure weather elements, including moisture. But when dealing with outdoor spray paints, it is important to prep and seal the surface correctly to get the full benefits of waterproof paint.

How To Tell: is Spray Paint Waterproof?

You can tell whether the paint is waterproof by carefully reading the spray paint’s label. If the product is waterproof or water-resistant, the manufacturer will indicate it on the container. But if you don’t see a mention, it will probably wash away effortlessly.

What Makes Spray Paint Waterproof?

Waterproof spray paints contain a special water-repelling ingredient in their formula. When added in proper ratios, this increases the paint’s ability to withstand water. However, all paints aren’t created equal– some have a higher level of water repellency than others. The amount of water-repelling agents used in the paint formulation changes its characteristics and response to water.

Waterproof vs. Water-Repellent- What is the Difference?

Moisture causes mold, mildew, and rot in wooden and masonry surfaces. For this reason, many people prefer to use spray paint that doesn’t let moisture in and keeps the color looking vibrant for longer. There are two basic types of spray paints: waterproof and water-resistant. But the difference between them can be confusing for first-time buyers.

Waterproof paint combines pigments, resins, and solvents that create a moisture barrier on any surface that it’s applied. It also has additives that prevent the growth of mildew and mold. Thus, this type of paint is water-insoluble and designed to keep the color and finish intact even if the surface comes in regular contact with water. You can apply a sealer to build another protective layer against water for a long-lasting finish.

On the other hand, water-resistant spray paints can endure water, but they aren’t entirely waterproof. They will eventually break down, fade, chip, or wash away over time. So, waterproof paint will give the best results if you’re planning to paint on a surface outdoors, in the bathroom, kitchen, or any other area with more humidity and moisture.

is spray paint waterproof

Different Types of Spray Paints

There are two broad categories of spray paints: they are either water-based or oil-based. When we say a color is oil or water-based, we are actually referring to the type of solvent used in the paint. It is the liquid component that evaporates when the paint dries.

  • Water-based paints are more eco-friendly and don’t require mineral spirits or turpentine for cleaning. Instead, it easily washes away with soap and water. They can expand and contract with changing weather conditions, making them more resistant to cracking.
  • Oil-based paints dry harder, which makes them more resistant to wear and tear. But since the paint dries harder, it doesn’t have the same flexibility as water-based paints and becomes dry, brittle, and chalky over time.

Here are a few basic types you can buy from a paint store. Each of them is either water-based or oil-based.

1.   Acrylic Paint

Acrylic, also known as Tempera, consists of pigments, flour, and water. So, is acrylic spray paint waterproof? No, it’s not.

This chemical-based paint is often used for painting cars, but it has to be covered with a clear coat or sealant to make it waterproof. Applying acrylic paint to surfaces is relatively easier, but it cannot endure moisture once the paint dries.

Montana Black Color Spray Set of 12 one of the best choices for acrylic spray paints for graffiti arts.

51d5u5bP97L. AC SL1000 Is Spray Paint Waterproof - Insightful Detailed Guide

2.   Epoxy Paint

Epoxy spray paint can be water-based or oil-based, so you can choose one according to your preference. This type of paint contains adhesives and polymers, which makes it resistant to stains, chemicals, and water. Although some epoxy paints are labeled waterproof, they don’t respond well to heat or frost.

However, the Rust Oleum Appliance Epoxy Spray Paint works best on appliances and can resist heat and frost in long run. The rust-resistant, white paint provides a glossy finish to the product and lightens up the surroundings.

718jsguOHjL. AC SL1500 Is Spray Paint Waterproof - Insightful Detailed Guide

3.   Chalk Paint

This is another water-based paint widely used for spray painting furniture, patio, floors, etc. It is not waterproof, but it’s water-resistant. However, an added layer of sealer or lacquer can significantly increase the paint’s life and protect surfaces from damage by water.

The Rust Oleum Chalk Spray paint is an amazing quality paint spray paint which comes in many colors and shades of blue, grey, rust and white.

61ip7kR33qL. AC SX300 SY300 QL70 FMwebp Is Spray Paint Waterproof - Insightful Detailed Guide

4.   Enamel Paint

Enamel paints can be water-based, oil-based, or lacquer-based, and the solvent used determines how weather-resistant the formulation is. Therefore, if you’re wondering, ‘is enamel spray paint waterproof,’ you should know that oil-based or lacquer-based enamel paints are waterproof and can be used without a sealer.

Water-based enamel paints are not waterproof like the other two variants and need the surface to be primed and sealed to make it withstand moisture.

Rust Oleum’s Enamel Gloss Spray Paint is one of those high quality spray paints that come in vibrant colors. It is a must try for all your DIY projects.

711aPkWcaSL. AC SL1500 Is Spray Paint Waterproof - Insightful Detailed Guide

5.   Latex Paint

Latex paint is often referred to as ‘acrylic latex’ because of its similarities with acrylic paint. However, a prominent difference between them is that latex is water-based while acrylic is chemical-based. Moreover, latex paint is cheaper and easier to use, but it’s not as weather-resistant as acrylic, making it more suitable for indoor projects.

I would highly recommend Krylon Latex Aerosol Spray paint as it gives the most durable finish.

51MSPlQhm+L. AC SL1000 Is Spray Paint Waterproof - Insightful Detailed Guide

6.   Metallic Paints

Reflective pigments in metallic paints make them ideal for projects where you want a high-shine finish. Moreover, this paint is a cheaper alternative to enamel-based colors but still offers impressive results.

Water-based metallic spray paints are suitable for indoor projects as the paint is not waterproof.

However, exterior-grade metallic paint is mostly oil-based and highly resistant to water, making it a waterproof spray paint for metal and other surfaces.

You will find a number for different metallic shades with the Rust Oleum Metallic Paint and Primer in One, extremely durable and highest quality spray paint for a smooth finish.

71dlwh7RklL. AC SX300 SY300 QL70 FMwebp Is Spray Paint Waterproof - Insightful Detailed Guide

Here is a little summarized version

Type of Spray PaintWater-Proof X-BasedSealant Required
Acrylic Paint Chemical BasedYes
Epoxy PaintWater BasedYes
Epoxy PaintOil BasedYes
Chalk PaintWater BasedYes
Enamel PaintWater BasedYes
Enamel PaintOil BasedNo
Enamel PaintLacquer BasedNo
Latex PaintWater BasedYes
Metallic PaintWater BasedYes
Metallic PaintOil BasedYes
Waterproof Spray Paints

*Although some paints do not require sealant, however its highly recommended for a long lasting finish

FAQs

Does rain wash off spray paint?

Wet paint easily washes off with rainwater, but waterproof paint will not wash away with rain if it has dried for long enough.

Is spray paint permanent?

Spray paints can last between three to five years, depending on the quality and type used. Exterior-grade waterproof paints have a longer life than regular spray paints.

Does spray paint need to be sealed?

It is not necessary to seal spray paint, but it is recommended to seal the surface after using water-based paint. Also, if you are working on an outdoor project, a sealer can help increase the life of the coat.

Does spray paint come off easily?

You can clean water-based spray paints quickly when wet. Oil-based paints require turpentine and other strong chemicals for removal.

Is spray paint toxic?

Most spray paints are toxic as they contain hazardous elements called VOCs. Also, you should always wear protective gear when using spray paint to keep yourself safe.

Is spray paint heat-resistant?

Yes, some spray paints can resist high heat levels and you can use them for painting outdoor surfaces and appliances such as ovens.

Conclusion

Whether or not you need waterproof paint for your project depends on its exposure to humidity, moisture, and water. Most outdoor spray paints are waterproof, but the longevity of the color depends on how you prepare, prime, apply, and seal the paint.

We hope to have answered your question “is spray paint waterproof” in detail. So, here is a detailed guide on how to apply waterproof spray paint, check out the details and let us know what you think.