Interior Paints

pexels mikhail nilov 6933429 Can Wall Paint Be Used On Furniture - Wood, Metal or Plastic 

Can Wall Paint Be Used On Furniture – Wood, Metal or Plastic 

Done painting the interior and exterior walls? It’s time to finish the revamping process and get done with the furniture. With years of painting experience, I know all the paint hacks that helped me save money. You can benefit from it, too, and keep saving for your dream vacation or the car you’ve always wished for!

You can use wall paint on wood or wood furniture; however, you must thoroughly prep and prime the surface. Acrylic wall paints work best on wooden furniture, while oil-based wall paints are great for painting over metallic furniture. 

Wall paints are the best alternatives to specialized furniture paint. So if you have leftovers from when you last painted your house, this is your sign to bring out those buckets and show some creativity on your furniture. However, you must ensure that you are using the correct techniques so that the paint doesn’t chip off easily from the surface.

Wall Paint Vs. Furniture Paint

Is wall paint the same as furniture paint? The answer is NO!!

As the name suggests, wall paints are specialized paints manufactured on interior and exterior walls. Depending on the base type, their usage can also be extended to painting doors and windows. 

On the other hand, furniture paint is specialized in painting home furniture. It contains synthetic resin, which is often not present in wall paint. Furniture paints are designed to adhere to surfaces like wood and metal, whereas the adhesion for wall paints is specified to concrete and bricks. 

The color scheme of both the paints varies greatly since walls are usually painted with lighter colors, and the furniture is generally dark. You will find numerous color options for wall paints but furniture paints are limited and mostly revolve around natural wooden colors. 

Both wall and furniture paints can range from matte to glossy finish so you can choose them per your preference.

Wall PaintFurniture Paint
Wide variety of colorsLimited colors are available
Wall paints are easily removableYou cannot wash all furniture paints
Easy application of paintRequires hands-on techniques to paint
Wall paints do not have synthetic resinSynthetic resin is present

How to use wall paint on wooden furniture?

Most of the home furniture is made up of wood. The royalty in beds, cupboards, dressers, and tables comes from the finest woods crafted with precision. 

However, wooden furniture may lose its charm over time, calling for a paint coat. 

If it is your first time painting wooden furniture, here is a detailed guide on how you can go about it.

Step 1 – Clean the furniture 

Before painting your wooden furniture, you must thoroughly clean its interior and exterior. This is because leftover dirt or grime compromises the paint’s adhesive power. This will eventually cause the paint to peel off very soon. 

We recomment that you scrub the entire surface with a sponge, and use stain remover where required. 

Once you are done cleaning, ensure the wood surface is dried before moving on to the next step. 

Step 2 – Scrape off old paint 

Your old furniture will probably have traces of half-chipped paint. So the next step is to scrape it off before you start sanding it. Use a metallic scraper for this purpose, as it will help you to get rid of most of the paint. 

Step 3 – Time to sand it up

Once you are done with the scraping part, next in line is sanding. Begin sanding with 60-grit sandpaper. Apply gentle, even pressure so that any surface inconsistencies are removed. You might also need a sanding sponge to cover areas that are not easily accessible. Sanding will also scrape off any remaining paint particles from your furniture. 

Grab a sand paper that suits is the right fit for your furniture. On most furnitures, sand papers ranging from 120 grit through 220 grit works best. However, higher levels upto 600 grit can be used for specific types as well. 

Step 4 – Patch up the cracks 

It would be best if you moved on to mend the cracks. If your furniture has nail holes or damages, you must patch them up first. Then, use wood putty to fill up the holes and gaps in the wood. Refer to the instructions provided on the package regarding the drying time of the product. 

Step 5 – Sand it again 

Once the wood filler has dried completely, sand the surface again. This time, use 320 grit sandpaper and continue with even strokes. The purpose of sanding again is to provide an ultrafine, smooth finish to the wood and a uniform surface for painting.

Wipe down the sawdust with a tack cloth before you prime and paint.

Step 6 – Apply primer 

Apply two to three coats of primer to have a solid paint base. The paint will not adhere properly to the wood surface without the primer and will chip off at the slightest pressure. You will also require multiple coats, as the wood absorbs some paint. 

The key here is to get a primer suitable for the type of paint you will use and apply it before you apply it. 

Step 7 – Apply the first coat of paint 

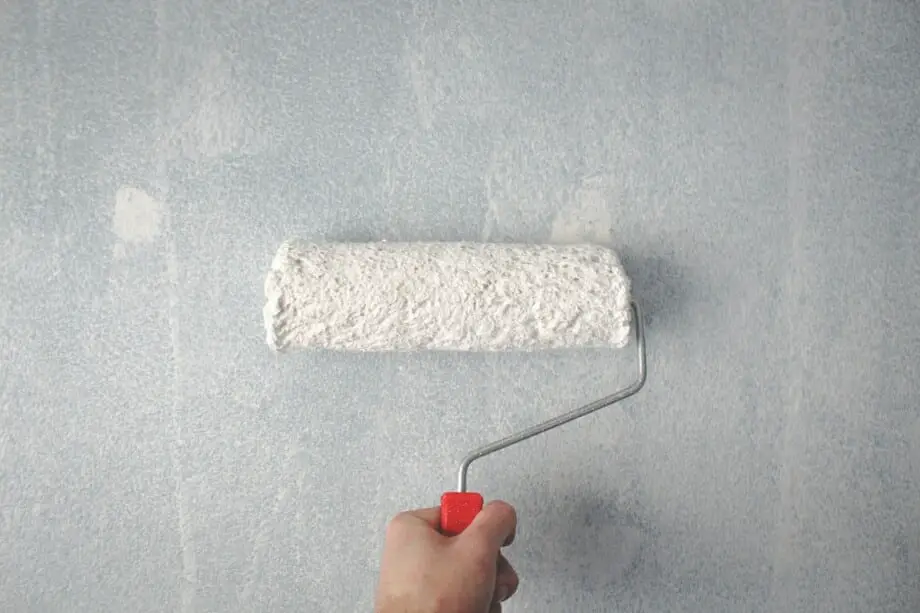
After the primer has dried completely, apply the first coat of your paint. Make sure you spread thin, even coats, instead of thick ones. Use a foam roller for this purpose, as it provides better application than bristle brushes. For non-flat areas, you can use a foam brush too. 

Step 8 – Sand in between coats of paint 

Wait for the paint to dry completely after applying the first coat. You can also speed up the drying process.

Once it has dried, then you must sand the surface again. Sanding after every coat of paint smoothens the texture and ridges created while painting. Move the sandpaper quickly and lightly, so you do not scrape the paint off. Wipe off the dust before moving on to the next coat. 

Special Note: Brush in the same direction as the wood grain

All brush strokes should be in the same direction so your final coat is clean and solid. Painting along the wood grain gives off a professional look to your work. 

Wall Paint on Metallic Furniture.

Metal is prone to oxidation and rust, so special paint is manufactured for painting metal surfaces. It is not recommendable to use interior or exterior wall paints on metal furniture since they do not contain essential ingredients to protect against rust. They will crack and peel off very soon, leaving behind ugly streaks. 

However, if you have some leftover wall paint and wish to utilize the stuff, these are a few following points that you must ensure for the success of your plan. 

  1. You can only use wall paint on metallic furniture after thorough cleaning and priming. 
  2. After prepping the surface, it is highly recommended to use oil-based exterior paint.
  3. Even though wall paint will not last much on metallic furniture, this can be a temporary solution for a year or two. 
  4. Take great care of your newly painted metallic furniture, making it worth the time and energy spent painting it. 
  5. Using wall paint with proper steps and care will surely make your furniture appear just as new.

Wall Paint on Plastic Furniture.

Besides wood and metal, some of our furniture is made of plastic, such as chairs and small storage boxes. 

I recommend replacing plastic furniture after it seems worn out or if it doesn’t go with the outlook of your revamped room.

Wall paint is not meant to be used on plastic furniture. If you’re persistent about painting plastic furniture, using wall paint will be a waste of money

Cleaning the chairs with ammonia solution to get rid of molds, followed by prepping, priming, and the paint application, will make the plastic accessories look worse. Not only will you waste the paint you could use elsewhere, but your plastic furniture and precious time.

The only paint that can be used on plastic chairs is spray paint, which doesn’t require extra work. Unfortunately, the spray paint will fade away if furniture like chairs is exposed to the sun.

How long does wall paint last on wood?

Wall paints are specialized to adhere to surfaces like concrete, bricks, stone, or clay. Wood has an entirely different texture; thus, wall paints will not adhere efficiently to wood. However, you can use wall paint on wooden furniture after it has been prepped and primed using the method mentioned above.

Appropriate sanding and prepping can ensure that the paint lasts 5 to 7 years on a wooden surface. The duration of how long the paint will last on the surface depends on the quality of the color used. Low-quality paints can fade away or begin chipping off early, and great-quality paints can even exceed the limit. 

You must maintain the paint on wooden surfaces and repaint wooden furniture every 5 to 6 years. Taking good care of your paint is essential to make it last longer. Thus, you mst ensure that you’re regularly cleaning the surface with a mildly wet cloth followed by a dry one. Also make sure to prevent your furniture from direct exposure to harmful sun rays.

Frequently Asked Questions

What kind of paint do you use on furniture?

Depending on the results and aesthetics you need, you can choose latex, chalky, acrylic, oil, or milk paint for your furniture. Each kind of paint comes with its advantages as well as disadvantages. So if you’re wondering what paint to use on furniture, you must go with acrylics on wood but oil-based paints for metallic furniture.

Can you use regular paint on wood?

Yes! You can use regular paint on wood after the wood is adequately primed. Traditional acrylic paints are the most common type used for painting wooden furniture. Before applying the paint coat, you must ensure that you prime and seal the surface. 

Can I use regular paint to paint a dresser?

Yes, you can certainly use regular paint to paint a dresser. If you have leftover wall paint, it is one of the best ways to utilize the material and not let it go to waste. In addition, if you know how to use wall paint on furniture, and are aware of all the prepping and priming techniques, regular paint on the dresser will do just as well as specialized furniture paint.

Does wall paint work on furniture? – Summing it up

Wall paint is the number one alternative to specialized furniture paint. You can achieve great results with a little extra effort of deep prepping and priming the furniture surface. Using flat wall paint on furniture is a little time-consuming. However, it saves you a lot of money, so the two balance out. 

If you’re painting wooden furniture, make use of the acrylic paints, however, if your furniture is metallic, ensure using oil based paint for optimal results.

No more furniture to paint? Have a look at how you can use leftover wall paint on canvas!

old house 2205492 1280 Can I Use Interior Paint Outside- Read the Details Here

Can I Use Interior Paint Outside- Read the Details Here

I had some paint left over after painting my living room walls. Awakening the artist inside of me, I decided to give the front wall of my house a new look.It turned out excellent and I was so glad that my paint didn’t go wasted. However, what happened a few weeks later was disappointing.

You cannot use interior paint outside because of the difference in chemical compositions of both paints. Interior paint cannot bear the exterior environmental effect. Even though interior paint does not cause any damage to the exterior walls, it will fade away and chip off faster. You will have to repaint your walls soon, adding to the overall painting cost.

The color started fading and the paint started chipping off. I had to repaint my front wall. If you also want to save time, effort, and money, you must know how interior paints are different from exterior paints, so you do not end up making the same mistake as myself. 

Difference Between Interior and Exterior Paint

They have different names for a reason. Interior paints are different from exterior paints mainly because of their chemical composition. Even though all kinds of paints are made up of binders, additives, and pigments in a base, each component has different properties for different purposes.

1. Binders

Paint binders or resins are chemicals that hold the pigment together to create a durable film. The paint’s adhesion, durability, and stain resistance depend on the binder type. Paints contain different kinds of binders depending on their use.  

Exterior paints use acrylic as the binding resin. Acrylic binders are soft and ideal for outdoor environments. These resins can expand or contract in different temperatures while maintaining their form. They also prevent the paint from cracking and peeling off under sunlight or heavy rainfall. 

On the other hand, interior paints contain thick, rigid resins. They are neither flexible nor able to withstand the harsh outdoor environment but can hold up against regular cleaning and scratches. Interior paints use silicone or epoxy binders, unlike acrylic ones, which do not have a harsh odor.     

2. Additives 

Modern paints contain additives to enhance the paint’s appearance and function. Additives are added in the form of thickeners, emulsifiers, leveling agents, and antimicrobials. Additives used in interior and exterior paints vary because they serve different purposes.   

Interior paint additives include levelers, conditioners, glitters, and scents since they are used for decorative purposes. They give extra gloss and shine to your interior to make it look fresh and smooth. Interior paints do not contain harmful chemicals, making them safe to use indoors. 

Exterior paints, on the other hand, have numerous additives in them. They contain antimicrobials, UV blockers, and many VOCs (Volatile Organic Compounds) that help the paint toughen and protect against harsh climatic conditions. 

3. Pigments

The finely ground particles that provide paint its color are the pigments. Paint pigments are of two types; organic and inorganic. Organic pigments are transparent and derived from animals or plants, while inorganic pigments are obtained from mineral rocks. The durability of the paint depends on the type of pigment used. 

Exterior paints contain inorganic pigments. Since they are based on metallic compounds, their particle size is big and provides high coverage. Inorganic pigments are resistant to UV lightening and temperature changes, making them suitable for outdoor usage. They are more durable and long-lasting than organic pigments. 

Interior paints have organic pigments because the house’s interior is not exposed to direct sunlight. Organic pigments are not UV light resistant and offer much less covering capacity. Due to their small particle size, they blend easily into the solvent and give off a cleaner look when applied.  

4. Bases

The base is an essential component of paint. It is the solvent into which all other ingredients are mixed and applied. It evaporates after some time, leaving the binders, additives, and pigments attached to the surface. Regarding bases, there are two kinds of paints; water-based and oil-based. 

  • Water Based Paints

Water-based paints, also known as latex paints, use water as their solvent. All the pigments, resins, and additives are dissolved in a water solution. This kind of paint is used for interior painting because it is easier to clean and scrub. If you’re wondering, “can I use interior latex paint outside” you probably can.

The water molecules evaporate at room temperature and are not adapted to direct sunlight, so it is better to keep them for indoor use only. Water-based paints do not give off any harsh odors and are suitable to be used indoors. 

  • Oil Based Paints

In oil-based paints, mineral spirit or turpentine is used as the solvent. Oil-based paints make the pigments appear brighter and smoother than water-based paints but take longer to dry. They also have a strong smell and require sunlight to be cured. 

Oil-based paints provide a thicker and harder coat but are challenging to clean. They can resist moisture and sunlight and last longer than their water-based counterparts. 

Interior PaintExterior Paint
Contains silicon or epoxy bindersContains acrylic binders
Less or no VOCs. UV blockers and antimicrobials are absent. VOCs, UV blockers, and antimicrobials are present.
Bleaches out under direct sunlightCan withstand direct sunlight 
Pigments are organic Inorganic pigments are used
Water-based paintsOil-based paints 
Bearable odorUnpleasant odor
Differences Between Interior and Exterior Paints

What happens if you accidentally use interior paint outside?

Using interior paint outside is a common mistake many people make. However, this does not cause any damage. The only drawback you will face is that your paint will chip off faster. This is because interior paints do not contain additives used in exterior paints to make them last longer. 

The Interior paint is thin and does not adhere well on outdoor surfaces. It cannot withstand the harsh outdoor environment; as a result, cracks appear faster, and the paint peels off quicker. 

If you have accidentally used interior paint outside, you can seal it by applying a coat of exterior paint sealer. This will provide some resistance, and the paint will not come off too soon. 

Using interior paint over exterior paint

If you had your house painted by a professional before you decided to take up this job, you are most likely to have exterior paint outside.

Technically it is possible to use interior paint over exterior paint. Still, it is essential to remember that different kinds of paints vary significantly in formulas and should not be used interchangeably. 

Interior paint does not adhere well to exterior surfaces or paints. It is recommended not to use interior paint over exterior paint because it will peel off quickly. However, if you have no alternative, you can use a primer. Priming the surface will help the paint bond properly and make the paint last some time. 

Remember that interior paint cannot withstand temperature changes, UV radiations, mildew, or humidity. And despite using a primer, the paint will not last very long.  

Hybrid or Universal Paints

A particular type of paint, commonly known as hybrid or universal paint, bridges the two kinds of paints; interior and exterior. These have been designed specifically for people who wish to give their houses a fresh look without professional help.

Hybrid paints are a unique combination of oil and water-based paints that provide excellent adhesion and durability on indoor and outdoor surfaces.

While these paints are suitable to be used on the interior and exterior of your house, they do not provide heavy-duty resistance on the exterior. Hybrid paints lack the additives necessary to protect against mildew, moisture, and temperature fluctuations. They are ideal for use indoors and in small outdoor projects like doors, window frames, and even garages. 

Hybrid paints last longer than usual interior paints but are not as tough as actual exterior paints. 

FAQs

Can you mix interior and exterior paint?

Interior paints and exterior paints should not be mixed. Combining the two shortens the paint’s lifespan, affects its consistency and makes application difficult. 

In addition to that, the mixed interior and exterior paint cannot be used indoors due to the high amount of VOCs present in exterior paint. And when it is used outdoors, it increases the chances of mildew and paints peeling faster. 

Is exterior paint thicker than interior paint?

Yes, exterior paints are thicker than interior paints. This is because most exterior paints are oil-based. Oil-based paints are thicker than their latex or water-based counterparts, which is why they appear thicker in consistency. 

Another reason is the addition of heavy-duty additives and binders. These are added to exterior paints to provide resistance against extreme weather changes and prevent it from cracking or peeling off. 

Is exterior paint more expensive than interior paint? 

Exterior paints are comparatively more expensive than interior paints. This is because exterior paints have additional chemicals and compounds that make them resistant to the outdoor environment. They are formulated to last longer and provide extra protection from moisture, mildew, and UV radiation.

In contrast, interior paints are more basic in their formula and are cheaper than exterior paints. 

How long will the interior paint last outside?

Interior paint is not designed to withstand the outdoor environment and does not have the adhesive qualities of exterior paint. Using interior paint outside does not last long and starts to crack and peel off very soon. 

Depending on the weather conditions, interior paint lasts only about a year or two maximum when used outside. 

Using interior paints outside – Know the consequences

If you think of using the leftover interior paint outside like I did, you might have second thoughts. Interior paints differ significantly from exterior paints. They cannot survive the rough conditions the exterior walls are exposed to and fade away rapidly. There are paints specialized for the exterior walls; you should use them if you wish to paint outside.

I also realized that I painted the house wall at the wrong time of the year, if you do not want to do the same mistake then check out our post which tell you details about the best time of the year to paint.

interior design 6691116 1280 Best Time of the Year to Paint Interior - Expert Advice

Best Time of the Year to Paint Interior – Expert Advice

Excited to paint your house walls? I was too. But back then, I knew very little about paints, especially how the different seasons affected the application process. Now that I know how important it is to pick the right time of the year to start painting, you can too learn from my experience.

The beginning of the winter and the initial weeks of summer are ideal for painting indoors. Humidity levels at that time are low, and the temperature suits all kinds of paints, such as oil-based or acrylics. However, one must avoid extreme summers to prevent the paint from diluting or extreme winters to prevent paint from thickening.

There is much more to know about how different weather conditions can affect your paint application process. First-timers might be surprised to see how different types of paint react differently to hot, cold, and moderate temperatures, but do not worry, I got your back.

Painting in Spring 

Spring is perhaps most people’s favorite season. With winter winds coming to a calm and trees blossoming, it is the perfect weather for all kinds of indoor and outdoor activities. Spring season is also the peak time for renting or selling your property. Painting your house during this season will give it a fresh look and certainly attract the attention of more customers.

Waiting to get the house painted in the summer can add up the expenses, so it is better to utilize the springtime. 

Humidity levels are pretty low in spring, eliminating any chance of moisture getting trapped during the painting process.

Moreover, the temperature remains cool throughout the day, which aids in drying the paint faster.

I suggest, spring is a great time to freshen your home and prepare for the coming year if precipitation levels are minimal. 

Painting in Summers

Painting your interior in the summer can be pretty beneficial at times. The warm summer air causes the paint to dry faster, and you can complete multiple coats of paint in a day. The bright daylights give you the perfect view for choosing the ideal shade for your rooms.

The paint also gets thinner in consistency due to high temperatures throughout the season. This paint, when applied, gives off a smoother and cleaner finish to your walls. 

While there are many advantages of painting homes in summer, there are a few drawbacks to it. The hot weather can cause fatigue and make painting a tiring process. 

High humidity is another common problem in summer. It can interfere with drying time despite the warm air. Therefore, you must always check the humidity, but checking the weather channel or using a hygrometer and ensure that the levels are between 40% – 50%.

Sometimes the temperatures get as high as 104°F, and the paint starts cracking. This happens if the base work loses all its moisture before the new coat of paint is applied. To avoid that, ensure the walls are cleared of pipe leakages, or this problem will persist for a long time.

Painting in Fall 

While we approach fall, we can prepare our place for the most awaited Christmas season, just a couple of months away. Fall happens to be a great time to paint your interior and prepare the house for upcoming family gatherings and events. 

Painting in the last weeks of fall is an intelligent choice as it can prepare you for the Christmas holidays and allow you to flaunt your interior to family and friends. 

Since temperature fluctuations throughout the day are minimal, the paint will spread and dry out evenly.

Most professionals agree that it is the best season for indoor painting. A lot of factors contribute to fall as an ideal season for painting, as summers can be pretty hot, while winters are freezing. The perfect balance between hot and cold weather is achieved during the fall.

Another advantage you get is that the chances of precipitation in fall are lesser, and humidity levels remain low. The dry atmosphere and cool breezes throughout the day provide great assistance for the paint to dry and properly bond to the wall surface. 

Painting in Winters

Painting in winter has its fair share of pros and cons. 

Winters are seasons of lower humidity or, in other words, a drier season which enables quick drying of the paint on the walls. That helps to save time which is speeds up the painting process.

However, the consistency of the paint often becomes denser in extremely cold temperatures. This makes it challenging to adhere to the walls. You can add some thinner to the paint to avoid this problem.

Oil-based paints oxidize slower in cooler temperatures. Moreover, extreme cold temperatures also reduce the evaporation rate of solvents like water, which can delay drying. 

As mentioned earlier low humidity can always help speeding up the process, and therefore the best part time in winters specifically are the first few weeks as the humidity and temperature levels are just perfect for interior painting. 

SeasonProsCons
Spring Minimal temperature fluctuations spread paint evenly. The inside of your house can look as fresh as the blooming flowers outside.High precipitation can sometimes hinder painting projects. 
Summer Thinner paint consistency results in smooth application. Extreme heat causes cracking High humidity dries paint slower.
Fall Moderate temperatures ideal for interior painting Low humidity and atmosphere moisture. Adherence problems if temperature drops as low at 50 degrees. 
Winter Low humidity dries paint faster  Dense paint makes application difficult. 

Frequently Asked Questions

What is the best month to paint indoors?

March, April, and November are the most suitable months for painting indoors. The temperature ranges from 50 to 65 ℉, perfect for most oil-based paints. 

It is just the right temperature for the paint to dry quickly, and the humidity is relatively low. The paint forms a solid protecting layer with the walls.

Can you paint in temperatures below freezing point?

Painting at temperatures below the freezing point is not possible. The drying time of the paint increases with the decrease in temperature, but at temperatures this cold, the paint can also solidify. Most paints lose their consistency which makes application difficult. Even the special cold-weather paints cannot be applied at temperatures below 35 F.

What happens if it starts to rain while you are painting indoors?

As long as the paint is not coming in contact with the water directly, it won’t affect it all. However, if the paint on the walls hasn’t dried, it may take longer to dry out. Since rain raises the humidity levels, the drying process of the paint is affected negatively. 

Does paint fade away faster in summers?

Paint fades away faster when exposed to sunlight directly for more extended periods. There’s hardly any chance of sunlight hitting straight on the interior walls; hence indoor paints are not affected by much sunlight. The fading process of indoor paint remains the same for all seasons.

In a Nutshell

Painting indoors is an exciting activity you can carry out with your family or your best friend. There is no right or wrong season to paint indoors. However, before you begin, check for the temperatures and humidity levels in your surroundings. Most people prefer painting during the winter since the season is the dry season and avoid painting during the rainy season as the humidity levels are at their peak.

Check for our article on best humidity levels and temperature to paint in so there’s nothing left that you could go wrong with.

Let us know if you have any questions in mind, and we would love to answer them.

pexels malte luk 1669754 Do I Need Primer for Interior Walls Before Painting

Do I Need Primer for Interior Walls Before Painting

“Practice makes perfect” stands true especially when years of experience are at hand. Painting over the past few years has taught me a great deal, and it is absolutely necessary to understand how to go about your painting job to achieve the desired post-paint look on the walls: Primer is one important ingredient. 

Yes, it is necessary to use a primer before you start painting indoors. It will give a professional finish on your walls. Skipping the primer will require additional coats of paint to even out the walls. However, you can skip the primer if you are reapplying the same shade of paint to freshen up the walls.

Painting your house is time-consuming, and you want to do it right the first time to make it last for years to come. Make sure you know how important primers are for your interior walls prior to painting them. 

Primer: the foundation for paints

Primers are the undercoats that prepare your walls for painting. They cover the surface entirely to provide a smooth-finished canvas for you to begin your painting project. Without primer, it would be “painting on a crooked surface”. 

Primers look like sticky paints or sealants that adhere to the walls flattening its surface making it perfectly clear of any cracks, cuts, dents and gaps. After applying primer, painting becomes a piece of cake, and you will love the final results. 

Benefits of using a primer

Interior paints can last up to 10 years if painted using a primer. Below are some ways you can benefit from priming the interior walls before painting.

1. Optimizes painting surface

Primers can help optimize the painting surface by filling in the cracks and pores on the interior walls. The formula of primers contains sealants that get inside these pores and cracks and adhere firmly. This prevents the primer from coming out after the painting process is finished. 

Moreover, depending on the type of primer, it can also absorb moisture in the walls or eradicate excessive dryness so the paint can sit neatly on the walls.

2. Improves adhesion and compatibility

Primer’s adheasive properties cannot be taken taken for granted. A glue-like base for your drywall, it really helps the paint stick neatly to the surface. They hold the paint in place and enhance the top coat finish minimizing the chances of top coat failure. 

Skipping this step will be a risk that could give you chipping, pealing and staining on walls, just a couple of months into the future. Redoing your walls would cost you money and time both.

Primer will make your walls hold the paint longer, look neater, feel smoother and smell fresh for a years ahead. 

3. Saves time and money

Without the primer, you may have to use multiple coats, more than the usual requirement, to achieve smoother finish and to get the desired color of the paint on the wall. Extra paint could be utilized to eradicate the unwanted marks on the walls. All that means a great amount of extra paint is going to be used unnecessarily. 

Using a primer will create a base that makes your desired color pop out in fewer coats, covering all those unwanted marks on the walls, and saving a great amount of time and money. 

Moreover, paints applied over primers last longer, and gives an amazing ambience to the room.

4. Provides quality and finishing to the walls

No one wants walls that begin cracking in a couple of weeks after painting, nor does anyone want ugly spots to reappear. We also do not wish to see textured walls after working all day long for a smooth finish, right!

Smoothing out uneven surfaces and adding value to the paint quality is what a primer does. Invest in a primer if you want a professional-like finish on your interior walls.

Why is priming a wall necessary?

1. To avoid tough stains and bad odor on walls

Priming becomes necessary if your walls have any stains, marks and dark blotches. These could be cooking stains, grease spots, water damage, or your child’s random artwork. Priming will permanently seal any of these, so they can be hidden but most importantly they remain hidden years after the paint is applied. 

Another most amazing quality of a premier is it cover any terrible odors that the walls soak up over time. If your walls smell of cigarette smoke, pets or any other unpleasant odor, you must prime your walls before repainting them. 

2. Before painting drywalls

Drywalls cannot be painted directly. The surface of fresh drywall is highly porous, and absorbs most of the paint. If the walls are not primed, you will need to apply multiple coats of paint before you get an even finish, and then too the finished wall is not guaranteed to meet your expectations.

The primer get into the holes and cracks and prevents the paint from getting absorbed into the drywall ensuring a smooth paint application. The paint adheres better on a primed wall and is not affected by temperature changes inside the room. 

3. To avoid moisture-related damage in humid areas

Wall paint is more prone to damage in areas with high humidity. Moisture can cause molds to form and paint to peel off faster. Priming the walls is essential especially in kitchens or bathrooms where the humidity is very high as it will prevent any damage and ensure longevity.

4. While painting repaired walls

When walls are repaired, patches of spackle are left behind. The application is not smooth if the paint is applied directly on these patches. Cracks may reappear after some time, so applying a coat of primer is necessary before painting the wall to reduced these imperfections.

5. Applying paint to glossy surfaces

The paint does not adhere well to glossy surfaces. It needs a slight texture to stick to the walls. Using a primer before painting the wall provides a base for the paint to set in. 

The primer will adhere to any shiny surface, and you can easily apply paint on top of it. 

Sometimes these surfaces need sanding and rebuffing before they are primed.  

6. Porous surfaces

Materials like untreated wood on fresh drywalls are highly porous. They will absorb any paint applied to them right away. To prevent this from happening, priming the walls is very important. 

A coat or two of primer is good enough to fill the pores and prepare the wall for painting. Primer acts as a sealant, saving the paint from getting absorbed into the walls.

7. Changing the color of your wall

If you want to change the outlook of your room, you might want to switch to a color on the other end of the color wheel. Transitioning from a darker to a lighter shade is impossible without using a primer. The primer neutralizes the color tones so that whatever shade you apply can appear as desired. If you skip the primer in such conditions, a mixture of the two colors will be the final result. We do not guarantee how you will like it.

What happens if you do not use a paint primer for your walls?

In some situations, such as the ones mentioned above, priming walls before painting becomes necessary. If you skip primers in mandatory-to-prime situations, you’ll spend a lot of money on paint and wouldn’t even be able to achieve the perfect finish.

If you decide not to prime, you might face these issues:

  • Absorption of paint into cracks and pores will give an uneven surface even after multiple coats. 
  • Paint will fade faster, revealing the spots and blotches underneath it.
  • Changing wall color of your wall will not turn out as you required so you might have to compromise it, multiple layers might get you close though. 

When can you skip the primer?

Now that you know when to use primer on interior walls let’s have a look at situations where you can skip the priming process.

Paint is infused with primer

Applying multiple coats of primers, waiting for it to dry out, and then applying coats of paint can be too much for someone working individually. To ease the process of efficient painting, paint companies have now begun manufacturing paint and primer in one paint bucket. 

Since these paints are already infused with primer, you can skip the primer coat and start directly.

Reapplying the same color on walls

Priming the walls can be a lot of work. Even though it saves you money in the long run, it still appears as a considerable cost at the painting time. If you want to freshen up your interior walls with a similar shade of paint, you can start directly with the paint and skip the primer.

Frequently Asked Questions

How long after priming can you paint?

Most latex-based primers take between 30 minutes to an hour to dry out. However, it is suggested to wait for 3 to 4 hours before beginning to paint the walls. This ensures that the primer has dried off completely regardless of the temperature and humidity in the room. If the primer is wet, the paint may appear to wrinkle on the walls.

How many coats of primer do you need?

Ideally, you need two coats of primer before applying paint to the walls. In some cases where you have stubborn red or orange stains or persistent odor, you might as well have to apply three coats of primer to achieve optimal results.

Is it OK to paint over old paint without using a primer?

It is okay to paint over old paint without using a primer. Suppose you are reapplying the same color. However, if you are switching to an entirely different shade of paint on your interior walls, the color may not show up without using a primer. In such cases, applying a primer is important.

Is paint and primer in one better?

Paint and primer in one, as the name suggests, is paint mixed with primer. Not only it helps save time, but also has better-adhering properties. It tends to cover up odor and stains, fill in pores, and cover cracks. 

However, since paint and primers have different functions, mixing them compromises the individual function of each. Thus, the products are better off used separately. 

FINALLY – Is it necessary to use primer for interior walls?

Priming the walls is an intelligent decision. You can easily spot the difference between a primed wall and an unprimed one. It may appear as a factor that adds cost; however, you can save a massive sum of money by reducing the number of coats you need to apply and the frequency of repainting the interior walls.

If you were to begin painting without a primer, this is your sign to get one now. 

best temphumidity Best Temperature and Humidity for Interior Painting 

Best Temperature and Humidity for Interior Painting 

Painting your interior could be one of the most exciting projects that you’re taking up to give your house a renovated look. However, factors like temperature and humidity drastically affect the outlook of the paint.

The ideal indoor paint temperature is between 50 and 90 degrees Fahrenheit, and the recommended humidity is between 40% and 50%. In case of deviations from these temperature and humidity ranges, the paint may take too long to dry or begin chipping off, resulting in an untidy finish.

Painting the entire interior of the house by yourself sounds exciting. However, it is a highly time-consuming, considerably costly, and reasonably exhausting job. We’re sure you do not want to mess it up, wasting your time and money. Read along to stay on track and understand how the temperature and humidity affect the paint and what precautions you can consider rocking your self-painted interior.

Types of PaintsBest Temperature Range Ideal Humidity Range
Oil Based Paints40°F – 90°F40% – 50%
Latex / Water Based Paints50°F – 85°F40% – 50%

Best Temperature to Paint Inside

If it is your first time painting the inside of your house by yourself, we understand that it can be the most exciting thing that you can think of. However, rushing to open the paint cans and beginning to apply coats on the walls is not an intelligent choice.

Before you take the paint brushes in your hand, ensure that the temperature is ideal for painting. 

The best temperature for interior painting with oil-based paints ranges from 40°F to 90°F. However, latex-based paint dries well at temperatures between 50°F and 85°F.

If temperatures deviate from the optimal ranges, you may experience discolouration, bleaching, fading, lifting, cracking, bumps, blisters and flakiness, which we are sure you do not want.

Ideal humidity for painting indoors

Just as the temperature is a crucial factor determining how the paint sets on the walls, so is the humidity level. Therefore, you should only begin painting after checking the humidity levels.

The ideal humidity for painting indoors ranges from 40% to 50%. Anything higher will take too long for the paint to dry. 

This means that you will have to dedicate more than 24 hours to this venture. Moreover, the longer it takes for the paint to dry, the higher the chances of it clumping together on walls. Painting in low humidity levels does not fulfill the walls’ moisture requirements and causes paint chipping during the drying process.

Whether it is your first time painting your interior or you’ve been doing it for quite a few years now, the paint must look neat on the walls. This can only be achieved if humidity levels are kept into consideration.

When to Start Painting –  Earlier in the Day or When the Sun is High?

Experts recommend not to paint under direct sunlight. Therefore, it is a good idea to begin painting earlier in the day. This way, you will be done with quite a chunk of what needs to be painted, and an actual drying process can begin.

If you begin painting when the sun is high, chances of uneven drying and chipping increase. You may also notice brush marks or lap marks on the walls. Moreover, the UV rays from the sun can change the chemical composition of the pigments present inside the paint and eventually bleach out the color too.

Beginning earlier in the day will also help you manage time efficiently, and you can probably get it done before the sun goes down.

FAQs

Should you paint indoors on a rainy day? 

There is no problem in painting indoors on a rainy day as long as you ensure the rain does not reach the inside of the house. A few things that you must keep in mind are;

  • Humidity levels should not be too high, or the paint won’t dry. 
  • The painting surface must be at least 50°F 
  • The paint will take longer to dry. 

How can I tell what the humidity is in my house? 

The easiest way to measure the humidity in your house is using a hygrometer. It will provide you with an accurate reading of the humidity levels in your house. 

You can also perform the ice test if you do not have a hygrometer. A hygrometer gives you a general idea of whether the humidity is low or high. 

Apart from these methods, various weather applications are also available for this purpose.

Is 70% humidity too high to paint? 

70% humidity is considered too high to paint. Due to the air’s moisture content, evaporation slows down to the extent that the paint takes considerably longer to dry. This consumes extra time and doesn’t give off a neat look.

The ideal humidity for painting indoors is 40 – 50%. However you can use a dehumidifier to reduce humidity indoors.

What paint is good for high humidity? 

Satin or semi-gloss paints are the best kind of paints to use in a high humid area. These paints provide a hard finish that is moisture-proof.  

The glossy surface deflects any moisture, unlike the matte paints that absorb it. 

How to reduce humidity in your house?

Using a dehumidifier can help you reduce humidity if you have already begun painting indoors. An alternative to that would be putting up oscillating fans in the room. You can also use an industrial blower to get rid of excess moisture. 

Does humidity affect drying of oil-based paints?

Yes, humidity affects the drying of oil-based paint as well. When the surrounding air is saturated with water vapors, it doesn’t leave much room for any solvent to evaporate. Oil-based paints use turpentine as a solvent, making it difficult to evaporate when the humidity levels are high.

To sum it up..

Ideal temperature and humidity for interior painting are equally important as the type and brand of paint you are using. 

Let us know if you still have any questions, and we would love to answer them. We wish you all the best in this indoor painting venture.