Interior Paints

pexels max vakhtbovych 8146147 What Is The Best Paint Finish For Interior Ceilings

What Is The Best Paint Finish For Interior Ceilings

Selecting the best paint finish for ceilings among all the options available can be confusing. Is flat better than an eggshell finish? Or is semi-gloss finish the ideal paint for creating an inviting open space? Getting these answers before you start a DIY paint job is crucial to help you make a careful selection that’s durable and attractive.

The most popular choice for interior ceiling paints is a flat finish because it conceals surface imperfections and gives your ceiling a clean look. Since ceilings aren’t exposed to a lot of wear and tear, the lack of washability of flat paint isn’t a major concern for users.

Although most homeowners prefer a flat finish, there are some drawbacks to using the paint. To counter those problems, eggshell and satin finishes are also becoming popular as durable ceiling paint options. 

Let’s find out how to select an ideal ceiling finish for individual rooms without compromising quality and durability.

Which paint finish is best for ceilings?

Flat finish

Flat finishes are ideal for ceilings because they are the most forgiving when it comes to surface imperfections. They effectively hide blemishes without calling attention to the ceiling in particular. The non-reflective finish of flat paint reduces glare from artificial lights overhead and creates the illusion of open space.

However, there’s a downside to this paint, and that is they’re not as easy to clean compared to other glossier finishes, but that shouldn’t be a concern since there are usually no spills on the ceiling anyway.

Matte finish

Matte finish paints are similar to flat, but with a slight sheen. They absorb light and effectively cover any surface imperfections on the ceilings. Another perk of using this paint on the ceiling is that you don’t need several coats since it’s highly pigmented and delivers excellent color payoff.

The only downside to matte paint is that it’s not easily cleaned, but that shouldn’t be a problem if it’s used on the ceiling.

Satin finish

Satin finishes are also good options for ceilings. It has a velvety soft finish with a small amount of sheen, which looks flattering. Satin sheen helps add warmth to a room and makes it feel more inviting.

Eggshell finish

The Eggshell paint finish is another durable choice for ceiling paint. It is slightly glossier than satin, with some texture on it. It’s a popular choice among homeowners who don’t want their ceilings to look dull and inconspicuous. The eggshell finish also adds character to your ceilings and makes them a noteworthy part of the room.

Here’s how the finishes fare against each other:

TYPE OF PAINTFlat FinishMatte FinishSatin FinishEggshell Finish
Is it durable?It doesn’t last as long as other finishesIt is more durable than a flat finishYesYes
Can it be easily cleaned?NoNoYesYes
Does it cover ceiling imperfections?YesYesYesNo, the sheen highlights surface imperfections
What is the sheen level?No sheenVery Low SheenLow sheenLow sheen
Details about the preferred Ceiling Paint for Interior Walls

Should ceiling paint be flat or eggshell?

Choosing between flat and eggshell finish is a personal choice because they’re both excellent options for painting the ceiling.

If you have an accent wall in a room, you’d want to draw attention to it and not the ceiling; therefore, flat paint will work better in that case. On the other hand, if you’ve chosen a matte finish for all the walls in a room, an eggshell finish on the ceiling will add some depth to the overall look.

Another factor you should consider is the room where you want to paint the ceiling. Does your room require washable ceiling paint? Like the bathroom or the kitchen. If that’s the case, you should prefer a finish with some sheen to easily wipe away dirt, food splashes, mold, etc.

If your house has high ceilings that hardly require any cleaning, a flat finish will work perfectly and last as long as any other glossier finish.

Best paint for ceilings- Flat or satin?

A flat finish looks clean and crisp on ceilings, but many homeowners find it too dull for their taste. They opt for satin paints because it has a low sheen that looks flattering on both walls and the ceiling. Satin finish generally looks more soothing to the eyes, regardless of whether it is white or some other color.

Another reason for choosing the satin finish for ceilings is that its low sheen makes it easier to clean compared to flat paints and doesn’t highlight surface imperfections.

The right paint finish according to room type

Did you know that you don’t have to use the same ceiling paint in every room? That’s because only some spaces need washable paint, and most rooms can do without touch-ups for many years.

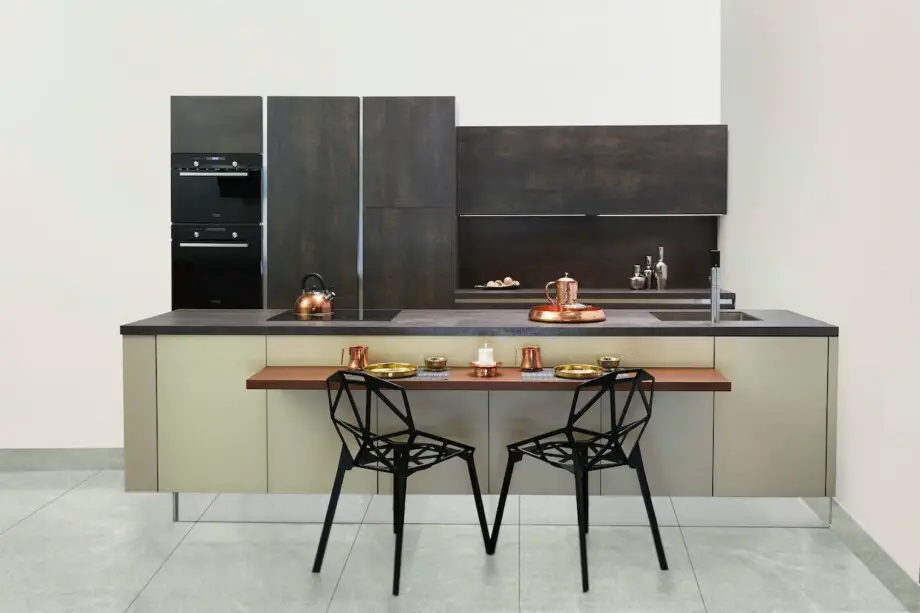
Best paint finish for kitchen

Here’s a question that I often hear, ‘What paint finish is best for kitchen ceiling?’ and my answer is always the same: ‘One that you can clean.’

pexels max vakhtbovych 7061668 What Is The Best Paint Finish For Interior Ceilings

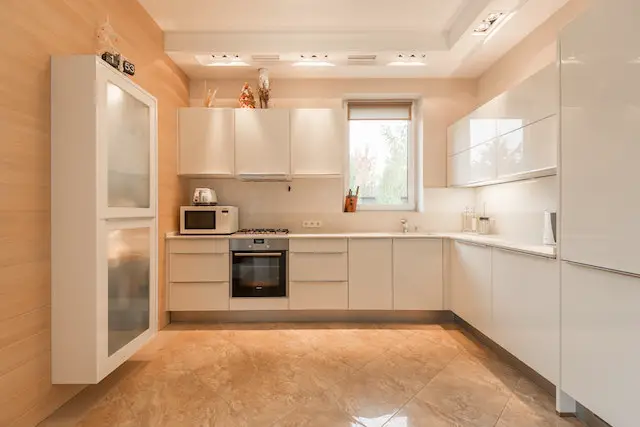
Kitchen ceilings see a lot of cooking action every day- from blender jug mishaps to sauce splashes; there is a long list of things that can stain the ceiling.

Therefore, you need a paint finish that is durable and washable. While semi-gloss is definitely an option you can try, an eggshell finish looks more aesthetically pleasing on kitchen ceilings.

Best paint finish for bathrooms

Your bathroom ceiling has to pay the price for all those steamy showers you enjoy during the winter. From splashes to sprays and lingering mists, bathrooms have plenty of moisture to trigger the bubbling and peeling of the ceiling’s paint.

For this reason, you need a lasting finish that withstands moisture and remains to look good as new for longer.

pexels max vakhtbovych 6436764 What Is The Best Paint Finish For Interior Ceilings

An eggshell finish is better suited to such spaces since it is mold-resistant and washable. And if you apply flat paint on your bathroom ceiling, it may result in the paint peeling over time.

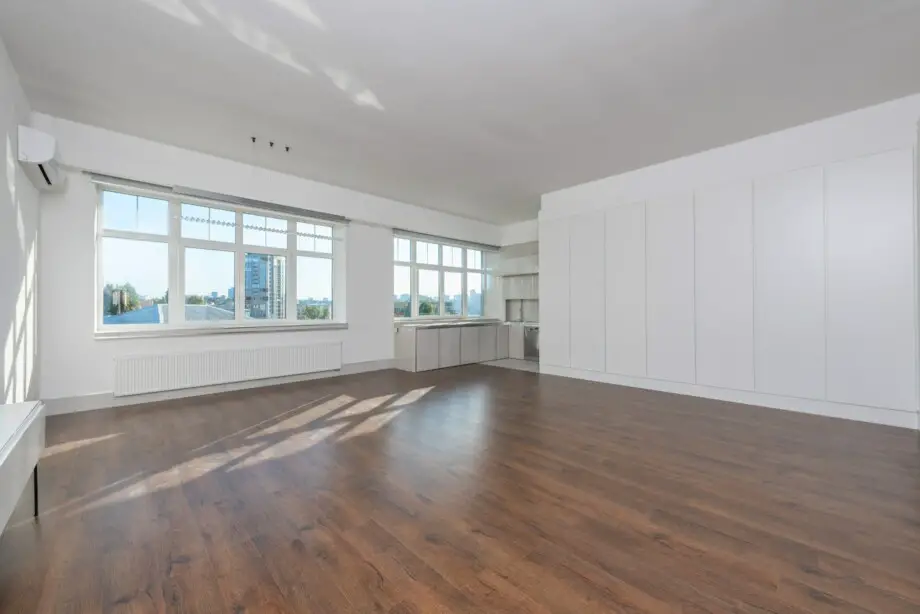
Best paint finish for living room and bedrooms

Living rooms and bedrooms can get away with less durable paints on the ceiling because the chances of splashes, mold, and mist are almost non-existent there. Flat colors are ideal for these rooms because they don’t draw attention to themselves or take away from the space’s décor.

pexels max vakhtbovych 6238614 What Is The Best Paint Finish For Interior Ceilings

Qualities you need from ceiling paint

Before you pick out the best finish for ceilings, let’s first understand how we want the ceiling paint to perform. This will help you figure out which paint sheen is better suited to your needs.

1. Make the room look bright and spacious

The ceiling is often overlooked in a home DIY painting project, but the truth is giving your ceilings a fresh coat of paint can elevate the entire appearance of your room. So, the first thing you want from the paint finish is to create an illusion of spaciousness.

Paints with sheen bounce off light; therefore, a high or low-sheen finish will make the room look brighter. Dark colors can make your ceilings appear lower than they are, whereas light hues, mainly white, gives the perception of an open space.

2. Cover ceiling imperfections

Ceilings are often painted in a lighter color compared to the walls. This often results in your eyes wandering to the ceiling every time you look up. For this reason, your paint finish should give a clean look, concealing blemishes and covering any imperfections.

A flat finish is best for camouflaging wall imperfections as it absorbs light. Paints with more sheen reflect light and highlight surface flaws. Hence, a flat finish will help create a smooth canvas that draws attention to the walls if your ceiling is less than perfect.

3. Easy to clean and maintain

Interior paints are subjected to considerable wear and tear, especially in high-traffic areas. This makes the paint’s washability a crucial factor when choosing between finishes. However, all rooms do not require washable ceiling paint, for example, the foyer, living room, staircase, etc.

As a rule of thumb, glossy finishes are easier to clean and washable, making them ideal for rooms susceptible to dirt, grease, and mold, like the kitchen and bathrooms. On the other hand, flat finishes are difficult to clean with water, so you may need to repaint your ceilings more frequently to keep them spot-free.

If you’re interested in learning which paint finishes are washable, check out my blog for more details.

4. Durable and long-lasting

When you paint your house, whether it’s the ceilings, walls, trims, or doors, you want it to last a long time, so you don’t have to repaint it quickly. If we compare different paint finishes, high-gloss is the most durable because it dries to a hard finish and resists wear and tear.

However, high gloss isn’t recommended for ceilings but for trims, doors, and other objects we want to draw attention to. As we move down on the spectrum, from high-sheen to flat paints, the durability of the finish continues to fall. However, eggshell and satin finish sits in the middle, making them lasting and more durable than matte paints.

pexels f h 2747901 What Is The Best Paint Finish For Interior Ceilings

Are flat and matte finishes the same thing?

We have discussed how flat finishes are ideal for ceilings, but there’s always some confusion about whether flat and matte paints are the same. Let me clarify so you can choose a ceiling paint more confidently.

A flat paint finish has zero sheen, while matte paints have a very low level of shine. For this reason, matte colors are also referred to as velvet finish. So, if you want a flat finish for your ceilings but with a hint of sheen, matte paints are what you need.

Can I use glossy paint on ceilings?

Since high-gloss paints are the most durable, you may be tempted to use them on your ceilings. However, you should know that glossy paints are better suited to objects with a smaller surface area. This is why high-gloss and semi-gloss finishes are considered the best paint finish for doors, trims, and window panes.

You can read more about what paint finish is best for doors and trims, so you buy the best type for each of them.

While too much sheen might not look flattering on ceilings, several interior designers prefer to use paints with low-to-mid gloss levels to draw attention to the ceiling. This is because when natural light enters a room, the ceilings often look darker than the rest of the walls. Therefore, a slightly higher level of sheen on the top helps bounce the light around, making the ceiling of the room light up as well.

So, if you want to increase the light in your living space, you can opt for an eggshell, satin, or silk paint finish.

Can I use wall paint on the ceiling?

If you’re repainting your home, you must have probably decided on buying acrylic or latex paint for your walls. It’s normal to wonder if you can apply the same paint finish for walls to ceilings, but no matter how much you’re tempted to paint the whole room with a single paint, stick to ceiling paint to color your ceilings.

Here’s why:

Latex-based wall paints are effortless to apply on walls but tend to drip a lot during the process. Now imagine using the same paint on your ceilings; do you think it will stick properly? Probably not.

The reason is that wall paints have a low viscosity, and that causes drips. Therefore, applying wall paint on ceilings is a recipe for paint drops all over the floor. Not only does that leave you with a hard-to-clean floor, but it also creates unsightly areas on the ceiling that are difficult to fix once the paint dries. On the other hand, ceiling paint has a higher viscosity, and that prevents it from dripping as much as wall paint.

The viscosity difference isn’t based only on observation but can also be measured. The standard unit of viscosity of a Krebs Unit (KU) and most ceiling paints have a higher KU than interior wall paints.

Using ceiling paint will make the painting process smoother and result in neat ceilings. Since it is a higher-viscosity paint, it contains more solids, so you can expect fewer drips and very little paint mist.

FAQs

Are ceilings usually painted in satin or eggshell?

The most popular finish for ceilings is flat color, but many homeowners are moving towards low-sheen options like satin and eggshell paints to add some definition to their rooms.

Why does my ceiling look patchy after painting?

The primary reason why your ceiling may look patchy after paint application is low-grade paint. Sometimes, not applying a thick enough coat of paint can cause the same situation.

Is it still in style to paint ceilings white?

Most homeowners prefer white color because it reflects the most light and makes any room appear brighter.

Should you paint the ceiling or walls first?

It’s always recommended to paint the ceiling first because you don’t have to worry about paint drips or over-sprays. However, you can paint the walls first, too, as long as you hang plastic sheets on the walls when you start painting the ceiling.

Conclusion

Applying a fresh coat of paint on your ceilings can help elevate the entire look of the room. But before you start any project, it’s best to identify which paint type and finish are best suited for that surface.

After reading this article, you can pick paint for your ceiling without worrying about messy application or short-term results. For an even better result, find the best temperature and humidity for interior painting before you start.

pexels bennie lukas bester 1217205 How To Remove Paint From Hair - 10 Solutions That Work

How To Remove Paint From Hair – 10 Solutions That Work

There’s a lot of excitement when you start a painting project. You get your paint supplies out, throw on your painter’s attire and begin creating your masterpiece.

Unfortunately, the realization that your hair is vulnerable to paint splatters settles in too slowly, and you’re left with paint splotches on your head and colored strands once the project is over.

This is when the excitement turns into panic, and you wonder, ‘how can I remove paint from my hair without damaging it?’

The first thing you can try is to comb the paint out. If that doesn’t work, wash your hair with a clarifying shampoo. Baby oil, vegetable oil, or dish soap also works wonders for cleaning oil-based paints from the hair. Interestingly, peanut butter and toothpaste can also be used to remove paint from hair.

Luckily, there are several DIY solutions to this common problem. So, let’s go over each of them, and you can decide which one you want to try out first.

Does paint come out of hair?

Yes, it does! Even if it doesn’t come off right away, it’s not an impossible task.

If you get stuck with paint in your hair, you first need to establish the type of paint you’re dealing with. So, check the label on the spray paint to find out if it’s water-based or oil-based.

Water-based paints are easier to remove compared to oil-based paints, and the method for paint removal is different for each.

The second factor that will affect which paint remover works best for you is the amount of paint you have accidentally splashed on your head. If it’s just a speck or two, the colour should clean up easily, but if it’s a considerable amount, you may need more than one trick to remove it completely.

Tricks to clean paint from hair

Here are a few tried and tested solutions that might work for you too.

1. Comb through your hair

Sounds too good to be true? Sometimes the simplest tricks are the most effective.

If you have splashed a little paint in your hair, the comb might be the easiest way to remove it. However, you can’t expect it to clean a giant splotch of colour, so be reasonable with your expectations.

pexels artem podrez 7504719 1 How To Remove Paint From Hair - 10 Solutions That Work

Hold the strand of your hair with paint on it, and make sure to pull it slightly, so the strand is stiff. Now comb slowly through it with a fine-toothed comb focusing more on the paint-stained area. Use a back-and-forth motion to loosen the paint.

Work in small sections and keep going until you start seeing some progress. Remember to be patient and not dish out your frustration on the strand of hair you’re holding.

Try me: Put your fingernails to good use and scrape the paint off your hair by pinching them together and pulling your nails down the strand.

2. Wash with a clarifying shampoo

Depending on the type of paint you’ve used, you might be able to shampoo it out from your hair. Water-based paints are user-friendly because they can be cleaned easily, so give a strong, clarifying shampoo a shot.

pexels nataliya vaitkevich 8467970 How To Remove Paint From Hair - 10 Solutions That Work

First of all, loosen the dry paint by combing through your hair. Follow it up by making them wet and applying a liberal amount of shampoo. Scrub the stained strands for a few seconds with your fingertips.

Rinse out the clarifying shampoo and check whether all the paint is gone. If you’ve missed a few spots, repeat the same process again, but leave the shampoo in your hair for longer.

Pro Tip: Too much shampoo can dry your hair, so remember to apply a conditioning treatment after rinsing it.

3. Clean with dish soap

If shampooing doesn’t work, it’s time to go a notch up. Dish soap contains more potent chemicals that can cut tough grease and stains.

pexels karolina grabowska 5241044 How To Remove Paint From Hair - 10 Solutions That Work

This time I won’t ask you to apply dish soap to your hair liberally but recommend a spot treatment instead. Take some dish soap on your fingers and gently work it on the hair strands with paint. You can also use a washcloth or a comb to give the dried stain a nudge.

Scrub the paint for a minute or two and thoroughly rinse your hair out with water. If this trick works in the first round, perfect! If not, you can always repeat the process two to three times.

You can also use dish soap to wash off paint from clothes, but we have you covered if you want to find out more ways to remove paint from clothes.

Pro Tip: Let the dish soap sit in your hair for fifteen to twenty minutes before washing it out. Just remember to apply a conditioning treatment at the end.

4. Try vinegar

Vinegar is a great choice for removing paint from hair, especially apple cider vinegar. However, it has a pungent odour that might turn you off.

pexels maksim goncharenok 4663133 How To Remove Paint From Hair - 10 Solutions That Work
Spraying vinegar into hair

If you’re not bothered by the smell, go ahead with this tip.

Massage a good amount of vinegar into your hair, making sure the painted strands are completely soaked. Allow it to sit for a few minutes before detangling the strands with a fine-toothed comb. The natural acid in the vinegar helps break down the paint particles, making it easier to comb the dried paint out.

Finally, wash your hair with a regular shampoo to clean the vinegar and any paint residue.

5. Use toothpaste

When you try to remove paint from your skin, you turn to a loofah or a pomace stone to shake things up. But the same cannot be used on your hair, so you have to find the next best thing that is gritty and abrasive enough to clean paint from your hair.

Toothpaste has the perfect texture to remove paint from hair strands. So, start by squirting some onto the colour in your hair and massage it in thoroughly. You should stretch the strand you’re working to reach tough spots.

Rinse the toothpaste out to check if all the paint has come off. If your hair is back to its original state, give yourself a pat on the back. If not, repeat the process until you remove every speck of paint.

6. Try baby oil

Oil-based paints can be tricky to remove, and your best bet is to use an oil-based cleaner. Oil helps soften the dried paint and makes cleaning it easier.

You can take some baby oil on a cotton ball and dab it on the painted strands. Make sure to cover the stain completely by rubbing it in as much as possible. Leave it in your hair for around 30 minutes, then try to run a detangling comb through it. 

BABY How To Remove Paint From Hair - 10 Solutions That Work

You should be able to comb out the paint completely, but if some residue remains, you can repeat the same process again.

Finally, wash your hair and condition it as usual.

7. Apply olive oil

If you find baby oil to be too mild for the job, try olive oil instead to break down the paint. Apply a liberal layer of the oil to your hair, making sure to massage it into the strands with dried paint.

Let olive oil sit in your hair for fifteen to thirty minutes before combing the strands with first a wide-toothed comb and then a fine-toothed comb. In the end, simply wash your hair with shampoo.

A perk of using olive oil is that it makes your hair soft and shiny. So, even if it doesn’t clear all the paint away, you will be left with lustrous locks in the end.

Try me: Coconut and vegetable oil work the same way as olive oil. So, feel free to use whichever one you have in your pantry.
pexels towfiqu barbhuiya 11809347 How To Remove Paint From Hair - 10 Solutions That Work

8. Clean with peanut butter

Did you think peanut butter was only good for making a sandwich? You’d be amazed at how this delicious snack can remove oil-based paints.

Before you start racking your brain trying to figure out why peanut butter is a good paint remover, let me give it to you straight. Peanut butter is made primarily of oil, making it perfect for breaking down oily substances.

The grit in peanut butter works the same way as sandpaper so massage some into your hair from where you want to remove the paint.

pexels roman odintsov 5149348 How To Remove Paint From Hair - 10 Solutions That Work

Allow it to sit for some time before checking its progress. If the paint starts to move around, it’s time to wash it out. But if the stain doesn’t budge, apply more peanut butter and wait a few extra minutes before washing your hair.

9. Use a chemical like turpentine or paint thinner

If you have exhausted all natural paint removers but still need to get rid of the paint in your hair, it’s time to bring in the big guns. Just be aware that strong chemicals like paint thinner, turpentine, or mineral spirit can damage your hair. For this reason, I am mentioning them near the end of the list.

These harsh chemicals can eat away the paint and remove it effectively from your hair. All you need to do is soak a rag with the chemical paint remover of your choice and wipe down the hair with dried paint on it.

In a few wipes, you will begin to see the paint coming off bit by bit. Reapply the chemical as needed and keep wiping until all the paint is removed.

Wash your hair thoroughly to ensure all the chemicals are removed. You can shampoo your hair twice just to be safe, as the harsh compounds can burn through your strands and leave permanent damage.

Pro Tip: Get more details about the two products: turpentine and paint thinner you can check out our blog. 

10. Try WD-40

If you are stuck with latex paint in your hair, you will need a heavy lifter to remove it. Although using on your hair sounds bizarre, it might be the solution you need.

51baYPQEjXL. AC SL1250 How To Remove Paint From Hair - 10 Solutions That Work

Spray it directly on the paint and rub the liquid, so it covers the area entirely. Let it sit for a few minutes so it can work its magic.

Once you start to see the paint move on your hair, rinse it out with warm water.

Pro Tip: Use this trick as a last resort because WD-40 can be very harsh on your hair.

FAQs

How to remove latex paint from hair?

Removing latex paint from hair can be challenging but rubbing alcohol, and other solvents can get the job done quickly. Soak a rag cloth in the solvent and rub the paint stain gently. In a few wipes, the paint will ultimately come off.

How to get enamel paint out of hair?

If you have a few specks of enamel paint in your hair, you can apply a few drops of cooking oil to the affected area. Massage the oil for a few minutes and wash your hair with regular shampoo.

How to remove acrylic paint from hair?

Acrylic paint is easy to clean from the hair. Work up a lather using warm water and shampoo and apply it to wet hair. Allow the product to sit for 10 to 20 minutes before washing it off.

Will nail polish remover get paint out of hair?

Nail polish removers are made of acetone which is a paint thinner. For this reason, it can break up the paint particles in your hair. However, it can cause damage to your hair and should only be used when you have exhausted all other paint-removing options.

Does hair spray remove paint?

Hairspray contains isopropyl alcohol which helps break down paint stains on clothes and hair. Simply spray a generous amount on the paint stuck in your hair and allow it to work its magic for a few minutes. Next, comb through your hair to remove paint residue.

pexels karolina grabowska 5240259 edited How To Remove Paint From Hair - 10 Solutions That Work

Conclusion

The best way to prevent the paint from getting into your hair is by covering it. (Hint: shower cap) But if you do end up getting a few flecks here and there, my tips will help you get rid of them in no time.

So, keep calm and continue painting!

pexels elijah odonnell 3894557 How To Remove Paint From Skin - Face, Hand, And Nails

How To Remove Paint From Skin – Face, Hand, And Nails

Painting is fun- whether you do it on a canvas or your walls. But once the project is complete and you’ve admired your creation, you look down only to find your hands and nails covered in paint.

Understandably, your first instinct is to simply hit the shower and wash everything off, but I have been in the same position too many times to believe that would work.

As a rule of thumb, water-based paints are easier to remove than oil-based paints because they dissolve in water. Fortunately, I have quite a few tricks up my sleeve to help you get rid of oil and enamel paints as well.

You can remove oil-based paints with oil-based cleaners. Sounds simple enough?

You can start with a light layer of mineral or baby oil to rub off the paint from your skin. If that doesn’t work, you can try rubbing alcohol or nail polish remover. For tougher stains, I recommend using vegetable or cooking oils.

But these are just a few cleaners to help you get rid of paint from your face, hand, and nails. In the article, we will discuss several other options that work just as well.

So, stick around to find the fastest way to get paint off hands and nails.

Can you remove paint from the skin?

Yes, absolutely!

The best way to clean paint from your skin depends on the type of paint you’re dealing with. This is important because both types of paints require different cleaning methods. 

Water-based paints require less effort as they dissolve in water, but oil-based paints are trickier and more time-consuming to clean.

Pro tip: The skin on your face is more sensitive compared to your hands and nails, so be gentle with it.

Let’s start with water-based paints.

How to get rid of water-based paint from skin and nails

Usually, paints are easier to remove while wet but water-based paints can be quickly cleaned even after they have dried. If you’re unsure whether your paint is water-based, here are a few examples to help you decide.

  • Water-based paints include:
  • Watercolors
  • Latex interior and exterior paint (spray and liquid)
  • Acrylic craft paint
  • Finger paint
  • Fabric paint
amauri mejia IhXrWDckZOQ unsplash How To Remove Paint From Skin - Face, Hand, And Nails

Now, let’s move on to paint removal methods.

Wash with water and soap

You should always begin with the gentlest cleaning method to avoid exposing your skin to unnecessarily harsh ingredients. Wet the skin with warm water and generously apply soap to the area. Work it into a lather and gently scrub away the paint using your hands or a washcloth.

You can repeat this method two to three times to completely remove any splatters of paint.

Use a pomace stone or salt

If you feel the water and soap aren’t working as well as you’d like, add some salt to the mix to add an element of abrasion. You can also use granulated sugar instead of salt- the idea is to give the paint a push with something harder.

If these natural ingredients aren’t effective, use a pomace stone or a soap bar containing ground pomace. Scrub the skin using gentle motions and rinse well.

Apply isopropyl alcohol

If the water-based paint has dried on the skin, you can dampen a cotton ball with isopropyl or rubbing alcohol and apply it lightly to the paint. Keep scrubbing the stain with the cotton ball for a few minutes until the color starts to dissolve.

Once the paint is wet with alcohol, try the above two steps to remove it altogether from your skin.

pexels greta hoffman 9475421 How To Remove Paint From Skin - Face, Hand, And Nails

How to remove oil-based paint from skin

Oil-based paints can be challenging to remove, especially if they have dried on the skin. They can irritate your skin’s natural barrier because of the petroleum distillates it contains. Therefore, it’s best to act quickly and remove the paint before it damages your skin.

Turpentine and thinner and other mineral spirits are best for removing oil-based paints but aren’t the most skin-friendly. For this reason, you should exhaust other safer options first before jumping to these strong cleaners.

PS: Have a look at a greater understanding of the difference between turpentine and thinner before using them on your skin. 

Use baby oil

Since oil-based paints can be cleaned using oil cleansers, this is the gentlest option of the lot. Apply some baby oil liberally on your skin using circular motions. Keep cleaning the dried paint with the oil until it starts to move around. It may take a few minutes to see visible results but stay patient.

Rinse and repeat a couple of times to get rid of paint splatters completely.

Try cooking spray

Removing oil-based paint with baby oil might test your patience so try cooking spray instead. Spray a thick layer of cooking spray on the paint-covered area. Rub the skin gently to move the paint, and keep spraying more as you scrub the previous layers off.

If you have managed to get a considerable amount of paint on your skin, you may need multiple sessions of cooking spray to get it off entirely.

Wash with dish soap

Dish soap is used to clean up oil spills in the kitchen, then why shouldn’t it work on oil-based paint?

After you’ve used a cooking spray or baby oil, you will be left with oil build-up on your skin. That’s when you can turn to your dish soap and clean the grease and oil off.

Dish soap contains mild cleaning agents that don’t harm the skin, so rest assured that even if the paint doesn’t come off, your skin will be just fine.

Clean with mayonnaise

Who would have thought your favorite sandwich spread could remove tough paint stains?

While this choice may sound surprising at first but just hear me out. Mayonnaise is made with oil, so it works similarly to other oil-based cleaning options. But the highlight of using mayo is that it can be cleaned up easily once you’re done because it’s not entirely oil-based.

It is a safe paint remover that should probably be your first or second choice. Since it’s so mild, it may not get the job done as well as other potent ingredients, but it’s a good place to start.

Petroleum jelly

Petroleum jelly can do much more than just hydrate your skin. It can be used to lift oil-based paints from your skin as well.

Since petroleum jelly has a mild formula, it’s perfect for sensitive skin. While it can be used on your hands, it’s ideal for cleaning paint off the face.

That being said, the mild formula may not be as effective at removing paint as the other options mentioned, but it’s a good start. Just make sure the jelly doesn’t spread paint onto other parts of the skin as you rub it in.

pexels dana tentis 725998 How To Remove Paint From Skin - Face, Hand, And Nails
Petroleum in a Jar

Use acetone

Acetone is the main ingredient in nail polish removers; therefore, it does a pretty decent job of removing paint from the skin. However, it is not a gentle cleaning agent and can cause adverse reactions on the skin.

Although it’s highly effective at getting rid of paint, I recommend using this method only after you’ve exhausted all the others.

Just make sure to use it sparingly to avoid getting your skin worked up. Wash it with warm water and soap immediately to minimize its harmful effects.

Make a paste of coconut oil and baking soda

You can mix 1 cup of coconut or any vegetable oil with ½ a cup of baking soda. Create a thick paste and apply it to the dried paint. Next, use toothpaste to gently scrub away the stain and continue until all the color has come off.

You can wash your skin with dish soap and warm water to remove paint residue and the grease from coconut oil.

pexels polina tankilevitch 3738365 How To Remove Paint From Skin - Face, Hand, And Nails
Coconut Oil and Baking Soda

Try Vick’s Vapor Rub

Did you know that Vick’s Vapor Rub contains turpentine oil? Well, it does, and that too in safer quantities. Therefore, you can use it to remove oil-based paint without aggravating your skin.

Cover the area you want to clean with a layer of Vick’s vapor rub and let it sit for a few minutes. Then gently wipe away the paint with a clean washcloth, some soap, and water.

How to remove paint from under fingernails

The worst side-effect of being an avid paint lover is paint-stained fingernails.

The problem with cleaning fingernails is that the skin underneath is very hard to reach; therefore, removing paint becomes tricky. Your best bet for cleaning your nails is to soften the dried paint first and then attempt to remove it.

If you’re working with water-based paints, any paint on your nails should wash right off with water and soap. In case it has dried down, you can use a sugar scrub or butter to soften the paint before washing it off.

However, if you need to clean oil-based paint, get ready for a long ride.

  1. Scratch as much paint as you safely can from your nails and the skin underneath them.
  2. Wash your hands thoroughly with soap and warm water.
  3. After drying your nails, apply a few drops of mineral oil to the dried paint and massage it in.
  4. Continue rubbing the paint for a minute to soften it.
  5. Use a soft-bristled brush (an old toothbrush can work too) to scrub the paint on top and underneath your nails. Remember to be gentle, as the skin under your nails is delicate.
  6. Wash your hands again with warm water and soap to remove all residue.
  7. Repeat the above process until your remove all the paint from your skin.

Mineral oil is just one option; you can also try the above methods to clean paint from your fingernails. Always start with the mild options first and use a chemical remover only when everything else fails.

Pro Tip: Citrus fruits like grapefruit, lemon, and oranges contain natural acids that help remove paint. They’re also safe to use and won’t irritate your skin.

 Tips to keep paint off your skin

Removing paint from your face, hands, and nails is a time-consuming task that gets even more difficult when you’re tired from completing a paint job. So, instead of focusing on ‘how to remove paint from the skin,’ think about ‘how to prevent paint from getting on your skin.’

Here are a few handy tips you can use the next time you paint.

  • Wear thin rubber or plastic gloves.
  • Wear an old long-sleeved shirt with overalls or long pants.
  • Use a paint roller guard to avoid paint splatters when painting.
  • Add a pistol-grip handle to your spray can to minimize the staining of your trigger finger.
  • Keep a wet cloth handy while you paint to remove any paint splatters immediately.
  • Wear safety gear to protect your hair, face, hands, and clothes from accidental paint splashes.

FAQs

How long does it take for paint to come off the skin?

Water-based paints can come off in a single wash, but oil-based paints may need repeated washing and scrubbing. You can expect it to take two to three days to come off completely.

Does WD 40 remove paint from skin?

Yes, WD 40 can remove paint from the skin, but it has harmful chemicals that can cause an adverse reaction. That’s why you should stick to mild paint removers only.

What happens if you have paint on your skin?

Paint can block the pores on your skin, leading to acne, blemishes, and rashes. Any type of paint pigment prevents your skin from breathing, so you should wash it off entirely while it’s still wet.

Is wall paint toxic to skin?

Wall paints are usually safe, but prolonged exposure to them can sometimes cause skin irritation, a sore throat, and watery eyes.

Final verdict

If you’re someone who enjoys DIY paint jobs, you should make sure to cover your clothes and skin adequately to avoid any paint splatters. However, if you miss a spot, you can try any of the methods above to remove paint from your skin.

We have you covered even if you need help removing paint from your clothes, so check that out as well.

pexels blue bird 7218568 How Much Interior Paint Do I Need - Do The Math Yourself

How Much Interior Paint Do I Need – Do The Math Yourself

Looking for activities to engage with your friends and family? Paint your interiors! It is an answer to dull and faded walls, transforms your space, and, more importantly, gives you cherishable moments.   

As for me, nothing gets me more excited than talking about coloring a home’s interior because indoor painting is what makes a house the HOME.

Being someone with a passion for painting, I often encounter the question: how much interior paint do I need? 

Let’s answer you right away;

To paint a room of 400 sq ft, you need one gallon can of paint. To paint a room of 800 sq ft, you need two-gallon cans of paint and so forth. If we talk about an average room size, 1 gallon can of paint easily covers the entire room with a single coat. 

Now only if things were this effortless…

I know, I know, if you’re up for a DIY job, you have so many questions racked up in your brain, and my job is to get them all answered. 

Keep scrolling to learn about all the ins and outs of the paint quantity you need to make your walls shine.

PS: Other than learning how to calculate the quantity of interior paint needed, some more nuggets of gold await you to ensure nothing goes wrong while you’re on the job. Grab them 🙂

How Much interior Paint Do I Need?

When it comes to painting indoors, there’s some measurement that goes into it. To avoid multiple trips to the store or overspending a lot of money just to see cans leftover in your garage, you need to be sure how many gallons of paint you need. 

A Rule of Thumb to Remember…
One gallon can of paint is needed for a room of 350 sq ft to 400 sq ft depending on the nature of your walls. Textured and porous walls like stucco absorb more paint.

If you can learn how to take your wall’s dimensions and follow the steps coming ahead, calculating the paint quantity will become as easy as ABC.

To make things easier to understand, we will consider the example of a medium-sized room whose length, width, and ceiling height are 12 ft, 10 ft, and 9 ft, respectively.

1. Calculate the Area of Your Room

  • Measure the perimeter of your room which is (length + width) x 2. In our case, it becomes (12 ft + 10 ft) x 2 = 44 ft.
  • To get the room’s total wall area, multiply the perimeter by the ceiling height. (44 ft x 9 ft) = 396 sq ft.

2. Calculate the Area of Windows and Doors

  • It’s obvious not to paint your windows and doors. Which means we will not include their area in our measurements.
  • An average door is 20 sq ft, and an average window is 15 sq ft. The total sq ft of the two is 35. You can measure the area of your doors and windows if you think they’re not a standard size.

3. Measure the Total Room Area Minus the Area of Doors and Windows

  • In our case, we are considering one standard door and one standard window in the room. Now our total wall area of the room becomes 396 sq ft – 35 sq ft = 361 sq ft.

4. Divide the Answer by 400

  • Since we already know that one gallon can is needed to cover 400 sq ft, we will divide the total wall area by 400, and that will be an adequate measurement of how much paint you’ll need. For our considered example, 361/400 = 0.9025. This means 1 gallon can will be enough to cover an average-sized room of 12 ft x 10 ft. 

The above measurements are for a single coat. For two coats, you can simply multiply the number of gallon cans by 2. 

Although the above steps can help you calculate the paint quantity for any dimensions, the below table will help give an estimate of some standard room sizes (the standard area of one door and one window are taken into consideration).

Room SizeRoom DimensionGallon Cans Needed
Small8 X 100.81 ≅ 1
Average9 X 120.945 ≅ 1
Large12 X 161.26 ≅ one and a half gallon 

Pop Out Your Room With Different Trim Colors

Finishing your crown moldings, baseboards, windows, doors, and ceilings in a different color than walls attracts more eyes. 

To calculate the paint needed for trims, multiply the length and width of each trim separately and add all the area measurements to get the total area of the trim. 

This may sound tiresome, but usually, trims are all the same size, so it won’t take you much time to recalculate.

Now to calculate how much paint is needed, simply divide the area by 400, and you’ll get your answer.

PS: Trims do not need much paint, so consider buying paint in quarts rather than spending on an entire gallon. Do check out the details about how to paint trims on our website. 

Time to Paint the Ceiling

To calculate the paint needed for the ceiling, just multiply the length and width of your space. Now divide this area by 400 to get your desired answer. You will likely need paint in quarts for ceilings as well. 

Let’s Calculate the Primer Needed

Did you just think of finishing your walls without a primer? That’s definitely a BIG NO, as your walls may start to crack shortly. Moreover, you will also need multiple coats of paint to finish indoors. You can read more about why primer is necessary and what happens if you skip it. 

Rule of Thumb for Primer…
You may need more primer than you need paint as one gallon can of primer covers 200 sq ft.

To calculate how much primer is required, you just need to divide your total area by 200 and the answer will give you an estimated value of the gallons. 

Go for Paint Calculators

Another way to determine the quantity of indoor paint you need to cover your spaces is to use online paint calculators. The calculator has columns that let you insert the value of your walls’ width and height and mention the doors and windows you have in the room. Moreover, you can also add measurements of the baseboards, crown moldings, and trims in the custom calculator option. After inserting all the values, press the calculate button, and there, you have it – your answer to how much indoor paint you need to coat your spaces. 

PS: Do not forget to paint the doors. You can see the best paint for interior doors and pick the right one for yours.

Some Nuggets of Gold Before You Pick Up the Brush

  • Be properly prepared with the right tools and equipment. Using the right tools can lead to less paint consumption, offer a better and smooth finish without marks, and save you time and cost. 
  • Recoloring your walls with the same old color? Just one coat of paint would do the work. Moreover, the good news is, you won’t need a primer for recoating. Hence, you will be refurbishing your home at a lower cost. 
  • Getting custom paint? Make sure to calculate exactly and get all the batches at the same time for evenly matched hues. You may also need to have a quart or two extra for future touch-ups.
  • If your walls are porous like stucco or you have unpainted dry walls, you may need more paint than calculated. While not mandatory, it is strongly recommended to apply primer to stucco walls to protect color and have consistent shade. You can learn more about priming your stucco walls. 
  • To prevent your walls from having roller lines, ensure your final stroke goes down the wall and not upwards.

FAQs

How much paint do I need for a 12 X 12 room?

For a 12 X 12 room with a 9 ft height, 1.25 gallons of paint would suffice for a single coat. For multiple coats, you can multiply 1.25 by the number of coats needed. 

How much interior paint do I need for a 2000 sq ft. house?

To color a house of 2000 sq ft, you will likely need 5 gallons of interior paint. You are likely to go for a different shade for each room, so it is best to calculate separately for each room. 

How much interior paint do I need for a 1500 sq ft house?

Since 1 gallon covers 400 sq ft, to paint the indoors of a 1500 sq ft house, you will need around 4 gallons of interior paint. However, it also depends on the number of rooms and size of each room, this article covers how you can calculate it precisely to get the accurate answer.

How much interior paint do I need for a 1000 sq ft house?

A 1000 sq ft house can be easily painted with 2.5 gallons of paint. Again, it depends on the size of your rooms, bathrooms and kitchen and what exactly you want to paint. We recommend you to calculate your rooms separately to get exact answer to your question.

Is a 5-gallon can of paint cheaper than 1-gallon? 

Yes, buying a big bucket of paint will cost you less than buying single buckets individually. If you have a big job and a single color is needed, go for a bigger gallon instead of buying smaller gallons. 

Can a quart of paint cover one wall?

A quarter of paint generally covers 100 sq ft area. If the area of your wall is 100 sq ft, it can be easily covered by a quart. For estimated coverage, check out the paint container.

I have a sloping ceiling. How will I calculate the area?

A sloping ceiling makes a triangle, and to calculate its area, you need to multiply the height of the triangle by its base and divide that number by 2. Visit the link to learn more complexities on how to measure rooms with sloped ceilings. 

In a Nutshell

Painting indoors is a fun way to make the most of time with your family and friends or by yourself too. There is no exact quantity to how much paint you will need to color the interior, but a good estimate is 1 gallon for 400 sq ft. You can further calculate the area of the walls and divide that by 400 to evaluate an approx quantity of the containers needed. 

Moreover, if you are thinking of refurbishing your indoors, make sure to check out the best season to paint the interior,  and the best humidity and temperature to paint indoors so everything happens smoothly. 

Got more questions? Drop them in the comments below, and we will get back to you. 

pexels max vakhtbovych 6238608 What Paint Finish Is Best For Interior Doors and Why 

What Paint Finish Is Best For Interior Doors and Why 

Interior doors face the most wear and tear, so it’s important to repaint them once they start looking ugly. However, it’s easier said than done. But by selecting a paint finish that is durable and washable, you can extend the life of your door paint by a few years.

Semi-gloss is the best paint finish for interior doors because it can be cleaned easily. The finish is durable and has a glossy appearance that isn’t too bright but also highlights the surface it’s applied to against flat walls.

Picking a color for doors and trims is relatively easy, but when it comes to selecting the finish, many people need help deciding which way to go. I will reveal how to choose the right paint, finish, and color for your interior doors so you can paint confidently.

Should interior doors be matte or glossy?

There are five paint finishes: high-gloss, semi-gloss, satin, eggshell, and flat. The first two are obviously glossy, while satin sits right between glossy and matte ends. Eggshell has a very subtle sheen to it; therefore, it can’t be called glossy.

As a rule of thumb, glossy surfaces are more durable and easier to clean than their flat counterparts. Since interior doors get their fair share of traffic, it’s just smarter to select a finish that doesn’t ruin easily.

Apart from washability, glossy surfaces have the ability to draw attention to themselves. So, when you paint your doors and trims a high-gloss or semi-gloss finish, it stands out against flat walls, especially if everything is painted the same color.

Hence, a glossy finish is better suited to interior doors surrounded by matte walls.

pexels martin de arriba 9895227 What Paint Finish Is Best For Interior Doors and Why 

Is satin or semi-gloss better for doors?

The satin finish feels velvety to the touch and has a low sheen. Even though it is slightly shiny, it’s still not as glossy as a semi-gloss finish. Satin paints can be cleaned easily compared to flat colors, but the semi-gloss finish is more durable and hard-wearing, making it a better choice for doors and trims.

You can learn more about how washable each paint finish is to ensure you select the correct one for your home.

Semi-gloss or High-gloss: Which one is better for doors?

High-gloss paint is hands-down the most resilient of the lot, and it’s perfect for areas prone to nicks, stains, and high traffic. Naturally, you’d feel it is the better choice for interior doors. But the finish also has a downside: it brings out every surface imperfection.

Moreover, high-gloss can be ‘too bright’ for some people as it gives an enamel/plastic-like finish. Semi-gloss, in comparison, offers all the benefits of a glossy surface without extreme shine.

Why you should choose semi-gloss for your doors

Semi-gloss finish is widely used for doors, door jambs, and interior trims. Homeowners prefer this finish as it can easily withstand continual dusting and rigorous cleaning with a damp cloth. Since doors accumulate dust just like other furniture in your home, you need a finish that can handle regular cleaning. Hence, a semi-gloss finish is perfect for interior doors.

You can use a semi-gloss finish on the following interior doors:

  • Slab doors
  • Solid wood doors
  • Raised paneled doors
  • Hollow-care interior doors

Doors are a focal point on plain walls, and a semi-gloss finish brings attention to just that. In addition, the semi-gloss sheen is available in a wide variety of colors, so you have plenty of options to choose from.

Is oil-based paint more lasting on doors?

Door paints are either water-based or oil-based, and both have different properties.

Latex or water-based finishes are perfect for indoor use because they are quick-drying and have low VOCs. On the other hand, oil-based paints contain harmful fumes you’d rather not expose your family to.

However, oil-based paints are much more long-lasting and durable. They are also ideal for use on wood surfaces.

Generally, water-based paints are recommended for walls, ceilings, etc. but not on furniture or doors. Oil-based paints are best for doors and trims because they dry to a hard finish and can be cleaned easily. So, you can always search for oil-based paints specially formulated for indoor use to counter their high VOC content.

Rust-Oleum Protective Enamel Paint Stop Rusts is an excellent option as it’s an oil-based, semi-gloss paint formulated for indoor and outdoor use. The color delivers a solid finish that withstands abrasion, fading, and chipping, making it an ideal choice for interior doors.

71Hda9pOlqL. AC SX679 What Paint Finish Is Best For Interior Doors and Why 

Also, make sure to paint your doors when the temperature is ideal, so it dries quickly.

How to select a paint color for your doors

Now that we have discussed paint finishes let’s look at how to pick the right color for your interior doors.

You first need to decide how much attention you want to draw to the doors. Do you want them to stand out against the walls? Or do you want them to blend right in?

Painting your doors white against white walls creates the illusion of open space. It brings light into the room and makes it appear brighter. On the other hand, if you paint your doors a statement color such as aqua blue, grey, etc., they stand out because of the high contrast.

Therefore, the color you choose for your doors ultimately depends on the theme you have going in your home and your personal preference.

Can you paint your door and frame a different color?

pexels yelena odintsova 9953504 What Paint Finish Is Best For Interior Doors and Why 

Yes, you can color the door and its frame a different color. For example, if the walls are blue but you want the doors to be white, it is up to you to paint the frame either blue or white.

If you pick blue for the frame, it will blend seamlessly with the wall around it and make the door color pop. Similarly, painting the frame white will make it appear cohesive with the door.

Remember to maintain some kind of balance with the colors. If you paint the doors, walls, trims, and frames all a different hue, the result might look haphazard and all over the place.

It’s better to paint the door frames and trims the same shade, so there is a uniform flow of color around the room.

Helpful tips for selecting door color

  1. If you prefer a classic look, paint the door, trims, and walls the same color.
  2. Whether you have light or dark walls, neutral-colored doors go well with both hues. You can color your doors beige, white, black, taupe, tan, or grey.
  3. If your door has architectural details that you want to highlight, paint it two shades darker or lighter than the walls.
  4. For wallpapered rooms, you can pick a deeper color from the design for the door and the lightest color for the trims. 

Some people prefer a wood finish over other paints. You can check Giani Wood Look Paint Kit For Front & Interior Doors if you have a similar preference. It delivers a faux wood finish and is available in Black/ Walnut, English Oak, Honey Oak, Red Oak, and Royal Mahogany.

71MRnYPp92L. AC SX300 SY300 QL70 FMwebp What Paint Finish Is Best For Interior Doors and Why 

If you plan to renovate your doors, don’t forget to spray paint your trims and breathe new life into your home.

Traditionally, doors are painted the same color as the surrounding walls, but now homeowners opt for stunning accent colors to add some personality to the room. Statement colors work best for doors that have unique molding and paneling. So, if you want to spruce up a dull room, paint your door a bright hue for a pop of color.

FAQs

Is it better to paint a door standing up or laying down?

The best way to paint a door is by laying it down, as it ensures that there are no drips or runs. While painting the door standing up sounds convenient, it will not always give the smoothest finish.

Do doors need two coats of paint?

If you want to achieve good paint coverage, you will need at least two coats of paint on the door. When buying paint, measure the door’s surface and keep two layers in mind.

Should I paint the door frame the same color as the door?

It depends on your preference. If you want the door frame to look prominent, choose a color that is darker than the walls and different from the door.

What is the most popular color for interior doors?

You will find white interior doors in 99% of homes. This is because white creates the illusion of open space and lets the furnishing and décor in the room take center stage.

Conclusion

Selecting the right finish for your doors is easy if you know what you’re looking for. Just remember that doors are constantly handled by people living in your home, which is why you need a durable and wipeable finish. High-gloss, semi-gloss, and satin finishes are all washable, so the final decision is up to you! Make a wise decision today and enjoy a lasting finish for years to come.

pexels tima miroshnichenko 6474305 What Kind Of Interior Paint Is Washable- Pick The Right One

What Kind Of Interior Paint Is Washable- Pick The Right One

Painting your walls a fresh new color can help breathe life into your home. But apart from its aesthetic appeal, you also want your paint job to last. While some wear and tear is inevitable, choosing a washable interior paint can help keep your walls looking clean and as good as new for a longer time.

As a rule of thumb, high-gloss paints are the easiest to clean, but semi-gloss, satin, and eggshell paints are also washable. Usually, flat paints aren’t washable, but a few water-based variants can be wiped clean. On the other hand, matte finishes cannot be cleaned or washed so easily. 

When selecting paint finishes for your home, you must decide which rooms are more suited to a particular paint. Here, you will find out what interior finishes are washable and which rooms are best for them.

Are all interior paints washable?

There is a basic rule when it comes to choosing paint sheens- the more shiny the paint, the more durable it will be. High-gloss paints have the most brilliance, whereas matte paints have the least. Therefore, the former is more durable, and washability is a major factor contributing to its strength.

Here is a rundown of how each paint type fares in terms of washability.

High-gloss paints

High-gloss paints dry to a hard finish and have light-reflecting properties. It is the most durable and easiest to clean out of all paint sheens. The only downside of the paint is that it highlights imperfections on the wall. However, if you prep the surface correctly, you should get quality results.

Semi-gloss paints

Semi-gloss paints are highly durable and are formulated to reflect light like high-gloss paints. However, its sheen is lesser than its predecessor. Semi-gloss paints are washable and easily cleaned thanks to their hard, shiny surface. Homeowners prefer this paint because it instantly adds luster to any object.

The only problem with the finish is that it also brings out any imperfections of the walls it’s applied to.

Satin paints

Satin finish has a subtle sheen that is often described as velvety. If you don’t prefer a lot of shine on the walls, a satin finish is perfect for your home. The paint is easy to clean and also stands up exceptionally well to scrubbing. However, its glossiness brings out imperfections like cracks or poorly patched areas.

If you plan to use satin paints, prep your walls thoroughly for a perfect finish.

Eggshell paints

The eggshell finish lies right between satin and flat paints, and it has a very subtle sheen that resembles a chicken’s egg hence, the name. These paints are durable but not as sturdy as their shinier counterparts. However, it is washable to an extent, and you can wipe off stains more quickly from an eggshell finish than from flat walls.

The upside to using this paint is that it effectively hides imperfections to give a flawless finish. It’s shinier than flat but not as glossy as satin, so an eggshell is a good option if you’re undecided on the two.

Matte or flat paints

If your walls have a story of wear and tear to tell, matte paints are your best friend. The finish can absorb light; therefore, it hides any flaws underneath. Flat paints also have the most pigment, which is why they deliver excellent coverage. The only downside to this paint is that it’s not easy to clean. So, if you get grime on your walls, chances are you will take the paint off as you attempt to wipe it.

Best washable paint for interior walls- Which finish is better for which room?

Every paint finish has different properties; therefore, one type may suit specific surfaces more than others. For example, you would want washable paint for kitchen walls, but the bedroom can get away with a less durable finish.

Let’s find out which paint type is best for individual rooms in your home.

High-gloss finish

High-gloss paints are the most durable paint for walls and the easiest to clean, making them perfect for high-traffic areas in the house. While you can use them on interior walls, the excessive shine might not be everyone’s cup of tea. But you can always use high-gloss paints in playrooms or the kitchen. In fact, this paint works best on kitchen cabinets, doors, and trims. Just make sure not to skip on prep work before applying high-gloss paint.

Semi-gloss finish

Semi-gloss paint can withstand moisture, drips, and grease stains. Since it provides a hard finish, it is a wall paint that can be wiped clean. Semi-gloss is a good candidate for high-traffic areas in the house. You can apply it on trims, chair rails, and woodwork, and it’s also ideal for rooms like the kitchen and bathroom.

Satin finish

The satin finish is washable, making it ideal for hardworking rooms such as the kitchen and bathroom. You can also apply this durable paint to family rooms, foyers, kids’ bedrooms, and hallways.

As a rule, paints with a sheen are perfect for low-lit areas or rooms that don’t get a lot of sunlight. It helps your home look bright and lively.

Eggshell finish

Eggshell paint is unsuitable for high-traffic areas like the playroom, kitchen, etc. Since it offers low to medium durability, you can use it in hallways, living rooms, and bedrooms. Eggshell paint can camouflage minor imperfections, so if you prepare the surface well, you can expect it to last a long time.

Matte or flat finish

Matte paints offer medium to low durability and should be used in low-traffic areas. Since you cannot easily wash away dirt and grime, it’s not a good candidate for bathrooms, kitchens, living rooms, or other areas more prone to stains.

However, you apply a flat finish in adult bedrooms and other spaces that are not used throughout the day. Compared to other finishes, matte paints are less durable and require high maintenance.

How to clean different types of paints on walls

Regardless of the sheen you select, a freshly-painted wall always looks immaculate. However, the same cannot be said two to three years down the lane. Your walls start showing signs of wear and tear in the form of scuff marks, spots, etc. That’s when you start wondering,’ Can I clean my walls without washing off the paint?’

Fortunately, the answer is yes! Here is a quick guide that tells you how to clean different paint finishes.

Water-based painted walls

Water-based paints are the easiest to clean. All you need is some warm water and a non-abrasive all-purpose cleaner.

  1. Mix the cleaner with warm water in a bucket.
  2. Fill another bucket with clean water.
  3. Now, dip a sponge in the cleaner solution and gently wash the walls using the mixture.
  4. Next, take another sponge and immerse it in clean water.
  5. Gently wipe away the cleaner from the walls with the clean sponge.
  6. Dry your walls with a towel.

This is the best way to wash water-based painted walls. However, some stains are tougher to clean. Try rubbing a paste of baking soda and water with a sponge. The stain should come right off.

Oil-based wall paints

Oil-based paints are not as easy to clean as water-based paints, but it’s not impossible. You will need liquid detergent, white vinegar, and warm water to clean the walls.

  1. Mix 1 teaspoon of liquid detergent, a quarter teaspoon of vinegar, and warm water together in a bucket.
  2. Dip a sponge in the cleaning mixture and gently scrub the walls.
  3. Once the stain is gone, clean the area with a clean wet sponge.
  4. Finally, dry the walls with a towel.

Flat wall paints

Flat finishes are the least durable and the toughest to clean. It’s better not to use any harsh chemicals, or you might strip the paint with it. Instead, wash any dirty spots with just water. You can also use a mixture of white vinegar and water but always test it on a small area to ensure it doesn’t damage the paint.

Best washable paint for interior walls

Keeping your interior paint looking fresh and clean can be challenging, but your job gets more manageable if you know what kinds of paints are washable. As a rule of thumb, premium paints are more lasting and provide truer color. In addition, they are more scrub-resistant than cheaper paints and can be washed easily.

Here are my picks of washable paints that you can try for your home.

Diamond Brite Paint Latex Gloss Enamel

71BSgNWgbWL. AC SX300 SY300 QL70 FMwebp What Kind Of Interior Paint Is Washable- Pick The Right One

The Diamond Brite Paint offers a high-gloss finish that mimics the appearance of enamel or plastic. If you like bold and bright looks, this is an excellent option since you can choose from 8 colors. Make sure to prep your surface correctly before applying paint, as the shiny finish magnifies surface imperfections. 

Montage Signature Eco-Friendly Paint, Low Sheen

81bFa7YNoQL. AC SL1500 What Kind Of Interior Paint Is Washable- Pick The Right One

The Montage Signature is an excellent choice for interior and exterior walls. It is water-based and offers a low-sheen finish which is easy to wash. The paint is perfect for interior walls in your main living areas, such as dining rooms, lounges, and bedrooms.

The ONE Paint & Primer for Interior/ Exterior

616+mwaP4SL. AC SX300 SY300 What Kind Of Interior Paint Is Washable- Pick The Right One

Here is a premium chalk-based paint that delivers excellent coverage. As it is a 2-in-1 paint, you don’t need to prime your walls before applying it. It has a water-based formula; you can choose between gloss, satin, and matte finishes. The ONE paint is highly versatile and can be used on walls, window frames, wood paneling, skirting boards, kitchen cupboards and more.

RECOLOR Paint Recycled Interior Latex Paint Wall Finish

51WJl0Ja9lL. AC SX300 SY300 QL70 FMwebp What Kind Of Interior Paint Is Washable- Pick The Right One

The RECOLOR paint offers a finish that is between flat and eggshell. It’s a durable latex paint process from screened feedstock to ensure the highest quality recycled content paint is produced. If you want a greener alternative to virgin paint, this is an option, as it can be cleaned up easily with soap and water.

Boomerang Eco-Friendly Interior Paint, Eggshell Finish

51cBqAhwfwL. AC SL1001 What Kind Of Interior Paint Is Washable- Pick The Right One

The Boomerang egg-shell finish is a premium, eco-friendly latex paint that can be used on ceilings and walls. Since it is not as shiny as semi-gloss or satin finishes, it has excellent hiding power. It is available in 8 modern colors, so you have plenty of hues to choose from.

Rust-Oleum Painter’s Touch Latex Paint, Gloss

71XlsRulTFL. AC SL1500 What Kind Of Interior Paint Is Washable- Pick The Right One

The Rust-Oleum Painter’s Touch delivers a semi-gloss finish that effectively resists chipping and fading. It is a multi-purpose product that can be applied to masonry, wood, metal, plastic, or unglazed ceramic. The water-based acrylic paint formula is low-odor, so you can easily use it on indoor surfaces. 

FAQs

What does washable interior paint mean?

Many interior paints are described as washable, and what it really means is that you can wash away marks, grime, and other impurities from the wall with water.

What is the difference between wipeable and washable paint?

You can clean washable paint with soap and water, but wipeable paint can be cleaned gently using a damp cloth. Washable finishes are more durable than wipeable paint.

Is it worth buying washable paint?

Theoretically, washable paints are more durable than non-washable paints. So, if you’re buying paints that you can clean easily, you’re investing in a finish that will be lasting and easy to maintain.

How do you know if the walls are washable?

If you want to test whether your walls are washable or not, mix some dishwashing liquid with water and apply some on the corner of the wall with a clean cloth. If you see color transferring onto the cloth, your wall paint isn’t washable.

Conclusion

Buying washable paints for your interior walls is a great idea because they are easier to maintain and remain vibrant and fresh for a longer time. If you have young children at home, then you should definitely go for washable interior paints but if you prefer a matte finish over shiny ones, be prepared for more maintenance and frequent touch-ups.

Also, make sure to know about the use of primer before painting your interiors, and check out the best time of the year to paint your interiors

Painting guides - paintplatform

Interior Vs. Exterior Paint – Differences and Similarities

I painted the outside of the house, and it faded in a couple of months. I also observed there were some places where the paint was chipped. The paint I used was fresh and nowhere close to expiry. However, upon researching and found out that I used the wrong type of paint outside. Different kinds of paints vary in properties. That is when I discovered that labeling the paint cans as interior and exterior paint is not a business strategy but an actual paint classification.

Different kinds of paints are synthesized to cater to different needs. Interior paints are adapted to stain resistance and ease of regular cleaning. Interior paints are different from exterior paints mainly due to their chemical makeup. On the other hand, exterior paints are designed to withstand weather changes. 

Can I use interior and exterior paints interchangeably? Will it save me cost or become a spilled glass of wine on a white dress? Let’s take a deep look at how the two types of paint vary as I answer all questions you may have in mind.

Compositional difference between Interior and Exterior Paints

The four main paint components are binders, pigments, additives, and bases. Variations in these lead to the differences in properties of Interior and Exterior paints.

Binders or Resins

Resins are commonly known as binders. They are the substances that hold the paint pigments with the base and make the paint adhere to the wall. 

Exterior paints are manufactured using soft resins, which can expand or contract based on weather conditions. The flexibility in exterior paints is essential to prevent cracking during the winter season. 

However, the resins used in making interior paints are inflexible and rigid. Since interior paints are not exposed to such drastic temperature changes throughout the day, the resins used here do not possess flexibility.

Exterior paints use acrylic binders, whereas silicon or epoxy binders are found in interior paints.

Additives

Modern paints incorporate various additives in the paint formula to enhance the outlook and improve the efficiency of paint. Additives can be any additional element added to the paint that is not part of the general paint formula and the dye or pigment. 

Interior paints contain leveling agents, antimicrobials, glitters, and conditioners as additives. 

Some examples of additives found in exterior paints are UV blockers and thickening agents to improve the functionality of the paint.

Pigments

Pigments are substances that give the paint its color. 

The nature of pigments in interior paints is purely organic. Due to the smaller size of organic pigments, we notice a much smoother blend in interior paints. Moreover, they are taken from plants and animal extract, thus safe to be used inside.

Exterior paints incorporate pigments derived from earthly minerals. Due to their larger size, these inorganic pigments provide a highly durable finish to the exterior walls.

Bases

The base is the solvent used to dissolve the resins, additives, and pigments. It is the key component that gives the paint its texture and allows mixing all the components to create a blend that can be applied to the walls.

There are two main kinds of bases; water base and oil base. 

Most interior paints are water-based, which allows easy cleaning and stain resistance inside the house. They also dry out more quickly than oil bases.

Exterior paints are oil-based. Oil-based paints provide water and temperature resistance; however, they take much longer to dry.

Learn more details about the composition of interior paint in our blogs.

pexels blue bird 7217999 1 edited Interior Vs. Exterior Paint - Differences and Similarities

Differences in Paint Properties

Due to the differences in composition of the paints, you can notice a difference in their properties as well. These can be measured as differences in weatherproofing abilities, durability, VOC levels etc.

Durability

On the exterior of your house, you experience stress, such as twigs falling off the trees, footballs hitting the walls, often kids running into it with their skateboards, and years of climatic distress. This demands higher durability, which is precisely how exterior paints are manufactured.

Even though interior paints can withstand a specific amount of stress, they are not as tough and durable as exterior paints.

Adhesion

Adhesion is the ability of the paint to stick to the wall surface. Interior paints require adequate priming before painting as they display excellent adherence to the primer.

You can learn about this in detail by reading our blog on the primer requirement before painting your interior

However, exterior paints adhere strongly to walls without primer as well. Most exterior paints will also adhere to brick or wooden surfaces; however, there will be differences in finishing when you’re not using a primer. Read more on this topic and learn whether you need a primer for your exterior walls.

Outgassing

Exterior paints have various additives to keep the paint weatherproof, temperature, moisture, and UV resistant. While exterior paints dry out, they release toxins that one must not inhale. Usually, the wind carries them away, which is not an issue while painting the exteriors.

Since interior paints have lesser additives added to the formula, they do not outgas harmful fumes.

Cleaning

Interior paints are stain resistant to keep up with the aesthetics of a clean house. Nonetheless, there can still be tough stains on the walls, perhaps your kid’s doodles. This may require heavy scrubbing, peeling off that area’s interior paint.

Exterior paints are more rigid and can resist scuffing and scrubbing better without affecting the paint.

VOC levels

Exterior paints have high VOCs compared to interior paints. These are harmful to health, and despite being highly durable, VOC emission is the main reason exterior paints cannot be used indoors.

Fade Resistance

An average house experiences sunlight for almost 12 hours a day. The rays shine bright, hitting your house at least 6 hours daily. That is a lot of saturated energy coming in contact with your house. Exterior paints incorporate additives that can withstand such strong beams of light and contain intense pigments that don’t fade away under the sun.

Temperature Resistance

The interior temperature of the house hardly fluctuates. Thus temperature resistance is not a characteristic we find in interior paints. 

Exterior paints encounter harsh temperatures, fluctuating throughout the day; thus, additional additives are added to exterior paints that make the paint temperature resistant and prevent cracking. The temperature-resistant additives are absent in interior paints, making interior paints unfit to be used on the exterior.

Moisture resistance

Exterior paints contain moisture-resistant additives to protect your house against severely fluctuating humidity, rainfall, hail, and melting snow.

Interior paints hardly undergo washing once or twice a year; therefore, moisture resistance component is absent in interior paints.

Mildew Prevention

Since the interior undergoes cleaning and disinfection regularly, molds and mildew do not build up on interior paints. Additional mildew protection is not required in the formula. Moreover, mildew preventive chemicals fume out for years and thus are unsafe to be used in interior paints. 

On the other hand, mildew is a severe risk on the exterior, and thus exterior paints contain mildew-prevention additives.

UV prevention

The sun carries heat, light, and harmful radiation, known as  UV radiation. UV radiations can bleach out pigments in your paint, causing it to fade and appear dull. Since the outer walls are exposed to the sun directly, exterior paints require UV protection. 

Interior paints do not require UV protection additives as sunlight doesn’t hit the inside walls directly.

Weatherproofing

Every time you purchase an exterior paint bucket, you’ll see a sticker that says weatherproof. Because it is the exterior that faces rain, snow, hail, dust storm, falling leaves, and harsh sunlight, they contain weatherproofing. The exterior secures the interior; thus, it does not require weatherproofing. This is why interior paints are not weatherproof.

Color Scheme

Exterior colors are in contrast to the surroundings. The most common exterior colors are gray, white, blue, autumn red, dull yellow, etc. thus, most exterior paints revolve around these shades. Interior color schemes differ as people choose colors like olive green, pastel pink, lavender, and teal, so you will find interior paints revolving around these shades. 

You can also learn more about interior paint colors and how they affect temperature

Cost

The cost of interior and exterior paints is quite similar; however, the difference still exists. Interior paints are more on the affordable side, whereas exterior paints tend to be a bit expensive due to the additional additives added to them. 

If you want to know the amount of interior paint you need for your house, you can go through this detailed blog. 

Similarities Between Interior And Exterior Paints

Interior paints and exterior paints are both used to paint your house. They are both made up of four essential components; resin, also known as binders, additives, color pigments, and a water- or oil-based base. 

Both these paints are available in various finishes such as matte, gloss, semi-gloss, mild shine, satin, etc., with a vast range of colors to choose from. Whether you’re painting indoors or outdoors, you need paint maintenance every 5 – 7 years.

Are interior and exterior paints interchangeable?

Since the basic makeup of interior and exterior paint is quite similar, the two most obvious questions arise. Can I use interior paint outside? Or can exterior paint be used inside? After all, they are just paints.

No, interior and exterior paints are not interchangeable. Interior paints must strictly be used inside the house, whereas exterior paints should be used on the outer walls. Not only will their efficiency as a paint be affected when used alternatively, but they can also cause serious health hazards. 

For example, interior paints outside will decrease the paint’s lifespan, as interior paints aren’t weather, temperature, or UV resistant. They will fade away faster when exposed to the sun, calling for a yearly touch-up.

Similarly, when exterior paints are used inside the house, they outgas harmful fumes that irritate the eyes, throat, and nose. Headaches, nausea, and fatigue have also been reported after exposure to the volatile compounds in exterior paints.

To avoid surpassing your yearly home maintenance budget, ensure a healthy environment, and guarantee the longevity of paint, interior and exterior paints must not be interchanged.

Frequently Asked Questions 

Is exterior paint thicker than interior paint?

Exterior paint is thicker than interior paint as exterior paints contain rigid binders and additives, increasing the paint’s density. Since exterior paint is supposed to withstand harsh conditions, it requires a thicker coat supported by the thick formula of exterior paints.

Should exterior and interior colors match?

There is no defined rule on whether exterior and interior colors should match. Your exterior color is chosen in contrast to the surroundings, whereas your interior color is chosen following the furniture. However, having similar tones will allow a smoother transition from the house’s exterior to the interior setting.

Can you DIY exterior paint?

Of course, you can! DIY painting is trending all over the world. People are taking up the responsibility to paint their own house with their families, which also leads to quality family time. However, painting requires time, patience, and expert advice to enhance your skill set and achieve a professional finish.

Can I mix interior and exterior paint?

If both the interior and exterior paints are water-based or oil-based, they can be mixed. However, water doesn’t dissolve in oil. If the bases used in the paints are different, they should not be mixed.

Moreover, exterior paints have higher VOCs than interior paints. If paints are chemically compatible for mixing, you must be careful of the ratio while mixing both the paints. 

Summing it up

Exterior and interior paints are not merely labeled on a paint can but are actual representations of the product. Interior paints differ significantly from exterior paints based on their chemical nature and usage. Exterior paints are designed to bear the harsh UV radiation and combat wear and tear due to weather changes. On the other hand, interior paint is meant to give a smooth and aesthetic finish and resist stains. They must not be used interchangeably for optimal finish, durability, and longevity.

If you still have questions, check out our recent blogs about whether you can use interior paints outside or if exterior paints can be used inside!

pexels max vakhtbovych 5998120 Does Interior Paint Color Affect Temperature

Does Interior Paint Color Affect Temperature

Have you ever wondered, despite having a broad spectrum, there are limited colors on a paint sheet? Ever since I was a kid, I wanted to paint my room black, and my mom never let me. However, the grown-up me now understands the reason behind it.

Paint color contributes to the amount of energy absorbed or reflected through the walls. Yes! Interior paint color affects the temperature as darker colors absorb more heat, making rooms warmer, while lighter colors generate a cooling effect inside your rooms.

Choosing the right interior paint color can help you regulate temperature. This means establishing an energy-efficient system through the choice of colors can help you cut down on bills. Either you can use my years of experience and save some bucks on bills or continue to spend extra on energy; the choice is yours!

How does color affect temperature?

Interior temperature and the color of your walls are related. It may seem strange to people how color can help regulate temperature as well as help you save on energy costs.

Cool colors, generally the lighter shade colors, reflect the sun’s radiation, producing a cooling effect. On the other hand, warm colors, generally the darker colors, absorb 70 to 90 percent of the sun’s radiation, inducing a heated effect.

Moreover, visualizing certain colors, like the warm shades of red, yellow, and brown, can subconsciously remind us of all the hot objects like the sun and fire. This instills a warm feel, making the insides of our rooms much cozier. 

Similarly, shades of teal and blue, which fall under the cool colors category, remind us of cool things such as the morning sky, water, or tree shades, inducing a cooling effect that we can feel physically.

Can the interior paint color help you save energy?

People in hotter regions tend to use more air conditioning in their houses. Using lighter colors on the walls can reflect up to 35% of the sunlight. Reflection of sunlight means less energy is absorbed, reducing the air conditioning used inside the house. The lesser your air conditioner will be operational, the lesser will be your electricity usage.

The same goes for heating systems. For example, painting your house a darker color absorbs the sun’s energy as heat. This automatically raises the internal temperature, calling to shut off the heating systems installed.

Using appropriate colors based on your environment is a great and highly effective way to reduce energy expenditure.

Colors that make your room cooler

pexels saviesa home 2089696 Does Interior Paint Color Affect Temperature

If you’re wondering what color makes a room feel cooler, I’ve got a little exercise for you. First, close your eyes and take a deep breath. Then, think of all the things that give you a cooling sensation. 

Most people come up with objects like the blue morning sky, water, and mint. Any light shade that appears in your imagination and gives you a cooling sensation is the color you should be going with. 

White is undoubtedly the best color for heat reflection as it reflects 98.1% heat off the surface. If you can maintain the ordinary class of white interior, keeping it clean at all times, there certainly can’t be a better option. 

However, due to a difficult maintenance routine, you can explore mint green, pastel pink, ivory, pastel green, colonial blue, pale blue, or light gray, which tops the best paint to reflect heat.

Colors that make your room warmer

pexels max vakhtbovych 6580222 Does Interior Paint Color Affect Temperature

Now you know that dark colors can absorb heat energy during the day, making the interior feel warmer. A warm and cozy interior is the top choice for people living in high altitudes with harsh winters. Using natural energy to heat your house is smart and energy-efficient. 

Darker colors such as mustard yellow, rich red, tangerine, gold, amber sienna, and shades of brown can absorb maximum solar energy to warm up your space. Even though black is the best absorber of heat, a black interior is unpleasant to many people’s eyes. 

Always ensure that your chosen color matches the furniture style and color. You can always add yellow lighting to make the interior appear much warmer.

Frequently Asked Questions

Should the entire house be painted the same color?

No, you should never paint the house the same color. Instead, you can use shades of the same color to connect the walls. Using the same color throughout the house makes the area look smaller, and your house may appear congested. Using different colors also adds to the aesthetic appeal of your house. 

Also, adding texture to some of your walls creates a fantastic outlook and attracts the eye. 

Are white walls in Style 2022?

White walls are the most classic color scheme inside a house. However, they still seem to trend amongst the most popular interior colors, but the new year has also brought in some textured designed walls. 

Even though the evergreen fashion of a white interior seems one of the chicest looks you can give your house, not all houses can pull off this color since it requires heavy maintenance, therefore, textured walls are trending-in.

Why shouldn’t you paint your house a dark color?

Dark-colored paints absorb more energy from the sun than lighter tones. So even though it helps regulate warmth inside the house and acts as a natural heater in winter, they absorb more UV light and heat from the sun’s radiation, causing the color to fade away quicker than usual.

Is it better to paint a house light or dark color? 

If you’re living in a warm region, light colors should be your choice to paint the house. These colors help induce a cooling effect by reflecting 35% more heat from the sun.

Dark colors, however,  are ideal for your home in cooler areas as they absorb maximum heat to warm up your house. However, dark colors fade more quickly because of the sun’s UV radiation. Thus it would be best if you select the right shade and keep them maintained.

Wrapping it up

Instead of investing money in insulation, air conditioning, and heaters, you can choose an appropriate interior paint to regulate temperature. 

Lighter paints reflect heat and lower the temperature, while dark colors absorb heat and raise the interior temperature significantly. So if you’re living in a region with a high temperature, it’s great to paint your interior light colors. 

In contrast, dark tones would be ideal for your interior if the temperature around you often drops too low.

If you’re thinking of repainting your house with a suitable color based on your region’s climatic conditions, find out about the temperature and humidity levels to paint your interiors and the best time to paint your interior here! Happy painting.

pexels blue bird 7217990 What Is Interior Paint Made Of - Understanding The Basics

What Is Interior Paint Made Of – Understanding The Basics

Everyone loves the look and feel of freshly painted walls but have you ever wondered what’s inside your paint? It’s important to understand what interior paint is really made of since you have to live with it every day inside your home. So, let’s find out.

Interior paint comprises four basic ingredients: pigments, binders, carriers, and additives. The pigments give the paint its hiding ability and color, while binders turn liquid paint into solid when applied to the wall. Carrier acts as the solvent, and additives help boost the paint’s performance.

Each element used in interior paints has a purpose to serve that we will explore in this article. I will also discuss different types of interior paints you can buy from the market and what makes them unique.

What are the ingredients of paint?

All paints have four essential ingredients:

  • Pigments
  • Binders
  • Carrier (solvent)
  • Additives
Navy and Broken White Modern Company Organizational Chart Graph 1 What Is Interior Paint Made Of - Understanding The Basics

Here is a detailed look at what each ingredient entails.

Pigments

Pigments are finely ground insoluble particles that may be natural or synthetic. They are used in paints to add color, impart bulk, or have physical or chemical properties to the wet or dry film. Pigments comprise two basic variations:

Navy and Broken White Modern Company Organizational Chart Graph edited What Is Interior Paint Made Of - Understanding The Basics

1. Prime pigments

  • Organic
  • Inorganic

Prime pigments affect both wet and dry hide in paint. The whiteness in paint is achieved through the pigment Titanium dioxide, while colorants create the paint’s actual color.

Colorants can be either organic or inorganic. Organic pigments tend to form clumps or pigment particles, while inorganic pigments spread out evenly in the resin. The former is more or less transparent when we look at opacity, but the latter delivers high opacity results.

Organic variants provide brighter colors, such as phthalo blue and hansa yellow, but they aren’t very durable, which is why they’re used in interior paints. Inorganic colorants are mostly duller and earthy, like red oxide, umber, and yellow ochre. They are more resilient than their counterparts and are used in exterior paint.

2. Extender pigments

  • Functional
  • Special effects

Extender pigments add extra weight or bulk to the paint and contribute only to the paint’s dry hide.

Functional pigments add specific properties to the coating, like the corrosion inhibitor, while special effect pigments are responsible for creating optical effects like hammer and metallic finish.

Clay, talc, silica, diatomaceous silica, zinc oxide, and calcium carbonate are all examples of extender pigments.

Binders

The binders used in paints directly relate to its performance, washability, fade resistance, scrub resistance, and gloss retention. Binders are polymers (resins) that bring the pigments together to create the perfect dry coat of paint on a wall.

Alkyd (oil) based binders dry to a hard finish that offers superior adhesion and leveling. The downside is that it will turn yellow in light colors and oxidize on surfaces. Moreover, it contains VOCs that are harmful to human health.

Thanks to modern technology, a newer alternative is alkyd-emulsion paint which gives an oil-like performance but can water and soap solution can clean it up easily. Unfortunately, this, too, can turn yellow and chalk over time.

The following are common binders that are found in paint:

  • Acrylic resins
  • Alkyd resins
  • Latex (PVA)
  • Phenolic resins
  • Urethane resins
  • Epoxy resins
  • Chlorinated rubber

Carrier (solvent)

The carrier is the solvent that allows the paint to be applied from the can to the surfaces. Pigments and binders are considered solids, while the carrier is a liquid. When they are all mixed together, they create the paint you see on the walls.

Carriers can be:

  • Oil-based or alkyd paints that comprise paint thinner or other types of solvent.
  • Water-based or latex that consists primarily of water.

If a paint contains more solids than liquid, it is considered higher in quality. So, if 35-40% of the paint remains on the wall after the solvent has evaporated, the paint will perform better. But that doesn’t mean every paint with high solids content is good. It’s the make-up of the solid elements that make a paint formula better than the others.

Additives

Additives add specific properties to the paint and improve its overall performance. The most commonly used are:

  • Defoamers- to break bubbles formed during manufacturing and when applied onto a surface.
  • Thickening agents- to provide additional thickness and viscosity for improved flow and leveling. It also helps reduce the splatter effect when the paint is applied with a roller.
  • Biocides- to prevent bacteria from growing and to eliminate mildew growth.
  • Co-solvents- to increase the liquid content in the paint. This helps the binders form a solid film when applied at low temperatures.
  • Surfactants- to prevent the paint from separating. They also keep the pigments evenly distributed in the liquid resulting in better color accuracy and hiding power.

Characteristics of interior paint

  1. Interior paints are used for decorative and aesthetic purposes. Since it’s used inside the home, its properties include washability, easy maintenance, and dampness prevention.
  2. Interior paint is formulated to withstand abrasion, but it’s not as hard as exterior paint.
  3. The paint is washable, so you can quickly wipe away roller and brush marks, as well as dirt and grime.
  4. Interior paints don’t have fade-resisting properties as they don’t have to face the sun. It also doesn’t require sunlight to cure.
  5. They contain a low amount of VOCs, reducing health risks and maintaining the air quality inside the home.

6 Types of interior paints and finishes

Many homeowners focus on picking the right color palettes for their homes but often don’t know the difference between various finishes. How the paint color looks on your wall greatly depends on the finish you select.

Some paints reflect light, creating a sheen on the walls, while others absorb light and make the walls look flat. A glossy surface usually highlights cracks and imperfections, whereas matte finishes camouflage flaws. The type of paint plays an integral role in its durability, coverage, and lighting within the space.

1. Matte Finish

Flat or matte paints deliver a diffused and mute color with a minimum to a soft sheen. They usually have a higher ratio of solids: liquid which helps them give deeper coverage. Also known as the concealer of paints, they work well to hide any imperfections on the walls, like nail holes, scratches, etc.

This variant is perfect for painting interior spaces like the bedroom. Since the paint is high-coverage, you don’t need multiple coats. The only downside is that matte walls can be harder to clean compared to glossy surfaces.

If you want to buy flat paint for your home, you can try the Rust-Oleum Painter’s Touch Latex Paint. I love this one because it is available in 28 exciting colors.

2. Textured Finish

If you like to add some character to their walls, textured paints are the right choice for you. These paints make your walls appear rustic and distinct, which is hard to achieve with other paints.

With textured paint, you can add depth and shadows to the walls. Since it doesn’t deliver a flat finish, it effectively masks uneven walls and other imperfections.

3. Satin Finish

Satin is right between matte and shiny; therefore, an all-rounder of wall paint finishes. These satin paints reflect more light than eggshell finishes, but they are not at all glossy. You can compare it to the shine of a pearl- soft and muted.

Satin finish feels soft and velvety to the touch and is ideal for living spaces that don’t receive a lot of sunlight. The only problem is that satin paint brings out application imperfections, unlike matte and textured finishes.

4. Eggshell Finish

As the name suggests, this paint gives a low sheen when applied to walls, just like an eggshell. It’s not entirely lusterless like matte paints and has a pleasing texture and feel. Eggshell paint hides wall imperfections like holes, bumps, etc., and offers a highly durable finish.

The finish is easier to clean than satin, making it ideal for high-traffic living spaces like the dining room, kitchen, living room, and hallways.

5. Semi-Gloss Finish

The semi-gloss is an ideal solution if you like gloss but don’t want ‘high-shine’ walls. Semi-gloss paints are shiny and reflective but not as shiny as high-gloss paints. They are durable, mildew-resistant, and easy to clean, making them perfect for playrooms, dining rooms, etc.

The only drawback is that it highlights the flaws in your walls, like satin finishes. The Montage Signature Interior/ Exterior Eco-Friendly Paint is a good option if you want a low-sheen finish. It comes in two finishes: low-sheen and semi-gloss.

6. High-gloss finish

The high-gloss finish is popular among designers and homeowners because it reflects light to give the highest sheen. Apart from being reflective, this delivers a hard finish that is highly durable. High-gloss surfaces are easy to clean, making them perfect for cabinetry, kitchen work, doors, and other objects prone to dirt and moisture.

The drawback of a high-gloss finish is that it makes any imperfections on the walls more apparent and requires several coats for full coverage.

How to choose the right paint finish for your home’s interior

Before you head out to buy paint for your DIY home paint project, you should decide the finish you want in your space. Consider these factors to help you find the perfect paint for your home.

Traffic

The first crucial thing to consider is the usual traffic in your living space. If an area is busy all the time, like playrooms and kitchens, you must get a durable paint finish and easy to clean. Semi-gloss, high-gloss, or satin finishes are perfect for such areas.

Spaces that remain relatively calmer can get away with flat and eggshell paints.

Sheen

When it comes to paint’s sheen, everyone has a different preference. But regardless of what you like, low-light or dark areas can benefit from higher-gloss finishes. If you want to make a room appear brighter and more open, go for a glossy finish. But if your living space receives plenty of daylight, you can go for any finish you like.

Walls condition

Paint helps bring life into your home, but the wrong finish can ruin a freshly-painted look. Suppose your walls have imperfections; in that case, you should choose a paint that hides them instead of highlighting them.

The more reflective a finish, the more surface imperfections will show. So, if your walls have nail holes or bumps, go with matte or satin finishes, as they help make walls appear smooth.

FAQs

Is all interior paint latex?

Latex-based paints are highly popular for both interior and exterior surfaces. Almost 75% of paint sold is latex, and more homeowners are jumping on the green-paint bandwagon.

Can I use interior paint on the exterior?

Interior paint should not be used on external surfaces as they are not formulated with the required additives. If you use interior paint outside, it will not withstand heat, rain, or any other environmental stressors.

What happens if I accidentally use exterior paint inside?

Exterior paint contains toxic additives, so if you use it inside your home, you will expose your family to long-lasting harmful chemicals. There are several other reasons why you shouldn’t use exterior paint inside.

How long does interior paint last?

A good interior paint job should last 5 to 10 years or even longer, depending on how well you maintain it.

Conclusion

All paints are created using four ingredients: binders, pigments, solvents, and additives. As manufacturers tweak the quantity and quality of these elements, the paint’s formulation and finish change. Knowing the basics about interior paint will help you find the right fit for your home.

pexels wangchen tsomu 8436382 Can You Spray Paint Trim- Renovate Your Home In 9 Easy Steps

Can You Spray Paint Trim- Renovate Your Home In 9 Easy Steps

Your home is your haven, but everything can lose its appeal over time. Fortunately, you can spruce up the look of your house by repainting the trims. Whether you choose a bright color or paint it a classic white, freshly painted trims can elevate your home’s interior without costing you an arm and a leg.

You can easily spray-paint trims to make them as good as new! Start by prepping the room with tape and paper. Next, clean the border and fill up any nail holes. Sand the surface so the primer can adhere correctly. Caulk the gaps between the baseboard/ walls and trims. Apply primer, followed by two coats of paint.

Spraying your trim always gives a better finish compared to brush application. However, spray paint means more mess and, therefore, more clean-up. I will tell you how to prepare your trims so there’s minimum clean-up for later. With my tips, you will achieve professional-looking results without spending on a pro-paint job.

Is it better to spray or brush paint trim?

Many homeowners wonder whether it’s better to brush paint or spray their trims. In theory, spray paint will always result in a smoother and even finish. If you are new to painting, brush application will leave ugly brushstrokes that are impossible to cover.

Spray painting is the best option in new construction where trims aren’t attached to the baseboards. But in an existing home, spray painting your trim will cause you a ton of extra work you might not be willing to do.

So, it all comes down to how much time and effort you’re willing to dedicate to the project. Another deciding factor would be the finish you’re after.

If you want to maintain the quality of the paint job regardless of the extra work it would require, spray paint your trims by all means. But if you’re on a tight schedule and don’t mind the look of brush strokes, you can brush paint all your trims.

How to spray paint trims

I have outlined the process in a step-by-step guide to help you spray paint your trims quickly. If you want to brush paint instead of spray, the following steps will remain the same. The only difference is that you will use paint and brush to do the priming and painting.

Let’s begin.

1. Prepare the floor

Spray painting can get messy very quickly, but if you prepare the surrounding areas properly, you should have a much easier time cleaning up. You will tape and paper –lots of it.

Prepping the floor

Place the paper on the floor and tape it so that one end is on the paper while the other is tucked under the trim. Take your time placing the tape in a straight line, so the result looks neat and sharp. If you have carpeted floors, tuck the inside edge of the tape under the trim but over the carpet.

Dragging a drop cloth everywhere you paint can be time-consuming and leave paint smears on the floor. The best way to cover your floors is with a 36″ rosin paper roll. This way, you can paint without fearing the paint getting on the baseboards.

Prepping the wall

Apply tape on the upper side of the trim as well, making a straight line between the edge and the wall.

Prepping for windows

If you’re painting the trims on your windows, apply a strip of tape and paper on the window, glass, or any other surface you don’t want to paint accidentally. You should also remove window coverings and cranks before you start.

Prepping for door trims

For door trims, you can remove the door and hinges or cover the two with tape and paper.

2. Clean the trims

Regardless of the project, cleaning the surface you will paint is crucial. Start by vacuuming the room with a shop vac to remove all dust from the area.

Vacuuming might not be enough if you’re painting the trims in your kitchen or a similar area. You can wash the trims with warm water and soap, cleaning up any oily residue or grease from the surface.

Once the trims are clean, wipe away the soap residue with a clean cloth.

3. Repair holes

If you’re going to paint your trims, any holes or cracks you leave will show up as a contrasting black and ruin the final result. Therefore, fill all the nail holes with spackling paste to achieve a smooth surface.

Refrain from filling the gaps between the walls and the trims because a flexible caulk works better for that surface.

4. Sand the trims

Once all the nail holes are filled, start sanding the trims to smooth down the surface. Sanding the surface also helps the primer bond properly with the trim being painted.

Take a medium grit sanding sponge and start sanding the surface in a back-and-forth motion. The good thing about using a sponge is that it conforms to the trim’s shape and prevents slivers.

After you’ve sanded thoroughly, clean the trims and the surrounding areas with a vacuum cleaner. A clean work area means fewer chances of dust and debris ruining your finish.

5. Apply a primer

When selecting a primer and paint for your project, make sure to choose the same type. For example, if you’re going to use water-based paint, then buy a water-based primer to accompany it. Similarly, you should select a water-based top coat to finish the paint job.

I suggest using water-based paints for residential homes primarily because of the VOCs in oil-based paints that can stink up your house. In addition, cleaning up oil-based paints is challenging because it doesn’t just wash off; you have to use a paint thinner to remove it.

Since painting the trims requires moving around the whole house, the clean-up after using an oil-based paint could be a disaster.

Spray a coat of primer to prepare the surface. The smoother the foundation, the better your final paint application will be. The Rust-Oleum Painter’s Touch 2X Ultra Cover is an excellent flat white primer for this project.

71skbuiHARL. AC SY879 Can You Spray Paint Trim- Renovate Your Home In 9 Easy Steps

6. Sand the surface again

Allow the primer to dry completely before sanding all the trims again. If you’re wondering whether it’s necessary to sand the surface again, you should remember that quality paint jobs require several rounds of sanding.

This time, use a 3M fine-grit sanding sponge, as it helps make the primer extra smooth. Once you’re done, vacuum the trims and the room to remove any dust from your work area.

7. Caulk the trim gaps

You can caulk the gaps before priming the surface, but I prefer to do it later for a few reasons. For starters, primed trims make the cracks even more apparent. It makes your caulking job easier and also saves time from having to caulk areas where it’s not needed.

Secondly, primed and sanded trims significantly reduce the chances of slivers. And finally, your trim is very smooth after all the above processes, allowing you to lay a fine bead of caulk.

To caulk the trims, you need a dripless gun, paintable caulk, and a wet cloth. Snip a small piece off the tube to neatly squeeze the caulk into the gap. Start laying a bead of caulk and pause to go over it with a wet rag. This pushes the caulk into the gap and makes it look neat and smooth.

Try not to overdo the caulking and keep it from coming out or over the gaps. Allow it enough time to dry before painting the surface. You don’t need to sand the surface after caulking.

8. Start painting

Now that your trims are primed, sanded, and caulked, we can finally move on to the color coat. For interior projects, creating an ideal temperature and humidity level is recommended for the best results.

Shake the can for a good five minutes and check for any clogged nozzles. If you’re working with old paint, check its expiry date and spray on a spare cardboard sheet to ensure the spray paint has not expired. Spray one coat of paint and wait for 15 minutes to go in with the second one.

If you’re working on several trims at the same time, finish painting and circle back to where you started for the second coat.

9. Clean up

You’re in the final stretch now. Once your top coat has dried completely but not cured, pull the tape around the trims and remove all the paper you’ve spread on the floor. Don’t wait too long to pull the tape, though, as paint drips on the floor will get very hard to remove later.

Painting trims or walls? Which one to do first

Here’s a question I have heard many times: “Should I paint my trims before I paint the walls?”

The answer is yes! Here’s why.

A painted trim has already been prepped and primed. So when you start painting the walls, you can save time creating a surface for the tape. You simply tape a straight line on the trim and paint the walls.

Secondly, if you paint the trim later, it means you didn’t caulk it to the walls before it was painted. So, when you spray paint the trims at the end, the paint will flow from the trims to the caulk and onto the walls.

Finally, the paint you use on the trims is harder compared to wall paint. For this reason, when you tape the wall to paint the border, there’s always a chance of that wall paint pulling off with the tape. Sometimes, pulling the tape also results in lifting the top layer of paper from your drywall along with the color, which could be a catastrophe.

Hence, it is recommended to paint the trims before moving on to the walls.

FAQs

Can you use can spray paint on the trim?

You can easily spray paint your home’s interior and exterior trims if you sand and prime the surface properly before applying the top coat.

Can you paint wood trim with spray paint?

The best way to paint wood trims is by using spray paint specially designed for wood surfaces. The result will not be long-lasting if you use other variants that are not meant for wood.

Should you spray or hand paint trim?

Spraying your trims will give you a smooth and clean finish, but it’s a time-consuming process. You can hand paint your trims if you are okay with the brush strokes and have limited time for the project.

What kind of paint should be used on trim?

Trims are considered a decorative addition; therefore, the paint you choose should bring out its details. Semi-gloss, satin, gloss or high-gloss paint finishes are best suited to trims.

Conclusion

Repainting your trims helps brighten your home and makes the walls and décor look more attractive. Fortunately, spray painting is a quick way to refresh your living space while staying within a DIY budget.