Raheela

Meet Raheela, your friendly neighborhood content wizard, armed with over four years of experience in the realm of writing. An enthusiast of all things tech, lifestyle, chemistry, dyes, paints, spray paints, interior design, and exterior design, Raheela crafts articles that are both informative and engaging. Dive into the world of knowledge and creativity with Raheela's articles, where every piece is thoughtfully curated to bring you insights and a dash of inspiration.

old house 2205492 1280 Can I Use Interior Paint Outside- Read the Details Here

Can I Use Interior Paint Outside- Read the Details Here

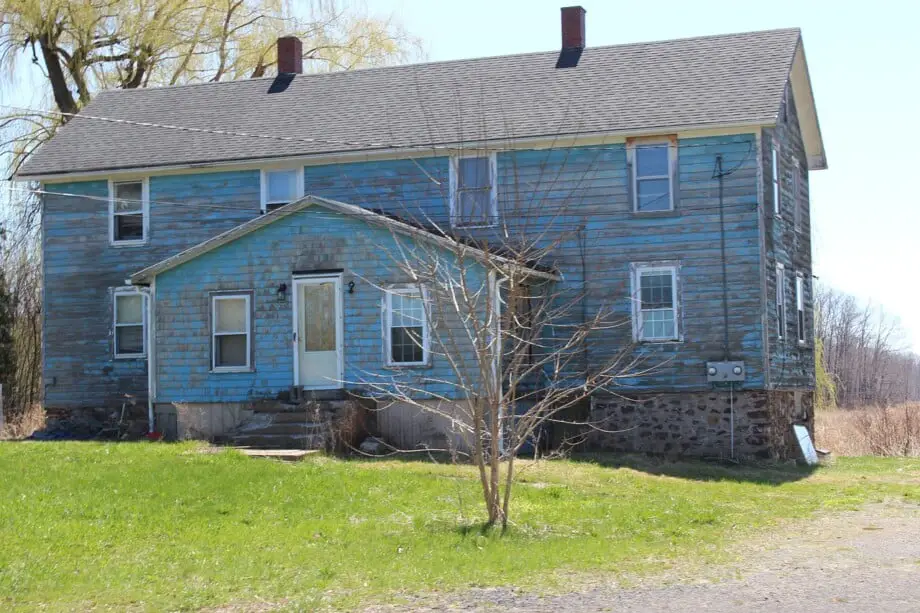
I had some paint left over after painting my living room walls. Awakening the artist inside of me, I decided to give the front wall of my house a new look.It turned out excellent and I was so glad that my paint didn’t go wasted. However, what happened a few weeks later was disappointing.

You cannot use interior paint outside because of the difference in chemical compositions of both paints. Interior paint cannot bear the exterior environmental effect. Even though interior paint does not cause any damage to the exterior walls, it will fade away and chip off faster. You will have to repaint your walls soon, adding to the overall painting cost.

The color started fading and the paint started chipping off. I had to repaint my front wall. If you also want to save time, effort, and money, you must know how interior paints are different from exterior paints, so you do not end up making the same mistake as myself. 

Difference Between Interior and Exterior Paint

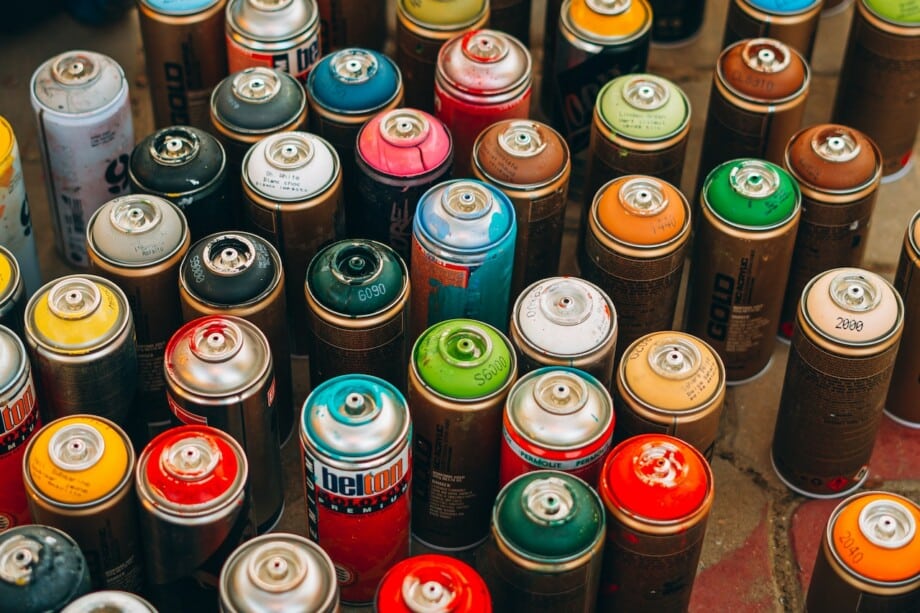
They have different names for a reason. Interior paints are different from exterior paints mainly because of their chemical composition. Even though all kinds of paints are made up of binders, additives, and pigments in a base, each component has different properties for different purposes.

1. Binders

Paint binders or resins are chemicals that hold the pigment together to create a durable film. The paint’s adhesion, durability, and stain resistance depend on the binder type. Paints contain different kinds of binders depending on their use.  

Exterior paints use acrylic as the binding resin. Acrylic binders are soft and ideal for outdoor environments. These resins can expand or contract in different temperatures while maintaining their form. They also prevent the paint from cracking and peeling off under sunlight or heavy rainfall. 

On the other hand, interior paints contain thick, rigid resins. They are neither flexible nor able to withstand the harsh outdoor environment but can hold up against regular cleaning and scratches. Interior paints use silicone or epoxy binders, unlike acrylic ones, which do not have a harsh odor.     

2. Additives 

Modern paints contain additives to enhance the paint’s appearance and function. Additives are added in the form of thickeners, emulsifiers, leveling agents, and antimicrobials. Additives used in interior and exterior paints vary because they serve different purposes.   

Interior paint additives include levelers, conditioners, glitters, and scents since they are used for decorative purposes. They give extra gloss and shine to your interior to make it look fresh and smooth. Interior paints do not contain harmful chemicals, making them safe to use indoors. 

Exterior paints, on the other hand, have numerous additives in them. They contain antimicrobials, UV blockers, and many VOCs (Volatile Organic Compounds) that help the paint toughen and protect against harsh climatic conditions. 

3. Pigments

The finely ground particles that provide paint its color are the pigments. Paint pigments are of two types; organic and inorganic. Organic pigments are transparent and derived from animals or plants, while inorganic pigments are obtained from mineral rocks. The durability of the paint depends on the type of pigment used. 

Exterior paints contain inorganic pigments. Since they are based on metallic compounds, their particle size is big and provides high coverage. Inorganic pigments are resistant to UV lightening and temperature changes, making them suitable for outdoor usage. They are more durable and long-lasting than organic pigments. 

Interior paints have organic pigments because the house’s interior is not exposed to direct sunlight. Organic pigments are not UV light resistant and offer much less covering capacity. Due to their small particle size, they blend easily into the solvent and give off a cleaner look when applied.  

4. Bases

The base is an essential component of paint. It is the solvent into which all other ingredients are mixed and applied. It evaporates after some time, leaving the binders, additives, and pigments attached to the surface. Regarding bases, there are two kinds of paints; water-based and oil-based. 

  • Water Based Paints

Water-based paints, also known as latex paints, use water as their solvent. All the pigments, resins, and additives are dissolved in a water solution. This kind of paint is used for interior painting because it is easier to clean and scrub. If you’re wondering, “can I use interior latex paint outside” you probably can.

The water molecules evaporate at room temperature and are not adapted to direct sunlight, so it is better to keep them for indoor use only. Water-based paints do not give off any harsh odors and are suitable to be used indoors. 

  • Oil Based Paints

In oil-based paints, mineral spirit or turpentine is used as the solvent. Oil-based paints make the pigments appear brighter and smoother than water-based paints but take longer to dry. They also have a strong smell and require sunlight to be cured. 

Oil-based paints provide a thicker and harder coat but are challenging to clean. They can resist moisture and sunlight and last longer than their water-based counterparts. 

Interior PaintExterior Paint
Contains silicon or epoxy bindersContains acrylic binders
Less or no VOCs. UV blockers and antimicrobials are absent. VOCs, UV blockers, and antimicrobials are present.
Bleaches out under direct sunlightCan withstand direct sunlight 
Pigments are organic Inorganic pigments are used
Water-based paintsOil-based paints 
Bearable odorUnpleasant odor
Differences Between Interior and Exterior Paints

What happens if you accidentally use interior paint outside?

Using interior paint outside is a common mistake many people make. However, this does not cause any damage. The only drawback you will face is that your paint will chip off faster. This is because interior paints do not contain additives used in exterior paints to make them last longer. 

The Interior paint is thin and does not adhere well on outdoor surfaces. It cannot withstand the harsh outdoor environment; as a result, cracks appear faster, and the paint peels off quicker. 

If you have accidentally used interior paint outside, you can seal it by applying a coat of exterior paint sealer. This will provide some resistance, and the paint will not come off too soon. 

Using interior paint over exterior paint

If you had your house painted by a professional before you decided to take up this job, you are most likely to have exterior paint outside.

Technically it is possible to use interior paint over exterior paint. Still, it is essential to remember that different kinds of paints vary significantly in formulas and should not be used interchangeably. 

Interior paint does not adhere well to exterior surfaces or paints. It is recommended not to use interior paint over exterior paint because it will peel off quickly. However, if you have no alternative, you can use a primer. Priming the surface will help the paint bond properly and make the paint last some time. 

Remember that interior paint cannot withstand temperature changes, UV radiations, mildew, or humidity. And despite using a primer, the paint will not last very long.  

Hybrid or Universal Paints

A particular type of paint, commonly known as hybrid or universal paint, bridges the two kinds of paints; interior and exterior. These have been designed specifically for people who wish to give their houses a fresh look without professional help.

Hybrid paints are a unique combination of oil and water-based paints that provide excellent adhesion and durability on indoor and outdoor surfaces.

While these paints are suitable to be used on the interior and exterior of your house, they do not provide heavy-duty resistance on the exterior. Hybrid paints lack the additives necessary to protect against mildew, moisture, and temperature fluctuations. They are ideal for use indoors and in small outdoor projects like doors, window frames, and even garages. 

Hybrid paints last longer than usual interior paints but are not as tough as actual exterior paints. 

FAQs

Can you mix interior and exterior paint?

Interior paints and exterior paints should not be mixed. Combining the two shortens the paint’s lifespan, affects its consistency and makes application difficult. 

In addition to that, the mixed interior and exterior paint cannot be used indoors due to the high amount of VOCs present in exterior paint. And when it is used outdoors, it increases the chances of mildew and paints peeling faster. 

Is exterior paint thicker than interior paint?

Yes, exterior paints are thicker than interior paints. This is because most exterior paints are oil-based. Oil-based paints are thicker than their latex or water-based counterparts, which is why they appear thicker in consistency. 

Another reason is the addition of heavy-duty additives and binders. These are added to exterior paints to provide resistance against extreme weather changes and prevent it from cracking or peeling off. 

Is exterior paint more expensive than interior paint? 

Exterior paints are comparatively more expensive than interior paints. This is because exterior paints have additional chemicals and compounds that make them resistant to the outdoor environment. They are formulated to last longer and provide extra protection from moisture, mildew, and UV radiation.

In contrast, interior paints are more basic in their formula and are cheaper than exterior paints. 

How long will the interior paint last outside?

Interior paint is not designed to withstand the outdoor environment and does not have the adhesive qualities of exterior paint. Using interior paint outside does not last long and starts to crack and peel off very soon. 

Depending on the weather conditions, interior paint lasts only about a year or two maximum when used outside. 

Using interior paints outside – Know the consequences

If you think of using the leftover interior paint outside like I did, you might have second thoughts. Interior paints differ significantly from exterior paints. They cannot survive the rough conditions the exterior walls are exposed to and fade away rapidly. There are paints specialized for the exterior walls; you should use them if you wish to paint outside.

I also realized that I painted the house wall at the wrong time of the year, if you do not want to do the same mistake then check out our post which tell you details about the best time of the year to paint.

pexels suleyman seykan 6068821 1 Does Spray Paint Expire - Can it go Bad Before Expiry Date

Does Spray Paint Expire – Can it go Bad Before Expiry Date

Last month I decided to spray paint the new ceramic pots I bought for my Purple Heart plants. Since I already had a can of ice blue spray paint that I purchased 4 years ago, I decided I didn’t need a new one. But as I started painting, I realized the color was much darker, and the nozzle kept giving up on me. That’s when I realized that my spray paint had expired.

Yes, usually spray paint expires in 2-3 years, but the duration varies between brands. The best way to determine whether your spray paint has expired is to check the expiration date on the bottom of the can.

Sometimes, you will find that your paint hasn’t expired, but it’s still not giving the same results as before. That’s because spray paints can go bad even before their expiration date if not stored properly. With my help, you can learn how to get the most out of your spray paint investment.

Does Paint Have An Expiration Date?

Many DIY enthusiasts have different colors of spray paint lying around in their garages. However, before you start using them for a new project, you should check their expiration date.

Every spray paint has an expiration date that you can check at the bottom of the can. Usually, every can has two dates: production and expiry, and if you look closely, you can easily identify both. The expiry date is generally written as Month/ Day/ Year. So if your paint expires on July 1, 2023, it will be printed as 7/1/23.

How To Know If Spray Paint Is Expired?

The spray paint expiration date is the most effective way to determine if your spray paint has gone bad. However, inappropriate storage conditions can also cause an adverse chemical reaction in the paint and affect its consistency.

The following are telltale signs that your spray paint can has expired:

  • The paint has turned a different color than when it was new.
  • The nozzle of the can is clogged or rusty.
  • The paint has started to separate.
  • The application is not smooth, and the nozzle keeps clogging up as you spray.

Does Spray Paint Go Bad Before Expiry?

If you’re wondering, ‘does spray paint expire if not opened?’ the answer is no. Storing your sealed paint in ideal conditions can make it retain its original position for years. Sometimes, you may notice that the can has developed a hard lid, but that can be easily reversed by softening it with hot water or a hairdryer.

The lid usually hardens when the solvents inside the paint have evaporated, but that doesn’t mean it’s unusable.

After you’ve opened a spray can, environmental stressors, such as high heat, humidity, etc., can cause the paint to go bad.

Especially if the paint has been sitting for a long time, it’s possible that its propellant has evaporated or the nozzle is clogged. At times, the formula of the paint changes or its potency reduces over time, which means it may not deliver the same results as when it was new.

What Causes Paint to Go Bad?

Several factors can affect spray paint’s formula and mechanism. If you’re not careful enough, the following factors can reduce spray paint’s shelf life and affect its quality.

Extreme Temperature

Any area that receives too much heat or cold is not an ideal storage place for spray paint. The paint inside will dry and crack if the can is exposed to high temperatures. So, when you press the nozzle, nothing will come out.

Placing it in a cold spot will also affect the paint’s quality, making it go bad before the expiration date.

Exposure to Direct Sunlight

Direct exposure to sunlight can be harmful for your spray paints. If you keep your spray paint cans where they are exposed to direct sunlight, the chemicals in the paint’s formula will break down, causing it to become dry and brittle.

The paint will also lose its color if it’s wrongly stored directly under the sun.

Humidity Levels

Too much moisture in the air can upset the composition of the spray paint. This can make the paint inside sticky and lumpy. If you are not careful about high humidity levels in the storage area, your paint can go bad and become unusable.

Reduced Aerosol Pressure

If you open a spray paint can but don’t use it frequently, the aerosol pressure inside the can reduces over time. In this case, the paint’s formula is usable, but because there’s no pressure in the can, the spray mechanism won’t work.

Environmental Impurities

Whenever you use spray paint, environmental impurities such as dirt, oxygen, and ultraviolet rays enter the can through the tube. When these impurities get mixed with the chemicals inside, it causes an adverse reaction that makes the paint go bad even before its expiration.

Can You Use Paint That Has Gone Bad?

Sometimes, your spray paint can go bad even before its expiration date, but that doesn’t mean you should toss it away immediately. You can follow the tricks below to revive your old can and make it work.

1.      Shake It Well

If you’re using an old can and nothing is coming out, try giving it a thorough shake for 2-3 minutes and use it again. Most of the time, this acts as a ‘jump start’ for spray cans as it’s jolted back to life after sitting on the shelf for too long.

Shaking the can also help mix the color pigments that get settled at the bottom due to infrequent usage.

2.      Immerse In Warm Water

If you find that your spray paint is coming out too thick, you can immerse it in warm water to thin it out. Once the paint returns to its normal consistency, the application will become smooth and even.

3.      Decant the Paint If the Aerosol Isn’t Working

Loss of aerosol pressure is common in spray paints, but why throw the can away if the paint inside is usable?

Simply decant the paint by gently making a small puncture near the top of the can. Once the remaining pressure has escaped, you can cut the can open and transfer the paint into a sealable jar or a spray gun jug.

It would be best to stir the decanted paint before using or storing it to help release any gas or propellant that may still be inside.

FAQs

Does spray paint expire or go bad?

Spray paints usually expire in 2 to 3 years, but if they’re not properly stored, they can go bad before expiration.

How to dispose of spray paint safely?

A safe way to dispose of empty spray paint cans is to puncture a hole and recycle it as scrap metal.

How long does unused spray paint last?

An unopened can of spray paint has a shelf life of 2-3 years from its production date if stored properly.

What happens if you use expired spray paint?

If you use expired spray paint, the result will be vulnerable to drying and cracking. Also, its application and color may be different.

Final Word

It can be frustrating to find your spray paint can unusable after you have prepped the surface. Therefore, you should check your old cans’ expiry and test them before starting a new project to avoid any surprises. 

graffiti 1467768 1280 How Long Does it Take the Spray Paint to Dry - Expert Advice

How Long Does it Take the Spray Paint to Dry – Expert Advice

There are so many different types of spray paints that deciding how long you should wait until the surface is ready for the next layer of color can be pretty perplexing. With my help, you will know precisely how long spray paint takes to dry, considering the type of paint and the surface it is used on.

Individual spray paints dry at different times; for example, water-based paints usually take 30- 60 minutes to become touch dry, while oil-based spray paints can sometimes take up to 24 hours to fully dry. Curing can go upto as much as a week. The duration also varies with the type of paint used and the surface it is applied to.

Before you start a spray paint DIY project, make sure to know the type of paint you’re using, whether it’s oil-based, water-based, acrylic, enamel, or latex. Also, learning how porous your surface is will help you determine how long the paint will take to dry. Let’s take a look at what we need to know. 

What Is The Difference Between Drying and Curing Time?

If you are a spray paint DIY regular, you may have experienced that after painting a surface, it feels dry to the touch, but it still registers signs of wear. This is especially true with fast-drying spray paints. Since they become dry in a matter of minutes, you feel a false sense of security that the object is good to use.

However, there’s a difference between dry time and cure time. While your paint may feel dry when you touch it, the surface remains vulnerable to damage until it is fully cured.

This will help you understand the four stages to spray paint’s drying process:

Surface DryPaint’s solvent evaporates, but it feels sticky to the touch.
Touch DryThe paint feels dry when you touch it.
Hard DryThe top layer of the paint, hardens but still takes fingerprints.
Fully CuredThe surface is completely dry, and the object is ready for use.
Four Different Stages of Spray Paint Drying

Different types of spray paint dry and cure at different times. For example, oil-based paint takes the longest to dry. Its surface dries in thirty minutes, but the paint doesn’t dry to the touch for approximately 8 hours. And you should wait for 24 hours before applying the second coat. In contrast, acrylic spray paint needs 10- 30 minutes to become surface dry and 8 hours to fully cure.

If you’re wondering when to apply the second coat of spray paint, you should wait until the previous layer is touch dry before adding the next coat. You don’t need to wait for it to cure completely.

Spray painting being done on street walls

How Long Does It Take Different Spray Paints To Dry?

Spray paints usually take a few hours to dry completely, after which you can apply the next coat. If you’re using fast-drying spray paint like the Rustoleum 2x coverage, you can expect it to dry within 20 minutes, depending on the surface. Knowing how long your spray paint will take to dry helps you apply multiple coats without saturating the surface and causing the paint to crack or peel. 

The formula of the paint is only one deciding factor, the surface, temperature, humidity- everything plays an important role in how quickly the paint dries. If you want to know how to reduce spray paint’s drying time, you can read this article.

The following details will help you decide how long you should wait between coats.

Enamel Spray Paint

Enamel spray paints have a hard, glossy, and opaque finish. They are available in two variants: water-based and oil-based, and each has a different drying time.

Water-based enamel spray paints touch dry within an hour, while oil-based paints need almost eight hours to reach the same dryness level. Also, oil-based enamel paint takes about 24 hours to dry enough for a second coat.

Some fast-drying enamel paints, like the Rust-Oleum Professional High Performance Spray Paint, take 15 minutes to dry and can be reapplied within an hour. Temperature and humidity significantly affect drying time, so make sure to pick days with ideal weather conditions to start your spray paint project.

Acrylic Spray Paint

Acrylic spray paints are water-based and non-toxic. Since they have a quick drying time, they are widely used in the arts and crafts industry for painting various surfaces like plastic, glass, canvas, wood, paper, etc.  

It takes around 10- 20 minutes to become dry to the touch but can take almost an hour to fully dry for applying a second coat.

Lacquer Spray Paint

Lacquer spray paint offers a protective, durable and hard finish that is scratch-resistant. While it gives excellent results on most surfaces like wood, metal, plaster, etc., users avoid it because it requires multiple layers of paint to achieve good coverage.

The paint requires three hours to dry but around 48 hours to cure enough for the next coat. Water-based lacquer paints are more popular because their drying time is less, and you only need to wait around three hours to apply the second coat.

Epoxy Spray Paint

Epoxy paint is perfect for a durable, water-proof coating that resists household stains and grease. It can be applied to various surfaces like wood and concrete as it easily weathers up to cleaning materials.

Epoxy spray paint dries very quickly– in around five minutes, your surface becomes dry to the touch. The paint requires approximately an hour to cure so you can apply the next coat. Some fast-drying epoxy spray paints like the Rust-Oleum Appliance Epoxy only need a 30-minute cure time between coats.

Oil-based Spray Paint

Oil-based is a popular choice among DIY enthusiasts because it provides excellent coverage and is highly resistant to chipping and corrosion. In addition, this paint is very versatile, so you can use it on various surfaces, including terra cotta, plastic, metal, wood, ceramics, laminate, etc.

It takes eight hours to dry to the touch, but you must wait for around 24 hours to let it cure enough for another coat.

Polyurethanes Spray Paint

Polyurethanes are a preferred finish in wood working. It effectively protects surfaces from water, spills, and fading due to excess sunlight exposure. This paint is available in oil and water-based options, both of which deliver a solid surface finish.

Water-based Polyurethane spray paint becomes dry to the touch in about one to two hours, whereas oil-based paint takes five to twelve hours to dry. It takes about 24 hours to become properly cured before applying the second coat of paint.

How Different Surfaces Affect Spray Paint Drying Time

Regardless of the spray paint you use, your project’s surface influences its drying time. Some materials may be porous or more prone to damage from paint than others; therefore, you need to treat them accordingly.

Here are a few common materials usually used in DIYs and the time they take to dry.

Metal

Metal is a flat, non-porous surface that is easy to color using spray paints. If you choose ideal weather conditions to start a metal painting project, you can expect it to dry within ten minutes.

Plastic

Another favorite among DIY enthusiasts, plastic is one of the easiest materials to paint on. It takes around 30 minutes to become dry to the touch, but you should wait for at least 3 hours before reapplying a coat.

Wood

Spray painting on wood is a quick way to spruce up wooden furniture and objects- especially with the wide range of paints available; you can create something unique in no time.

Since wood is a porous surface, its drying time is about one hour, but you should wait for 24 hours to allow it to cure completely.

Cardboard

Cardboard is a soft material that’s vulnerable to accidental damage. Luckily, it has a fast drying time of 15 minutes if you’re working in a well-ventilated space.

Glass

Painting glass is tricky because if you’re not careful enough, you can easily end up with a runny, dripping, or steaky surface. Spray paint needs around 24 hours to dry on glass surfaces completely, but you can apply a second coat of paint in 15 minutes.

Rubber

Rubber is a highly-porous material which means it requires more drying time. You need to wait 30 minutes before applying another layer of paint, but if you want the surface to become fully dry, it would require 24 hours to get to that stage.

Fabric

If you’re using fabric spray paint, you can expect it to become dry to the touch within an hour and safe to handle in another. However, it requires 24 hours to dry completely, and you should avoid washing it for at least 72 hours.

FAQs

How can I make spray paint dry faster?

If you want to make spray paint dry faster, apply thin coats and work in a well-ventilated area. You can also alter the temperature, humidity, and airflow around your project to speed up its drying time. You are most welcome to read in detail about it too. 

Does spray paint dry faster with heat?

A warmer temperature is ideal for spray painting projects, and increasing the heat helps reduce the drying time of most spray paints.

Why is my spray paint not drying?

A common reason spray paint remains sticky and tacky is thick paint application. It can also be caused by extremely humid, cold, or hot weather.

Conclusion

DIYs might seem simple at first, but if you don’t research and plan ahead, the results can be way below your expectations. A good paint application is crucial if you want perfect coverage without streaks and drips, and knowing how long to wait between paint coats is a stepping stone toward a flawless spray paint project.

pexels rodnae production How To Make Spray Paint Dry Faster - Practical Tips and Tricks

How To Make Spray Paint Dry Faster – Practical Tips and Tricks

Spray painting is quite an exciting DIY which can quickly transform the appearance of various surfaces and objects. However, handling our spray painting objects would mean we need to wait for it to dry and can be a long wait, not to mention the wait between two or more coats. Luckily, there are ways to make spray paint dry faster, so you can enjoy your finished projects earlier than the recommended time.

Using a fast-drying spray paint for your project will reduce the drying time to just 20 minutes. Also lowering humidity, increasing room temperature, and improving ventilation can significantly reduce the drying time of your spray painted projects. Wax-based furniture polishes have also proven quite effective in drying paint faster to apply the next coat.  

The drying time of spray paints varies with the surface it’s applied to. You can know more about spray paint drying time and read the details. Similarly, a method that speeds up paint drying time on one surface might not work on the other. Therefore, I will explain how you can dry spray paint quickly on different surfaces.

Best Ways To Dry and Cure Spray Paint Faster

When you start a spray painting project, waiting time is inevitable. However, it is possible to reduce it so you can flaunt your finished work to your loved ones. 

Well, first you must know what are different stages of drying while spray painting so have a look as it is very important to know that before you proceed here

Let’s go over some easy and practical tips in detail.

 1.   Spray Thin Coats

If you keep layering on the spray paint, it will take longer to dry completely. Instead, apply the paint in thin layers, making sure to avoid overlapping, so the coat dries down quicker. 

Don’t spray too close, or you may end up saturating the surface. Start by standing 10 inches away, then decide if you need to move in closer. 

Also, use your entire hand to move the spray can and not just your wrist as you paint the surface.

2.   Increase Airflow

Whenever you’re working with spray paints, it’s better to choose a well-ventilated area. This serves two purposes: good ventilation ensures that you don’t breathe the VOCs in spray paint, and it allows your spray paint project to dry quickly. Therefore, work in an area with plenty of fresh air circulation.

If you want your spray paint to dry faster, you can increase the airflow by opening windows or using a fan to circulate air. Don’t get too excited with the fan, though and place it at a safe distance from the painted object so that the entire surface gets equal air pressure.

Caution: Don’t use the fan if you’re working in a dirty room, or else dirt and debris will stick to your paint.

3.   Increase the Temperature

A warm temperatures between 65 and 85 ℉ is ideal for a spray painting project. You can plan according to the weather forecast and pick days when it’s not too hot or humid. Painting outside on a warm and sunny day can help your paint dry faster.

However, Mother Nature doesn’t always stick to plans, and you may not find the ideal weather to work on your project. So, if you’re working indoors but want to speed up the paint’s drying process, you can increase the room’s temperature with a heater. Not only will it raise a few degrees, but also improve air circulation to cut the drying period by a few hours. 

You can even try drying spray paint with a hairdryer for smaller surfaces, as it works the same way as a heater. Just avoid getting it too close to the wet painted surface. 

4.   Decrease Humidity

Moisture is paint’s biggest enemy– especially when wet, too much moisture in the air can significantly increase drying time. High humidity levels also increase the chances of paint drips and dust contamination. Therefore, always pick days with low humidity, between 40% – 70%, to paint.

If you want your spray paint coat to harden quickly, decrease the humidity in the room by opening windows and doors. You can also use a dehumidifier or portable heater to reduce the moisture content in the air.

5.   Add Paint Thinner to the Paint Mix

You can add a paint thinner to your spray paint to make it dry faster. The solvents in the thinner dissolve paint and reduce its thickness to allow nice and smooth application of paint. A thinner paint means even thin paint layers that dry more quickly than thick ones.

Make sure not to add too much thinner to the paint as it can cause the color shade to be lighter than desired, just appropriate enough to get the desired consistency.

6.   Use Furniture Polish

Another effective way to dry spray paint faster is to apply wax-based furniture polish on the surface. While the product is not an easy-find, the polish can make spray paint dry instantly. 

Simply spray the wax-based polish over wet paint and allow it to dry for 5 minutes before adding a second layer. Wipe off the extra polish with a soft dry cloth.

Depending on the surface, you may need multiple thin layers to make the paint dry completely.

7.   Cure Spray Paint in the Oven

You can make spray paint dry faster on smaller objects by placing them in the oven. Since it delivers a combination of high temperature and airflow, curing spray paint in the oven is a trick that works all the time. 

However, you should not use a traditional oven as the paint releases harmful chemicals and VOCs as it dries, which can get absorbed by the food cooked in the oven later on. Instead, use an oven toaster that’s only used for paint-drying purposes.

You can place the object in a toaster oven when the spray paint is dry to the touch. Set the heat to 250 ℉ and leave it inside for around 2 hours. Before using this technique, make sure the paint is safe to cure in an oven by checking the label, as some may crack or bubble at high temperatures.

8.   Use a Heat Gun

You can use a heat gun to reduce spray paint drying time, but you must be careful and follow safety precautions. 

Hold the gun 2 inches away from the surface and move around the surface so the entire area is covered evenly. 

Caution: Always use the heat gun on a low setting because if you set it too high, you might remove the paint instead of drying it.

Does sunlight make spray paint dry faster?

There’s a common assumption that when we place a freshly painted object outside, the sun makes the paint dry faster, but the wind actually works its magic.

While painting outside has benefits, doing so directly under the sun is not advised. This is because the sun can cause the paint to dry too quickly, increasing the chances of paint cracks. So, if you find yourself in a similar situation, you will have to remove the top layer and start over again.

Temperatures above 50 degrees are ideal for painting, but excessive heat can make your paint peel and leave marks even though it will dry faster.

How To Make Spray Paint Dry Faster On Different Surfaces

As discussed earlier, different surfaces have different drying times depending on how porous it is. Let’s look at how you can make spray paint dry faster on various surfaces.

How To Make Spray Paint Dry Faster On Metal

Metal is a smooth and fast-drying material. If you’re spray painting metal in ideal weather conditions, it can become touch dry within 5 to 10 minutes. However, you can also lower the humidity and rise the temperature to make the paint dry faster. Try placing a heater and fan together near the surface to get the desired result.

How To Make Spray Paint Dry Faster On Plastic

Spray paint on plastic takes around 30 minutes to an hour to become touch dry. But if you want to hurry up the drying process, you can take your project outdoors in the sun and let Mother Nature work its magic. 

For indoor projects, you can increase the air circulation in the room and use a heater to raise the temperature. 

Caution: Don’t give a plastic surface too much heat, though or it may warp and lose shape. This means no curing in the oven or drying it with a heat gun.

How To Make Spray Paint Dry Faster On Wood

Wood is a porous surface that usually needs multiple paint coats to achieve the final result. Spray paint takes one to two hours to become touch dry on most wooden surfaces. 

If you’re working with water-based paints, you can expect them to dry faster than oil-based counterparts. 

By now, you know that heat is your best friend for speeding up paint’s drying time. So, paint on a sunny day when the temperature is between 65 and 85 ℉ or use a heater or heat gun to make your wooden surfaces dry faster.

How To Make Spray Paint Dry Faster On Cardboard

Cardboard, like wood, is another porous surface that needs to be dealt with care. If you spray on a thick layer of paint at once, you could ruin the surface; therefore, thin layers of paint are ideal for cardboard projects.

If you want the paint to dry soon, increase the ventilation by opening windows or placing a fan near it for quick results. Like plastic, cardboard cannot withstand high heat, so keep it away from heat guns, but you can use a hair dryer instead.

How To Make Spray Paint Dry Faster On Fabric

Spray painting on fabric requires a different technique– from pre-washing the material to the actual paint application. When you spray paint on the cloth, you have to do so in a continuous motion, or else you will produce splatters that will ruin the final look.

If you want the painting design to last on the fabric, you should leave it for 72 hours before washing. You can speed up the drying process by placing your project outdoors but not under direct sunlight. You can speed up the process by using a hair dryer set to at medium heat, keeping it at a distance of at least 10 to 12 inches from the surface.

Ironing the reverse fabric on low heat can also add an extra layer of protection to the design once the paint has dried up.

Plus, it is so much fun to spray paint your old pair of jeans. Here is a sneak peak into how to do that!

FAQs

How long does spray paint stay tacky?

Epoxy and polyurethane spray paints remain tacky for 5 minutes, but lacquer spray paints need a few more minutes to become dry to the touch. Latex and enamel paints take the longest time to dry and stay sticky for 60- 90 minutes.

How many coats of spray paint is too much?

You should apply 2-3 light coats of paint to achieve good coverage. Some surfaces may need more layers for a deeper color though. A primer will help achieve better finish with less coats of paint. 

Why is my spray paint not drying?

There can be two main reasons for spray paint not drying: you applied a thick layer of paint or didn’t give the first coat enough time to dry before applying the second one. 

Why is my spray paint soft?

If your spray paint is soft, it could be because you applied a thick layer of primer or sealer. Sometimes, not giving sufficient drying time between undercoat and topcoat can also cause this problem.

Long Story Short

You can speed-up the drying time and handle your DIY spray painting projects by improving ventilation and temperature and reducing humidity of the surrounding. If you want to know what are the exact drying times of different spray paints then you can read it here

If you want to know more about anything else regarding this topic, please leave a comment below and we will be happy to give you a response. 

interior design 6691116 1280 Best Time of the Year to Paint Interior - Expert Advice

Best Time of the Year to Paint Interior – Expert Advice

Excited to paint your house walls? I was too. But back then, I knew very little about paints, especially how the different seasons affected the application process. Now that I know how important it is to pick the right time of the year to start painting, you can too learn from my experience.

The beginning of the winter and the initial weeks of summer are ideal for painting indoors. Humidity levels at that time are low, and the temperature suits all kinds of paints, such as oil-based or acrylics. However, one must avoid extreme summers to prevent the paint from diluting or extreme winters to prevent paint from thickening.

There is much more to know about how different weather conditions can affect your paint application process. First-timers might be surprised to see how different types of paint react differently to hot, cold, and moderate temperatures, but do not worry, I got your back.

Painting in Spring 

Spring is perhaps most people’s favorite season. With winter winds coming to a calm and trees blossoming, it is the perfect weather for all kinds of indoor and outdoor activities. Spring season is also the peak time for renting or selling your property. Painting your house during this season will give it a fresh look and certainly attract the attention of more customers.

Waiting to get the house painted in the summer can add up the expenses, so it is better to utilize the springtime. 

Humidity levels are pretty low in spring, eliminating any chance of moisture getting trapped during the painting process.

Moreover, the temperature remains cool throughout the day, which aids in drying the paint faster.

I suggest, spring is a great time to freshen your home and prepare for the coming year if precipitation levels are minimal. 

Painting in Summers

Painting your interior in the summer can be pretty beneficial at times. The warm summer air causes the paint to dry faster, and you can complete multiple coats of paint in a day. The bright daylights give you the perfect view for choosing the ideal shade for your rooms.

The paint also gets thinner in consistency due to high temperatures throughout the season. This paint, when applied, gives off a smoother and cleaner finish to your walls. 

While there are many advantages of painting homes in summer, there are a few drawbacks to it. The hot weather can cause fatigue and make painting a tiring process. 

High humidity is another common problem in summer. It can interfere with drying time despite the warm air. Therefore, you must always check the humidity, but checking the weather channel or using a hygrometer and ensure that the levels are between 40% – 50%.

Sometimes the temperatures get as high as 104°F, and the paint starts cracking. This happens if the base work loses all its moisture before the new coat of paint is applied. To avoid that, ensure the walls are cleared of pipe leakages, or this problem will persist for a long time.

Painting in Fall 

While we approach fall, we can prepare our place for the most awaited Christmas season, just a couple of months away. Fall happens to be a great time to paint your interior and prepare the house for upcoming family gatherings and events. 

Painting in the last weeks of fall is an intelligent choice as it can prepare you for the Christmas holidays and allow you to flaunt your interior to family and friends. 

Since temperature fluctuations throughout the day are minimal, the paint will spread and dry out evenly.

Most professionals agree that it is the best season for indoor painting. A lot of factors contribute to fall as an ideal season for painting, as summers can be pretty hot, while winters are freezing. The perfect balance between hot and cold weather is achieved during the fall.

Another advantage you get is that the chances of precipitation in fall are lesser, and humidity levels remain low. The dry atmosphere and cool breezes throughout the day provide great assistance for the paint to dry and properly bond to the wall surface. 

Painting in Winters

Painting in winter has its fair share of pros and cons. 

Winters are seasons of lower humidity or, in other words, a drier season which enables quick drying of the paint on the walls. That helps to save time which is speeds up the painting process.

However, the consistency of the paint often becomes denser in extremely cold temperatures. This makes it challenging to adhere to the walls. You can add some thinner to the paint to avoid this problem.

Oil-based paints oxidize slower in cooler temperatures. Moreover, extreme cold temperatures also reduce the evaporation rate of solvents like water, which can delay drying. 

As mentioned earlier low humidity can always help speeding up the process, and therefore the best part time in winters specifically are the first few weeks as the humidity and temperature levels are just perfect for interior painting. 

SeasonProsCons
Spring Minimal temperature fluctuations spread paint evenly. The inside of your house can look as fresh as the blooming flowers outside.High precipitation can sometimes hinder painting projects. 
Summer Thinner paint consistency results in smooth application. Extreme heat causes cracking High humidity dries paint slower.
Fall Moderate temperatures ideal for interior painting Low humidity and atmosphere moisture. Adherence problems if temperature drops as low at 50 degrees. 
Winter Low humidity dries paint faster  Dense paint makes application difficult. 

Frequently Asked Questions

What is the best month to paint indoors?

March, April, and November are the most suitable months for painting indoors. The temperature ranges from 50 to 65 ℉, perfect for most oil-based paints. 

It is just the right temperature for the paint to dry quickly, and the humidity is relatively low. The paint forms a solid protecting layer with the walls.

Can you paint in temperatures below freezing point?

Painting at temperatures below the freezing point is not possible. The drying time of the paint increases with the decrease in temperature, but at temperatures this cold, the paint can also solidify. Most paints lose their consistency which makes application difficult. Even the special cold-weather paints cannot be applied at temperatures below 35 F.

What happens if it starts to rain while you are painting indoors?

As long as the paint is not coming in contact with the water directly, it won’t affect it all. However, if the paint on the walls hasn’t dried, it may take longer to dry out. Since rain raises the humidity levels, the drying process of the paint is affected negatively. 

Does paint fade away faster in summers?

Paint fades away faster when exposed to sunlight directly for more extended periods. There’s hardly any chance of sunlight hitting straight on the interior walls; hence indoor paints are not affected by much sunlight. The fading process of indoor paint remains the same for all seasons.

In a Nutshell

Painting indoors is an exciting activity you can carry out with your family or your best friend. There is no right or wrong season to paint indoors. However, before you begin, check for the temperatures and humidity levels in your surroundings. Most people prefer painting during the winter since the season is the dry season and avoid painting during the rainy season as the humidity levels are at their peak.

Check for our article on best humidity levels and temperature to paint in so there’s nothing left that you could go wrong with.

Let us know if you have any questions in mind, and we would love to answer them.

pexels malte luk 1669754 Do I Need Primer for Interior Walls Before Painting

Do I Need Primer for Interior Walls Before Painting

“Practice makes perfect” stands true especially when years of experience are at hand. Painting over the past few years has taught me a great deal, and it is absolutely necessary to understand how to go about your painting job to achieve the desired post-paint look on the walls: Primer is one important ingredient. 

Yes, it is necessary to use a primer before you start painting indoors. It will give a professional finish on your walls. Skipping the primer will require additional coats of paint to even out the walls. However, you can skip the primer if you are reapplying the same shade of paint to freshen up the walls.

Painting your house is time-consuming, and you want to do it right the first time to make it last for years to come. Make sure you know how important primers are for your interior walls prior to painting them. 

Primer: the foundation for paints

Primers are the undercoats that prepare your walls for painting. They cover the surface entirely to provide a smooth-finished canvas for you to begin your painting project. Without primer, it would be “painting on a crooked surface”. 

Primers look like sticky paints or sealants that adhere to the walls flattening its surface making it perfectly clear of any cracks, cuts, dents and gaps. After applying primer, painting becomes a piece of cake, and you will love the final results. 

Benefits of using a primer

Interior paints can last up to 10 years if painted using a primer. Below are some ways you can benefit from priming the interior walls before painting.

1. Optimizes painting surface

Primers can help optimize the painting surface by filling in the cracks and pores on the interior walls. The formula of primers contains sealants that get inside these pores and cracks and adhere firmly. This prevents the primer from coming out after the painting process is finished. 

Moreover, depending on the type of primer, it can also absorb moisture in the walls or eradicate excessive dryness so the paint can sit neatly on the walls.

2. Improves adhesion and compatibility

Primer’s adheasive properties cannot be taken taken for granted. A glue-like base for your drywall, it really helps the paint stick neatly to the surface. They hold the paint in place and enhance the top coat finish minimizing the chances of top coat failure. 

Skipping this step will be a risk that could give you chipping, pealing and staining on walls, just a couple of months into the future. Redoing your walls would cost you money and time both.

Primer will make your walls hold the paint longer, look neater, feel smoother and smell fresh for a years ahead. 

3. Saves time and money

Without the primer, you may have to use multiple coats, more than the usual requirement, to achieve smoother finish and to get the desired color of the paint on the wall. Extra paint could be utilized to eradicate the unwanted marks on the walls. All that means a great amount of extra paint is going to be used unnecessarily. 

Using a primer will create a base that makes your desired color pop out in fewer coats, covering all those unwanted marks on the walls, and saving a great amount of time and money. 

Moreover, paints applied over primers last longer, and gives an amazing ambience to the room.

4. Provides quality and finishing to the walls

No one wants walls that begin cracking in a couple of weeks after painting, nor does anyone want ugly spots to reappear. We also do not wish to see textured walls after working all day long for a smooth finish, right!

Smoothing out uneven surfaces and adding value to the paint quality is what a primer does. Invest in a primer if you want a professional-like finish on your interior walls.

Why is priming a wall necessary?

1. To avoid tough stains and bad odor on walls

Priming becomes necessary if your walls have any stains, marks and dark blotches. These could be cooking stains, grease spots, water damage, or your child’s random artwork. Priming will permanently seal any of these, so they can be hidden but most importantly they remain hidden years after the paint is applied. 

Another most amazing quality of a premier is it cover any terrible odors that the walls soak up over time. If your walls smell of cigarette smoke, pets or any other unpleasant odor, you must prime your walls before repainting them. 

2. Before painting drywalls

Drywalls cannot be painted directly. The surface of fresh drywall is highly porous, and absorbs most of the paint. If the walls are not primed, you will need to apply multiple coats of paint before you get an even finish, and then too the finished wall is not guaranteed to meet your expectations.

The primer get into the holes and cracks and prevents the paint from getting absorbed into the drywall ensuring a smooth paint application. The paint adheres better on a primed wall and is not affected by temperature changes inside the room. 

3. To avoid moisture-related damage in humid areas

Wall paint is more prone to damage in areas with high humidity. Moisture can cause molds to form and paint to peel off faster. Priming the walls is essential especially in kitchens or bathrooms where the humidity is very high as it will prevent any damage and ensure longevity.

4. While painting repaired walls

When walls are repaired, patches of spackle are left behind. The application is not smooth if the paint is applied directly on these patches. Cracks may reappear after some time, so applying a coat of primer is necessary before painting the wall to reduced these imperfections.

5. Applying paint to glossy surfaces

The paint does not adhere well to glossy surfaces. It needs a slight texture to stick to the walls. Using a primer before painting the wall provides a base for the paint to set in. 

The primer will adhere to any shiny surface, and you can easily apply paint on top of it. 

Sometimes these surfaces need sanding and rebuffing before they are primed.  

6. Porous surfaces

Materials like untreated wood on fresh drywalls are highly porous. They will absorb any paint applied to them right away. To prevent this from happening, priming the walls is very important. 

A coat or two of primer is good enough to fill the pores and prepare the wall for painting. Primer acts as a sealant, saving the paint from getting absorbed into the walls.

7. Changing the color of your wall

If you want to change the outlook of your room, you might want to switch to a color on the other end of the color wheel. Transitioning from a darker to a lighter shade is impossible without using a primer. The primer neutralizes the color tones so that whatever shade you apply can appear as desired. If you skip the primer in such conditions, a mixture of the two colors will be the final result. We do not guarantee how you will like it.

What happens if you do not use a paint primer for your walls?

In some situations, such as the ones mentioned above, priming walls before painting becomes necessary. If you skip primers in mandatory-to-prime situations, you’ll spend a lot of money on paint and wouldn’t even be able to achieve the perfect finish.

If you decide not to prime, you might face these issues:

  • Absorption of paint into cracks and pores will give an uneven surface even after multiple coats. 
  • Paint will fade faster, revealing the spots and blotches underneath it.
  • Changing wall color of your wall will not turn out as you required so you might have to compromise it, multiple layers might get you close though. 

When can you skip the primer?

Now that you know when to use primer on interior walls let’s have a look at situations where you can skip the priming process.

Paint is infused with primer

Applying multiple coats of primers, waiting for it to dry out, and then applying coats of paint can be too much for someone working individually. To ease the process of efficient painting, paint companies have now begun manufacturing paint and primer in one paint bucket. 

Since these paints are already infused with primer, you can skip the primer coat and start directly.

Reapplying the same color on walls

Priming the walls can be a lot of work. Even though it saves you money in the long run, it still appears as a considerable cost at the painting time. If you want to freshen up your interior walls with a similar shade of paint, you can start directly with the paint and skip the primer.

Frequently Asked Questions

How long after priming can you paint?

Most latex-based primers take between 30 minutes to an hour to dry out. However, it is suggested to wait for 3 to 4 hours before beginning to paint the walls. This ensures that the primer has dried off completely regardless of the temperature and humidity in the room. If the primer is wet, the paint may appear to wrinkle on the walls.

How many coats of primer do you need?

Ideally, you need two coats of primer before applying paint to the walls. In some cases where you have stubborn red or orange stains or persistent odor, you might as well have to apply three coats of primer to achieve optimal results.

Is it OK to paint over old paint without using a primer?

It is okay to paint over old paint without using a primer. Suppose you are reapplying the same color. However, if you are switching to an entirely different shade of paint on your interior walls, the color may not show up without using a primer. In such cases, applying a primer is important.

Is paint and primer in one better?

Paint and primer in one, as the name suggests, is paint mixed with primer. Not only it helps save time, but also has better-adhering properties. It tends to cover up odor and stains, fill in pores, and cover cracks. 

However, since paint and primers have different functions, mixing them compromises the individual function of each. Thus, the products are better off used separately. 

FINALLY – Is it necessary to use primer for interior walls?

Priming the walls is an intelligent decision. You can easily spot the difference between a primed wall and an unprimed one. It may appear as a factor that adds cost; however, you can save a massive sum of money by reducing the number of coats you need to apply and the frequency of repainting the interior walls.

If you were to begin painting without a primer, this is your sign to get one now. 

pexels felicity tai 7951238 How To Apply Waterproof Spray Paint- A Step-by-Step Guide

How To Apply Waterproof Spray Paint- A Step-by-Step Guide

Poor preparation and paint application can make even the best waterproof spray paint fail at withstanding moisture. As a DIY enthusiast, I can guide you through my research and experience in achieving the best results with this particular question: how to apply waterproof spray paint?

Applying waterproof spray paint is easy. Firstly, wash and sand the surface to get a smooth surface. Cover the surface with a primer to ensure the paint adheres properly. Next, apply the paint evenly in thin layers, and once the final coat is ready, you can finish it with a sealer.

Weather-proof spray paint is an effortless way to spruce up different surfaces and keep them looking as good as new. But, if you don’t follow the application process correctly, you may end up with a paint job that washes off with the next rain. So, let me reveal how you can achieve excellent results with waterproof spray paint.

Tools/ Equipment You Will Need

The success of a DIY paint job depends on the tools and equipment you use. Here are a few things you should keep handy before you begin.

  •  Soft bristle brush- for cleaning the surface
  • Soapy water
  •  Paint thinner or rubbing alcohol (if needed)
  •  Fine grit sandpaper
  • A rag cloth
  • A primer
  • A waterproof sealer

Steps To Get Waterproof Results With Spray Paint

Most spray paints have high levels of volatile organic compounds (VOCs) that can be detrimental to health. Hence, wearing protective gear such as a face mask or respirator is necessary before you begin spray painting.

Also, make sure that the paint you’re using for the project is waterproof and not just water-resistant. If you are unsure about the difference between them, you can read our blog on Is spray paint waterproof to get a better idea.

Now, let’s get started.

Step 1: Clean the Surface

It is always better to paint on a clean surface as it ensures a smooth finish without any dust particles trapped underneath. Clean the surface with soap, water, and a soft bristles brush.

If you are working with highly saturated items or plastic, paint thinner or rubbing alcohol can help speed up the cleaning time. Allow the wet surface to dry completely before moving on to the next step.

 Step 2: Sand the Object

To ensure your spray paint adheres to the surface properly, removing any dust or debris is essential. You can use fine-grit sandpaper to achieve a smooth and even surface. Don’t forget to wipe away the sanding residue with a clean rag or tack cloth afterward.

Step 3: Apply A Primer

While a primer is not necessary for all spray paint projects, you should always prime furniture and outdoor items. In addition, a primer is crucial when using water-based spray paints as it helps the paint stick to any surface and keeps water and moisture from breaking the color down over time.

Apply a primer compatible with your selected paint, following the instructions on the label.

Step 4: Start Painting

The paint application is a critical part of creating a waterproof surface. Start spraying paint in thin, even layers, ensuring the entire surface is covered. Any missed spots mean that water may get beneath the painted surface and result in cracks. You want to avoid spraying on the paint too thick and allow plenty of drying time between coats.

You may need two to three thin coats of paint to achieve your desired color and finish. Don’t forget that dry time is critical, so it’s better not to rush the process.

Step 5: Seal the Paint

While you don’t need to seal all types of spray paints, it is recommended to use a sealer for longevity. A clear and waterproof spray paint sealer can help preserve the paint color and make the coat more durable.

If you’re using waterproof spray paint, skipping the sealer for indoor projects is okay, but if the paint is only water-resistant, the sealer is necessary to protect surfaces from water and moisture damage.

five steps to apply waterproof spray paint
Steps to apply waterproof spray paint

FAQs

How do you waterproof spray paint?

If you want the paint to be weather-resistant, it’s best to apply waterproof spray paint. You can also use a waterproof sealer on top of regular paint to make it last through rain and snow. While a single coat of sealer may be enough, you can add multiple layers depending on your project’s vulnerability to moisture.

Can you make spray paint last on metal?

Yes, you can make spray paint stick to metal and also last by using a primer underneath. For permanent results, it’s recommended to use water-based acrylic paints or oil-based paints. Don’t forget to apply a sealer at the end to make the project waterproof.

How long does spray paint take to harden fully?

Different types of paints have varied drying times. Water-based paints harden more quicker than oil-based paints. Lacquer spray paint is the quickest to dry, with only 20 to 30 minutes of drying time.

Lastly

A spray paint DIY takes time and energy, so why not make it waterproof while you’re at it? With the right tools and technique, you can achieve a flawless finish and also make your project last longer with techniques that that explain how to apply waterproof spray paints.

spray paint waterproof

Is Spray Paint Waterproof – Insightful Detailed Guide

Spray paint is probably the easiest way to paint an object, making it a preferred addition in most DIYs. However, many worry if it will last or simply wash away with water. I will help you debunk misconceptions about different kinds of spray paints and reveal the answer to the most common question: “is spray paint waterproof?”

In general, spray paints are not waterproof, but they are water-resistant. However, exterior-grade spray paint is waterproof and can withstand weather elements like rain and snow. You should read the label carefully before buying spray paint to ensure it can resist moisture.

Several types of spray paints are available on the market, but if you know what you’re looking for, selecting the perfect one for the job gets easier. With my help, you will be able to identify which spray paint is waterproof the next time you walk into a paint shop.

Is Spray Paint Waterproof or not?

Some types of spray paints are waterproof, while others are not. Most of the options you will find are water-repellent but not completely waterproof.

However, exterior spray paints are formulated to endure weather elements, including moisture. But when dealing with outdoor spray paints, it is important to prep and seal the surface correctly to get the full benefits of waterproof paint.

How To Tell: is Spray Paint Waterproof?

You can tell whether the paint is waterproof by carefully reading the spray paint’s label. If the product is waterproof or water-resistant, the manufacturer will indicate it on the container. But if you don’t see a mention, it will probably wash away effortlessly.

What Makes Spray Paint Waterproof?

Waterproof spray paints contain a special water-repelling ingredient in their formula. When added in proper ratios, this increases the paint’s ability to withstand water. However, all paints aren’t created equal– some have a higher level of water repellency than others. The amount of water-repelling agents used in the paint formulation changes its characteristics and response to water.

Waterproof vs. Water-Repellent- What is the Difference?

Moisture causes mold, mildew, and rot in wooden and masonry surfaces. For this reason, many people prefer to use spray paint that doesn’t let moisture in and keeps the color looking vibrant for longer. There are two basic types of spray paints: waterproof and water-resistant. But the difference between them can be confusing for first-time buyers.

Waterproof paint combines pigments, resins, and solvents that create a moisture barrier on any surface that it’s applied. It also has additives that prevent the growth of mildew and mold. Thus, this type of paint is water-insoluble and designed to keep the color and finish intact even if the surface comes in regular contact with water. You can apply a sealer to build another protective layer against water for a long-lasting finish.

On the other hand, water-resistant spray paints can endure water, but they aren’t entirely waterproof. They will eventually break down, fade, chip, or wash away over time. So, waterproof paint will give the best results if you’re planning to paint on a surface outdoors, in the bathroom, kitchen, or any other area with more humidity and moisture.

is spray paint waterproof

Different Types of Spray Paints

There are two broad categories of spray paints: they are either water-based or oil-based. When we say a color is oil or water-based, we are actually referring to the type of solvent used in the paint. It is the liquid component that evaporates when the paint dries.

  • Water-based paints are more eco-friendly and don’t require mineral spirits or turpentine for cleaning. Instead, it easily washes away with soap and water. They can expand and contract with changing weather conditions, making them more resistant to cracking.
  • Oil-based paints dry harder, which makes them more resistant to wear and tear. But since the paint dries harder, it doesn’t have the same flexibility as water-based paints and becomes dry, brittle, and chalky over time.

Here are a few basic types you can buy from a paint store. Each of them is either water-based or oil-based.

1.   Acrylic Paint

Acrylic, also known as Tempera, consists of pigments, flour, and water. So, is acrylic spray paint waterproof? No, it’s not.

This chemical-based paint is often used for painting cars, but it has to be covered with a clear coat or sealant to make it waterproof. Applying acrylic paint to surfaces is relatively easier, but it cannot endure moisture once the paint dries.

Montana Black Color Spray Set of 12 one of the best choices for acrylic spray paints for graffiti arts.

51d5u5bP97L. AC SL1000 Is Spray Paint Waterproof - Insightful Detailed Guide

2.   Epoxy Paint

Epoxy spray paint can be water-based or oil-based, so you can choose one according to your preference. This type of paint contains adhesives and polymers, which makes it resistant to stains, chemicals, and water. Although some epoxy paints are labeled waterproof, they don’t respond well to heat or frost.

However, the Rust Oleum Appliance Epoxy Spray Paint works best on appliances and can resist heat and frost in long run. The rust-resistant, white paint provides a glossy finish to the product and lightens up the surroundings.

718jsguOHjL. AC SL1500 Is Spray Paint Waterproof - Insightful Detailed Guide

3.   Chalk Paint

This is another water-based paint widely used for spray painting furniture, patio, floors, etc. It is not waterproof, but it’s water-resistant. However, an added layer of sealer or lacquer can significantly increase the paint’s life and protect surfaces from damage by water.

The Rust Oleum Chalk Spray paint is an amazing quality paint spray paint which comes in many colors and shades of blue, grey, rust and white.

61ip7kR33qL. AC SX300 SY300 QL70 FMwebp Is Spray Paint Waterproof - Insightful Detailed Guide

4.   Enamel Paint

Enamel paints can be water-based, oil-based, or lacquer-based, and the solvent used determines how weather-resistant the formulation is. Therefore, if you’re wondering, ‘is enamel spray paint waterproof,’ you should know that oil-based or lacquer-based enamel paints are waterproof and can be used without a sealer.

Water-based enamel paints are not waterproof like the other two variants and need the surface to be primed and sealed to make it withstand moisture.

Rust Oleum’s Enamel Gloss Spray Paint is one of those high quality spray paints that come in vibrant colors. It is a must try for all your DIY projects.

711aPkWcaSL. AC SL1500 Is Spray Paint Waterproof - Insightful Detailed Guide

5.   Latex Paint

Latex paint is often referred to as ‘acrylic latex’ because of its similarities with acrylic paint. However, a prominent difference between them is that latex is water-based while acrylic is chemical-based. Moreover, latex paint is cheaper and easier to use, but it’s not as weather-resistant as acrylic, making it more suitable for indoor projects.

I would highly recommend Krylon Latex Aerosol Spray paint as it gives the most durable finish.

51MSPlQhm+L. AC SL1000 Is Spray Paint Waterproof - Insightful Detailed Guide

6.   Metallic Paints

Reflective pigments in metallic paints make them ideal for projects where you want a high-shine finish. Moreover, this paint is a cheaper alternative to enamel-based colors but still offers impressive results.

Water-based metallic spray paints are suitable for indoor projects as the paint is not waterproof.

However, exterior-grade metallic paint is mostly oil-based and highly resistant to water, making it a waterproof spray paint for metal and other surfaces.

You will find a number for different metallic shades with the Rust Oleum Metallic Paint and Primer in One, extremely durable and highest quality spray paint for a smooth finish.

71dlwh7RklL. AC SX300 SY300 QL70 FMwebp Is Spray Paint Waterproof - Insightful Detailed Guide

Here is a little summarized version

Type of Spray PaintWater-Proof X-BasedSealant Required
Acrylic Paint Chemical BasedYes
Epoxy PaintWater BasedYes
Epoxy PaintOil BasedYes
Chalk PaintWater BasedYes
Enamel PaintWater BasedYes
Enamel PaintOil BasedNo
Enamel PaintLacquer BasedNo
Latex PaintWater BasedYes
Metallic PaintWater BasedYes
Metallic PaintOil BasedYes
Waterproof Spray Paints

*Although some paints do not require sealant, however its highly recommended for a long lasting finish

FAQs

Does rain wash off spray paint?

Wet paint easily washes off with rainwater, but waterproof paint will not wash away with rain if it has dried for long enough.

Is spray paint permanent?

Spray paints can last between three to five years, depending on the quality and type used. Exterior-grade waterproof paints have a longer life than regular spray paints.

Does spray paint need to be sealed?

It is not necessary to seal spray paint, but it is recommended to seal the surface after using water-based paint. Also, if you are working on an outdoor project, a sealer can help increase the life of the coat.

Does spray paint come off easily?

You can clean water-based spray paints quickly when wet. Oil-based paints require turpentine and other strong chemicals for removal.

Is spray paint toxic?

Most spray paints are toxic as they contain hazardous elements called VOCs. Also, you should always wear protective gear when using spray paint to keep yourself safe.

Is spray paint heat-resistant?

Yes, some spray paints can resist high heat levels and you can use them for painting outdoor surfaces and appliances such as ovens.

Conclusion

Whether or not you need waterproof paint for your project depends on its exposure to humidity, moisture, and water. Most outdoor spray paints are waterproof, but the longevity of the color depends on how you prepare, prime, apply, and seal the paint.

We hope to have answered your question “is spray paint waterproof” in detail. So, here is a detailed guide on how to apply waterproof spray paint, check out the details and let us know what you think.

best temphumidity Best Temperature and Humidity for Interior Painting 

Best Temperature and Humidity for Interior Painting 

Painting your interior could be one of the most exciting projects that you’re taking up to give your house a renovated look. However, factors like temperature and humidity drastically affect the outlook of the paint.

The ideal indoor paint temperature is between 50 and 90 degrees Fahrenheit, and the recommended humidity is between 40% and 50%. In case of deviations from these temperature and humidity ranges, the paint may take too long to dry or begin chipping off, resulting in an untidy finish.

Painting the entire interior of the house by yourself sounds exciting. However, it is a highly time-consuming, considerably costly, and reasonably exhausting job. We’re sure you do not want to mess it up, wasting your time and money. Read along to stay on track and understand how the temperature and humidity affect the paint and what precautions you can consider rocking your self-painted interior.

Types of PaintsBest Temperature Range Ideal Humidity Range
Oil Based Paints40°F – 90°F40% – 50%
Latex / Water Based Paints50°F – 85°F40% – 50%

Best Temperature to Paint Inside

If it is your first time painting the inside of your house by yourself, we understand that it can be the most exciting thing that you can think of. However, rushing to open the paint cans and beginning to apply coats on the walls is not an intelligent choice.

Before you take the paint brushes in your hand, ensure that the temperature is ideal for painting. 

The best temperature for interior painting with oil-based paints ranges from 40°F to 90°F. However, latex-based paint dries well at temperatures between 50°F and 85°F.

If temperatures deviate from the optimal ranges, you may experience discolouration, bleaching, fading, lifting, cracking, bumps, blisters and flakiness, which we are sure you do not want.

Ideal humidity for painting indoors

Just as the temperature is a crucial factor determining how the paint sets on the walls, so is the humidity level. Therefore, you should only begin painting after checking the humidity levels.

The ideal humidity for painting indoors ranges from 40% to 50%. Anything higher will take too long for the paint to dry. 

This means that you will have to dedicate more than 24 hours to this venture. Moreover, the longer it takes for the paint to dry, the higher the chances of it clumping together on walls. Painting in low humidity levels does not fulfill the walls’ moisture requirements and causes paint chipping during the drying process.

Whether it is your first time painting your interior or you’ve been doing it for quite a few years now, the paint must look neat on the walls. This can only be achieved if humidity levels are kept into consideration.

When to Start Painting –  Earlier in the Day or When the Sun is High?

Experts recommend not to paint under direct sunlight. Therefore, it is a good idea to begin painting earlier in the day. This way, you will be done with quite a chunk of what needs to be painted, and an actual drying process can begin.

If you begin painting when the sun is high, chances of uneven drying and chipping increase. You may also notice brush marks or lap marks on the walls. Moreover, the UV rays from the sun can change the chemical composition of the pigments present inside the paint and eventually bleach out the color too.

Beginning earlier in the day will also help you manage time efficiently, and you can probably get it done before the sun goes down.

FAQs

Should you paint indoors on a rainy day? 

There is no problem in painting indoors on a rainy day as long as you ensure the rain does not reach the inside of the house. A few things that you must keep in mind are;

  • Humidity levels should not be too high, or the paint won’t dry. 
  • The painting surface must be at least 50°F 
  • The paint will take longer to dry. 

How can I tell what the humidity is in my house? 

The easiest way to measure the humidity in your house is using a hygrometer. It will provide you with an accurate reading of the humidity levels in your house. 

You can also perform the ice test if you do not have a hygrometer. A hygrometer gives you a general idea of whether the humidity is low or high. 

Apart from these methods, various weather applications are also available for this purpose.

Is 70% humidity too high to paint? 

70% humidity is considered too high to paint. Due to the air’s moisture content, evaporation slows down to the extent that the paint takes considerably longer to dry. This consumes extra time and doesn’t give off a neat look.

The ideal humidity for painting indoors is 40 – 50%. However you can use a dehumidifier to reduce humidity indoors.

What paint is good for high humidity? 

Satin or semi-gloss paints are the best kind of paints to use in a high humid area. These paints provide a hard finish that is moisture-proof.  

The glossy surface deflects any moisture, unlike the matte paints that absorb it. 

How to reduce humidity in your house?

Using a dehumidifier can help you reduce humidity if you have already begun painting indoors. An alternative to that would be putting up oscillating fans in the room. You can also use an industrial blower to get rid of excess moisture. 

Does humidity affect drying of oil-based paints?

Yes, humidity affects the drying of oil-based paint as well. When the surrounding air is saturated with water vapors, it doesn’t leave much room for any solvent to evaporate. Oil-based paints use turpentine as a solvent, making it difficult to evaporate when the humidity levels are high.

To sum it up..

Ideal temperature and humidity for interior painting are equally important as the type and brand of paint you are using. 

Let us know if you still have any questions, and we would love to answer them. We wish you all the best in this indoor painting venture.

guillermo latorre Y44x1mQB2Xc unsplash Can You Spray Paint Concrete - 6 Speedy Steps

Can You Spray Paint Concrete – 6 Speedy Steps

Concrete is a durable building material, but too much of its gray color can be a bit boring. Luckily, I can help you cover imperfections and spruce up the look of any concrete object, from walls to basements and driveways, with a coat of spray paint. With my tips, you can spray paint concrete walls and achieve a smooth finish that doesn’t chip or feather away.

Yes, you can easily spray paint on concrete surfaces with the correct technique. Start by cleaning the surface you want to paint and follow it up with a thorough sanding to achieve a smooth base. Apply a coat of primer to build a strong foundation, and finally, spray the paint in multiple thin layers for an even finish.

Painting on concrete can be tricky, and it’s easy to mess up the paint job if you don’t follow the right process. Here is everything you need to know about painting concrete surfaces like a pro while making sure it stands the test of time.

What Kind Of Spray Paint To Use On Concrete?

A spray paint DIY is the easiest way to bring life to old and dull concrete surfaces. It not only enhances the appearance of concrete objects but also protects surfaces from stains.

While the thought of clean and freshly-painted concrete is appealing, choosing the right type of paint is critical to give your masonry surface a new look. There are two types of concrete paints:

  • Acrylic latex paint
  • Epoxy paint

Each type of concrete paint has pros and cons. Familiarize yourself with the two, so you know which kind of paint is better suited to your project.

Acrylic Latex Paint

Acrylic latex paint is water-based and makes paint application on concrete seem like a breeze. The paint mixes and spreads quickly on masonry surfaces without special tools such as brushes or rollers. It is a budget-friendly option that can be used to paint walls, floors, steps, etc.

The downside of acrylic latex paint is that it’s not as durable as epoxy paint. As easy as it is to apply it, the paint comes off rather quickly and requires a fresh coat every 2-3 years.

Epoxy Paint

Epoxy paint is available in different variants, such as two-part solids-based, water-based, or solvent-based. It is an acrylic latex product that contains a small amount of epoxy in the mix. The addition of epoxy provides a tough and durable protective coating that is easy to maintain.

The main difference between epoxy and ordinary paint is that epoxy ensures that the paint adheres to the concrete surface better, whereas standard acrylic paint will eventually flake and peel.

Epoxy kits contain two liquids that must be mixed before application: an epoxy resin and a hardener. This type of paint is difficult to spread and is more labor-intensive. Apart from the additional paint application hours needed for epoxy paint, it is more expensive than acrylic paint. However, the results of epoxy paint application are amazing and worth the cost.

Additional Considerations For Paint Selection

If you plan to spray paint concrete, the type of paint you select isn’t limited to the latex vs. epoxy debate. There are other important considerations that you should keep in mind before starting your project.

  • Where is the object that you want to paint? Floor paints and epoxies are heavy, so they don’t work well on vertical surfaces. So, it’s better to buy concrete wall paint or concrete brick paint.
  • If you want to use the paint outdoors, make sure the paint is exterior-grade and weather-resistant. Exterior-grade paint and epoxies hold up well under harsh weather conditions and require fewer repairs and touch-ups.
  • Decide on the paint finish you want. A glossy surface is smooth, easy to clean, and overall more durable. But a matte finish would be more suitable if you want your masonry to blend into the background.

Materials You Will Need To spray Paint Concrete

Painting concrete is not as easy as painting a regular wall, but if you do it correctly, it can make your home look modern and neat. Here are the equipment and materials you will need for spray painting concrete.

  • A stiff bristle brush
  • A putty knife
  • A pole sander
  • A paintbrush, roller, or spray paint
  • Protective gear mask, gloves, eye googles and apron
  • A vinyl concrete patching compound
  • Sandpaper
  • Concrete sealing primer
  • Non-skid concrete paint
  • Painters tape

6 Steps To Apply Spray Paint To Concrete

Now, let’s get down to the real task. Please remember to wear protective gear so the paint doesn’t come in direct contact with your skin, eyes, or clothes, as it can be hazardous to health. Also, if the object you’re painting is brand new, wait for at least a month before painting it; otherwise, the paint will not adhere to the surface properly.

You can follow this step-by-step guide for painting on concrete.

Step 1: Clean the Concrete Surface

You can achieve good paint results only if you start with a clean surface. Therefore, you must thoroughly clean the concrete surface with a stiff-bristle brush and remove loose concrete and debris. If you are working outdoors, remove any weeds or moss growing out of the area you want to paint.

You can use warm soapy water to get rid of any grime or dirt. If you have a power washer, take it for a spin and cut your cleaning time, but let the concrete dry completely before moving on to the next step.

Step 2: Patch Holes and Cracks

Concrete has small holes and cracks that can result in a patchy paint application. You can smooth out the texture by filling in the holes with a putty knife and concrete compound.

Step 3: Sanding

Use sandpaper to sand off any rough bumps or spots. If you are painting a large surface such as the basement floor or a wall, you can attach the sandpaper to a pole sander to cover more area quickly. After sanding, make sure to clean up any residue.

Step 4: Tape off areas you want to keep paint-free

It is a good idea to tape off any nearby areas where you don’t want to paint accidentally. For example, if you’re painting up to the edge of a wall, you can apply tape on the base to keep paint off of it.

Step 5: Prime the concrete

Concrete is a highly porous surface, so if you skip the priming step, the paint will not stick to it. Apply primer evenly over the surface with a roller or brush and wait for at least 30 minutes before you start painting. Some paints already have a primer in the formula; in that case, you can skip this step.

Step 6: Apply Paint

Now start applying paint to the prepped and primed concrete. You can use a brush, roller, or spray to cover the surface completely. Some masonry paints are thicker in texture and might clog air sprayers. So, if you plan to spray paint, buy a product that works well in a sprayer.

A single coat might not be enough, so apply paint in 2 to 3 layers for a rich and even finish. It would be best to let the area dry for at least a day before you go in with the next coat. If you are painting outdoors, scan the weather forecast before starting the project to avoid any surprise rainfall.

Steps for Spray Painting on Concrete
6 Easy Steps: Spray Paint Concrete

FAQs

Does painting concrete last?

Spray paint lasts on concrete for 3-5 years, depending on the type of paint you use and the elements the area is exposed to.

Is it better to roll or spray paint concrete?

Spray painting concrete is better than rolling because you can achieve an even finish even on rough and porous surfaces. However, it needs more number of coats as the paint goes on thinly with each coat.

Does painting concrete make it slippery?

Freshly-painted concrete surfaces tend to be slippery, but you can reverse that effect by using non-skid concrete floor paint.

Can you spray sealer on concrete?

Yes, you can apply a penetrating concrete sealer with a spray. If you are working with decorative acrylic sealer or epoxy floor coating, it is better to use a roller.

Can you spray paint concrete statues?

Yes you can most definitely spray paint concrete statues. You can use one basic color for whole statue or just a few different colors to create depth and make them life like. In any case, it is always better to prep the surface before spray painting them.

Can you spray paint concrete-Conclusion

Spray painting on concrete is not as difficult as it may look at first. Especially when you picture a perfectly-painted surface, all the effort seems worth it. With the correct tools and technique, you can easily paint any concrete surface regardless of size and condition.

Do check out our blog how to apply waterproof spray paint which might help you further increase your knowledge.