
How to Paint a Vaulted Ceiling: Step-by-Step
This post contains affiliate links. As an Amazon Associate, we earn from qualifying purchases.
To paint a vaulted ceiling, settle access first: above 20 feet, scaffolding is the best approach, and below that an extension ladder plus a telescoping pole does the job. Then prime new drywall, apply a dead flat paint, and roll or spray in overlapping passes.
Access decides the rest of the job. A vault that peaks below 20 feet is a pole-and-ladder project. Push the peak past 20 feet and you’re setting up staging, and staging doesn’t fit around a sofa. That is why how to paint a vaulted ceiling starts with measuring the peak.
What follows is the access call, the primer argument the sources don’t settle, the sheen decision, and the spray-or-roll question that only really matters on textured ceilings.
Key Takeaways
- Above 20 feet, scaffolding is the trade answer, but in a furnished room the ladder-plus-pole fallback is what actually gets used.
- New drywall needs primer, and the drywall level picks which one: Level 5 gets VINYLASTIC Plus, Level 4 gets VINYLASTIC or ULTRA-GRIP.
- Dead flat paint suppresses critical-light flaws; wood vaults are the exception, where penetrating oil or satin polyurethane is the norm.
- Spraying a textured ceiling preserves the texture; Graco warns that rolling can flake it off.
- Overlap each spray pass by 50% and keep the tip hole inside the sprayer’s rated maximum.
Twenty Feet Is the Line Where Access Decides Everything
Twenty feet is the number that decides your whole setup. Above it, the trade guidance is blunt: scaffolding, sometimes called staging, is the best approach to painting a vaulted ceiling. Below it, an extension ladder handles the perimeter and a telescoping pole handles the body.
Scaffolding, sometimes called staging, is the preferred access method for vaulted ceilings that exceed 20 feet in height. Extension ladders fitted with rubber mitts on the aluminum rails, plus a telescoping roller pole, serve as the fallback when staging cannot be erected in an occupied room where furniture and floors limit the footprint.
That second sentence is the part that matters for most homes when you compare a how to paint a vaulted ceiling approach. Pro Construction Guide concedes directly that scaffolding is not always practical, especially when the house is occupied. Ladders become the next option, and the pole covers what the ladder can’t reach.
Rubber ladder mitts on the aluminum rails protect the wall, and a second person footing the bottom rung keeps the ladder from skating on a slick floor; high ceiling safety goes deeper on both. Getting a pole to reach high ceilings without hauling staging indoors is the whole trick.
Before you start: Interior floors get slippery under a ladder, so have a second person stand on the bottom rung while you’re up. Spray equipment needs gloves, goggles, a spray sock or hat, and a respirator, plus ventilation and appliances switched off nearby. A loaded 18-inch roller on a fully extended pole gets heavy fast, and your shoulder will quit before the ceiling is done.
The Ladder-and-Pole Setup That Actually Works
The common method for how to paint a vaulted ceiling is a two-part job. Brush-cut the ceiling perimeter from an extension ladder, then roll the body of the ceiling from the floor with a telescoping roller extension pole.
- Cut-in brush: a 2-inch cutting brush for the perimeter line.
- Roller: either a 9-inch or an 18-inch setup. The 18-inch cover is desirable on a vault because it covers so much surface at once, though it gets heavy when fully extended and loaded.
- Pole: telescoping, rated for the reach you need.
- Ladder protection: rubber mitts on the aluminum rails where they rest against the wall.
A platform ladder is an option for the perimeter cut-in when your peak stays under the staging threshold. Try it on the next one.
Does a Vaulted Ceiling Need Primer? Two Sources, Two Answers
Dunn-Edwards treats primer as mandatory on new drywall and gets specific about which product. Valspar frames it as conditional, something you reach for when there are marks, spots, or stains to cover.
That’s a real disagreement, not a wording difference. Here’s each position as stated:
| Source | Position on primer | When it applies |
|---|---|---|
| Dunn-Edwards | Required on new drywall, matched to drywall level | Every new-drywall ceiling |
| Valspar | “May be used” to cover marks, spots, stains | Stained or marked ceilings |
Neither is wrong for its own scope. Dunn-Edwards is writing a technical bulletin about new drywall. Valspar is writing a repaint tutorial for a ceiling that’s already sealed.
Where this goes sideways: Sealing a water stain before fixing the leak. Dunn-Edwards is explicit that the repair comes first, then the stain-blocking primer. Skip the repair and the primer is fighting a live problem, and the mark comes back.
Valspar’s stain-blocking option is Valspar Multi-Surface, and the guidance is to let it dry for about an hour before topcoating.
Level 5 Versus Level 4 Drywall
The primer isn’t one product, it’s a mapping. Dunn-Edwards ties it to how smooth the drywall was finished:
- Level 5 drywall: prime with VINYLASTIC Plus.
- Level 4 drywall: prime with VINYLASTIC or ULTRA-GRIP to seal the surface before the topcoat.
Level 5 drywall gets VINYLASTIC Plus, while Level 4 gets VINYLASTIC or ULTRA-GRIP. Get this wrong and the topcoat does the revealing for you.
If you’re repainting an already-sealed ceiling with no stains, the primer question mostly evaporates. Prime new drywall. Spot-prime damage. Don’t prime out of habit.
Dead Flat Is the Right Finish for Drywall, Full Stop
Critical light is the phrase Dunn-Edwards uses for the angle where incoming light rakes across a ceiling at a shallow angle and casts shadows on every ridge, patch, and lap. It’s the reason a ceiling that looked fine at noon looks like a relief map at dusk.
The fix is a dead flat paint. Dunn-Edwards recommends it specifically to minimize sheen uniformity issues and reduce the effect of critical light, and warns against topcoats with angular sheens because that raking light magnifies surface imperfections.
| Surface | Finish | Why |
|---|---|---|
| Drywall, flat | Dead flat | Suppresses critical-light shadows |
| Drywall, patched | Dead flat | Hides repair texture |
| Wood plank vault | Penetrating oil | Brings out grain tone |
| Wood plank vault | Satin polyurethane | Warm depth over time |
The dead-flat products Dunn-Edwards names are ULTRA-SCRUB (ULSB10), SPARTAWALL (SWLL10), SPARTAZERO (SZRO10), ACRI-WALL (ACWL10), and VERSAFLAT (W6240). For a plain white ceiling, DEHW08 in Classic White is the recommendation, on the reasoning that it improves hide and makes the room read larger.
If you want the wider field, there’s a full rundown of best paint for ceilings worth reading before you commit to a gallon.
The wood vault is the exception worth flagging. Pro Construction Guide puts popular wood-ceiling finishes at penetrating oils or satin polyurethane, chosen to encourage the tone of the wood. The finish depends on the species and the look you want, so the dead-flat rule simply doesn’t transfer.
I’d rather see a slightly imperfect flat white than a perfect satin that turns the whole vault into a mirror for every flaw. Flat forgives. Satin testifies.
Roll or Spray? The Texture Decides, Not the Square Footage
Rolling a textured ceiling can cause the texture to flake off. That’s the texture letting go, and it’s the reason Graco argues for a sprayer on textured surfaces.
This is another place the sources split. Dunn-Edwards says ceilings can be rolled or sprayed, both being good application techniques, and leaves it there. Graco goes further: rolling a textured ceiling takes time and can cause the texture to flake off, while an airless sprayer preserves the appearance and gives more complete, uniform coverage.
On flat drywall, take your pick. On texture, spray.
For a smooth ceiling and a strong arm, ceiling roller technique is the cheaper path, and Valspar’s method is sound: cut in from the outside by the trim with an angled brush, work toward the center with the roller, and roll in straight lines all in the same direction in small sections, finishing each section by lightly rolling off in that same direction.
Common mistake: Rolling in short, back-and-forth strokes across a vault. You won’t see the lap lines while the paint is wet. They show up the next morning when the light rakes across the ceiling and every change of direction reads as a band.
Spraying a Textured Ceiling Without Tails
Tails are the tapered streaks left behind when the sprayer pressure is wrong for the material. They’re a pressure problem, not a technique problem.
- Match the tip to the sprayer. The tip’s hole size must not exceed the sprayer’s maximum rated capacity. Oversize it and the pump can’t atomize the paint properly.
- Strain the paint through a bag. A paint strainer bag prevents tip plugs and gives a better finish. Skip it and a fleck of dried skin stops the pass dead.
- Batch-mix multiple containers. If you’re pulling from more than one can, combine them in an empty 5-gallon container first. Small color differences between cans show as a seam on a flat ceiling.
- Start at the wall-ceiling edge and spray along it from one side of the room to the other.
- Overlap each pass by 50%. Underlap and you get banding you can’t see until the light changes.
- Use a spray shield at 45 degrees into the corner where wall meets ceiling, held tight, if you’re not masking the walls.
- Clean the sprayer after every use, following the manual’s Power Flush procedure for water-based materials.
Dunn-Edwards adds one more: apply in a crisscross, overlapping pattern to avoid sheen uniformity issues, and use a new spray tip for top-quality results.
If streaks are already your problem, the guide on how to paint without streaks covers the wet-edge side of it in more detail.
About 60% of Small-Room Vaults Get Painted to Match the Trim
That number comes from a designer’s client base, not a survey, so treat it as one professional’s pattern rather than a rule. Kyliem Interiors reports that of clients with a small room and only a vaulted ceiling, roughly 60% paint the angled surface to match the trim and 40% paint it the same as the walls.
For a large room with a vaulted ceiling and a flat level at the top, the split shifts hard: about 80% paint all the ceiling areas the same as the trim, unless the angle starts very low.
The low-start rule is the one I’d actually keep. The lower an angled ceiling area starts, the better it looks painted the same color as the walls, because a low angle reads as wall from most of the room.
Matching Trim, Walls, or Neither
Painting ceiling and walls the same color disguises an uneven line where they meet, and it means less cutting in. That’s a practical win on a wobbly drywall corner.
Going darker changes the mood. The lower the LRV of a color, the less light it bounces around, which creates a moodier feel. LRV is light reflectance value, which tells you how much light a color bounces back.
Match the trim when the vault is the feature. Match the walls when the vault starts low and you’d rather it disappear. There’s no third option worth arguing about.
Two practical notes before you buy: figure out how much paint for a ceiling from the actual square footage rather than guessing, and decide early how you’ll paint around fixtures so you’re not taping a live light fixture at the last minute.
Three Things Decide Whether This Job Looks Clean
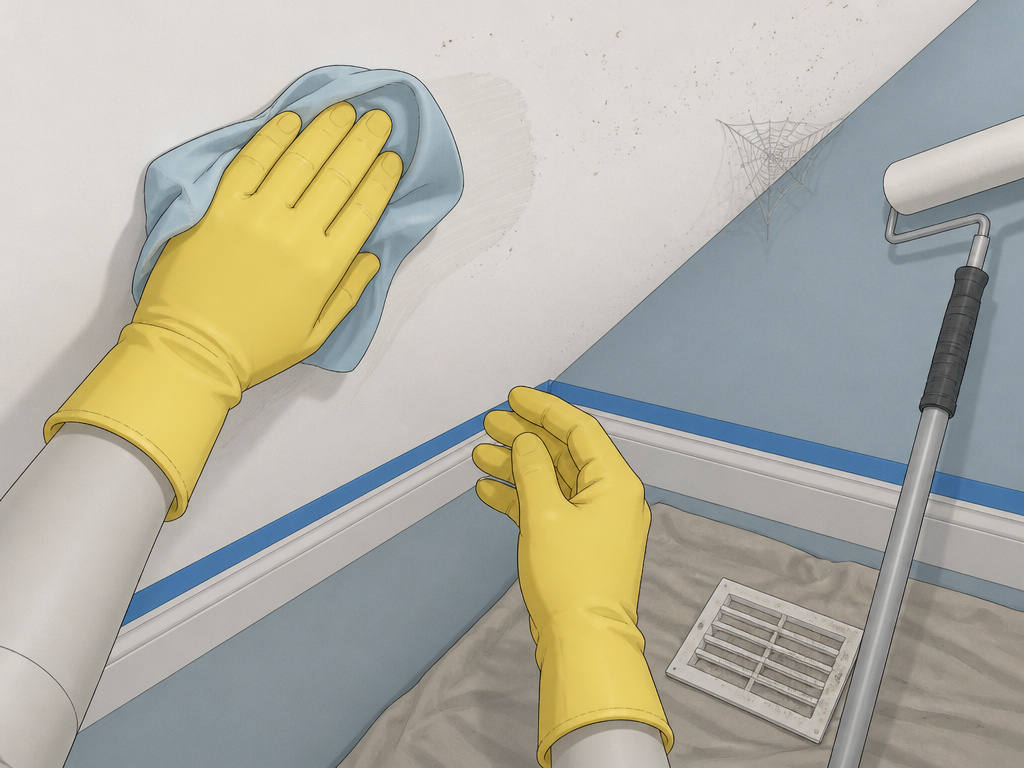
Prep, wet edge, and light. Get those three right and the finish takes care of itself.
Prep is where this job is won. It’s also the part that gets rushed.
- Wipe the ceiling down with a clean damp cloth and a mild soapy solution to lift dirt, dust, cobwebs, and grime. Skip it and you’ll trap hairs in the paint film.
- Remove the vents before you start. Vents left in place catch splashes and make the whole room look sloppy.
- Tape the trim and edges with painter’s tape for a straight line between wall and ceiling.
- Sand according to substrate. A duster and pole sander handle drywall; wood ceilings often need hand-sanding or power-sanding.
- Mask precisely on mixed finishes. A panelized timber vault with both painted and natural surfaces needs significantly more surface protection, and the masking has to be exact.
Worth knowing before you start: Paint the ceiling before the walls. Any splash that lands on a wall gets covered later, and you’re not taping a finished wall to protect it from above.
The last mechanical detail is the wet edge. Work in sections small enough that you’re always rolling into paint that hasn’t flashed off yet, and if lap marks are already a familiar sight on your ceilings, the guide on how to avoid lap marks breaks down the timing.
Let the ceiling be a little imperfect. Nobody looks up there with a flashlight except you.
Frequently Asked Questions
Can one person paint a vaulted ceiling safely?
Above 20 feet, scaffolding is the best approach. Pro Construction Guide recommends a second person foot the ladder while you’re on it, because interior floors can be slippery and the extra weight on the bottom rung helps prevent a slip.
How long does it take to paint a ceiling?
Valspar puts a professional ceiling at about an hour, depending on size and ease of access.
Do I have to prime a vaulted ceiling before painting?
Only if it’s new drywall or has stains. Dunn-Edwards requires primer on new drywall and specifies the product by drywall level. Valspar treats primer as conditional, used to cover marks, spots, or stains.
Can I roll a popcorn ceiling instead of spraying it?
Graco advises against it. Rolling a textured ceiling takes time and can cause the texture to flake off the surface, while an airless sprayer preserves the appearance and gives more uniform coverage. Dunn-Edwards treats roll and spray as equally valid techniques, but that guidance doesn’t address texture specifically.
What sheen should a vaulted ceiling be?
Dead flat on drywall. Dunn-Edwards recommends dead flat to minimize sheen uniformity issues and reduce the effect of critical light, and warns that angular sheens magnify surface imperfections. Wood vaults are the exception, where penetrating oil or satin polyurethane is common.
The Bottom Line
If your peak clears 20 feet, scaffolding is the best approach. Ladder, mitts, a footer, and a telescoping pole are the fallback when staging can’t be used.
One concession worth stating plainly: the sources don’t agree on primer for a repaint, and neither do they agree on roll versus spray for textured ceilings. Where they conflict, I’ve shown you both positions rather than picking a winner for you, because the right answer depends on your substrate and not on a rule.
Start with the access decision tonight. Everything else follows from it.
