
Scumbling Technique in Painting: Thin Layers, Real Depth
This post contains affiliate links. As an Amazon Associate, we earn from qualifying purchases.
The scumbling technique in painting means rubbing a thin, irregular layer of color over a dried basecoat so the layer underneath still shows through. In a solventborne glaze, that means mixing clear poly-flat with 15% mineral turps, applying it by brush, sponge, or rag, and leaving it 4 hours before you overcoat.
The depth comes from what the scumbling technique in painting leaves uncovered. A thin, broken film lets the basecoat show through in patches. Lay it on too even and the whole thing flattens into a tint.
What follows covers the mix, the surface argument nobody settles, the three applicators a manufacturer actually allows, and the dry times that decide whether your scumble survives the next coat.
Key Takeaways
- Mix 15% mineral turps into the clear poly-flat base.
- Wait 4 hours minimum before overcoating, and 48 hours if you finish with Polythane or Uracryl.
- Work small areas at a time. The data sheet says it, and it’s the difference between a soft broken layer and a muddy one.
- Test on a sample board first, especially for ragging and sponging, where the result depends on mix ratio and technique.
- Keep it interior. Resene rates Scumbling Glaze for interior use only.
What the Scumbling Technique in Painting Actually Does
Scumbling changes the value of a surface without hiding it.
Scumbling is defined as a thin, irregular layer of color rubbed over an existing, dried layer. The basecoat remains visible through the broken film. Canson describes the result as a way to liven up color blocks and add motion, and notes that a granular surface such as canvas or canvasboard takes the effect more easily than a smooth support.
That’s the whole mechanic. A thin film sits on top of a cured basecoat, and the basecoat keeps showing through in the gaps.
This isn’t a new trick either. The NPS Preservation Brief 28 records glaze treatments used in the early 20th century to antique walls and trim in Spanish Colonial Revival and Mission buildings. Crews applied them by ragging, sponging, and other techniques that left an uneven surface.
Where the pigment sits is what separates this from a flat tint. A scumble sits in a broken film, and the break is what you’re actually painting.
Walk past it and the value shifts, because the film thickness varies across the surface.
That variation is the point.
For creating texture on a flat wall, a broken pass does more than a careful even one.
The 15% Rule: Mixing a Scumbling Glaze That Behaves
Fifteen percent is the entire recipe, and it comes straight off Resene’s data sheet for Scumbling Glaze (D308).
Before you start: Scumbling Glaze is flammable, so keep it away from heat and naked flame and keep the container closed when you’re not using it. The Qristal base carries a VOC content of about 554 grams per litre, so work with adequate ventilation and don’t breathe the vapour. Wear suitable gloves when sponging or ragging.
The sheet’s instruction is to mix Resene Qristal Clear Poly-Flat with 15% mineral turps, stir well, and only then add colour. Order matters here.
- Mix the base first. Combine the clear poly-flat with 15% mineral turps by volume.
- Stir before tinting. Unstirred flatting agents settle at the bottom, and a glaze poured off the top dries to an uneven sheen.
- Add colour last. Tinting before the turps goes in gives you a lumpy, uneven dispersion.
- Test on a sample board. Resene lists this as precaution one, specifically because ragging and sponging depend on both mix ratio and technique.
That’s the argument for an open window, not willpower.
Coverage runs 20 to 30 square metres per litre depending on surface and technique.
The glazing versus scumbling distinction trips people up constantly. Glazing builds transparent layers that deepen colour. Scumbling builds broken opaque layers that lighten and texturise. Same motion, opposite result.
Get the ratio right and the rest is technique. Get it wrong and no brush will save you.
Which Surface Takes a Scumble Better?
Two credible sources give opposite answers, and neither one is wrong.
The Canson Position: Tooth Helps
Canson’s guidance for acrylic scumbling says the effect is easier on a granular surface like canvas or canvasboard than on a smooth medium. The tooth catches pigment and breaks it up for you.
The Resene Position: Seal It First
Resene’s data sheet goes the other way for its own product. Scumbling Glaze needs a basecoat of Resene Lustacryl (D310) or Resene Lusta-Glo (D33) that has been given enough time to fully cure before application. That’s a sealed film, not a toothed one.
The reconciliation is simple enough. Canson is describing an acrylic technique on a porous support. Resene is describing a solventborne glaze over an alkyd film. Different chemistries, different rules, and no contradiction once you know which one you’re holding.
What you can’t do is mix the two logics. A turps-based glaze over raw canvas won’t behave like Canson’s acrylic scumble.
Treat the basecoat the way you’d treat any underpainting: fully cured, consistent in sheen, and free of dust. A soft film lifts under a rag.
Cure beats coat every time.
Ragging, Sponging, and Dry Brush: Picking Your Applicator
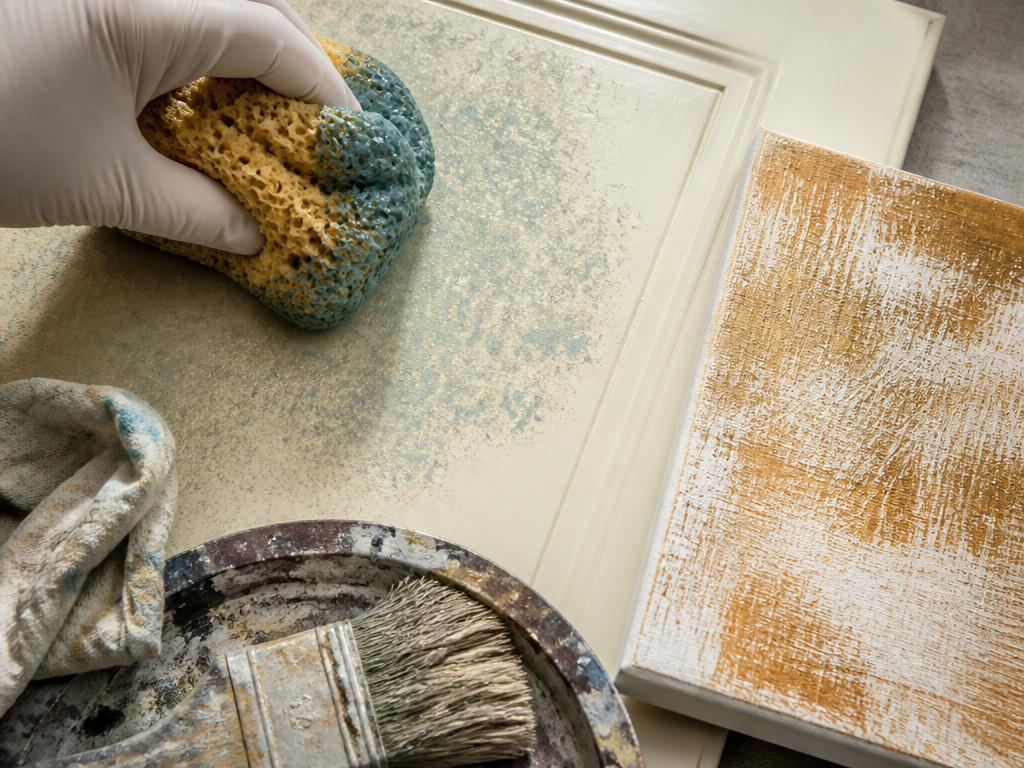
Three applicators appear on the Resene sheet, and a fourth comes from art-materials practice.
| Applicator | Effect | Best For | Watch Out |
|---|---|---|---|
| Brush | Broad, directional streaks | Colourwash and limewash | Leaves lap marks if it sets mid-pass |
| Natural marine sponge | Soft dappled print | Sponging, broken colour | Synthetic sponges print harder and more even |
| Dry rag | Lifted, cloudy break | Ragging off, soft blends | Grabs and balls up if the glaze sets |
| Old worn brush | Scratched, dry texture | Dry brush scumbling on canvas | Too rough for a sealed interior wall |
Ragging On vs Ragging Off
Ragging off means brushing the glaze on and then lifting it back with a dry rag. Ragging on means soaking the rag in glaze and pressing it onto the basecoat. The first gives a softer, more controlled break. The second gives bolder marks.
Wear gloves for either one. Resene lists suitable gloves as a precaution for sponging and ragging.
For sponging, the sheet specifies a natural marine sponge, wet with glaze and applied over the basecoat. For sponging, the sheet specifies a natural marine sponge.
For colourwash and limewash effects, the sheet calls for a large soft-bristled brush. Load it lightly and keep moving.
Here’s where the sources part company again. Canson endorses fingers as an applicator and old, worn-out brushes for dry brush technique. Resene’s sheet lists brush, natural marine sponge, or clean rag and nothing else. On canvas with acrylics, Canson’s list applies. On a sealed interior wall with a solventborne glaze, stay with the three.
A dry rag dragging over properly tacky glaze gives soft, even resistance.
Test the drag on a corner first.
Why Does My Scumble Turn Muddy?
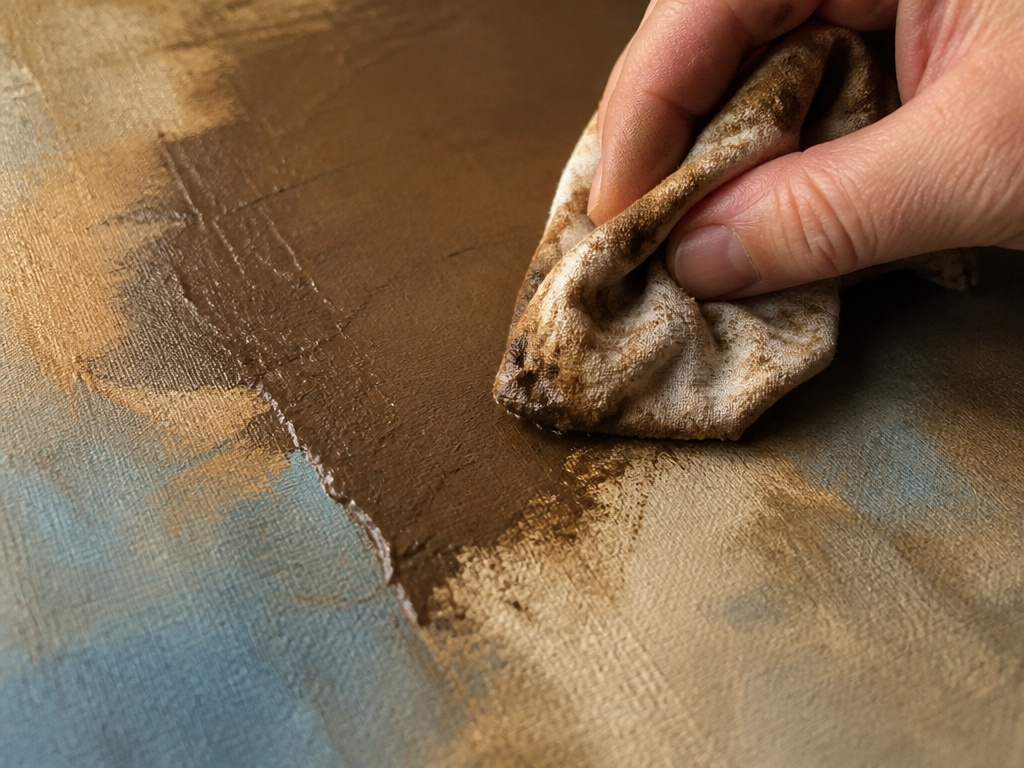
You brush the glaze on, drag the rag across, and the colour underneath lifts into the mix. Two passes later the patch reads brown and flat, and more glaze makes it worse.
That’s almost always an undercured basecoat. Resene’s sheet is explicit that the basecoat needs sufficient time to fully cure before the glaze goes on. A soft film redissolves under a turps-based glaze, and the two layers merge into one dull tone.
I learned the same lesson in a different medium, back when I kept working a single patch of colour until it collapsed into one muddy puddle, swatch after swatch. The fix turned out to be smaller areas and a clean spot to work in.
Overworking One Patch
Resene’s second precaution is to work only small areas of the surface at a time. A glaze that stays workable will keep lifting pigment, and every extra pass pulls more basecoat into the mix.
Common mistake: Going back over a patch that’s already starting to set. The film tears, the edges dry hard, and you get a visible seam that no amount of blending hides.
Where scumbling and blending meet is at the edges. Soft, feathered transitions come from leaving the boundary alone while it’s still open, not from fussing with it.
Stop while the patch still looks slightly unfinished.
Drying and Overcoating: The Timings Nobody Writes Down
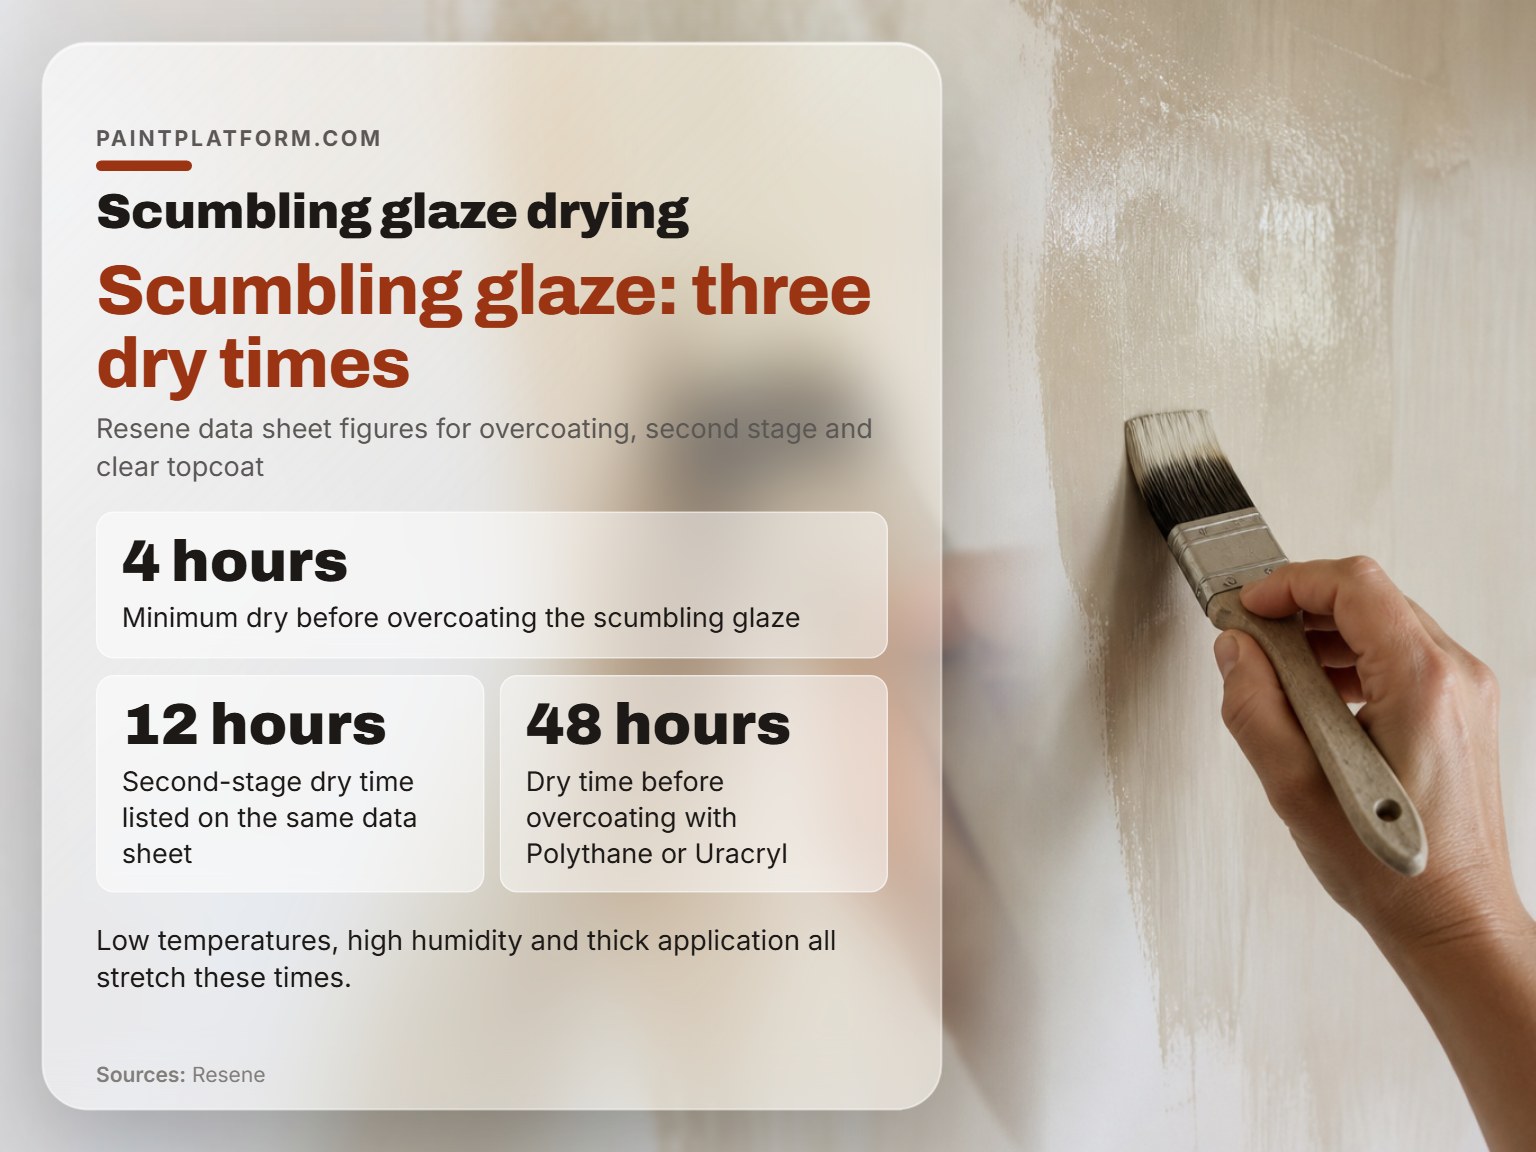
Four hours is the number everyone quotes, and it’s the one that gets people into trouble.
Resene lists 4 hours as the minimum dry before overcoating, 12 hours as a second-stage figure on the same sheet, and 48 hours if you’re going over the top with Resene Polythane or Resene Uracryl. Those figures cover three different situations: a plain overcoat, a second stage, and a clear topcoat.
Low temperatures and high humidity stretch all of them, and thickly applied areas stretch them furthest. The sheet says that directly, and it’s the reason a bathroom wall in winter behaves nothing like the same wall in summer.
Wet areas like bathrooms are fine for this product, and the slower dry time is an advantage there rather than a problem.
Exterior use is a flat no from Resene. Canson presents scumbling as a general acrylic technique with no exterior restriction, which is accurate about the technique and irrelevant to this product. A solventborne interior glaze isn’t built for UV and weather cycling.
| Symptom | Likely Cause | Fix |
|---|---|---|
| Patch reads brown and flat | Basecoat still soft | Strip back, let it cure fully, start again |
| Visible seam at patch edge | Re-worked setting glaze | Feather the edge while wet, then leave it |
| Glaze skids instead of dragging | Too much turps in the mix | Add clear poly-flat to bring the body back |
| Still tacky the next morning | Cool room or thick application | Extend the wait, don’t force the topcoat |
| Sheen looks blotchy | Flatting agents not stirred in | Stir the base properly before tinting |
This is also where impasto versus scumbling separates hard. Thick application is the enemy of every one of these timings, because a heavy pass holds solvent far longer than a thin one.
That’s four hours before you can overcoat.
Frequently Asked Questions
Is scumbling the same as glazing?
No. Glazing uses transparent layers that deepen and enrich the colour underneath. Scumbling uses a thin, irregular opaque layer that lightens and breaks up the surface. The motion with a rag looks similar, and the results sit at opposite ends of the value scale.
Can you scumble over acrylic paint?
Canson’s guidance treats scumbling as a general acrylic technique, and a granular acrylic ground like canvas or canvasboard takes it well. If you’re using a solventborne glaze instead, the basecoat needs to be a fully cured alkyd film such as Resene Lustacryl D310 or Lusta-Glo D33. Match the glaze chemistry to the basecoat chemistry.
What can I use instead of a scumbling glaze?
An acrylic scumble needs nothing more than paint and a worn brush or your fingers. Both routes give you a workable film. They just dry on different schedules.
How long should a scumble dry before the next coat?
Four hours is the minimum listed dry time before overcoating. If you’re finishing with Resene Polythane or Resene Uracryl, the sheet specifies 48 hours. Low temperatures and high humidity push both figures out, especially in thickly applied areas.
Why does my scumble look streaky instead of broken?
Streaking usually means too much turps in the mix or too large a working area. The sheet’s 15% ratio gives a film that holds its body long enough to rag. Beyond that, work small areas at a time so the glaze never sits long enough to set before you finish the pass.
The Bottom Line
Here’s the threshold I’d hand anyone starting out: if your basecoat hasn’t fully cured, don’t touch it with glaze. The mud shows up quickly, and there’s no rescue once the layers merge.
Your first move this week is a sample board. One panel, one mix at 15% turps, one dry rag. A little testing beats guessing on a wall you’ll have to repaint.
None of this applies if you’re on canvas with acrylics. Canson’s rules take over there, and the whole question becomes tooth, worn brushes, and how much texture you want your ground to give you for free.
The rest of it is patience dressed up as technique. Mix it thin, work it small, and stop before it looks finished.
Keep it simple.
