
How to Blend Acrylic Paint: Step-by-Step (Without Mud)
This post contains affiliate links. As an Amazon Associate, we earn from qualifying purchases.
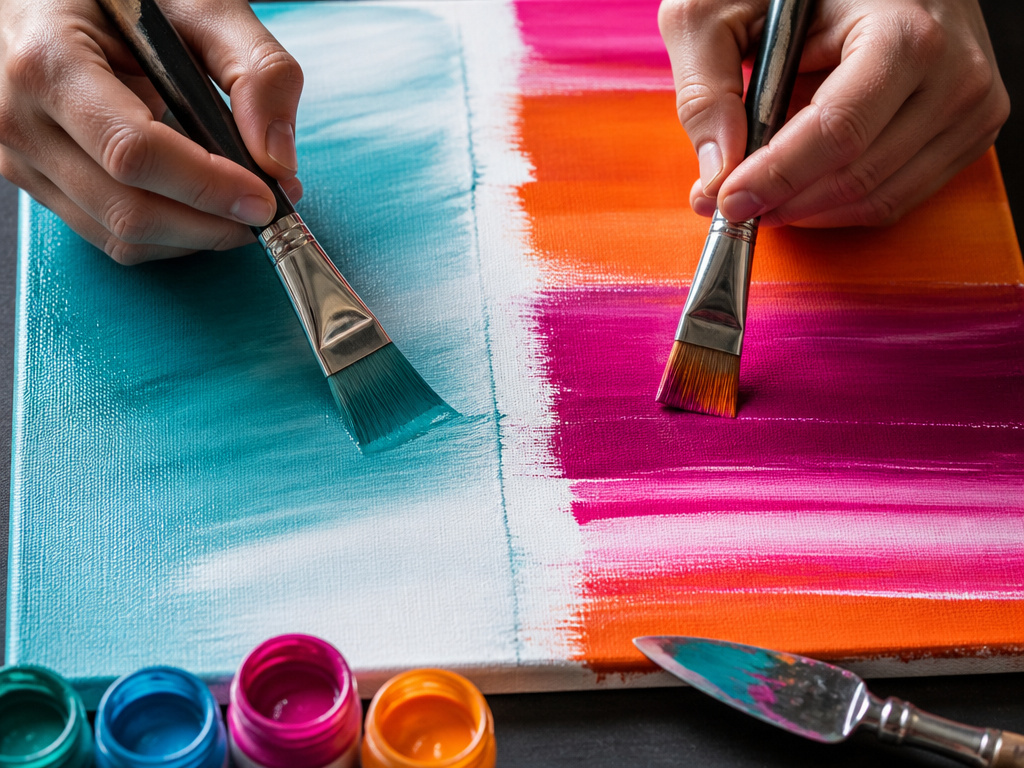
How to blend acrylic paint: work wet-into-wet with a damp brush, thin the paint just enough to flow, and add water sparingly so the binder stays intact. Blend adjacent colors before the edge sets, or slow the dry time with a retarder or an OPEN medium.
An acrylic edge sets faster than the eye can track. Thin layers can be touch-dry in under 10 minutes according to the Russell Collection’s mixing guide, and once that skin forms, the next stroke drags instead of merges.
By the end you’ll know how much water is safe, which mediums actually buy time, and the how to blend acrylic paint answer for why wet-on-wet and layering solve different problems.
Key Takeaways
- Keep each pass thin: over 1/16 in / 1.5 mm wet film stays cloudy for days.
- The water ceiling is contested: Golden caps OPEN at 2:1, Harding says 25%, Russell says 30%. Stay under the tightest one you can work with.
- Slow the dry with a retarder or OPEN Thinner. Roughly 10x the working time at 70°F/21°C and 30% RH.
- Wet-on-wet for soft edges, layering for hard ones.
- Consistency beats brush shape. Thinned paint and a soft flat out-blend a fancy brush with thick paint.
Why Acrylics Stop Blending Before You Do
I’ve lost more blends to a five-minute coffee break than to any brush I own. You step away to answer the door and come back to a skinned-over edge. The color is still there. It just won’t move.
Acrylic paint is pigment suspended in an acrylic polymer dispersion. Water is the carrier. When the water evaporates, the polymer particles pack together and fuse into a film. That film resists re-wetting once it sets. Thin layers can be touch-dry in under 10 minutes, which is why the window for wet-into-wet blending is so short.
Acrylic paint dries by water evaporation followed by polymer coalescence. Once the polymer particles fuse into a continuous film, that film resists re-wetting with plain water. The working window is set by ambient temperature and humidity, not by how much paint sits on the palette.
The physical reason blending gets harder as the paint sets is the tack. During the middle stage, the film has lost enough water to feel sticky but hasn’t fully fused. A brush dragged through it pulls pigment instead of merging it.
You’ll feel it before you see it, the how to blend acrylic paint warning sign. The brush starts to skip. The color stops stretching.
Golden’s OPEN technical sheet adds a second wrinkle. Applications over 1/16 in / 1.5 mm wet film thickness produce excessively long drying periods, a persistently soft higher-tack feel, and translucent layers that stay cloudy. So piling on more paint to keep it workable backfires.
How Much Water Can You Add to Acrylic Paint?
Four sources give four answers. Search for a single water ceiling and you’ll find 20%, 25%, 30%, and about 33%. They’re all defensible. Each one is talking about a different product and a different goal.
Four real numbers. Four different contexts.
| Source | Water Ceiling | Context |
|---|---|---|
| Golden High Flow | Over 20% changes properties | Thinning HFA for flow |
| Harding / Liquitex book | Never more than 25% | General acrylic thinning |
| Russell Collection | Below 30% by volume | General mixing guide |
| Golden OPEN | 2:1 paint-to-water (~33%) | OPEN line only |
Golden’s High Flow sheet is the strictest at 20%, but that’s for the High Flow line specifically. It also says high water levels are fine for color stains on absorbent surfaces, provided you add extra medium layers afterward for durability. Golden’s OPEN line permits up to 2:1 paint-to-water, roughly 33%. It notes that exceeding it produces an increasingly fragile, water-sensitive film. Harding’s 25% is one figure, from the Harding University acrylic book PDF, while Russell says below 30% and Golden’s OPEN line permits up to 2:1 paint-to-water (~33%). Russell’s 30% is a retailer figure from its general mixing guide.
My working number is 25%. It’s the highest amount that still lets the paint flow, and it leaves room for error. If you want to push higher, use a medium instead of water.
The reason water hurts the film is that it dilutes the binder along with the pigment. Below the ceiling, there’s still enough polymer to form a continuous film. Above it, the film gets chalky, underbound, and prone to lifting. If you want the full walk-through on dilution, the guide to thin acrylic paint covers it.
Golden OPEN and Retarders Stretch the Window
I nearly boxed up my first airbrush because it spat and sputtered every time I pulled the trigger. I assumed the tool was broken. My craft acrylic was straight-from-the-bottle thick, and thinning it to a flowable consistency fixed it in minutes.
That’s the first lesson in open time: the paint’s consistency decides more than the tool does. Once you know that, the rest is about which lever to pull when you need more time.
- Retarder: a few drops slow the dry without changing the paint’s body. Add too much and the film stays tacky for days.
- OPEN Thinner: replenishes volatile components in Golden OPEN paint. Don’t go past 3:1 paint-to-thinner, because the thinner contains no binder.
- A slower paint line: Golden OPEN at 70°F/21°C and 30% RH gives about 10 times longer working time than standard acrylics.
- A wet palette: the Masterson Sta-Wet keeps paint usable for hours without changing its chemistry.
Here’s the test I use now. Dip a stir stick, lift it, and watch the drip. If the paint clings and globs, it’s too thick. If it runs off in a thin stream, it’s ready. Add thinner a few drops at a time, because overshooting gives you watery, runny coverage that’s harder to fix than thick paint.
Golden’s own numbers on OPEN are worth knowing. A marble-sized dollop shows noticeable surface thickening within 2-4 hours unattended. Misting the same dollop with OPEN Thinner kept it usable after 24 hours, with only slight skinning after an overnight dry. Water and OPEN Thinner are both aggressive at reactivating OPEN films, so use them sparingly or you’ll lift partially dried layers.
If you just want to make acrylics dry slower without switching paint lines, a retarder is the simpler path.
Retarder, OPEN Thinner, or a Slower Paint Line?
Pick based on how much time you need. A retarder slows the dry without changing the paint’s body. OPEN Thinner keeps OPEN paint workable for hours. A full switch to OPEN is for sessions where you’re building a whole passage wet-into-wet and can’t afford a set edge.
The Stir Stick Test
The stir stick test is the fastest way to check consistency without guessing. Dip, lift, watch the drip. A stream means the paint is ready. A glob means you need more thinner.
No tools, no guesswork. Try it.
Wet-on-Wet vs Layering: Which Wins When
Frequently Asked Questions
Can you blend acrylic paint once it has already dried?
Not with water alone. A fused acrylic film resists re-wetting, so brushing water over a dry edge will not revive it. Your options are to paint a new layer over the top and blend that while it is fresh, or to use a dedicated re-wetting product designed to soften cured acrylic. For most work, repainting the transition is faster and more predictable than trying to wake up an old edge.
Does a wet palette help with blending on canvas?
It keeps your mixed colors usable on the palette, but it does nothing for the paint already on your surface. A wet palette extends the life of your puddles so you are not remixing mid-blend, which saves time and keeps your color consistent. The drying clock on the canvas still runs at the same speed regardless of how you store your paint.
Why does my blend look chalky or washed out after it dries?
Over-thinning is the usual culprit. Past a certain point, extra water separates the pigment from the binder, and the film that remains has less polymer holding it together. The result is a weaker, duller, sometimes powdery surface. Keep additions modest and use a medium rather than water when you need more flow without losing film strength.
Can you blend acrylics with a sponge or your fingers instead of a brush?
Yes, and both are useful for soft, atmospheric transitions where brush marks would be distracting. A damp sponge dabbed along a seam pushes pigment without the hard drag of bristles, and a gloved fingertip works well for small areas on a smooth surface. The same timing rules apply, so work quickly and keep the paint thin.
