
How to Use Painter’s Tape for Crisp Lines: Step-by-Step
This post contains affiliate links. As an Amazon Associate, we earn from qualifying purchases.
To use painter’s tape for crisp lines, clean and dry the surface, press the edge down with a putty knife, and let the tape set 30 to 60 minutes. Pull it back slowly at a 45-degree angle. FrogTape and Duck Brand say pull while the paint is wet; 3M’s own specialist, Jeff Malmer, says score the edge and let the paint dry first.
Those two removal methods come from the same company, which is the part worth sitting with when you compare a how to use painter’s tape for crisp lines. FrogTape and Duck Brand tell you to pull while the paint is wet. 3M’s Advanced Application Engineering Specialist, Jeff Malmer, tells a trade magazine the opposite.
What follows is the sequence that holds up under both readings: prep, tape choice, edge seal, and a removal method you can switch mid-job if the paint starts to fight.
Key Takeaways
- Press the edge down with a putty knife, not just a fingertip. Gaps under the tape are where bleed starts.
- Let the tape set 30 to 60 minutes before the brush touches the wall.
- Pull at 45 degrees, slowly. A ripping sound means you’re going too fast.
- Duck Brand Professional has a 3-day window; Clean Release has 14. Past the window, the adhesive bonds and takes paint with it.
- Score the edge with a razor blade once the paint has skinned over. Pulling blind is how edges tear.
The Edge Seal Decides the Line
The line you get is set by the bottom millimeter of tape. That’s the only part of the roll touching the wall.
Paint bleeds under tape wherever the adhesive fails to wet out against the surface. Dust, moisture, and surface texture all prevent full contact. Burnishing the edge with a firm plastic tool closes those gaps, and on textured walls a thin bead of paintable caulk seals the profile the tape cannot follow.
Everything above that edge is decoration. Get full contact along the bottom and paint has nowhere to creep.
Burnishing is the move. Run a firm plastic tool along the tape edge: a putty knife, a credit card, the back of a plastic spoon. 3M, Shurtape, FrogTape and Duck Brand all describe the same step with slightly different tools in hand.
Fingers don’t do it. A fingertip is round and soft, so it presses the middle of the tape and skips the last two millimeters where the seal actually forms. That’s the whole reason the putty knife keeps showing up in every manufacturer’s instructions.
On a baseboard, angle the blade so the flat rides the trim and the edge presses the tape. Malmer recommends exactly that for the spots a finger can’t reach.
Dust Is the Reason Tape Fails More Often Than Anything Else
Run a finger along the top of a baseboard in a room nobody has painted since the last owner moved in. It comes back grey.
That grey is the failure. 3M’s own troubleshooting page blames dirt and moisture for tape that won’t stick, in that order, and it’s the step a rushed job skips first.
Before you start: Razor blades slip toward your hand, so score with the blade flat and pull away from your body. Trisodium phosphate (TSP) irritates skin and eyes, so wear gloves and open a window. Paint and caulk both need airflow, and a closed-up room stretches every dry time you’re counting on.
The manufacturers disagree about how to clean, and the disagreement matters less than the drying. Here’s the sequence I’d run:
- Wipe with a damp sponge and a couple drops of dish soap in a bucket of warm water. That’s Duck Brand’s method. Skip it and the adhesive grabs a film of kitchen grease instead of the wall.
- Dry it completely. 3M says clean, dry and dust-free. Malmer goes further with lukewarm water and TSP, then insists on adequate dry time. Some painters run a hair dryer over the trim. Trapped moisture is the usual reason tape refuses to stick.
- Go back over it with a microfiber cloth. FrogTape’s step, and it catches what the sponge pushed around. Loose particles hold the adhesive off the surface by their own thickness.
- Repair any damage so the surface is even. Tape bridges a divot instead of following it, and the paint then follows the gap.
- Test in a hidden spot if the old coat is peeling, bubbling or thick. FrogTape flags all three as reasons a surface might not be right for tape at all. Tape can lift a failing coating in one sheet.
Dust and moisture don’t only weaken the bond. They open the path for paint bleeding under the edge, which is the thing you came here to prevent.
Which Painter’s Tape Goes on Which Surface?
Adhesion level sorts the products. The removal window is the part that bites you.
Duck Brand publishes both numbers for its two tapes, which makes them a useful yardstick for everything else on the shelf.
| Tape | Adhesion | Removal window | Where it belongs |
|---|---|---|---|
| Duck Brand Professional Painter’s Tape | High | 3 days | Durable, scrubbable surfaces |
| Duck Brand Clean Release Multiple Surface | Medium | 14 days | Painted walls and trim |
| 3M ScotchBlue Original Multi-Surface | Medium | Read the roll | General interior and exterior |
| FrogTape with PaintBlock Technology | Medium | Read the roll | Medium-textured walls |
Medium Adhesion vs High Adhesion
High adhesion holds on durable, scrubbable surfaces. Medium adhesion is what you want over painted walls and trim, because the adhesive has to let go without taking the coating with it.
That’s the trade in one sentence. More grip buys you security during the job and costs you at removal.
The 3-Day and 14-Day Windows
FrogTape calls this the clean removal days: the number of days before painting that a tape can sit on a surface safely. Duck Brand Professional gives you 3. Duck Brand Clean Release gives you 14. Past the window, the adhesive bonds to the paint and the tape stops being removable in any useful sense.
Check the roll before you commit. FrogTape prints the number on the label and expects you to read it.
Different types of painter’s tape behave differently on the same wall. The best painter’s tape for clean lines on smooth drywall is often the wrong roll for a textured one.
Duck Brand Puts the Limit at 1 to 2 Feet of Tape Per Run
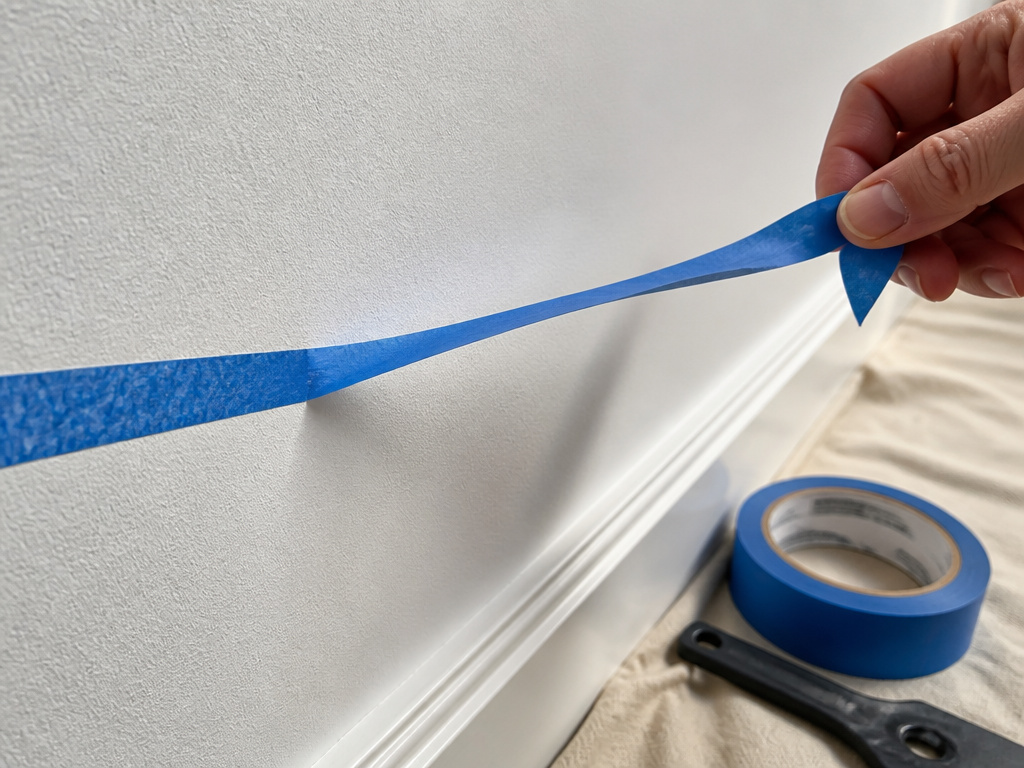
That’s the shortest recommendation in the set, and it’s the one I’d follow on a first attempt.
Stretching is the failure mode. 3M says stretched tape may lift or break. FrogTape says stretching causes poor adhesion and paint bleed. Both describe the same physical event: the backing film elongates, the adhesive layer thins, and the edge stops sitting flush.
FrogTape and Shurtape both carve out an exception for experienced painters, who can unroll one long section and keep the roll flat against the wall. Shurtape’s version is about the pull-off rather than the lay-down: smaller sections give a straighter line.
Common mistake: Pulling the tape tight to make it follow a corner. The backing stretches, the adhesive thins, and the edge lifts as soon as the tape relaxes.
Three signs you’ve stretched it:
- The tape looks narrower in the middle of the run than at the ends.
- The ends curl up before you’ve finished laying the section.
- The edge lifts when you burnish, no matter how hard you press.
Listen while you pull. FrogTape and Shurtape both say a ripping noise means you’re going too fast, and that sound is the adhesive letting go in jumps rather than a steady peel. Silence is the target.
Shorter runs are the whole painter’s tape technique in one line. Control beats speed, every time.
FrogTape’s PaintBlock Is a Polymer Barrier That Has to Be Woken Up
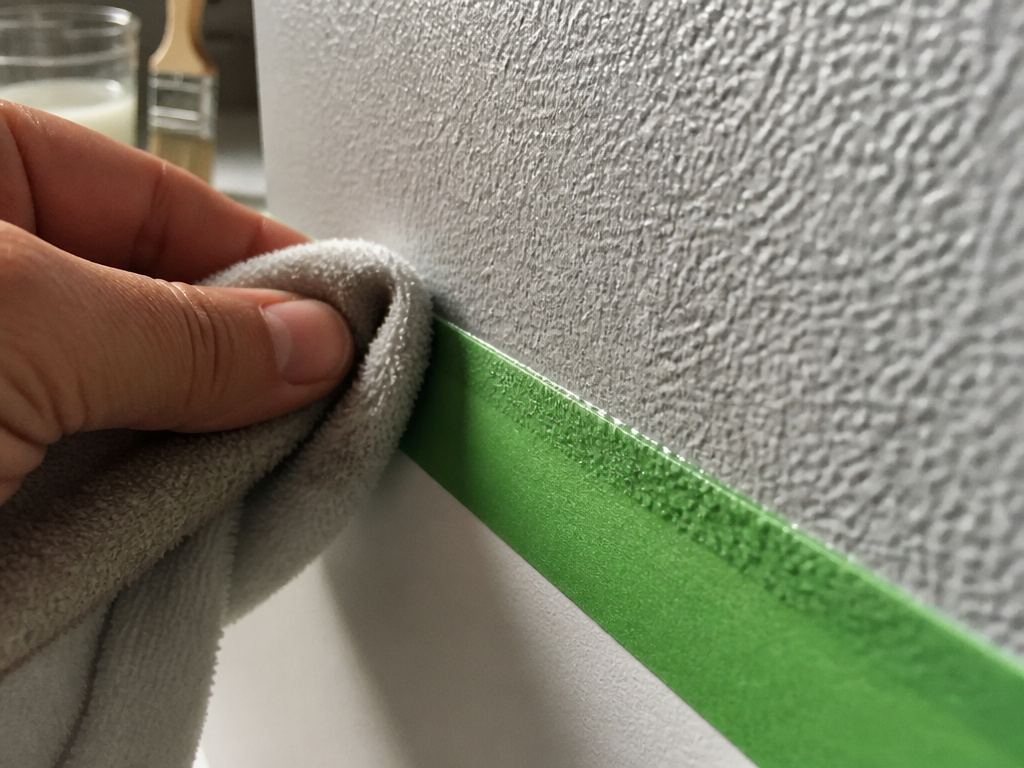
The tape edge carries a strip of superabsorbent polymer that swells the moment paint touches it, and the swelling is what blocks the bleed.
On a medium-textured surface, FrogTape says to run a damp cloth over the tape edges to activate it. Skip that step and the polymer sits there dormant while the paint finds its way underneath.
The Caulk Method for Textured Walls
Malmer’s version for rougher surfaces is a thin strip of paintable caulk along the tape edge. Less than 1/8 inch. Smooth it with a rag or a finger, then let it dry before the brush goes anywhere near it.
The dry time is the part that gets rushed. Soft caulk under a fresh coat pulls up in strings when the tape comes off.
I learned that one the messy way on a trim run. A bead I hadn’t let cure came up with the tape and smeared a grey line along the whole skirt board. Now the caulk goes on first and the painting waits.
Where this goes sideways: A bead wider than 1/8 inch. It squeezes out from under the tape, dries into a visible ridge, and you end up sanding a line you were trying to avoid.
The same bead does most of the work when you tape off trim, because the trim-to-wall joint is exactly where the gap is widest.
Your options on texture, in order of effort:
- Damp cloth on PaintBlock tape for medium texture. Fastest, and it works.
- A caulk bead under 1/8 inch for anything rougher than that. Slower, but it seals a profile tape can’t follow.
- Neither, on stucco. Tape alone will not give you a crisp line there.
Temperature sits underneath all of it. Malmer puts the ideal range at 50 to 100 degrees F. Over 100, or in high humidity, adhesion drops and the tape starts behaving like a different product.
Should You Pull Tape While the Paint Is Wet?
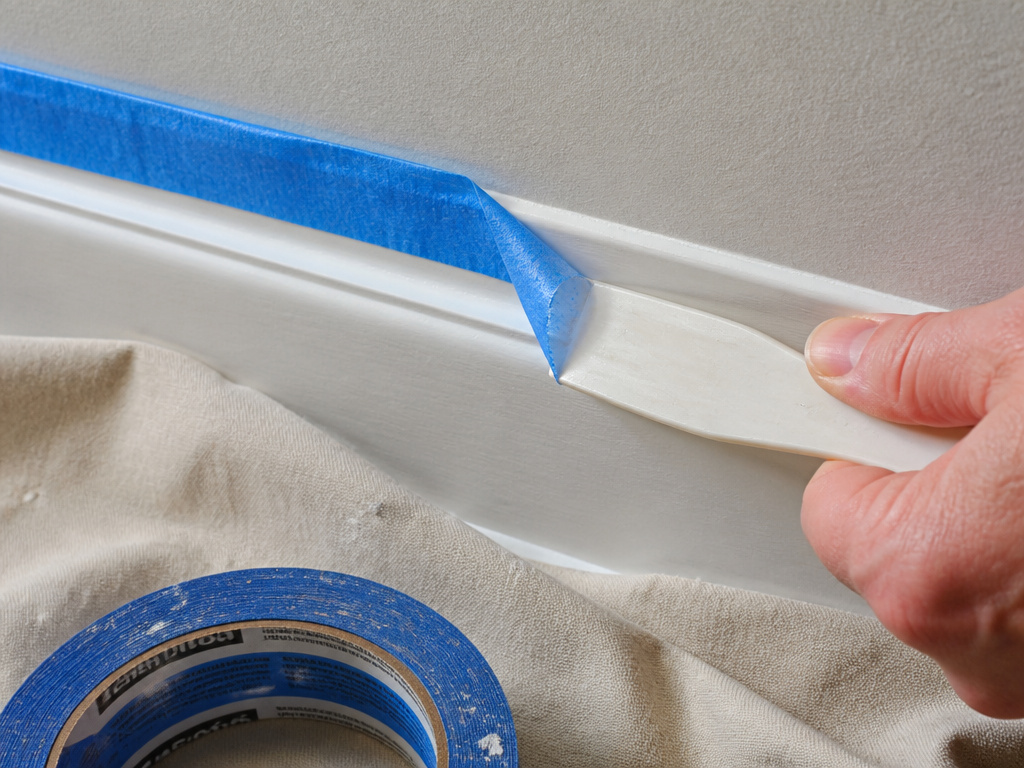
Three manufacturer pages say yes. A 3M engineer says no.
FrogTape and Duck Brand both tell you to remove the tape while the paint is still wet. Malmer, in a trade interview, calls that a messy approach that doesn’t always work.
His method: check the paint can for the manufacturer’s dry time, let the paint dry to the touch, then run a putty knife or razor blade along the edge where tape meets painted surface.
Both can be true. Wet removal works on thin coats and short runs. Scoring wins on trim, on thick coats, and anywhere the paint has bridged the gap between wall and tape.
I press the tape edge down with a putty knife and pull while the paint is still slightly tacky, usually inside an hour. That’s the wet camp with a timer attached. The one time I left a thick coat overnight, the tape came up in ragged strips and took the paint edge with it.
The 45-Degree Angle and the 90-Degree Fallback
FrogTape, Shurtape and Duck Brand say 45 degrees, while Malmer adds a 90-degree fallback if the adhesive sticks. 3M, Shurtape, FrogTape and Duck Brand all say pull back slowly at that angle, and FrogTape adds a hard no: never straight up or perpendicular to the surface.
Malmer adds a fallback that conflicts with that. If the adhesive sticks to the surface at 45, try 90. Read it as a rescue move, not a default setting.
I keep a cheap plastic putty knife in my back pocket the whole time I’m taping. Not for the seal. For the pull. Sliding it under a stuck corner beats yanking the tape and hoping.
None of this saves you if the tape line itself wanders, and learning to paint a straight line is mostly about where your hand sits, not which roll you bought.
A Ragged Edge Usually Means the Paint Bonded to the Tape Before You Pulled
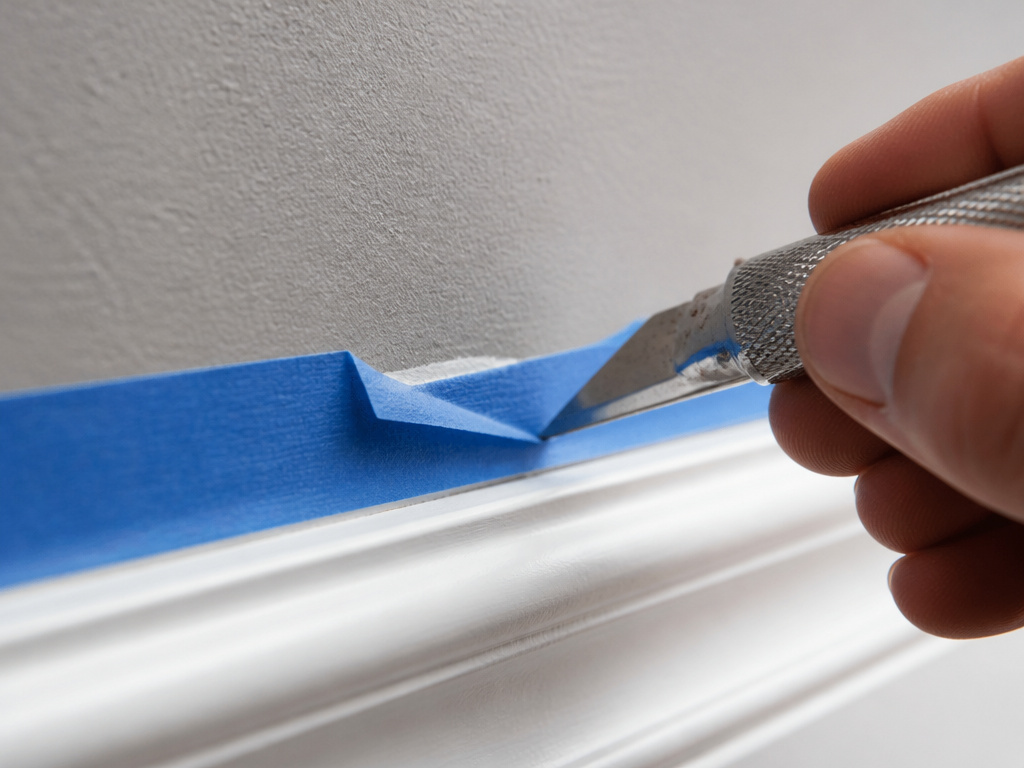
Shurtape describes the failure exactly: an uneven edge that takes pieces of paint with it. The fix is to break the bond first, using a razor blade along the edge.
Scoring works best where trim and wall meet, according to Malmer. Other spots don’t always allow it, and he says to recognize that rather than force a blade into a corner where it can’t travel.
| Symptom | Likely cause | Fix |
|---|---|---|
| Paint bleeds under the edge | Dust or moisture under the tape | Wipe, dry fully, burnish again |
| Tape lifts at a corner | Stretched during application | Lay shorter runs, 1 to 2 feet |
| Ragged edge, paint comes up | Paint bonded to the tape | Score with a razor blade first |
| Tape won’t stick at all | Surface too cold or too humid | Work between 50 and 100 F |
Tape doesn’t fail in the middle of a run. It fails at the corner, the outlet, and the one spot where the wall isn’t flat. Tape those three places first and the rest takes care of itself.
If the coating itself is already failing, technique won’t rescue it. Choosing tape that won’t peel paint is a separate conversation about adhesion levels, and it starts with an honest look at the wall.
Throw the used tape straight in the trash. FrogTape warns that tape left lying on a surface can track paint residue, and it can re-adhere if you set it down.
Frequently Asked Questions
How long should painter’s tape sit before you paint?
3M’s consumer page and Malmer both land on 30 to 60 minutes for tape alone. If you’ve run a caulk bead along the edge, follow the caulk manufacturer’s dry time instead, because the tape can’t seal over wet caulk.
Why does paint still bleed under tape on a textured wall?
Texture keeps the adhesive from making full contact along the edge. FrogTape’s answer is a damp cloth over the tape edge to activate PaintBlock Technology. Malmer’s answer is a paintable caulk bead under 1/8 inch, smoothed and dried before painting.
Can you leave painter’s tape on overnight?
Depends on the roll. Duck Brand Professional has a 3-day removal window and Clean Release has 14, so overnight is well inside both. The risk isn’t the tape sitting there, it’s the paint drying hard against the edge before you pull.
What angle do you pull painter’s tape at?
45 degrees, slowly, according to 3M, Shurtape, FrogTape and Duck Brand. Malmer adds a 90-degree fallback if the adhesive sticks to the surface, though FrogTape explicitly warns against pulling straight up or perpendicular.
Does stretching tape really cause bleed?
Yes, and every manufacturer says so. 3M warns stretched tape may lift or break. FrogTape ties stretching directly to poor adhesion and paint bleed. The backing film elongates and the adhesive layer thins out along the edge.
The Bottom Line
Here’s the threshold I’d hand anyone asking how to use painter’s tape for crisp lines: if the coat is thicker than a skim, stop pulling wet and start scoring. That one switch fixes more ragged edges than any upgrade at the tape aisle.
The rest is unglamorous. Clean and dry the wall, burnish the edge with something firm, keep your runs short, and pull slowly enough that you hear nothing.
This all changes on stucco or heavy orange-peel. There the tape is only half the job, and the caulk bead under 1/8 inch is doing the actual sealing.
Ten-minute challenge: tape off one baseboard tonight, burnish the edge with a credit card, and pull it while the paint is still tacky. Look at the edge before the tape hits the trash. That’s the whole lesson, and it costs you ten minutes and a foot of tape.
