
How to Stencil a Floor Without Bleeding Edges
This post contains affiliate links. As an Amazon Associate, we earn from qualifying purchases.
To stencil a floor, get the surface clean, dry, and dull, tape the stencil flat, and load the brush so lightly it feels almost empty. Then seal it.
How long you wait between coats decides whether the pattern survives a chair leg. A floor coating that’s dry to the touch is still soft underneath, and the sources below don’t agree on the numbers, which matters when you’re learning how to stencil a floor.
What follows is the order I’d actually work in: prep, base coat, layout, the almost-dry brush, then the waiting. The waiting is the part I rush, every time.
Key Takeaways
- Almost-dry paint beats perfect technique. Load the brush, then offload most of it onto a paper towel before it goes near the stencil.
- Seal only after the stain fully cures. Purdy’s procedure puts the clear coat after full cure, not before.
- Seal only after the stain fully cures. Purdy’s procedure puts the clear coat after full cure, not before.
- Dew point matters as much as temperature. One commercial spec wants the substrate 5°F above dew point during and after application.
- Stencil removal timing is genuinely disputed. Rust-Oleum says pull it wet; Purdy says wait until dry to the touch.
Why Do Stencil Patterns Bleed Under the Edge?
Almost every smeared stencil edge traces back to one habit.
If you want the longer version, the mechanics of how to prevent paint bleeding go deeper than one section can hold.
Here’s the diagnostic table I’d keep on the floor next to you.
| What You See | Likely Cause | Fix |
|---|---|---|
| Fuzzy, soft edge | Too much paint on the tool | Offload onto a paper towel first |
| Paint bridges under the stencil | Stencil not taped at every edge | Re-tape all four sides with masking tape |
| Pattern smeared on removal | Stencil dragged while wet | Lift straight up, or wait until dry to touch |
| Blotchy, uneven coverage | Roller pushed instead of dabbed | Dab straight down, one direction only |
| Paint lifts off with the stencil | Glossy, unsanded substrate | Sand dull and vacuum before painting |
Where this goes sideways: Pushing a roller across the design color instead of dabbing it.
Prep Decides Everything, and It Takes Longer Than the Painting
The floor has to be clean, dry, and dull before any paint goes down.
Purdy’s procedure is blunt about it: sand out glossy spots and surface imperfections, then vacuum thoroughly. Follow the cleaner or etcher label for its own dry times, because that’s a separate clock from the paint.
I learned the dull part the annoying way. I stenciled a thrifted dresser drawer front without sanding first, and the pattern scratched off under a fingernail. The next drawer got a light pass with fine grit and held.
Concrete is the same story at a bigger scale when you compare a how to stencil a floor. A slick or sealed slab has no tooth, and the coating sits on top until something scrapes it off.
Before you start: Wet sealer is slicker than the bare floor, so keep traffic out until the label’s walk-on time. Solvent-based sealers need cross-ventilation. Concrete etchers are caustic enough to burn skin, so gloves and glasses go on before the jug opens.
Four conditions decide whether you paint today or wait.
- Surface temperature at or above 50°F. One commercial stencil-coating specification sets that as a hard minimum. Rust-Oleum and Purdy both defer to the product label instead of naming a number, so treat 50°F as a floor, not a universal law.
- Substrate 5°F above the dew point, during and after application. When the slab surface drops to the dew point, moisture films onto it and the coating can’t bond.
- Surfaces dry for at least 24 hours before anything goes down.
- Application finished at least 2 hours before sunset. Evening damp and falling temperature both work against a fresh coat.
Tape off baseboards and door frames before you open a can. protect floors when painting covers the drop-cloth side of the setup if you want the full picture.
Which Coating Goes Down First, and How Many Coats
Purdy’s procedure calls for concrete stain in at least two colors, and that’s the part I’d get wrong if I were improvising.
Two colors means a base and a design color. The base goes down first, over the whole floor, and the design color goes through the stencil on top. Skip the base and you’re stenciling onto bare substrate with nothing to hide the variation.
| Coating | Best For | Watch Out For |
|---|---|---|
| Waterborne acrylic system | Interior concrete, fast recoat | 50°F minimum on one commercial spec |
| Concrete stain, 2 colors | Base plus design color on a slab | Needs full cure before sealer |
If you haven’t picked the base yet, best floor paint narrows it by surface type rather than by brand loyalty.
The Recoat Window Nobody Reads
Rust-Oleum HOME gives a 6-hour recoat window between base coats, and the second topcoat goes on within 24 hours of the first. Outside that window, read the label again before you add another coat.
Purdy says the same thing in fewer words: always read label directions for recommended recoat times. Several coats may be needed for full coverage, and the clock between them belongs to the product, not to you.
The topcoat is dry to the touch in 1 to 2 hours, the how to stencil a floor question. That number is not the same as the cure number, and mixing them up is how people ruin the floor.
The Almost-Dry Brush Rule That Stops the Bleeding
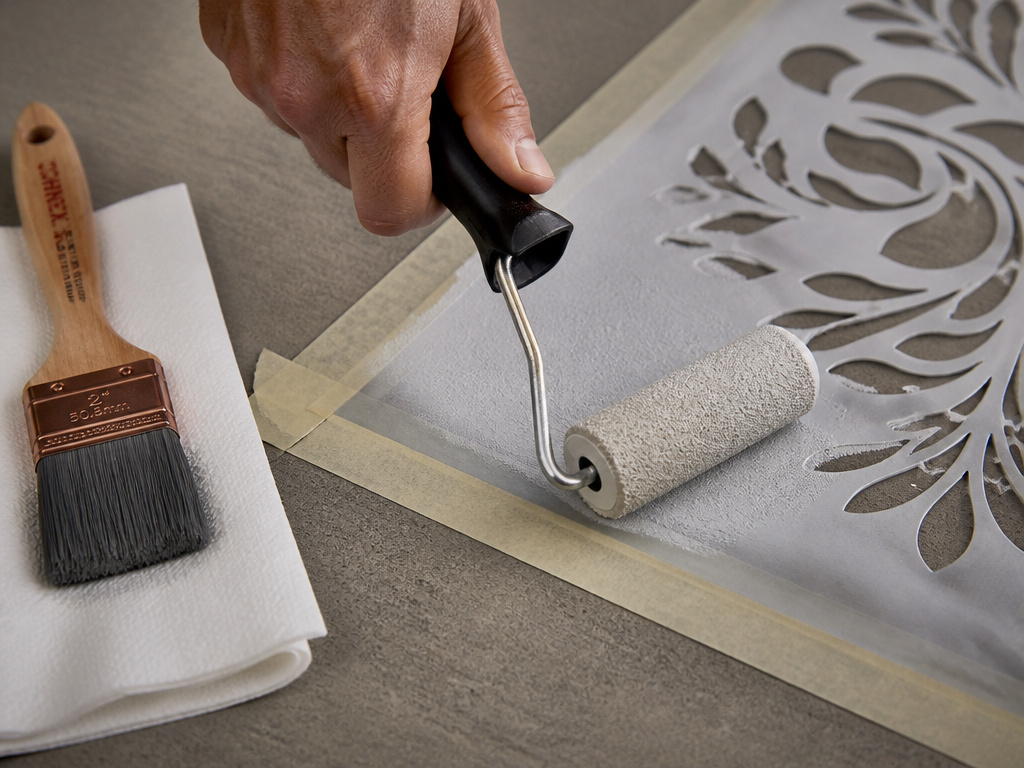
The tools that actually matter for the design color:
- A WhiteDove 4″ x 1/4″ jumbo mini roller cover for open flat areas, worked in one direction
- A 2″ or 2.5″ Chinex Elite brush for the perimeter, because stiff bristles suit rough concrete
- Masking tape, since the stencil gets taped at every edge, not just two
- Paper towels, which are the real tool here
Brush or Mini Roller for the Design Color?
Purdy uses the WhiteDove mini roller for the design color and the Chinex Elite brush for cut-in around the floor perimeter. That split is the answer: roller for open flat areas, brush for edges and texture.
Committing to one tool for both jobs is where the mess starts.
If you’re still deciding, stencil brush vs roller breaks it down by surface rather than by preference.
I still overload the brush when I’m moving fast. The tell is a wet, glossy edge on the very first pass, and by then the paint is already under the stencil. Slow down for the first few tiles and the rhythm comes back.
Laying Out the Pattern: Corner, Center, or Somewhere Else
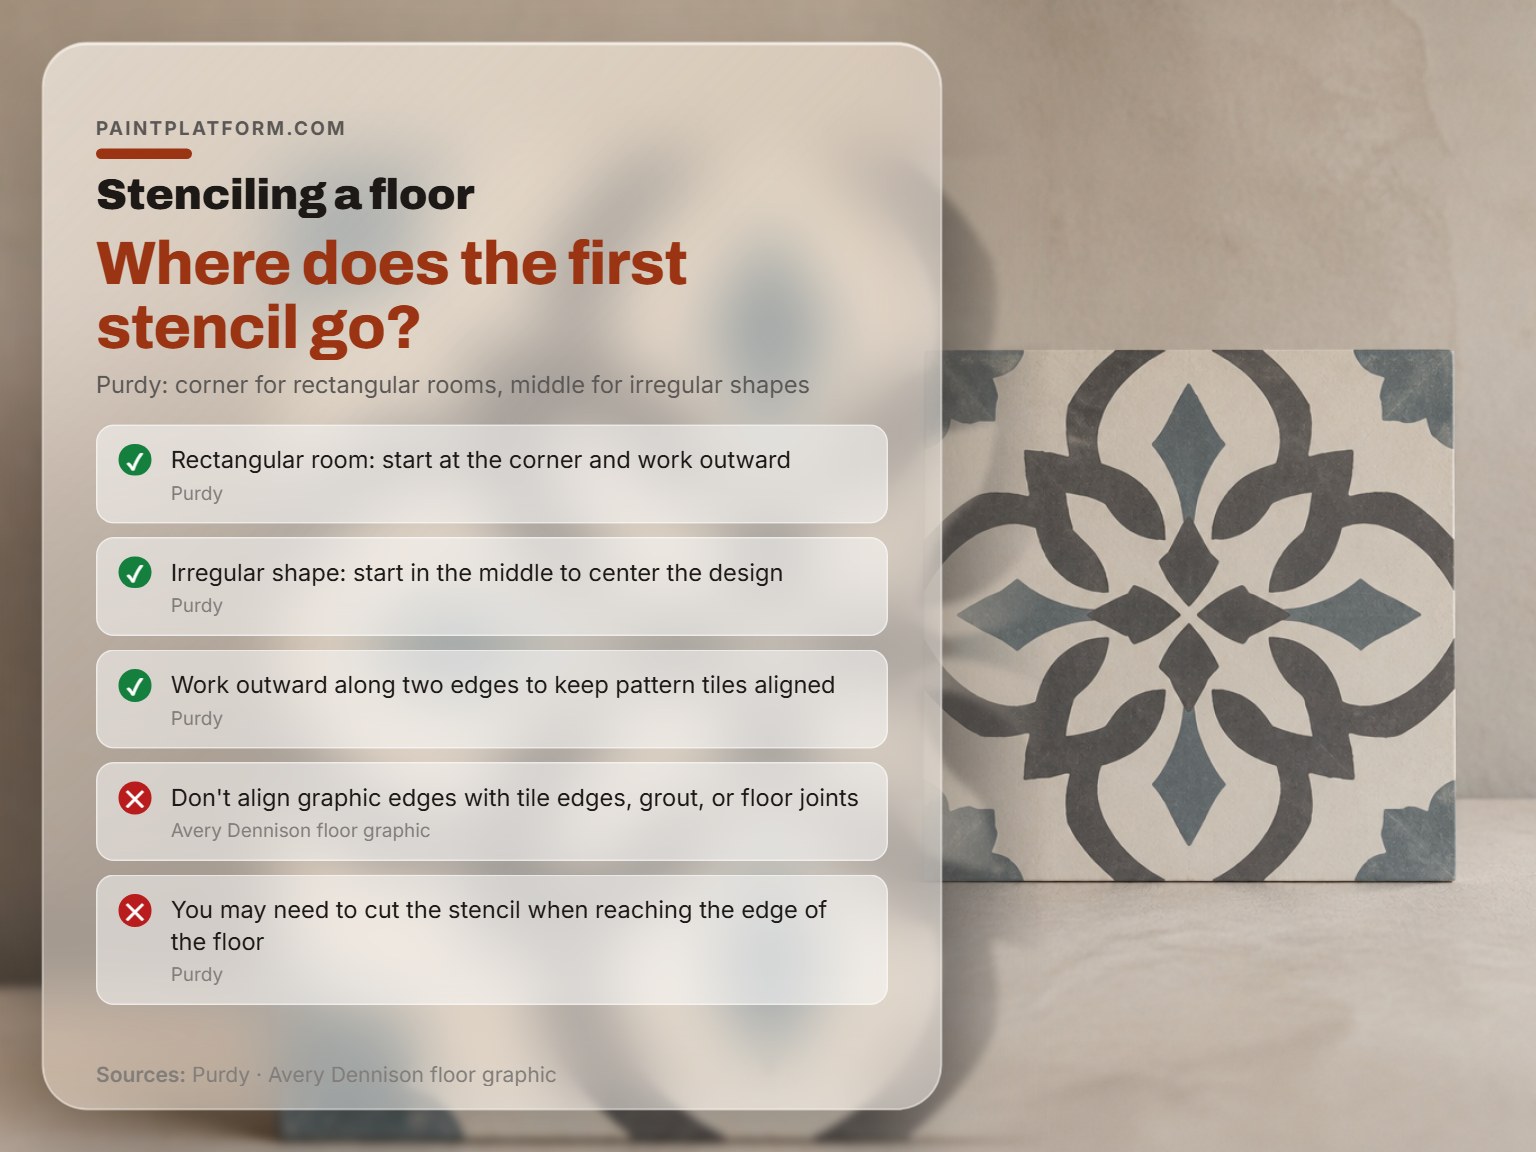
Where do you put the first stencil?
Purdy splits the answer by room shape. A rectangular room starts at the corner and works outward. An irregular shape starts in the middle, so the design ends up centered on the floor rather than jammed against one wall.
There’s a second Purdy tip that matters more than either. Starting in a corner and working outward along two edges is how you keep each new pattern tile positioned correctly.
Avery Dennison’s bulletin covers adhesive floor graphics rather than stencils, and it still carries a rule worth borrowing. Graphic edges must not align with tile edges, grout lines, or floor joints.
The instinct is to line the pattern up with the tile. The bulletin says don’t, and the reason holds up: an edge that follows a grout line reads as crooked the moment the grout shifts.
If you’re running an alternating two-color layout, the positioning logic in checkerboard floor transfers straight across. For patterns where a second color sits on top of the first, layered stencils covers registration.
Easy to miss: Letting the stencil run up the baseboard instead of trimming it. Purdy’s procedure calls for cutting the stencil when you reach the floor edge, and a stencil that folds upward leaves a bent pattern line that never sits right again.
How Long Before You Can Walk on It?
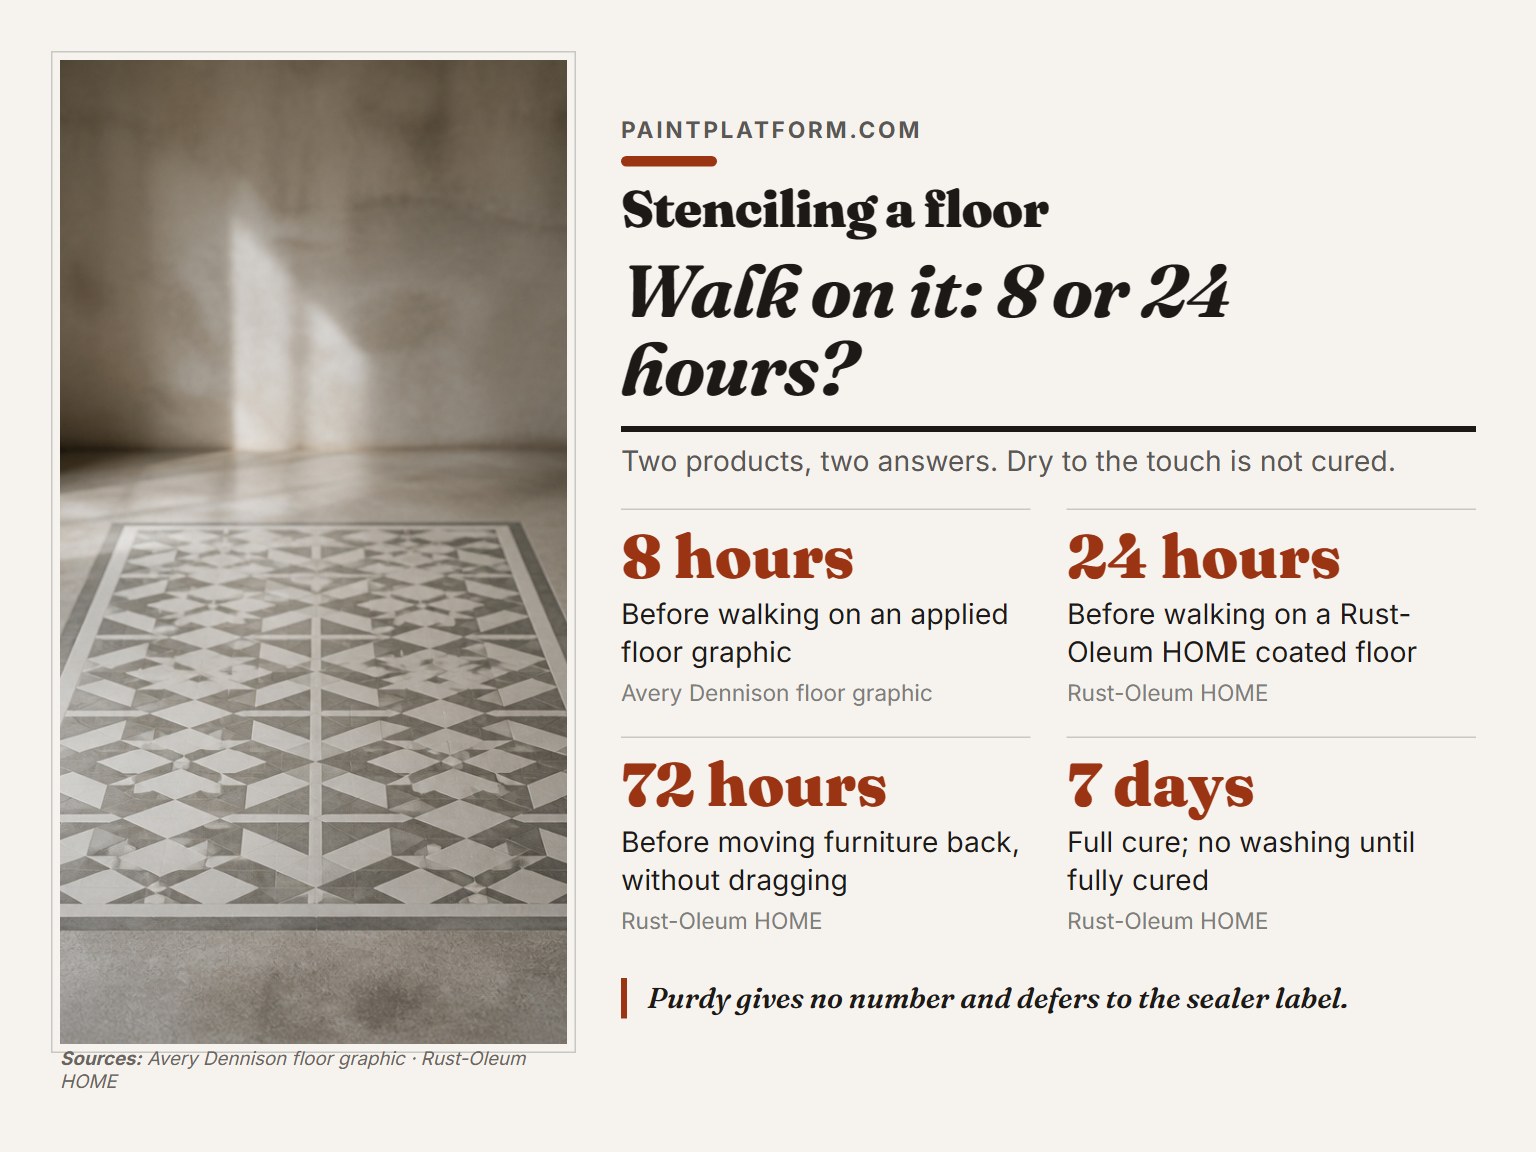
Two sources give two different answers: 8 hours and 24 hours.
Avery Dennison’s bulletin says don’t walk on an applied floor graphic for at least 8 hours. Rust-Oleum HOME says walk on the coated floor after 24 hours. Purdy gives no number at all and defers to the sealer label.
They’re describing different products, which is part of the gap. The practical takeaway is that dry and ready-for-feet are two different states.
| Product | Walk On | Furniture | Full Cure |
|---|---|---|---|
| Rust-Oleum HOME coated floor | 24 hours | 72 hours, no dragging | 7 days |
| Avery Dennison floor graphic | 8 hours | Not stated | Not stated |
| Purdy procedure | Follow sealer label | Follow sealer label | Seal after stain fully cures |
Rust-Oleum HOME also says no washing until the floor is fully cured, and full cure is 7 days. Furniture goes back at 72 hours, and you don’t drag it across the new surface.
On a floor I’d skip wax entirely. A water-based polyurethane is what I’d reach for, because feet find the pattern fast.
Dry to the touch is a different state from cured. A topcoat can feel dry to the touch in 1 to 2 hours and still take a mark from a chair leg.
Concrete, Driveways, and the 5-Ton Load Limit
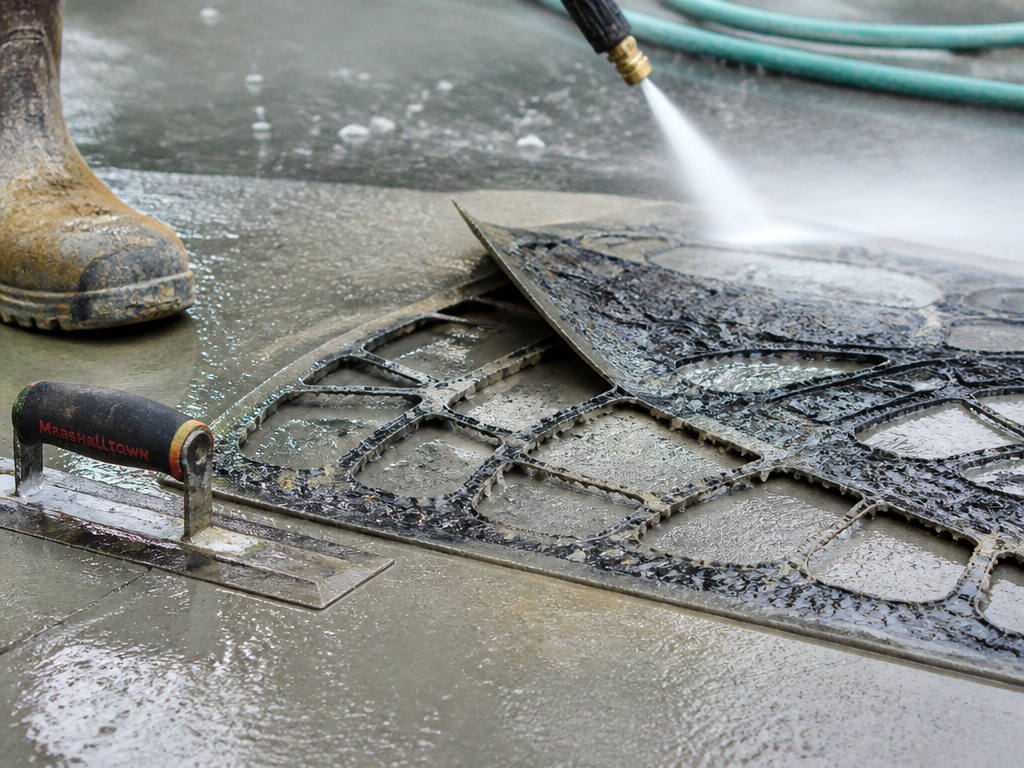
Concrete slabs that take vehicles follow a different set of limits.
Hicrete’s method statement rates Designer Stencil Flooring for vehicle traffic up to a maximum 5-ton load. If the axle load exceeds 2.5 tons, the statement says to bring in a structural engineer and check the sub-grade condition before anything else happens.
That’s the edge case that breaks the whole procedure. A decorative stencil on a laundry floor and a decorative stencil on a driveway are not the same job.
Hicrete’s stencils are reusable urethane, pressed into wet concrete with Fresno or Mag floats until no portion of the stencil shows on top. You wait until the bleed water leaves the surface before the final troweling.
The next-day cleanup runs nothing like a paint job:
- Pressure-wash the surface to lift the stencils and the loose concrete skin.
- No pressure washer? Wet it with a garden hose, spray Hicrete Super Blue, and scrub in circles with a medium-stiffness bristled broom.
- Rinse, repeat the scrub until the dust is gone, and let the slab dry fully before sealer.
The 48-Inch Overspray Rule
One commercial stencil-coating spec wants building paper extending at least 48 inches beyond the coated edge to block overspray. That’s a lot of paper. It’s also the difference between a clean wall and a speckled one.
If the slab is the part you’re unsure about, concrete floor paint covers which coatings actually bond to concrete and which sit on top.
Removing the Stencil: Two Manufacturers, Opposite Instructions
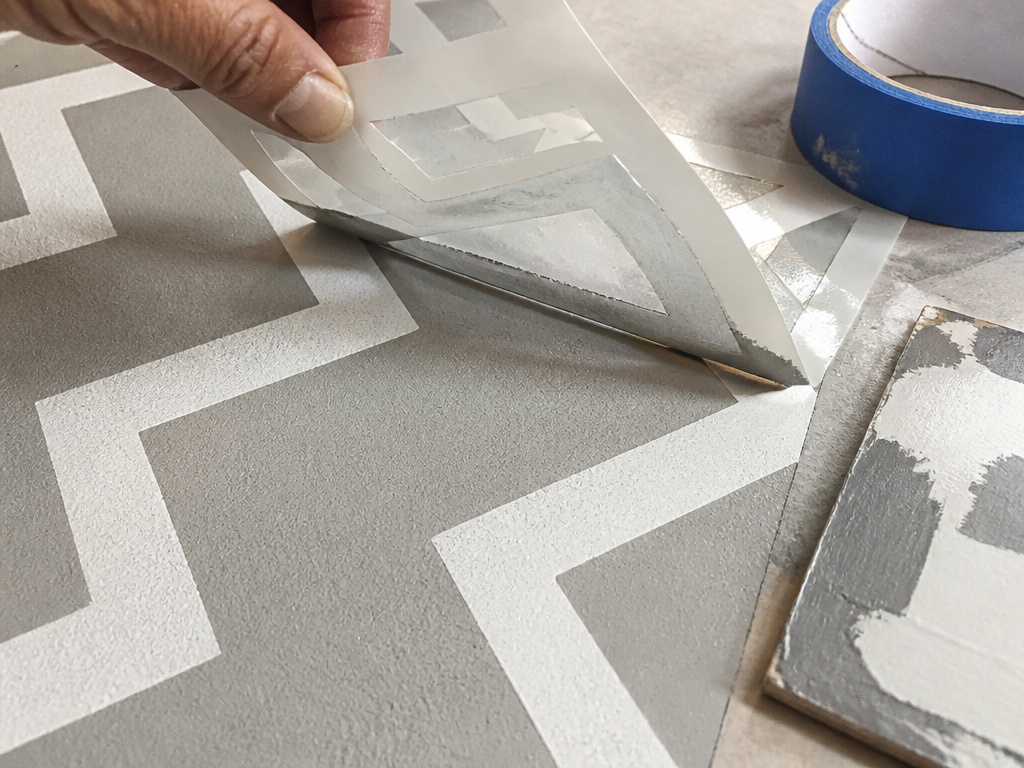
One label tells you to pull the stencil while the paint is still wet.
Rust-Oleum HOME says to remove tape and stencil while the second color is still wet, for both the pattern and the border. Purdy says reposition the stencil only once the paint is dry to the touch.
Both are guarding against a real failure. Pull it wet and you avoid a dried film bridging the stencil edge and tearing when you lift. Pull it dry and you avoid smearing a wet edge as the stencil drags across it.
The visual tell is the same either way. A wet edge looks glossy and slightly darker right at the tape line, and that’s the moment you make the call.
Test on a scrap board before you commit to a whole floor. A small scrap settles which instruction your paint follows.
Clean reusable stencils before the paint hardens. clean stencils covers the soak-and-rinse order so the pattern survives for the next room.
Skip this if: You’re using a one-shot paper or acetate stencil. There’s nothing to clean and nothing to preserve, so the removal-timing question only matters for stencils you plan to reuse.
Frequently Asked Questions
Do I need to seal a stenciled floor?
On a floor, yes. Purdy calls the clear sealer especially important for exterior and high-traffic areas. A water-based polyurethane is what I’d put down, because feet find the pattern fast.
How long should paint dry before I move the stencil?
Purdy says dry to the touch. Rust-Oleum HOME says pull the stencil while the second color is still wet. Those are opposite instructions from two manufacturers, so test your specific paint on a scrap board first.
Can I stencil over an existing painted floor?
Only after the old coating is dull, clean, and sound. Purdy’s prep step calls for sanding out glossy spots and vacuuming thoroughly. A slick existing finish is exactly what makes a new pattern scratch off under a fingernail.
What temperature is too cold to stencil a floor?
One commercial stencil-coating spec sets 50°F as a hard minimum for air and surface temperature, and requires the substrate to stay 5°F above the dew point during and after application. Rust-Oleum and Purdy don’t name a number and point you at the label instead.
Why does my stencil pattern look fuzzy at the edges?
Too much paint on the tool. Excess paint wicks under the stencil edge through capillary action, and no amount of tape stops it. Offload most of the paint onto a paper towel before the brush touches the stencil.
Can I use a stencil on a concrete driveway?
Only within the slab’s load rating. Hicrete rates its Designer Stencil Flooring for a maximum 5-ton vehicle load, and anything above a 2.5-ton axle load needs a structural engineer to review the sub-grade first.
The Bottom Line
Before you buy anything, do the scrap test. A scrap board, one stencil, one almost-dry brush. If the edge comes out crisp there, the floor will work.
Here’s the concession. Everything above assumes an interior floor with foot traffic. If vehicles are involved, Hicrete’s 5-ton and 2.5-ton axle thresholds come before any of it, and a structural engineer decides whether that slab is a candidate at all.
And the part I’d argue with someone about: I’d rather see a slightly uneven stencil pattern that’s properly sealed than a perfect one with a single coat on it. The pattern is what shows up in the photos. The sealer is what shows up in year two.
