
How to Layer Stencils: Step-by-Step (No Smearing)
This post contains affiliate links. As an Amazon Associate, we earn from qualifying purchases.
To layer stencils, lock each pass to the one before it with registration marks, then let every color dry fully before the next stencil goes down. Offload most of the paint onto a paper towel and dab straight up and down. Wet paint under a fresh stencil is what smears an otherwise clean design.
The marks do two jobs at once. They hold the design in position, and they show you the second a stencil has shifted, before you’ve committed a second color. Without them, drift stays invisible until the repeat is already wrong.
What follows is the order that works: registration first, drying times second, brush loading third, and the four places layered stencils actually fail.
Key Takeaways
- Register before you paint. Two or three tape marks on the surface, aligned to the stencil edge, catch drift before it costs you a repeat.
- Wait 20 to 30 minutes between acrylic layers. Lifting a stencil off tacky paint pulls the layer up with it.
- Offload almost all the paint onto a paper towel first. A brush that looks nearly dry is the one that prints a crisp edge.
- Dab straight up and down. A sweeping stroke pushes paint under the stencil.
- Clean between colors. Dried flecks in the openings are what make third and fourth layers look patchy.
What Do You Need Before the Second Color Goes Down?
Four things: the stencil itself, low-tack painter’s tape, a stencil brush or a small sponge, and a scrap of card to test on.
Registration is a mechanical alignment step, not an artistic one. Two tape marks placed against two fixed edges of the stencil define a repeatable position on the surface. Any later stencil set against those same marks returns to the same spot, provided the marks stay fixed to the substrate and not to the stencil.
That last clause is the one that gets skipped. Tape the marks to the surface, never to the film.
The rest of the kit is cheap, and you probably own half of it already.
- Low-tack painter’s tape, cut into short strips rather than long runs
- A stencil brush with stiff, flat bristles, or a makeup sponge for softer edges
- A folded paper towel for offloading
- Scrap card stock, so the first test layer doesn’t cost you the real surface
The how to layer stencils question starts with the stencil itself, which matters more than most tutorials admit. Reusable mylar holds its shape through a dozen repeats; thin craft-store film curls at the edges after three or four, and a curled edge is a bleeding edge. If you’re weighing stencil materials, favor thickness over price.
Paint comes second. Heavy-body acrylic straight from the jar is too thick for stenciling. It bridges the openings and dries with a visible ridge. Craft acrylic thinned to the consistency of heavy cream prints cleanest, and a guide to stencil paint types will save you a wasted afternoon.
Registration Marks Are the Whole Game
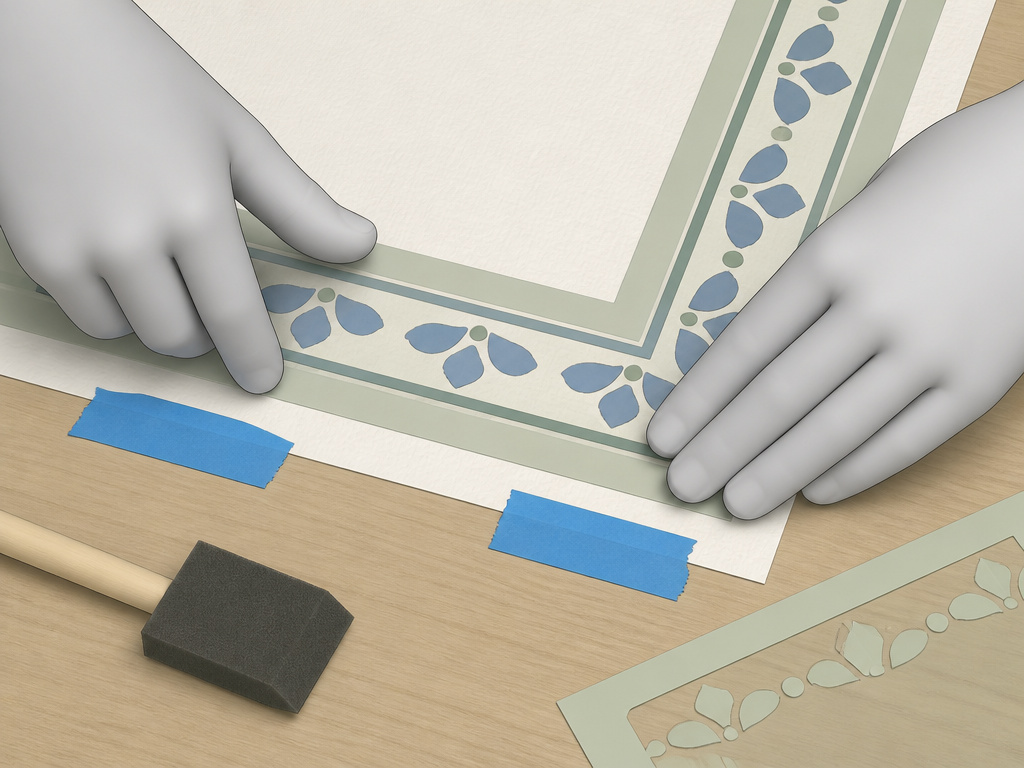
Layered stencils live or die on this one step.
By the fourth repeat of a two-color border, my second color had drifted about a quarter inch off. The design looked drunk. I’d been lining each stencil up by eye against the previous print, and eyeballing compounds across a repeat.
Two or three registration marks stop that. The tape gives every stencil the same reference frame. Line the stencil edge to the tape, press it down, and the position matches the last pass exactly. Your eye can’t do that, because each pass resets your judgment from scratch.
Punch the marks before the first color
Place the marks outside the design area, on two adjacent edges. Tape goes on the bare surface, not on the stencil. On paper, use a strip long enough that it doesn’t creep under the brush.
Where this goes sideways: Taping the registration marks to the stencil instead of the surface. The marks travel with the stencil, so every repeat inherits the previous one’s error and the drift gets worse, not better.
I keep the same two tape marks down for an entire session, even when I switch to a different stencil in the same set. Re-taping between passes is where I used to lose my place. Now the marks stay put and the stencils come to them.
How Long Should You Wait Between Layers?
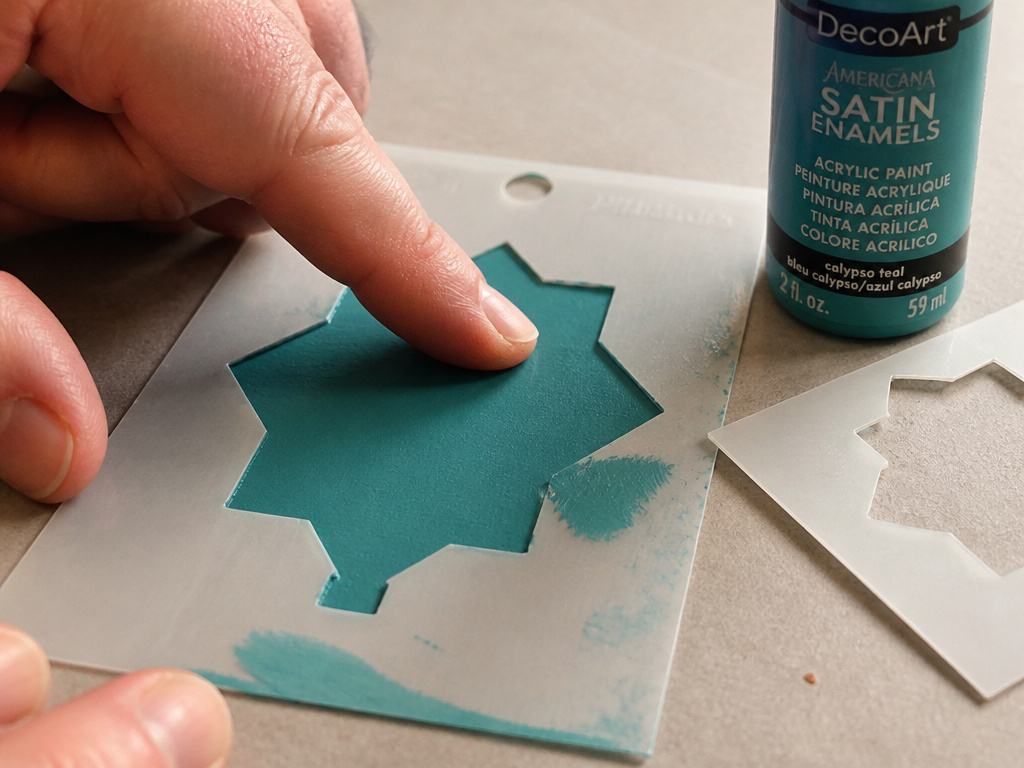
Twenty to thirty minutes is the real number for acrylic craft paint at room temperature.
Not five. Not until it looks dry. Acrylic goes matte while it’s still soft underneath, and the surface lies to you.
Wet acrylic carries a faint sheen across it. When that sheen flattens out and the color turns chalky-matte, most of the water is gone and the film has started to knit. That’s your cue, not the clock alone.
| Layer | Wait Before the Next Stencil | How to Tell It’s Ready |
|---|---|---|
| Thin base coat | 20 to 30 minutes | Flat and matte, no sheen |
| Second color | 20 to 30 minutes | Cool to the touch, not tacky |
| Thick or dabbed layer | Until a fingertip leaves no paint | Press a corner, check your finger |
I got impatient once and lifted a fresh layer right off with the stencil. The paint came away in a soft sheet, stuck to the back of the mylar, and the design underneath was a pale ghost of itself.
A cold room stretches the wait. A fan blowing across the surface skins the top while the layer underneath stays soft. Warmth and gentle airflow help; a hairdryer on high doesn’t. I tried the hairdryer-on-every-layer trick once and got uneven edges plus a couple of cracked patches where the top dried before the layer beneath it.
The same drying logic that governs how you layer acrylic paint applies here, except now there’s a stencil sitting on top of the wet film.
The Almost-Dry Brush Rule
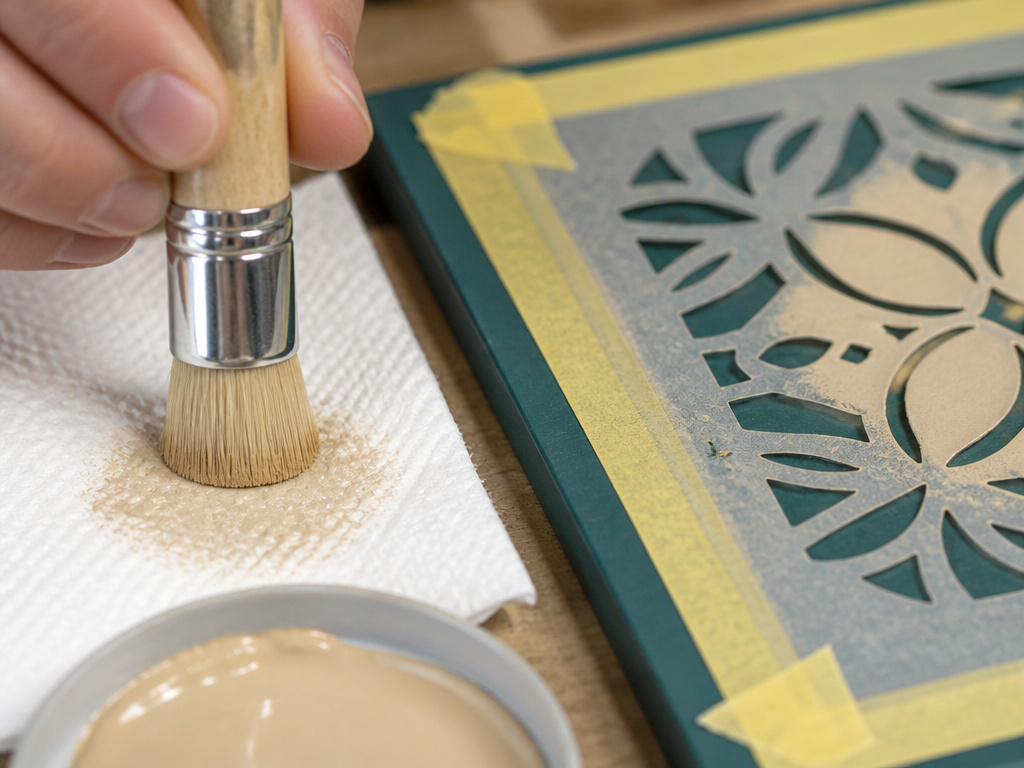
The brush that prints the crispest edge looks like it has almost nothing on it.
Load it, then unload it. Drag the bristles across a folded paper towel until the paint stops transferring, then dab straight up and down on the stencil.
Loading a stencil brush is like seasoning a soup. You can always add another pinch. You can’t take one back out.
If you can see wet paint sitting on the bristles, the brush is too loaded. The right amount looks like a stain, not a coat.
Dabbing matters as much as loading. A sweeping stroke pushes paint ahead of the bristles and under the stencil edge. Straight up and down keeps the paint where the opening is. This is the single biggest cause of paint bleeding, ahead of tape quality and ahead of stencil brand.
A properly loaded brush makes almost no sound against the film. An overloaded one gives a soft wet squelch, and that squelch is your warning.
FolkArt and DecoArt Americana both thin down well for this. Heavier artist acrylics need more water and turn slippery. The best paint for stenciling is usually the cheapest craft acrylic on the shelf, not the most expensive one.
Brush vs Roller vs Sponge for Layered Work
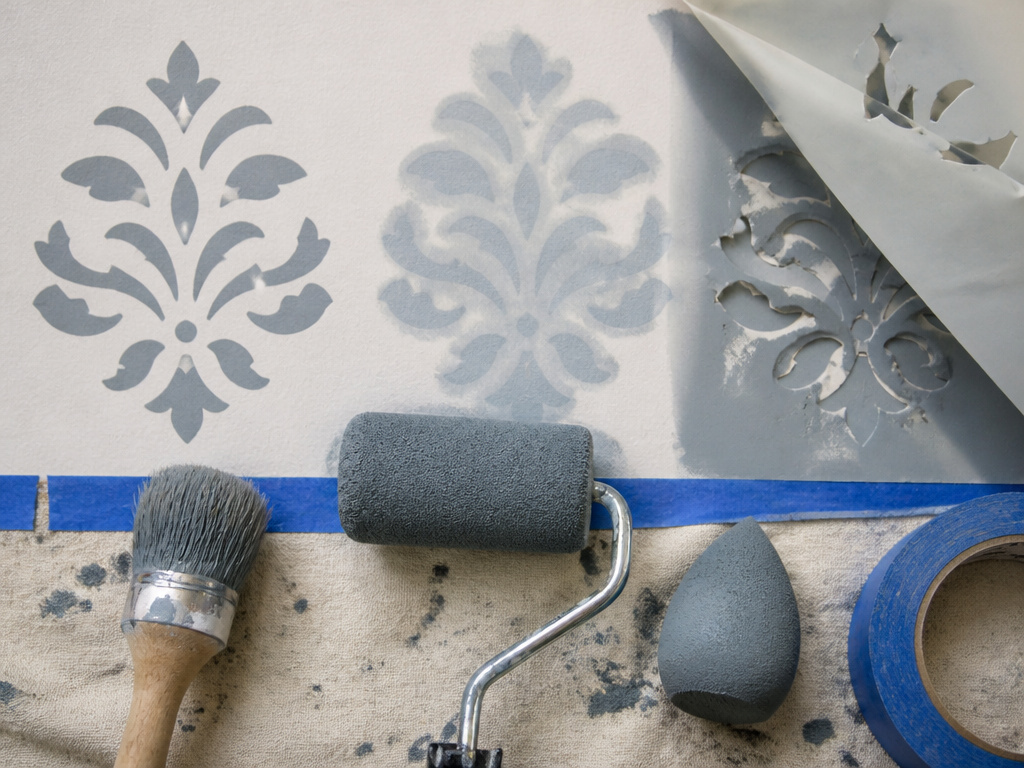
A foam roller covers a wall far faster than a stencil brush, and it pushes paint under the edges on anything textured.
| Tool | Best For | Risk on a Layered Design |
|---|---|---|
| Stiff stencil brush | Detail, tight repeats | Bleeds if overloaded |
| 4-inch foam roller | Large flat areas, walls | Pushes paint under edges on texture |
| Makeup sponge | Soft blends, fabric | Soaks up paint and dries out fast |
For cards, canvas, and furniture, a stiff stencil brush wins. For a full wall, a foam roller wins on speed and you accept a slightly softer edge. Sponges are for fabric and blending, not for crisp layered repeats.
The stencil brush vs roller question gets settled by surface area more than by technique.
When a roller wins
Anything bigger than a sheet of paper, honestly. Royal Design Studio builds their larger designs around wall repeats, and those are miserable to dab by hand at full size. Stencil1’s adhesive-backed stencils hold themselves down, which takes tape out of the equation on small projects where registration is the only real risk.
Where Layered Stencils Actually Go Wrong
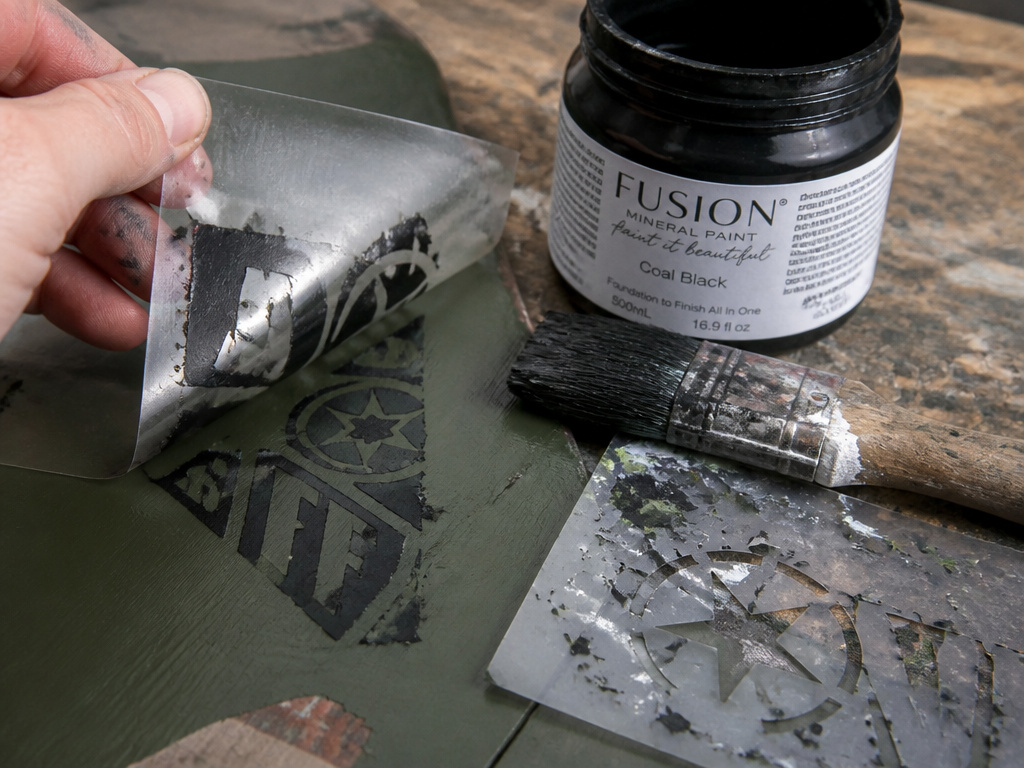
Four failures account for almost every ruined layered design.
- Paint still tacky when the next stencil lands. The film lifts the layer and you get a torn edge that touch-up makes worse.
- Registration marks taped to the stencil. Drift compounds with every repeat until the shape is unrecognizable.
- A brush loaded straight from the jar. Paint floods the opening and creeps under the edge on the very first pass.
- Stencil not cleaned between colors. Dried flecks lift and print as grit across the next layer.
Lifting a stencil off paint that’s still tacky pulls the top layer with it. The damage shows immediately, and touching it up usually makes it worse, because the fresh paint grabs the lifted edge a second time.
Cleaning between colors is the one everybody skips. Rinse under cool water, blot, dry flat. Warm water softens the mylar and the corners start to curl. The full clean stencils routine is short, and it’s the difference between a stencil that lasts a season and one that lasts a single project.
Easy to miss: A stencil that’s still damp from cleaning will bleed on the first pass. Blot it dry and give it a minute before it goes back down.
How to Layer Stencils, Start to Finish
Six steps, in this order.
- Set your registration marks first. Two strips of low-tack tape on the surface, outside the design area. Skip this and every later step inherits the error.
- Test layer one on scrap card. Same brush, same paint, same pressure. If it bleeds on scrap, it will bleed on the real surface.
- Print the base color and stop touching it. Dab up and down, lift straight off, leave it alone.
- Wait 20 to 30 minutes. The surface should read flat and matte, not just dry to a light touch.
- Align the next stencil to the tape marks, not to the previous print. The tape is fixed. The print is what you’re trying to match.
- Clean the stencil before it goes back in the stack. Dried paint in the openings is what makes the third and fourth layers patchy.
The same sequence scales to walls, though vertical sections and overlap planning add a step of their own. If you’re working at that size, stencil a wall in sections rather than trying to register across a whole room at once.
Cutting Your Own Registration-Friendly Stencils
A manila folder and a craft knife will outperform most kits for simple layered shapes.
Cut two small V notches into adjacent edges of the stencil itself, matched to your tape marks. Then the stencil drops into place with no eyeballing at all. That’s the whole trick, and it costs nothing.
Acetate vs manila folder
Acetate is transparent, which matters when you’re registering through the film. Grafix clear acetate sheets are stiff enough to hold a notch through repeated cleanings. A manila folder is opaque and free, and it holds a shape better after a few washes than thin craft film does.
Spray adhesive and heavy-duty stencil kits are overkill for a three-color card. The adhesive gums up the stencil after two uses, and the kit costs more than the project is worth.
Frequently Asked Questions
Can you layer stencils with different paint types?
Yes, as long as each layer is fully dry before the next one goes down. Water-based craft acrylic over a dried water-based layer is fine. Putting a water-based layer over an oil-based one is where you run into trouble, because the top film can’t grip and it lifts. Test on scrap first.
How do you keep a stencil from moving between layers?
Tape registration marks to the surface, not to the stencil, and align every pass to those marks. Two marks on adjacent edges are enough. Three is better if the design is large or the surface is slick.
Do you have to wait between stencil layers?
Yes. Acrylic craft paint needs roughly 20 to 30 minutes at room temperature before it’s safe to put a stencil on top. Matte surface doesn’t mean dry film. Press a corner with a clean fingertip and check that nothing comes away.
What do you do if the second layer bleeds?
Stop and let it dry completely before you touch it. Wiping wet bleed smears it wider. Once it’s dry, you can often lift a small bleed with a damp cotton swab, or paint over it with the base color and reprint the layer with a drier brush.
Can you layer stencils on fabric?
Yes, with two changes. Use a fabric medium mixed into the acrylic, and put a scrap of card inside the shirt or bag so paint doesn’t strike through. Fabric also drinks paint, so load the brush even lighter than you would on paper.
The Bottom Line
Here’s the trigger worth remembering: if your second color has drifted about a quarter inch off the first, stop and re-register. Don’t try to correct it by nudging the stencil on the next pass. Nudging compounds the error instead of fixing it.
The first thing to do this week is small. Tape two marks to a scrap card, print one shape, wait half an hour, then print a second shape over it. That’s the entire skill in one exercise, and it costs you a scrap of card and thirty minutes.
Everything about how to layer stencils comes back to two habits: register, and wait. Get those right and the paint handling almost takes care of itself. Fair warning, though: this all assumes water-based craft acrylic. Oil-based stencil paint changes the drying math completely, and if that’s your medium you want a different guide than this one.
Keep it simple and keep it joyful.
