
How to Cut in When Painting Walls: Order and Wet Edge
This post contains affiliate links. As an Amazon Associate, we earn from qualifying purchases.
To cut in when painting walls, load an angled sash brush and draw a straight line along the ceiling, baseboard, and trim before you roll, feathering the paint a few inches out so the roller can blend into it. The line has to stay wet until the roller reaches it.
Wet edge is the phrase that decides the how to cut in when painting walls question, whether this looks like a pro job or a stripe. Brushed paint and rolled paint land on the wall with slightly different texture, and the only thing hiding that difference is rolling into cut-in paint that hasn’t dried yet.
What follows is the order question, the loading argument, the tape fight, and the weather that tells you to close the can.
Key Takeaways
- Cut in before you roll the walls, per Benjamin Moore. Benjamin Moore’s guidance is explicit on this, while Sherwin-Williams’ explanation of hatbanding shows exactly what happens when the band dries first.
- Feather width is contested. Benjamin Moore says 3-5 inches, while Bob Vila says a 6-12 inch sweep before you push the line.
- Brush loading has two published answers: fully loaded (Purdy) and two-thirds of the bristle (Bob Vila).
- Tape is a comfort decision, not a rule. Purdy describes cutting in as brush-only work; Benjamin Moore’s own steps include taping according to comfort level.
What Does Cutting In Actually Mean?
Cutting in is brush work along every edge a roller physically can’t reach, which is the how to cut in when painting walls answer: the ceiling line, baseboards, window and door casings, inside corners, and the strip around outlets and switches.
Cutting in produces a straight boundary between two finishes using a brush alone. The brushed band runs along ceilings, trim, and corners, then feathers outward several inches so a roller can blend into that band while the paint stays wet. A dry cut-in band leaves a visible stripe. Speed matters as much as straightness.
Before you start: Interior paint gives off solvent vapor, so open a window and run a fan through the room. Latex paint cleans up with water but bonds to skin and hair fast, so keep a damp rag within arm’s reach. Set the stepladder on bare floor rather than on the drop cloth, because a folded cloth edge under a ladder foot slides when you shift your weight.
Benjamin Moore’s tool list is short: painter’s tape, drop cloths, a screwdriver, a stepladder, and interior paint. Bob Vila’s adds a multitool for opening the can and a bucket. Purdy’s angle is different again, and its tools for cutting in advice leans hard on brush selection because that’s what the company sells.
The Sequence That Works
- Pull the plates. Remove outlet and switch covers, then tape over the switches themselves. Painting around a live switch is how a loaded brush ends up against a live edge.
- Start at the ceiling line. Benjamin Moore’s steps begin there, drawing the brush along the ceiling edge without painting onto the ceiling. Starting at the baseboard spends your steadiest stroke on the least visible line in the room.
- Feather 3-5 inches out from the line. Paint back into what you just laid down. A hard-edged band with no feather is the one thing a roller can’t hide.
- Repeat around windows, doors, and baseboards with the same 3-5 inch feather, since those are the areas a roller can’t reach.
- Roll before the band dries. Benjamin Moore notes its paints dry fast, so the cut-in and the roll happen in one pass around the room, not two.
Bob Vila’s version of the stroke differs in the details. He puts paint about an inch away from the top of the trim first, sweeps parallel with the trim for 6 to 12 inches, then turns the brush horizontal and sweeps back to erase brush marks and feather the boundary.
Ceilings are the line everyone notices first and the one most people rush. Cutting in a ceiling edge needs a stepladder and a slower stroke than the baseboard does. A textured ceiling grabs wet bristles, so the paint on ceiling problem shows up fast on popcorn and knockdown finishes.
If your line wanders, the cause is usually speed and pressure rather than the brush. Learning to paint a straight line is mostly about moving your whole arm from the shoulder instead of steering with your wrist.
How to Cut In When Painting Walls: Order of Operations
Two credible sources give opposite answers on order, and neither is describing the same surface.
Benjamin Moore is direct: cut in before you paint the walls in full, because blending the cut-in areas into the painted wall is easier that way, while Sherwin-Williams stresses keeping a wet edge and Bob Vila paints the lighter surface first. The TAMU painting methods research runs the other direction, putting woodwork first and the cut-in strip around it second. Bob Vila adds a third sequence: paint the lighter surface first, overpaint the edge a little, then come back and cut in the wall color.
Why Both Orders Describe Different Surfaces
Benjamin Moore is talking about wall meeting wall, where the brushed band and the rolled field have to blend into each other. Texas A&M is talking about trim, where a little paint on the wall edge gets wiped or covered. Bob Vila is talking about a white ceiling against a colored wall.
Three sequences, three different junctions:
- Wall to wall: cut in first, roll while wet.
- Wall to trim: trim first if you’re wiping the edge anyway, then cut in.
- Wall to ceiling: lighter surface first, then cut in the darker one.
My read is that the real question isn’t “cut in first or trim first” in the abstract. It’s which surface your roller touches next. The band you cut in only has to be wet when the roller arrives, and that timing decides the order for you.
How Much Paint Goes on the Brush?
Three sources give three different loading answers, and the gap between them is not small.
Purdy says use a fully loaded brush, while Bob Vila caps it at two-thirds of the bristle length, the sources disagree. That’s a real spread across two credible sources, which is worth knowing before you assume there’s one right answer.
Loading a brush is like seasoning a soup: you add a little, taste, add more. Dumping the whole jar in is how beginners end up with a wall that runs.
Common mistake: Dipping to the ferrule and then pressing hard to move the paint. Purdy names overloading as the cause of both runs and sags, and pressing just squeezes the excess onto the wall in a thick band the roller can’t flatten.
My own habit sits closer to Bob Vila’s two-thirds than to Purdy’s fully loaded, mostly because a heavy brush punishes a slow hand. Purdy’s advice assumes a fast, confident stroke. If you’re still thinking about where the line goes, you’re not moving fast.
I own more brushes than any reasonable person needs and reach for the same 2½-inch angled one nine times out of ten. The brush for cutting in that earns its keep has a chisel tip that holds an edge.
If you’re buying one, a 2½-inch angle sash brush is the model Benjamin Moore specifies, and it’s the one I’d hand a beginner.
Tape or No Tape? Where the Sources Split
Three positions on tape, three sources, and one of them sells brushes for a living.
Purdy defines cutting in as the art of drawing a straight line separating two colors with the brush alone, no masking tape or other aid. Benjamin Moore’s official steps include taping off areas according to your comfort level and note that you may be able to cut in faster without tape if you’re comfortable. Bob Vila says to save time by skipping painter’s tape and relying on a steady hand.
Read Benjamin Moore’s wording closely. It doesn’t tell you to tape. It tells you to tape according to comfort level, which is a different instruction.
| Question | Position | Who says it |
|---|---|---|
| Tape | Tape per comfort level | Benjamin Moore |
| Tape | Brush alone, no tape | Purdy |
| Brush loading | Fully loaded | Purdy |
| Brush loading | 2/3 of bristle | Bob Vila |
| Feather width | 3-5 inches | Benjamin Moore |
| Feather width | 6-12 inch sweep | Bob Vila |
What Tape Actually Buys You
Tape buys speed on surfaces you don’t know yet.
An edger sits between the two camps. A paint edger holds a small pad against the ceiling line and keeps the bristles off it, which helps on a long straight run and hurts in a corner.
Where tape earns its keep is trim with a profile, because a brush can’t follow a molded edge cleanly. That’s the case for taking the time to tape off trim rather than taping the whole room.
If you want the Purdy version, the whole skill is cutting in freehand with a properly loaded brush and a hand that moves from the shoulder.
My take: tape the trim, skip the tape on the ceiling line after the first room. The ceiling line is one long straight run, which is the easiest thing in the room to learn.
The Wet Edge Is the Whole Job
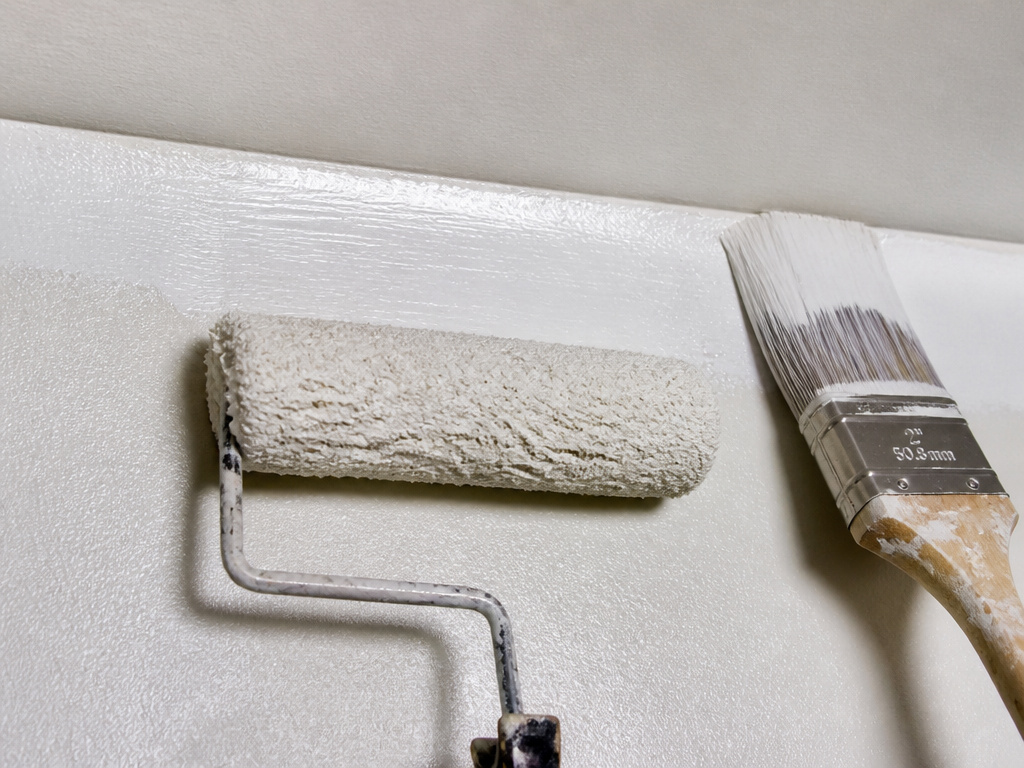
Hatbanding has a name because it happens constantly, and it’s the one defect that comes straight from bad timing.
Sherwin-Williams describes it precisely: a stripe at the edges or top of a wall, appearing when the brushed cut-in area is dry by the time the wall gets rolled. Not rolling onto a wet edge makes the texture difference between brushed and rolled paint very visible. The fix is another coat applied while keeping a wet edge on the cut-in areas.
Where this goes sideways: A cut-in band left to dry before you roll will show as a stripe along the ceiling within the first coat, and rolling back over it won’t erase the texture line. Sherwin-Williams’ correction is a full additional coat applied wet.
Cut in one wall, roll that wall, then move. Doing every edge in the room before you touch a roller is how a fast-drying paint turns a one-pass job into a recoat.
Purdy’s rolling method supports the same timing. Roll an N in a three-foot square, work from unpainted into painted surface, and never run the cover dry. The roller and brush have to be in the same section of wall at the same time, which means your tray, your brush, and your roller all travel together around the room.
A properly loaded brush opens into a semi-oval against the wall and moves with a soft wet sound. When it starts to drag and skip, you’re out of paint and about to leave a dry edge behind you.
When the Conditions Say Don’t Paint
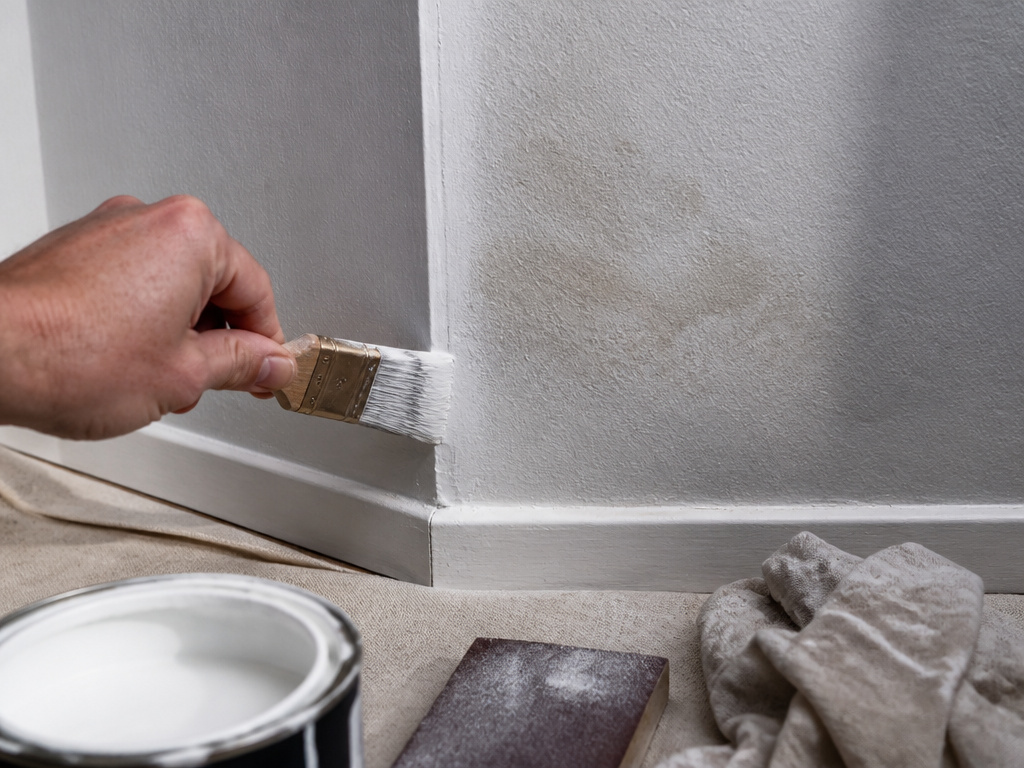
A cut-in line runs through every corner of a room, and corners are where damp shows up first. Early on I painted two coats of white straight over a few gray freckles in one corner and felt pleased with myself. Later they were back through the fresh coat. A spot that’s still visible when you paint over it hasn’t been fixed; it’s been given a cleaner surface to grow on.
When to close the can:
- A glossy surface that hasn’t been washed and sanded. Sherwin-Williams is blunt here: paint needs something to grip.
- Bare drywall or fresh patches with no primer.
Fixing the Three Failures You’ll Actually Get
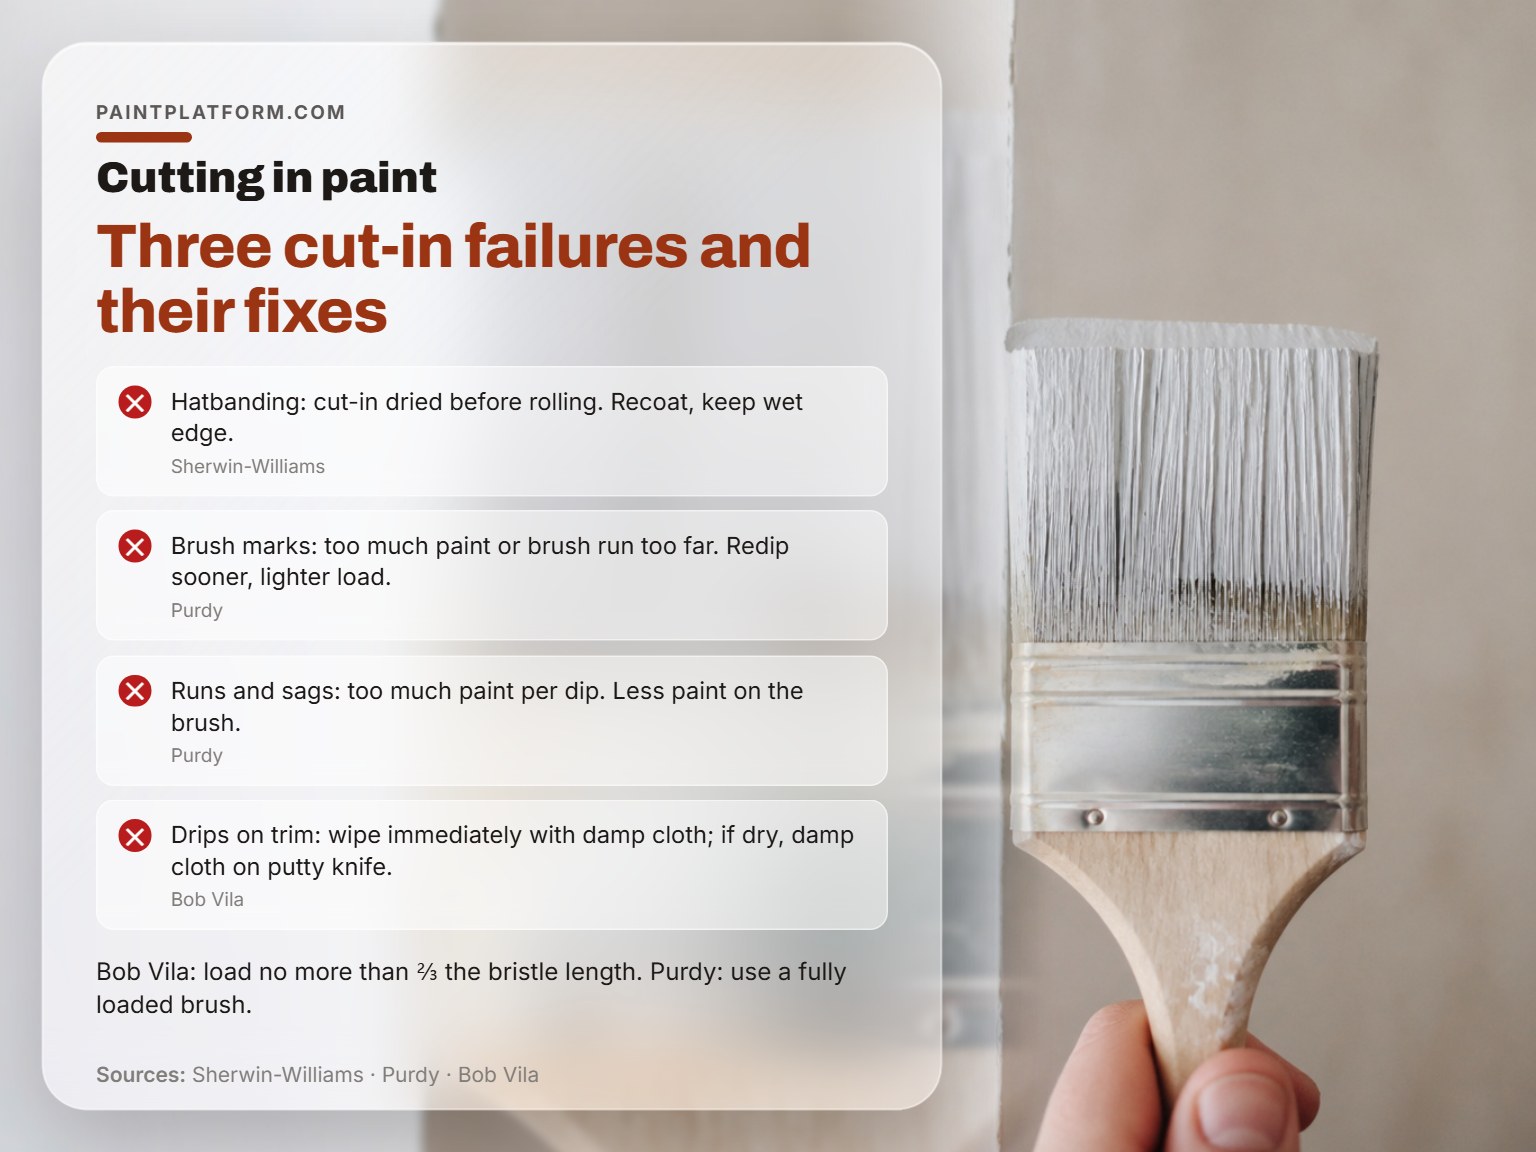
Almost every cut-in problem traces back to how much paint was on the brush.
| Problem | What causes it | Fix |
|---|---|---|
| Hatbanding | Cut-in dried before rolling | Recoat, keep wet edge |
| Brush marks | Too much paint, brush run too far | Redip sooner, lighter load |
| Runs and sags | Too much paint per dip | Less paint on the brush |
| Drips on trim | Overloaded brush at the edge | Wipe wet; damp cloth on putty knife |
Purdy’s own diagnosis is that brush marks come from too much paint at the start or a brush run too far before it gets dipped again. Both are loading problems wearing different clothes.
Drips, Sags, and the Back-Sweep
Drips on trim are the easiest to fix and the easiest to make worse. Bob Vila’s instruction is to wipe immediately with a damp cloth. Once the paint has dried, wrap a damp cloth around a putty knife and run it along the paint line instead.
Dry paint on trim doesn’t wipe. It smears into a gray haze that catches the light at an angle, and you’ll see it every time you walk past.
The back-sweep is the move that fixes most ragged lines. Once the edge is clean, turn the brush horizontally to the floor and ceiling and gently sweep back over the area to erase brush marks and feather the outer boundary. Bob Vila also suggests practicing along the baseboard first, since the ceiling needs a stepladder and the baseboard doesn’t.
Let it be messy first. A wobbly line on a hallway wall teaches you more about pressure than a perfect line on a closet door ever will.
Frequently Asked Questions
Do you cut in before or after rolling walls?
Benjamin Moore says cut in before painting the walls in full, because blending the cut-in into the painted wall is easier that way. Sherwin-Williams explains the consequence of getting it wrong: hatbanding appears when the brushed band is dry by the time the roller arrives. The practical rule is that the band has to be wet when your roller reaches it, whatever order gets you there.
How wide should the cut-in band be?
Benjamin Moore feathers the paint 3-5 inches along the wall, painting back into what was just laid down. Bob Vila sweeps parallel with the trim for 6 to 12 inches before pushing the line. The two ranges don’t overlap, so pick one and stay consistent within a room.
Can you cut in without painter’s tape?
Purdy frames cutting in as brush-only work with no masking tape or other aid, and Bob Vila recommends skipping tape entirely. Benjamin Moore’s steps include taping according to comfort level, which leaves the decision with you. Tape helps most on profiled trim and unfamiliar wall textures.
Why does my cut-in line show through the rolled paint?
That’s hatbanding, and Sherwin-Williams attributes it to rolling onto a cut-in band that has already dried. The brushed and rolled textures differ enough to catch light as a stripe. The correction is another coat applied while keeping a wet edge on the cut-in areas.
What brush size should a beginner use for cutting in?
Benjamin Moore specifies a 2½-inch angle sash brush. Bob Vila puts the professional range at 1 inch to 2½ inches, with some painters preferring a small round brush. A 2-inch angled brush is a reasonable middle ground for a first room.
The Bottom Line
One rule survives every disagreement in the sources: the band you cut in has to be wet when your roller reaches it. Loading depth, brush width, feather width, tape or no tape, all of that changes with the hand holding the brush. Timing doesn’t.
Start with the wall that has the least visible ceiling line. Behind a dresser, in a hallway, inside a closet. Cut in one wall, roll that wall, then move to the next one, and you’ll learn more in a single room than in a week of reading.
Fair warning: the first room will look worse than the second. That’s not a technique problem, and it’s not a reason to buy a more expensive brush.
Close the can and wait. A bad day of painting costs more than a day of waiting.
