
Brush Care and Storage Guide: What Actually Works
This post contains affiliate links. As an Amazon Associate, we earn from qualifying purchases.
Brush care and storage guide, short version: wash with lukewarm water and a tablespoon of gentle shampoo, keep water out of the ferrule, and dry flat with the tips over the edge. Wipe the bristles after every use and a monthly-to-six-monthly wash holds; a brush in daily rotation wants weekly.
The ferrule is the metal band crimped over the bristle bundle, and it is where most brushes actually die. Water that creeps inside softens the adhesive holding the hairs. The damage shows up weeks later as a head that sheds in clusters.
What follows is the wash, the drying argument, the storage rules, and the point where a brush is past saving.
Key Takeaways
- Frequency depends on contact, not on a rule. The American Academy of Dermatology puts skin-contact brushes at every 7 to 10 days, while CHIKUHODO allows monthly to every six months if you wipe the bristles after each use.
- Water below the ferrule is the whole game. Submerging a brush dissolves the glue that holds the head on, and no soap brand fixes that.
- Flat, hung, and head-down all work because each one moves water away from the ferrule. Upright in a jar does not.
- Skip conditioner and hot water. Silicone changes the hair-scale structure and reduces how well the bristles grip pigment.
- Shedding in clusters means the brush is done. That is adhesive failure, and reshaping cannot undo it.
Why Brushes Fail at the Ferrule, Not the Tips
The metal band is what kills most brushes. Bristles splay, stain, and keep working for years. The ferrule lets go and the head starts dropping hairs into your wash water.
A brush ferrule is a metal band crimped around the bristle bundle and bonded with adhesive at the base. Water reaching the interior softens that bond. Once the adhesive releases, the head loosens and hairs shed in clusters, and reshaping cannot restore a bundle that has already separated.
Three separate care guides agree on the direction and differ only on how strict to be. The AAD makeup brush cleaning guide says rinse the tip only, because submerging the whole head will eventually dissolve the glue. MOB & KO says keep the ferrule as dry as possible while the hairs get wet. SIXPLUS draws a hard line at the joint between the ferrule and the handle.
The mechanism is boring and slow. Adhesive softens a little each time water sits against it, so one soak does nothing visible and repeated soaks loosen the whole head. A soaked brush goes floppy at the belly and the hairs splay like a worn broom.
Most art brush care advice starts and ends with the bristles, which is exactly why the ferrule gets ignored until it fails.
How Often Should You Actually Wash a Brush?
Four reputable sources give four different answers for the same object, and all four are defensible.
| Source | Recommended interval | Condition attached |
|---|---|---|
| American Academy of Dermatology | Every 7 to 10 days | Brushes that touch skin |
| MOB & KO | At least once a week | More often around eyes or breakout-prone skin |
| CHIKUHODO | Monthly to every six months | Only if wiped on a tissue after each use |
| SIXPLUS | Weekly for fibre, monthly for animal hair | Depends on bristle material |
Read the middle column alone and it looks like a contradiction. Read the right column and it mostly resolves. The dermatology interval assumes a brush loaded with product and pressed against skin, where bacteria have somewhere to grow. The Japanese brush maker’s long interval assumes you wiped the tip clean after every single use and the brush is not touching broken skin.
What most people get wrong: Treating one number as universal. A brush you wipe after each session and a brush you leave loaded in a cup are different objects by day ten, and the second one is already a bacterial problem.
The AAD makeup brush cleaning guide also flags the risk plainly: washing every 7 to 10 days helps protect skin and kill harmful bacteria. That is the reason the dermatology number is conservative.
For shared or professional use, MOB & KO is unambiguous. A clean and sanitised brush for every client, no exceptions.
The sink method for clean paint brushes is the same three moves whether the bristles are sable or synthetic.
The Wash Itself: Three Minutes, No Soaking
Three things happen in order: wet the tips, lather, rinse until the water runs clear. Everything else is detail.
Before you start: White spirit and lacquer thinner, which show up later for oil and dried-paint cleanup, are flammable and give off fumes. Work near an open window, cap the container between uses, and keep both off your skin. Hot water is the other hazard here, because heat speeds up the adhesive breakdown at the ferrule and lukewarm is the ceiling.
The Bowl Method, Step by Step
- Wet only the tips under lukewarm running water. Flood the whole head and you push pigment straight down into the ferrule, where it sets.
- Fill a bowl with lukewarm water and one tablespoon of gentle or clarifying shampoo. The AAD gives that exact dilution, and it warns that plain soap and water dries out bristles.
- Swirl each tip in the bowl, or massage it in your palm for a better lather. Scrubbing against the grain roughs up the hairs.
- Rinse until the water runs clear. Cleanser left in the belly dulls the next colour you pick up, and the lather thins out and stops feeling slippery before that point arrives.
- Squeeze the excess out with a clean towel. Do not wring or twist, because twisting breaks bristles and loosens the bundle at the same time.
A cake of brush soap does the same job as the shampoo bowl with less water, and it is what I reach for when a brush has sat a day too long.
What Doesn’t Belong in the Water
- Hair conditioner. SIXPLUS is specific about why: the silicone changes the structure of the hair scales and reduces the brush’s gripping power. A conditioned brush feels lovely and paints worse.
- Alkaline detergents and thinner-based solvents. Same source, same warning, and it applies to natural hair and synthetic alike.
- Hot water. Warm is fine. Hot accelerates the glue problem you are trying to avoid.
- Alcohol, sort of. This one genuinely splits. MOB & KO says an isopropyl alcohol-based brush cleanser is fine for quick cleaning between full washes. SIXPLUS says no alcohol solvents at all. Both are describing real brushes.
My read: alcohol on the hairs of a synthetic brush is a fast, useful shortcut. Alcohol on a painted wooden handle is a bad idea, so keep it on the tip and you are fine. Keep it on the tip and you are fine.
A dedicated paint brush cleaner earns its place once you are working in oil or dried acrylic.
Flat, Hung, or Head-Down: Picking a Drying Method
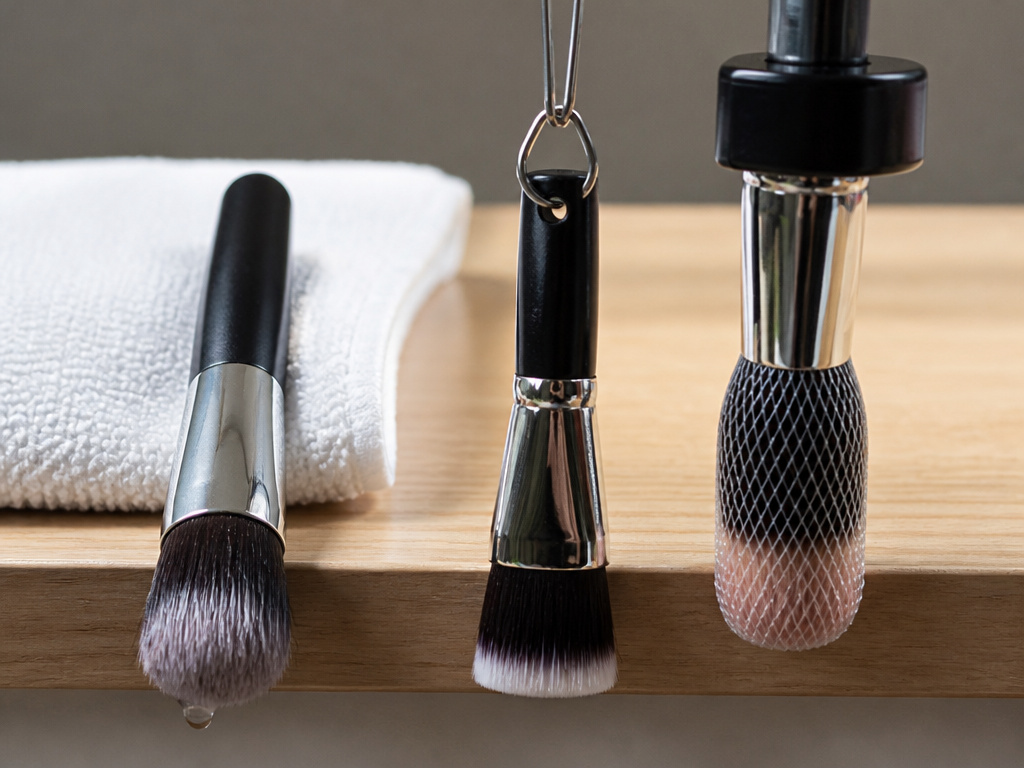
AAD and MOB & KO say lay it flat, while IS 3451-1 says hang it up to dry and SIXPLUS says dry it head-down in a net. The Indian standard says hang it up. SIXPLUS says dry it head-down in a net. All three are right.
- Flat, tips over the edge. AAD and MOB & KO both land here. Lay the brush on a towel with the head just past the counter edge so air moves around it and water runs out of the hairs, not into the band.
- Hung. The IS 3451-1 brush maintenance code requires washed brushes to be hung up to dry, supported by a clip or wire through the handle, and never stood on the filling material.
- Head-down. SIXPLUS suggests a protective net once the brush is half dry, and a magnetic holder that keeps the head pointing straight down.
The shared principle is the useful part. Every one of those methods puts the ferrule above the wet bristles so water drains away from the glue. A brush dried upright in a jar comes out with a bend at the shoulder that looks like a slept-on fringe.
Reshape the tip with your fingers while it is still damp, and reshape a paint brush properly and it dries to a point instead of a fan.
Whatever method you pick, the test is the same: ten minutes in, is there water sitting in the ferrule? If yes, the method is wrong for that brush.
Two things never to do, per CHIKUHODO and SIXPLUS: no direct sunlight, and no hair dryer. Both dry the outside faster than the inside and leave the bundle brittle.
Brush Care and Storage Guide: Keeping Bristles Straight
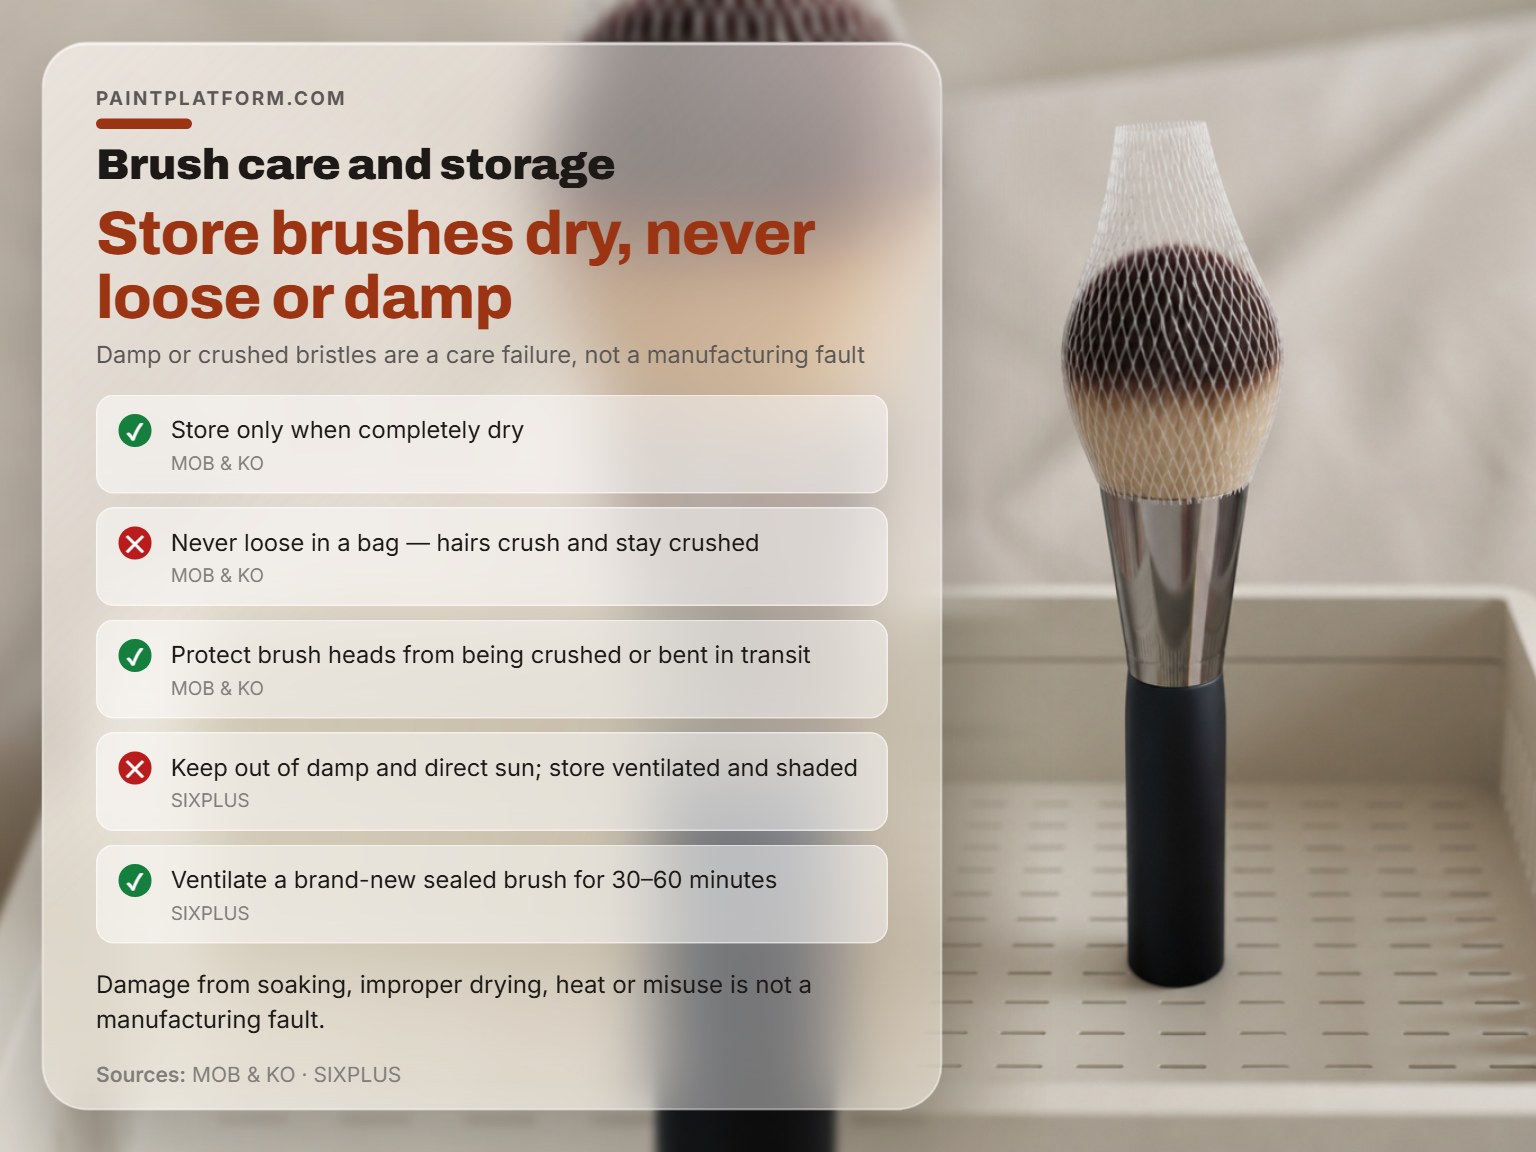
Storage is where a clean brush quietly gets ruined. A dry brush with a good shape can still come out of a drawer looking like it lost a fight.
- Store only when completely dry. MOB & KO is firm on this, and a damp brush in a closed tin is a mildew experiment.
- Never loose in a bag. Hairs crush and stay crushed. MOB & KO lists this as a care failure, not a manufacturing fault.
- Protect heads in transit. A kit bag with brushes rolling around inside will bend tips before it breaks anything else.
- Keep them out of damp and direct sun. SIXPLUS asks for ventilated, shaded storage, and that covers most of it.
- Ventilate a brand-new brush for 30 to 60 minutes. SIXPLUS notes that a sealed brush carries a smell out of the packaging, and that window clears it.
If you are mid-painting rather than packing up, you want to store paint brushes between coats instead. That is a different problem with a different answer, and it is mostly about keeping air off the bristles.
Storing Brushes You Won’t Touch for Months
IS 3451-1 has a storage bath for pan-set brushes: raw linseed oil and white spirit at 50:50, with the filling wrapped in oil paper once the shape and alignment are right. The oil keeps the bundle supple instead of letting it dry into a stiff wedge.
The part nobody mentions: Do not store pitch-set brushes with naphthalene or p-dichlorobenzene. The standard is blunt that those destroy the setting, which means the mothball in your storage box can quietly kill a brush the soap never touched.
Stencil brushes get bound with thin paper and string to hold their shape. Handles get wiped with a dry cloth. Comb the bristles to align them before hanging, and comb from the tips upward, because starting at the heel drags every tangle tighter into itself.
What Do You Do With a Brush That’s Already Stiff?
| Symptom | Likely cause | Fix |
|---|---|---|
| Tips bent to one side | Stored upright or stood in water | Reshape damp, dry flat |
| Hairs shedding in clusters | Water or solvent reached the ferrule | No fix, replace it |
| Stiff, crusted belly | Dried paint left in the heel | Solvent soak, minimal time |
| Dull, dusty colour | Cleanser residue in the hairs | Rinse until water runs clear |
| Faint smell on a new brush | Sealed packaging | Ventilate 30 to 60 minutes |
When the Residue Is Oil Paint, Not Acrylic
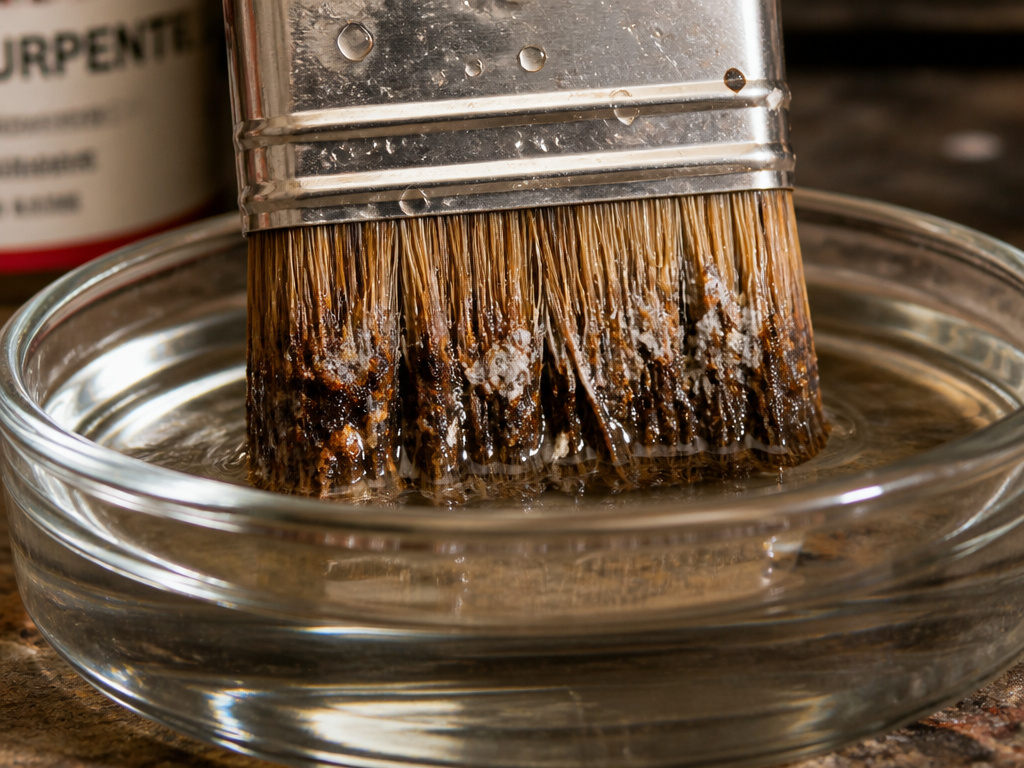
IS 3451-1 puts solvents first and names the ones that attack the cement: carbon tetrachloride, benzole, toluene, coal tar, solvent naphtha, and trichloroethylene. If lacquer thinner is the only thing that works, the standard says immersion time shall be no longer than necessary to soften the residue.
The standard also forbids leaving the brush in the paint. The brush shall not be left in the paint to remove a hardened residue.
For a full walkthrough on remove dried paint from brushes, soften, work the residue out, then wash in warm water with soap.
Fair warning: a solvent brush cleaner will lift dried acrylic that soap will not touch, and it will also strip a painted handle if you leave the brush lying in it. Use it in a shallow dish, not a deep jar.
Once the residue is gone, the routine for how to clean oil paint brushes is the same bowl method, and then a hang to dry.
Power-driven brushing tools sit outside all of this, and the ANSI B165.1 power brush safety standard is the document that covers design, care, and use for that equipment.
When to Stop Cleaning and Replace the Brush
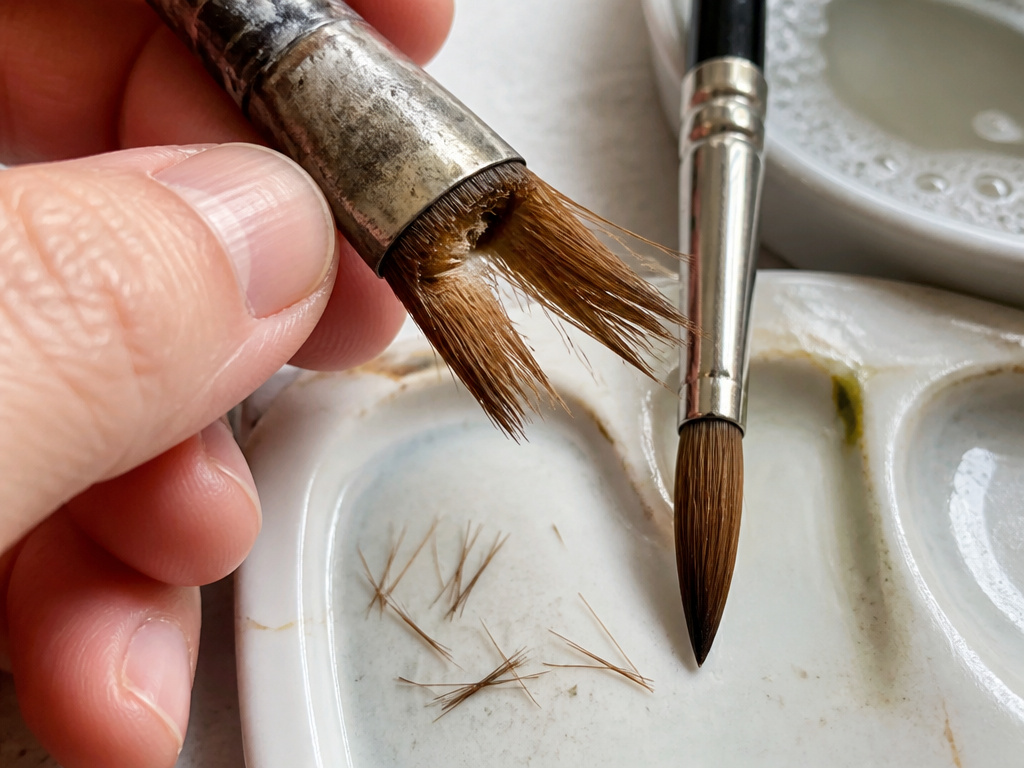
Some brushes are past saving, and no soap fixes them. The tell is not stiffness. It is shedding.
CHIKUHODO publishes a lifespan guideline of roughly 3 to 5 years for makeup brushes and 6 months to 2 years for facial cleansing brushes, and it ties that range to material, use, and care routine. Nobody publishes an equivalent number for a filbert, so I judge by the belly: once the hairs at the base feel hollow and the head moves under your fingers, the adhesive is gone.
Here is the honest gap. The sources give me a lifespan for cosmetic brushes and nothing for art brushes. Anyone quoting you a firm replacement interval for a watercolour round is guessing.
What I will commit to is the starting kit. A flat brush around 3/4 inch and a round brush around size 6 will carry most of a sketchbook. Add a quill brush when you want a brush that holds a puddle. A student line is what I would hand a beginner before any 24-piece set.
Skip the 24-piece set. The ones that do get used will be worse than two brushes you actually chose.
Frequently Asked Questions
How often should I wash my paint brushes?
The published intervals of 7 to 10 days apply to brushes that touch skin, not to a brush loaded with cadmium.
Can I dry my brushes upright in a jar?
No. The AAD and MOB & KO both warn that water runs down into the ferrule and loosens the glue holding the head on. Lay the brush flat with the tip past the edge of the counter, hang it up to dry, or dry it head-down in a net, depending on which guide you follow.
Is dish soap okay for cleaning brushes?
The AAD warns that plain soap and water can dry out bristles, and recommends a gentle or clarifying shampoo instead. The AAD warns that plain soap and water can dry out bristles, and recommends a gentle or clarifying shampoo instead.
Can I use isopropyl alcohol for a quick clean?
MOB & KO says an isopropyl alcohol-based brush cleanser is fine between full washes. SIXPLUS says to avoid alcohol solvents entirely. Keep alcohol on the bristle tips only, and keep it off painted wooden handles, which it damages.
How long should a brush last?
CHIKUHODO gives roughly 3 to 5 years for makeup brushes and 6 months to 2 years for facial cleansing brushes. For art brushes there is no published figure, so watch for shedding and a head that shifts under your fingers.
The Bottom Line
The trigger for replacing a brush is shedding, not stiffness. The day hairs come out in clusters rather than singles, the adhesive has failed and no amount of conditioning brings it back. Stiff you can fix. Shedding you cannot.
This week, do one thing: stop standing brushes up in the rinse jar. Lay them down with the tips over the edge of the sink, or clip them so the head hangs. That single change is most of the brush care and storage guide done.
And a concession, because it matters. If you are painting with cheap hog bristle you replace often, none of this is worth much effort. Rinse it, wipe it, keep the ferrule dry, and spend your attention on the painting instead.
