
How to Fix Scratches on Painted Furniture: Step-by-Step
This post contains affiliate links. As an Amazon Associate, we earn from qualifying purchases.
To fix scratches on painted furniture, match the repair to the depth: a light scuff takes touch-up paint in thin coats, a gouge takes filler first, and anything flaking or powdering needs a conservator. Knowing how to fix scratches on painted furniture starts with this depth check. Sand with 400 grit to feather the edge, clean with a tack cloth, then build color slowly.
That flaking clause carries more weight than it sounds. Paint forms a complete film across the wood, and the Canadian Conservation Institute notes that film cracks and loosens as the wood expands and contracts with the seasons. Touch-up paint laid over a film that’s already lifting just rides the lift.
What follows walks the whole ladder: reading the damage, the 1 cm threshold that decides whether touch-up paint is even the right tool, filler and grit, and the four places where the manufacturers flatly contradict each other.
Key Takeaways
- Match the repair to the depth. Touch-up paint handles light scuffs, filler handles gouges, and flaking or powdering paint is a conservator’s job.
- 400 grit feathers an edge. 120 grit levels a wide abrasion. Those two numbers come from different sources and do different jobs.
- Thin coats, hours apart. Marvin allows a hair dryer on low; Transformer Table says leave the patch 24 hours undisturbed.
- A scratch under 1 cm is the size Transformer Table asks you to photograph when requesting touch-up paint.
- Test on a hidden spot first. Color and sheen both shift as the film cures.
What Kind of Scratch Are You Actually Looking At?
Three things decide the repair: how deep the scratch goes, what the finish actually is, and whether the paint film is still bonded to the wood. Get one of those wrong and the best touch-up paint in the world just makes a tidy-looking mistake.
A painted surface is a film, not a stain. The film sits on top of the wood and moves with it. As the wood expands and contracts, the film flexes, and where it can no longer flex it cracks, lifts, or powders away from the substrate, letting moisture and dirt into the wood underneath.
Judging scratch depth by eye is unreliable in any finish. The test that works is the same one used on a car panel: drag a fingernail across the mark. If your nail catches, you’re past the topcoat. If it glides, you’re in the surface layer only.
Scuff marks sit on top of the film and wipe away with a damp cloth. A scratch cuts into it. Those are two different problems and they get two different fixes.
| What you see | What it usually means | First move |
|---|---|---|
| Faint dull line, sheen broken | Abrasion in the top layer only | Scratch remover, then a thin topcoat |
| Color gone, pale wood showing | Stain layer cut through | Build color back before sealing |
| Crater with a raised lip | Gouge into the wood itself | Fill, sand flush, then color |
| Fine cracks in a web pattern | Film moving with the wood | Stop and check adhesion first |
| Chalky powder on the rag | Binder breaking down from light | Conservator, not touch-up |
Light abrasions, larger abrasions, and gouges
This Old House splits finish damage into three buckets, and the split is useful. Light abrasions touch only the outermost layer. Larger abrasions cut through the finish but stop short of the wood. Deep scratches and gouges go into the wood itself.
Each bucket needs a different first move. A light abrasion gets scratch remover and a thin topcoat. A larger abrasion needs the finish removed, stain reapplied, and a new topcoat. A gouge needs filler before any color goes near it.
The 1 cm Threshold That Decides If Touch-Up Paint Is Even an Option
Transformer Table draws a line at 1 cm. Below that, their support guide treats the damage as touch-up territory and asks you to include photos when you request paint. Above it, the same guide gets quiet, and that quiet is the honest part.
Marvin’s field instructions say it a different way. Their procedure covers “small imperfections, nail holes, scratches etc.” and sends anything larger to the service manual or a local representative.
Part numbers matter if you own Marvin painted interior units. Designer Black is 11401919 and White is 11401914. Underneath sits a 100% acrylic water-based enamel, which becomes important later when somebody tells you to topcoat with lacquer.
When you compare a how to fix scratches on painted furniture, a furniture touch up marker is fine for hairline scratches where the color is already close. It’s the wrong tool for anything your fingernail catches.
What You Need on the Table Before You Start
Five things cover almost every scratch on a painted surface, and none of them come in a kit.
- Touch-up paint matched to the finish. The manufacturer’s own is safest. For Marvin painted units that means 11401919 or 11401914.
- A solvent-based nail hole filler. Marvin names solvent-based as the preferred filler for nail holes and small imperfections.
- 400 grit sandpaper, plus something coarser for wide abrasions. This Old House reaches for 120 grit on larger areas.
- A tack cloth. Marvin’s second step is wiping the area with one before applying paint.
- A small artist brush. The applicator in the bottle is usually too fat for a hairline scratch, and this is oddly my comfort zone.
Why a tack cloth and not a damp paper towel
A tack cloth lifts dust without wetting the film. That distinction matters because the Canadian Conservation Institute describes painted surfaces as sensitive to water and other solvents. A damp rag leaves a residue the next coat has to bond to.
Shake the bottle until the color looks uniform before you open it. Transformer Table’s guide puts that first for a reason: pigment settles, and a half-mixed bottle gives you a patch that reads too thin or too dark.
How Do You Fill a Gouge So It Doesn’t Show?
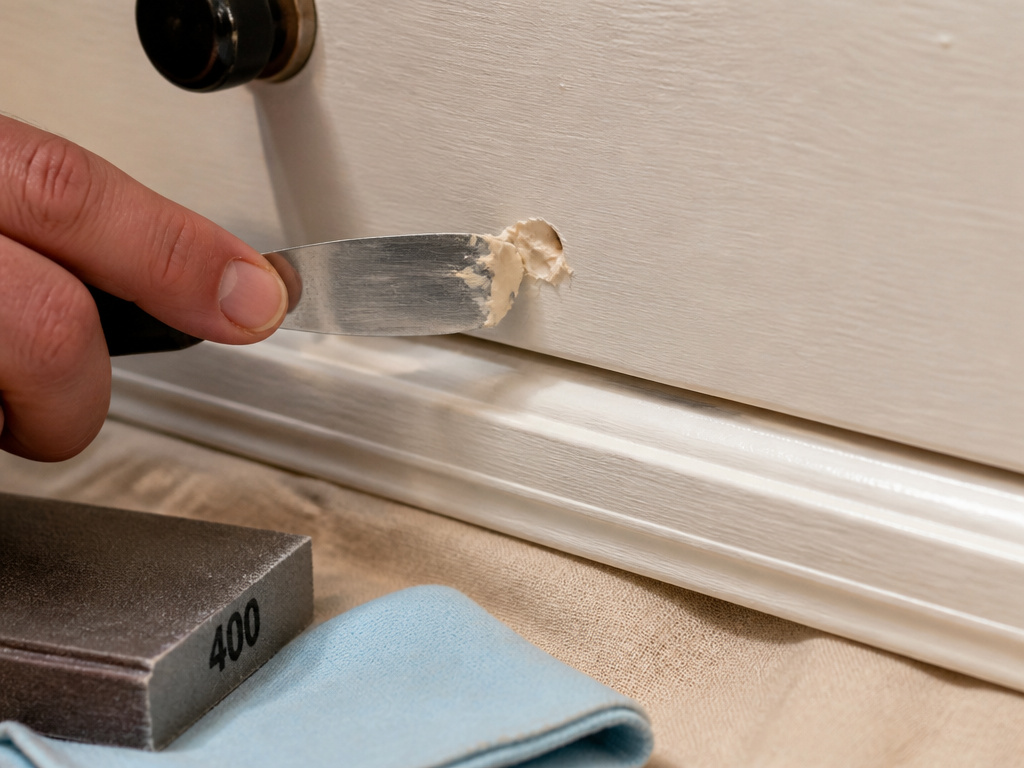
The dresser I practiced on had a gouge the size of a grain of rice, right where a drawer pull had swung into it for years. I filled it, sanded it with 400 grit, then spent twenty minutes chasing a color I could have matched in two.
Here’s the order that worked, and the order the instructions describe.
- Clean the crater first. Wipe with mineral spirits and let it flash off. This Old House uses mineral spirits to lift wax and residue before a repair. Skip it and the filler bonds to wax instead of wood.
- Fill with solvent-based nail hole filler. Marvin prefers solvent-based for nail holes and small imperfections. Overfill slightly, because filler shrinks as it cures.
- Let it cure flush or slightly below the surface. Marvin’s wording is specific: repairs should sit flush or slightly below the surface when cured. A proud mound means you’ll sand straight through the surrounding paint.
- Feather with 400 grit. Light pressure, and move with the grain. This Old House warns that sanding across the grain adds scratches you didn’t have.
- Wipe with a tack cloth, then build color in thin coats. Multiple light coats may be necessary. Thick coats are where repairs go wrong.
If it goes wrong: the filler dries proud and you sand a bald spot into the paint. Stop there. Recolor the bald spot with a touch up paint pen before you add more filler on top.
I’d rather see a slightly off-color patch than a perfect color match with a proud edge. The eye forgives hue. It does not forgive a bump.
For a crater rather than a hole, This Old House’s carpenter reaches for a wax filler stick like Mohawk Fil-Stik, melts it with a lighter, drips it in, then scrapes the excess with a plastic razor. He’s blunt about the plastic: a metal razor gouges the surrounding finish. Buff with 0000-grade steel wool afterward.
The sanding dust from cured filler is a fine white powder that gets under a fingernail and stays there for a day. Wear something you don’t care about.
Three Reputable Sources, Three Different Starting Grits
Ask what grit to start with and the answers split three ways. All three sources are careful, all three are describing painted or finished wood, and none of them agree.
| Source | Grit specified | What it’s for |
|---|---|---|
| Marvin Windows & Doors | 400 grit (range 200-400) | Feathering the edge of the existing coating |
| This Old House | 120 grit | Larger abrasions that don’t reach the wood |
| T.Y. Fine Furniture | Work up through every grit, up to 400 | Removing superficial scratches and chips |
| A painted dresser, in practice | 180 grit | Leveling cured filler before color |
The how to fix scratches on painted furniture split makes sense once you see what each one is doing: Marvin uses 400 grit (range 200-400) to feather the edge, This Old House uses 120 grit for larger abrasions, and T.Y. Fine Furniture works up through every grit in order. Marvin is feathering a factory film so the patch blends. This Old House is taking a finish layer off so new stain can reach the pores. T.Y. Fine Furniture is running a kit sequence, where each grit removes the scratches the previous one left.
For a scratch on a painted surface, Marvin recommends starting at 400 grit (range 200-400) to feather the edge, while This Old House uses 120 grit for larger abrasions and T.Y. Fine Furniture starts coarser and works up through every grit. That’s paint repair, not touch-up, and it’s a different set of steps.
400 grit on a factory film feels like almost nothing. The paper glides, and you have to tilt the piece toward the window to see where you’ve been.
Thin Coats, and Two Opposite Answers on Drying
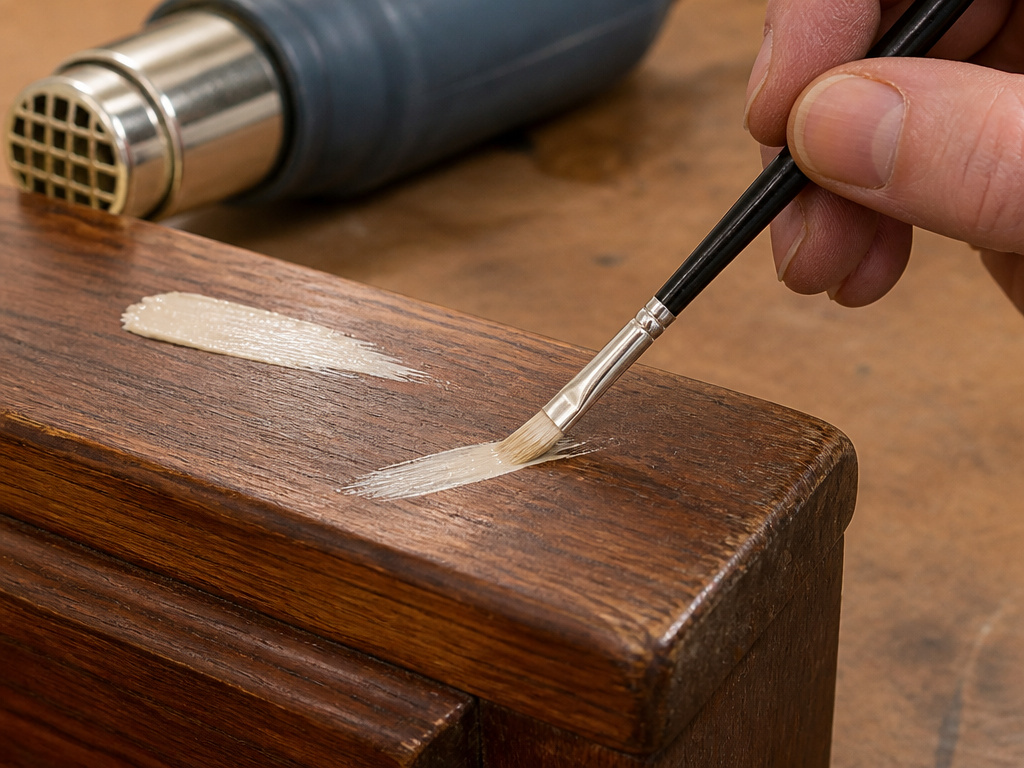
Marvin’s instructions end with a hair dryer on the low setting. Transformer Table’s guide says leave the patch 24 hours undisturbed. Both are describing the same freshly painted spot.
I know which one I follow. Thick touch-up on furniture stays tacky for days, so I do two thin coats about an hour apart and then leave the piece alone overnight. Poking a patch to check whether it’s dry has ruined more than one of my repairs.
Where this goes sideways: Testing a drying patch with a fingertip. The print stays in the film within the first hour, and getting rid of it means sanding back to bare paint.
The thin-coat rule holds everywhere, though sources differ on drying: Marvin allows a hair dryer on low, while Transformer Table says leave the patch 24 hours undisturbed. The same logic applies when you touch up paint on a wall, and for the same reason: a thick film skins over on top while the layer beneath stays soft.
A patch that’s dry to the touch at one hour can still smell faintly of solvent at four. Trust your nose over your finger.
What Do You Topcoat With, and Does It Matter?
This Old House fills light abrasions with scratch remover, then topcoats with polyurethane or lacquer, while Marvin specifies a 100% acrylic water-based enamel and sanctions no solvent or lacquer topcoat.
The difference is what’s underneath: This Old House topcoats with polyurethane or lacquer, while Marvin specifies a 100% acrylic water-based enamel and sanctions no solvent or lacquer topcoat. A lacquer topcoat over a factory acrylic film is a compatibility experiment, and Marvin’s instructions don’t run it, while This Old House topcoats with polyurethane or lacquer.
Match the topcoat to the finish that’s already there: This Old House topcoats with polyurethane or lacquer, while Marvin specifies a 100% acrylic water-based enamel and sanctions no solvent or lacquer topcoat.
For tabletops I reach for wipe-on polyurethane, ragged on in about three thin coats, though Marvin specifies a 100% acrylic water-based enamel and sanctions no solvent or lacquer topcoat. It has survived coffee mugs and sweaty glasses far better than wax ever did for me. Brushing poly on thick leaves drips and bubbles, and thin wipes with a lint-free rag forgive sloppy hands.
Choosing how to seal painted furniture matters more than the patch itself when the whole piece is getting a coat. On a single scratch, This Old House topcoats with polyurethane or lacquer, while Marvin specifies a 100% acrylic water-based enamel and sanctions no solvent or lacquer topcoat.
When a Painted Surface Is Past DIY
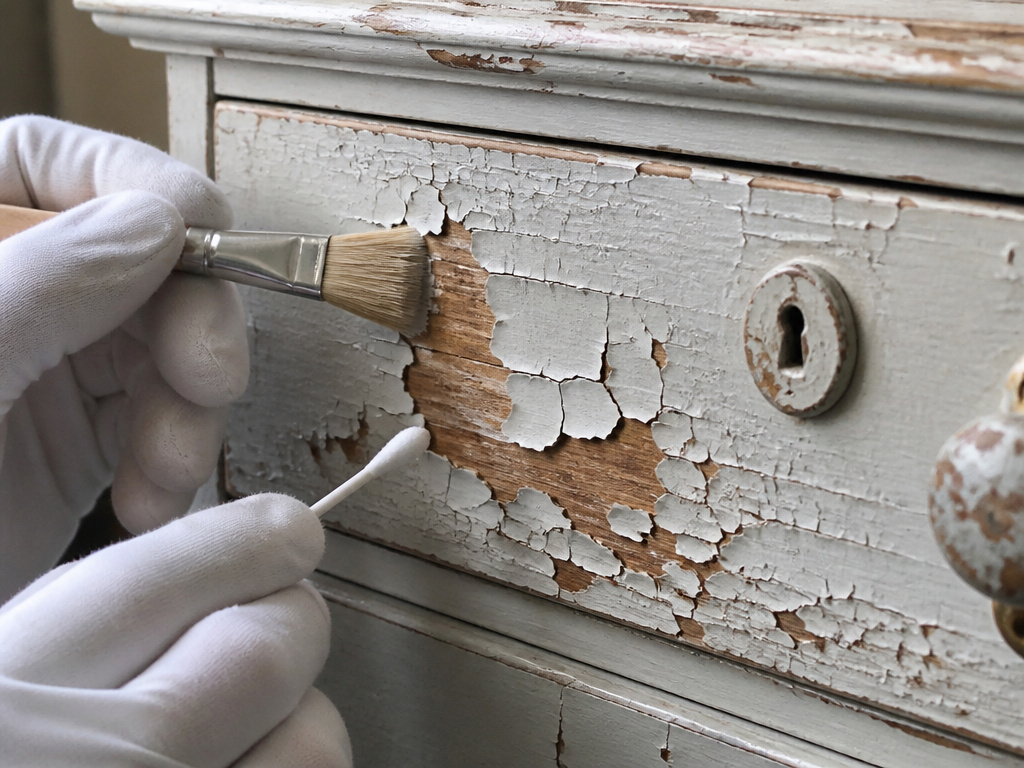
Flaking paint is not a scratch, and touch-up paint won’t fix it. The Canadian Conservation Institute is direct here: painted surfaces are sensitive to water and other solvents, and cleaning should only be conducted by a conservation professional, while Transformer Table says owners should self-apply touch-up paint to conceal minor scratches and T.Y. Fine Furniture says owners can handle care themselves as long as the original finish is unchanged.
The same note says furniture with loose or flaking varnish should go to a conservator rather than being treated at home, while This Old House holds that DIY repair is appropriate for many common finish issues with professional help only for specific cases. Dry pigment finishes are more fragile still, powdery enough that even light brushing loosens the pigment.
This Old House agrees on the boundary, though it draws it narrower:
- Valuable antiques and family heirlooms
- Previous repairs that already failed
- A finish you can’t identify
- Damage that’s extensive or covers a large area
Where the sources genuinely part company is owner-level care. T.Y. Fine Furniture says that as long as the original finish is unchanged, owners can handle care themselves, sanding and defect-lifting included. The Canadian Conservation Institute says painted surfaces should be cleaned by a conservation professional.
My read: the two are describing different furniture. A modern factory finish on a working dresser is not a nineteenth-century painted surface, and the conservation guidance is written for the second one.
Routine care is where everyone overlaps. This Old House suggests diluted dishwashing soap or Murphy Oil Soap for regular cleaning, and warns off alkaline, ammonia-based, or abrasive cleaners. The Canadian Conservation Institute describes effective cleaning of a sound finish as damp dusting, buffing, and careful, infrequent waxing. It endorses no fixed waxing calendar.
Light is the slow killer. The Canadian Conservation Institute attributes binder breakdown primarily to visible light and UV, which shows up as powdering and color change. Pulling a piece back from a bright window does more for it than any product on the shelf.
Frequently Asked Questions
Can I just use a touch-up pen instead of paint?
For a hairline scratch where the color is close, yes. A pen lays down a thin line of pigment and dries fast. Once your fingernail catches on the scratch, a pen sits on top of the damage instead of filling it, and the mark stays visible at an angle.
Why does my touch-up paint look darker than the furniture?
Wet paint reads darker than cured paint, and a thick patch reads darker than a thin one. Shake the bottle until the color looks uniform, apply thin coats, and judge the match the next day rather than while the film is still wet.
Do I have to sand before touching up a painted scratch?
Marvin’s procedure sands with 400 grit (range 200-400) to feather the edges of the existing coating before applying paint, while This Old House uses 120 grit for larger abrasions and T.Y. Fine Furniture works up through every grit in order. Feathering gives the new coat something to blend into. Skip it and you get a visible ridge where the patch meets the old finish.
How long before I can touch the repair?
Transformer Table says 24 hours undisturbed. Marvin allows a hair dryer on low to speed drying, while Transformer Table says leave the patch 24 hours undisturbed.
What if the paint around the scratch is cracking or flaking?
Stop. The Canadian Conservation Institute advises that painted surfaces with failing adhesion go to a conservation professional, while This Old House holds that DIY repair is appropriate for many common finish issues with professional help only for specific cases; touch-up paint over a lifting film traps the loose flakes underneath. Cosmetic repair comes after the film is stable, not before.
The Bottom Line
One threshold decides most of this. If the scratch is under 1 cm and the surrounding paint is still stuck tight, it’s a touch-up job you can do at the kitchen table with 400 grit, a tack cloth, and two thin coats. If the paint around it is cracking, powdering, or lifting at the edges, the Canadian Conservation Institute says the honest move is a conservator, while This Old House holds that DIY repair is appropriate for many common finish issues with professional help only for specific cases.
The part I’d push you on: test your color on the back of a leg or the inside of a drawer before you touch the front. Progress beats perfection, and a hidden test patch is the cheapest mistake you’ll ever make.
Start small and stay curious. Then pick one scuffed thing in your house this week, sand it with 400 grit, and see what happens.
