
How to Create Orange Peel Texture: Controlling the Bumps
This post contains affiliate links. As an Amazon Associate, we earn from qualifying purchases.
To create orange peel texture, you break the coating’s ability to level: use a material that holds the peaks a roller or gun leaves, keep film build and material temperature in the range where flow stalls, and stop before the surface self-smooths. PPG defines the result as an uneven, bumpy surface formation that resembles orange skin.
Flow is the clock you’re racing. A coating that keeps moving after it lands will pull its own peaks flat, and the variables that decide when it stops are film build, atomization, and the temperature of the material at the moment it touches the surface.
Saint Clair Systems, Carlisle Fluid Technologies, and BYK-Gardner built a design-of-experiments study around exactly those three variables. Their results ran in PCI Magazine on May 4, 2018, as a two-part series.
What follows covers the mechanism behind the bumps, two ways to build the texture on purpose, the places where the manufacturers honestly disagree, and the drying mistake that turns a textured surface into a cracked mess.
Key Takeaways
- Texture comes from stalled flow, not from a specialty product. Anything that keeps its shape after application will do it.
- Film build, atomization, and material temperature interact, per the Saint Clair / Carlisle / BYK-Gardner study. Nudge one and the other two shift.
- Film build, atomization, and coating temperature interact, per the Saint Clair / Carlisle / BYK-Gardner study.
- Thick texture cracks. Build it in thin passes and let each one set.
- Factory finishes already carry some orange peel, per PPG. A little texture is normal, not a failure.
What Actually Makes a Surface Look Like Orange Peel?
BASF’s coatings defect library describes the finish as small bumps surrounded by valleys, and it puts the cause down to poor leveling and flow.
Orange peel is uneven paint surface texture that resembles the skin of an orange. The film shows surface roughness made of small bumps surrounded by valleys. Those bumps form because the coating levels and flows poorly after application, so the shape left by the applicator survives into the cured film. Some orange peel is common in most factory finishes.
The practical version of how to create orange peel texture falls straight out of that. A coating that levels well pulls itself flat. A coating that levels badly keeps whatever shape your roller, brush, or spray gun handed it.
PPG’s refinish page adds a detail worth sitting with: some orange peel is common in most OEM finishes. Robot arms in a sealed booth still leave texture behind.
Flat is the exception, not the default.
Tilt a cured panel toward a window and the bumps show up as a scatter of tiny highlights. Lay the same panel flat under the same light and they vanish completely.
That angle trick matters later, when you’re judging your own work. Straight-on light hides everything.
The Three Variables That Decide How Coarse the Texture Comes Out
Three variables, one instrumented study, and no ranking among them.
The Saint Clair collaboration formed in late 2017 and set out to prove how process variables combine to form orange peel on critical painted surfaces. The team isolated film build, atomization, and coating viscosity, with viscosity controlled through temperature. They judged the results with wave-scan balance and distinctness of image, both optical measures rather than eyeballing.
| Variable | What it changes | To push texture coarser |
|---|---|---|
| Film build | How much material has to level out | Lay it thinner; BASF ranks low film build first |
| Atomization | Droplet size leaving the gun | Coarser droplets hold bigger bumps |
| Material temperature | Viscosity at the moment of contact | Cooler material stops flowing sooner |
The study isolated and contrasted three key process variables: film build, atomization, and coating viscosity (temperature).
That’s a narrow target.
For anyone working by hand, the how to create orange peel texture lesson is simpler than the numbers. Pick one material, one applicator, and one room, then change a single variable at a time. Two changes at once and you learn nothing.
A cup of material that’s been sitting in a cold garage feels cool against the back of your wrist. That cool cup is the one that lays texture instead of flowing out.
How to Create Orange Peel Texture on a Wall or Canvas
You need a material that refuses to flatten.
That’s the whole trick, and it’s why the defect research is worth reading even though it was written for people trying to remove the stuff. The mechanism runs in both directions.
Before you start: Sanding cured joint compound puts fine silica dust in the air, so wear at least an N95 respirator and wipe surfaces wet rather than dry-sweeping. Solvent-borne coatings need cross-ventilation and a respirator rated for organic vapour. Keep a wet rag on hand for drips; cured compound on a hard floor takes a scraper and patience.
Here’s the sequence, in order, with what goes wrong at each step:
- Test on a scrap board first. Skipping this means you discover your mix was too wet on a finished wall, where the fix is sanding the whole thing back.
- Load the applicator properly. An underloaded roller skids and leaves streaks instead of an even field of peaks.
- Apply in one direction only. Back-rolling in two directions knocks the tops off the bumps you just made.
- Stop touching it once the surface goes matte. Every pass after that point drags half-set material and leaves ridges.
- Let it cure fully before judging. Compound looks flatter when wet and reads much coarser once dry.
The Roller Method
A stipple roller is the cheapest route. Load it heavily, roll in one direction with light pressure, and lift straight off at the end of each pass.
The sound tells you whether you’re doing it right. A properly loaded stipple roller makes a wet, tearing noise as it lifts. A dry one makes a papery rasp, and that rasp means you’re skidding.
Thin your material only as far as the label allows. Over-thinned compound levels out overnight and you wake up to a smooth wall.
The Hopper and Mud Method
For a full room, a hopper gun throwing thinned joint compound covers ground fast. The texture coarseness comes from the needle setting and the mud consistency, not from how hard you pull the trigger.
If you want a flatter, more irregular result, knock the peaks down after the mud sets with a drywall knife. That’s the whole idea behind knockdown texture, and it’s a fallback if your first pass comes out too aggressive.
Sand, Paste, and Other Cheap Ways to Get the Bumps
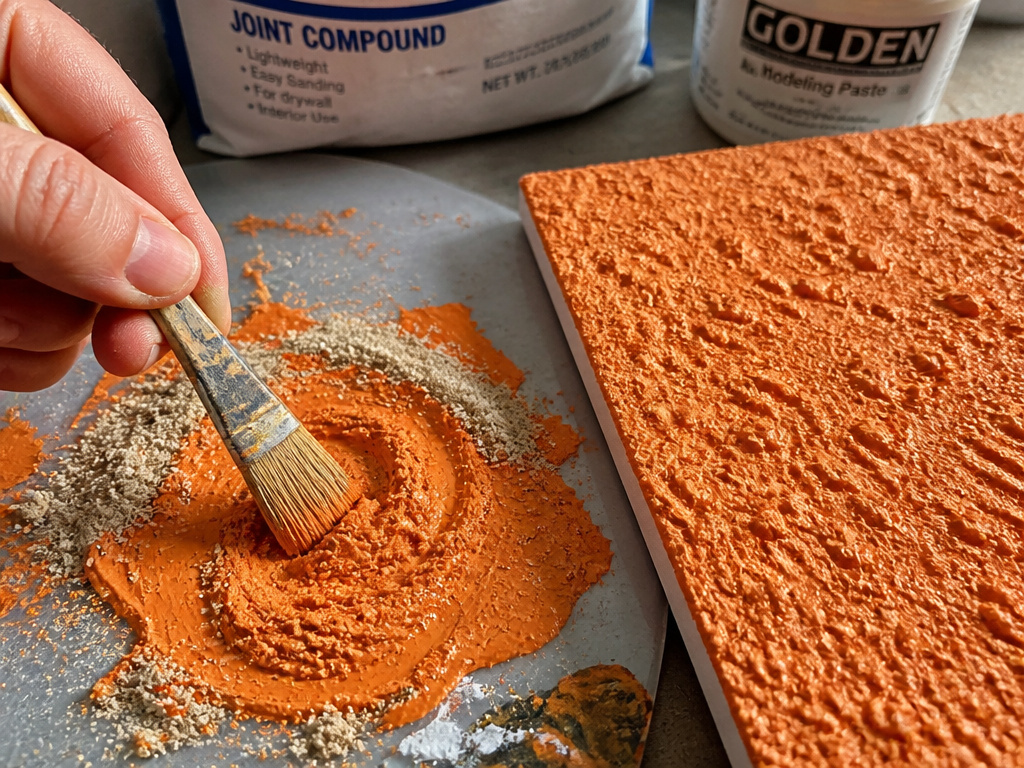
The priciest texture mediums on the shelf do the same job as a bag of joint compound and a handful of sand.
I own a shelf of specialty pastes and I reach for the cheap stuff first. Expensive textured mediums are mostly paying for packaging and a nice label.
For canvas and board, the working options look like this:
- Liquitex Modeling Paste holds a peak beautifully and takes sanding once dry, which makes it the forgiving choice for a first attempt.
- Golden Molding Paste is softer and stipples into a finer, more even field of bumps.
- DAP joint compound, thinned slightly, gives you the coarsest texture for the least outlay, though it stays chalky and needs sealing before paint.
- Sand. Plain sand.
Sand Mixed Into Paint
Stir a spoonful of fine sand into acrylic paint and stipple it on with a stiff brush. The grit props the film open so it can’t level, and you get a genuine orange-peel field without buying anything.
This is the most underrated trick in the whole texture toolbox. It’s also the one people dismiss because it feels too simple.
There’s more on the broader menu in this piece on creating texture with paint, and if you’re weighing materials generally, these texture paint types cover what each one does.
Where the Sources Genuinely Disagree
PPG, BASF, and the Saint Clair team do not agree on what causes orange peel, and the disagreement is genuinely useful.
| Claim | PPG | BASF | Saint Clair DOE |
|---|---|---|---|
| Gun distance | Frames causes around gun adjustment and reducer speed | Too far leads to bad orange peel | Not one of the three variables tested |
| Film build | Not listed as a cause | Ranks low film build first, clearcoat especially | One of three interactive variables, not ranked |
| Temperature | High booth temperature listed as a cause | Not ranked | Effect is non-monotonic across the range |
Take gun distance first. BASF’s defect library names excessive distance as a cause and recommends setting proper gun distance, while PPG frames the cause around gun adjustment and reducer speed without singling out proximity. PPG’s refinish page frames the cause around gun adjustment and reducer speed without singling out proximity at all.
Then film build. BASF puts low film build at the top of its list. PPG doesn’t mention film build as a cause. The DOE treats it as one of three variables that interact rather than a ranked culprit.
Temperature is the most interesting one. PPG cites high booth temperatures as a cause, while the DOE treats coating temperature as one of three interactive variables rather than a ranked culprit.
If you take one thing from the disagreement, take this: no single setting produces a perfect finish, because the metrics themselves pull in different directions. Pick which texture quality you care about and tune for that one.
Why Does Texture Crack After It Dries?
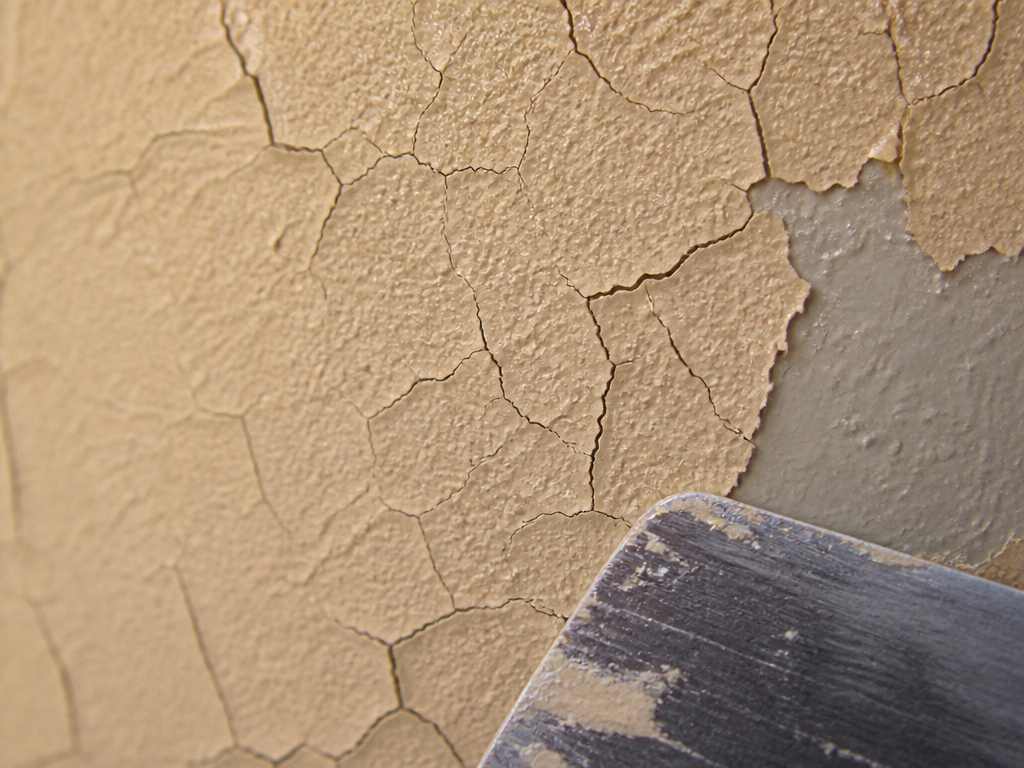
A wall that looked perfect on Friday shows a spiderweb of hairline cracks by Monday.
The cause is almost always depth. A heavy single pass skins over on top while the material underneath is still shrinking, and the surface splits along the weakest line.
I once pulled tape off a painting while the paper was still slightly damp and tore a strip of the surface clean off. Same lesson, different material. Wait until it’s properly dry, then peel slowly at a low angle.
Two habits prevent most of this:
- Build in thin passes. Two or three thin coats beat one thick one, every time.
- Never texture over a dusty or glossy surface. The new layer can’t key in, and it lifts in sheets later.
- Keep the room stable while it sets. A cold night followed by a hot morning moves the material before it’s cured.
Where this goes sideways: Applying compound at full thickness over a painted wall without sanding first. The texture looks fine for a day, then blisters along the boundary within the week.
Watch the colour, not the clock. Wet compound reads glossy and grey. As it sets it turns matte and slightly lighter, and that shift is your cue that it has stopped moving.
Painting Over Orange Peel Without Flattening It
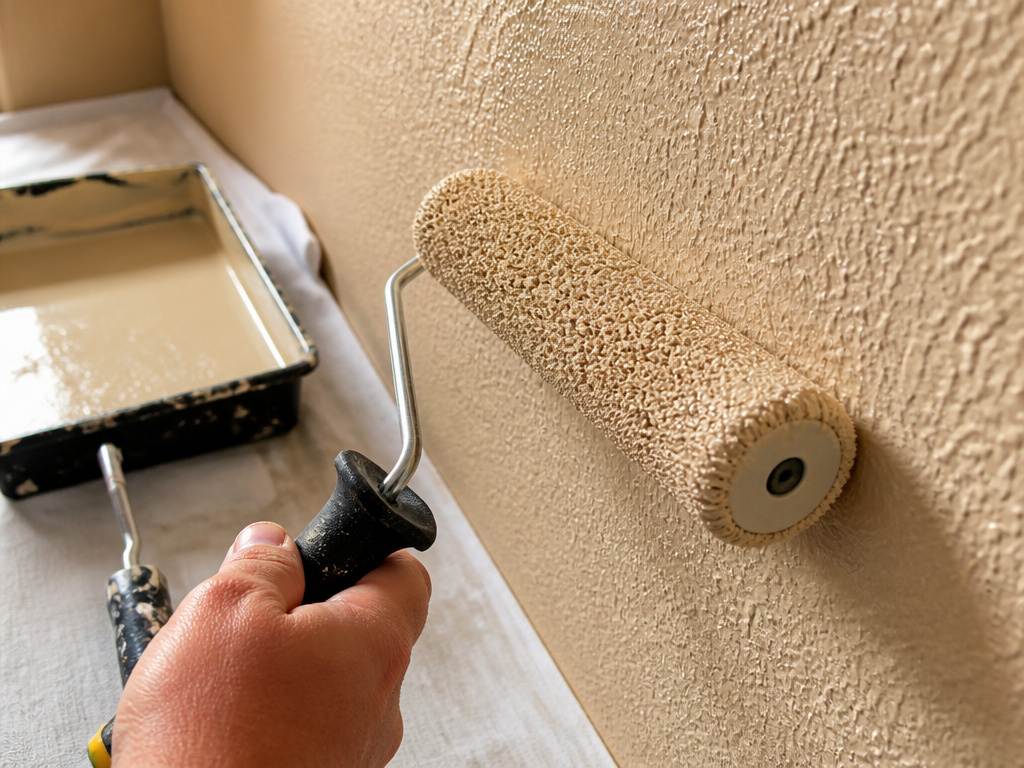
Paint choice decides whether your texture survives the topcoat.
A high-build paint with a longer nap roller rides over the bumps. A thin, self-levelling paint fills the valleys and quietly flattens the whole effect.
For the practical side, this guide to painting over orange peel walks through the sequence, and this one covers the best paint for textured walls if you’re choosing a product. Roller choice matters just as much, which is why the rollers for textured walls question comes up so often.
A long-nap roller on cured stipple makes a dry, papery rasp instead of the wet hiss you get on a flat wall. That sound is your confirmation the roller is riding the peaks rather than flooding them.
And if you decide you hate the result, you can always smooth a textured wall back down before you commit to a finish coat. Nothing here is permanent.
Frequently Asked Questions
Can I create orange peel texture with a regular paint roller?
Yes, if the cover has a long nap and you don’t overwork the surface. A short nap leaves a light texture. A longer nap leaves a coarser field of bumps. Roll in one direction and lift straight off at the end of each pass.
How thick should the texture be?
Thin enough that it doesn’t crack as it cures. Two or three thin passes beat one heavy coat, and the surface reads coarser once dry than it does when wet. Judge it after it has fully set, not while it’s still glossy.
Does temperature really change the texture that much?
It changes the flow, which is what produces the texture. The Saint Clair study isolated film build, atomization, and coating temperature as three interactive variables affecting orange peel. Cooler material flows less before it sets.
Why do PPG and BASF disagree about the causes?
They weight different variables. BASF ranks low film build as the leading cause. PPG frames causes around gun adjustment and reducer speed. The Saint Clair design-of-experiments treats film build, atomization, and temperature as interactive rather than ranked, which reconciles both positions reasonably well.
Can I get orange peel texture on canvas instead of a wall?
Yes. Modeling paste stippled with a stiff brush gives you a controlled field of bumps, and sand stirred into acrylic paint does the same thing more cheaply. Seal chalky materials before painting over them.
The Bottom Line
One rule the manufacturer pages skip: if your room temperature swings more than a couple of degrees overnight, texture applied in the evening will look different by morning. Do the work in the most stable window you have, and leave the heat alone while it cures.
Everything above assumes you’re texturing a wall or a canvas. If you’re spraying a car panel, the calculus changes completely, because there the bumps are a defect you’re trying to eliminate, and the fix is machine polishing or compounding a cured coating, per PPG.
Start with one scrap board. Mix your material, stipple it, let it dry overnight, and look at it under raking light before you touch a wall. That single test costs you an evening and saves you a weekend of sanding.
Go ahead and make it ugly on the test piece. That’s what it’s for.
