
How to Texture a Wall With Joint Compound: Step-by-Step
This post contains affiliate links. As an Amazon Associate, we earn from qualifying purchases.
To texture a wall with joint compound, thin the mix to a smooth, uniform consistency and apply it with a trowel, roller, brush, or spray rig, then knock down or leave the peaks depending on the pattern. USG’s Tuf-Tex takes up to 3.75 gal of water per 50 lb bag, and total water must never pass 4.6 gal.
That 4.6-gallon ceiling is the number that decides the whole how to texture a wall with joint compound job. Push past it and the mix stops holding a peak and starts sliding off the board. USG’s submittal sheets note that water-based texture is not recommended below grade or in high-humidity areas, and they set board thickness and framing rules for ceilings.
What follows is the order I’d actually work in: prep, mixing, the water limits printed on the bag, pattern choice, room conditions, and the finish coat. The numbers come from USG’s submittal sheets and the Drywall Finishing Council spec. Where those two disagree, I’ll show you both instead of picking a winner for you.
Key Takeaways
- Thin to the pattern, not to the bag. A light orange peel wants more water than a bold knockdown does.
- Total water has a hard ceiling of 4.6 gal per 50 lb bag on Tuf-Tex, whatever the pattern needs.
- Hold the room at 55 °F (13 °C) minimum per USG. The Drywall Finishing Council allows 50 °F (10 °C) with 48 hours of pre-conditioning first.
- Unpainted texture is not washable. Decide on the paint coat before you mix anything.
- Below grade and high-humidity rooms are out. USG says so directly, and that overrides any technique.
What Consistency Should the Mix Be Before It Hits the Wall?
The Graco finger test settles this faster than any measuring cup. Run a finger through the center of the mix and watch what the groove does. If the material folds smoothly back over itself, the mix is medium to light. If the line where your finger passed still stands open, the mix is too thick.
A mix that folds back over itself after a finger is drawn through it is medium to light. A mix where the groove stays open is too thick. Thinner material sprays faster and lands finer. Thicker material sprays slower and lands coarser. Water content sets the pattern.
Here’s the part that took me a while to internalize. Consistency isn’t a single target you hit once. It’s a dial you set to match the pattern you’re chasing.
A light orange peel needs a thin mix that atomizes into a fine mist. A bold spatter or knockdown needs a heavier mix that lands in fat blobs and stays there. Same bag of powder, two different pails.
| Consistency | Finger test result | What it sprays like |
|---|---|---|
| Light | Folds back over itself quickly | More output, finer finish |
| Medium | Folds back slowly, holds a soft edge | Even coverage, light orange peel |
| Heavy | Finger line stands open | Less output, coarser pattern |
| Unthinned, as-mixed | Stiff, resists the finger | Trowel, roller, or brush only |
For the thickest finish, USG’s application guide says to use the material as it comes out of the bag. No water at all. That’s the heavy trowel and stomp-brush territory, and it’s where a lot of first-timers start when they should finish there.
The first pail I mixed sat in an unheated garage in February and got exactly 15 minutes of soak. It came out with dry pockets near the bottom that showed up as pale flecks on the wall. USG’s Tuf-Tex sheet says the soak runs longer in cold water, and they mean it.
The Prep Steps That Decide Whether the Texture Stays Put
Texture fails at the substrate, not at the surface, when you compare a how to texture a wall with joint compound. USG’s prep language is blunt: the surface has to be sound, dry, clean, and free of oil, grease, mildew, efflorescence, and other foreign material. Skip that and the mix bonds to the contaminant instead of the board.
Before you start: Sanding dried texture throws fine dust, so wear a respirator and ventilate the room. TSP solution irritates skin and eyes, so glove up and keep it off bare wood. Unvented gas and oil heaters are prohibited during application and drying because they add moisture and combustion gas to the room you’re trying to keep dry.
The DWFC gypsum board preparation specification adds one more condition: the gypsum board finish has to be completed to the specified level of finish before texture prep even starts.
That means joints taped, nailheads treated, and the board sanded to whatever level you specified. The board must be completed to the desired or specified level of finish before texture prep begins.
Painted Walls Need Tooth, Not Just a Wipe-Down
A painted wall is the most common surface people texture over, and it’s the one that fails most often. USG’s guide calls for two things in sequence. Lightly sand to dull the sheen and develop tooth for the bond. Then wash with a strong detergent from the bottom up, and a strong TSP solution works best.
Bottom-up matters because dirty water runs downhill. Wash top-down and every streak of grime you loosen lands on a section you already cleaned.
Pick your sandpaper grit for drywall by what’s on the wall. Lightly sand to dull the sheen and develop tooth for the bond. Lightly sand to dull any sheen and develop tooth for the bond.
New Concrete and Plaster Need 60 Days
USG requires at least 60 days of age before texturing new concrete or plaster. Remove form oils and efflorescence, and grind down the form lines. Remove form oils and efflorescence, and grind down the form lines.
Rushing that window is how you get texture that blisters from moisture still leaving the substrate.
Sealer or Primer: Two Credible Answers
If the texture is the final decorative finish and nobody’s painting over it, the Drywall Finishing Council wants a moisture-barrier sealer with a perm rating of 1 or less, while USG’s guide calls for a prime coat of flat latex paint applied undiluted. The point is to stop water-soluble discoloring agents from leaching to the surface and to even out absorption differences across the board.
USG’s guide takes a different route to the same goal. It calls for a prime coat of SHEETROCK Brand First Coat flat latex or a high-solids interior latex wall paint, applied undiluted and allowed to dry.
Two different products, two different mechanisms, one shared aim. Follow the one whose texture product you’re actually using, and check the label before you buy the pail.
If you’re texturing over a wall that already has a pattern and you’d rather start clean, the process for how to smooth a textured wall runs through skim coating first. A sanding pole earns its keep on that job.
Mixing Order: Water First, Then Powder, Then Patience
Order matters more than ratio. Graco’s guidance is to always add a few inches of water to the pail before the powder goes in. That single step stops the material from clumping and sticking to the sides of the container.
Here’s the sequence, with what breaks if you skip a step.
- Put a few inches of water in the pail first. Add powder to an empty pail and you get dry pockets welded to the bottom that no amount of mixing will break up.
- Add the powder and stir until the consistency is smooth and uniform. USG’s guide is specific about smooth and uniform, and lumps left now stay lumps in the finished texture.
- Let it soak at least 15 minutes, longer in cold water. USG’s Multi-Purpose sheet says to soak longer than 15 minutes when the water is cold, because the standard soak under-mixes in cold conditions.
- Run the finger test, then adjust with small water additions. Water goes in a cup at a time. It does not come back out.
- Hold back some dry powder. Graco’s rule: always save some powder in case the mix ends up too thin. A handful of powder rescues a wet pail. Nothing rescues a pail you’ve already drowned.
- Mix with a heavy-duty drill or a texture mixer. Graco warns that standard drills can be damaged mixing heavy mud. A heavy-duty drill or a mixer designed for texture and drywall mud is the minimum I’d trust.
Common mistake: Topping up the water after the pail has already soaked. Every extra quart thins the mix and drops your peak height, and by the time the pattern looks wrong you’ve got a pail you can’t fix without more powder.
One more thing worth knowing. Graco notes that most contractors spraying texture avoid fast-setting compounds because of the constant cleanup and the fast setup time. If you’re spraying, buy standard-setting powder, not the quick-set bag.
How to Texture a Wall With Joint Compound Without Drowning the Mix
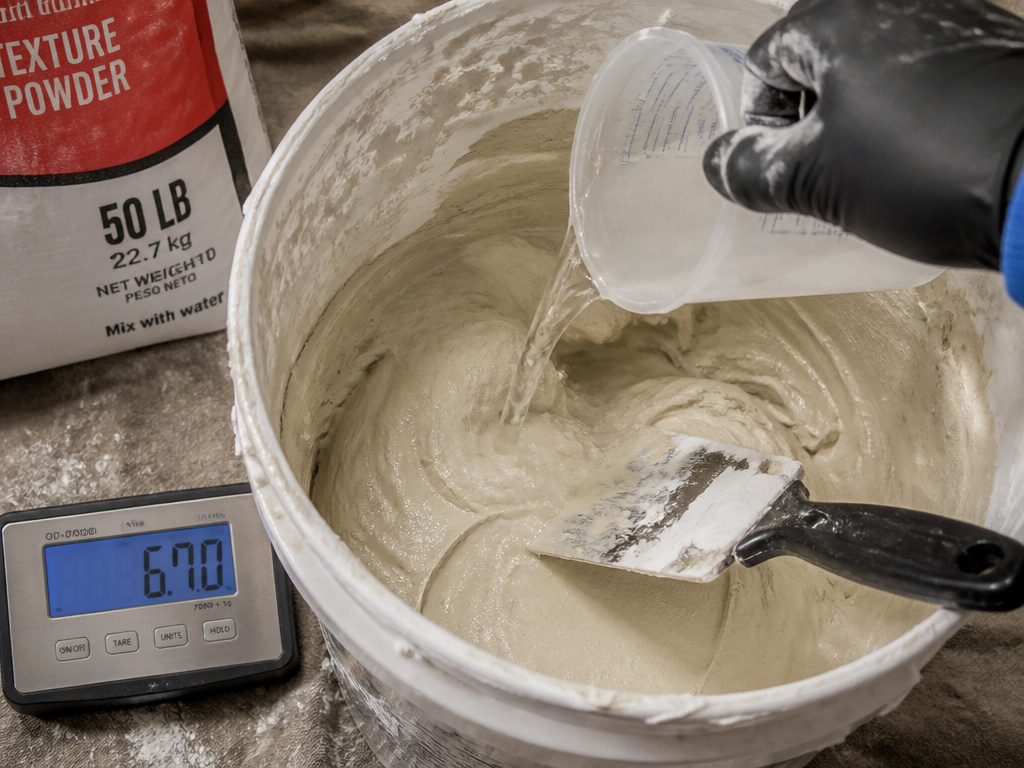
USG prints three water figures on the Tuf-Tex sheet, and two of them are ceilings. Start with up to 3.75 gal (14.195 L) of water per 50 lb (22.68 kg) bag. Soak at least 15 minutes. Then adjust from there.
The adjustment range depends on the pattern:
- Bold patterns get up to 0.75 gal extra per 50 lb bag.
- Light patterns get up to 1.8 gal extra per 50 lb bag.
- The hard ceiling is 4.6 gal (17.413 L) per 50 lb bag, total, no exceptions.
That’s a real limit, not a suggestion. Past it, the mix stops behaving like a texture coating.
The USG Tuf-Tex submittal sheet is where those numbers live, and it’s worth reading before you buy powder. USG’s general application guide tightens things further for pre-mixed material: no more than 1 quart of water per 2-gallon pail for spray or light roller work, and water never to exceed 2/3 gal per 2-gallon pail.
Adding aggregate changes the math too. USG allows up to 1.6 lb (0.74 kg) of perlite per 2 gal, or up to 8.6 lb (3.9 kg) of white silica sand per 1 gal, for a heavier body.
Season it like a soup. You add a splash, stir, check, and taste again. Nobody fixes an oversalted pot by adding more salt, and nobody fixes an overwatered pail by adding water.
Cold water is the sneaky variable here. USG’s Tuf-Tex sheet says soak at least 15 minutes, longer in cold water. The Multi-Purpose sheet is more direct: the standard 15-minute soak under-mixes when the water is cold. In a cold garage, soak longer than 15 minutes and check for dry pockets before you commit.
Which Pattern Do You Actually Want?
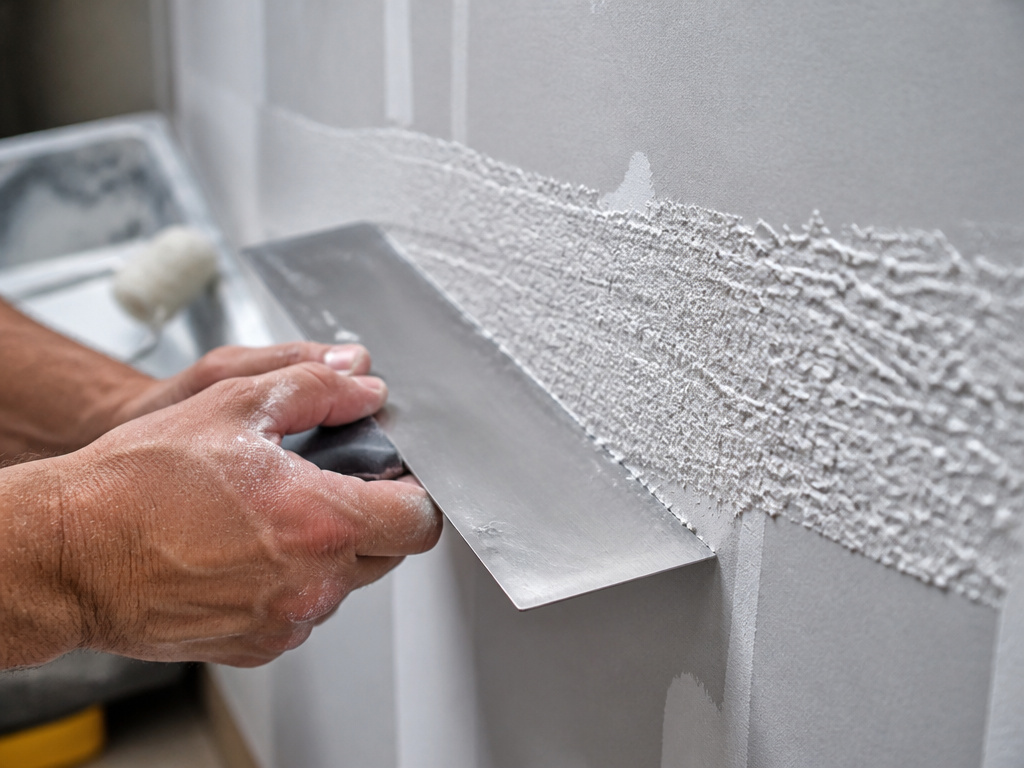
Do you want the wall to look like stucco, orange peel, or a stomped ceiling? The tool decides more than the mix does.
USG’s application guide lays out four workable patterns, and each one has a specific tool and motion:
- Stipple knockdown: apply a heavy stipple with a roller, brush, or trowel, wait until the material firms slightly, then lightly strike down the tops of the stipples with the flat side of a trowel.
- Stucco: use a roller. Deep pile creates a more textured surface, shallow pile a softer look.
- Swirl: use a whisk broom, trowel, or brush to create gentle overlapping arcs.
- Rough ‘n’ Tumble: wrap rope around the roller and gently work it over the surface.
The knockdown timing is the one that catches people. Wait too long and the material sets hard enough that the trowel skips instead of slicing. Strike too early and you smear the peaks into mush instead of flattening their tops.
Knockdown vs Orange Peel vs Plaster
Here’s the honest comparison, and I’ll commit to a winner for each situation.
Knockdown wins for a whole-room refresh on a wall with minor dents. The flattened peaks hide patched areas better than any other pattern, and the trowel pass is forgiving. The full method is in this knockdown texture guide.
Orange peel wins for ceilings and hallways where you want texture without a visible pattern. It’s the least fussy to spray and the least noticeable when you get a section slightly wrong. Start with the orange peel texture method if this is your first room.
Plaster texture wins when the wall is the feature. It’s also the most demanding, because a troweled plaster finish shows every hesitation in your wrist. I’d do two knockdown rooms before attempting it.
Skip knockdown if your wall has strong raking light across it. The flattened peaks read as smudges under a window with direct afternoon sun.
Why Does Room Temperature Decide Whether the Texture Holds?
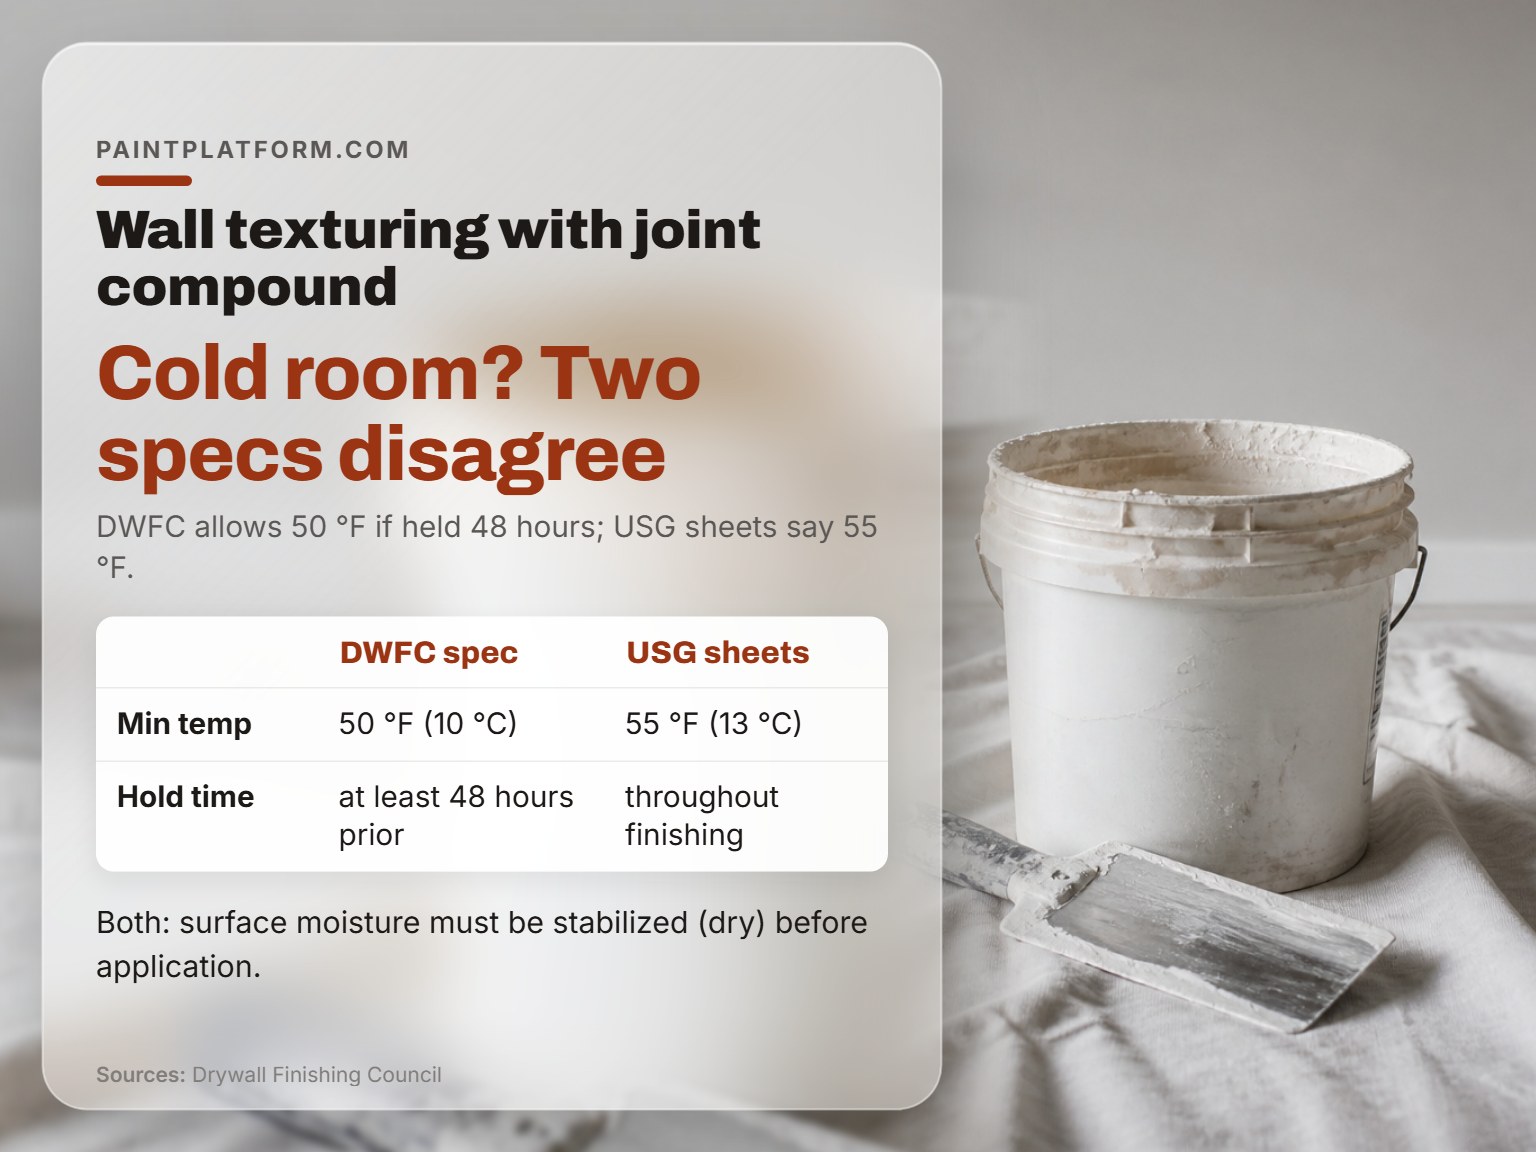
Cold weather ruins more texture jobs than bad mixing does. The two authorities don’t agree on the exact number, and you should know both.
The Drywall Finishing Council’s recommended spec sets the floor at 50 °F (10 °C), but adds a condition USG doesn’t state: that temperature must be held for at least 48 hours before work starts, and maintained until all materials are dry and stable.
So the DWFC number is lower but the DWFC window is longer. If your room has been sitting at 50 °F for at least 48 hours, the DWFC spec covers you and the USG sheets don’t. If you’re using USG’s product and want to stay inside their written instructions, hold 55 °F.
Both documents agree on one thing: the surface moisture has to be stabilized and dry before anything goes on.
Where this goes sideways: Cranking a kerosene heater in a cold room to hit the number. DWFC prohibits unvented gas and oil heaters during texture prep and application, and the moisture they throw makes the sag risk worse, not better.
Ceiling work carries its own rulebook, and it’s the one people ignore. USG’s water-based texture guidance says 3/8 in board is not recommended at all. Half-inch board runs perpendicular to framing at 16 in on center. Five-eighths runs perpendicular at 24 in on center. Double-layer laminated board at 3/4 in total or greater allows 24 in on center.
And if you’ve specified 1/2 in Sheetrock interior gypsum ceiling board, USG allows up to 24 in on center instead of 16.
Below grade or in a high-humidity room, stop. Both USG sheets say application there is not recommended, and no mixing trick fixes a room that stays damp.
Spraying vs Hand Work: Where Each One Wins
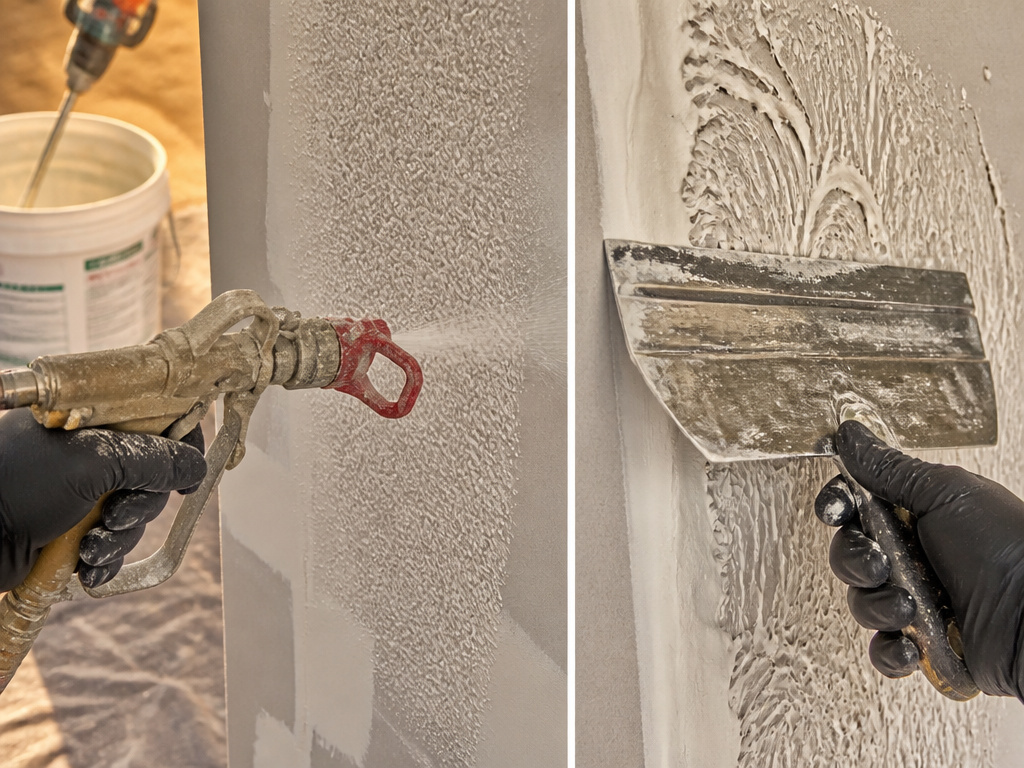
A five-gallon pail, a borrowed drill, and a rented sprayer in a driveway on a Saturday morning. That’s the picture most people have, and it’s usually the wrong call for one room.
USG’s application guide lists the spray setup in detail: a Grover 452-A 10-to-1 ratio double-action pump with a 7-1/2 in stroke, and a 4 ft pole gun with a 3/8 to 1/2 in round orifice. Material hose runs 3/4 to 1 in, the atomizing hose is 3/8 in, and the air line is 1.2 in. USG cites a compressor capacity of 85 cfm.
USG also says to keep pressure as low as possible, which is the opposite of what most people do when the pattern looks thin.
| Method | Best for | Main risk |
|---|---|---|
| Spray | Whole-house jobs, ceilings, orange peel | Overspray on trim and floors |
| Roller | Stucco and light patterns | Uneven pressure leaves lap marks |
| Trowel | Knockdown and heavy finishes | Visible hesitation in the wrist |
| Brush or whisk broom | Swirls and small feature walls | Arcs that don’t overlap evenly |
The Spray Rig Numbers That Actually Matter
Orifice size drives the pattern more than pump pressure does. USG specifies a 4 ft pole gun with a 3/8 to 1/2 in round orifice.
If you’re spraying, a heavy-duty spray rig handles a full room without the hose-length headaches of a borrowed unit. For hand work, an all-purpose joint compound thins predictably and holds a peak well.
My take: for a single room, hand work wins. You’ll spend less time masking than you would cleaning a sprayer, and you can stop mid-wall without a pail setting up in the hose.
Sealing, Painting, and the Mistake That Shows Up Months Later
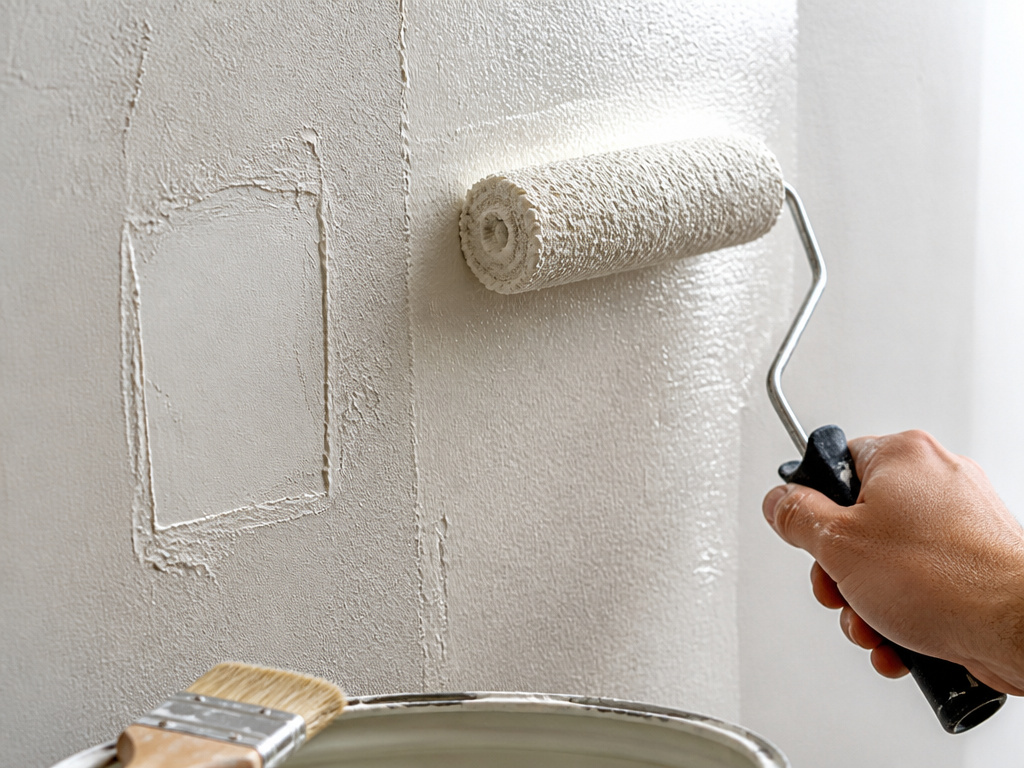
Unpainted texture is not washable, and that single line from USG changes what you do next. Tuf-Tex isn’t intended as a final coating and should be overpainted when dry. Multi-Purpose is usually overpainted on walls but can be left unpainted on ceilings.
That distinction matters in a kitchen or a hallway where hands touch the wall. On a ceiling, bare texture is fine.
USG also warns not to exceed the recommended coverage, because subsurface defects, variations in base suction, or color differences will show through. Multi-Purpose is rated at 50 to 100 lb per 1,000 ft², so a light pass is the intended approach, not a heavy one.
Remove spatters immediately from woodwork and trim. Dried texture on trim is a scraping job. Wet texture is a rag job.
Easy to miss: Sealing a patched area and painting the whole wall in one coat. The patch absorbs paint differently and shows as a dull rectangle under raking light for months.
The full sequence for painting textured walls starts with a primer coat, not a color coat. Skip it and the texture drinks your first gallon.
Fair warning: a textured wall shows a sheen difference across a patch even after two coats. Give it time before you decide it’s wrong.
Frequently Asked Questions
Can I texture a wall with regular joint compound?
Yes, with a caveat. Standard-setting powdered joint compound thins and sprays predictably, and USG’s texture products are powder formulations mixed with water. Pre-mixed joint compound works too, but Graco notes most pre-mixed material needs thinning to meet the pattern criteria. Avoid fast-setting compound for spray work.
How much water do I add to joint compound for texture?
For USG Tuf-Tex, start with up to 3.75 gal of water per 50 lb bag, then add up to 0.75 gal extra for bold patterns or 1.8 gal extra for light patterns. Total water must never exceed 4.6 gal per 50 lb bag. For pre-mixed material, USG caps it at 1 quart per 2-gallon pail for spray work.
Do I have to paint over textured walls?
Tuf-Tex should be overpainted when dry, and USG states plainly that unpainted texture is not washable. Multi-Purpose can be left unpainted on ceilings. On walls, plan on a primer coat followed by your finish color.
Why did my texture crack or sag?
Sagging usually traces to a mix that’s too wet for the board thickness or the room humidity. USG lists high humidity, poor ventilation, and insufficient board thickness for the span as the causes. Cracking usually traces to a room that dropped below the temperature floor while the material was drying.
Can I texture over painted drywall?
Yes, after prep. Sand lightly to dull the sheen and develop tooth, then wash with a strong detergent from the bottom up. USG notes that texturing over previously painted, textured, or stained substrates may require a stain-blocking sealer for uniform color, and bare metal needs a rust-inhibitive spot primer first.
The Bottom Line
If the room can’t hold 55 °F for the entire dry time per USG (or 50 °F for at least 48 hours per the DWFC), don’t start. That’s the one condition no mixing trick, no additive, and no pattern choice will rescue. Wait for a warmer week.
The first thing to do this week is smaller than that. Buy one bag of standard-setting powder, mix a quarter pail, and run the finger test until you can feel the difference between medium and too thick without looking. That instinct is worth more than any sprayer.
Everything above assumes you’re texturing a wall with joint compound in a room that stays dry and above the temperature floor. Below grade, in a damp basement, or in a bathroom with no fan, the honest answer is a different wall.
Let it be messy first. The first pail usually is.
