
Underpainting Techniques Explained: Block in, Then Refine
This post contains affiliate links. As an Amazon Associate, we earn from qualifying purchases.
Underpainting techniques explained in plain terms: you lay a thin, loose first layer that fixes the big shapes, the values, and the color temperature before any detail exists. Wash, block-in, grisaille, and dead color are the four main approaches, and each one answers a different question about how much the first layer should decide.
That underpainting techniques explained question of how much the first layer decides is the part that actually changes your painting. A wet wash will lift and blend when you go back into it, whether you planned on that or not. A tight grisaille locks the drawing down and leaves you free to push color around on top without losing the shapes.
What follows is the four methods side by side, how thin a first layer really needs to be, the failure modes that show up three layers later, and the one layering spec I keep coming back to that isn’t an art book at all.
Key Takeaways
- Wash first if you’re still finding the picture. A loose solvent wash lets you move shapes around while everything is still wet and can be corrected.
- Grisaille wins when drawing is the hard part. Locking values in grey turns color into a separate, much easier decision.
- Thin means tea-weak. If the first layer sits with visible ridges, it’s already too thick to glaze over cleanly.
- Stop before it looks finished. An underpainting that looks rough and slightly wrong when you walk away from it is what you want.
- Fix the ground before you fix the paint. A glossy or tacky surface makes every method below fail the same way.
The Three Jobs Your First Layer Is Already Doing
Three jobs land on the first layer at once, and every method below is just a different way of splitting them up.
An underpainting establishes the value structure of the picture before color is introduced. Thin pigment is applied to a toned or sealed ground so that later layers sit on a stable, slightly absorbent surface. The first layer controls the drawing, the light-and-dark pattern, and the temperature bias that subsequent glazes and opaque strokes inherit.
The value pattern is the biggest of those three. Get the darks and lights roughly where they belong and the picture reads from across the room, even with no color on it at all. That’s why blocking in shadows and highlights early saves so much grief later.
Here’s what the first layer is deciding, in order of how much trouble it causes when you get it wrong:
- Value. Where the light sits and how dark the shadow goes. Wrong here and no amount of glazing rescues it.
- Drawing. The edges and proportions. Loose is fine, vague is not.
- Temperature. Whether the whole picture leans warm or cool. This one is easy to forget and hard to undo.
The ground matters as much as the paint. A sealed, slightly absorbent surface pulls the first layer into a matte, even film. Bare canvas drinks it unevenly, and you get a patchy start that never quite evens out.
You can feel the difference through the brush. Sealed ground gives a light drag. Bare canvas snatches at the bristles and pulls the mixture apart.
Pick a Method by What You’re Most Afraid of Getting Wrong
Four approaches, four different bets about how much the first layer should decide.
| Approach | Best for | What it locks in | Main risk |
|---|---|---|---|
| Wash / imprimatura | Loose, atmospheric work | Overall tone and big shapes | Lifting mud when you go back in |
| Block-in | Most painters, most subjects | Shape and value together | Overworking it into a tight mess |
| Grisaille | Portraits, figures, realism | Drawing and value in grey | Grey dulling the color above it |
| Dead color | Careful layered oil work | Local color and value at once | Chalky, flat result if too opaque |
Wash and Imprimatura
An imprimatura is a thin, even tone wiped or brushed across the whole ground before anything else happens. It kills the white of the canvas, and that white is the single biggest reason a beginner’s first layer looks wrong. Raw white makes every color you put on it read darker and cooler than it will once dry.
A wash underpainting goes further. You sketch the whole picture in thin, solvent-heavy color, then lift the lights back out with a rag or a clean brush. It’s fast and forgiving. It’s also the method most likely to turn into grey soup if you keep pushing wet paint around.
Where this goes sideways: Toning the ground with a color you love. That tone fights every layer above it, and by the third session you’re painting around it instead of over it.
Grisaille and Dead Color
Grisaille is a full value study in grey, painted as the first layer. It suits anyone whose weak point is drawing, because it splits the two hard decisions apart. Get the values right in grey, then deal with color on a dry surface.
Dead color is the older, stranger cousin. You block in local color at low saturation, deliberately dull, and let transparent layers bring it up to full strength later. It sounds backwards. It works, especially in oils, because a muted base lets thin glazes build richness.
Whichever route you take, the next stage is usually a transparent pass. Glazing over an underpainting only behaves if the layer underneath is fully dry and lean, which is why thinness matters more than any other single thing here.
Acrylic painters get the same logic on a faster clock. Layering acrylic paint over a dry matte first pass gives clean edges. Going back in while it’s still tacky gives you torn, gummy shapes that never flatten out.
Which Underpainting Method Fits the Way You Actually Paint?
Do you already know what the finished picture looks like, or are you finding it as you go?
That single question sorts most people. If you’re finding it, wash. If the drawing is the hard part, grisaille. If you’re painting fast and loose, block-in. If you’re building careful transparent layers in oil, dead color.
Wash versus block-in is the choice most people actually face. Wash wins when the subject is atmosphere, weather, or anything with soft edges. Block-in wins when the shapes themselves are the point. If you’re genuinely unsure, block-in, because learning to see big shapes transfers to every other method you’ll try later.
I’d teach block-in before any of the others. It’s the least fussy method and the one that survives being done badly. A clumsy block-in still leaves you a map. A clumsy wash just leaves you a grey puddle.
Portrait and figure painters drift toward grisaille, and underpainting in realism painting is where that habit pays off most, because the drawing has to survive every layer stacked on top of it.
Underpainting is also the cheapest place to fix depth, before you’ve committed to anything. Building depth with underpainting works because you can push the far shapes back with a cool, weak first pass, and nobody ever sees the correction.
How Thin Is Thin? Mixing a First Layer That Still Binds
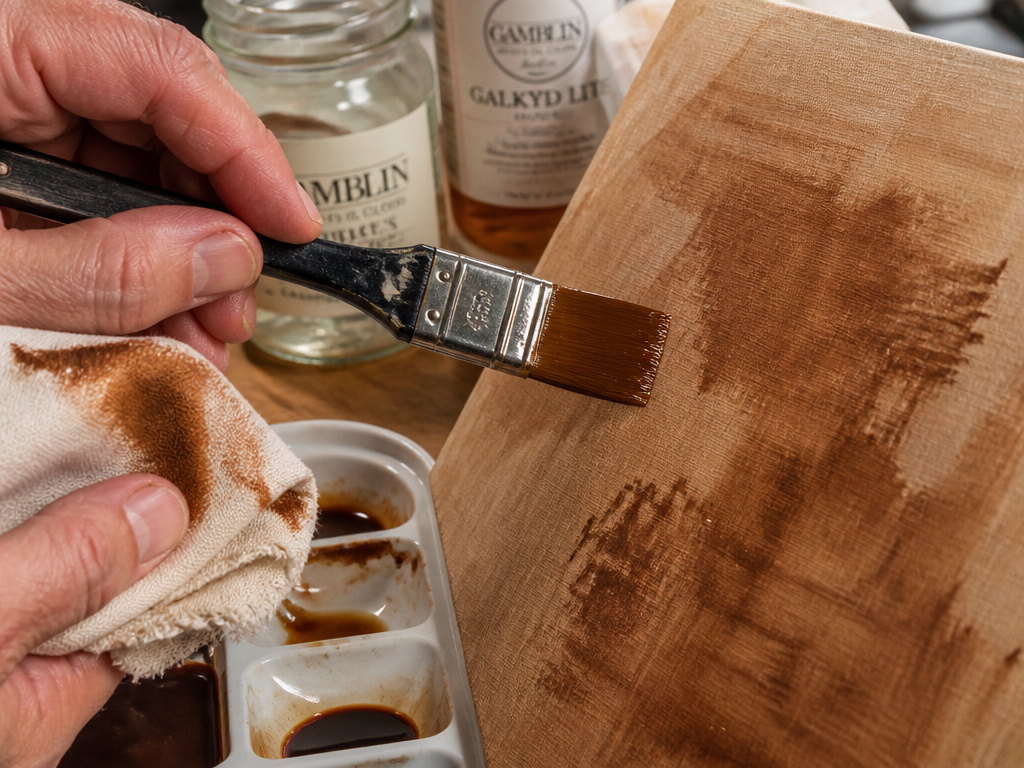
Solvent does most of the work in a wash underpainting. The pigment is there for color, not for coverage.
Here’s the order that keeps you out of trouble:
- Seal or tone the ground first. Skip it and the first pass sinks in unevenly, leaving pale patches that read as highlights you never planned.
- Load the brush thin, then wipe the excess off. A dripping brush pools paint at the edge of a shape and dries into a dark ring you’ll fight for the rest of the session.
- Work from the biggest shape to the smallest. Start with the small stuff and the big shapes get painted around, which leaves you with outlines instead of masses.
- Stop while it still looks rough. Keep going until it looks finished and you’ve built a thick layer the next pass can’t grip.
Choosing a Solvent or Medium That Won’t Fight You
Thinning is where most first layers die. Thinning oil paint with too much solvent breaks the binder and leaves a flat, underbound film that dusts off under your finger. A few drops of medium keeps the paint together while it stays workable.
Oil painting mediums are worth understanding before you buy four of them. For a first layer you need one fast-drying medium and one slower one, and that’s the whole kit.
A low-odor solvent is the one I reach for indoors, mostly because the smell stays low enough that I forget it’s open until I put the lid back on. Student-grade oils and acrylics both thin down well enough for a wash without going chalky, and a single flat brush does most of the work.
Where Underpainting Goes Wrong, and What It Looks Like on the Panel
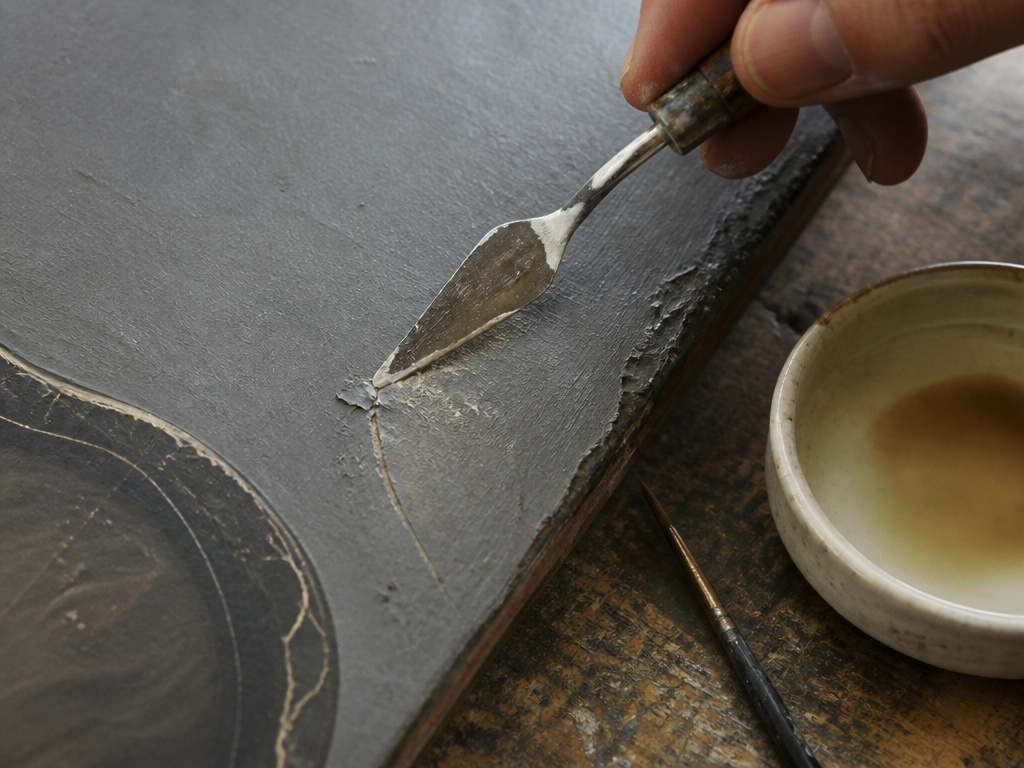
Most failed underpaintings fail in the same three ways.
A too-thick first layer dries with a chalky, matte sheen and a faint ridge you can catch with a fingernail. Under a glaze, that ridge reads as a bright line where no line should be.
The warning signs, in the order they usually appear:
- The surface looks powdery rather than sealed.
- Colors go muddy the moment you glaze over them.
- Edges of shapes have a dark rim.
- Brush marks sit proud of the surface instead of settling into it.
| What you see | Likely cause | Fix |
|---|---|---|
| Grey, chalky film over everything | Too much solvent, binder broken | Wipe back and re-tone thin |
| Dark ring around each shape | Brush loaded too wet | Reload lighter, work drier |
| Colors go muddy under a glaze | First layer still tacky | Let it dry fully before glazing |
| Visible ridges catching light | Paint applied too thick | Sand back fine, re-coat thin |
Common mistake: Going back into a wet wash to “fix” a shape. The pigment lifts, the edge goes soft, and you end up with a grey smear where a clean shape used to be. Wait until it’s touch-dry, then correct it.
There’s a second layer of trouble that comes from opacity rather than thickness. If your first pass is too opaque, the dry surface underneath can’t show through, and the whole picture goes flat. Scumbling over a dry underlayer fixes that, because a thin broken veil of opaque paint lets some of the base come back through.
What a Car Repair Manual Taught Me About Thin Layers
An automotive undercoating application manual has a more explicit layering spec than any painting book on my shelf.
The Hyundai body repair manual tells the technician to spray the primer surfacer over a wider area than the repair itself, then build 2 to 3 coats to reach 30 microns, while Honda’s bulletin names 20 microns as a fallback when the paint maker gives no figure. It specifies a 5 to 10 minute flash before force drying, and a sanding sequence that steps from #320 to #400 to #600 paper. Every one of those choices has a painting equivalent, and the manual states them more plainly than most art instruction does.
The documents don’t agree with each other, and that’s the useful part.
| Document | What it specifies | Why the number differs |
|---|---|---|
| Hyundai body repair manual | 2 to 3 coats to 30 microns | Primer surfacer built over body filler |
| Honda body repair bulletin | 20 microns as a fallback | Anti-chip primer when the paint maker gives no figure |
| 3M corrosion protection SOP | Four medium coats | Undercoating, never sanded |
The numbers disagree because the products disagree. Hyundai specifies 2 to 3 coats of primer surfacer, while the 3M corrosion protection SOP calls for four medium coats for maximum protection. Honda is naming a fallback for when no paint-maker spec exists. Same principle, three different jobs, three different answers.
The idea that transfers to your panel is the overlap. Every one of those documents sprays wider than the damaged area, because a layer that stops at the edge of the repair leaves a visible step. Your underpainting should run past the final shape for exactly the same reason.
GM’s anti-corrosion document splits its coatings into two families: closed-cavity coatings that stay sticky and creep into seams, and undercoat coatings that dry to the touch. That’s the same split as a wet wash versus a dry block-in, and GM assigns each one to the zones where it belongs.
What the manuals agree on is that a heavy coat is a defect, not a shortcut. Subaru’s paint manual names thick application as a direct cause of blistering and trapped air, and lists correct filler and primer application as the prevention.
Thin layers dry from the inside out. Thick layers skin over on top and stay soft underneath, which is why a heavy first pass feels dry long before it is.
Frequently Asked Questions
Do you have to underpaint before every painting?
No. Plenty of good paintings start with a direct opaque pass and never have a separate first layer. Underpainting earns its place when the picture has a lot of shapes to organize or a drawing you can’t afford to lose. For a small, simple study, skip it.
What’s the difference between an underpainting and a base coat?
Base coat is usually about coverage: an even tone or a ground color. An underpainting is about structure. It carries the drawing and the value pattern, and it’s meant to be painted over rather than seen. Some imprimaturas do both jobs at once, which is where the confusion comes from.
Can you underpaint in acrylic and finish in oils?
Yes, and it’s a common way to work fast. Acrylic dries quickly and gives you a stable, lean base. Let it cure fully, then work oil on top. The reverse is the problem: oil under acrylic traps solvent and the film fails.
How long should an underpainting dry before you paint over it?
Until it’s dry to the touch and no longer cool against the back of your hand. Solvent-rich washes can feel dry long before the film has actually settled, so give it more time than your fingers suggest. If a glaze beads or lifts the base, it wasn’t ready.
Is grisaille the same as underpainting?
Grisaille is one type of underpainting, done entirely in greys. It’s the most common one in figure and portrait work because it separates drawing from color. A wash or a block-in is also an underpainting, just with a different job.
The Bottom Line
Here’s the first thing to do this week: take one small panel, tone it with a single thin wash, and stop. Don’t draw anything on it. Just watch how the paint behaves on that ground, and how it feels when you go back over it once it’s dry. One panel, one thin wash, one short sitting, no stakes.
Every one of the underpainting techniques explained above depends on the same thing: a ground that’s ready for it. If the surface you’re painting on is glossy, sealed to a shine, or still tacky from a previous layer, the first pass will bead and crawl no matter how carefully you mix it. Fix the ground and everything above it gets easier.
The concession worth stating plainly is that none of this matters much for a quick study. If you’re painting something small and disposable, skip the underpainting entirely and go straight at it. The method earns its keep on work you intend to bring back to three or four times.
Start messy. The refinement is a separate job, and it’s a much easier one once the big shapes are already sitting where you want them.
