
How to Paint Over Peeling Paint: When It Works
This post contains affiliate links. As an Amazon Associate, we earn from qualifying purchases.
To paint over peeling paint, remove every loose flake first and test what’s left with the tape pull, because new paint only bonds to a film that’s still stuck. If the old coating measures thicker than 1/16 inch, spot-paint the bare wood instead: a full coat just adds film and peels again.
Film thickness is the number that decides this job, and it’s the one nobody measures. Paint builds in layers over decades, and each new coat pushes a failing wall closer to the point where the film can’t hold itself. Knowing how to paint over peeling paint starts with understanding that buildup.
What follows is the order that works: test, scrape, fix the cause, prime, then paint. Two of those steps have published guidance that contradicts itself, and I’ll show both sides instead of picking a winner for you.
Key Takeaways
- Test before you scrape. Press tape over a clean patch and pull. Flakes on the tape mean the coating has lost adhesion and has to come off.
- 1/16 inch is the cutoff. Past that film thickness, NPS says spot-paint the bare wood, because a full coat peels regardless of prep.
- Prime bare wood fast. NPS allows 48 hours; BRANZ says immediately after sanding. Treat the shorter window as the real one.
- Fix the moisture path first. New paint over a wet substrate fails no matter which primer you buy.
- Feather thin films, spot-paint thick ones. The two agencies disagree on sanding patch edges, and thickness is what settles it.
Test the Film Before You Pick Up a Scraper
A strip of ordinary adhesive tape tells you more about a wall than a ladder and a flashlight will. BRANZ Bulletin 633 lays out the procedure in a couple of lines, and it maps how far the failure spreads before you commit to a scraper.
The tape test presses a strip of adhesive firmly over a clean section of paint, then pulls it away. A cross-hatch scored with a sharp knife gives the same reading on a smaller area. Flakes lifting with the tape mean the coating has lost adhesion and must be removed before any new paint goes on.
Score a cross-hatch with a sharp knife if the flat pull looks borderline. The cross-hatch gives the tape more edges to grab, so a weak film shows itself on a smaller test area.
Then measure the film. NPS Preservation Brief 10 sets a hard cutoff at 1/16 inch; past that, the coating can’t carry its own weight and any new paint on top peels with it. You measure at a lifted edge, not in the middle of a sound panel.
Chalk is the other early signal. Rub a finger across the paint and a white residue comes off on your skin. That’s the film breaking down at the surface, and BRANZ says repaint before it goes further.
| What You See | What It Means | Test | Move |
|---|---|---|---|
| White smear on your fingertip | Surface breaking down | Rub test | Wash and repaint soon |
| Flakes lift with tape | Adhesion is gone | Tape pull | Remove the coating |
| Peeling under an eave | Salt and dirt buildup | Check rain exposure | Wash, then spot repair |
| Film over 1/16 inch | Coating can’t hold itself | Measure a lifted edge | Spot-paint bare wood only |
| Peeling below a sill | Water getting behind | Check caulk and slope | Fix the water path first |
The automotive bulletins use the same logic with a tighter number. Toyota T-SB-0162-19 voids its tape-test spot repair once peeling reaches 10 mm.
That’s the pattern across every source. The how to paint over peeling paint test tells you whether the coating is bonded, and the size of the failure tells you whether a spot repair is honest.
Scrape, Sand, and Stop at the Right Moment
The putty knife slides under a loose edge and a sheet the size of your palm pops off, and now there’s bare wood staring back at you. That’s the moment most people reach for a sander and take off three layers they didn’t need to touch.
Before you start: A heat gun or a power sander on old exterior paint can throw lead dust into the air if the house was painted before lead restrictions. Test a chip before you sand or heat-strip. Chemical strippers also burn skin on contact, so gloves and ventilation are not optional. And a hooked scraper edge will gouge soft wood in one careless pull.
NPS ranks removal methods from gentlest to harshest and says to pick the gentlest one that works on that particular piece of wood. Scraping and hand sanding come first for crazing, intercoat peeling, solvent blistering, and wrinkling.
The Push and the Pull
A putty knife pushes. It runs from the loose paint toward the edge that’s still stuck, beveling the transition as it goes. Widths run 1 to 6 inches, and the beveled edge is what keeps you from digging a trench in the wood.
A paint scraper pulls. It rakes damaged paint away with a hooked edge, and it comes in 1 1/4, 2 1/2, and 3 1/2 inch widths with replaceable blades.
Both tools gouge soft wood if you get careless with the angle. That’s the whole risk.
Sanding With the Grain
Sand after scraping, never instead of it. The surface left behind is uneven because you removed different numbers of layers in different spots, and hand sanding feathers that transition.
Coarse open-coat flint paper is the cheap option and the right one here. It clogs with paint within a few strokes and goes slick under your fingers, and you throw it away and tear off a fresh piece. All sanding goes with the grain.
- Test first. A tape pull on a clean patch; flakes on the tape mean the coating comes off, not that it gets covered.
- Scrape only the loose material. Working past the sound edge gouges wood and creates a repair you didn’t have.
- Sand with the grain and stop when the transition feels flat under your palm. Over-sanding an old molding profile is permanent.
- Prime the bare spots the same day if rain is coming. NPS allows 48 hours, BRANZ says immediately.
- Wash the wall before you paint. BRANZ calls for annual washing to remove dirt, salt spray, moss and mildew, and paint over that film traps it.
I keep two scrapers, a 1 1/4 inch for moldings and a 2 1/2 inch for flat siding, and I sharpen neither. Replaceable blades are the entire point. A dull hooked edge gouges soft wood faster than a sharp one ever will.
Can You Paint Over Peeling Paint, or Does It Always Fail?
Sometimes yes, and the how to paint over peeling paint answer turns on film thickness, not on which primer you bought. This is where the two published guides split, so here’s each position in its own terms.
NPS Preservation Brief 10 says do not sand or feather the thick paint edges around a patch, because the thickness of the film will cause it to peel regardless. The recommendation is to spot-paint the bare wood and leave the sound film alone.
BRANZ Bulletin 633 goes the other way for small failures: clean and sand the failed areas, prime or seal any raw surface exposed, then repaint.
Field practice sits closer to BRANZ. The peeling paint repair most people actually do is scrape, sand the edges, seal with a binding primer, then fill and topcoat.
My read: feather when the film is thin, spot-paint when it’s thick. Sanding an edge that’s already past 1/16 inch just builds a smoother runway for the next peel.
Feather a thin film and spot-paint a thick one. Sanding an edge that’s already too thick only makes a nicer-looking edge for the next failure to start from.
Glossy film changes the prep but not the logic. A high-gloss surface needs a mildly abrasive cleaner or a scuff before anything will grip it, which is the same reason painting over gloss fails when people skip the de-glossing step entirely.
Fix the Cause First or the New Coat Fails
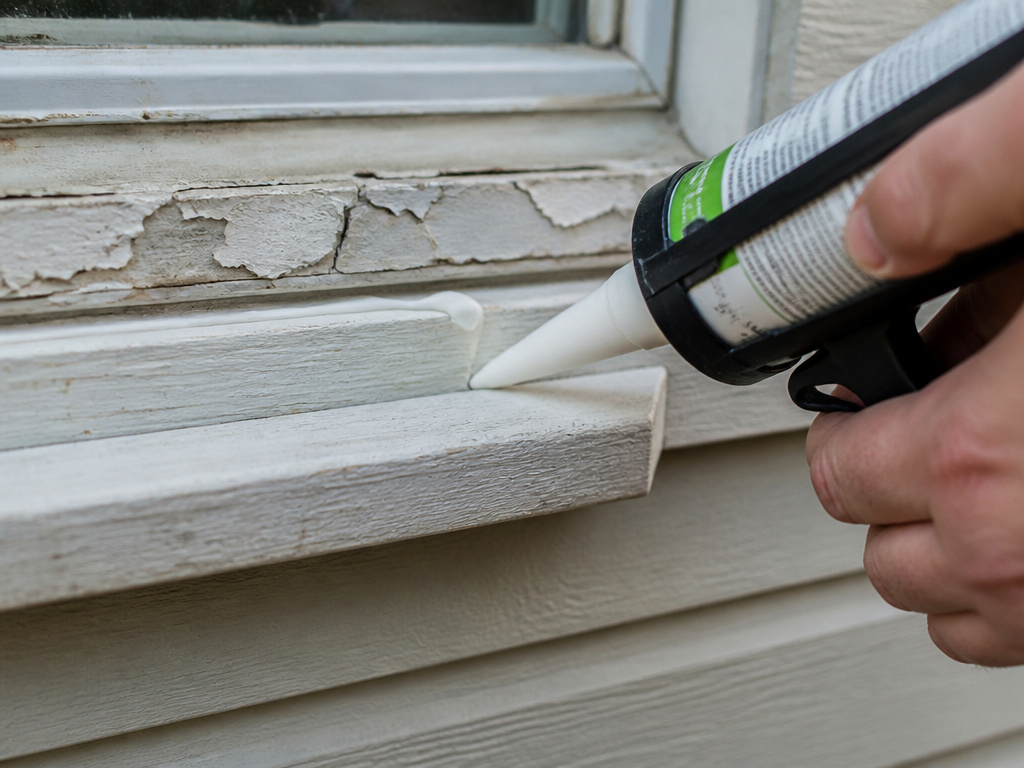
Paint is the last step, and it’s the cheapest one to waste. NPS is blunt about the order: unsound wood gets replaced and moisture problems get corrected before primer and top coats go on.
Here’s what to check, in the order that catches the most failures:
- Water getting in at a joint. Look for peeling that starts under a sill or at a corner rather than in the middle of a field.
- A leak behind the wall. Stain rings that come back after repainting are the tell.
- Bare wood left open. Primer is the only thing standing between exposed wood and the next rain.
- Chalk and salt on a sheltered surface. Eaves and porches never get rain-washed, so contamination builds where you can’t see it.
Skim coating is the underrated fix here. A small area of torn substrate takes a thin coat of filler and a sanding block, and it gives the new paint something flat to sit on. Most people reach for a thick textured paint instead and hide the damage temporarily.
A tube of exterior caulk and a few minutes at the sill does more than any primer. That’s the boring answer, and it’s the one that holds.
If the stain is already there, seal it before you topcoat. Water damage that gets painted over without sealing comes back through the fresh coat, and chipped paint around the same spot usually means the substrate moved.
What most people get wrong: Painting over a water stain without sealing it first. The stain bleeds through the new coat, and you’re repainting the same wall with the same leak still running behind it.
How Long Can Bare Wood Sit Before You Prime It?
I rushed a canvas once, painting over an underlayer that hadn’t set, and watched the color go muddy and then lift in sheets as it dried. Same physics on a wall, just slower and more expensive.
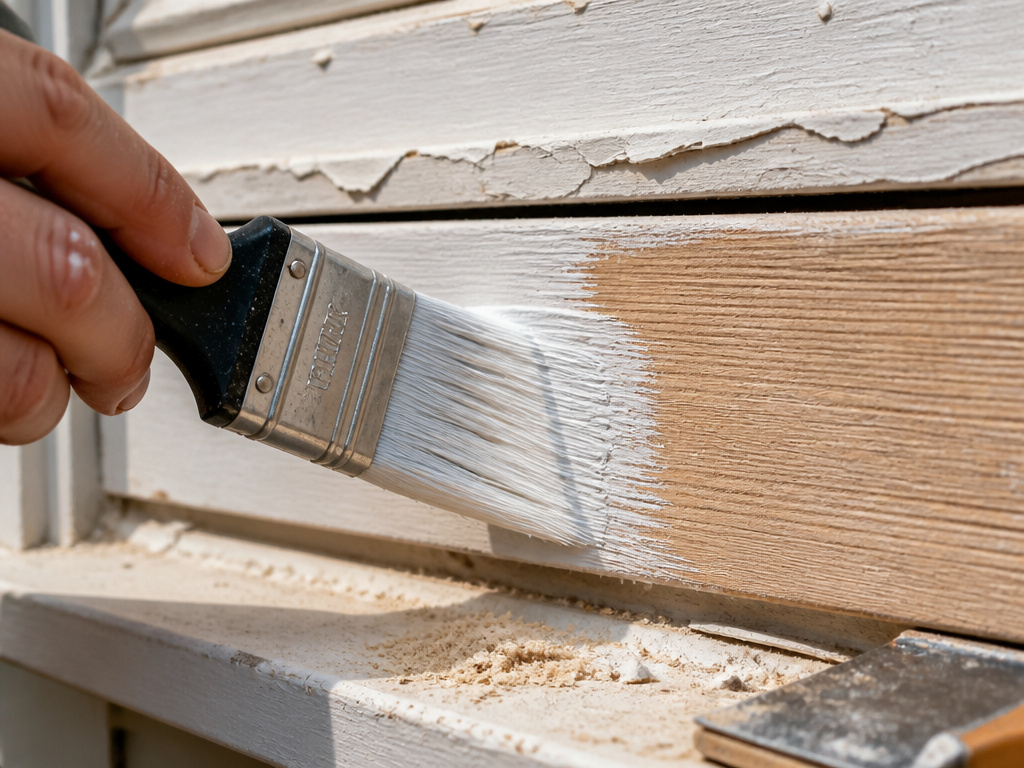
NPS says bare wood should be primed within 48 hours, then repainted. BRANZ says apply primer to exposed wood immediately after sanding to prevent the substrate from degrading. The sources disagree, so follow the guidance for your situation.
Primer type is the second split. NPS recommends a high-quality oil-type exterior primer as a universal base under either an oil or a latex topcoat. BRANZ specifies a primer undercoat without naming oil, and separately warns that oil-based paints keep hardening and go brittle with age.
Oil Primer or Water-Based?
For a spot repair over an oil film, the oil-type primer NPS calls for is the safer bet. Over bare wood with a latex topcoat going on, a water-based primer is the option.
A binding primer is a different tool from a sealing primer. A binding primer is what the field videos reach for to lock down a peeling edge before filling, and it goes over the scraped area, not over loose flakes. If you want the full shortlist, this roundup of primer for peeling paint covers the binding options.
Where this goes sideways: Priming straight over sanding dust. The primer bonds to the dust instead of the wood, and the whole film lifts away in one sheet.
Spot-Paint or Full Repaint: The Thickness Math
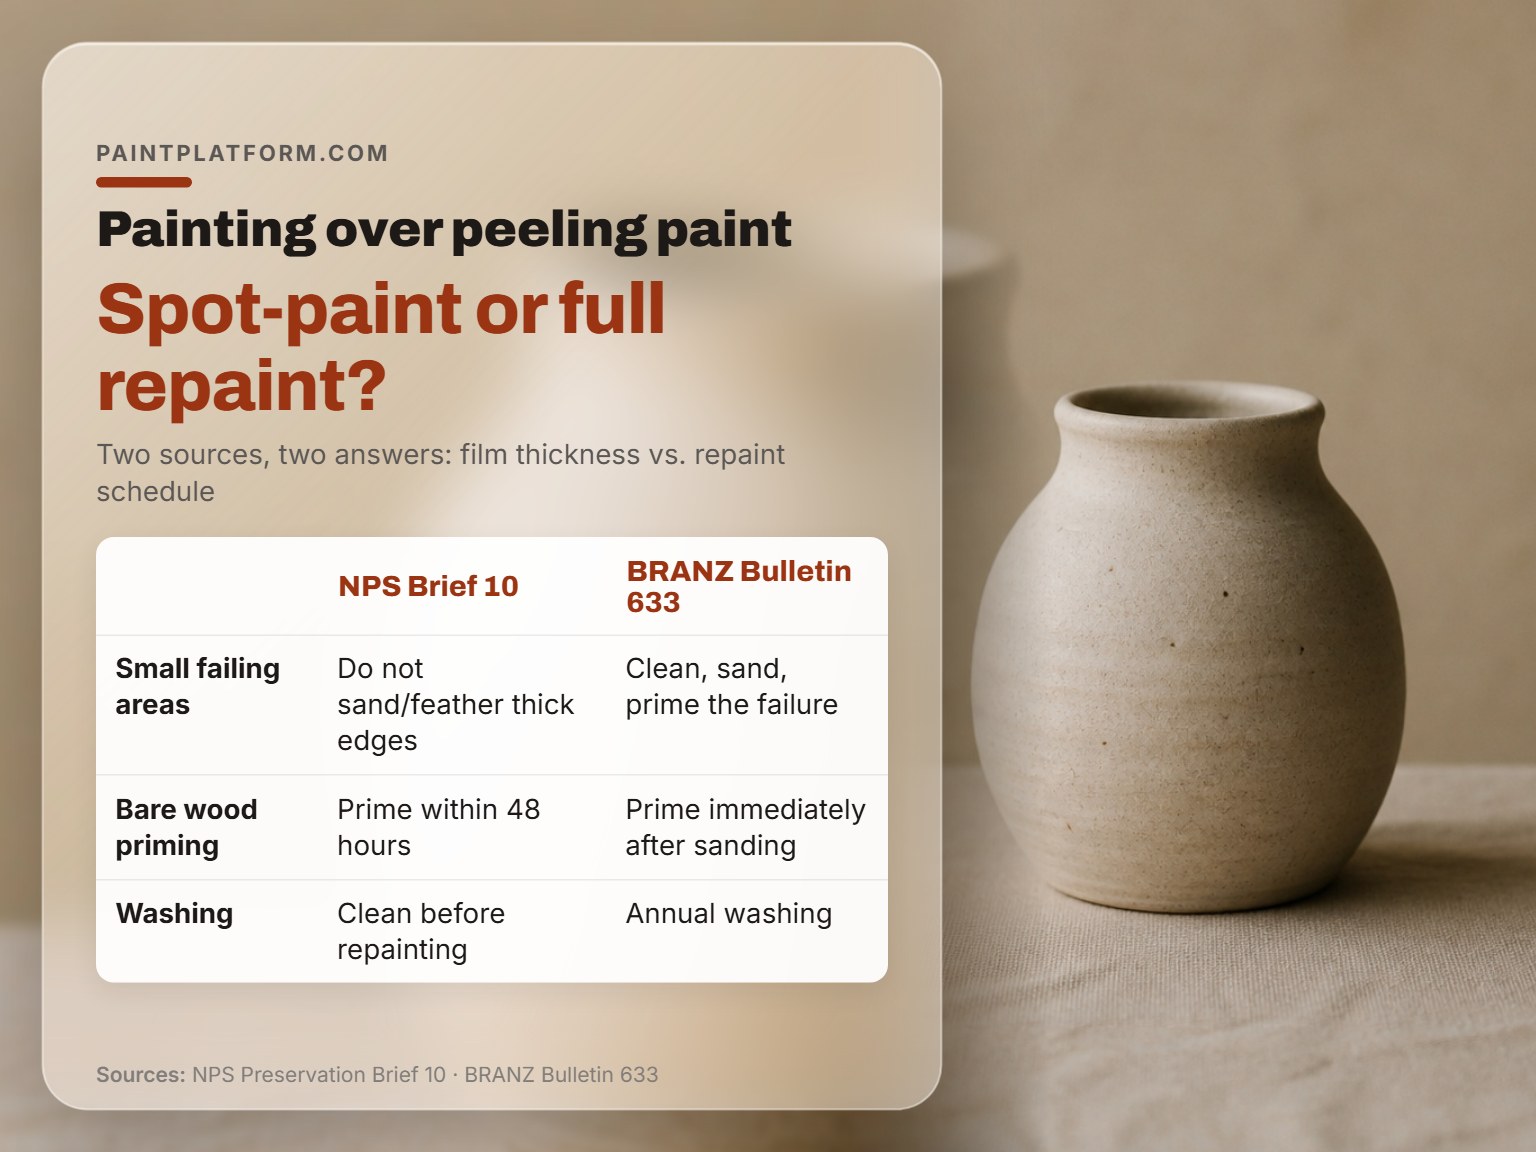
This is the decision that costs people the most, and the two agencies answer it differently because they’re solving different problems.
| Situation | NPS Position | BRANZ Position | Sensible Move |
|---|---|---|---|
| Isolated peel, sound film around it | Spot-paint bare wood | Clean, sand, prime the failure | Spot repair |
| Film past 1/16 inch | Spot-paint only; full coat peels | Repaint every 7-10 years | Spot-paint, plan a strip later |
| Chalky but intact | Clean before repainting | Repaint before failure starts | Repaint this season |
| Peeling under a sheltered eave | Wash, then spot-paint | Clean, sand, prime | Wash first, always |
The NPS logic is arithmetic. A full coat on a spot-failing wall adds film thickness, and thickness is what causes the peel, so the repaint accelerates the next failure. The BRANZ logic is scheduling: repaint before the film fails, typically every 7 to 10 years, and you never reach the thick-film stage.
Both can be right on the same house. A wall that’s been recoated five times needs spot work. A wall with a thin, chalky film that’s never been touched needs a full coat before it fails.
Leave a failing film and repaint over it anyway, and the new coat fails from the bottom up. NPS puts the mechanism plainly: extra film thickness causes peeling regardless of prep, so the second failure arrives faster than the first one did.
Washing is the one step neither agency argues about. BRANZ calls for annual washing to remove dirt, salt spray, moss and mildew, and NPS says clean the surface before repainting. Skipping it is how a sound film starts failing in the first place, and it’s the core of any plan to prevent paint peeling.
If you’re working a whole elevation rather than a patch, prep exterior walls properly before the first coat goes on.
Frequently Asked Questions
Can you just paint over peeling paint without scraping?
Not if the tape test pulls flakes. Loose coating has already lost adhesion, and new paint bonds to the flake instead of the wood, so it comes off with it. Scrape the loose material back to a sound edge first, then decide whether to feather or spot-paint.
What happens if you paint over peeling paint?
The new coat fails from the bottom up. NPS explains that added film thickness causes peeling regardless of surface prep, so the second failure usually shows up faster than the first one did.
Do you have to sand the edges of a patch before repainting?
It depends on thickness. NPS says don’t bother feathering thick edges because the film peels anyway, while BRANZ advises cleaning and sanding small areas of failure before priming. Below 1/16 inch, sanding helps. Above it, spot-paint the bare wood.
How long can bare wood sit before you prime it?
NPS allows 48 hours. BRANZ says to prime exposed wood immediately after sanding to stop the substrate degrading. The sources disagree, so choose the window that fits your conditions.
Is it better to spot-paint or repaint the whole wall?
Measure the film first. Past 1/16 inch, a full coat only adds thickness and speeds up the next peel, so spot-paint the bare wood. On a thin, chalky film that hasn’t failed yet, a full repaint is the cheaper long game.
Does primer stop peeling?
Primer bonds a new coat to a sound substrate. It can’t rescue a film that’s already too thick, and it won’t hold over moisture that’s still coming through the wall. Fix the cause, then prime.
The Bottom Line
If the film measures past 1/16 inch, stop planning a repaint. Spot-paint the bare wood, put the money into prep, and save the full recoat for the day you strip the wall back to sound coating.
Your first step this week takes about ten minutes and costs almost nothing. Cut a strip of tape, press it hard over a clean patch of the peeling wall, pull it, and look at what comes up. That single test tells you whether you’re doing a spot repair or a strip-down.
Fair warning: none of this holds if the peeling sits under a window with a failed sill or below a stain that keeps returning. In that case the paint is a symptom, and the fix lives in the caulk line, not the can.
