
How to Spray Paint Wood: Step-by-Step (No Peeling)
This post contains affiliate links. As an Amazon Associate, we earn from qualifying purchases.
To spray paint wood, sand and prime the bare surface, then shake the can for 1-2 minutes and hold it 8-12 inches away at a slight angle. Apply light coats 15-30 minutes apart, and stop spraying before the wood looks wet. Most failures trace back to skipping the primer or painting damp wood, so learning how to spray paint wood properly starts with these steps.
Water trapped under the film is the most common cause of paint blistering, according to the National Bureau of Standards, and the how to spray paint wood question comes down to less moisture than you’d think to lift a coat. A board that feels dry to the palm can still be holding enough to ruin the job two weeks later.
What follows is the order I actually do it in: setup, sanding and priming, distance, temperature and humidity, thinning, and what to do when a coat goes wrong. Three of the numbers below don’t agree across the manufacturer documents, so I’ve shown where they split instead of picking one and pretending.
Key Takeaways
- Sand and prime bare wood before the first pass. Skipping both is the fastest route to peeling.
- Hold the can 8-12 inches at a slight angle and keep your wrist locked through the whole pass.
- Wait 15-30 minutes between light coats. A tacky or fingerprinting surface means the coat is still wet.
- Don’t spray below 45°F or above 90°F, and don’t spray outside above 60% humidity.
- Store cans upside down so the nozzle stays clear and the paint stays fresh.
Why Spray Paint Peels Off Wood
Peeling is almost always a prep problem, not a paint problem.
Bare wood needs a mechanical key before any coating will hold. Sanding opens the grain and removes the thin layer of UV-degraded fiber that sunlight leaves behind. A primer then seals that fresh surface and gives the topcoat something to grip, which is why unprimed wood fails years earlier than primed wood.
The USDA Forest Service put hard numbers on that gap. Wood that was primed before any sun exposure went at least 30 years before it needed repainting. Wood that sat in the sun for one week before priming needed repainting at 13 years. Two weeks of sun dropped it to 10 years.
Two weeks of neglect cost years of coating life. That’s the whole argument for sanding and priming, and it’s the part that gets skipped on a Saturday afternoon when you’re impatient.
Water is the other half of the story. The NBS Letter Circular 810 states plainly that water behind the paint film will ruin the best paint, and it names trapped moisture as the most common cause of blistering.
One more tell worth knowing. Old paint that wipes onto a cloth as a fine white chalky dust has started to break down. If cleaning stops the chalkiness, clean and topcoat. If paint still wipes off after cleaning, you need to reprime, per the Why House Paint Fails report.
The Setup Check Before the First Pass
Three things get checked before the can is even shaken when you compare a how to spray paint wood checklist: the surface, the air, and the gun.
Before you start: Paint mist and solvent vapor are harmful to breathe, so work in a well-ventilated room or with forced ventilation and wear a respirator rated for solvent vapors. Keep the turbine or compressor as far from the spray zone as the hose allows, or paint dust gets pulled into the motor. Never rinse a gun or dump leftover paint down a drain; take it to a local waste collection site.
Hempel’s spray guideline lists the checkpoints to run through before you pull the trigger:
- Air capacity from the compressor, plus the size, rating, and condition of the hoses
- The oil and moisture separator, since some paints are sensitive to humidity in the air line
- Temperature of the substrate, the paint, and the air
- Paint viscosity, nozzle size, and cap size
- Ventilation, flow, and direction
That last one matters more than it sounds. Hempel flags overspray and spray-dust as a real risk and says to plan ventilation so dust doesn’t settle back onto the wet surface.
For a can, the equivalent is simpler. Shake it vigorously for 1-2 minutes, per Sherwin-Williams, and hold it at a slight angle rather than dead upright. For most furniture and trim, a standard spray paint for wood with a built-in primer handles the job.
If you’re running a cup gun instead of a can, filter the paint through a funnel with a filter or a pair of hosiery when you fill the container. The HVLP Spray Station 3500 manual recommends it to keep particles out of the tip, and it also warns against filling above the start of the threaded neck.
How Far Should You Hold the Can From the Wood?
Eight inches is the number most can labels give, and it’s a fine starting point, but the sources genuinely don’t agree.
| Source | Distance | What it covers |
|---|---|---|
| Sherwin-Williams | 8-12 inches | Aerosol cans, slight angle |
| Hempel, pneumatic | 8-14 inches | Air spray and HVLP guns |
| Hempel, airless | 12-15 inches | Large flat panels |
| Wagner | 10-30 cm | Varies with attachment and material |
| HVLP Spray Station 3500 | 10-12 inches max | Beyond that, spray width drops |
The pattern in that table is worth reading twice. Aerosol cans and pneumatic guns cluster around 8-12 inches. Airless rigs, which push far more material, sit further back at 12-15 inches. Wagner’s guidance is the widest because it covers several attachments, and its wood-and-metal steps narrow to 10-15 cm.
Whichever number you land on, the rule that matters is that you don’t change it mid-pass. Hempel also specifies holding the spray fan at 90 degrees to the surface, which keeps the coat even across the width of the fan.
Sanding and Priming: The Two Steps I Skipped Once
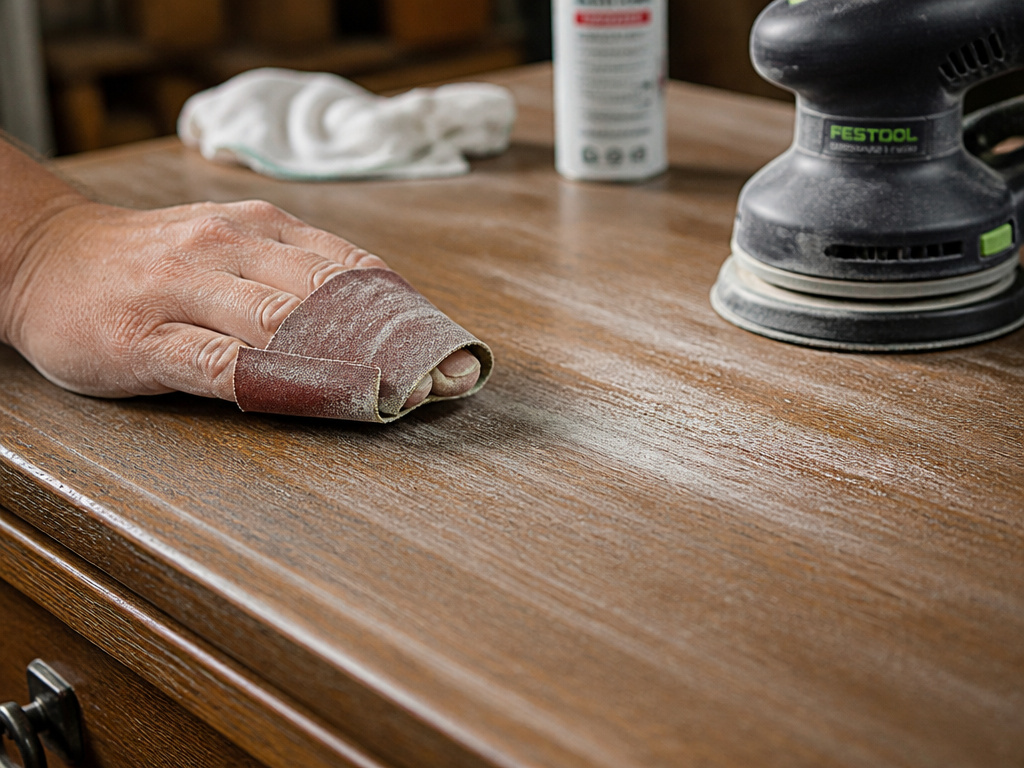
The dresser cost me almost nothing at a thrift store, and I had it painted the same afternoon. Quick wipe, no sanding, straight to color.
Before long the drawer edges were peeling off in sheets, right where hands and knees hit them. Not everywhere. Just the spots taking contact, which is exactly how a mechanical-key failure shows up.
Now I wipe with a degreaser, sand the surface, and wipe again. Boring step. It’s the difference between paint that sticks and paint that flakes.
The sanding pass that actually matters
You’re not trying to make the wood look new. You’re trying to break the surface so the coating has something to grab.
The Forest Service adds a wrinkle for exterior wood: if unfinished siding sat in sunlight for more than a few days, sand it or power wash it first to remove the thin degraded layer. If you power wash, don’t point the wand upward, because that forces water behind the siding. Taping a stick to the wand keeps you at a safe distance without thinking about it.
Priming bare wood
A spray primer for wood does two jobs: it seals the open grain and it gives the color coat something to bite. Sherwin-Williams recommends a primer on wood for exactly that reason, and it also blocks a darker previous color from showing through.
There are real cases where you can get away with painting wood without sanding, mostly on sound, previously coated surfaces that just need a degloss. Bare wood and chalky wood aren’t those cases.
I sand each piece and stop when the sheen is gone. Sanding until the wood looks new is a waste of a Saturday. Sanding until it feels slightly toothy under a fingertip is enough.
What Temperature and Humidity Do to a Coat of Spray Paint
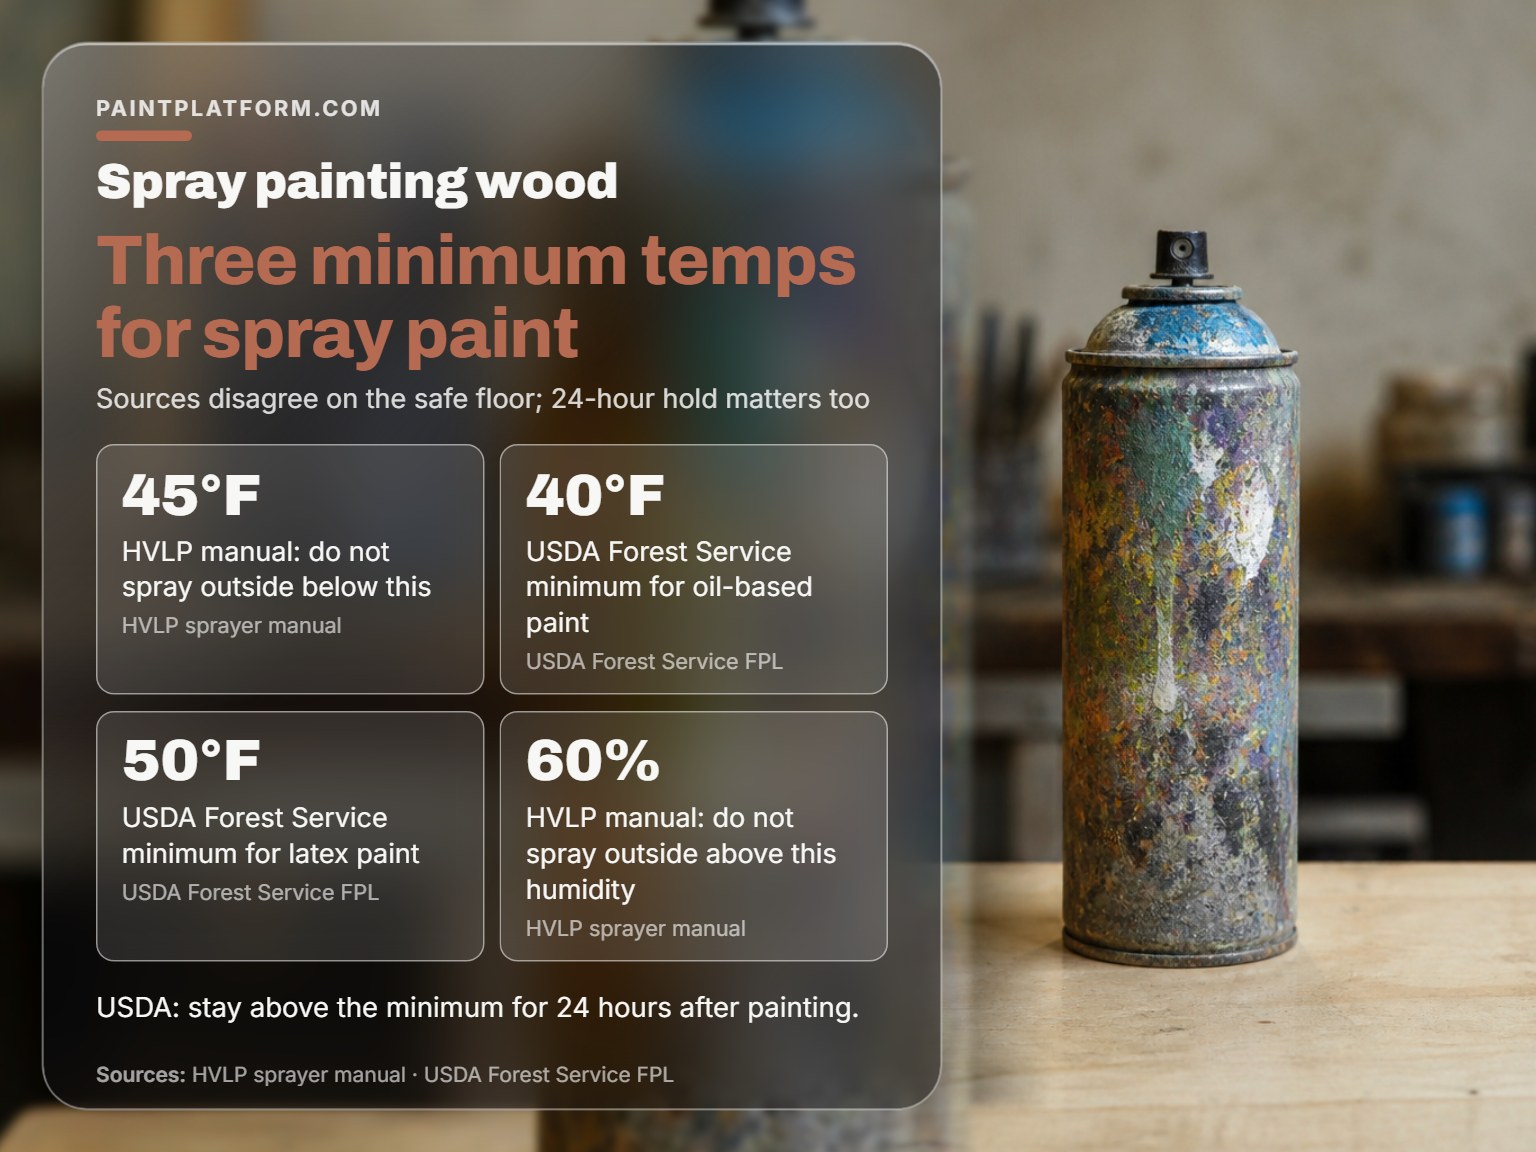
Forty degrees is the lowest number any of these sources will let you spray at, and it comes from the USDA Forest Service and NBS guidance rather than a sprayer manual.
Here’s where they split, and it’s a real split:
- The HVLP Spray Station 3500 manual says don’t spray outside below 45°F or above 90°F, and don’t spray outside at all when humidity is above 60%.
- The USDA Forest Service sets oil-based paint at 40°F minimum and latex at 50°F minimum, and adds a condition the others skip: temperatures must stay above those minimums for 24 hours after painting.
- NBS Letter Circular 810 says not below 50°F, urgent cases 40°F, and never when the temperature is expected to drop about 10°F or well below 50°F.
Three thresholds for the same condition. My read: 50°F is the safe floor for anything water-based, 45°F is the absolute edge, and the 24-hour hold matters as much as the number you start at.
Why humidity breaks a water-based coat
The Forest Service explains the mechanism, and it’s the clearest explanation of this I’ve found. When a water-based paint cures, the water needs to evaporate as fast as or faster than the solvents. In humid air the water can’t leave, the solvents go first, and the paint cures while still water-filled. Their words for the result: you cannot recover from it.
That’s why the HVLP manual treats 60% humidity as a hard stop, while Hempel gives no numeric humidity limit and only advises checking the moisture separator. Hempel doesn’t publish a numeric humidity limit, but it does tell you to check the moisture separator and notes that some paints are humidity sensitive.
For anything that lives outside, choose a spray paint for outdoor wood that suits the wider end of that temperature window, not the narrow one.
Does Wood and Metal Paint Need Thinning?
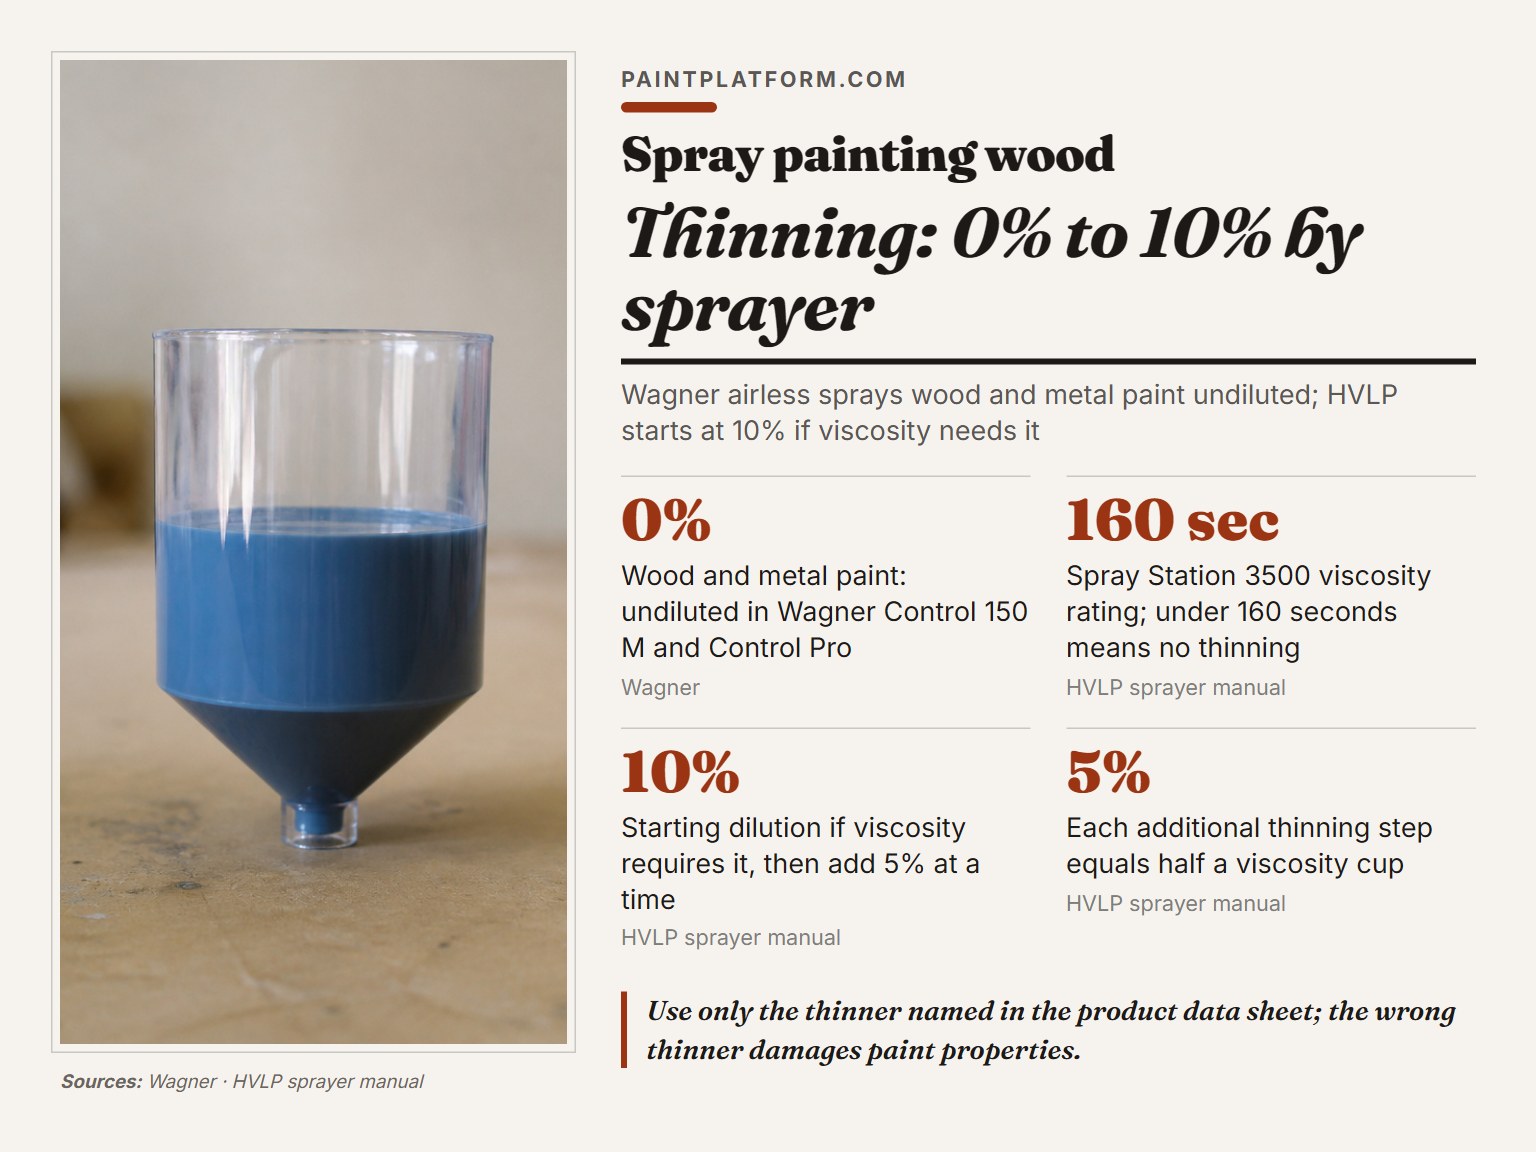
Wagner says wood and metal paint sprays undiluted in the Control 150 M and Control Pro series, while the HVLP manual says to start at a 10% dilution if viscosity requires it; the difference is the machine.
Wagner’s dilution table for the Control 150 M and Control Pro series is specific:
- Wood and metal paints: undiluted
- Solvent- or water-based wood preservatives, stains, oils: undiluted
- Varnishes, primers, car top coats, thick paints: 5-10%
- Interior wall emulsion and latex: 0-10%
The HVLP manual works from a measured number instead of a category. The Spray Station 3500 has a viscosity rating of 160 seconds. Fill the viscosity cup, time how long it takes to empty, and if it drains in under 160 seconds, you don’t thin. If it’s over, start at 10% dilution and add 5% at a time (5% equals half a viscosity cup) until you hit the target. For a gallon batch, four viscosity cups is roughly 10%.
Hempel adds the constraint neither of those mentions: thin only with the thinner named in the product data sheet, because the wrong thinner damages the paint’s properties. It also states that pot life can’t be extended by altering the mix ratio or adding solvent near the end of the pot life.
That last point kills a habit a lot of people have. Thinning to stretch a batch that’s going off doesn’t work.
Thin in 5% steps and re-measure after each one. A batch that’s a touch too thick sprays heavy and still covers. A batch that’s too thin sags on the first pass, and there’s no putting it back.
Thinning paint is like thinning a sauce. You add a splash at a time and check as you go, because you can always add more and you can never take it out.
Wet Wood, Blisters, and the Cedar Wall I Ruined
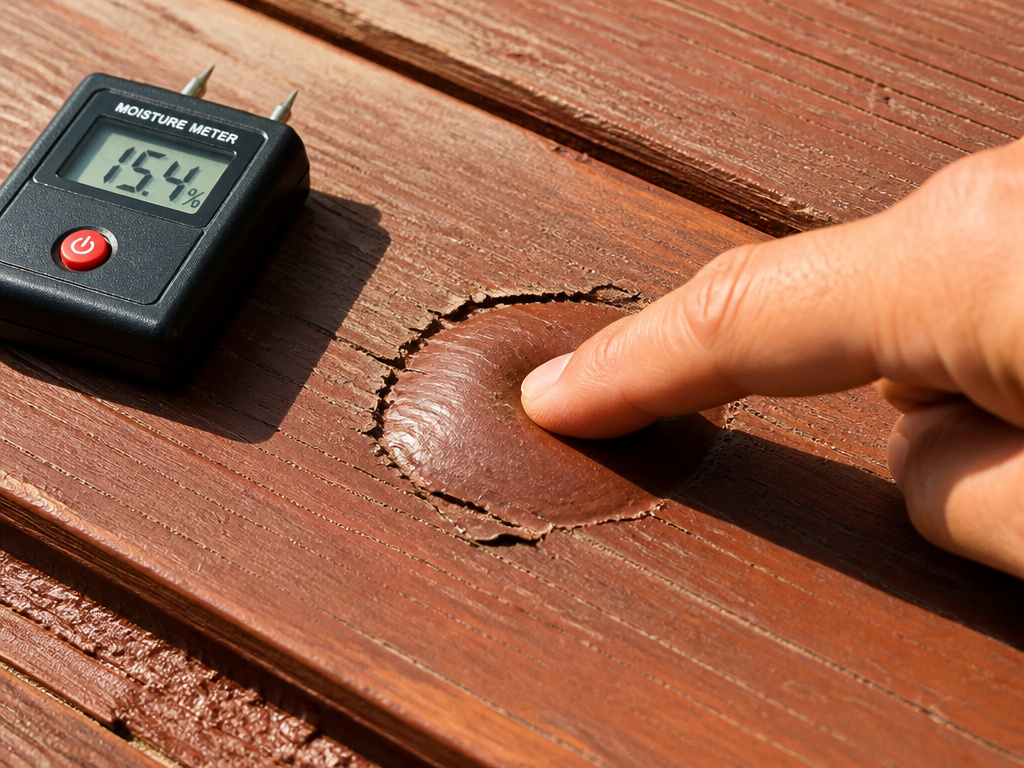
I washed a section of cedar siding, gave it a sunny afternoon to dry, and painted it. Later it had blisters on the surface.
They felt soft under a fingertip and gave slightly when I pressed. That’s the tell. A blister with water behind it doesn’t feel like a paint defect; it feels like a small dome.
Now I wait a full sunny day after washing, and I tape a square of plastic wrap to the wood overnight. If there’s fog under it in the morning, I’m not painting. A cheap pin moisture meter is my other gate before the can opens.
The plastic wrap test
Tape a square of clear plastic tight to the wood, leave it overnight, and check at dawn. Condensation on the underside of the plastic means the wood is still releasing moisture. No fog means you’re clear.
The Forest Service draws a useful line here. If only the surface of the wood is wet, one sunny day is usually enough drying time. If the wood is saturated, you need several sunny or windy days. Those are different problems, and the plastic wrap test tells you which one you have.
Where this goes sideways: Painting over dew or frost. The film skins over with water still underneath, and the blister shows up a week or two later when the sun hits that face of the building. NBS Letter Circular 810 says paint only in clear dry weather with the surface free of dew or frost, and that’s the reason.
If you already have blisters, the Forest Service repair is straightforward: let the paint dry for a few days, scrape the blisters off, smooth the edges with sandpaper, and repaint the area.
Paint or Stain on Rough Cedar?
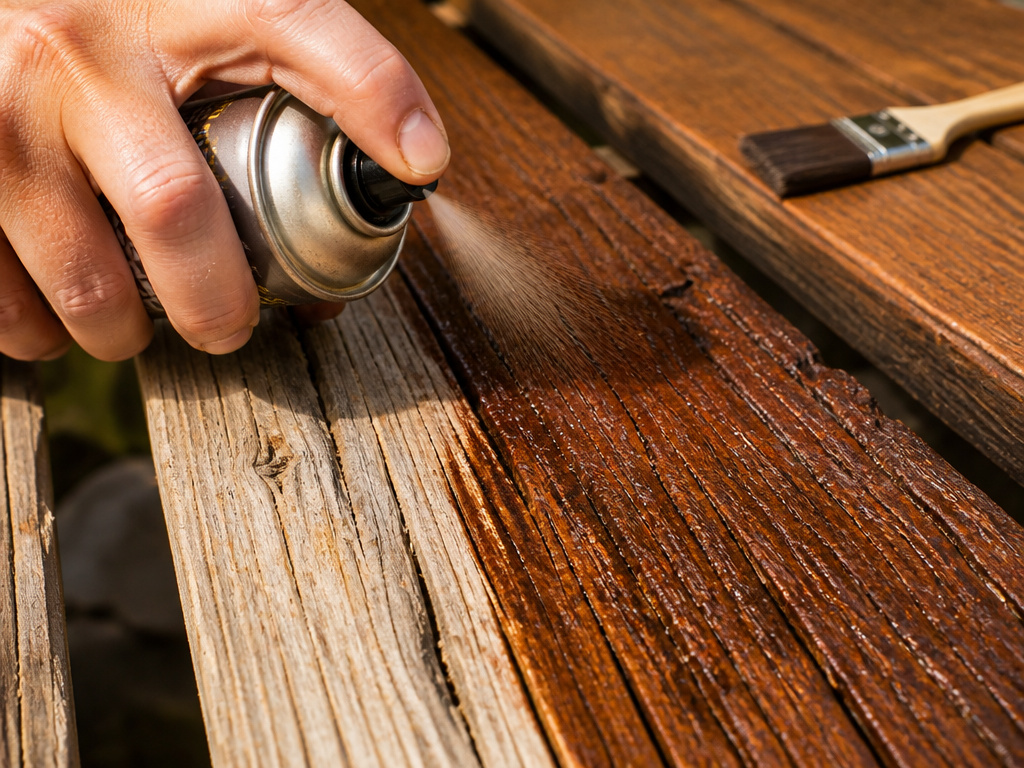
On rough cedar, solid stain beats paint for most people, and it isn’t close.
I’ve done both. Solid stain hid less of the grain than paint did and was far easier to touch up, because there’s no hard edge to start peeling. On log siding I’d pick a penetrating stain most days, with maybe two coats and a brush worked into the checks.
Paint gives you the strongest color and a thicker film. It also fails loudly once it goes on wood. Stain fades quietly, so a recoat every few years is a lot less drama than scraping.
| Coating | Best for | How it fails |
|---|---|---|
| Aerosol spray paint | Furniture, trim, small parts | Peels at hard edges |
| Solid stain | Rough cedar and siding | Fades thin, no peeling |
| Penetrating stain | Log siding, open grain | Fades quietly |
| Latex via HVLP | Large flat panels | Blisters over moisture |
The same logic carries into spray painting furniture. On a dresser or a chair, paint is the right call because you want a film and a color. On a wall of rough cedar, you want something that moves with the wood.
Worth knowing about wood species before you commit. NBS ranks them by how long they hold a coating: cedar, redwood, and cypress at the top; then northern white pine, western white pine, and sugar pine; then Ponderosa pine, spruce, and hemlock; and last Douglas fir, western larch, and southern yellow pine.
Light Coats, Overlap, and the Crisscross
The gun never stops moving while the trigger is down.
Wagner’s guidance is to start spraying before you reach the edge of the object and keep going past it. Stopping the motion while the gun is still pointed at the panel is what builds a heavy spot.
The spray painting technique that fixes streaks on a large flat surface is the crisscross. Spray horizontal strips across the panel, then cross back over them with vertical strips, overlapping slightly each time. Hempel calls this cross-spraying and says it may be necessary for even film thickness and cosmetic smoothness.
A pass, in order:
- Start the pass off the edge of the panel, trigger already down.
- Lock your wrist and move from the shoulder at a constant speed. Wagner specifically warns against moving your wrist, because it changes the distance mid-pass.
- Release the trigger past the far edge, then reverse direction for the next pass with a slight overlap.
- Cross back over the whole panel vertically once the horizontal passes are done.
Spray as thinly as possible to avoid streaks and cut drying time, per Wagner. The HVLP manual is blunter: too much paint in one area leads to sags and drips, and light coats are always better until you build confidence.
Common mistake: Stopping the spray motion mid-pass. The film piles up at that spot in a heartbeat, and by the time you see the sag it’s already too heavy to level out on its own.
When a Coat Goes Wrong: Drips, Blisters, Clogs
Blisters, sags, and dry spray each have one likely cause, and none of them is bad paint.
| Symptom | Likely cause | Fix |
|---|---|---|
| Soft blisters | Moisture under the film | Dry a few days, scrape, sand, repaint |
| Sags and drips | Too much paint in one pass | Let it cure, sand flat, recoat light |
| Gritty dry spray | Overspray landing on wet film | Plan ventilation, mask nearby areas |
| Clogged nozzle | Paint dried in the tip | Store can upside down, clear the tip |
For runs specifically, the honest fix is patience. Let the coat cure harder than feels reasonable, sand the sag flat, and put a light coat back over it. If you’re chasing this a lot, there’s a whole separate approach to avoid paint runs that starts with the first pass rather than the repair.
Two habits that save the most grief:
- Store aerosol cans upside down. Sherwin-Williams recommends it to keep the paint fresh and stop the nozzle drying out.
- Bag the gun during breaks. The HVLP manual says to leave the spray gun in a plastic bag if you’re stepping away, so the paint in the tip doesn’t set.
Cleaning is faster than people expect if you do it right away. The HVLP manual puts an immediate clean at under 5 minutes. Let it sit overnight and you’re soaking parts instead.
A finish coat is worth the extra step. Sherwin-Williams recommends Krylon COLORmaxx Acrylic Crystal Clear as a clear topcoat for a durable, non-yellowing finish on wood projects. If the piece is going to see heat, Krylon High Heat Max is the one they point to, with the caveat that it shouldn’t be used where the surface contacts flame or a direct heat source.
Frequently Asked Questions
Can you spray paint wood without sanding it first?
Only on sound, previously coated wood that just needs a degloss. On bare wood, sanding opens the grain and removes the degraded surface layer, and skipping it is the most common reason a coat peels at the edges within a few weeks. A quick sanding pass takes only a few minutes per piece.
How long should you wait between coats of spray paint?
Sherwin-Williams puts the typical window at 15-30 minutes between light coats. Test an inconspicuous spot with a light touch. If it’s tacky or leaves a fingerprint, the coat is still drying and you should wait longer.
What temperature is too cold to spray paint wood?
One low figure in the manufacturer documents is 45°F, from the HVLP Spray Station 3500 manual. The USDA Forest Service sets 40°F for oil-based paint and 50°F for latex. NBS Letter Circular 810 says not below 50°F, with 40°F only in urgent cases. For water-based paint, treat 50°F as the floor.
Do you need to thin paint before spraying wood?
It depends on the sprayer. Wagner says wood and metal paints spray undiluted in the Control 150 M and Control Pro series. The HVLP manual says to test viscosity first and start at a 10% dilution if the paint drains from the cup in under 160 seconds. Measure before you add anything.
Why did my spray paint blister?
Trapped moisture is the most common cause, per the National Bureau of Standards. It usually means the wood was damp when you painted, or that dew or frost was on the surface. Blisters often show up after the coat goes on, once the sun hits that face.
Should you store spray paint cans upside down?
Yes. Sherwin-Williams recommends storing leftover cans upside down to keep the paint fresh and prevent the nozzle from drying and clogging.
The Bottom Line
If you take one thing from this, take the moisture gate. Tape plastic wrap to the wood overnight before you open the can. Fog under the plastic means you wait, no matter how good the weather looks.
Fair warning: I’m not a professional finisher. I’m a person who has ruined enough wood to have opinions, and the cedar wall taught me more than any tutorial did.
Start with one small piece. A drawer front, a scrap of the same species, a section of trim you can hide if it goes wrong. Sand it, prime it, and spray it at the distance the can label gives you. You’ll learn more from one panel than from a whole afternoon of reading.
And if it blisters anyway, you’ll know exactly which of the four causes it was.
