
How to Spray Paint Small Objects: Step-by-Step
This post contains affiliate links. As an Amazon Associate, we earn from qualifying purchases.
To spray paint small objects, hold the gun or can 6 to 10 inches from the surface, keep it moving at a steady speed, and build the finish from several thin coats instead of one wet one. Overlap each pass by half, keep the gun at 90 degrees to the work, and mask everything you don’t want coated.
The 6-to-10-inch window is where the manuals start disagreeing. Meiji publishes one range, Gepro another, Titan a hard minimum, and Hempel splits its advice by equipment type. On a wall that spread averages out. On a drawer pull, the how to spray paint small objects question doesn’t.
What follows is the order I actually work in: prep and masking, distance and overlap with the disagreement laid out, thin coats, then cleanup. There’s a table of every distance spec I could find, so you can see how far apart the sources really sit.
Key Takeaways
- Mask first, spray second. On a small bracket, masking and cleanup take far longer than the actual spraying.
- Distance is a range, not a rule. Hempel puts pneumatic guns at 8 to 14 inches, Meiji says 150 to 250 mm, and Titan sets 6 inches as a floor.
- Overlap is genuinely contested. Titan says at least 50 percent. Gepro says one third. Both are OEM manuals.
- Thin coats beat one wet pass. A heavy coat skins over while solvent is still trapped underneath, then sags at the bottom edge.
- Clean the gun the same day. Meiji calls for daily cleaning and lubrication; Harbor Freight warns that delayed cleaning permanently clogs the gun.
Why a 6-Inch Shelf Bracket Is Harder to Spray Than a Door
A shelf bracket takes very little actual spraying. Masking it, taping the wall behind it, and cleaning up afterward take far longer.
Recommended spraying distance varies by equipment type and by manufacturer. Hempel specifies 20 to 35 cm (8 to 14 inches) for pneumatic and HVLP guns, and 30 to 45 cm (12 to 15 inches) for airless. Meiji specifies 150 to 250 mm for the FINER-CORE. Titan sets 6 inches as a minimum.
Small objects cram more edges into less area, which is why how to spray paint small objects matters. Every edge is a place where the spray fan wraps around and lands somewhere you didn’t aim. A door forgives that. A bracket shows it.
Then there’s bounce. Hempel’s guideline notes that overspray and spray dust form during application, and it recommends planning ventilation so that dust doesn’t settle back onto the wet surface. On a small part sitting on a bench, the bench is inches away. Whatever misses the bracket lands on the bench and can drift back up.
Handling is the third problem. You need the part held still and held at an angle you can reach. Gepro’s manual is blunt about one version of this: never hold the gun horizontally, because paint or solvent can run down the hose into the blower unit. The same logic applies to the part. Prop it, don’t chase it around the bench with your wrist.
Does Spray Distance Really Matter on Something This Small?
Yes, and more than it does on a wall. Distance controls how much solvent has flashed off before the droplet lands, and on a small part there’s no large flat area to hide the mistake.
Here’s every distance spec from the manuals I pulled:
| Source | Equipment | Distance |
|---|---|---|
| Meiji FINER-CORE | Compressed-air spray gun | 150-250 mm (about 6-10 in) |
| Titan FlexSpray | Handheld turbine | 6 in minimum |
| Gepro Easy Sprayer | Handheld turbine | 15-20 cm (about 6-8 in) |
| Hempel | Pneumatic / HVLP | 20-35 cm (8-14 in) |
| Hempel | Airless | 30-45 cm (12-15 in) |
Five specs, and they don’t agree. That’s not sloppiness on the manufacturers’ part. An airless pump pushes material at a very different rate than a gravity-fed gun, so the distance that lets the film level out is different too.
The mechanism is worth knowing. Too close and the air blast reaches the surface before the paint has spread, so it shoves wet material into ridges. Too far and the solvent flashes off mid-flight, and what lands is a dry, gritty speck instead of a wet film.
Where this goes sideways: Backing the gun away mid-pass to stop a run. The coat stops building in the middle of the stroke and you get a dry, dusty band sitting right next to the wet one.
Titan’s manual has an exception worth stealing. For a very narrow pattern, it says you may need to get closer than 6 inches. That’s the manufacturer contradicting its own minimum, which tells you the number is a starting point rather than a law. If you want the longer version of this, there’s a full breakdown of spray distance that covers cans and guns separately.
One more thing about turbine guns: they spin up before they spray. Titan tells you to pull the trigger partway first so the turbine starts, then pull fully to release material. You hear it as a thin whine that rises before any paint moves. Learn that sound and you’ll stop starting passes with a splat.
Thin Coats, Not One Heroic Wet Pass
One heavy coat is the fastest way to ruin a small object. It looks efficient. It isn’t.
A thick film skins over on the surface while solvent is still trapped underneath. The solvent has to escape somewhere, so it pushes out at the weakest point, which is usually the bottom edge where gravity is already helping. That’s the sag.
Chairs and rattan taught me this the slow way. My first rattan attempt with a brush went gloppy in the weave and took forever to dry. Now I do several thin coats instead of one heavy one, and I rotate the piece between passes so I’m not painting myself into a corner.
A coat that’s too heavy goes glassy and mirror-flat, then sags at the bottom edge a moment later. A coat that’s right stays slightly dull between passes. Dull is what you want.
Why Thin Coats Actually Dry Faster
Solvent leaves a film through the surface, not through the middle. A thin film gives it a short trip out. A thick film gives it a long one, and the top hardens first, sealing the rest in.
That’s also why thin coats let you recoat sooner. You’re not waiting for a slab of paint to cure all the way through. You’re waiting for the surface to stop being tacky.
If you do get a run, don’t panic and don’t wipe it. There’s a whole method for fixing spray paint drips once they’ve set up, and most of it is gentler than people expect. For prevention, the short version is spraying thin coats and keeping the gun moving through the end of the pass.
The Overlap Number the Manuals Fight Over
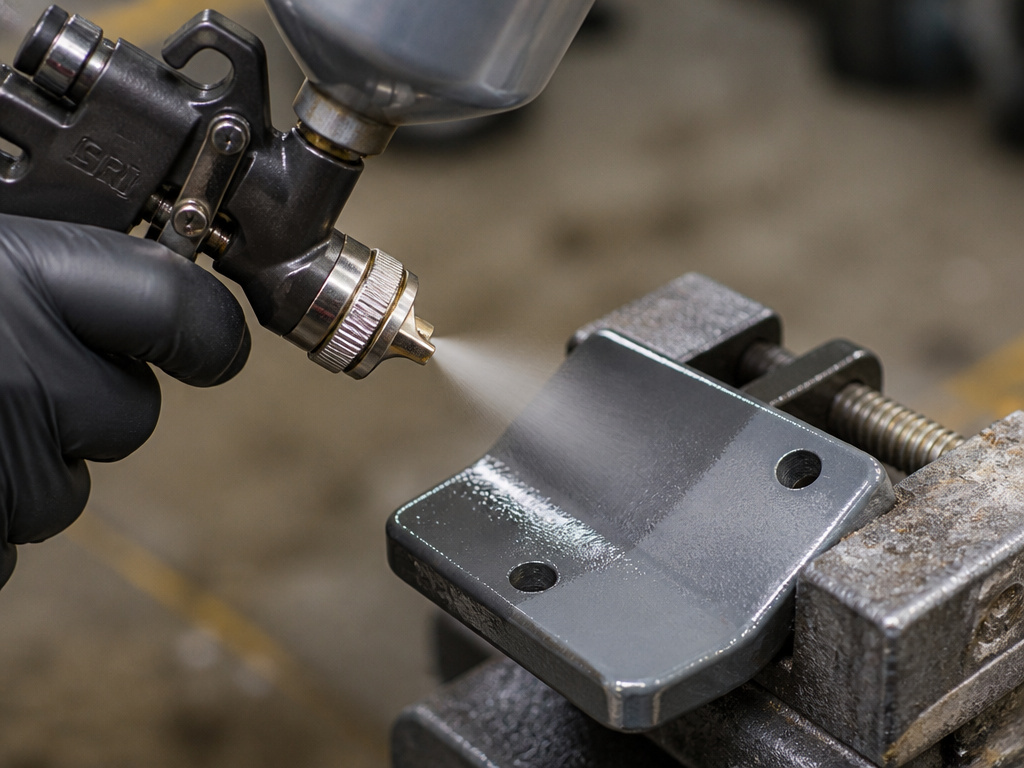
Titan’s manual says overlap each pass by at least 50 percent. Gepro’s manual says overlap by one third. Those are two OEM documents giving two different numbers for the same job.
Both are right for their own equipment, and here’s why the number exists at all. A spray fan isn’t even. The center of the pattern carries the most material and the edges carry less, because the atomizing air thins out toward the boundary. Overlapping is how you average that unevenness into a flat film.
If your fan is wide and soft-edged, a third is plenty. If it’s narrow and hard-edged, half is closer. Match the overlap to what the pattern actually looks like on scrap, not to a number in a manual for a different gun.
Overlap enough that you can’t find the seam afterward. If you can see where one pass ended, you went too narrow.
Hempel adds a caution that matters on small parts. It warns that overlapping areas should be sprayed carefully to avoid excessive film thickness, and it says to avoid overlaps on welding seams. On a bracket with a welded joint, that’s the exact spot where a double pass turns into a run.
There’s more on getting the fan and the speed to cooperate in this guide to spray technique, including how cross-spraying works. Hempel does recommend cross-spraying when you need even film thickness and a cosmetically smooth result, which is a useful trick on flat panels and mostly wasted on a spindle.
Prep Work That Actually Changes the Finish
Prep is where the finish gets decided. The spraying part is short.
Before you start: Solvent vapor and any ignition source are a bad pair. Flush or spray flammable solvents outside, in an area free of flammable vapors, with a class ABC fire extinguisher within reach. Titan flags materials with a flashpoint below 100°F (38°C) as needing extreme caution, and Gepro says never spray near a naked flame or in a confined space.
Here’s the order I run, and it’s the order the manuals describe too:
- Clean and degrease the part first. Gepro’s prep list starts with washing down to remove grease, then sanding, then dusting. Skip the wash and the paint bridges over oil instead of bonding to the surface. For metal parts specifically, there’s a fuller spray paint metal walkthrough that covers primer choice.
- Mask and cover before you mix anything. Harbor Freight’s manual says to mask nearby objects and lay cloths on the floor before spraying. Titan’s masking guide goes further for walls: cover the ceiling no less than 24 inches from the wall-ceiling joint.
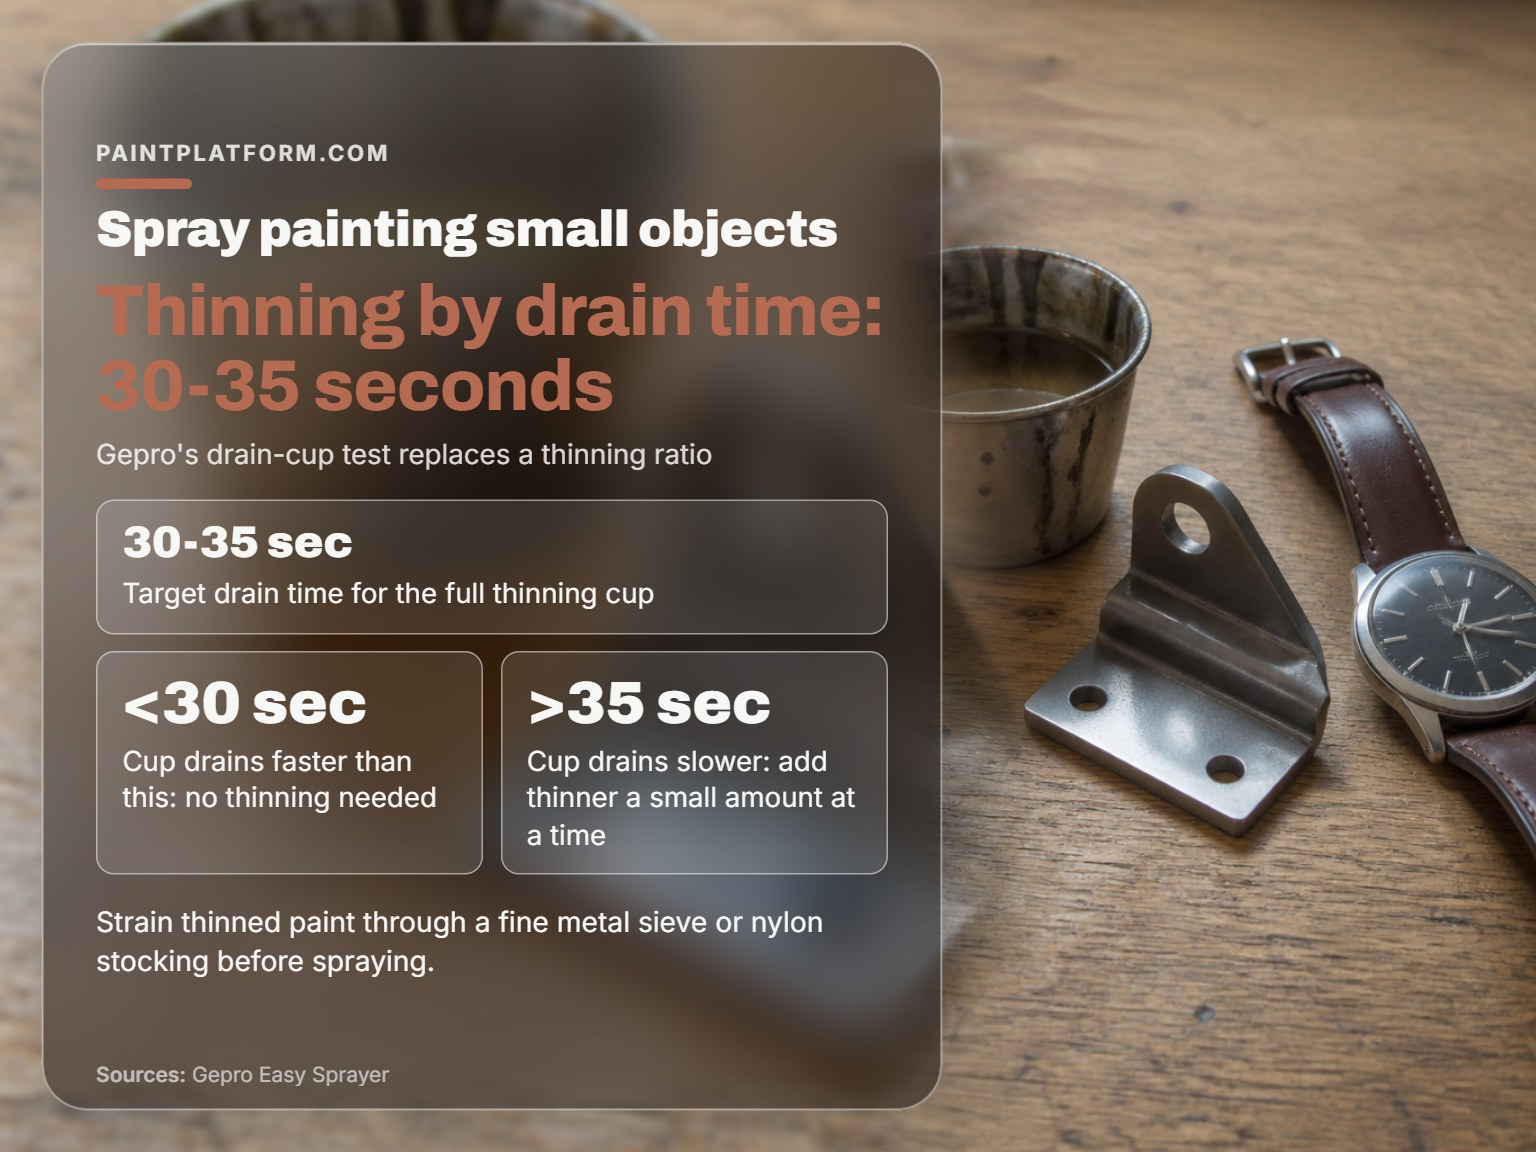
- Thin only if the material needs it. Gepro’s drain-cup test is below. Hempel says use only the thinner named in the product data sheet, because the wrong one changes the paint’s properties.
- Strain the material. Gepro calls for a fine metal sieve or a nylon stocking after thinning. Titan recommends a paint strainer if you have any doubt about purity. Both are removing the same thing: particles big enough to plug a nozzle.
- Fill to the right level. Gepro says fill the container to shoulder level and screw it on tightly. Overfilling a small cup on a small part just means more to spill.
Thinning by Drain Time
Gepro’s manual gives a test instead of a ratio, which is far more useful. Submerge the thinning cup in the paint, lift it clear, and time how long the full cup takes to drain.
30 to 35 seconds is the target. Under 30 seconds and no thinning is needed. Over 35 and you add thinner a small amount at a time, stirring before you re-test.
Harbor Freight’s 59825 manual takes a different route and simply defers to the paint manufacturer’s thinning directions. Neither approach is wrong. Gepro’s is measurable with a cup and a watch, which is why I use it.
Masking, and the Tape-Peel Timing
I’ve pulled tape too late and taken a crusty edge of paint with it. Now I peel while the paint is dry to the touch but not fully cured, pulling at a low angle back over itself.
That timing matters more on small objects because the edge is a bigger share of the total surface. A ragged pull on a door is a footnote. On a 6-inch bracket it’s half the object.
If you’re spraying plastic rather than metal, the masking job changes because adhesion changes. There’s a separate guide to spray paint plastic that covers scuffing and primer, and it’s worth reading before you commit a can to a part you care about.
Cleaning Decides Whether the Gun Survives the Week
A clogged gun is almost never a worn-out gun. It’s a gun that sat overnight with paint in the passage.
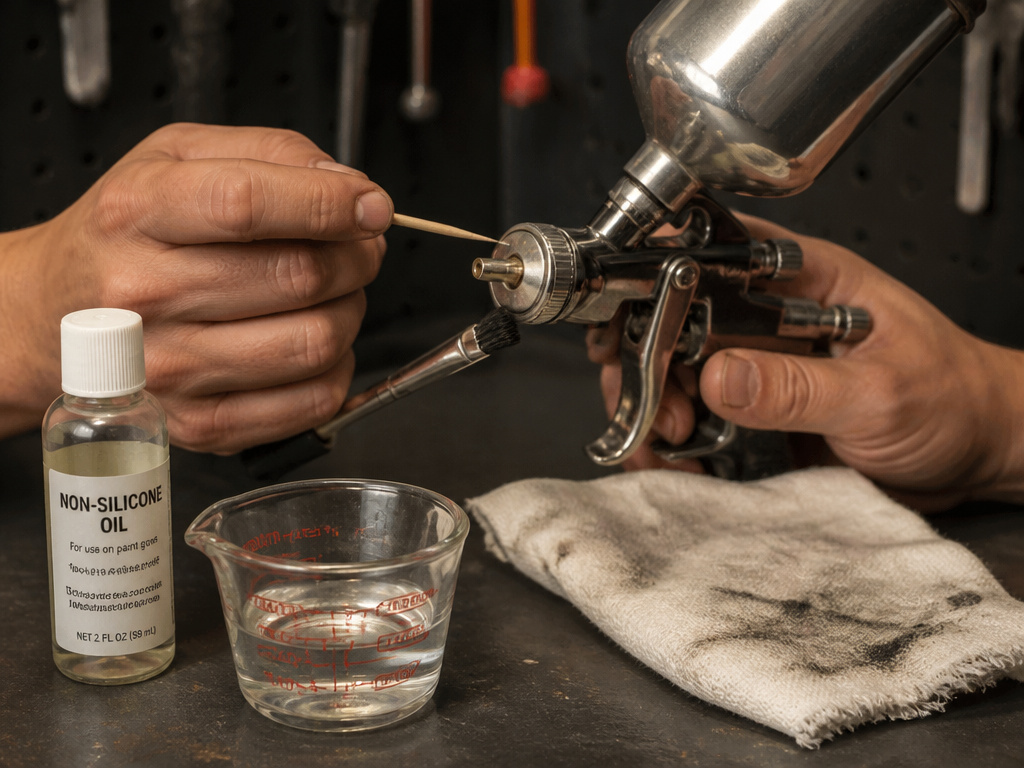
Meiji’s manual is direct about the schedule: clean and lubricate the spray gun every day. Not every project. Every day you use it. It also says to leave the cup empty after cleaning, because solvent left sitting in the gun and cup causes failures on the next job.
Harbor Freight’s post-use procedure is more granular, and it’s a good template:
- Add 1/4 cup of solvent to the liner, refit the lid and collar, and shake for several seconds.
- Open the fluid control knob until four threads are showing before you spray solvent through.
- Flush a full hose length away from the air compressor if you’re using flammable solvent.
- Use brushes and toothpicks on the air cap and fluid nozzle. Never metal objects, and never bend the fluid needle.
- Do not immerse the gun body in solvent or let solvent into the air inlet.
That last one shows up in all three gun manuals. Meiji warns that soaking the whole gun in solvent may cause malfunction. Gepro says never immerse the gun or blower unit in cleaning agent. Titan says do not submerge the turbine. Three manufacturers, one answer.
Easy to miss: Water left inside the gun after a water-based cleanup. Meiji specifically says to eliminate residual water because it causes the equipment to rust. A gun that gets put away damp will fight you.
Lubrication is the one place the manuals genuinely split. Meiji prescribes a small quantity of non-silicone oil on the sliding part of the needle valve and air valve, applied from the outside, while Harbor Freight’s 59825 manual says do not use any kind of lubricant in the air supply or air inlet. Follow whichever manual belongs to the gun in your hand.
One material rule worth flagging because it gets repeated as universal advice: Harbor Freight’s 59825 manual states plainly that you should not use latex paint in that gun. Titan’s FlexSpray manual lists water-based coatings as suitable. The latex limit belongs to the tool, not to spray painting as a whole.
Solvent, Skin, and the Oil Trick
For water-based paint on skin, warm water and plain soap work if you get to it before it dries. For dried flecks, a few minutes soaking in warm water lets them roll off on their own.
Spray paint on skin is a different animal. I rub in a little cooking oil or baby oil first to loosen it, then wash with dish soap. Same trick works for oil paint in hair.
Should You Spray Small Objects at All?
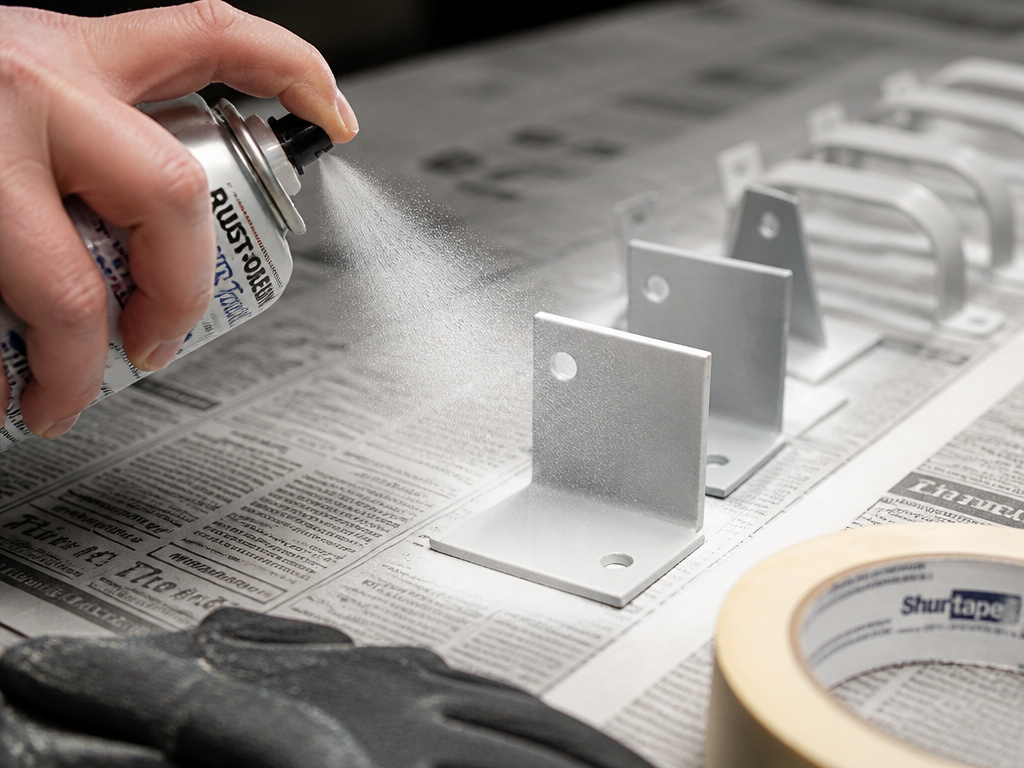
Sometimes the honest answer is no. Hempel’s own guideline says spray application is preferred on large regular surfaces, and that it’s often necessary to combine spraying with a brush on smaller areas where spraying won’t give a good result.
That’s a coatings manufacturer telling you to put the gun down. Take it seriously.
Where spraying wins on small objects: multiples. Twenty brackets, a set of drawer pulls, a batch of ornaments. Setup cost is fixed, so it amortizes across the batch. For a single part, a can and a bit of patience usually beats dragging out a compressor.
| Setup | Best for | Watch out for |
|---|---|---|
| Aerosol can | One-off parts, touch-ups | No real pattern control; heavy passes sag |
| Handheld turbine (Titan FlexSpray) | Trim, small furniture, indoor panels | Turbine can’t be submerged or rinsed |
| Compressed-air gun (Meiji FINER-CORE) | Repeat work, adjustable fan and volume | Needs a compressor, moisture trap, daily oil |
| Airless | Larger flat runs | More volume than a small part needs |
For most one-off small jobs, an aerosol can is the sane choice. No cleanup, no compressor, no moisture trap to drain. If you’re spraying more than a couple of pieces a month, a handheld unit like the Titan FlexSpray starts earning its shelf space, and the small paint sprayer comparison covers the rest of that field.
On plastic parts specifically, a can formulated to bond to plastic rather than sit on top of it is the one I reach for. If you’re stocking up, this rundown of aerosol spray paint covers which cans behave well on small surfaces.
And if overspray drifting onto the bench is your recurring problem, the fix is mostly masking and air movement. There’s a longer piece on how to avoid overspray that covers the setup side.
Frequently Asked Questions
How far should I hold the spray gun from a small object?
It depends on the equipment, and the manuals don’t agree. Meiji says 150 to 250 mm for the FINER-CORE. Gepro says 15 to 20 cm. Titan sets 6 inches as a minimum. Hempel splits pneumatic guns at 8 to 14 inches and airless at 12 to 15 inches. Start at the top of your own manual’s range and work closer only if the finish looks dry.
Do I need to thin paint before spraying small parts?
Not always. Gepro’s drain-cup test settles it: if the full cup drains in under 30 seconds, no thinning is needed. If it takes longer than 35 seconds, add thinner a little at a time. Hempel’s guidance is to use only the thinner named in the product data sheet.
Can I use a regular spray can instead of a spray gun?
For a single small part, yes, and it’s usually the better call. Cans have no cleanup and no compressor to set up. What you give up is pattern control and the ability to dial volume down for tight work. For a batch of parts, a gun wins on consistency.
Why does my spray finish look gritty?
Two likely causes. Either the gun is too far from the surface, so solvent flashes off before the droplet lands, or dust and overspray are settling back onto the wet film. Hempel recommends planning ventilation specifically to keep spray dust off the surface. Straining the paint first removes the third cause.
How long should I wait between coats?
Until the surface is dry to the touch and no longer tacky. That’s a feel test, not a clock, and it varies with the material and the room. Rushing it traps solvent under the next coat, which is how you get a sag two layers deep.
The Bottom Line
Here’s the trigger I use. If the object fits in one hand and has more than a couple of inside corners, I brush it and save the gun for the batch. Hempel’s guideline backs that up: spray the large regular surfaces, brush the small awkward ones.
The distance question has no single answer, and anyone who gives you one number for every gun is guessing. Meiji, Titan, Gepro, and Hempel each publish a different window because each is describing different equipment. Test on scrap cardboard at the top of your manual’s range, then move closer in small steps until the finish stops looking dry.
Fair warning: the masking will take longer than the spraying. That ratio is normal, and it’s the price of a clean edge.
So that’s how to spray paint small objects without wrecking them. Thin coats, a distance you tested yourself, overlap you can’t see, and a gun cleaned the same day. Let it be messy first.
