
How to Rag Roll a Wall: Subtle Glaze, Step by Step
This post contains affiliate links. As an Amazon Associate, we earn from qualifying purchases.
To rag roll a wall, apply a thin, even coat of glaze over a dry base coat, then press and lift a bunched rag across the surface in overlapping passes before the glaze sets. The rag removes glaze rather than adding it, which is what creates the soft, mottled look.
A bunched rag holds a shallow reserve of glaze and lifts the rest. The pressure of your hand decides how much comes back off, so a light drag leaves a soft veil and a hard press pulls the base coat nearly bare. That pressure range is the whole how to rag roll a wall technique.
What follows is the order I’d actually work in: what to buy, how to prep so the glaze grabs evenly, how to lay the base coat, and where the rag goes on the wall. I’ll also cover the tool rules that keep a powered roller alive, because a jammed pump halfway along a wall is its own kind of bad afternoon.
Key Takeaways
- Two tones, not five. A base coat plus one glaze reads as depth; a third color usually reads as a mistake.
- Test on a board first. Rag pressure is a feel thing, and a wall is an expensive place to learn it.
- Thin glaze, small sections. Heavy glaze turns the finish blotchy and never quite evens out.
- Glaze sets fast. Work in patches you can finish before the surface goes tacky under your hand.
- Clean by paint type. Latex gets hot soapy water; oil-based gets mineral spirits.
What Rag Rolling Actually Does to a Wall
Rag rolling takes glaze off a wall instead of putting more on. A base coat goes down and dries. A translucent glaze goes over the top, and a bunched cloth lifts patches of that glaze before it sets.
Rag rolling is a subtractive glaze technique. A base coat dries fully, a translucent glaze goes over the top, and a bunched cloth lifts glaze in irregular patches before curing. Lifted areas read lighter, retained areas read darker, and the wall gains depth without a printed pattern.
Lifted patches let more of the base coat show through, so they read lighter. Retained patches read darker. The wall ends up with soft variation that shifts as you walk past it, which is the effect most people are chasing with a faux finish.
Here’s where I’ve landed after years of looking at this stuff. Faux finishes look dated when they’re loud. A wall with five glaze colors fighting each other reads like a rental from 2004. Two tones, kept subtle, look like good paint that happens to have depth.
You’ll see the glaze go from a wet sheen to a dull, matte film as it sets. That shift is your clock. Once the film goes matte, the rag stops lifting and starts smearing.
What You Need Before the First Rag Touches the Wall
Two rags and one glaze. That’s the short list, and everything past it is comfort.
- A lint-free cotton rag, cut into hand-sized squares. Old T-shirts work. Terry cloth doesn’t, because the loops stamp a texture you didn’t ask for.
- One glaze a shade darker or lighter than the base. Choose a glaze that stays workable long enough to finish a section without rushing.
- A base coat in flat or eggshell. Gloss underneath fights the glaze and shows every lap mark.
- Painter’s tape, drop cloths, and a damp cloth for dust.
- A scrap of drywall or a spare board for testing.
The Rag Itself
Bunch the rag loosely. A tight, twisted rag leaves hard-edged shapes that read as flowers, and flowers are not what you want on a dining room wall.
Keep two rags going. One does the work. The other stays dry for the moments when the first one gets loaded and starts pushing glaze around instead of lifting it.
The Glaze
Glaze is a translucent medium, so it lets the base coat show through instead of covering it. That’s the entire reason the technique works.
If your paint store only sells tintable glaze base, ask them to tint it to your color. Thinned paint is a different animal. It dries too fast to move around, and you’ll be fighting it the whole way across the wall.
Pick one glaze color. A limited palette teaches you more than a shelf of options, and it’s the same argument I make about paint sets. Treat the glaze like seasoning a soup: add a little, look at it, add more. Dump the whole jar in and you’re stuck with what you’ve got.
Easy to miss: A brand-new cotton rag sheds lint into wet glaze. Wash and dry new rags once before they touch a wall.
How Do You Prep a Wall So the Glaze Doesn’t Blotch?
Most blotchy rag jobs were decided before the first rag came out of the bag. Glaze is unforgiving about what’s underneath it.
Before you start: Glaze and mineral spirits both put fumes in the room, so open a window and run a fan. Mineral spirits is flammable, so keep it away from pilot lights and water heaters. Rags with oil-based product on them should be spread flat outdoors to dry before they go in the bin.
Work through this in order:
- Wash the wall and let it dry completely. Glaze grabs dust and leaves a visible halo around every speck. Skipping this shows up as pale freckles across the whole finish.
- Patch holes and sand the patches flush. Glaze is translucent, so every ridge and dimple telegraphs through it.
- Prime bare patches. Fresh joint compound soaks up glaze at a different rate than painted wall. That difference reads as a dull patch you can’t fix later.
- Tape the trim, outlets, and ceiling line. Glaze creeps under a loose tape edge and dries there.
- Let the base coat cure longer than you think. A base coat that’s still soft will lift under the rag, and the lifted spot never blends back in.
Step 5 is the one people skip. I’ve never seen a blotchy job that started with a properly cured base coat.
The Base Coat: Where a Powered Roller Earns Its Keep
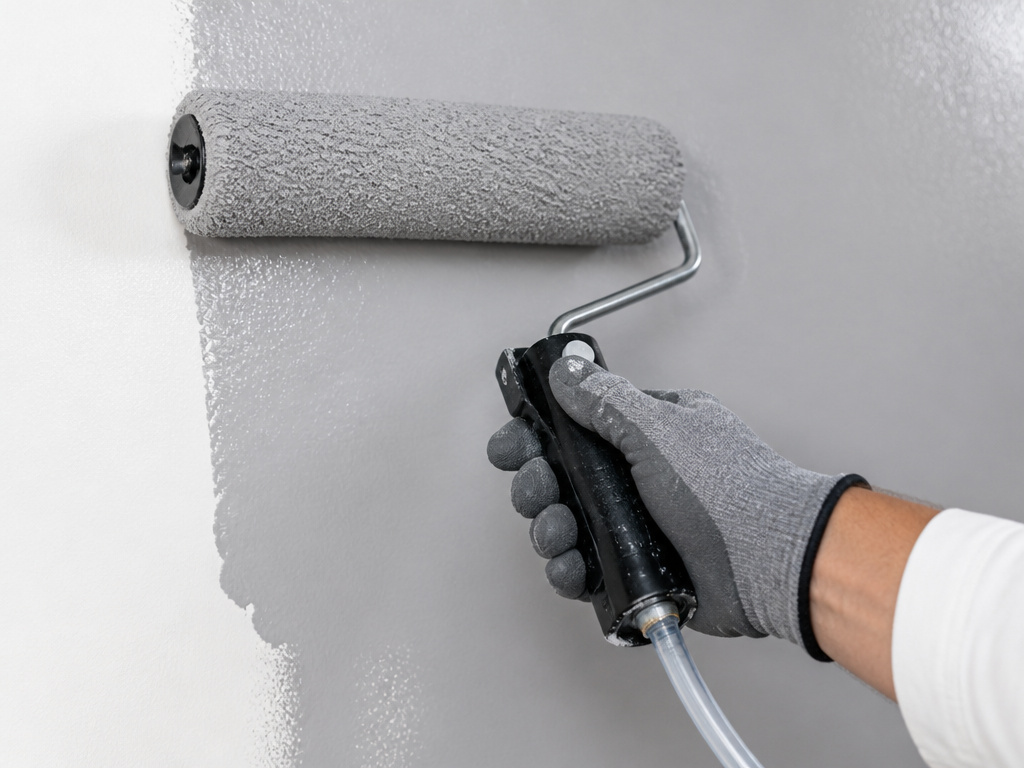
8 to 20 fluid ounces per minute. That’s the Wagner SideKick‘s flow rate, and it changes with how thick your paint is.
The SideKick runs a 9-inch roller assembly with a 3/8-inch nap cover, which is the right nap for smooth drywall. It also draws paint directly from the container, so you’re not decanting paint into a hopper first. The full spec is in the Wagner SideKick owner’s manual.
Same brand makes a second powered roller with a different loading motion: the EZ-Roller manual describes a manual plunger pulled to fill the tube, while the SideKick manual describes a press-and-release handle button that runs the pump. Worth knowing before you buy either one:
| Feature | Wagner EZ-Roller | Wagner SideKick |
|---|---|---|
| How it loads | Manual plunger pulled to fill the tube | Press-and-release handle button runs the pump |
| Power | None | Powered pump motor |
| Roller | 3/8-inch or 3/4-inch nap cover | 9-inch assembly, 3/8-inch nap cover |
| Container | Fill tube clips to the paint container | Any 1-gallon or 5-gallon container |
| Best for | Small rooms, no outlet nearby | Long walls, continuous feed |
I keep the SideKick for long walls and reach for a plain roller for anything smaller than a closet. Setting up a pump to paint eight feet of wall is more work than the wall.
One warning that matters here. A powered roller feeds paint at a rate that depends on thickness, so a heavy texture product is a different job entirely. Roll the base coat with power. Do the glaze by hand.
How to Rag Roll a Wall, Step by Step
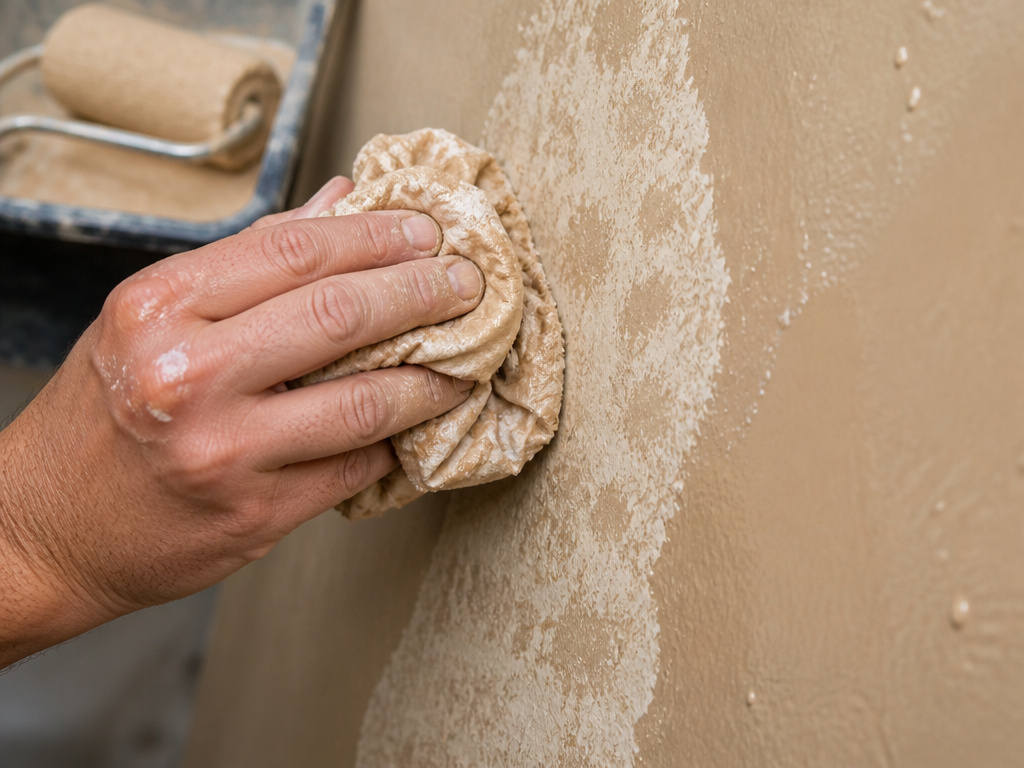
Three moves, in this order: lay it on, lift it off, soften the edge.
The first wall I ever rag rolled, I loaded the rag like I was washing a car. The glaze went down heavy, the rag dumped it back in puddles, and I spent an hour chasing streaks with a dry cloth. What fixed it was a thinner first coat and a rag with most of the glaze pressed back out of it.
I won’t rag roll a wall I haven’t painted a board for. The first three passes on a new surface always lie to you about pressure, and a board is where you find that out.
- Roll or brush a thin glaze coat over a section you can finish before it sets. Work top to bottom so drips land on unfinished wall.
- Press the bunched rag onto the wet glaze and lift straight up. Don’t drag sideways on the first pass, because dragging smears instead of lifting.
- Move to the next patch and overlap the last one slightly. Overlapping while the glaze is still open keeps the seams from showing.
- Step back every few passes and look at the wall from across the room. Up close, everything looks blotchy.
- Soften any hard edge with a nearly dry rag before it sets.
A rag that’s loaded with glaze feels heavy and cool in your hand. When it starts to feel light and dry, it’s done lifting and needs a fresh corner.
The First Pass
The first pass takes off more glaze than you think it should. Let it be messy first. You can always add a second, lighter pass over the top, and a second pass over a too-heavy first pass never looks right.
The Second Pass
The second pass is where the finish gets its softness. Use a cleaner rag, barely kiss the surface, and work the gaps the first pass left behind.
A strie finish drags glaze in one direction for a striped look. Rag rolling pushes it in every direction at once, which is why the two finishes read so differently even though the materials are identical.
Why Does My Rag Rolling Look Blotchy?
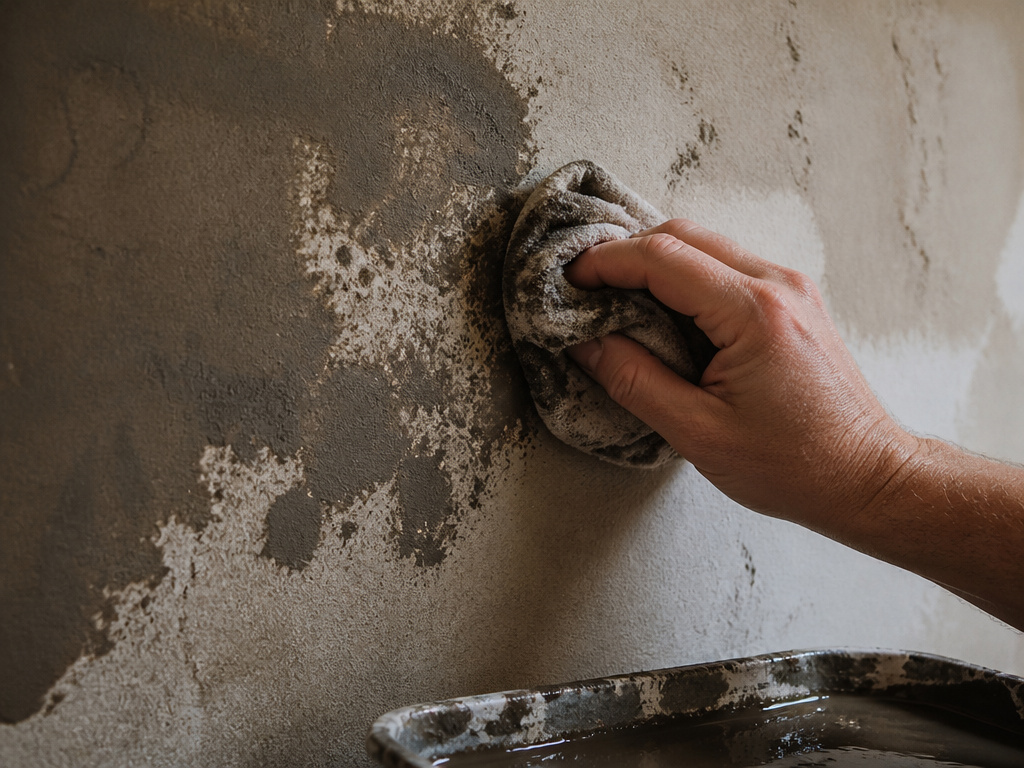
You step back from the wall and it looks like a weather map. Dark islands, pale gaps, and one corner that’s clearly a different job.
Almost every time, the cause is glaze volume. Too much on the rag, too much on the wall, or both.
| What you see | Likely cause | Fix |
|---|---|---|
| Dark, heavy patches | Too much glaze on the rag | Wipe with a clean dry rag while wet |
| Pale gaps with hard edges | Rag too dry, or glaze already tacky | Rewet the section and blend |
| Visible seams between sections | Sections worked too large | Cut sections smaller, overlap wet edges |
| Dull, flat patches | Unprimed drywall soaking glaze | Prime bare spots and recoat |
| Rag texture stamped in | Terry cloth or a tight, twisted rag | Switch to loose-bunched cotton |
Where this goes sideways: Loading the rag by dipping it straight into the glaze tray. The rag picks up a puddle, the first press dumps it, and you spend ten minutes lifting glaze you just added twice.
In my experience the fix is almost always less glaze, not more technique. The wall that looks wrong usually has too much product on it, not too little.
Cleanup and Break Periods: The Rules That Keep the Tool Alive
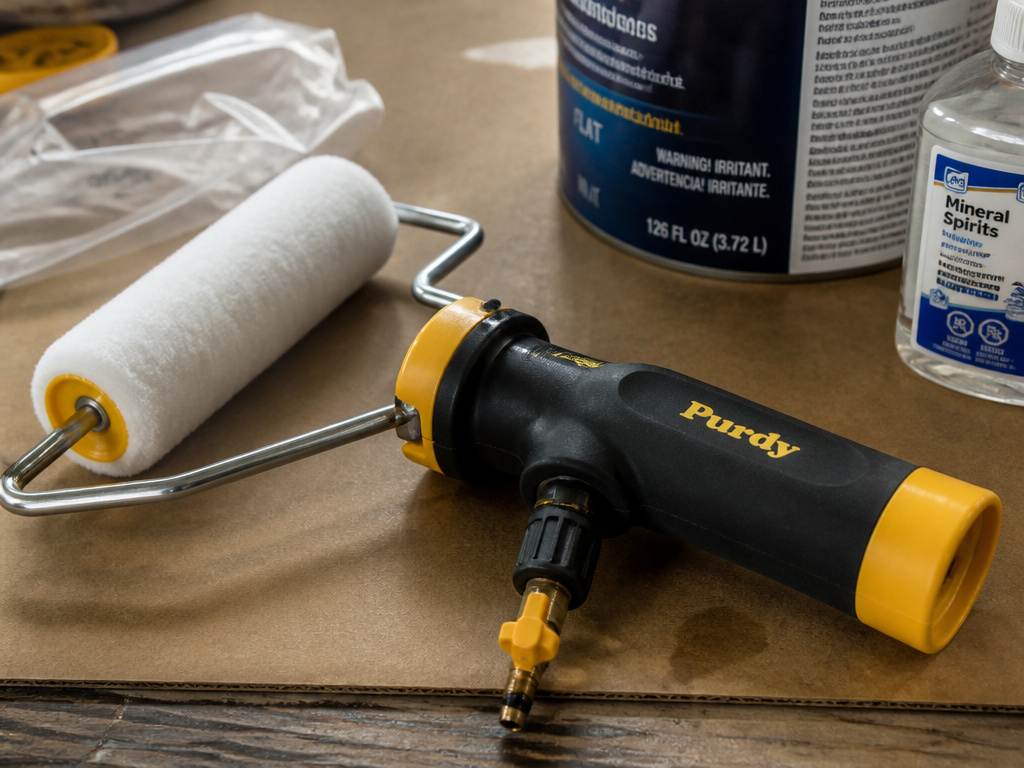
The EZ-Roller’s fill valve points down when it’s stored, and the unit must never be stored with the fill tube inserted into the fill valve. That’s straight from the EZ-Roller owner’s manual, and it’s the difference between a tool that works next spring and one that doesn’t.
Break-period rules for the SideKick, all from the manual:
- Lay the handle assembly flat with the roller resting on clean cardboard or on top of the container.
- Don’t leave the roller saturated with paint, because it drips and accumulates.
- Keep the roller out of direct sun and away from heat.
- Any break longer than 1/2 hour means wrapping the roller in a plastic bag, away from heat sources.
Cleaning splits by paint type. Latex gets hot soapy water. Oil-based gets mineral spirits. Some oil-based paints need cleaners stronger than mineral spirits, and the EZ-Roller manual says those must not be used with the unit.
Here’s where the two manuals disagree, and it’s worth knowing which one you’re holding. The EZ-Roller manual gives a qualitative rule about cleaner strength. The SideKick manual sets a hard number: nothing with a flash point below 100 °F (38 °C). If you’re running the SideKick, the number wins.
A powered roller is the wrong tool for texture paint, which is thick enough to change how the pump feeds. Roll the base coat with power and do the texture by hand.
Rag Rolling vs Color Washing vs Sponge Painting
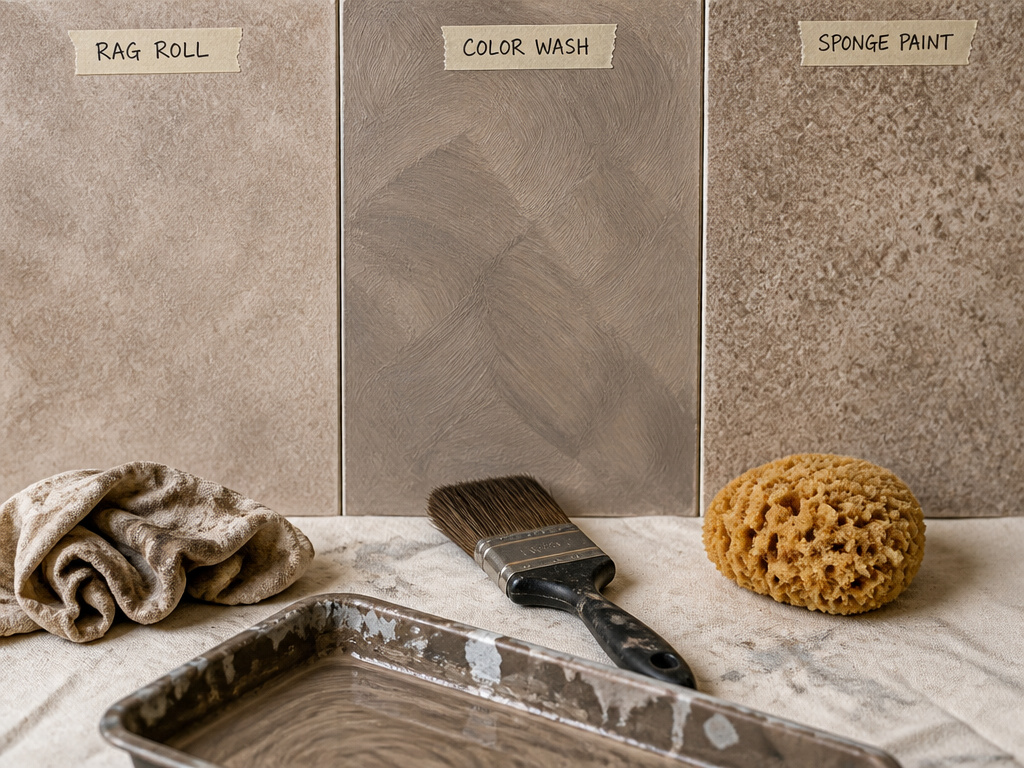
Ever wonder why three techniques that all start with glaze look so different on the wall?
All three go base coat, glaze, then a tool that disturbs the glaze before it sets. The tool is the whole difference.
- Rag rolling lifts glaze with cloth. Softest and most organic of the three. Best for a subtle two-tone in a bedroom or dining room.
- Color washing brushes glaze on in loose, overlapping strokes. More visible movement, and more forgiving on imperfect walls.
- Sponge painting presses a sea sponge into the glaze. Reads as texture, and it’s the easiest of the three to overdo.
If you want one answer: color washing is the most forgiving first project, and rag rolling is the better finish once you’ve got the feel. Sponge painting is the one I’d leave for a hallway nobody looks at closely.
If you want more movement than a rag gives you, dry brushing builds texture with a nearly dry brush. Different tool, different look, same instinct: thin layers, built up slowly.
Test on a board before you test on a wall. A board costs you one scrap of drywall. A wall costs you a whole repaint.
Frequently Asked Questions
Do I have to use glaze, or can I thin regular paint?
Thinned paint dries faster than glaze, which shrinks your working window and makes seams harder to blend. Glaze stays open long enough to move around. If you’re set on thinned paint, test it on a board first and expect to work in smaller sections.
How long should the base coat dry before I rag roll?
Longer than the recoat time on the can. The base coat needs to be fully cured, not just dry to the touch. A soft base coat lifts under the rag, and the lifted spot won’t blend back in once the glaze sets.
Can I rag roll over wallpaper?
Only if the wallpaper is fully adhered with no lifting edges or bubbles. Glaze is wet enough to soften old adhesive, and a loose seam will curl the moment the rag drags across it. Test a corner before committing to a whole wall.
What’s the difference between rag rolling and rag painting?
Rag rolling lifts glaze off a surface that already has it. Rag painting adds glaze by dabbing a loaded rag onto the wall. Rolling gives you a softer, more even finish. Painting gives you more visible texture, and it’s harder to correct once it’s on.
How do I fix a section that came out too dark?
Second pass with a nearly dry rag lifts some of the excess while the glaze is still open. Once it’s cured, your options narrow to repainting that section and blending the edges into the surrounding finish. Which is why the board test matters.
The Bottom Line
Here’s the threshold I’d give anyone: if the wall already has more than one strong color on it, pick a glaze close to the base rather than a contrasting one. Contrast on a busy wall reads as damage, not depth.
This week, tape a scrap of drywall to the wall you’re planning to glaze and do three passes on it. You’ll learn more about pressure from that scrap than from any description of how to rag roll a wall, including this one.
None of it helps if the base coat is still soft. Wait it out.
I’d rather see a plain painted wall than a finish someone abandoned halfway. Ugly page, good page.
