
How to Paint Interior Walls for Beginners: Step-by-Step
This post contains affiliate links. As an Amazon Associate, we earn from qualifying purchases.
To paint interior walls for beginners, work in this order: prep and prime the surface, cut in a 2-3 inch strip along the ceiling with an angled brush, then roll in overlapping W passes while that edge is still wet. Two coats, 2-4 hours apart, with dry time read off the can.
Wet edge is the load-bearing idea in that list. A paint film starts to set quickly, and a roller dragged back across a half-set stripe lifts it into a lap mark you’ll spot in raking light. So the cut-in strip and the first roller pass happen back to back.
What follows is the order I’d use in a real room: tool and nap choices, the paint math, the prep that eats more than half the job, and the spots where the manufacturers genuinely disagree about sequence.
Key Takeaways
- Prep and prime before anything else. Seattle’s Green Home Remodel guide puts well over half the total time of a paint job on prep.
- Cut in 2-3 inches, then roll immediately. Sherwin-Williams wants the roller on the wall while the edge paint is still wet.
- Match the nap to the finish. 3/8 inch for most walls, 1/4 inch for gloss, 1/2 or 3/4 inch for texture.
- Buy paint by math. Divide wall square footage by 350, then double it for two coats.
- Spot-prime every patch, even when the can suggests fewer coats are needed. Skipped primer flashes dull through the finish.
Where Beginners Go Wrong on Interior Walls
The paint usually takes the blame for a wall that was never ready, which is the core of how to paint interior walls for beginners. A dent, a ridge of old patch, a smear of kitchen grease: none of those get fixed by a better can of paint. I hold a work light flat against the wall before I open anything. Raking light turns every flaw into a shadow you can’t unsee, which is the point.
Interior wall paint bonds mechanically to the surface beneath. Dust, grease, and sanding powder sit between the film and the drywall, so adhesion drops wherever cleaning got skipped. Two top coats are the minimum for full hide and color development, and cure time comes from the product data sheet rather than the recoat window on the label.
That’s why prep gets the biggest share of the clock. The City of Seattle paint guide states that well over half the total time spent on a paint job should go to the prep stage. Sanding, patching, and cleaning are the job. Rolling is the reward at the end.
Here’s what a wall tells you before you paint:
- Chalky dust on a fingertip after a wipe means sanding residue, and residue sits between the film and the drywall.
- A patch that dries shinier than the wall around it needs primer. Full stop.
- Grease near a stove or a light switch needs more soap in the water, then a clear rinse.
- Mildew, which looks like a spray of dark freckles, comes off completely or the new coat fails over it.
The full sequence is covered in this guide to wall prep, but the short version is clean, patch, sand, prime, then paint.
Which Roller Nap and Brush Match Your Wall?
Which nap belongs on your wall? It comes down to the finish and the texture, and the wrong choice shows up as stipple you can feel with a fingertip.
| Surface or Finish | Nap Depth | Why It Fits |
|---|---|---|
| Gloss and semi-gloss | 1/4 inch | Short pile leaves the least stipple |
| Most wall finishes | 3/8 inch | Benjamin Moore’s default sleeve |
| Rough or textured walls | 1/2 or 3/4 inch | Deep pile reaches into the texture |
Benjamin Moore‘s interior wall guide is the source for those three numbers, and the logic holds: the rougher the wall, the deeper the pile needs to reach.
Brushes are simpler. An angled sash brush handles cut-in work, and Seattle’s guide splits bristles by paint type: synthetic for latex and acrylic, natural for oil-based. For water-based paint, wet the brush about half an hour before you start. It increases workability.
The part nobody mentions: A roller sleeve can shed loose fibers into the first coat. Benjamin Moore says wash and dry the sleeve before it touches paint, and skipping that step means picking fuzz off a wet wall.
One genuine split in the sources: Benjamin Moore says wash and dry sleeves, while Seattle’s wetting tip applies to brushes, not rollers. Follow the sleeve instruction for sleeves and the brush instruction for brushes.
How Much Paint Does the Room Actually Need?
A gallon covers 300 to 350 square feet on an average wall, per Dunn-Edwards’ how-to-paint guide, and that figure does most of the work. The rest is arithmetic you can do on a phone.
- Measure each wall and multiply. Length times height, then times the number of walls sharing those dimensions. If wall heights differ, measure at the highest point.
- Add the walls, then subtract openings. Dunn-Edwards counts a door at about 21 square feet and a window at about 15.
- Divide the total by 350. That’s the top of the spread-rate range.
- Multiply by two for coats. The answer is gallons for two full coats.
Porous and textured surfaces drink more paint than smooth drywall, so round up on a textured wall. Buying a little extra beats a mid-wall trip to the store.
Prep Eats More Than Half the Job
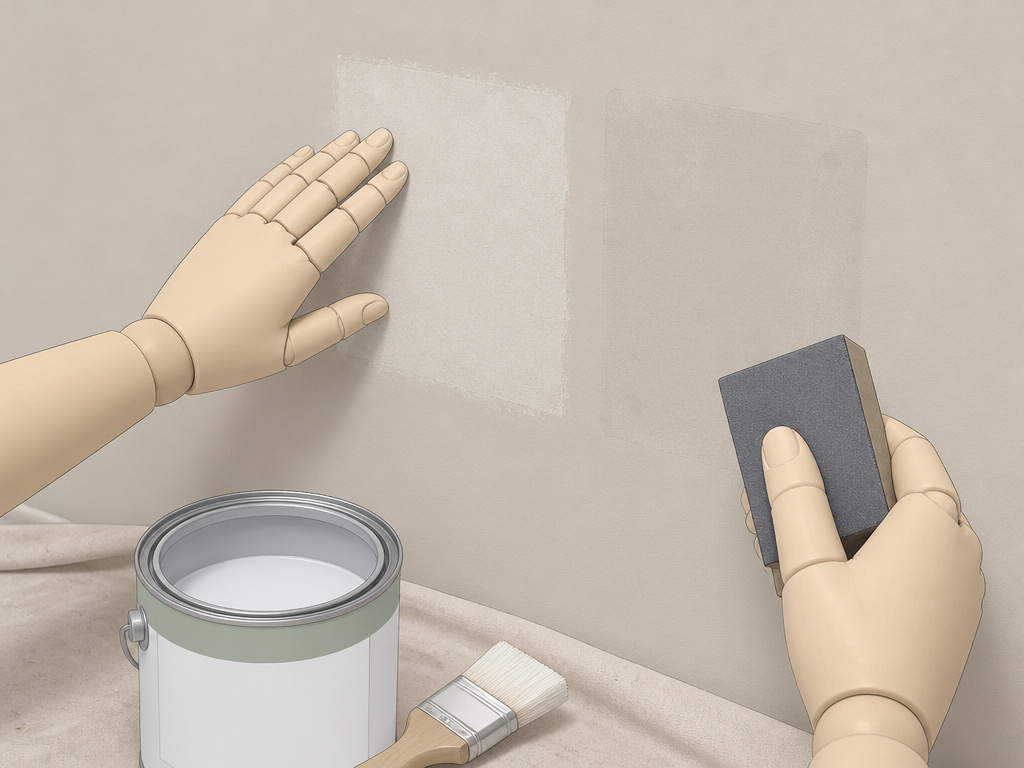
You sand a patch, run a hand across it, feel nothing, and paint it anyway. Later the spot sits there as a dull ghost under the finish coat, and you can’t work out why.
Before you start: Homes built before 1960 almost certainly contain some lead-based paint, and Seattle’s guide says removal belongs to licensed professionals only, because do-it-yourself scraping spreads dust rather than containing it. Paint sprayers can inject paint under the skin and into the bloodstream, so spray equipment is best left to professionals. Read every label and work with ventilation open, especially with solvent-based products.
Cleaning comes first, and the method matters less than the rinse. Warm water with a mild detergent handles most walls, and cleaning walls before painting covers the greasy cases. Grease needs a stronger soap ratio, then clear water, then time to dry.
Priming is where the sources genuinely part ways, and it’s worth knowing which position you’re following.
- Benjamin Moore treats priming as essential and calls for spot-priming patched and sanded areas, plus a deep-base primer when the new color is darker.
- Sherwin-Williams frames priming as essential for new walls or when going from dark to light, and doesn’t state it as required for every patch.
- Seattle’s guide says to prime unpainted, weathered, or adhesion-challenged surfaces, and warns against skipping primer if you want the job to last for years.
My read: spot-prime the patches. It costs little time, and Benjamin Moore’s position is the safer of the two. This is also where I’d point you toward choosing a primer for walls rather than guessing at the shelf.
Common mistake: Painting over a patch that was never primed. The patch absorbs the topcoat at a different rate, dries with a different sheen, and shows as a flat rectangle under the color. You’ll see it every time the afternoon light hits that wall.
Seattle’s guide also notes that newer high-quality acrylic primers perform equal to or better than oil-based ones with far less toxicity, which matters in a room you sleep in.
The Painting Order: Where the Manufacturers Disagree
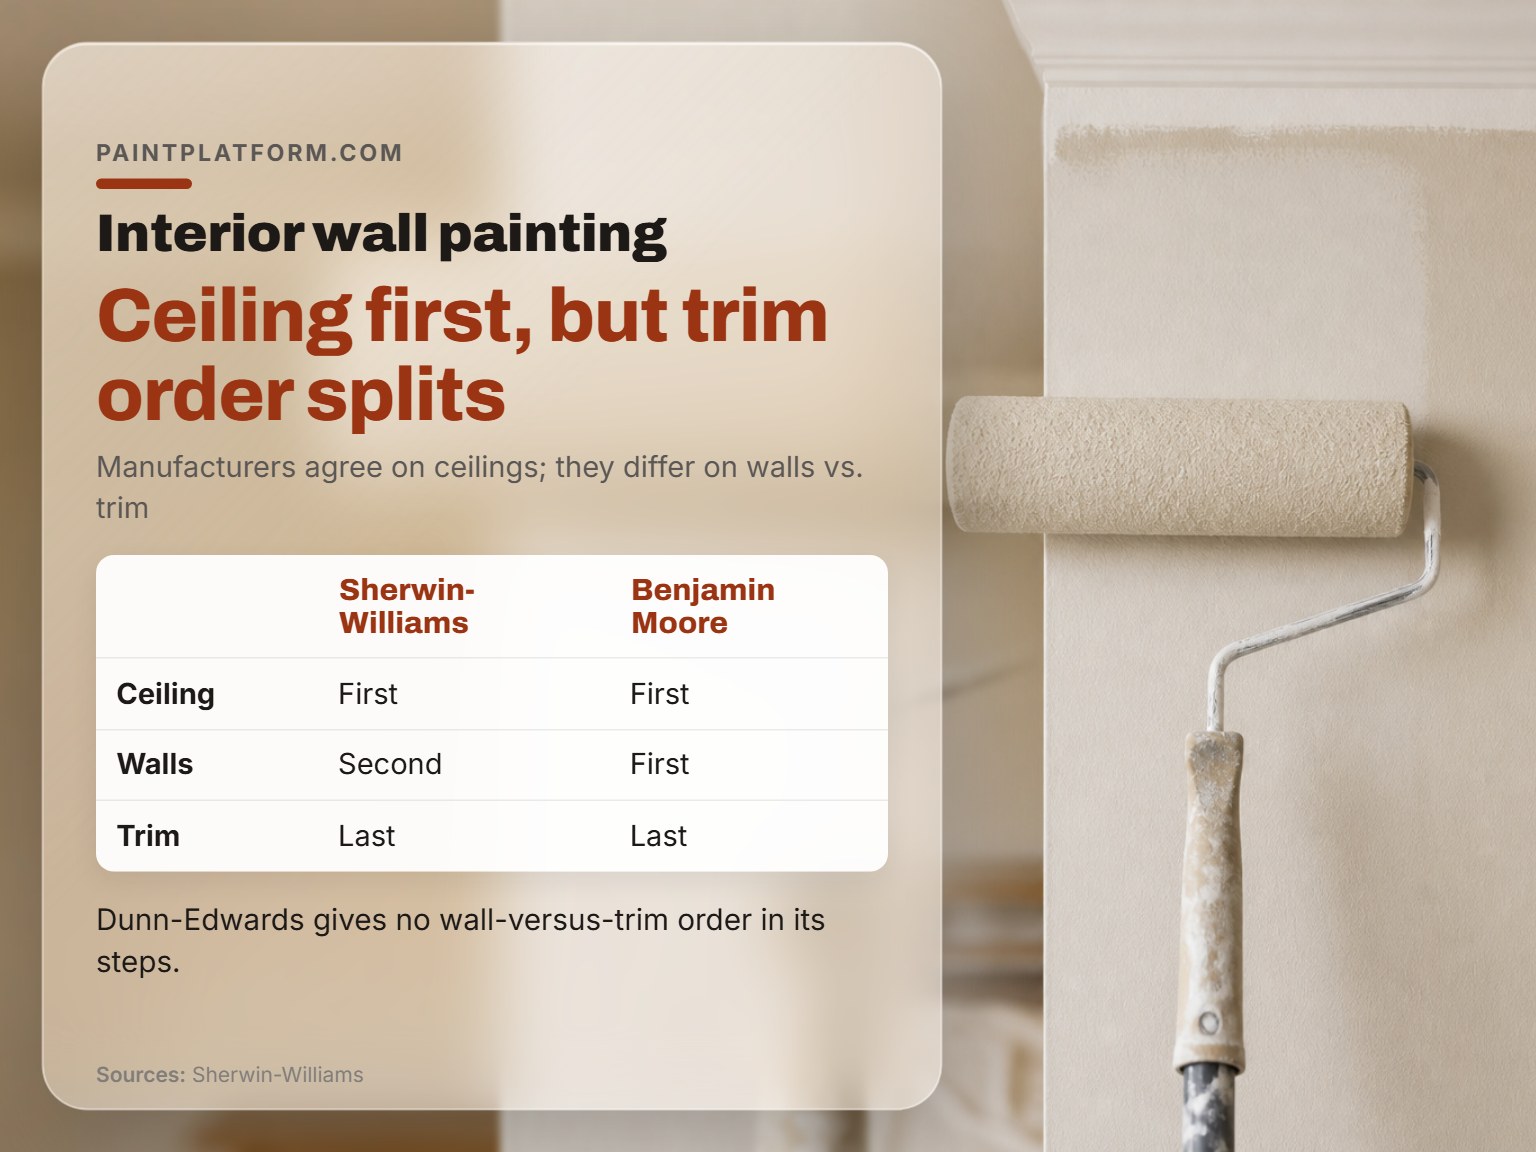
Sherwin-Williams puts the ceiling first, walls second, and trim last. That’s the sequence most pros follow, and the reasoning is practical: fresh trim is easy to touch up, and fresh walls are not.
| Source | Order It Gives | Reason Given |
|---|---|---|
| Sherwin-Williams | Ceiling, then walls, then trim | Trim last keeps drips off new walls |
| Benjamin Moore | Ceiling and trim prep first, walls after | Keeps the wall work continuous |
| Dunn-Edwards | No wall-versus-trim order in its steps | Its steps run primer, paint, gloss, estimate |
So there’s a real disagreement, and it’s narrower than it looks. Both manufacturers put the ceiling first, because ceiling work drops. The split is over whether trim gets painted before or after the walls. Dunn-Edwards doesn’t address the question at all in its step list.
I go walls first, trim last, which lines up with the room painting order most painters use. Cutting trim in after the walls means a small brush and a steady hand instead of tape and repair work.
Start on the shorter wall of the room. Sherwin-Williams uses a 20 by 12 foot room as the example: begin along one of the 12-foot walls, so you’re never stretching a wet roller across the widest span first. The same order works for painting a living room as for a hallway, and it helps avoid drips landing on finished surfaces.
How to Paint Interior Walls for Beginners: Cut In, Then Roll
My first project was a cheap thrift-store dresser with flat drawer fronts, and I wrecked it with a roller that was far too loaded. Paint ran down the sides in ropes and pooled in the drawer gaps. The lesson cost me a sticky Saturday.
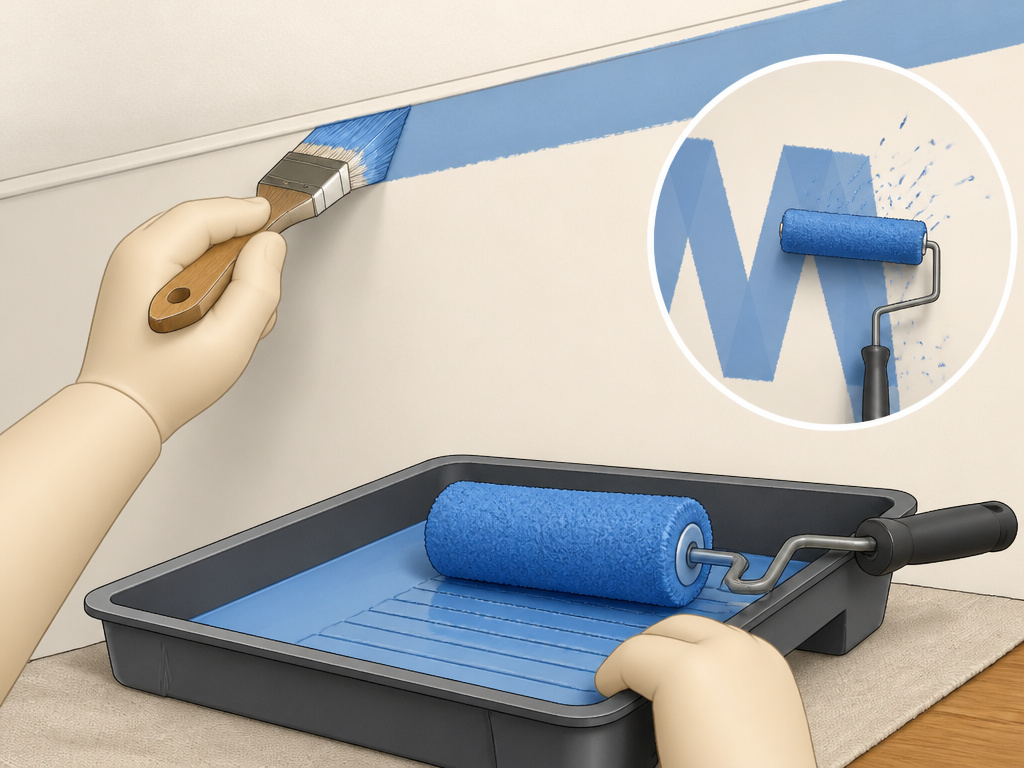
The same overload wrecks a wall, just at a bigger scale. An overloaded sleeve can throw spatter, and spatter on a baseboard is a second job you didn’t plan for.
- Cut in a 2-3 inch strip along the ceiling line with an angled brush. Skip it and the roller leaves a thin, ragged band you can see from across the room.
- Roll while that strip is still wet. Sherwin-Williams is explicit about the timing, and a dried edge is where lap marks begin.
- Work a 2-foot square in a W or N pattern, then fill it in without lifting the roller. Dunn-Edwards describes the same square-by-square habit.
- Overlap each pass and keep moving toward the dry side. Painting too large an area at once is how a wet edge dies halfway across a wall.
A properly loaded roller makes a dry hiss against the wall. An overloaded one throws spatter. That sound is your feedback loop.
Where this goes sideways: Rolling straight out of the tray without off-loading. The sleeve starts heavy, floods the first square, and you spend time spreading a puddle. Roll a few dry passes on the tray first, every time.
Full technique lives in painting with a roller, including the cut-in brush angles. If lap marks still show after the second coat, this guide to a streak-free finish walks through it.
Pick the Sheen by How Often You’ll Scrub It
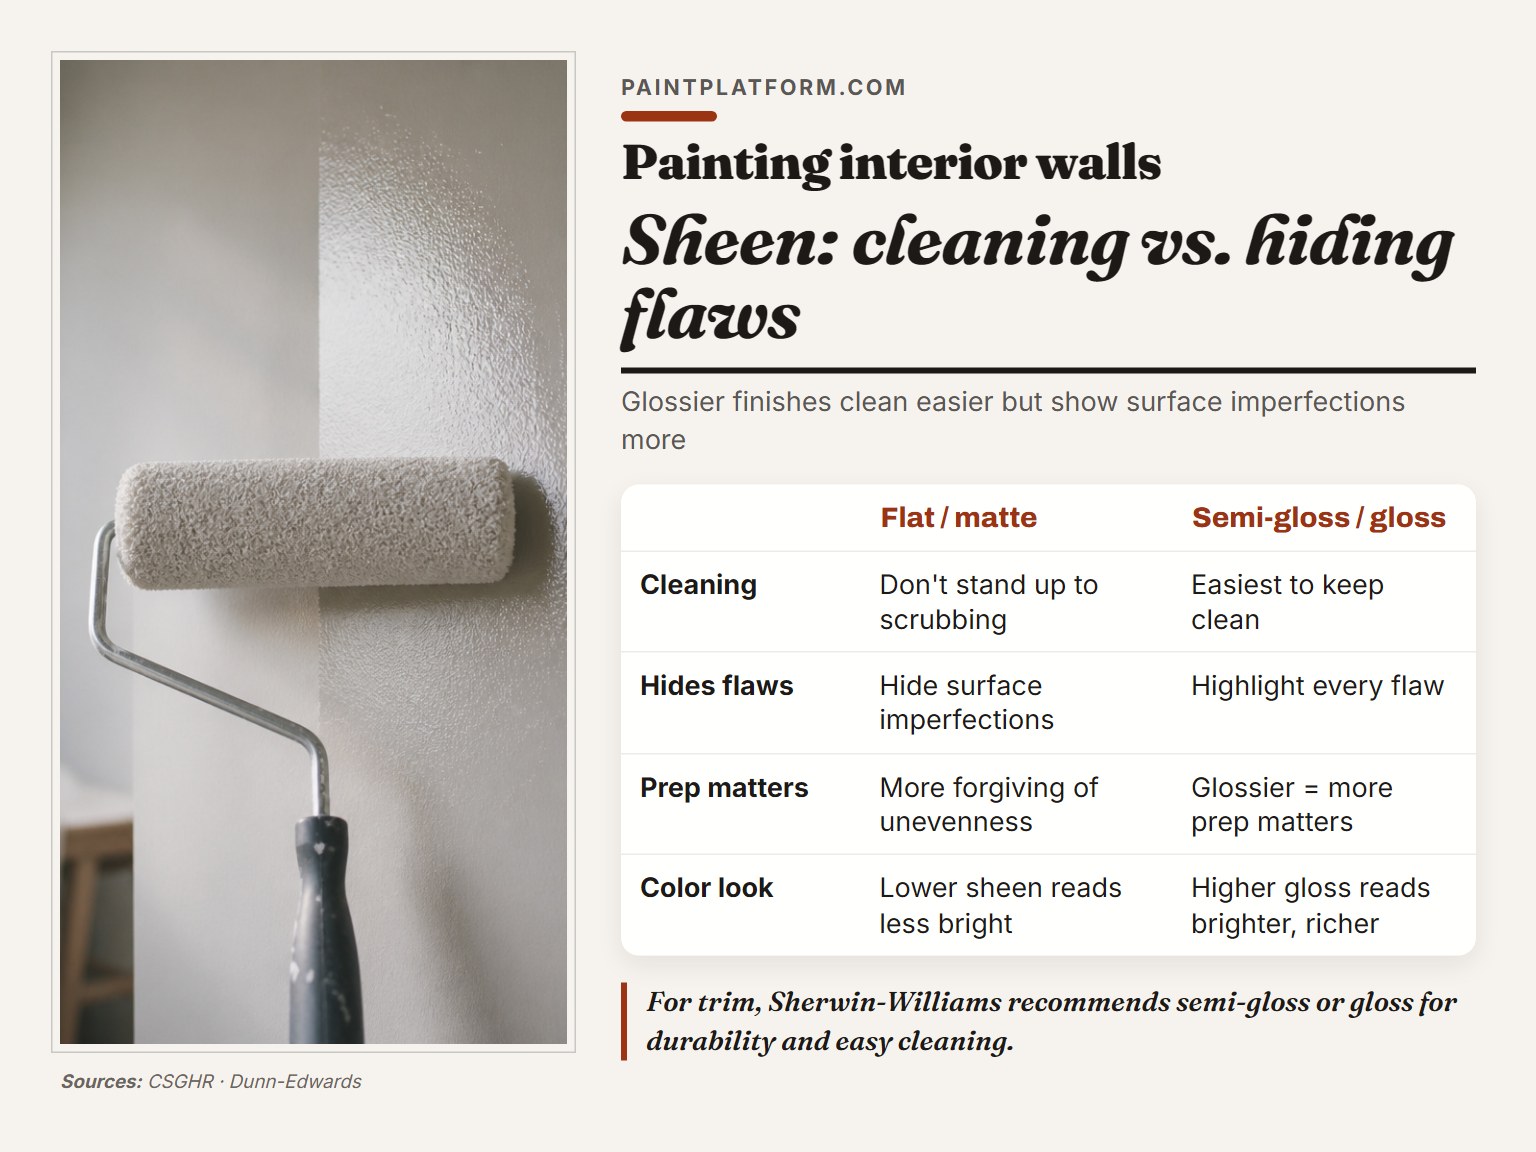
Sheen is a cleaning decision first. Flat and matte hide surface imperfections beautifully, and they don’t stand up to scrubbing. Eggshell and satin clean up more easily, though their reflectivity reduces how much unevenness they hide. Semi-gloss and gloss are the easiest to keep clean, and they highlight every flaw in the wall beneath.
The tradeoff compounds. The glossier the finish coat, the more surface prep matters, because a reflective surface shows what a matte one forgives.
For trim, Sherwin-Williams recommends semi-gloss or gloss for durability and easy cleaning. Dunn-Edwards adds that a color in a higher gloss reads brighter and richer than the same color in a lower sheen, which is worth knowing before you commit to a whole room.
A 12- to 18-inch brush-out square on the actual wall beats any color chip. Colors tend to look darker on interior walls than they do on paper, and the room’s own light settles the rest.
If you suspect a sensitivity to a formulation, Seattle’s guide suggests painting a sheet, leaving it in the room for 48 hours, and watching for a reaction. It’s a cheap test with a clear answer.
Two more things worth doing: pick the lowest-VOC paint that meets your needs, and check sheen and coverage on a real interior wall paint rather than trusting the name on the lid. For a smaller project, the same logic applies to painting a bedroom, where a flatter sheen usually wins.
Frequently Asked Questions
Do I really need two coats?
Benjamin Moore treats two top coats as the minimum for full hide and color development. One coat on a color change leaves thin spots that show up in angled light. Two coats, applied after the first is fully dry.
Can I skip primer on patched spots?
The sources split. Benjamin Moore says spot-prime patched and sanded areas. Sherwin-Williams ties priming to new walls and dark-to-light color changes. Seattle’s guide says to prime anything likely to challenge adhesion. Spot-priming is the safer call, and it takes minutes.
How long before the second coat?
Sherwin-Williams gives 2-4 hours as the usual gap, then says to check the label. The label wins. Recoating early can trap solvent under a skin that looks dry.
Should I paint trim or walls first?
Sherwin-Williams says walls first, then a fresh coat on trim and baseboards, so drips land on surfaces that get painted anyway. Benjamin Moore leads with ceiling and trim prep before walls. Both put the ceiling first.
What nap for textured walls?
1/2 or 3/4 inch, per Benjamin Moore. Deeper pile carries paint into the dips instead of skating over them. A 3/8 inch sleeve on a textured wall is the wrong choice; use 1/2 or 3/4 inch.
How long does a whole room take?
Sherwin-Williams puts a room at a day or two, depending on size, coat count, and dry time. Add the prep hours on top if the walls need patching, and remember that prep is where most of the clock goes.
The Bottom Line
Here’s the trigger to act on: if you can feel a ridge, a dent, or a rough patch with a bare hand, stop and fix it before the roller comes out. Paint adds only a thin film. It covers color. It doesn’t fill anything.
Your first move this week is small. Take a work light, hold it flat against one wall, and look along the surface. Whatever that light finds is your actual to-do list, and it’s usually shorter than you fear.
One concession: if the wall is behind a sofa or under a window that never gets direct sun, a slightly imperfect patch will disappear on its own. Fix the walls you look at. The rest can wait for the next repaint.
That’s how to paint interior walls for beginners without a single mystery: fix the surface, prime the repairs, cut in a narrow strip, and roll into it while it’s wet. The paint was never the hard part.
