
How to Paint a Living Room Wall: Step-by-Step
This post contains affiliate links. As an Amazon Associate, we earn from qualifying purchases.
To paint a living room wall, work the ceiling first, then cut in a 2- to 3-inch strip along the edges and roll while that strip is still wet. Sherwin-Williams puts recoat time at 2 to 4 hours, and Consumer Reports’ hiding test shows one coat can cover a dark wall with light paint.
The wet edge is where a living room goes right or wrong. Sherwin-Williams warns that overlap marks appear when a freshly painted section starts drying before you reach the adjoining area, so the brush and the roller have to move as one continuous operation. Knowing how to paint a living room wall means keeping that wet edge alive from corner to corner.
What follows is the order that holds up in practice, plus the four places where Sherwin-Williams, Valspar, Consumer Reports, and This Old House hand you different numbers for the same step.
Key Takeaways
- Ceiling first, walls second, trim last. Sherwin-Williams puts trim last for ease, after the walls.
- 2 to 4 hours between coats is typical, but the label on your can wins.
- Prep eats 30 to 50 percent of a roughly 30-hour room, per contractor Jim Clark in This Old House.
- Above 100 degrees Fahrenheit, stop. Sherwin-Williams says the film can dry before it adheres and peel later.
- Cut-in width splits the sources: 2 to 3 inches at Sherwin-Williams, 1.5 to 2 inches at This Old House.
What Order Do You Actually Paint a Living Room Wall In?
Ceiling first, walls second, trim last. Sherwin-Williams lays it out that way for a plain physical reason: paint drips downward, and a ceiling rolled after the walls spatters everything you already finished.
A living room wall is painted in three passes: a cut-in strip along the ceiling, corners, and trim; a rolled field applied while that strip is still wet; and a second coat after the first dries completely.
Sherwin-Williams also says to start on the shorter wall. In a 20 by 12 foot room, that means beginning along one of the 12-foot walls, so you work toward the long run instead of away from it.
- Ceiling, with an extension pole on the roller.
- Walls, shorter side first.
- Trim and baseboards last, with a small brush.
- Tape out within 24 hours of the final coat.
Valspar sequences it differently, and the difference matters. It says to do one wall at a time and roll the field while the cut-in on that wall is still wet, so you never cut in an entire room before loading a roller.
I check a wall by holding a lamp low and raking the light sideways across it. That tells you which flaws actually matter when you compare a how to paint a living room wall. Most of what you see under flat overhead light disappears the moment paint hits it.
Prep Eats 30 to 50 Percent of the Job, So Do It Properly
Thirty to 50 percent of a roughly 30-hour room goes into prep before a brush touches the wall. That number comes from painting contractor Jim Clark by way of This Old House, and it matches how the job actually feels.
Before you start: Sanding old paint throws lead dust into the air, and Sherwin-Williams notes that removal of old paint by sanding or scraping may generate lead dust or fumes, and controlling exposure requires proper protective equipment and containment. Wear a fitted NIOSH-approved respirator, seal the doorway with plastic, and wet-wipe surfaces instead of dry-sweeping.
Cleaning and Scuff-Sanding
Cleaning walls before painting is mostly a detergent-and-water job, and the timing matters more than the product.
This Old House is specific about that sequence, and it’s right to be.
Run the flat of your hand along the wall once it’s dry. If it feels faintly chalky or gritty, you’re about to lock that texture under a coat of paint permanently.
Painting over dust is the mistake I see most when you compare a how to paint a living room wall. The finish looks fine for a week, then reads as sandpaper under a raking light.
Patching Without Skim Coating
I talked myself into skim-coating an entire living room once to chase a few hairline cracks. Three evenings, sanding dust in my coffee, and the room looked about the same as a few spot patches would have.
A putty knife and lightweight spackle handle most dents in thin passes. Thin is the whole trick. One fat glob shrinks as it dries, cracks along the edge, and you’re back at it.
For deeper dents in wood trim, This Old House recommends a two-part auto-body putty such as Bondo. It takes longer to mix, and it doesn’t pop out later.
The prep order that works:
- Clear the room.
- Wash the walls and let them dry.
- Patch, then sand smooth.
- Scuff-sand trim with 220-grit and vacuum the dust.
- Wipe down and let everything dry before primer.
Prepping walls before painting is where the time actually goes.
Cutting In: 2 to 3 Inches or 1.5 to 2?
Cut-in width is the first place the sources split.
Both work. The wider strip gives you more margin to roll into. The narrower one wastes less paint on a line the roller will cover anyway.
The bigger disagreement is tape versus edger. Sherwin-Williams tapes the borders and says to pull the tape after the paint dries, typically within 24 hours. Consumer Reports’ testers skip tape entirely and use a plastic paint edger, which they say gets excellent results in a fraction of the time.
I keep painter’s tape in the cupboard and reach for the edger nine times out of ten. Tape is slower, and it still lifts a fleck of half-dry paint if you leave it past that 24-hour mark.
If you do use an edger, load it with a roller instead of dipping it in the tray. Consumer Reports points out that dipping catches paint on the guide wheels, and then the wheels track it down the wall.
Getting crisp lines is a skill worth ten minutes on a scrap of drywall before you commit to the living room.
How Big a Section Should You Roll at Once?
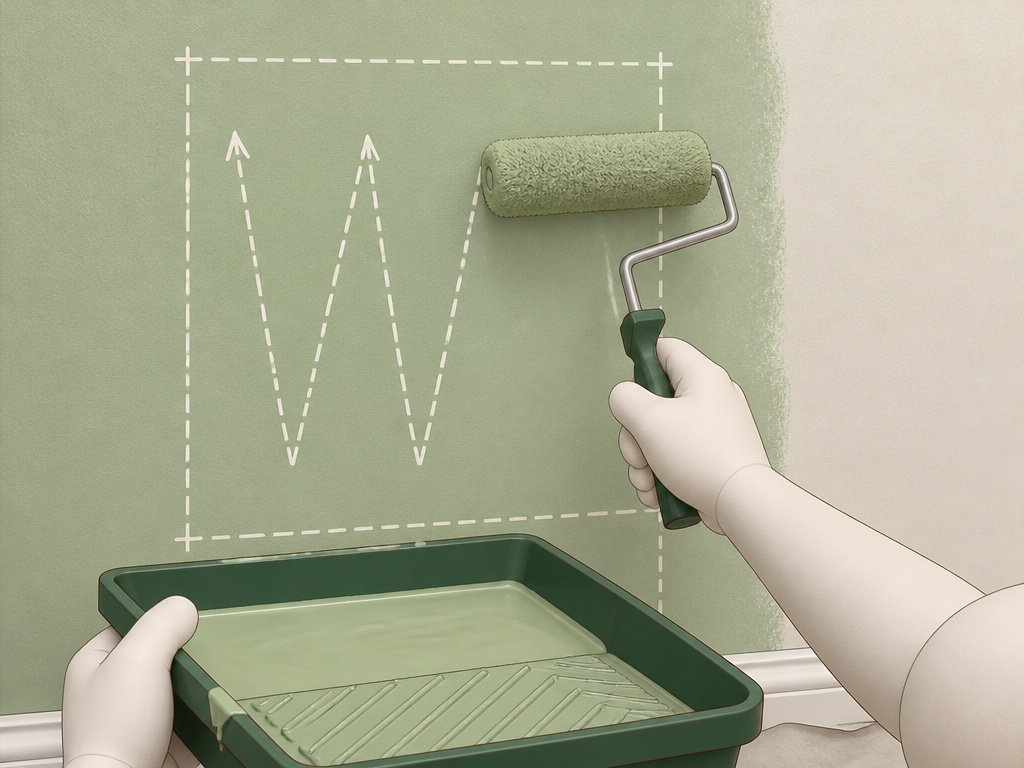
Consumer Reports says work a 2×2-foot section. Valspar and This Old House both say 3 to 4 square feet. Those aren’t the same thing, and the difference changes how fast the job goes.
Here’s where each source lands:
| Spec | Value | Source |
|---|---|---|
| Cut-in strip width | 2 to 3 inches | Sherwin-Williams |
| Cut-in strip width | 1.5 to 2 inches | This Old House |
| Rolling work area | 2×2 feet | Consumer Reports |
| Rolling work area | 3 to 4 square feet | Valspar and This Old House |
| Roller stroke pattern | N or W | Sherwin-Williams and Valspar |
| Roller stroke pattern | X, V, or Z | Consumer Reports |
The stroke pattern disagreement is real but small. Sherwin-Williams and Valspar both want a W or N to unload the roller and distribute paint. Consumer Reports smears an X, V, or Z inside its 2×2 section, then spreads to cover the square.
Wet Edge, Lapping, and the Roller Nap
Valspar’s warning about lapping is the one to internalize. A wet edge stops vertical paint lines from forming where you started and stopped, and lightly rolling back over a painted area smooths the roller lines out.
Roller cover matters too.
A roller that’s running dry makes a soft, tacky tearing sound against the wall. That’s your cue to reload. Two feet later is too late.
Common mistake: Stretching the paint to make it go further. This Old House flags it directly: use even pressure and a high-quality roller to reduce lint.
If you want a streak-free finish, section size and a wet edge do more work than any roller you can buy. The full rolling and cutting in sequence depends on that one rule.
Primer: Essential for Dark-to-Light, or Optional?
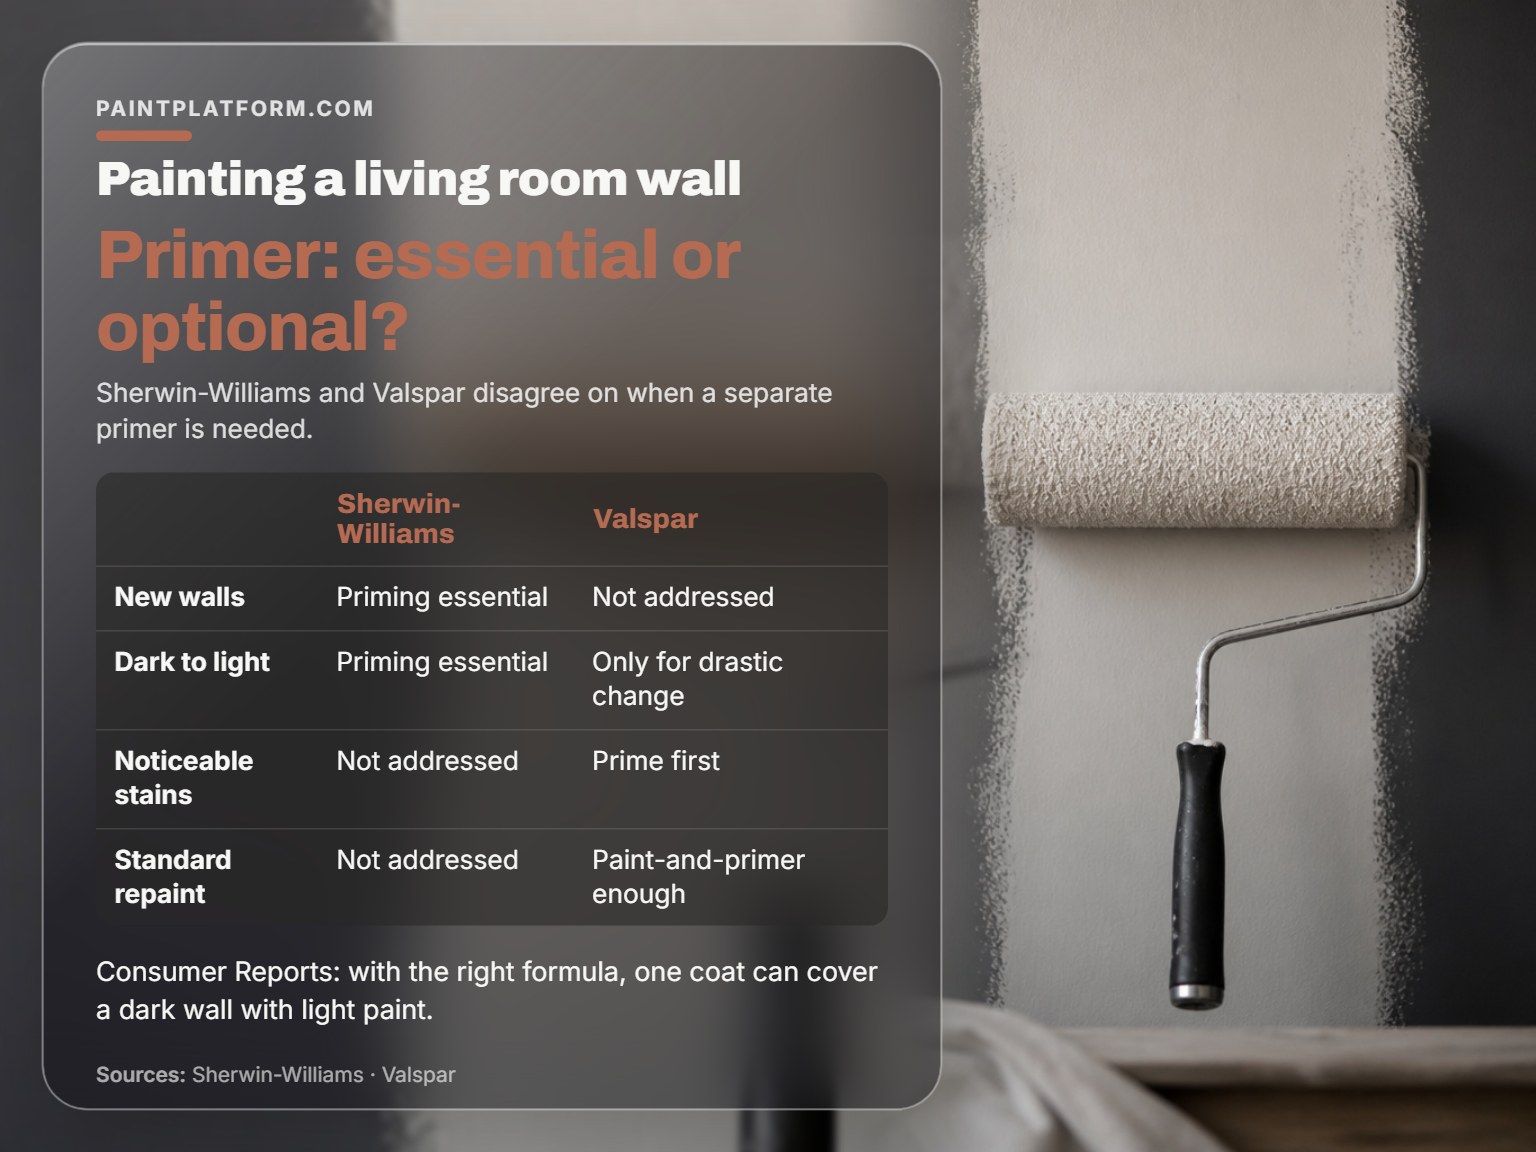
Sherwin-Williams calls priming essential for new walls and for dark-to-light color changes. Valspar says a separate primer is only needed for noticeable stains or a drastic color change, and that a paint-and-primer such as Valspar Medallion Plus covers the rest. Consumer Reports’ lab work sits in the middle: with the right formula, one coat can cover a dark wall with light paint.
| Situation | Sherwin-Williams | Valspar | Consumer Reports |
|---|---|---|---|
| New walls | Priming essential | Not addressed | Not addressed |
| Dark to light | Priming essential | Only for drastic change | One coat can cover it |
| Noticeable stains | Not addressed | Prime first | Not addressed |
| Standard repaint | Not addressed | Paint-and-primer enough | Formula-dependent |
Tinting the Primer for Dark Colors
That’s a middle path between full priming and skipping it.
Sherwin-Williams has a cheaper test than arguing about it. Prepare, prime if needed, and paint an inconspicuous spot. Wait the label’s drying time, then check for adhesion or compatibility problems before you commit to the room.
Small detail, easy to skip, and it changes how the primer lays down.
Picking the best interior wall paint for a living room is its own decision, and it’s where most of the budget goes. Sheen matters as much as brand.
One more number worth carrying into the store:
The Failures That Show Up After the Room Is Finished
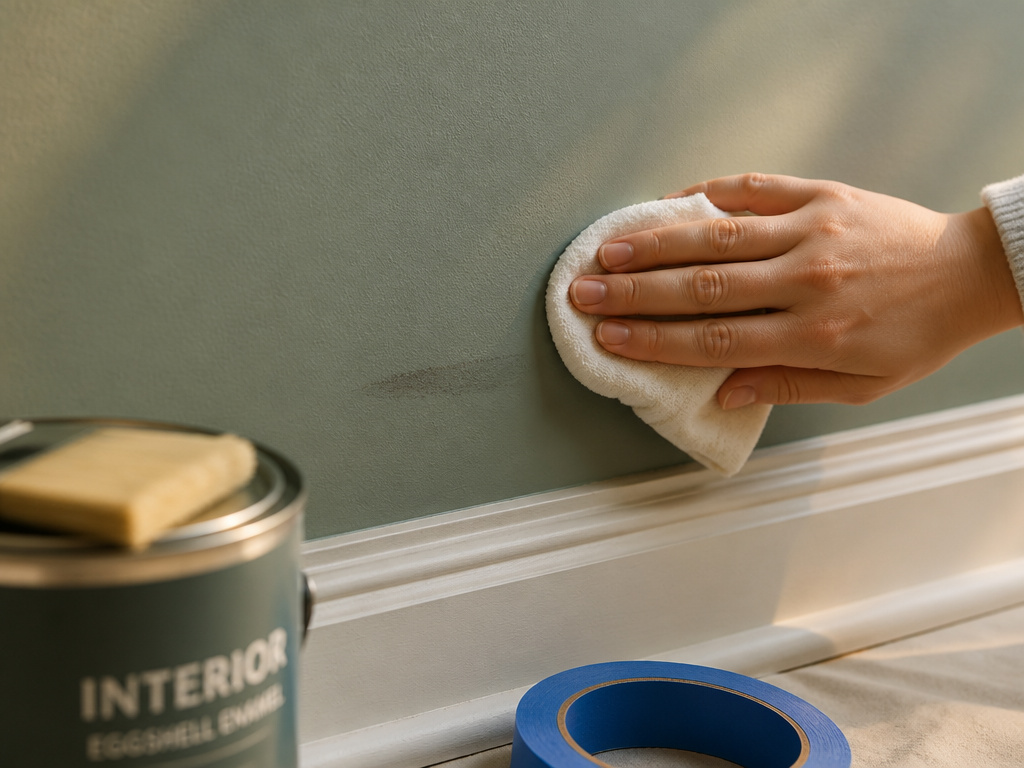
Two weeks after the last coat, someone drags a chair along the wall and a dull scuff appears that won’t wipe off. The paint wasn’t finished curing.
This Old House notes that latex paints take up to two weeks to fully cure, and that you should avoid scrubbing or rubbing the finish while they do. Clean gently, and don’t kick up dust.
Temperature and the Peel That Shows Up Later
Sherwin-Williams is blunt about heat: above 100 degrees Fahrenheit, a paint film can dry before it has a chance to adhere, and that shows up as peeling later. The recoat intervals above assume normal conditions, and they collapse in a hot room.
Fair warning. If you’re painting a closed living room in July, get the air moving and work early.
Where this goes sideways: Rolling too large an area at once. Sherwin-Williams explains that overlapping happens when the section you just painted starts to dry before you reach the next one, and that lap line stays visible under any sheen.
Dry-to-touch time is a separate clock from recoat time. Sherwin-Williams puts latex at one hour to the touch and alkyd at overnight to the touch; latex cleans up with water and alkyd with solvent. Neither one means the film is ready to scrub.
Touch-ups have their own rules.
Touch up with paint from the original can, thinned 25 to 50 percent, applied thin, in the same temperature and humidity as the first coat. A full-strength dab from a fresh can flashes differently and reads as a patch forever.
A few rules for the week after:
- Keep the room ventilated while the paint cures.
- Don’t scrub the finish for two weeks.
- Pull tape within 24 hours, not next weekend.
If you need to paint a room fast, the recoat window sets your ceiling on time, not how quickly you can move a roller.
Frequently Asked Questions
Do I have to prime a living room wall before painting?
Not always. Sherwin-Williams says priming is essential for new walls and for dark-to-light color changes. Valspar says a separate primer is only needed for noticeable stains or a drastic color change, and that a paint-and-primer is enough otherwise.
How long should I wait between coats?
Sherwin-Williams gives 2 to 4 hours as typical, and says to check the label on your specific paint. Dry to the touch is a different measurement: latex reaches it in about an hour, alkyd overnight.
Is painter’s tape or a paint edger better for cutting in?
Sherwin-Williams tapes the borders and removes the tape within 24 hours. Consumer Reports’ testers use a plastic paint edger instead and report excellent results in a fraction of the time. Both produce a clean line.
How much does one gallon cover?
Can I skip skim coating and just patch?
Yes. A 6-inch putty knife and lightweight spackle handle most dents in two thin passes. Overfill slightly, because spackle shrinks as it dries.
How long before I can wash the wall?
This Old House says latex takes up to two weeks to fully cure. Avoid scrubbing or rubbing the finish until then.
The Bottom Line
If your walls are more than 40 years old, stop and test for lead before you sand anything. That’s the one step in this whole job where skipping it isn’t cosmetic.
Skim-coating a room to chase hairline cracks is the other thing I’d skip. Three evenings of dust bought me a wall that looked the same as two thin passes of spackle would have. Fix the dents that catch a raking light, sand the ridges, wipe the dust, and paint.
Start with the ceiling and one short wall. If that wall looks even under a raking light when it dries, you’ve got the technique, and the rest of the room is just repetition.
