
How to Paint a Sink: Step-by-Step (Without Peeling)
This post contains affiliate links. As an Amazon Associate, we earn from qualifying purchases.
The short answer to how to paint a sink: use a two-part epoxy refinishing kit rated for your basin material, scuff the surface with 400 to 600 grit, and respect the cure clock. Rust-Oleum’s Tub and Tile kit stays usable 6 hours after mixing; the Bathworks kit gives you about 3 hours at 70 F.
That clock starts the moment the hardener hits the paint, and it does not pause for a phone call or a second trip to the hardware store when you’re learning how to paint a sink. Two-part epoxy cures by chemical reaction, so the pot life printed on the sheet is a deadline, not a suggestion. Miss it and the coating skins over in the tray before it ever reaches the basin.
What follows covers the surface check, the prep sequence, the two-coat window, and the places where the major kits flatly contradict each other on cure times. By the end you’ll know which numbers to trust and which to verify on your own basin.
Key Takeaways
- Cast iron, porcelain, fiberglass, acrylic, and steel are all fair game for a two-part epoxy kit. Galvanized steel and flexible plastic are not.
- Rust-Oleum wants 3 days before water touches the finish. Bathworks and Formula 131 both say 24 hours. The gap is real and it comes down to the formula.
- Scuff sanding is the whole job. Rust-Oleum specifies 400 to 600 grit wet/dry; a consumer spray-enamel method calls for 120 grit. Match the grit to the product, not to a blog post.
- Below 50 F, stop. Formula 131 warns against applying if the temperature will drop under 50 F within 8 hours of application, because adhesion is compromised.
- Mix only what you’ll use. A partial batch is a 4:1 base-to-activator ratio in a separate container, and it beats running dry at the last corner.
Which Sink Materials Can Take a Painted Finish?
Porcelain, cast iron, fiberglass, acrylic, and steel all take a two-part epoxy kit. Rust-Oleum’s data sheet lists every one of them, which is why a cast iron basin from 1952 is a better candidate than a modern composite one.
Rust-Oleum Specialty Tub and Tile Refinishing Kit is a two-part epoxy acrylic formulated for ceramic tile, porcelain, fiberglass, acrylic, cast iron, and steel. The technical data sheet excludes galvanized steel, flexible plastic, stovetops, and any surface held under continuous water immersion, including pools, hot tubs, ponds, and saunas.
The same product line carries three colors: 7860519 in White, 7861519 in Almond, and 7862519 in Biscuit. That’s the entire palette. If your heart is set on a deep graphite basin, a kit isn’t your route.
Porcelain, Cast Iron, and the Professional-Only Argument
Here’s where the sources split, and it’s worth naming both sides.
Hunker’s consumer guide states plainly that porcelain sinks should only be refinished professionally, while stainless steel and acrylic can be painted and repaired at home. Rust-Oleum, meanwhile, sells its Tub and Tile kit as a DIY product intended for porcelain tubs and tile surfaces.
So which is it? Hunker is a general-interest blog making a blanket call about durability. Rust-Oleum is the manufacturer publishing a technical data sheet for a product it warrants for porcelain. I’d weigh the data sheet higher, and I’d still tape a test patch on a hidden corner before committing a whole kit to a porcelain basin.
What the Kit Refuses to Cover
The exclusion list is short and absolute. Galvanized steel and flexible plastic are out. Stovetops and anything near extreme heat are out. Continuous water immersion is out, which rules out pools, hot tubs, ponds, and saunas.
That last one matters for kitchens more than people expect. A utility sink that doubles as a mop basin sits under standing water for minutes at a stretch, not seconds. If that’s your basin, a refinishing kit is the wrong tool.
Tile surrounds are a different job with a different prep rhythm, and the same logic applies when you paint over tile: only after the grout line is sound and dry.
The Prep Sequence That Decides Whether the Coat Bonds
Skip the scuff and the whole job is a coin flip. The epoxy needs a mechanical tooth to grab, and a glossy glaze gives it nothing.
Before you start: Sanding old paint can release lead dust, which is toxic and especially dangerous to children and pregnant women. Wear a NIOSH-approved respirator, clean up with a HEPA vacuum and a wet mop, and call the National Lead Information Hotline at 1-800-424-LEAD before you sand. Separately, these are solvent-borne products: ventilate the room, keep rags away from pilot lights, and never let lacquer thinner touch your skin.
Fair warning, the prep takes longer than the painting. That’s normal.
- Pull the hardware. Remove drains, faucet, and supply lines. Leave them in and paint bridges the rim, then the drain ring cuts the film when you retighten it.
- Scrub with an abrasive cleaner. Comet or a similar scouring powder, then rinse with fresh water and let it dry completely. Bathworks warns that any soap residue left behind prevents bonding and causes failure.
- Strip the caulk. Rust-Oleum says remove all of it. Bathworks treats removal as optional but recommended, and instructs you to reapply 100% silicone caulk once the surface is dry if you did remove it.
- Scuff sand the whole surface. Rust-Oleum calls for 400 to 600 grit wet/dry paper. Hunker’s spray-enamel method uses 120 grit. Chemtops uses 100-grit drums on a drill, but only on a cut-out edge.
- Wipe with a tack cloth immediately before the first coat. Dust is the quiet killer here.
- Tape a 2-inch strip from the sink flange and mask outward about 3 feet in every direction. Green painter’s tape first, then plastic.
Common mistake: Cleaning with a soap-based degreaser and calling it done. Soap film survives rinsing, and the epoxy bonds to the film instead of the basin. The coat looks fine for a week, then lifts in sheets the first time hot water hits the rim.
The grit question trips up more people than any other step. If you’re working a glossy glazed surface, the technique is the same one used when sanding glossy surfaces anywhere else in the house: dull the shine, don’t remove the glaze.
How to Paint a Sink Without Wasting a Kit
The Bathworks instructions give the mixture five minutes of rest after three minutes of stirring, and that pause does more than it sounds like it does. It lets the air bubbles rise out before the paint hits the tray.
I’ve been mixing paint for years and I still got lazy about testing a batch. I skipped the scrap-paper check on a mix I thought I knew, and it dried noticeably darker than I expected. Now I always test on scrap first, even when I’m sure. Epoxy is less forgiving than acrylic, so the habit matters more here, not less.
Rust-Oleum’s sequence is slightly different from Bathworks’. Mix Part A into Part B and stir for 1 minute. Bathworks has you empty Part B into Part A and stir for 3 minutes, then rest 5. Both kits are 4:1 base to activator.
Thinning is where the sheets really diverge:
- Rust-Oleum permits up to 10% thinning, which is 3 ounces per 1 quart, using 100% isopropyl alcohol (not rubbing alcohol), acetone, or xylene.
- Bathworks and Formula 131 give no thinning allowance at all. Mix and apply as-is.
Mixing epoxy is like seasoning a pot of soup. You add a little, taste, adjust. Dump the whole bottle of thinner in at once and you get a thin, chalky film that never builds.
I’d rather mix a partial batch and toss the leftover than run short at the last corner. A 4:1 split in a separate container costs you a few minutes. A dry roller at the rim costs you the whole coat.
Chemtops runs a different play for edges: pigment at roughly 20% of the total mixture (about 4 ounces per 16 ounces), two bottles of lacquer thinner per quart, then apply with a rag and wipe off immediately with a clean dry rag. Small sections only. Do not let it drip or set, and do not pre-wipe the edge with thinner, because that reduces the epoxy’s performance.
How Long Should You Wait Between Coats and Before Water?
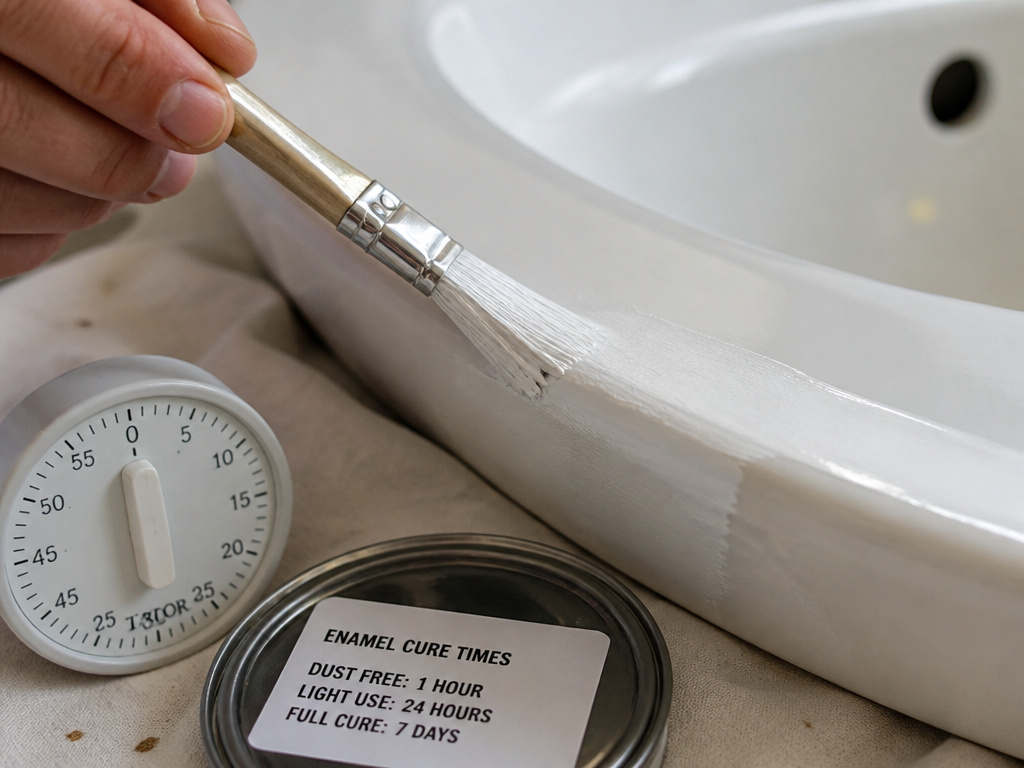
The three instruction sheets give three different answers, and none of them is wrong for its own product.
| Product | Between coats | Before water exposure |
|---|---|---|
| Rust-Oleum Specialty Tub and Tile | At least 1 hour | 3 days |
| Bathworks BW Sink Refinishing Kit | Second coat right away | 24 hours |
| Formula 131 | Not specified | 24 hours minimum |
| Hunker spray-enamel method | About 15 minutes, once tacky | 24 hours |
Read that table twice. Two manufacturers using the same 4:1 chemistry land three days apart on the single question every homeowner actually cares about.
The Recoat Gap
Rust-Oleum says wait at least 1 hour between coats. Bathworks says a second coat may be applied right away, following the same pattern. Hunker’s spray method waits until the first thin coat turns tacky, roughly 15 minutes.
The safest read: follow the sheet in your box. Rust-Oleum says wait at least 1 hour between coats, Bathworks says a second coat may be applied right away, and Hunker’s spray method waits about 15 minutes until the coat is tacky.
The Water-Exposure Gap
Three days versus 24 hours is not a rounding difference. Rust-Oleum’s sheet is explicit: allow to dry 3 days before exposing to water, while Bathworks and Hunker say 24 hours before use. Bathworks says 24 hours before use, and Formula 131 sets a 24-hour minimum before exposure to stain agents or rain, noting that high humidity or cool temperatures can stretch full cure out to a couple of days.
Follow the sheet that came in your box, not the one you read online. A cure time is a property of a specific formula, and the manufacturer who warranties the product is the one who set it.
If you’re weighing whether the whole refinishing route is worth it versus a replacement basin, the same trade-offs show up when you paint a bathtub: cure time, ventilation, and a surface that has to survive daily hot water.
Temperature and Humidity Limits Nobody Checks
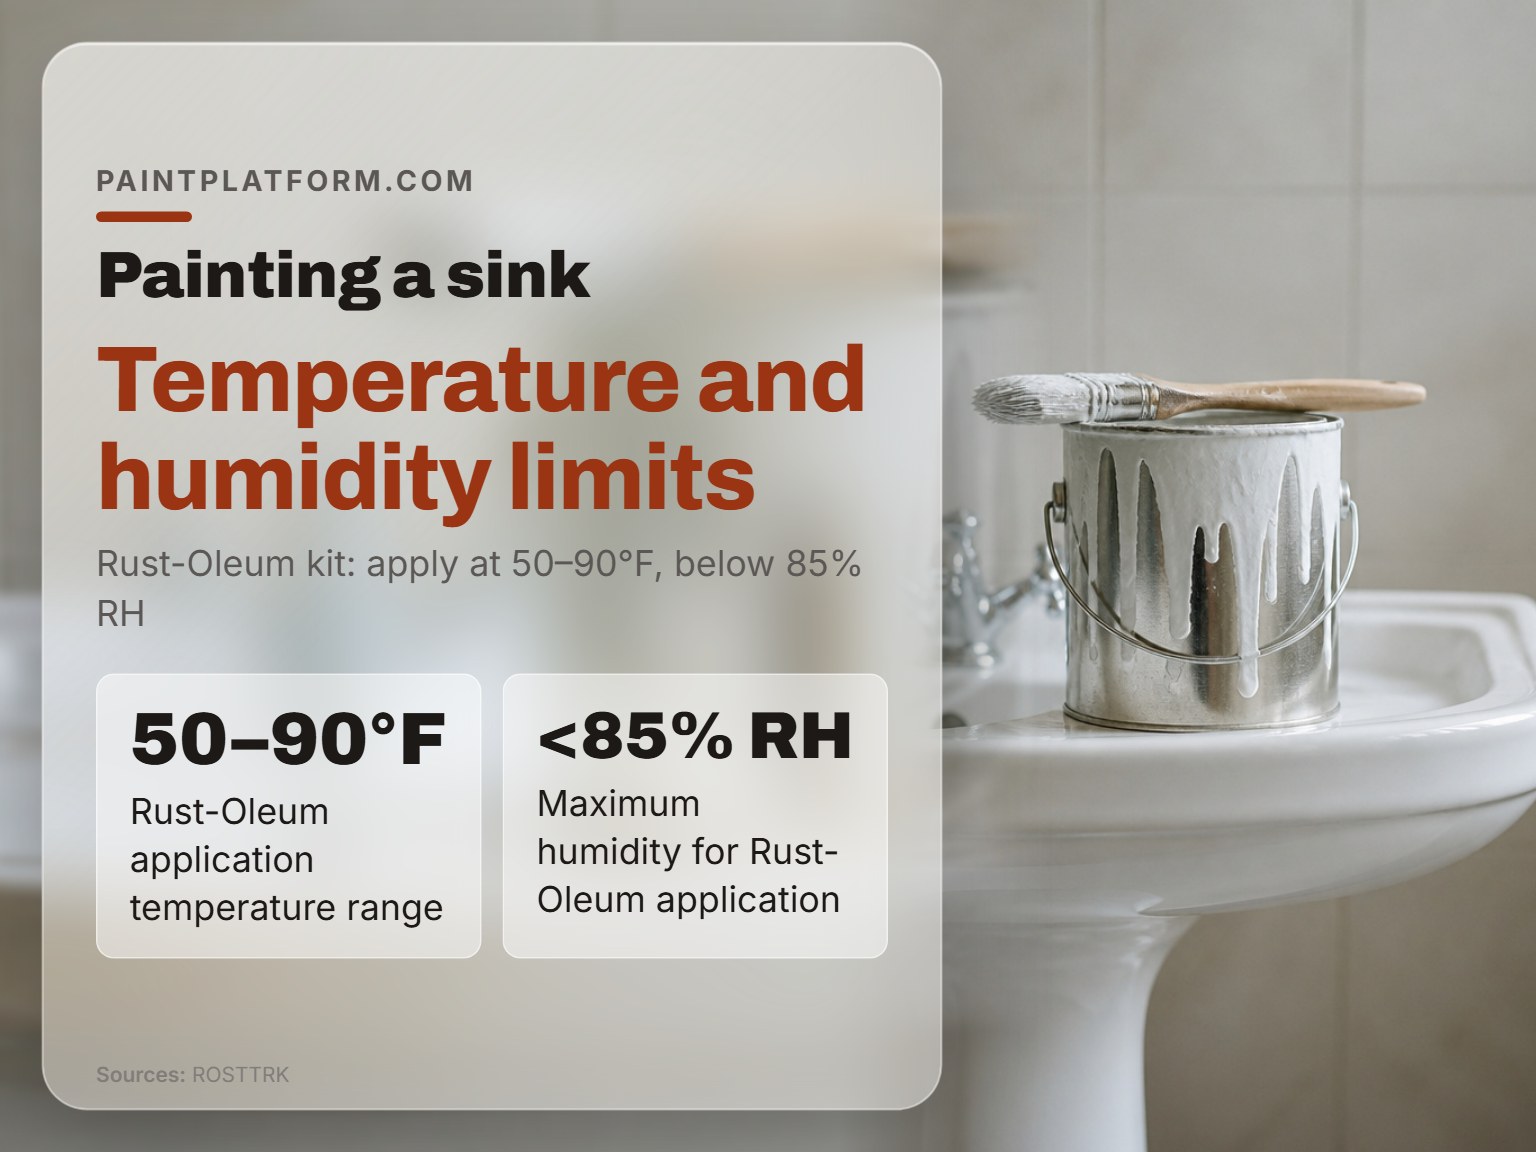
Fifty degrees Fahrenheit is the floor for the Rust-Oleum kit, and plenty of bathrooms sit below that on a January morning with the window cracked for ventilation.
Rust-Oleum specifies application between 50 and 90 F with humidity below 85%. Cooler rooms need more time, full stop.
Formula 131 warns against applying at all if temperatures will fall below 50 F within 8 hours. High humidity or cool air slows the cure, potentially out to a couple of days.
Where this goes sideways: Applying in a cold garage or an unheated basement. Formula 131 states adhesion is compromised if the temperature drops below 50 F within 8 hours of application, so the coat can look perfect and still fail the first time it’s wiped down.
A bathroom with a weak exhaust fan can hold humidity above 85% for hours after a shower. Run the fan, open the door, and give the room time to dry out before you mix anything. Here’s a short checklist of conditions to confirm before you open the can:
- Room holds 50 to 90 F for the full cure window, not just at application.
- Relative humidity stays below 85%, ideally in the 40 to 70% band.
- No showers, no dishwashing, no running water in that basin for the entire cure period.
- Ventilation moving air without blowing dust onto the wet film.
When the Finish Goes Wrong
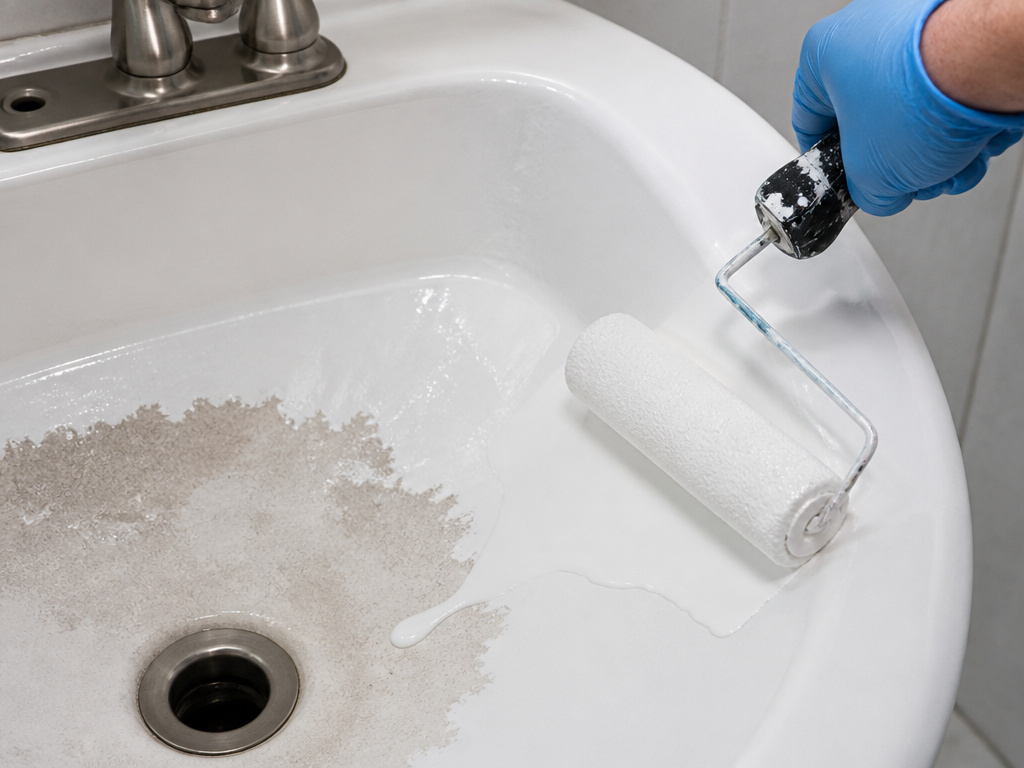
A run in the bottom of the basin is easier to fix than a thin, dry patch on the curve. That sounds backwards, and it’s the single most useful thing to understand about rolling epoxy.
Bathworks is blunt about it: use a fair amount of paint while rolling. Too much produces runs and sags. Too little produces a dry-roll result and causes product failure. The manufacturer calls this “very important,” which is about as loud as a technical sheet gets.
| Symptom | Likely cause | Fix |
|---|---|---|
| Runs pooling in the basin floor | Too much paint on the roller | Roll it out thinner on the next coat |
| Patchy, dry-looking curve | Dry-roll from too little paint | Recoat, load the roller properly |
| Peeling along the rim | Caulk left in place or trapped moisture | Strip, dry, recoat |
| Still soft after a day | Cold room or high humidity | Extend cure, add heat and airflow |
| Small surface bubbles | Normal outgassing during application | Let it self-level as it dries |
That last row is straight from Rust-Oleum: small bubbles appear on the surface as you paint, and the self-leveling properties eliminate them as the film dries. Don’t chase them with a brush.
If It Peels at the Caulk Line
The caulk line is where most failures start, and the two manufacturers disagree on the fix. Rust-Oleum says remove all caulk before refinishing, while Bathworks treats removal as optional and instructs you to reapply 100% silicone caulk once surfaces are dry if you did remove it. Bathworks treats removal as conditional, instructing you to reapply 100% silicone caulk around the sink once surfaces are dry if you did take it out, then rinse with warm water before use.
My read: pull the caulk, as Rust-Oleum instructs, though Bathworks treats removal as optional. A fresh silicone bead after cure is cheap insurance, and painting over a tired bead guarantees a hairline gap where water sits.
The Tools Worth Buying Before You Open the Kit
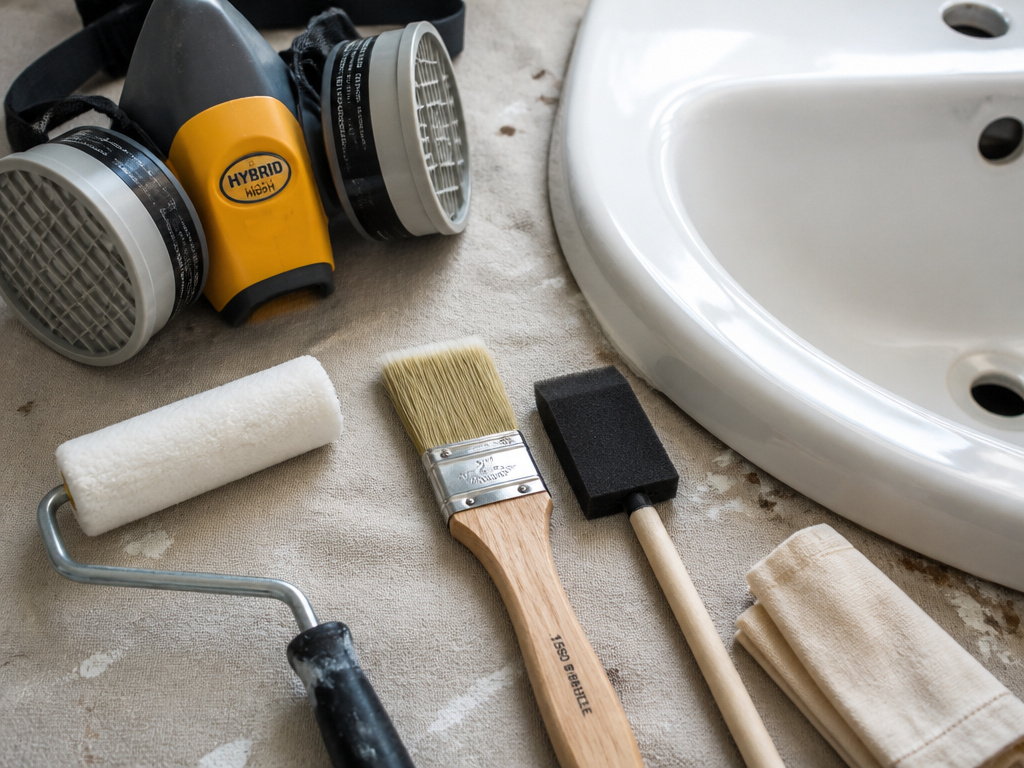
Four things do most of the work: a 1/4-inch short nap roller, a foam brush, a tack cloth, and a respirator.
Rust-Oleum specifies a high quality 1/4-inch short nap roller made for kitchen or bath use, plus a fine-bristle varnish brush if you’d rather brush. Bathworks’s instructions call for a foam brush and foam roller.
The rest of the kit list:
- A NIOSH-approved respirator for lead dust when sanding old paint. Rust-Oleum names it specifically for lead dust when sanding old paint.
- Rubber gloves and eye protection. Use gloves and eyewear with lacquer thinner, and never let lacquer thinner touch skin.
- Lacquer thinner for cleanup, which will permanently damage linoleum, plastic, wood, and previously painted surfaces if it splashes.
- Warm water and a rag for rinsing after the caulk is reapplied and surfaces are dry.
One disposal rule that gets ignored constantly: do not flush paint or rinse tools down a household drain. These are solvent-borne products and can damage pipes and the environment. Bathworks lists CHEMTREC at 1-800-424-9300 for emergencies.
If you want one answer, here it is. For a porcelain or cast iron basin and a schedule that doesn’t mind a three-day wait, the Rust-Oleum Specialty Tub and Tile Refinishing Kit in White (SKU 7860519) is the default, and the technical sheet is unusually clear. If you need the sink back in service tomorrow, the Bathworks BW Sink Refinishing Kit gets you to 24 hours instead of 72.
The same surface logic carries over to horizontal work, which is why countertop refinishing runs into the identical recoat-versus-cure argument. And if you’re still deciding between a kit and a can of enamel, this breakdown of kitchen sink paint covers where each one actually holds up.
Frequently Asked Questions
Can I paint a porcelain sink myself?
Rust-Oleum sells its Tub and Tile kit as a DIY product intended for porcelain, fiberglass, acrylic, cast iron, and steel. Hunker’s consumer guide argues porcelain should only be refinished professionally. The kit’s own data sheet is the stronger source here, but tape a test patch on a hidden corner and check adhesion before you commit.
How long before I can use the sink?
It depends entirely on the product. Rust-Oleum specifies 3 days before exposing the finish to water. Bathworks and Formula 131 both call for 24 hours before use. Formula 131 adds that high humidity or cool temperatures can stretch full cure out to a couple of days.
Do I have to remove the old caulk?
Rust-Oleum says remove all caulk before refinishing. Bathworks treats removal as optional but recommended, and tells you to reapply 100% silicone caulk once the surface is dry if you did remove it. Removing it gives you a cleaner bond line at the rim.
What grit sandpaper should I use?
Rust-Oleum calls for 400 to 600 grit wet/dry sandpaper across the entire surface. Hunker’s spray-enamel method uses 120 grit to scratch the glaze. Chemtops uses 100-grit sanding drums, but only on a sink cut-out edge. Match the grit to the product you bought.
Can I thin the epoxy to make it flow better?
Only Rust-Oleum allows it, and only up to 10%, which is 3 ounces per 1 quart, using 100% isopropyl alcohol (not rubbing alcohol), acetone, or xylene. Bathworks and Formula 131 give no thinning allowance at all. Thin those and you’re outside the instructions.
What temperature does the room need to be?
Rust-Oleum wants 50 to 90 F with humidity below 85%. Formula 131 calls for 60 to 85 F and warns against applying if temperatures will drop below 50 F within 8 hours, because adhesion is compromised.
The Bottom Line
Here’s the threshold that decides most of this: if your bathroom can’t hold 50 F for the full cure window, stop and wait. Not because the paint won’t dry, but because Formula 131 states plainly that a dip below 50 F within 8 hours compromises adhesion, and a coat that fails at the bond line can’t be rescued with a third layer.
Your first step this week is small. Buy the kit, then sand a hidden corner of the basin and tape off a test patch there before you touch the visible surface. Wait the full cure, then try to lift the edge with a fingernail. If it holds, you’ve just answered the only question that mattered.
Everything else is patience and a loaded roller. Start messy, refine later, and don’t let a three-day cure talk you into a rushed second coat.
