
How to Mix Black Paint: Warm, Cool, and Neutral
This post contains affiliate links. As an Amazon Associate, we earn from qualifying purchases.
To mix black paint, combine a deep blue with a dark earth brown: ultramarine blue plus burnt umber gives a neutral black you can push warm or cool. Start with the blue and add brown a little at a time. Tube black is already mixed, and it flattens everything it touches.
The difference shows up on the third or fourth layer. A tube black sits on the surface as one flat note, while a black made by learning how to mix black paint keeps a little color moving inside it, and the eye reads that movement as depth. Two pigments settle and dry at slightly different rates, so the black never goes completely uniform.
What follows is the two-color method, the warm and cool versions of it, and the one habit that keeps a mix from turning to mud. There’s also a detour into industrial coating data sheets, which turned out to be the most useful thing I read on this subject all year.
Key Takeaways
- Ultramarine plus burnt umber makes a neutral black you can lean warm or cool just by changing which pigment leads.
- Mix a small puddle, not a lake. Black goes far, and a mix that dries on the palette is paint you can’t get back.
- Add the stronger pigment to the weaker one, off the edge of the knife, in amounts you can still take back.
- Stop while the mix looks slightly too colorful. Black deepens as it dries, and a puddle that looks right wet usually dries dead.
- Tube black still has a job in blocking in and underpainting, where flat and fast is exactly what you want.
Why Tube Black Flattens Everything It Touches
The black in the tube lies flat.
Ivory Black leans warm and brown. Mars Black runs denser and cooler. Both arrive already neutralized, already decided, and both give you the same flat note across the whole page.
A single-pigment black absorbs most of the light that hits it and reflects very little back. That flatness reads as a hole in the picture rather than a shadow. A black built from two pigments reflects slightly different wavelengths in different areas, and the eye interprets that variation as depth.
When I started painting, I squeezed black straight from the tube and laid it on thick, because that’s what I assumed painters did. Every shadow came out the same dead grey. The pages looked like stickers, and for a long time I blamed my hand.
The tube was the problem.
Tube black still earns its spot on the palette:
- Blocking in a dark shape fast, where you want flat and you’ll paint over it anyway.
- Underpainting in oil, where a thin dark ground gives the layers above something to grip.
- Knocking back a color that’s gone too bright.
- Not much else.
How to Mix Black Paint From Two Colors
Ultramarine blue and burnt umber will get you most of the way to any black you need.
Ultramarine is a warm blue with a red lean. Burnt umber is a warm, dark brown carrying a little yellow. Push them together and the red and the yellow cancel the blue, leaving a neutral dark that still has temperature in it. This is the cancel-out principle at the heart of mixing paint colors, applied to the darkest end of the scale.
If you’re buying tubes for this, a student-grade ultramarine and burnt umber will get you there. A second student-grade pair works just as well for how to mix black paint, and a cheaper line is what I hand to students who want to practice without flinching at every squeeze.
Before you start: Solvent-based blacks and their reducers off-gas for as long as the puddle stays open, so work with a window open and a fan pulling air away from you, not toward you. Solvent on skin defats it, and repeated exposure adds up, so nitrile gloves are worth the bother. Solvent-soaked rags go in a lidded metal can, because a crumpled rag in an open bin is a fire risk.
Start With the Blue, Not the Brown
- Squeeze out noticeably more blue than brown. Go the other way and the umber swallows the blue, and you’re left with a chocolate smear you’ll chase for ten minutes.
- Drop the brown at the edge of the puddle. Putting it in the middle and stirring buries it, and you lose the ability to add in small increments.
- Mix in one direction, then fold back. Circles whip air in and dry the edges of the puddle before you’re finished.
- Test on the surface you’re actually painting. Black on a white palette reads lighter than black on toned paper. Try it on a scrap first.
- Stop while it still looks slightly too colorful. Black deepens as it dries, and a mix that looks right wet usually dries dead.
Burnt umber does most of the work here, so it pays to know how it behaves alone. The same logic that governs mixing brown paint applies to the brown half of this pair.
What Do Warm Black and Cool Black Actually Mean on the Page?
Warm black leans red and yellow, cool black leans blue and green, and that lean decides whether a shadow sits in sunlight or in shade.
| Black | Built From | Where It Belongs |
|---|---|---|
| Warm black | Ultramarine + burnt umber | Skin shadows, wood, firelight |
| Cool black | Phthalo blue + burnt umber | Night sky, metal, cool daylight |
| Neutral black | Ultramarine + raw umber | General shadow, blocking in |
| Green-black | Alizarin crimson + phthalo green | Foliage, deep water |
Matching the Black to the Light
Cool black belongs wherever the light comes from a cold source: overcast daylight, a north window, fluorescent tubes. Warm black belongs where the light has heat in it, which covers most interior scenes and almost every portrait.
For a purple-leaning black, add a touch of alizarin crimson to the blue before the brown goes in. How to mix purple paint walks through the same cancel-out trick in more detail.
For a green-leaning black, a whisper of phthalo green against a red-leaning base gets you there. Mixing green paint covers where that tipping point actually sits.
How Much of Each Color? Proportions Without a Recipe
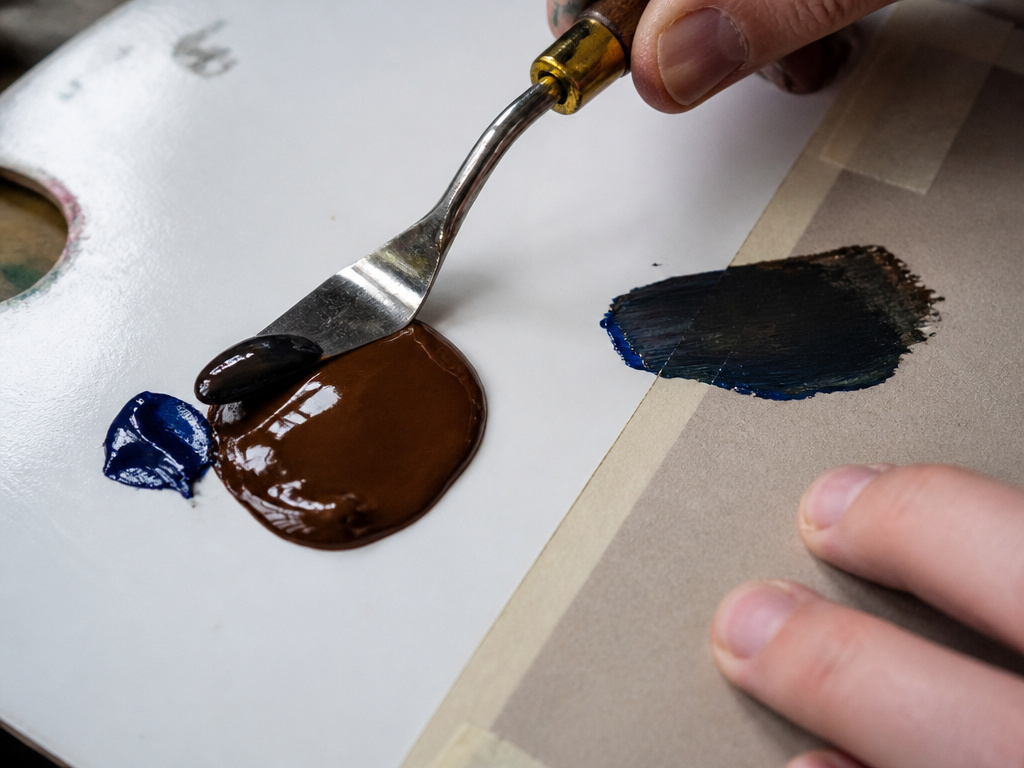
Anyone who hands you a fixed ratio for black is guessing about your pigments.
Phthalo blue will bury burnt umber at a proportion that would leave ultramarine gasping. Pigment strength varies that much between brands, and between lines inside the same brand. So you tune by eye, in small moves, and you accept that the ratio changes every time you open a different tube.
The one rule that survives: add the stronger pigment to the weaker one, off the edge of the knife, in amounts you can still take back.
Common mistake: Fixing an overshoot by adding more of the other color, then overshooting again. Three rounds of that and the puddle has grown to the size of a coaster and the black has gone dead.
If you overshoot, scrape it and start fresh. Paint is cheap next to the time you’ll spend trying to rescue a dead mix.
I keep a scrap of whatever paper I’m working on taped to the palette. Wet black on a white palette lies to you. It reads lighter than it will once it’s on toned paper, and that gap is where most of my early shadows went wrong.
What Industrial Black Coatings Taught Me About Mixing
Eastwood’s instructions for its 2K Ceramic Chassis Black open with a warning that the pigment settles.
That surprised me. Here’s a company selling black coating by the quart, and the first thing the data sheet says is that the ceramic content runs nearly four pounds per gallon, so significant settling during storage is normal and the can has to be shaken or stirred before the activator goes in.
The rest of the sheet is just as specific. Four parts paint to one part 21854Z activator. Pot life of about two hours at 70°F. Mix only what the immediate job needs. Two medium wet coats with 15 to 20 minutes flash between them.
Other manufacturers publish the same kind of document with completely different numbers:
| Product | Mix Ratio | Pot Life | Reduction |
|---|---|---|---|
| Eastwood 2K Ceramic Chassis Black | 4:1 with 21854Z | About 2 hr at 70°F | Up to 10% optional |
| Kirker Hot Rod Black UA-70388 | 3:1 with UA-1600 | About 2 hr at 70°F | None required; up to 20% |
| Axalta Cromax G9900S | 75-100% Basemaker, plus 12305S | 8 hr, best within 2 hr | 75-100% Basemaker |
| Transtar Factory Pack Black | 1:1 with reducer | 8 hr activated | 1:1 |
| SEM Trim Black | 1:1 with urethane reducer | Not stated | 1:1 |
Where the Data Sheets Disagree
Pot life is the clearest split. Eastwood and Kirker both land around two hours at 70°F. Axalta lists an eight-hour pot life for G9900S while also telling you to use the activated basecoat within two hours for optimum performance. Transtar lists eight hours activated and unlimited unactivated.
Reduction splits too. SEM and Transtar both say 1:1. Axalta says 75 to 100% Basemaker. Eastwood says no additional reduction required, up to 10% optional with its Zero VOC Reducer. Kirker says none required, up to 20% with UE-8000.
Activator ratios don’t even agree on the shape of the measurement. Eastwood is 4:1. Kirker is 3:1 by volume, with a batch table running 6, 12, 24 and 48 ounces of paint against 2, 4, 8 and 16 ounces of activator. Axalta gives 1 ounce or half an ounce of 12305S per ready-to-spray quart, which isn’t a simple volumetric ratio at all.
There is no universal ratio for black. There is the ratio a manufacturer tested for that specific can, and the ratio you test for your specific puddle.
Three habits worth stealing from a data sheet:
- Re-suspend before you mix. Eastwood’s ceramic loading is the extreme case, but heavy pigments settle everywhere. Your tube of Mars Black does it on the shelf.
- Mix only what the job needs. Eastwood and Kirker both say it outright, and both say it because the clock starts the moment the activator hits the paint.
- Two thin coats. Eastwood specifies two medium wet coats with 15 to 20 minutes flash. Kirker specifies two with 5 to 10. Neither one says lay it on thick.
I started keeping a two-line mixing note in the margin of my sketchbook after reading these. Pigment names, rough proportion, and the date. It has saved me from re-guessing a color more times than I can count.
The Mud Problem: When to Stop Mixing
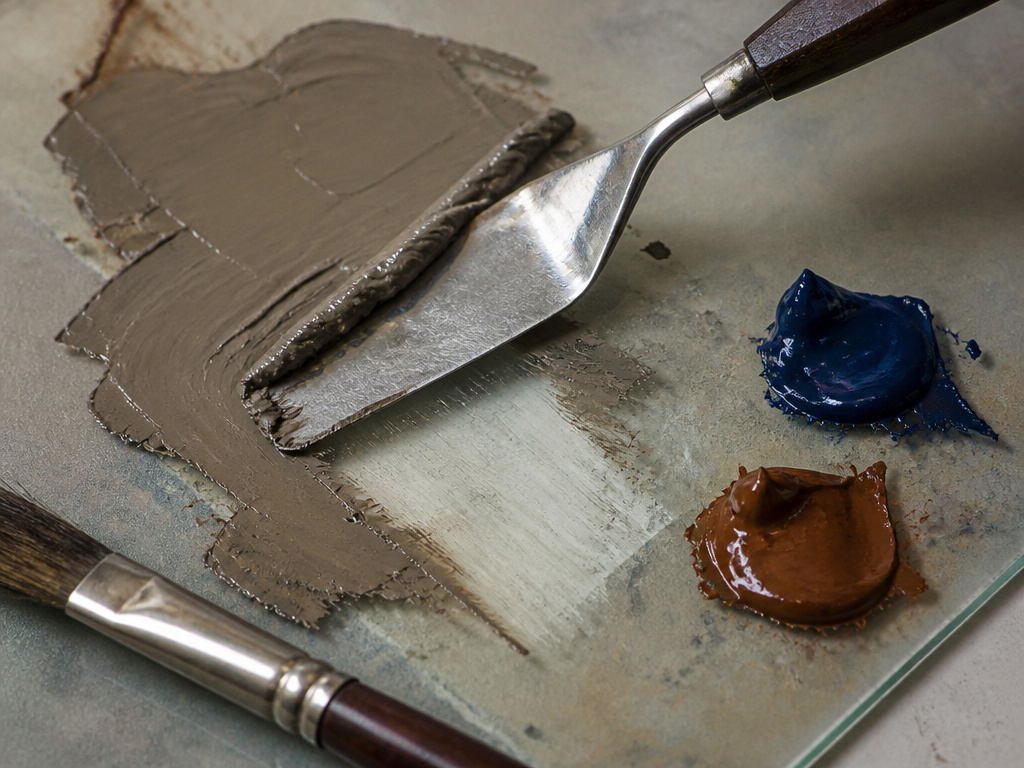
You know the moment. The puddle goes from deep and alive to flat brown-grey, and you keep stirring anyway, hoping it comes back.
Mud is what happens when too many pigments compete. Every pigment reflects a narrow band of light. Stack enough of them and the bands average out to nothing, which is why a five-color mix looks like grey-brown sludge no matter what you started with.
The signs, in the order they show up:
- The mix stops changing when you add more. That’s the loudest one.
- The color temperature flattens, and warm and cool both slide toward the same grey.
- It goes chalky at the edges where it’s drying.
- Your brush strokes stop showing, because mud is opaque and it kills texture.
The part nobody mentions: Every pigment you add cuts how much light the mix can bounce back. Two pigments make a black. Four make a brown-grey that nothing will rescue.
The fix is boring. Scrape the puddle off, wipe the knife, and start again with two pigments.
Muddy greys get a bad reputation, and they shouldn’t. Learning to make one on purpose is the same skill as how to mix gray paint, just with the volume turned down.
Black in Context: Shadows, Glazes, and Skin Tones
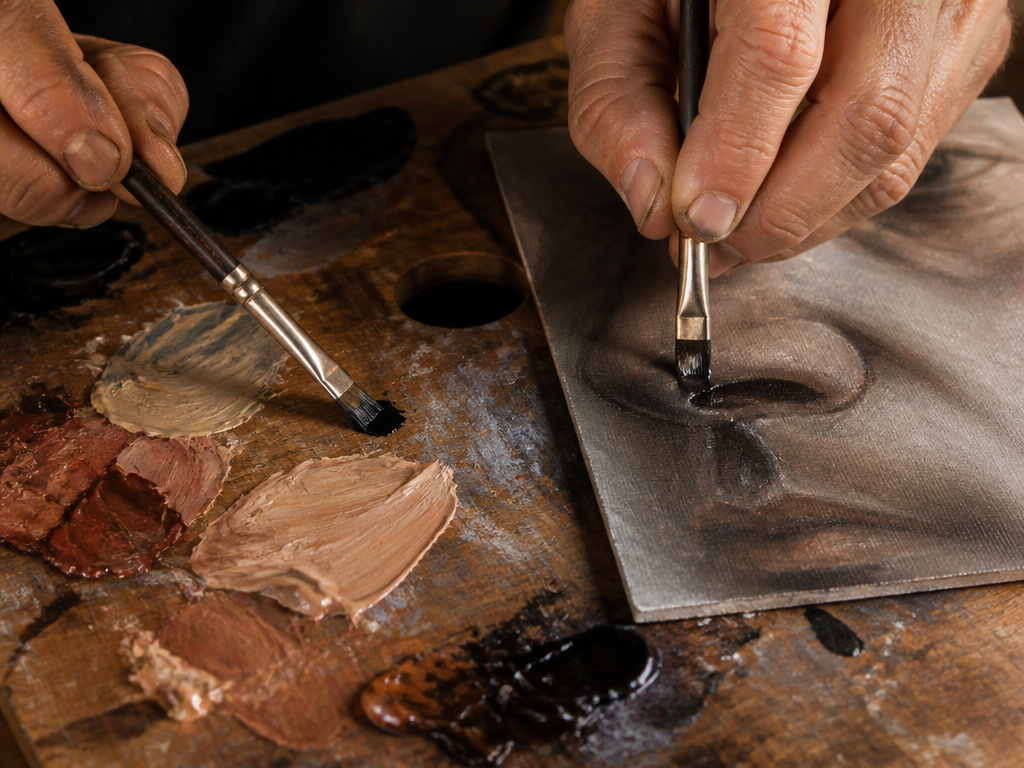
Black in a shadow does a different job than black in a glaze.
Black in Shadows
A shadow is light with the warm taken out, not the absence of light. That’s why a cool black reads as daylight shade and a warm black reads as interior shade, and why swapping them makes a scene look wrong without anyone being able to say why. There’s more on that balance in shadows and highlights.
Black in Skin
Tube black in skin goes grey and dead within a layer or two. Mix the shadow from the complement of the skin tone instead, and save the black you built for the deepest creases only. Mixing skin tones covers the complement pairs that hold up.
Frequently Asked Questions
Does black paint need white mixed in to look natural?
No. Adding white lightens the black into a grey and dulls whatever temperature the mix had. If you need a lighter value, mix a separate grey from your two pigments and leave the black alone.
Can you make black from just blue and brown?
Yes, and it covers more situations than a tube black does. Ultramarine plus burnt umber gives you a neutral that leans warm. Swap the blue for phthalo and the same brown takes you cooler.
Why does my mixed black dry lighter than it looks wet?
Wet paint has a sheen that bounces light back at you. As the film dries flat, that sheen goes away and the value settles darker. Test on the paper you’re painting on rather than the palette.
What’s the difference between ivory black and mars black?
Ivory black leans warm and brown, which makes it useful in earth-heavy scenes. Mars black is denser and cooler, and it covers faster. Neither one carries temperature the way a two-pigment mix does.
Do I need separate warm and cool blacks on one painting?
Usually yes, and it’s less work than it sounds. Mix one puddle and split it, pushing one half toward umber and the other toward blue. Two blacks from one start.
Before You Go
Here’s the trigger worth remembering. If the edges of your puddle have started to skin over, don’t stir it back in. Skinned black drags, it never fully re-blends, and it will show up as grit in the middle of a smooth passage. Scrape it and mix fresh.
The assignment is small: one puddle, ultramarine and burnt umber, tested on a scrap of the paper you actually paint on. That’s the whole thing. You’ll learn more from that single test than from a shelf of mixing charts.
And a concession, because it’s honest. None of this helps if you work on a tablet, where black is a hex value and mixing is a slider. I’m no use to you there. On paper, the two-color mix is the thing that changes how a shadow reads, and it costs you two tubes and an evening.
