
How to Fix Cracks in Painted Walls: Step-by-Step
This post contains affiliate links. As an Amazon Associate, we earn from qualifying purchases.
To fix cracks in painted walls, match the repair to the crack width. Hairline cracks at 1/32 inch and under need paint forced into them rather than filler. Anything wider takes a slurry patch, thin filler layers, and a primed, repainted panel so the repair doesn’t show.
That 1/32 inch line comes out of the cement plaster trade, where hairline cracking gets treated as normal settling rather than damage. Drywall and plaster manufacturers hand out the opposite instruction, and both camps are right about their own material. Which one applies to your wall depends on what’s underneath the paint.
The rest walks the width test first, then the prep, the filler, and the two coatings that decide whether the patch disappears or ghosts through in a year.
Key Takeaways
- Measure before you fill. Cracks at 1/32 inch (0.030 inch) and under are hairline, and the industry guidance is to paint them rather than patch them.
- Thin layers beat one thick pass. Each coat has to dry before the next, or the filler shrinks and cracks along the middle.
- Prime every repair. Unprimed spackle drinks the topcoat at a different rate and dries to a different sheen.
- Caulk above 40 °F only. Below that it cracks or crawls instead of curing, and the joint fails.
- Test adhesion six to 12 inches out before you repaint, or the new coat lifts with the old one.
How Wide Is the Crack? The 1/32-Inch Line That Decides the Repair
One thirty-second of an inch is the whole decision. Measure the gap at its widest point with a tape measure or a feeler gauge, and let that number pick your repair.
Cracks measuring 1/32 inch (0.030 inch) and narrower are classified as hairline cracks and are considered inherent in cementitious materials. Industry guidance states that cracks at or below this threshold typically require no treatment, and that aggregate patching material will not bond inside a gap of that size, so the patch detracts from the surface instead of improving it.
That threshold comes from the stucco crack repair technical document published by the Wall and Ceiling Contractors, and it exists because cement plaster keeps gaining strength after it cures, which is central to how to fix cracks in painted walls. Fresh stucco cracks most in its first few months, right when the building is settling, and most of those cracks are stress relief rather than failure.
If the look bothers you, the fix is a brush and a can of paint. Force the coating into the crack, follow with a full acrylic coat, and paint the entire panel so the color stays uniform. Skipping the whole-panel step leaves a visible rectangle.
| Crack | What it usually is | Repair |
|---|---|---|
| Hairline, 1/32 in or less | Normal shrinkage in cement plaster | Force paint in, or leave it |
| Craze or web pattern | Surface checking during cure | Refinish or thick acrylic coat |
| Wider than 1/32 in | A real gap in the membrane | Slurry coat plus bonding agent |
| Paint cracking, wall intact | Coating too thick, cross-grain | Strip to bare material and start over |
| Joint opening 1/4 in or more | Too wide for plain caulk | Backer rod or bond breaker tape |
Why Hairline Cracks Get Painted Instead of Filled
Filler needs something to grab. A gap of 1/32 inch or less won’t accept aggregate material, so a spackle patch sits on top of the wall rather than inside the crack. It dries proud of the surface and reads as a scar.
There’s a cosmetic catch too. Paint thickness on stucco alters the texture, and the color may not match existing integral-colored stucco. That’s why the guidance says to coat the whole panel rather than dab at the crack.
When the Gap Is Wider Than 1/32 Inch
Cracks past that threshold get a slurry coat of stucco finish mixed with a bonding agent, then the whole panel gets refinished so the patch doesn’t read as a scar. On a large remediation job, the industry guidance is to repair a small sample area first and agree on what acceptable looks like before anyone touches the main wall.
If the wall is drywall rather than plaster, the sequence changes slightly, and a drywall patch follows the same thin-layer logic. Most of the durability comes from wall prep, not from the filler brand.
What you actually need on hand:
- A small flexible putty knife for tight areas, plus a wider one for a big patch
- Fine-grade sandpaper
- Lightweight spackle or joint compound
- A primer made for the surface you’re coating
- A dry microfiber cloth and a damp sponge
So When Does Paint Actually Hide a Crack?
Benjamin Moore’s repair guide says the opposite of the stucco bulletin: painting over cracks and holes won’t make them disappear, and it may make them more noticeable. Both statements are correct, and the reason is the material under the paint.
| Question | Cement plaster guidance | Drywall guidance |
|---|---|---|
| Hairline crack | Leave it or paint over it | Widen it and fill it |
| Painting over | Recommended for appearance | Makes it more noticeable |
| Panel coverage | Paint the whole panel | Blend the patch, then prime |
| Wide gaps | Slurry coat plus bonding agent | Spackle in thin layers |
On cement plaster, a hairline crack is a surface feature. Forcing paint into it and coating the panel blends the color, and the texture change from the extra film is small enough that nobody notices. On interior drywall, a crack usually means the joint moved, and paint bridges it without closing it. The gap telegraphs through the new coat.
That’s why the drywall procedure starts with a putty knife. Widen the crack, clear the loose material, and give the filler a trench to sit in.
The Prep Work Nobody Wants to Do, and the One-Year Bill It Sends
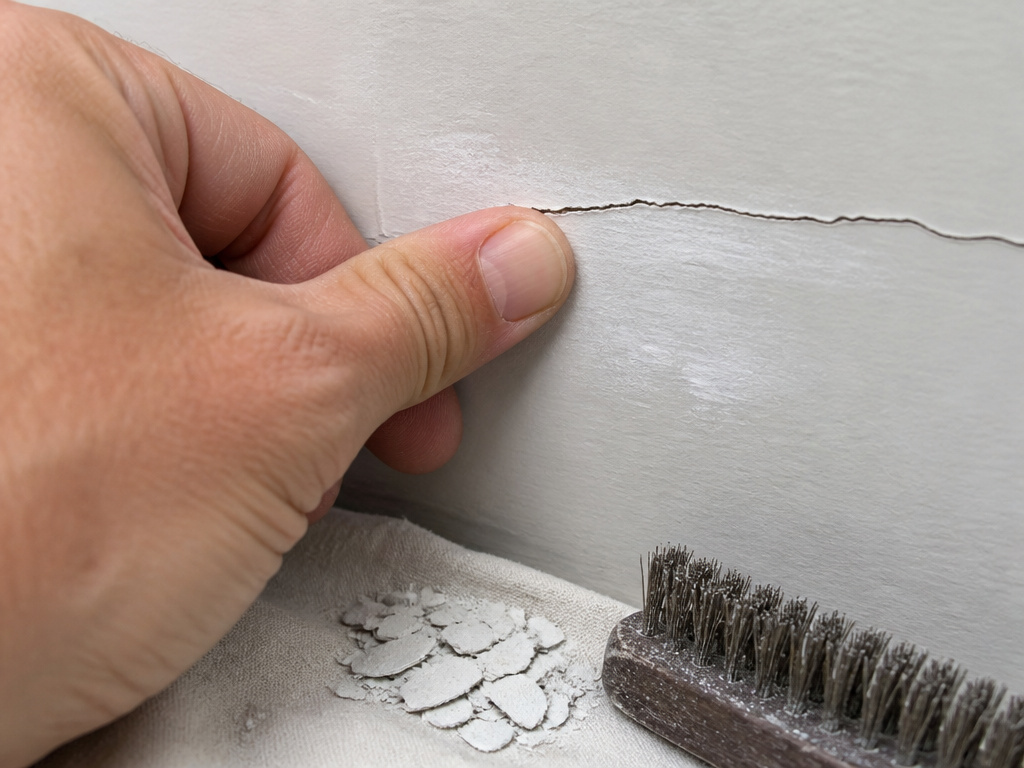
I once scrubbed a hallway scuff hard enough to leave a palm-sized shiny patch on flat paint, which looked worse than the mark I was chasing. Wall prep carries that same risk in reverse: the cleaning step can damage more than the defect if you lean on it.
The stakes are bigger than a scuff, though. Intercoat peeling usually shows up within one year of repainting, and the cause is almost always inadequate cleaning of the weathered old surface. That’s an afternoon of painting undone by skipped prep.
Start dry. A microfiber cloth on a long handle pulls dust off the wall and the top of the door trim, and it stops that dust turning into gray paste the second a wet sponge touches it.
Then follow the manufacturer sequence: scrape away loose and flaking material with a scraper or wire brush, sand the surface, and feather the edges. Before you commit to a repaint, test the coating around the damaged area about six to 12 inches out. If the old film lifts under your thumbnail at that radius, the new coat will take it with it.
Proper sanding walls gets you a surface that feels slightly tacky-dry under your hand and leaves nothing on your palm. Scrub with a sponge or bristle brush, rinse with clean water, then wipe the wall with your bare hand. If it comes away chalky, scrub again with detergent and rinse. Chalky residue is the setup for peeling paint a season later.
Common mistake: Rinsing once and calling it clean. Wipe the wall with your hand after it dries. A chalky palm means a layer is still sitting between the new paint and the old, and intercoat peeling shows up inside a year.
While the wall is bare, walk the trim line and look for popped fasteners. Nail holes are a two-minute fix now and a visible dimple under fresh paint later.
How to Fix Cracks in Painted Walls With Filler: Thin Coats, a Wide Knife, and the Blob That Ruins It
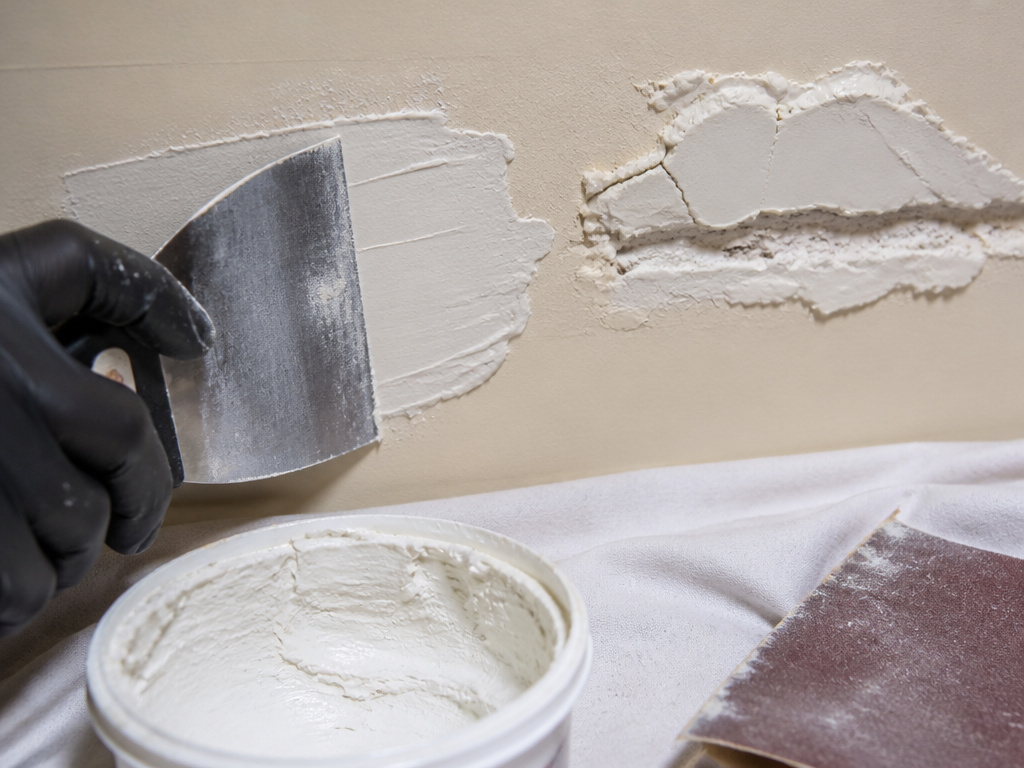
One thick blob of filler is the single most common way a patch fails. It skins over on top while the middle stays wet, then shrinks and cracks along the same line you just repaired.
Before you start: Sanding a patch throws fine dust that settles on every surface in the room, so tape down a drop cloth and wear a mask. Caulk only works when the air, the surface, and the tube are all above 40 °F; below that it cracks or crawls and the joint has to come out.
- Widen the crack with a putty knife and clear the loose material. Skip this and the filler bridges a gap that keeps opening underneath it.
- Cut a trench deeper and slightly larger than the crack. Filler needs volume to key into, and a shallow smear has nothing to hold.
- Score long cracks at intervals, removing a little plaster or sheetrock every so often so the filler has anchors along the run. One continuous bead over a long crack will split along the same path.
- Countersink popped nails with a hammer. The dent the hammer head leaves is a ready-made hole you can fill in one pass.
- Brush or vacuum the dust, then wipe with a damp cloth. Dust trapped between layers is why patches blister.
- Spread thin layers and let each one dry before the next. Two thin passes beat one heavy one every time.
- Sand lightly with fine-grade paper once everything is dry, then wipe the dust off with a clean cotton cloth.
- Prime the repair before the topcoat. Unprimed filler drinks paint and dries to a different sheen than the wall around it.
The Trench, and Why the Knife Goes Sideways
For small holes, dig the opening out so the inside is bigger than the outside. That’s what stops the filler falling out. Same principle as the trench: the patch needs a shoulder to sit behind.
Thin Coats, Dry Between
Benjamin Moore’s own procedure says to add as many layers as needed and make sure each one is dry before the next. That’s the least glamorous instruction in the whole document, and it decides the result.
I won’t pretend my first patch on any wall came out smooth. It was lumpy, I sanded through the paper face of the drywall in one corner, and I primed it anyway. It still looked better than the crack. Start messy, refine later.
Cross-Grain Cracking Means the Coating Is Too Thick, Not the Wall
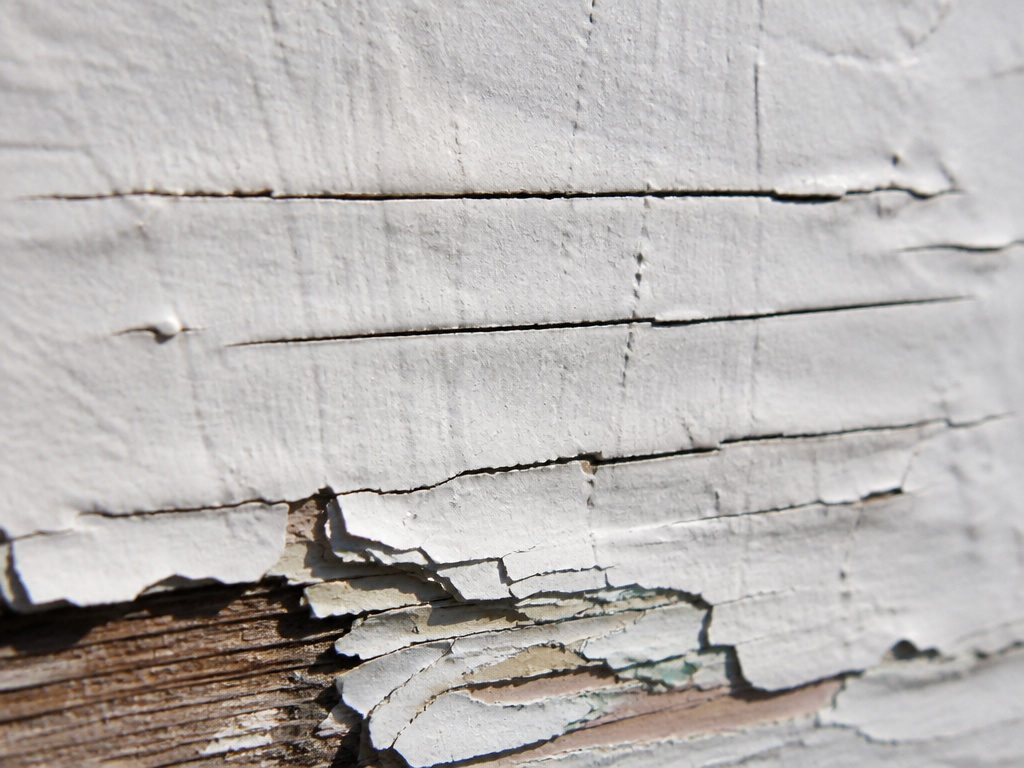
Cross-grain cracking happens when the paint film itself gets too thick, and it shows up most on older homes that have been repainted several times. Paint cracks in the direction it was brushed onto the surface.
Once cross-grain cracking has occurred, the only solution is to completely remove the old paint and apply a new finishing system. There’s no patch, no filler, and no extra coat that reverses it.
How to tell the two apart before you buy anything:
- The crack runs in long straight lines following the brush direction (paint failure)
- The crack wanders and branches like a river delta (wall movement)
- Paint flakes off in chips with bare material underneath (adhesion failure)
- The gap closes and reopens with the seasons (structural movement)
Once a paint film passes about 4 to 6 mils total, more coating stops buying you more years. It buys you cracking. A primer plus one or two topcoats is the whole system, and 4 to 6 mils is roughly the thickness of a single sheet of newspaper.
The Purdue Extension NCR-133 publication puts it plainly: one top coat of high-quality acrylic latex should last four to five years, and two top coats can last up to 10.
Here’s where the professionals split. Standard manufacturer guidance from Sherwin-Williams and Benjamin Moore says sand the surface and feather the edges for a smooth blend. The NPS exterior paint maintenance guide contradicts that for heavy buildup: if the film is thicker than 1/16 inch, just spot-paint the bare wood and don’t bother feathering the thick edges, because the film thickness will cause it to peel regardless.
That’s a genuine split on old buildings, and it matters. If your wall has layers of paint so thick the edges cast a shadow, the cracked paint you’re chasing is a coating problem, and feathering it is wasted effort. If the film is thin and the paint chips are isolated, sand and feather as the manufacturers instruct.
Does Caulk Belong in a Crack? Sometimes, and the Temperature Decides
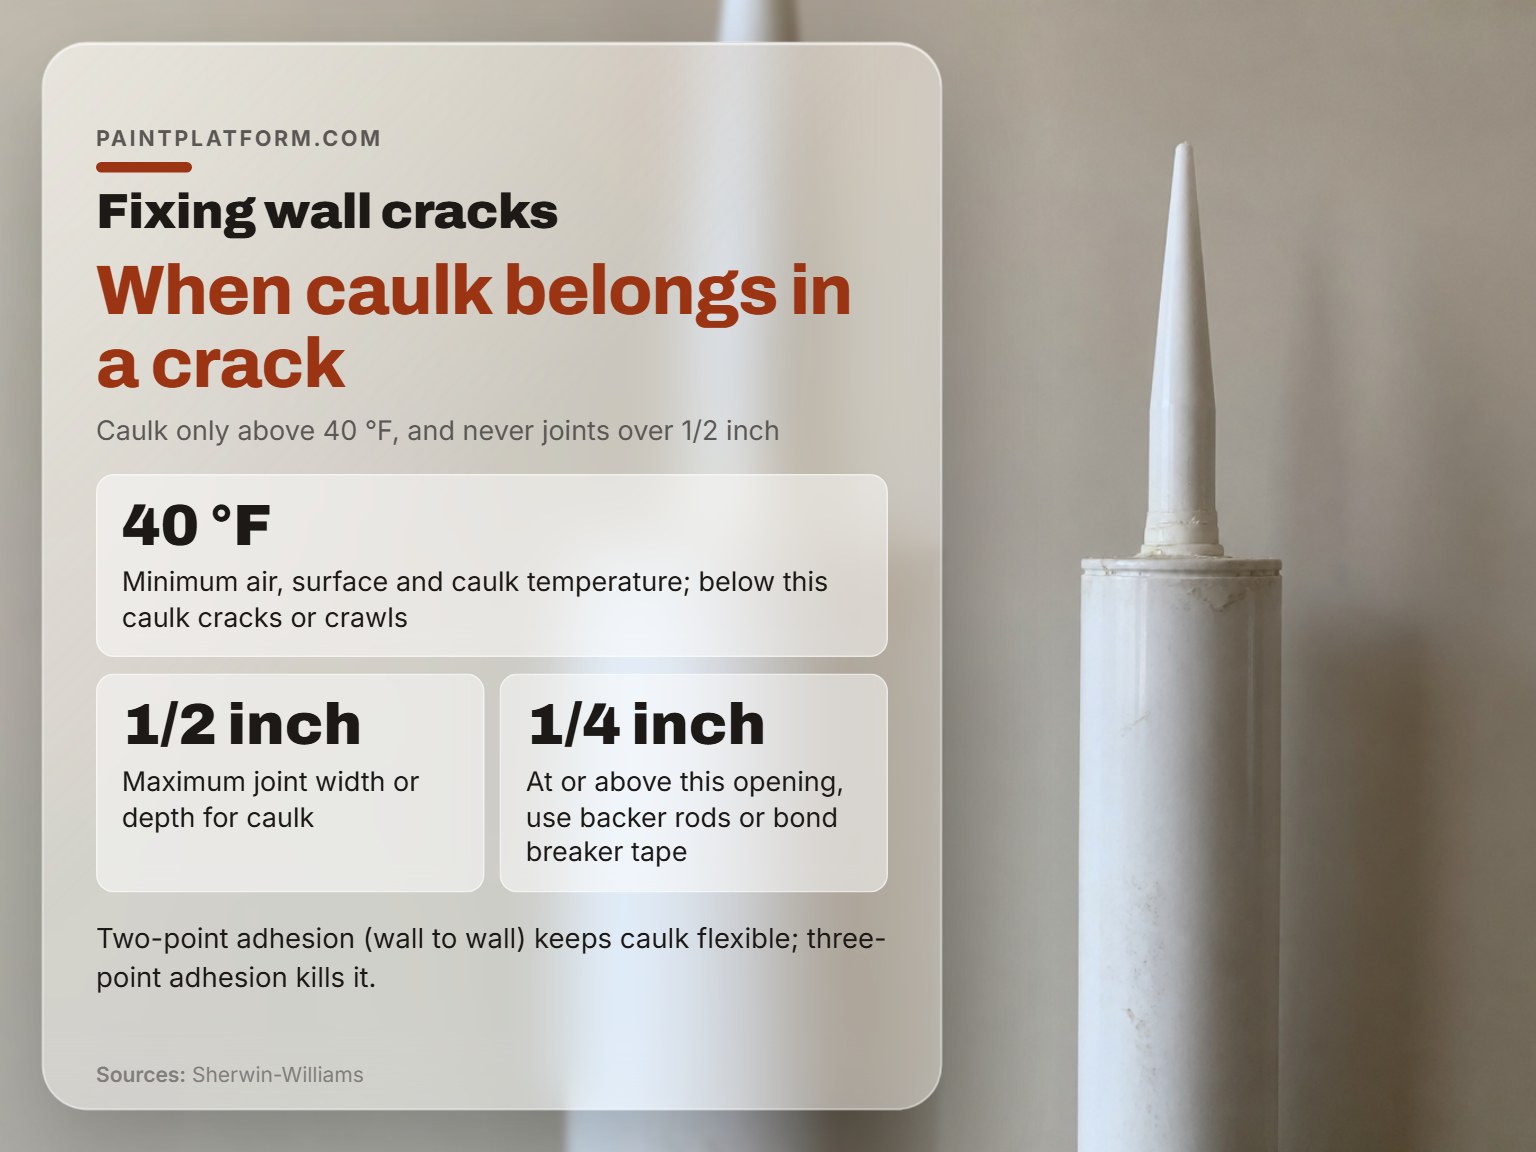
Most cracks in a painted wall should never see a caulk tube, and the ones that should come with a temperature rule attached.
Caulking joints in excess of 1/2 inch in width or depth is off the table. If the opening is 1/4 inch or greater, prevent three-point adhesion with backer rods or bond breaker tape. Three-point adhesion is what happens when the sealant grabs both walls and the bottom of the crack at once, and the flexibility goes out of it. Two-point adhesion, wall to wall, gives you the movement you need.
An acrylic tube that’s been sitting in a cold garage feels stiff and slightly resistant when you squeeze the trigger, and that stiffness is your warning. Below 40 °F, caulk cracks or crawls instead of curing, and the joint fails before the paint does.
Where this goes sideways: Filling a 1/4 inch gap with a single bead and no backer rod. The sealant bonds to both walls and the bottom of the crack at once, which kills its flexibility, and the joint splits instead of stretching.
Purdue’s sequence puts caulk last for a reason: caulk large cracks and openings after treating and priming, not before. Sealant over raw, dusty material is a joint waiting to let go.
Priming and the Two-Week Window That Decides Your Topcoat
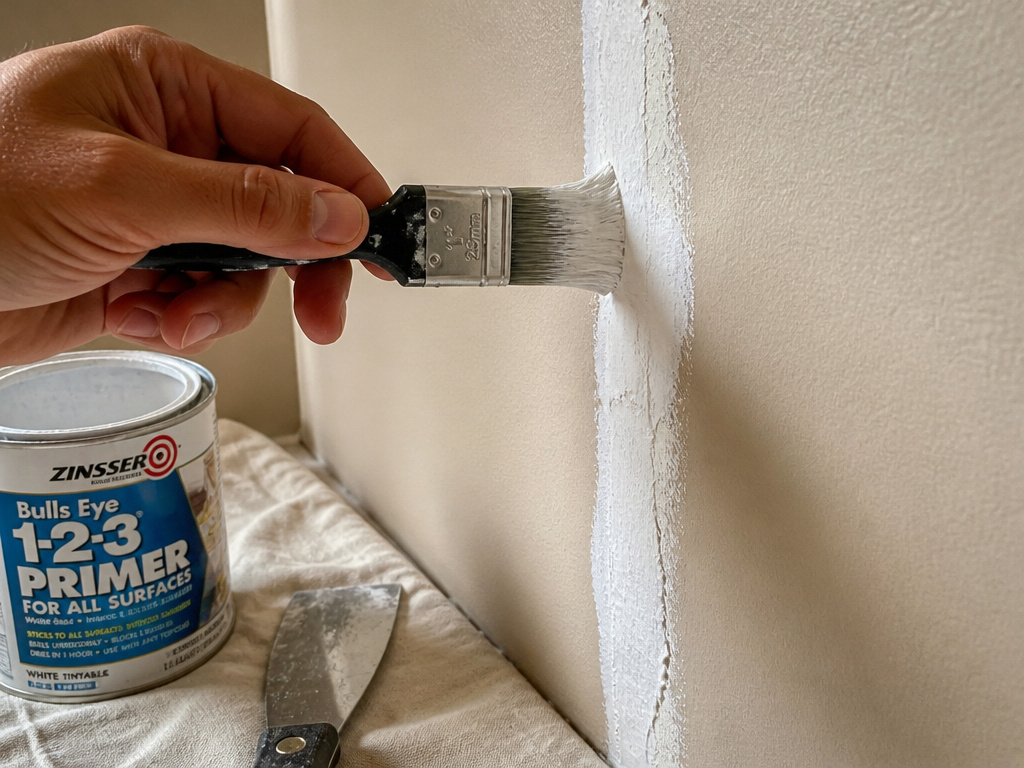
Primer is the step that gets skipped, and it’s the one that decides whether the patch reads as a repair. Benjamin Moore’s guidance is blunt: prime all repaired areas to seal the filler and stop it absorbing paint.
On bare wood, the sequence is an oil-base primer or a stain-blocking latex primer, followed by at least one top coat of high-quality acrylic latex. For exterior work, Sherwin-Williams points to Exterior Latex Wood Primer under SuperPaint Exterior Acrylic Latex, and both are built for surfaces that take weather.
Easy to miss: An oil-base primer left longer than two weeks before the topcoat forms soap-like material on the surface that blocks bonding. Scrub it back before you paint, or the new coat lets go in sheets.
For a small interior patch, a careful touch up paint pass that feathers into the surrounding wall usually works if you’re using the same batch. If the sheen is wrong, a matte paint finish hides the transition better than anything else on the shelf.
One thing I got wrong early: I reached for a magic-eraser sponge to clean a mark near a fresh patch and took the sheen straight off the surrounding paint. It left a dull spot I could see from across the room. Keep those away from anything but a tough finish.
Protected areas run on a different clock. Purdue’s guidance is to repaint porches, eaves, and overhangs every other time you paint the house, because those surfaces collect water-soluble material that interferes with adhesion. The National Park Service puts older buildings with heavy buildup on a spot maintenance round every two to three years.
Frequently Asked Questions
Is it OK to just paint over cracks in a painted wall?
It depends on the substrate. On cement plaster, hairline cracks at 1/32 inch and under are treated as normal, and painting over them is the recommended cosmetic fix. On interior drywall, the crack usually means a joint moved, and paint bridges it without closing it.
What size crack needs filler?
Anything wider than 1/32 inch (0.030 inch). Below that, the gap won’t accept aggregate material, so a patch sits on top of the wall instead of inside the crack and shows as a scar.
How long should I wait between coats of spackle?
Until each layer is completely dry. Thin passes dry faster than a thick one, and the whole point of layering is that the middle isn’t still wet when the surface skins over.
Can I caulk a crack instead of filling it?
Only for joints that move. Keep caulk out of joints wider or deeper than 1/2 inch, and use a backer rod or bond breaker tape once the opening reaches 1/4 inch so the sealant bonds wall to wall instead of three ways.
Why did my patch show through the new paint?
Usually unprimed filler. Spackle and joint compound absorb the topcoat at a different rate than the surrounding wall, so the patch dries to a different sheen. Prime every repair before you paint.
Do I have to repaint the whole wall?
For color uniformity on stucco, the industry guidance is to paint the entire panel. For a small interior patch, a feathered touch-up usually blends if you’re working from the same batch of paint.
Before You Go
The short version of how to fix cracks in painted walls: put a tape measure on the crack. If it’s 1/32 inch or under, leave it alone. If you can see it, force paint into it and coat the panel.
One concession worth stating plainly. The stucco bulletin that supplies the 1/32 inch number also says its repair methods aren’t a guarantee a crack won’t return. Nothing else here is either. A crack that keeps reopening is telling you about movement behind the wall, and filler won’t fix that.
If you’re patching this weekend, do one thing first: clean a two-foot square around the crack with a dry cloth, then a damp sponge, and let it dry completely before anything else touches the wall. That single step is the difference between a patch that lasts and one you’re scraping off in a year.
