
How to Choose an Airbrush: Step-by-Step
This post contains affiliate links. As an Amazon Associate, we earn from qualifying purchases.
To learn how to choose an airbrush, match four specs to the work you actually do: gravity feed (the cup sits on top, above and behind the head), a dual-action trigger (down for air, back for paint), a rear trigger limit if you’re new, and a needle around 0.3 mm for miniature-scale detail.
Those four specs talk to each other. The cup position decides how paint reaches the nozzle. The trigger decides how much say you get over the moment it arrives. The needle decides how small a mark you can leave behind, which is the heart of how to choose an airbrush.
Change one and the other three feel different in your hand, which is why buying on specs alone gets people into trouble when they ask how to choose an airbrush.
What follows: the four specs in plain language, the pressure argument the manuals can’t settle between themselves, the spending rule that holds up over years, and the cleaning habit that decides whether your gun survives year two.
Key Takeaways
- Gravity feed puts the cup on top, above and behind the head, so you can see what’s left while you work.
- Dual-action splits one trigger into two jobs: press down for air, pull back for paint, independently.
- A rear trigger limit is a beginner feature, not a crutch. It caps how far the trigger pulls back so you can’t flood a model by accident.
- Skip the extremely cheap tier and skip the top tier. Mid-level gear gives quality that lasts for many years.
- Cleaning is half the skill. Isopropyl alcohol strips acrylic for a fraction of what branded cleaner costs.
Gravity Feed, Dual-Action, Needle Size: What Each One Changes
Three specs do most of the work: how paint reaches the nozzle, what the trigger controls, and how fine the needle is. Everything else on the box is a variation on those three.
Gravity feed places the paint cup on top of the airbrush body, above and behind the head, so paint moves down into the nozzle under its own weight. Dual-action separates the two functions: the trigger travels down for air and back for paint, allowing each to be adjusted independently of the other, which is the whole point of the design.
If you’ve done any airbrushing for beginners reading already, you’ve met this advice before. Here’s what it actually buys you in the chair.
| Feature | What it changes | Who it suits |
|---|---|---|
| Gravity feed | Cup sits on top, above and behind the head | Most desk painters |
| Dual-action trigger | Down for air, back for paint, separately | Anyone blending or fading |
| Rear trigger limit | Caps how far the trigger pulls back | The first few months |
| 0.3 mm needle and nozzle | Finer atomisation, tighter detail | Painters past the beginner stage |
What Dual-Action Actually Buys You
Air on its own does nothing. Paint on its own does nothing. The value shows up when you can lay down air, then feather paint into it, then stop the paint while the air keeps running.
That last part is the one people miss. Cutting paint while air still flows clears the nozzle and stops the fat droplet that lands on your model a second after you thought you’d finished.
The Rear Trigger Limit Is Not a Crutch
Some airbrushes carry an adjustable control at the back that limits how far the trigger can travel, and therefore how much paint comes out. You can see it on some airbrushes.
The Mighty Brush’s beginner guide calls it useful for exactly one reason: it stops you flooding a model while your hand is still learning what “a little paint” feels like. It becomes less important as your feel develops.
I’d add one thing. Leave it set low at first, then open it gradually and notice how much more control you actually had than you thought.
Which Airbrush Feature Should a Beginner Pay For First?
None of them.
I started on a basic dual-action gun near the bottom of the hobby price range. I spent the first few months waiting for it to become the thing holding me back. It never was. I was.
That’s the whole answer, and it’s why I get twitchy when someone opens a shopping tab before they’ve put paint through anything. The gun is rarely the bottleneck in month one. Your thinning is. Your trigger control is.
When the paint goes on too thick, the gun spits fat droplets instead of a mist, and you’ll watch them land as separate splats rather than a soft edge. That’s a thinning problem wearing an equipment costume.
Before you upgrade anything, check these in order:
- Does the paint move like milk? If it clings to the cup wall, thin it more.
- Is the trigger gritty or sticky? Clean it before you blame it.
- Are you spraying at the same distance every time? Most splatter is distance, not gear.
- Have you actually worn out a needle? Bent tips happen. Worn-out guns mostly don’t, not in a year.
If you’d rather someone else made the matching decisions, beginner airbrush kits exist precisely so you don’t have to. Just open the box knowing what’s inside it.
Why Do the Manuals Disagree About Pressure?
Iwata’s own manuals don’t agree with each other, and that’s the most useful fact in this whole article.
The HP-C manual and the HP-M1/M2 manual give different starting pressures for what amounts to the same job. Grex’s Tritium manual gives a range that shifts with paint thickness, telling you thick paint needs far more than thin. The Mighty Brush’s guide picks one number for thinned hobby acrylics and moves on.
Four sources, four answers, no referee.
| Source | Where it lands |
|---|---|
| Iwata HP-C manual | Low end of its own range |
| Iwata HP-M1/M2 manual | A different, higher band |
| Grex Tritium manual | Wide range, scaled to paint thickness |
| The Mighty Brush guide | One fixed number for thinned acrylics |
None of them is wrong. They’re describing different paint, different distances, and different ideas of what “starting point” means. Anyone who tells you there’s one correct pressure for miniature work is quoting a habit, not a standard.
Choosing an airbrush compressor with a tank and a moisture trap matters more here than the gun does. A steady supply hides a lot of pressure sins. A pulsing one exposes every single one.
Iwata publishes its operating manuals as free PDFs, including the HP-C manual, and reading two of them side by side is genuinely instructive. The Grex Tritium manual is the other one worth downloading.
Where this goes sideways: Chasing one magic pressure number across three brands. Pick a starting point, spray a test line, and adjust from what you see on the paper. Ten minutes of testing beats an hour of reading.
The Budget Rule That Holds Up: Mid-Level Lasts, Extremely Cheap Doesn’t
Spending more does not buy you a better first year. The Mighty Brush guide is blunt about this: mid-level priced equipment gives quality that lasts for many years, and some items only need buying once and last a lifetime with care.
It’s equally blunt about the bottom. Extremely cheap options get replaced too soon. Top of the line isn’t required for decent quality either.
| Price tier | What the guide says | What actually goes wrong |
|---|---|---|
| Extremely cheap | Avoid it | You’re buying the replacement inside a year |
| Mid-level | Lasts many years, some items a lifetime | Nothing, if you clean it |
| Top of the line | Not needed for decent quality | Money that should have bought paint |
Friends ask me which premium kit to buy, and my answer is always the same. Spend the difference on paint, scrap paper, and cleaner, then decide after a month whether you actually like airbrushing. Most people find out faster that way, and cheaper.
Once you know your tier, the best airbrushes question gets much easier to answer. If you’d rather not match parts at all, airbrush and compressor combos take the pairing decision off your plate.
Skip this if: You already own a working compressor and a hose. Then you’re buying one item, not a setup, and the tier logic above applies to the gun alone.
Cleaning Is Part of the Skill, Not a Chore After It
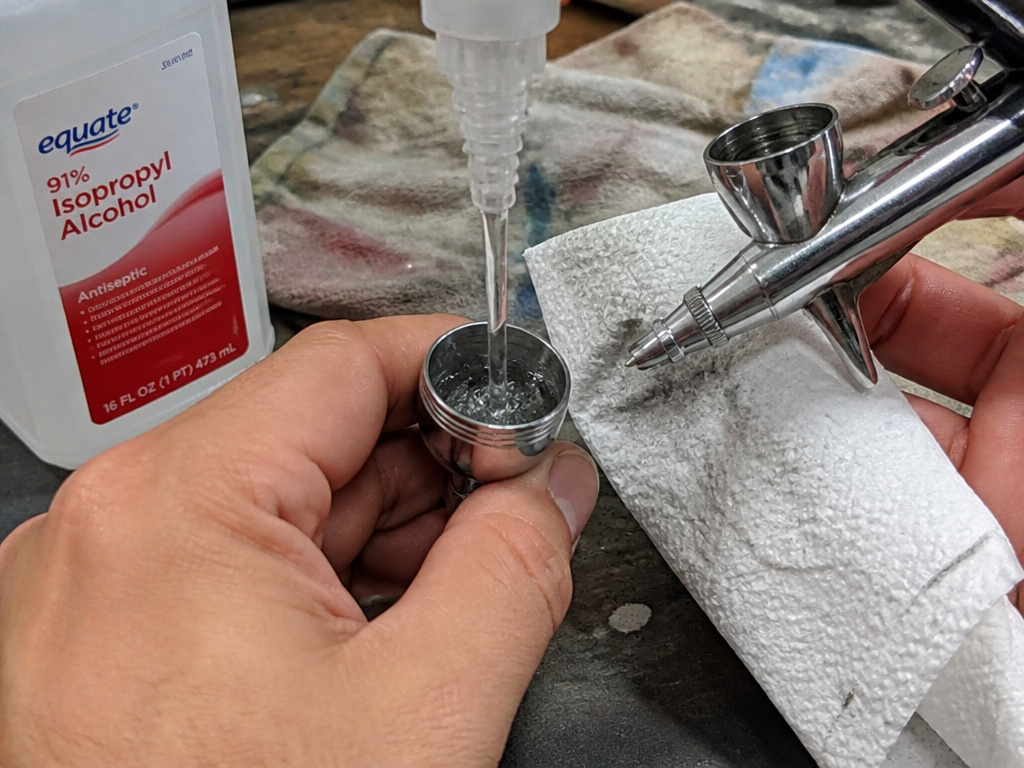
A needle that’s sat in dried acrylic for a week doesn’t slide. It drags, then it sticks, then the trigger feels like it’s full of grit and you start spraying around the problem instead of through it.
Before you start: Isopropyl alcohol is flammable and gives off strong vapour, so work near an open window and keep it away from anything that sparks. Compressed air drives fine paint mist into the air, so wear a respirator rather than a dust mask. Never point the nozzle at skin; an air bubble under the skin is a hospital trip, not a funny story.
The Mighty Brush guide points out that branded cleaning fluid gets expensive fast when you use it constantly, and that isopropyl (rubbing alcohol) does the same job on acrylic for far less. That’s the single best money-saving tip in this whole hobby.
- Dump the cup back into your paint pot rather than down the drain.
- Wipe the cup with a paper towel before it dries. Dried acrylic is the enemy; wet acrylic is trivial.
- Flush with cleaner and spray it out onto a rag until the colour stops coming through.
- Wipe the needle from the back, never the tip, so you don’t drag dried paint into the packing.
- Reassemble dry and run a few drops of cleaner through before the next colour.
Skipping step two is how you end up chipping dried paint out of a cup with a toothpick at eleven at night. I’ve done it. It’s not a personality-building exercise.
The Rinse Between Colours
You don’t need a full teardown between colours. Dump, wipe, flush, spray clear. That’s it.
The tell that you skipped it: the first spray of the new colour comes out slightly muddy, and you’ve just put a dirty edge on a clean model.
The Deep Clean
A deep clean should follow the airbrush manufacturer’s instructions, not a YouTube video from someone with a different gun. Packings, o-rings, and nozzle threads differ enough between brands that generic advice breaks things.
Learning to clean an airbrush properly is the difference between a tool you keep for years and a tool you replace too soon.
Most of what looks like a broken airbrush is really a paint thinning problem. Thin it, spray it, and see if the fault follows.
I won’t tell anyone to buy the finest needle their brand sells as a first gun. It clogs on the paint you’re using this month, you’ll blame the gun, and the gun is fine. Learn on the middle size and move down when you’ve stopped fighting the paint.
The One I’d Buy First, and the Two I’d Skip
Badger’s own line tells you where to start. The Renegade Krome is aimed at more experienced users than the Patriot 105, and it costs more for the privilege. So the Patriot 105 is the Badger to learn on, and the Krome is the one you graduate into.
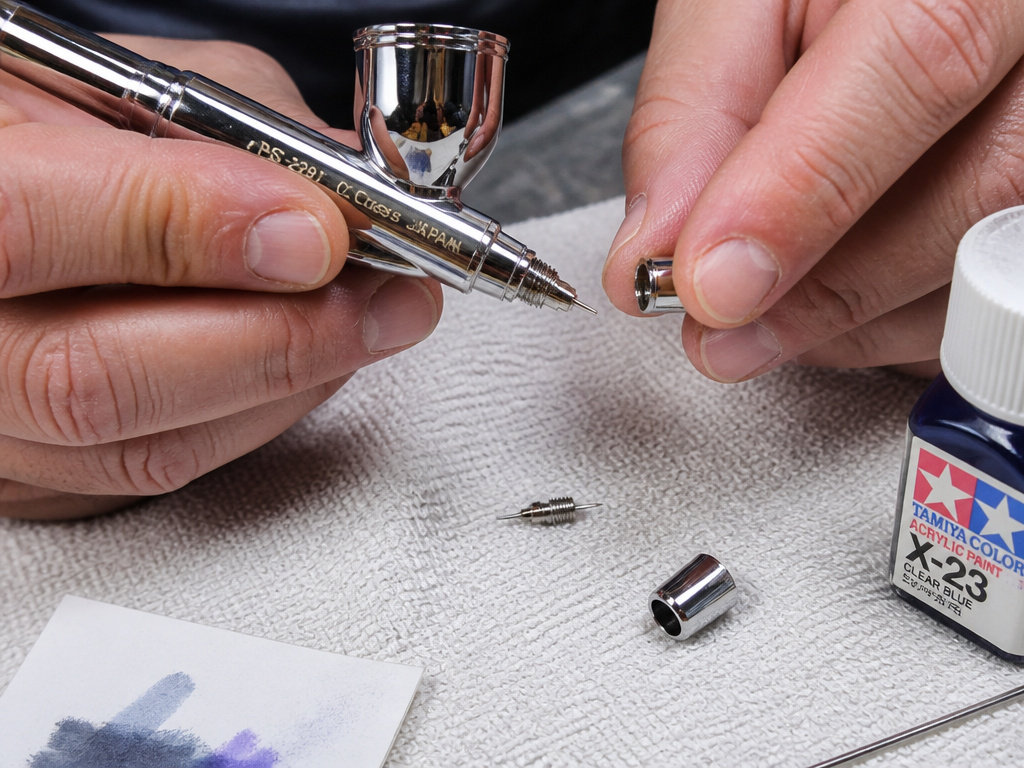
The Krome earns its place with a 0.3 mm needle and nozzle that lays down genuinely fine detail and tight atomisation. It also hides a trap. Its small nozzle isn’t threaded and sits flush inside the airhead, which makes it hard to damage and very easy to lose when you take the gun apart.
Easy to miss: Dismantling a flush-nozzle airbrush over an open sink. The nozzle is tiny, it’s unthreaded, and it goes straight down the drain with no drama at all. Work over a towel or a tray, every time.
What I’d actually tell you:
- First gun: a Badger Patriot 105, or a basic dual-action from Master Airbrush if you want to spend the difference on paint.
- Skip: the top-tier gun with the interchangeable needle sets. You’ll use one needle for a year.
- Skip: anything in the extremely cheap tier. It’s a subscription, not a purchase.
- Worth the money: a compressor with a tank and a moisture trap, and a respirator.
The money you saved on the gun goes into airbrush paint and scrap paper, which is where the actual learning happens. I’d rather see you on a Patriot 105 for six months than a Custom Micron B you’re scared to put paint through.
Frequently Asked Questions
Do I need a dual-action airbrush to start?
Dual-action is the sensible default because it lets you control air and paint separately, and that is what makes fades and blends possible at all. A rear trigger limit softens the learning curve if you’re worried about flooding. You don’t need to spend up to get it.
What needle size should a beginner buy?
Something in the middle of the brand’s range. The 0.3 mm needle and nozzle on the Badger Renegade Krome is a fine-detail setup aimed at more experienced users. Start coarser, get your thinning right, then move down once the paint behaves.
Can I use isopropyl alcohol to clean acrylic paint out of an airbrush?
Yes. The Mighty Brush guide names isopropyl as a low-cost, widely available alternative to branded cleaning fluid for acrylics. It’s flammable, so ventilate the room and keep it away from ignition sources. Flush it through and spray it out onto a rag.
How do I know if my airbrush or my paint is the problem?
Change one variable. Thin a small batch more and spray a test line. If the spitting stops, it was the paint. If the trigger still feels gritty or the spray pulls to one side, clean the needle and nozzle before you spend anything.
Is a more expensive airbrush easier to learn on?
Not reliably. Mid-level gear gives quality that lasts for many years, and top of the line isn’t required for decent quality. The Mighty Brush guide is open about the fact that nobody has tried every product in every situation, so “best” is personal preference and budget, not a spec.
The Bottom Line
Fair warning: if you already own a compressor and a hose, most of this collapses down to one decision. Buy the mid-tier gun, skip the kit, and put the rest into paint and cleaner.
Here’s the threshold I’d actually use. If you’re still new to airbrushing, don’t buy a second airbrush at all. Time on one gun teaches you more than a shelf of guns ever will, and that’s true no matter what the spec sheet promises.
This week, before any paint touches the cup: fill it with water and spray dots, lines, and fades on scrap paper. Watch where the spray starts and stops. That’s the skill. The airbrush is just the thing holding it.
