
Airbrush Compressor Guide: Pressure, Heat, and Threads
This post contains affiliate links. As an Amazon Associate, we earn from qualifying purchases.
An airbrush compressor guide starts with one number: the working pressure your airbrush actually needs, and every manufacturer sets a different ceiling. Paasche’s DA400R works from 0 to 50 PSI. The Harbor Freight 59508 shuts off at 72.5 PSI. Neither figure tells you what your gun wants, so start with the airbrush and size the compressor around it.
That gap between what a compressor can deliver and what a nozzle can use is where beginner setups go wrong, and the airbrush compressor guide shows it up as spitting rather than as a low gauge reading. A compressor is a supply problem. The airbrush is a demand problem. Get the supply ahead of the demand and the rest of this gets easier.
What follows: the pressure ceilings each manual actually prints, the temperature range SPARMAX puts on all three of its units, the three thread standards that don’t talk to each other, and the daily habit that keeps a steel tank from rusting from the inside.
Key Takeaways
- Match the compressor to the airbrush, not the reverse. A 0 to 50 PSI unit like the Paasche DA400R covers most hobby guns, and a 72.5 PSI shutoff is headroom you’ll rarely touch.
- Stay inside your manual’s range. SPARMAX prints 10 C to 35 C on the TC-620X, the Arism VIZ, and the AC-501X QUO, while Iwata’s manuals are quoted at 0 to 40 C. A cold garage sits below it.
- Drain the tank daily. Harbor Freight’s 59508 manual says internal rust can cause tank failure and explosion. That’s their wording.
- Threads don’t match across brands. Research briefs list 1/8 inch BSP for the Harbor Freight 59508 and 1/8-27 NPS for the 93657, while Paasche’s manual specifies 1/4 inch NPT, and none of them fit each other.
- A tank plus a moisture trap fixes the pulsing that shows up as banding in smooth gradients. That’s the upgrade I’d make before buying a second airbrush.
What Pressure Does Your Airbrush Actually Need?
Paasche prints 0 to 50 PSI on the DA400R. Harbor Freight’s 59508 shuts off at 72.5 PSI and restarts at 58. Those two numbers describe very different machines, and neither one is a recommendation for your gun.
Working pressure is set by the airbrush, not the compressor. A gravity-feed detail gun with a fine nozzle runs in the low range, while a siphon-feed gun covering larger areas needs more volume. The compressor’s job is to hold a steady supply above that demand without cycling constantly.
Paasche’s own manual puts the working range at 0 to 50 PSI and notes it depends on the airbrush. That’s the honest version. The compressor doesn’t have an opinion about your paint.
If you haven’t settled on a gun yet, work that out first. How to choose an airbrush covers needle size and feed type, and both of those decide how much air you’re actually asking for.
| Compressor | Pressure ceiling | What it means in practice |
|---|---|---|
| Paasche DA400R | 0 to 50 PSI working | Plenty for detail, tight for wide coverage |
| Harbor Freight 59508 | 72.5 PSI shutoff, 58 PSI restart | Headroom most hobbyists never use |
| Harbor Freight 93657 | Not stated in the manual | Lower ceiling, smaller output |
| SPARMAX TC-620X | Not stated in the manual | Auto Stop cycles the motor as needed |
Why the Ceiling Isn’t the Setting You Use
Nobody sprays at the shutoff pressure. The airbrush compressor guide ceiling is just where the motor stops. What reaches your gun is whatever the regulator passes, and that’s a separate dial.
Harbor Freight’s 93657 manual adds a rule that applies to every compressor covered here: don’t set the regulator higher than the marked maximum on the attachment. The gun is the thing with a limit, not the tank.
The same manual sets a parts standard worth knowing. Every hose, connector, and filter in the line must be rated for 150 PSI or 150 percent of your maximum system pressure, whichever is greater. Cheap vinyl hose that came free with a kit often isn’t.
Common mistake: Setting the regulator to the compressor’s shutoff number and leaving it there. The gun gets full line pressure at the inlet, and paint that wanted a gentler feed comes out in spits instead of a smooth pass.
The Temperature Range SPARMAX Prints on All Three of Its Units
SPARMAX puts the same caution in the TC-620X, the Arism VIZ, and the AC-501X QUO: operate only within 10 C to 35 C ambient temperature, while Iwata’s manuals are quoted at 0 to 40 C. That’s the operating envelope, not a storage note. A garage in January sits below the bottom of it.
The manuals don’t spell out what happens outside that window. They just draw the line and leave it there, which is about as much as most compressor documentation gives you on anything environmental.
Here’s where the sources part company. The Iwata manuals for the IS50/IS51 and the IS875/925/975 are widely quoted at 32 to 104 F (0 to 40 C), which is wider at both ends. I couldn’t verify that. The Iwata PDFs returned a 403 error every time I tried to open them, so treat that range as unconfirmed until you have the manual in your hand. The SPARMAX figure comes from a document I actually read.
Cool-down times disagree too. SPARMAX asks for 10 to 15 minutes after a run. A DeVilbiss service bulletin quoted in secondary sources says about five minutes. Same component, two answers. Follow the manual that shipped in your box.
Write the operating range on a strip of tape and stick it to the side of the compressor. You will not remember whether it was 35 C or 40 C in six months, and guessing is how people run a unit outside its envelope.
If you’re still comparing units, the airbrush compressor comparison puts these ranges side by side, which is easier than hunting through six PDFs.
Drain the Tank Every Day, Not Every Week
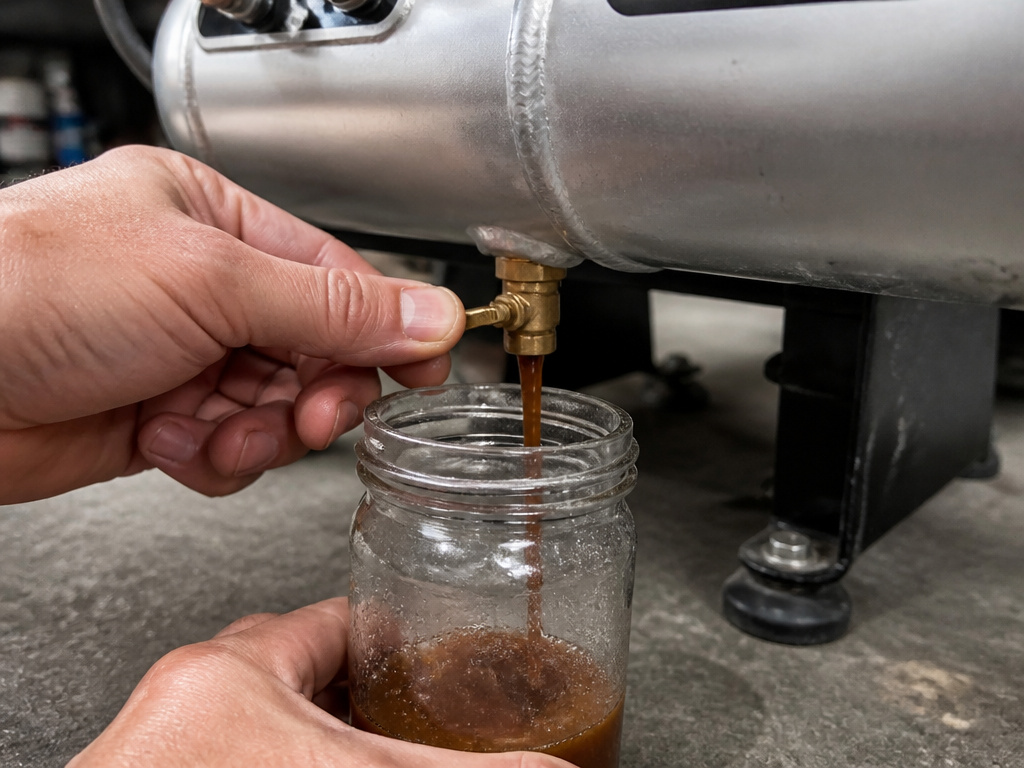
Harbor Freight’s 59508 manual doesn’t hedge on this one, and the reason it gives is rust, while Iwata’s brief instead suggests pulling the hose off after a session and letting it drain overnight.
The manual’s warning reads: internal rust can cause tank failure and explosion. That’s their sentence, not mine. A steel tank with water sitting in it is a pressure vessel quietly eating itself from the inside.
Three more numbers from the same manual are worth taping next to the drain valve. Keep at least 12 inches of space around the unit so air can circulate. Set it on a flat, level surface so the pump gets proper lubrication. And if pressure build-up takes longer than 2 minutes, assume there’s a leak.
| Symptom | Likely cause | What to do |
|---|---|---|
| Motor runs far more often than usual | A leaking connection | Listen for hiss, tighten the fitting |
| Pressure takes over 2 minutes to build | Leak somewhere in the line | Work through the connections one at a time |
| Water spitting into the paint | Condensation in tank or filter | Drain the tank, then the filter |
| Faint stripes in a smooth gradient | No tank, pulsing output | Add a tank or a moisture trap |
What a 2-Minute Build Time Tells You
The 2-minute figure isn’t about patience. It’s a diagnostic. A sealed system reaches its shutoff quickly, and a system with a leak doesn’t.
Harbor Freight spells out the mechanism in the same manual. Leaking air makes the compressor operate more often, which increases wear on the unit. You won’t hear the hiss over the motor. What you’ll notice is the motor kicking on more than it used to.
That’s also why the daily drain matters beyond rust. Water in the line ends up in the paint, and a spitting gun gets blamed on thinning ratios when the real culprit is condensation. Keeping the airbrush cleaning routine honest helps, but clean paint through a wet line still spits.
Why Your Compressor Pulses (and What a Tank Actually Fixes)
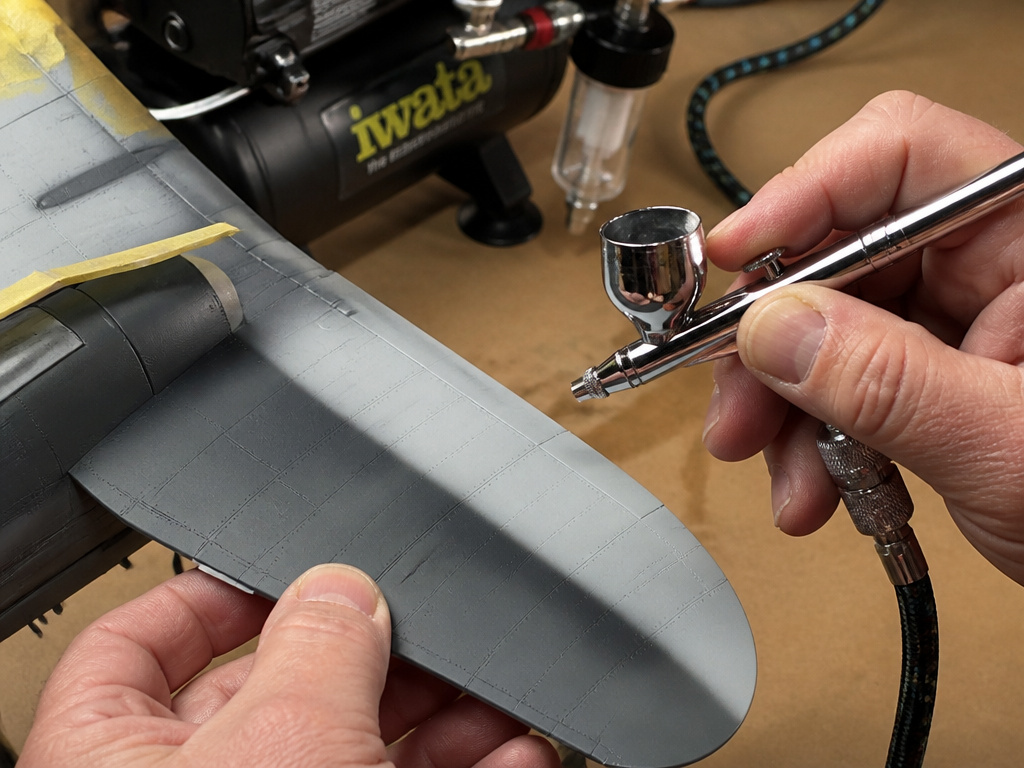
You’re laying a smooth gradient across a model wing and a faint stripe shows up every half inch. The paint is thinned. The needle is clean. The compressor is the variable you haven’t checked.
My first compressor had no tank. It pulsed slightly, and that pulse showed up as banding in exactly the kind of smooth blend where you can’t hide it. I spent a week adjusting paint consistency before I worked out that the air supply was the thing moving.
A small tank compressor with a moisture trap smoothed it out noticeably. The tank buffers the gap between motor cycles, so the air arrives steady instead of in pulses. The trap catches condensation before it reaches the nozzle.
I’d rather see a beginner put the money into a tank and a moisture trap than into a second airbrush. The gun you already own sprays fine once the air stops stuttering. Two guns on a pulsing supply just gives you two ways to make the same stripe.
For model work I run low pressure with thinned paint, and I bump it up for a bigger surface like a t-shirt. That’s a starting point from my own bench, not a figure from any manual. If models are your main thing, the airbrush compressor notes for miniatures cover the low-pressure end specifically.
Fair warning on noise. A compressor running in a small studio sounds like a tiny jet engine, and the first time I ran mine at midnight I learned that lesson in about four seconds.
Which Thread Standard Are You Actually Buying?
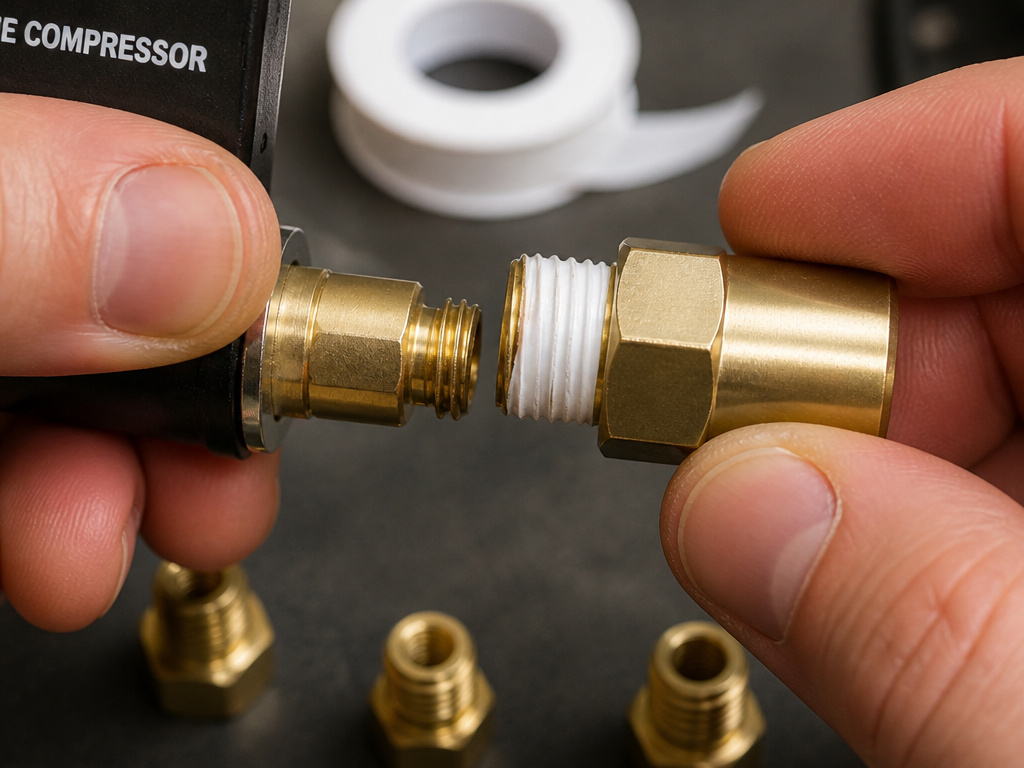
Ever tried to thread a 1/4 inch NPT fitting onto a 1/8 inch BSP outlet? It goes on about a turn and then stops, and you spend twenty minutes convinced you’re doing it wrong.
Three standards show up on consumer compressors. None of them interchange. This is the single most common accessory-mismatch trap in the category, and the manuals barely mention it.
1/8 BSP vs 1/8-27 NPS vs 1/4 NPT
- 1/8 inch BSP: a research brief lists this as the Harbor Freight 59508 outlet. Common on imported units, and the one most likely to need an adapter before anything else fits.
- 1/8-27 NPS: a research brief lists this as the Harbor Freight 93657 outlet. Close enough to BSP that it feels like it threads, which is exactly the trap.
- 1/4 inch NPT: the Paasche DA400R fitting. Bigger, and the standard most US airbrush hoses are cut for.
I keep a small bag of adapters in the same drawer as the airbrush. It’s cheaper than a second hose and it takes up less space than the swearing does.
Paasche’s manual has a line worth stealing regardless of which unit you own: use plumber’s tape on the threads to seal air leaks. Tape on a mismatched thread buys you nothing, though. Get the adapter first, then tape it.
The air compressor comparison lists outlet types per model, which saves you from measuring a thread with a ruler and hoping.
The Setup Checklist Before You Spray
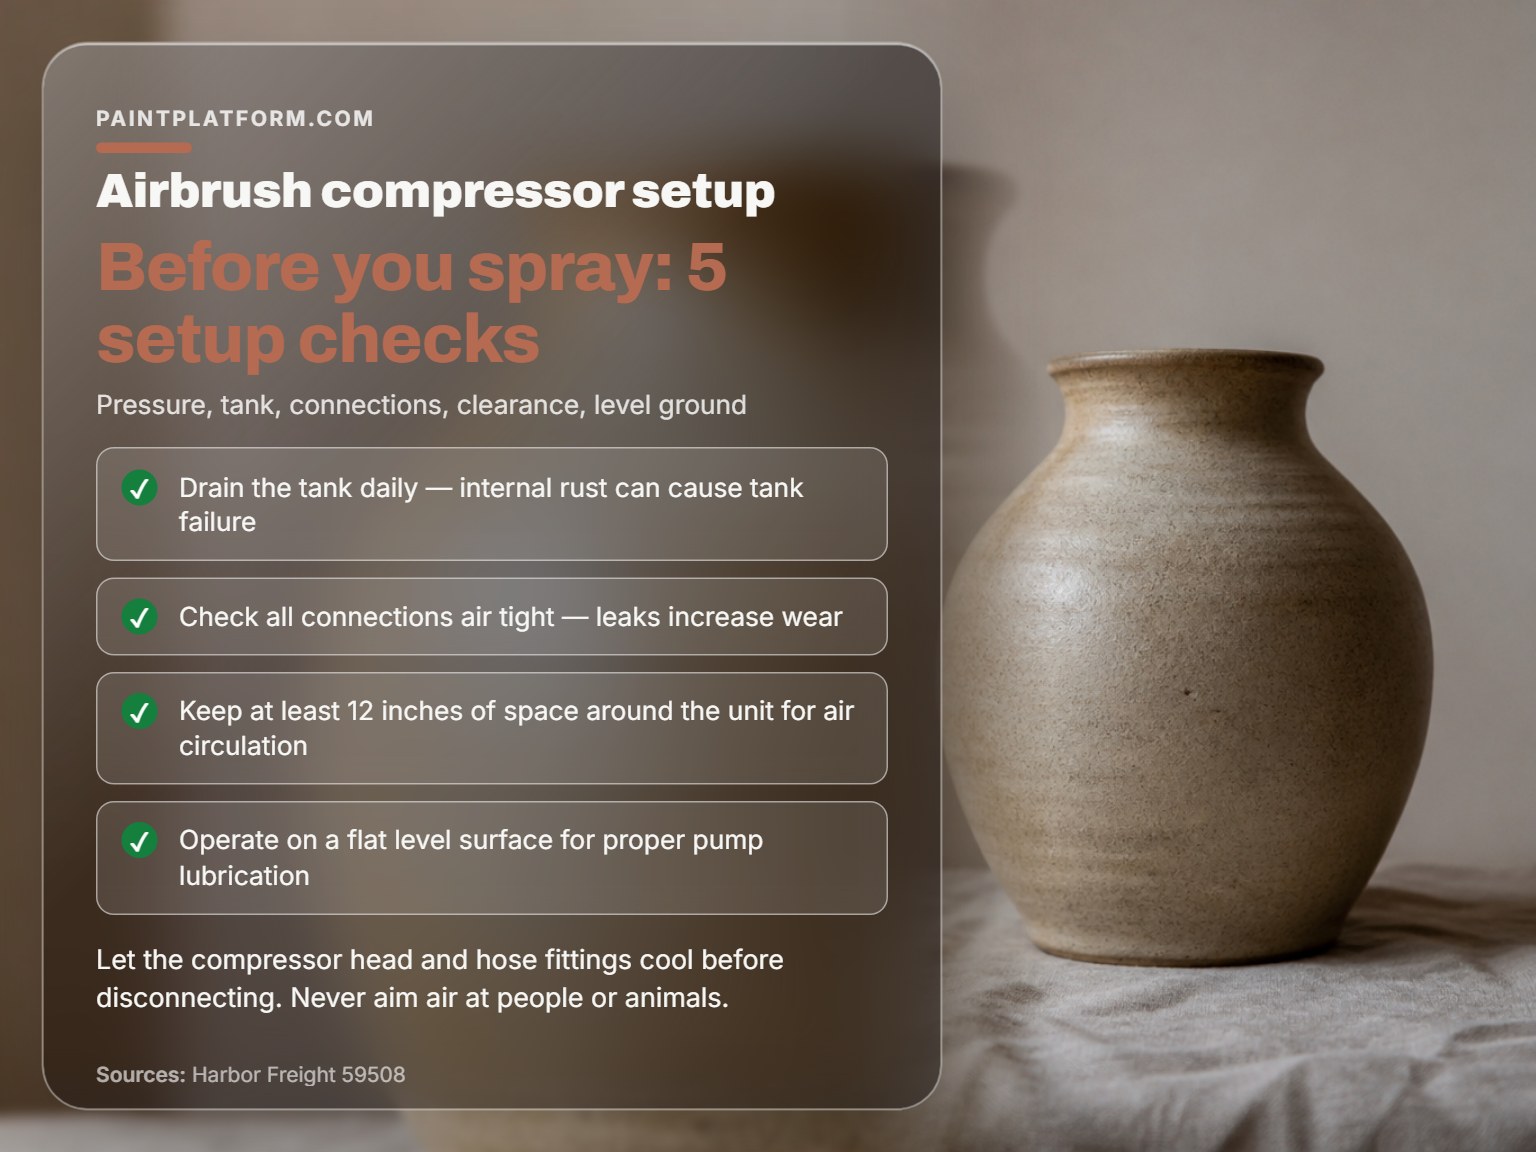
Three things happen before the first drop of paint: pressure set, tank drained, connections checked.
Before you start: The compressor head and the hose fittings both get hot during a run, so let them cool before you disconnect anything. Never aim the air stream at people or animals. And Harbor Freight’s 93657 manual says anyone with a pacemaker should check with a doctor first, because the electromagnetic field close to the unit can interfere.
- Drain the tank. Skip it and rust starts inside a steel tank, and the 59508 manual names tank failure as the outcome.
- Set the regulator to your gun’s working pressure, not the compressor’s ceiling. Inlet overpressure is what makes a detail gun spit.
- Check every connection by ear and by feel. A hissing fitting makes the motor cycle more often, and the manual says that extra cycling wears the unit.
- Leave 12 inches of clearance on all sides. Harbor Freight’s 59508 manual asks for that much room for air circulation.
- Run it on a flat, level surface. Both Harbor Freight manuals say the pump needs level ground for proper lubrication.
Easy to miss: The first-run odor. SPARMAX notes a slight odor on first use is normal and will fade. If it doesn’t fade, stop and look for something else, because the same manual tells you to shut down immediately on abnormal odor, smoke, or noise.
If you’re brand new to the whole thing, airbrushing for beginners covers the trigger control that no compressor will teach you. And if you’d rather buy the pieces together, there are airbrush kits with a compressor that include a tank and a trap from the start.
Frequently Asked Questions
Do I need a tank on an airbrush compressor?
Tank smooths the air supply between motor cycles, which is what stops the faint banding that shows up in gradients. Tankless units pulse slightly. If you only spray small details, you may never notice. If you spray smooth blends, the tank earns its place.
What PSI should I run for miniature painting?
I run low pressure with thinned paint for model work, and raise it for larger surfaces. That’s a bench habit, not a manufacturer figure. Start low and work up, because too much pressure at the nozzle is what causes spitting.
Can I leave my airbrush compressor running while I take a break?
Harbor Freight’s 93657 manual tells you not to leave it unattended for an extended period while plugged in, and to unplug it after working. Two brands, same direction.
Why does my compressor spit water into the paint?
Condensation collects in the tank and the filter, then travels down the line. Drain the tank daily and drain the filter through its valve, holding a paper towel underneath. In humid weather, do it more often. Some manufacturers also suggest pulling the hose off after a session and letting it drain overnight.
Is a 1/4 inch fitting the same as 1/8 inch?
No. The Paasche DA400R uses 1/4 inch NPT, while research briefs list 1/8 inch BSP for the Harbor Freight 59508 and 1/8-27 NPS for the 93657. They don’t interchange. Buy the adapter for your specific outlet before you buy anything else.
How long can I run a compressor continuously?
SPARMAX’s manuals do not state a maximum continuous run time or a cool-down duration for the Arism VIZ. The TC-620X manual does not state a maximum continuous run time. Same brand, two rules, so read the manual for your model.
The Bottom Line
Here’s the threshold I’d use. If you’re spending more time fighting spitting and banding than you are actually painting, the compressor is the thing to fix, not the airbrush. A second gun won’t solve an unsteady air supply.
Grab your manual this week and find two numbers: the working pressure range and the ambient temperature range. Write both on a strip of tape and stick it to the side of the unit. That’s the whole first step, and it takes about ninety seconds.
One concession, though. None of this matters much if you haven’t got a feel for a brush yet. Airbrushing is a second skill layered on top of the first one, and no compressor on the market will teach you pressure control. Practice dots and lines on scrap paper with water before you introduce paint. Let it be messy first.
I’d rather see a beginner buy a plain single-tank compressor with a moisture trap and one decent gun than a kit with three nozzles and a supply that stutters. Keep it simple and keep it joyful.
