
How Many Coats of Paint for a Ceiling? The Honest Answer
This post contains affiliate links. As an Amazon Associate, we earn from qualifying purchases.
Two coats of paint for a ceiling is the working standard, and the trade spec behind it is one primer plus two topcoats, known as Paint Application 3 in the Painting Contractors Association guide. One-coat products exist and work on clean, primed drywall, but the sheets claiming single-coat coverage also list a second coat for porous or patchy surfaces.
That gap between the trade spec and the one-coat label is where ceiling work goes sideways. The second coat is one more pass with the roller, but skipping it on a patchy or unprimed surface leaves a flat, uneven film no touch-up brush can fix. The fine print on those sheets says so, and it answers how many coats of paint for a ceiling.
What follows is the coat count from six different product sheets, the two places they actually disagree, and the one decision (primer or no primer) that settles the rest. By the end you’ll know what to roll on your ceiling this weekend without guessing.
Key Takeaways
- Two topcoats over a primer is the trade standard (PCA Paint Application 3) for standard drywall.
- One-coat products are real, but Zinsser caveats a second coat on very porous substrates, while Valspar Signature recommends a stainblocking primer on heavily stained areas.
- Primer isn’t optional on new drywall according to Dunn-Edwards and Valspar 4000, though Zinsser and Valspar Signature are self-priming products; Level 5 drywall wants VINYLASTIC Plus per Dunn-Edwards.
- Treat the 1-hour recoat label with caution: PCA says check the surface is actually dry, which can mean 12-18 hours after primer, while Zinsser and Benjamin Moore 508 specify 1-hour recoat and PPG Pittsburgh 17-45 specifies 2–4 hours.
- Wait 30 days before washing the finished ceiling, per Zinsser and PPG.
What the Trade Standard Actually Says About Coat Count
The Painting Contractors Association publishes the closest thing to an industry standard for coat count, and it’s a formal scale, not a rule of thumb. Paint Application 3 requires 1 primer plus 2 topcoats for standard gypsum board. The scale is tied to the gypsum board Level of Finish specified for the job, and Paint Application 3 requires 1 primer plus 2 topcoats.
Paint Application 3 in the Painting Contractors Association’s Interior Guide specifies one primer coat plus two finish coats for standard gypsum board. The same guide defines Paint Applications 1 through 4 by topcoat count, tying the number of coats to the gypsum board Level of Finish specified for the job.
The PCA interior painting guide ties that scale to the gypsum board Level of Finish. Level 5 drywall, the smoothest grade, is recommended for all gloss and sheen levels of paint and anywhere severe lighting hits the surface.
Here’s how the coat counts stack up across the sources I pulled:
| Source | Stated coat count | What it’s based on |
|---|---|---|
| PCA Interior Guide | 1 primer + 2 topcoats (Paint Application 3) | Standard gypsum board |
| Ressource Ceiling Matte 960 | Two coats | Undercoat dry first |
| Benjamin Moore 508 | 1 or 2 coats over primer | Substrate-dependent |
| PPG Porter VINYL SUEDE PP977 | One or more finish coats after prime | New work |
| Zinsser Ceiling Paint & Primer in One | 1 coat typical; 2 if porous | Self-priming product |
| Valspar Signature Ceiling Paint + Primer | Single coat | Self-priming product |
That table is the whole argument in one place.
The products that claim one coat are paint-and-primer combos. The products that specify two coats assume a separate primer underneath. Both camps are right. They’re solving different problems.
The mechanism is straightforward. The primer seals the porosity of the drywall so the topcoat doesn’t soak in unevenly, which is why how many coats of paint for a ceiling starts with one primer. The first topcoat builds the film. The second topcoat evens out the film thickness so light reflects uniformly across the surface. The coats for interior walls question works the same way, just with more wear and tear to account for.
One Coat Works. Until It Doesn’t.
My own lesson came from a rattan chair, not a ceiling. The first rattan piece I brushed got gloppy in the weave and took far longer to dry than expected. Thin coats would have dried more evenly. Ceilings behave the same way. A heavy pass on a patchy surface leaves a film that looks wet and dries unevenly.
The single-coat pitch on a ceiling paint label is real. It’s also conditional, and the condition is buried in the same sheet.
Zinsser Ceiling Paint & Primer in One says “in most cases only one coat is necessary.” Then the next line: “If excessive absorption occurs over very porous substrates, a second coat may be necessary.” Valspar Signature Ceiling Paint + Primer says it “cleanly covers ceilings in a single coat.” Then its own directions say to use a stainblocking primer first on heavily stained areas.
The one-coat label on a ceiling paint is a best-case scenario, not a guarantee. Read the second paragraph of the directions before you trust the first.
So the honest answer on one-coat products: they work on a sound, white, previously painted ceiling with no patches and no stains, though Ressource Ceiling Matte 960 specifies two coats and PCA’s Paint Application 3 requires 1 primer plus 2 topcoats. They don’t work on new drywall, on a ceiling with joint compound patches, or on anything that needs a color change. For those jobs, you want the two-coat products and a real primer.
The one-coat paint category is worth knowing, but treat the label as a best-case scenario, not a guarantee.
Does a Ceiling Need a Separate Primer?
Yes on new drywall per Dunn-Edwards and Valspar 4000, yes on patches, and yes on any ceiling that’s had water damage; but Zinsser and Valspar Signature are self-priming products, so no separate primer on a sound, previously painted ceiling where you’re rolling the same color.
Dunn-Edwards is blunt about it: new drywall should be primed before applying the finish coat, and the primer depends on the drywall level. Level 5 gets VINYLASTIC Plus. Level 4 gets VINYLASTIC or ULTRA-GRIP. Valspar 4000 says the same thing in fewer words: new or bare surfaces should be primed with an appropriate Valspar primer.
PPG Porter PP977 adds a wrinkle the other sheets skip. Specified drywall sealers seal better than finish paints and help reduce the appearance of tape joints and surface imperfections. In other words, the primer isn’t just a bonding layer. On a Level 4 ceiling it’s doing cosmetic work the topcoat can’t.
Joint compound absorbs topcoat differently than the surrounding board, so a patched ceiling without primer dries with visible dull spots where the patch is, and that is how many coats of paint for a ceiling gets decided. That’s the mechanism behind the “always prime patches” rule.
Level 4 vs Level 5 Drywall
The drywall level determines how much work the primer has to do. Level 5 is a skim-coated surface with no visible texture difference between the board face and the joint compound. Level 5 wants VINYLASTIC Plus. Level 4 wants VINYLASTIC or ULTRA-GRIP.
| Drywall level | Primer | Source |
|---|---|---|
| Level 5 | VINYLASTIC Plus | Dunn-Edwards |
| Level 4 | VINYLASTIC or ULTRA-GRIP | Dunn-Edwards |
| Stipple/popcorn | Alkyd primer sealer (Fresh Start 024) | Benjamin Moore 508 |
| Popcorn | Cover Stain Primer | Zinsser |
When Primer Is Mandatory
- New drywall or bare plaster. Dunn-Edwards, Valspar 4000, and PPG PP977 all require it.
- Patched ceilings. Joint compound absorbs topcoat differently than the surrounding board.
- Water-stained ceilings. Dunn-Edwards says repair the leak before applying a stain-blocking primer. Skip the leak repair and the stain comes back through the fresh paint.
- Popcorn and stipple. Benjamin Moore 508 notes some stippled ceilings are water sensitive and need an alkyd primer sealer (Fresh Start Multi-Purpose Oil Based Primer 024). Zinsser requires Cover Stain Primer on popcorn.
The best ceiling primer depends on the surface: Dunn-Edwards specifies VINYLASTIC Plus for Level 5 and VINYLASTIC or ULTRA-GRIP for Level 4. The exception is any water-sensitive texture, which needs the alkyd.
The Recoat Label Says One Hour. Ignore It.
The PCA guide says something almost no manufacturer will print on a can: “Do not follow the time period recommendation from the manufacturer, meaning, ‘This material can be recoated in 1 hour.'” The guide’s reasoning is that you should check the surface is actually dry before the next coat rather than trusting the manufacturer’s recoat time.
Before you start: Scraping old paint can release lead dust, which is toxic and especially dangerous to children and pregnant women.
The manufacturer numbers vary widely anyway. Zinsser says recoat in 1 hour at 70 degrees F and 50% RH. Benjamin Moore 508 says 1 hour. PPG Pittsburgh 17-45 says 2-4 hours at 77 degrees F and 50% RH. Ressource Ceiling Matte 960 says 4 hours, or 24 hours over stained surfaces. PPG Porter PP977 says 4 hours minimum.
Here’s the sequence that actually works:
- Prime and let it dry. PCA says primer/sealer should dry 12-18 hours under normal conditions, and 36-48 hours in rainy, humid, or cold weather, before topcoating.
- Check the surface with your hand. Touch the primer. If it feels cool or tacky, it’s not dry, no matter what the clock says.
- Roll the first topcoat. Work in small sections with light overlap, and keep the brush moving. Don’t stop mid-section.
- Wait, then check again. The first topcoat needs the same touch test before the second coat goes on.
- Roll the second topcoat. Same technique, perpendicular to the first coat if you want the most even film.
The how long between coats of paint question has a longer answer than the label suggests.
Common mistake: Rolling the second coat before the first is dry. The roller pulls the first coat and leaves a lap line that shows as a dull stripe from the doorway.
Critical Lighting Turns Two Coats Into Three
Critical lighting is the term for a surface lit at a shallow angle, like a window casting light across a ceiling or a surface-mounted fixture throwing light along the drywall. It exaggerates every minor surface difference, so a ceiling that looks fine in flat light can look like a relief map under raking light.
The PCA guide is clear on this: non-flat and dark or deep-tone paints highlight minor surface differences, while textures and flat paints conceal them. Dunn-Edwards adds that critical lighting magnifies surface imperfections under any topcoat with angular sheen.
Flat paint scatters light in every direction, so minor surface differences don’t cast the shadows that a sheen would. That’s why dead flat paint is the standard for ceilings under critical lighting.
The fix is two-part. First, use a dead flat paint. The PCA recommends a Gypsum Board Level 5 finish for all gloss and sheen levels of paint and where severe lighting conditions occur. Level 5 plus a non-flat paint often needs a skim coat, which is a different job than a recoat.
It turns every wet spot into a bright stripe as I roll, so I can see where I’ve been.
If your ceiling already has uneven ceiling paint from a previous job, adding a coat of dead flat over the top hides most of it. Adding a coat of anything with sheen makes it worse. The painting a ceiling with a roller technique matters here too, especially on a big ceiling where you can’t see the far edge.
Popcorn, Stipple, and Water Stains Break the Standard
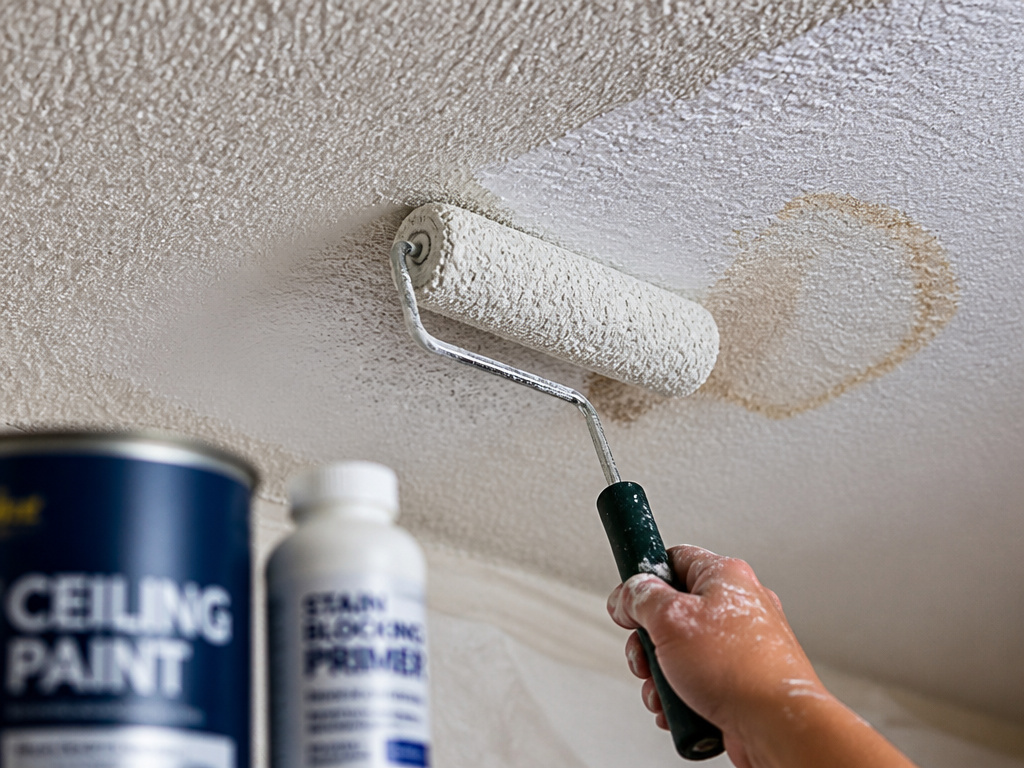
The standard two-coat procedure assumes a smooth surface. Three common ceiling types break that assumption, and each one needs a different fix.
- Popcorn ceilings. Zinsser requires Cover Stain Primer before applying ceiling paint. The texture is water sensitive, and a standard latex topcoat can soften it.
- Stipple and knockdown texture. Benjamin Moore 508 says bare metal and new or knock-down texture should be primed and sealed with Bulls-Eye 1-2-3 Primer. Some stippled ceilings are water sensitive and need an alkyd primer sealer.
- Water-stained ceilings. Dunn-Edwards says repair the leak before applying a stain-blocking primer. Valspar Signature says use a coat of Valspar Stainblocking Bonding Primer/Sealer on heavily stained areas. Ressource Ceiling Matte 960 says wait 24 hours between coats over stains, not the standard 4 hours.
- Plaster and masonry ceilings. Benjamin Moore 508 and PPG Pittsburgh 17-45 both require 30 days cure and pH below 10 before priming. PPG Porter PP977 says 28 days. Skip the cure window and the paint can fail prematurely.
The stipple and popcorn cases are where the “one coat is enough” pitch falls apart completely. The texture absorbs topcoat unevenly, and a single pass leaves the high spots thin and the low spots wet.
Where this goes sideways: Skipping primer on a water-stained ceiling. The stain bleeds through within a week and you’ll see a brown ring under the fresh white.
Which Ceiling Paint Should You Actually Buy?
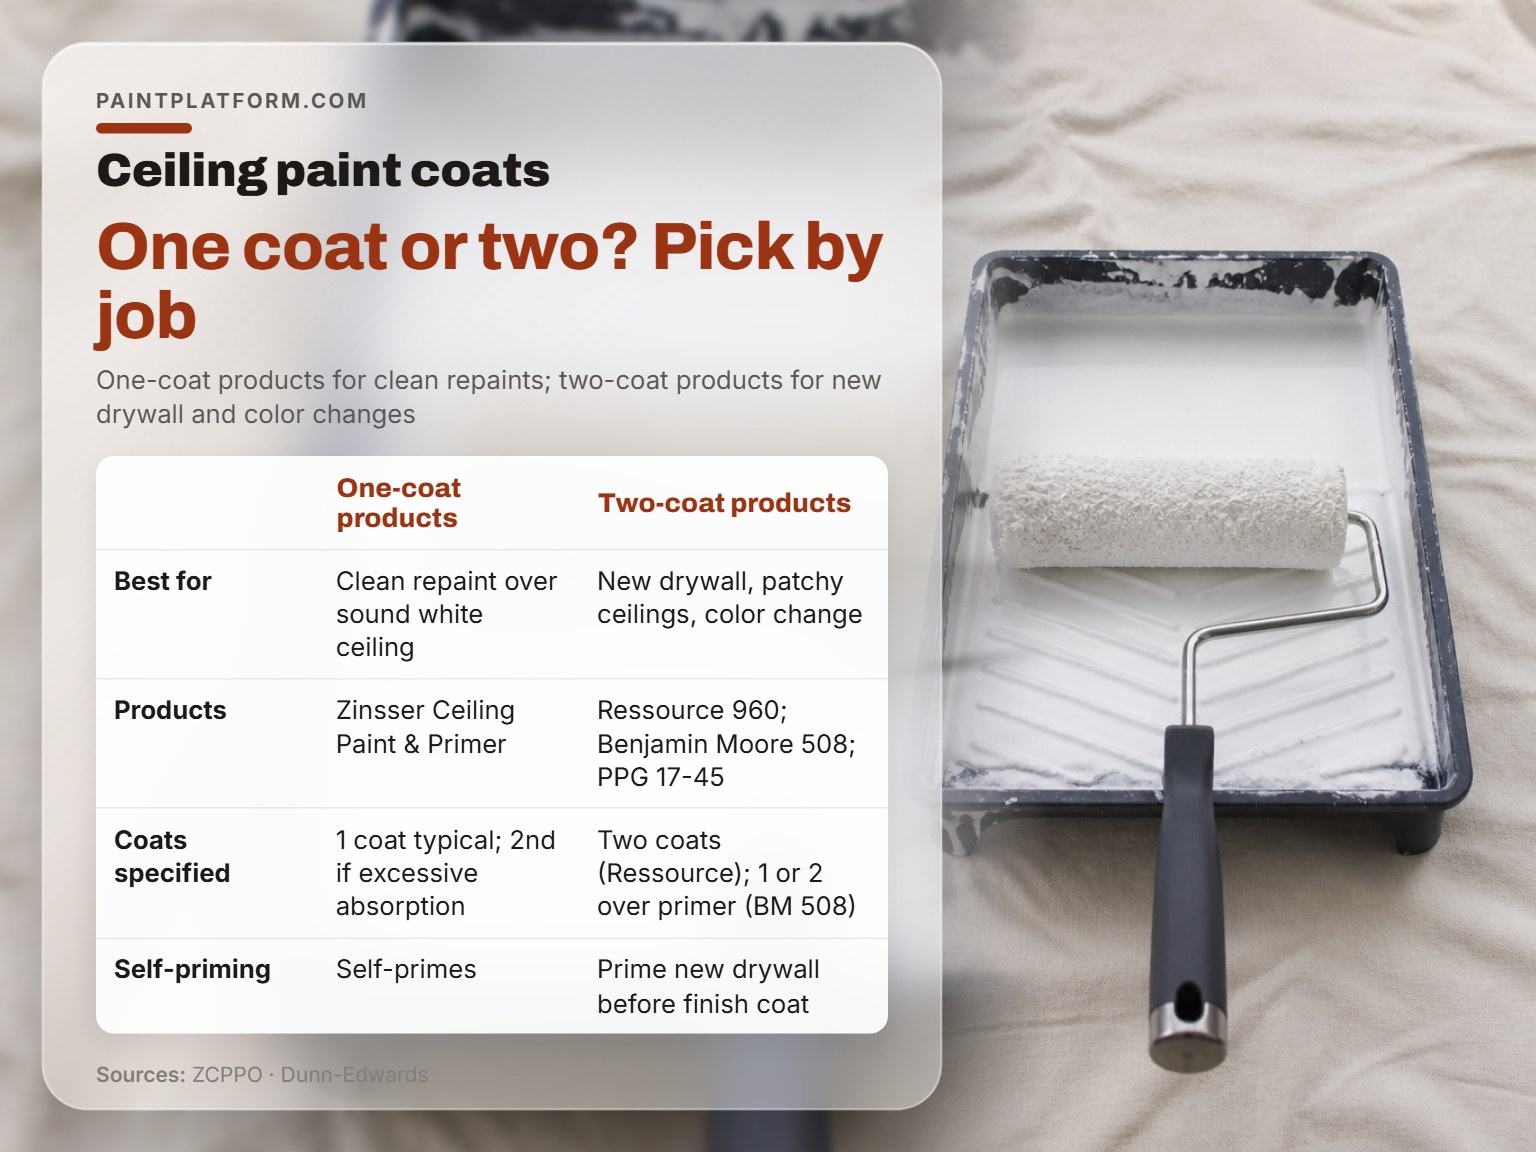
The product decision matters less than the technique, but it still matters. Here’s how I’d sort the shelf.
- Best for a clean repaint: Zinsser Ceiling Paint & Primer in One
- Best for light staining: Valspar Signature Ceiling Paint + Primer
- Best for new drywall: Ressource Ceiling Matte 960
- Best for critical lighting: Benjamin Moore 508
- Best for budget: PPG Pittsburgh 17-45
The One-Coat Products
Zinsser Ceiling Paint & Primer in One and Valspar Signature Ceiling Paint + Primer are the two I’d reach for on a clean repaint. Both self-prime, both cover a sound white ceiling in one pass, and both save you a trip up the ladder. Zinsser goes on pink and dries bright white, which is genuinely useful for spotting missed spots on a big ceiling. Valspar Signature is the better choice if the ceiling has light staining, because its stainblocking primer actually works.
The Two-Coat Products
Ressource Ceiling Matte 960, PPG Pittsburgh 17-45, and Benjamin Moore 508 are the products I’d trust on new drywall, patchy ceilings, or any job with a color change. Ressource specifies two coats and carries a Class 2 wet abrasion rating per ISO 11998/EN 13300 after 28 days, which is the most durable spec in this group. Benjamin Moore 508 is the safest bet for a critical-lighting ceiling because it’s a true flat (0-2 at 85 degrees) and it tints well. PPG Pittsburgh 17-45 is the budget-friendly workhorse of the three.
The one exception: PPG Porter VINYL SUEDE PP977 says “Do not tint.” If you want a tinted ceiling, that’s not the can.
The one-coat products win on repaints over sound, white ceilings where you just want a fresh coat. The two-coat products win on new drywall, patchy ceilings, and any surface with a color change. If you’re on the fence, the two-coat route is the safer bet.
A word on ceiling paint types: the flat-versus-sheen choice matters more than the brand. Dead flat hides imperfections. Anything with sheen highlights them.
For roller and technique, a 3/8-inch premium roller cover is what Benjamin Moore specifies, and Zinsser recommends a 1/2-inch nap. Both work. What matters more is loading the roller evenly and not overloading it. I’ve overloaded a roller more times than I’ll admit. The ceiling ends up fine, but the floor, the walls, and my shoes get a fine mist of paint droplets. Load the roller, then roll off the excess on the screen or the tray ramp before the first pass.
If you’re still sorting out how much paint for a ceiling, the practical coverage range across these sheets is 250-500 square feet per gallon, depending on porosity and application method. Buy toward the low end of that range if the ceiling is new or textured.
Frequently Asked Questions
Can I get away with one coat on a ceiling?
On a sound, white, previously painted ceiling with no patches and no stains, yes. Zinsser and Valspar both make products that cover in a single coat under those conditions. On new drywall, patchy ceilings, or any job with a color change, plan on two coats over a primer.
Do I need to prime a ceiling before painting?
On new drywall, yes. Dunn-Edwards and Valspar 4000 both require it. On a previously painted ceiling in good condition, a paint-and-primer combo can skip the separate primer step. On a water-stained ceiling, repair the leak first, then use a stain-blocking primer.
How long should I wait between coats on a ceiling?
Longer than the label says. The PCA guide explicitly warns against following manufacturer recoat times like “recoatable in 1 hour.” Touch the surface. If it feels cool or tacky, it’s not dry. Primer typically needs 12-18 hours under normal conditions and 36-48 hours in humid or cold weather.
What’s the best paint for a ceiling with water stains?
Stain-blocking primer first, then a topcoat. Dunn-Edwards says repair the leak before priming. Valspar recommends its Stainblocking Bonding Primer/Sealer on heavily stained areas. Ressource Ceiling Matte 960 says wait 24 hours between coats over stains, not the standard 4 hours.
Why does my ceiling look uneven after two coats?
Critical lighting is the usual culprit. Non-flat paints and dark colors highlight minor surface differences under raking light. The fix is a dead flat paint and, if the lighting is severe, a third coat. A Level 5 drywall finish is the long-term fix.
Can I tint ceiling paint?
Depends on the product. Benjamin Moore 508 tints well and recommends tinting the primer to the approximate shade of the finish coat for best hiding. PPG Porter VINYL SUEDE PP977 says “Do not tint.” Check the specific product sheet before you ask the paint desk to add color.
The Bottom Line
Here’s the threshold I’d give a friend: if the ceiling has any patch, any stain, or any color change, add the second coat and use a real primer. If it’s a sound, white ceiling you’re refreshing, one coat of a paint-and-primer combo is genuinely enough, and the label isn’t lying.
The trade standard is two topcoats over a primer because that’s what survives critical lighting, color changes, and the slow yellowing that shows up two winters later. The one-coat products are real time-savers on the easy jobs. They’re not a replacement for the standard on the hard ones.
So the next time you’re standing in the paint aisle, skip the specialty no-drip ceiling paint and put the money toward a roller cover and an extension pole. Technique does most of the work. The paint just has to be flat and white.
And if you take one thing from this: buy a small clip light before you buy the paint. It’s the cheapest quality-control tool in the ceiling game, and it’ll save you a third coat more often than any product on the shelf.
