
How to Clean Stencils: Step-by-Step (Without Damage)
This post contains affiliate links. As an Amazon Associate, we earn from qualifying purchases.
To clean stencils without warping them, wipe the wet paint off with a soft rag before it dries, rinse both sides under lukewarm water with a drop of dish soap, and lay them flat to dry. Skip hot water and harsh solvents.
That order matters more than the products. Acrylic paint that has already dried inside the apertures bonds to the film, and once it sets, no amount of soap lifts it without scraping. The whole how to clean stencils job is really about the moment right after a print, not the time you spend at the sink.
What follows is the exact sequence I use, the supplies that actually matter, and the one mistake that warps more stencils than anything else.
Key Takeaways
- Wipe first, rinse second. Wet paint lifts in seconds; dried paint needs a soak and a fingernail.
- A drop of dish soap, not a squirt. Too much soap leaves a film that grabs the next layer of paint.
- Dry flat, store flat. A stencil stored wet in a sleeve grows a crust that takes an hour to fight.
- Wipe the underside between passes. That single habit saves more reprints than any specialty cleaner.
Why a Dirty Stencil Costs You a Print
A dirty stencil costs you a print. It also quietly ruins the next one before you notice.
Stencil cleanliness is an essential issue for delivering the proper amount of paste, according to the IPC-7526 Stencil and Misprinted Board Cleaning Handbook. Residue left in the apertures restricts flow, distorts the deposit shape, and forces the operator to compensate with squeegee pressure rather than fix the actual cause.
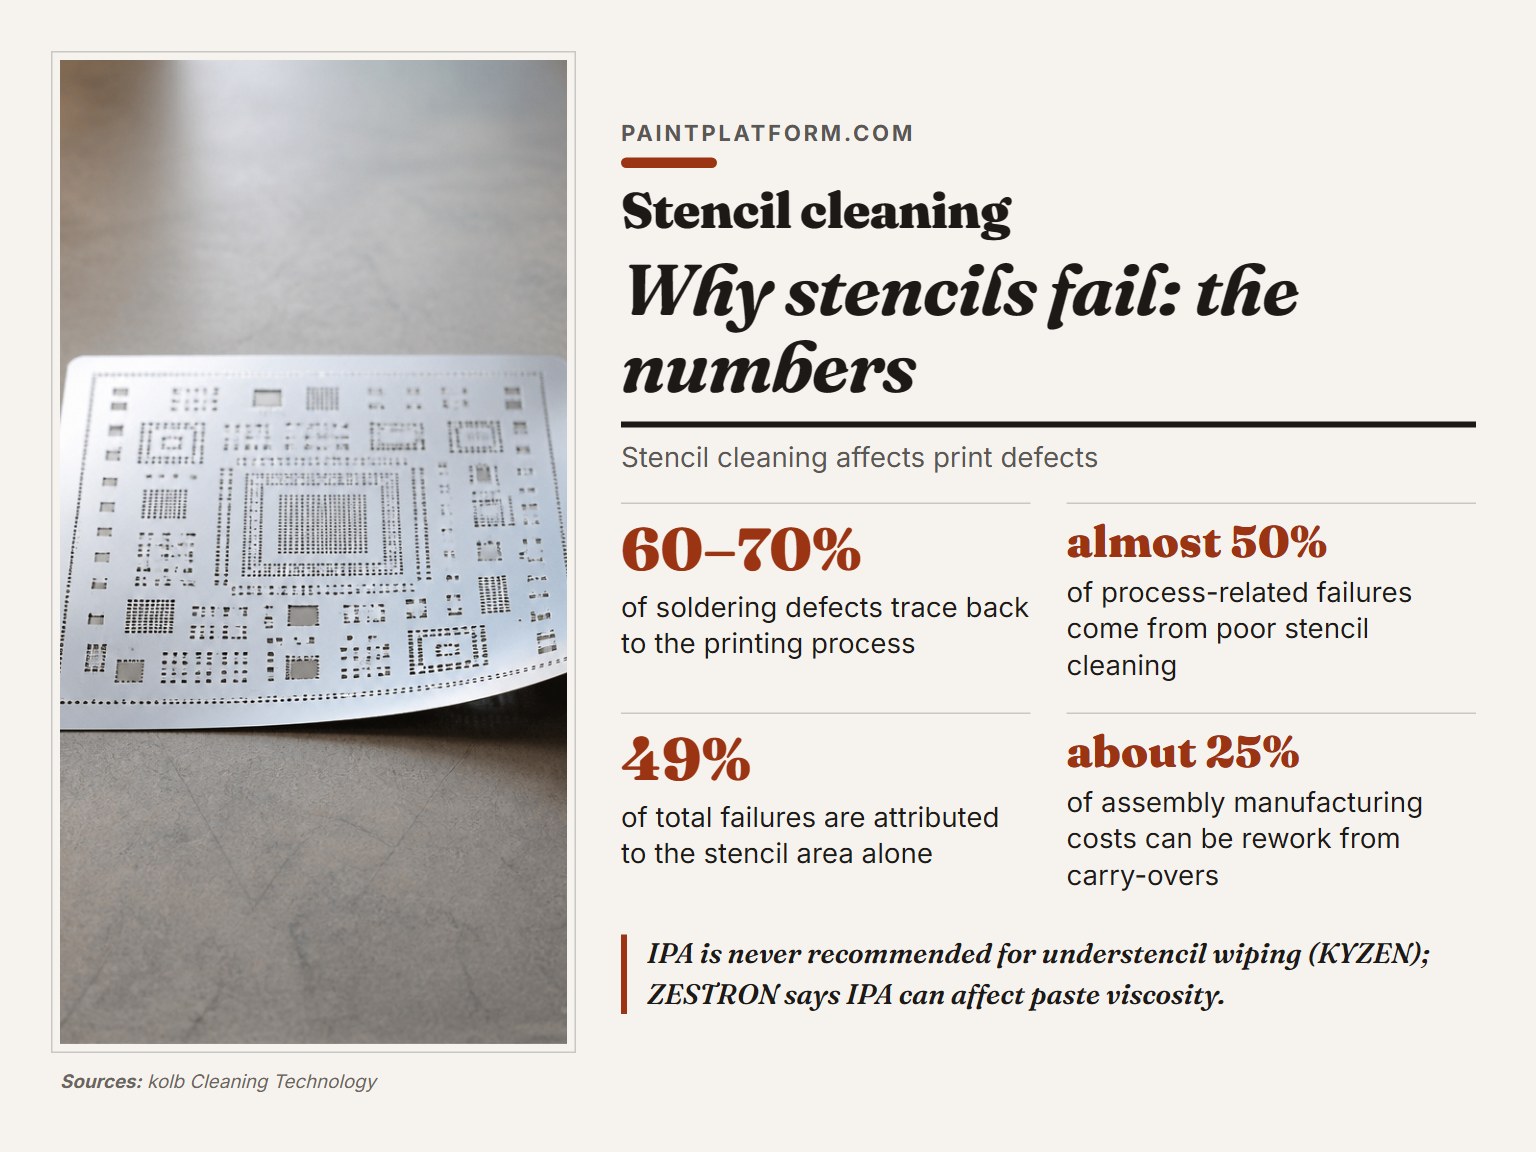
Kolb Cleaning Technology’s white paper on stencil underside cleaning puts a number on the cost. Between 60 and 70 percent of all defects and failures during or after soldering trace back to the printing process, and the stencil area alone accounts for 49 percent of total failures. Those figures come from circuit-board manufacturing, not from an art studio. The mechanism carries over: a clogged aperture starves the print, and the eye reads the result as a bad design rather than a dirty tool.
Dried acrylic has a tell. It goes from glossy to a dull, chalky sheen, and that sheen is your signal that the easy window has closed. Once the film skins over, water alone won’t re-wet it, because the polymer chains have already locked. You need mechanical help at that point, and mechanical help is where stencils get damaged.
I’ve pulled a stencil out of a drawer weeks after a print and found acrylic dried into a crust that needed a fingernail to lift. That is the version of a dirty stencil that costs you a whole afternoon.
If you’re already fighting paint bleeding under the edges, the stencil is the first thing to check. A clean aperture lays down a clean edge. A clogged one pushes paint sideways.
What You Actually Need to Clean a Stencil
Three things do almost all the work: a soft rag, a drop of dish soap, and lukewarm water. Everything else is optional.
- A soft rag or lint-free wipe. Viva paper towels work; terry cloth sheds fibers into the apertures.
- Dish soap. One drop.
- Lukewarm water. Comfortable to the touch, never hot.
- A shallow tray or basin. A clean paint tray works fine.
- A soft-bristle brush for stubborn spots. An old toothbrush, used gently, gets into the corners without tearing the film.
- A flat drying surface. A wire rack over a towel, or just a clean countertop.
The how to clean stencils supplies matter less than the order. A bottle of dish soap and a stack of lint-free wipes will out-clean a specialty stencil-cleaning kit every time, because the kit is solving a problem you don’t have. The kit is also one more thing to clean, and cleanup should be boring.
If you’re cleaning brushes at the same time, the same logic applies: wipe the loaded brush on a rag before it ever reaches the sink. That habit is the whole game for paint brush cleaning, and it saves the plumbing too.
The same rag wipes the paint tray clean in a couple of passes. No soaking, no scrubbing, no gadget.
How to Clean Stencils Step by Step
The sequence is short. The order is what keeps the stencil flat.
Before you start: IPA and acetone both flash off fast and both are flammable. Keep them away from an open flame, work near a window, and never decant them into an unlabeled cup.
- Wipe the wet paint off first. Use a dry corner of the rag to lift the bulk of the paint before it touches water. Skipping this step sends acrylic into the sink, where it hardens in the drain.
- Rinse both sides under lukewarm water. Hold the stencil flat and let the water run across it.
- Add one drop of dish soap and work it in with your fingers. Fingers are gentler than a brush on the aperture edges. A brush used with too much force tears the film at the corners.
- Scrub only the stubborn spots with a soft toothbrush. Light pressure, circular motion. More force bends the land between apertures.
- Rinse until the water runs clear. Soap film left behind grabs the next layer of paint and causes the exact bleeding you were trying to prevent.
- Lay flat to dry on a rack or a clean towel. Hanging a wet stencil warps it. Stacking a wet stencil grows mold.
The wash itself is quick. If it’s taking longer than the rinse, the paint has already dried, and you should soak instead of scrub.
Mylar vs Adhesive vs Brass: Which Stencil Takes Which Cleaning
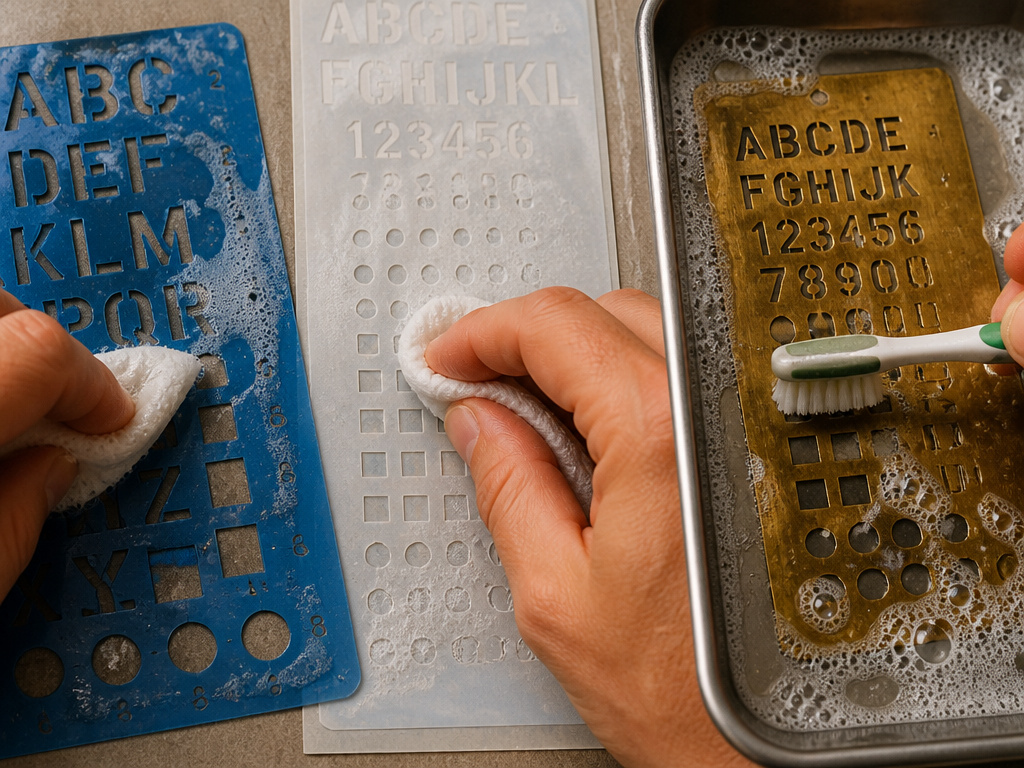
Mylar is the workhorse, adhesive is the delicate one, and brass is the one most people forget they own.
Mylar Stencils: The Workhorse
Lukewarm water, Dawn, and a soft rag will handle almost anything. The one thing Mylar won’t survive is heat.
It never lay flat again.
Adhesive Stencils: The Delicate One
Adhesive stencils have a tacky backing that sticks to the surface, and water is the enemy of that backing. Wipe the face with a damp cloth, never dunk the whole sheet. Peel it slowly, wipe the face, and let it air dry before you store it.
Brass and Metal Stencils: The Forgotten Option
Brass and stainless stencils are the ones you can scrub. They take a soft toothbrush, they take a soak, and they take a surprising amount of force without bending.
| Stencil Type | Best Cleaner | What to Avoid |
|---|---|---|
| Mylar film | Lukewarm water + dish soap | Hot water, acetone |
| Adhesive sheet | Damp cloth only | Full immersion |
If you’re not sure which stencil material you’re holding, the feel gives it away. A clean Mylar stencil feels slick and slightly cool; a dirty one has a tacky drag under your fingertip where the paint has started to set.
When Manual Cleaning Is Fine and When It Isn’t
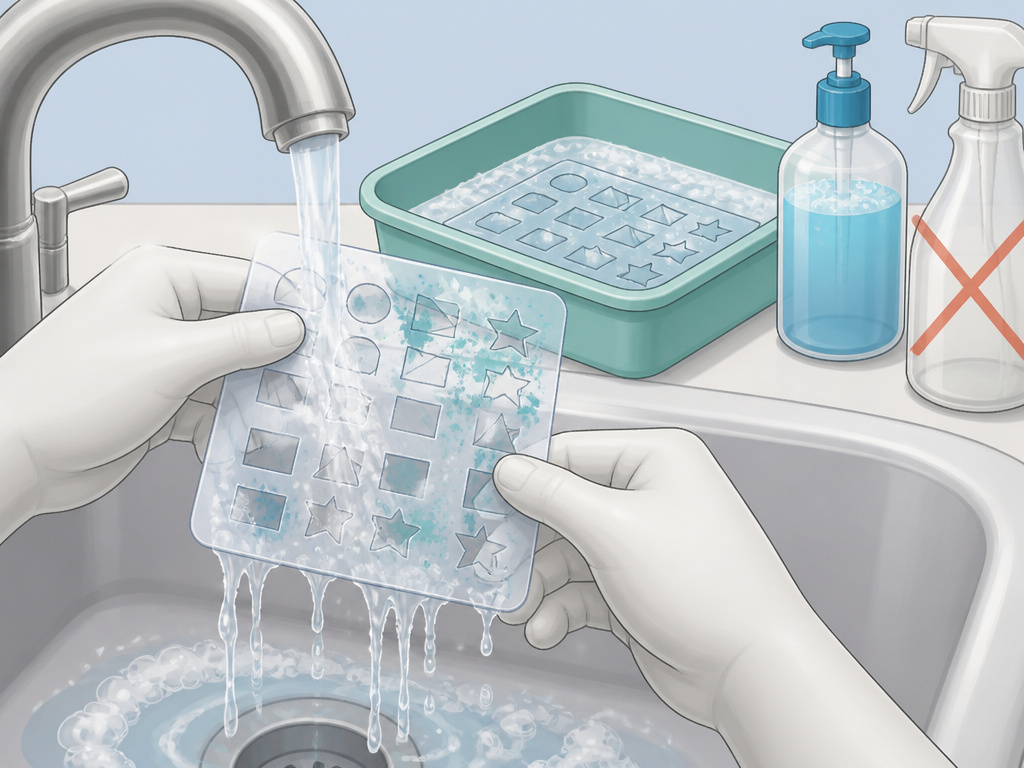
Here’s a rule that saves a lot of stencils: if the paint has dried, stop and soak.
The sources do not fully agree on manual cleaning. The IPC 7526A stencil cleaning standard permits manual precleaning with a blade or spatula before machine cleaning, but warns that manual cleaning’s inherent limitations and hazards usually outweigh the benefits. ZESTRON, a cleaning-chemistry supplier, goes further and says automated cleaning is the preferred method for reproducibility, because manual cleaning can cause mechanical damage and soften the stencil epoxy over time. The practical version for an art stencil is simpler: manual cleaning is fine for a one-off Mylar stencil, and a soak is the safer choice for anything you plan to reuse dozens of times.
I won’t recommend a specialty stencil-cleaning kit to anyone. Soap, water, and your fingers do the job, and the kit just gives you one more thing to clean. Found that out the expensive way.
IPA is the most contested cleaner in this space. ZESTRON says an incompatible cleaner such as IPA can affect the viscosity of the solder paste and impact the print result, and notes that IPA consumption is high because it evaporates quickly. KYZEN states flatly that IPA is never recommended for understencil wiping. IPC-7526 lists IPA as a VOC and fire hazard but does not ban it outright. The practical read for art stencils: skip it. Dawn and water do the job without the fumes.
How Often Should You Clean a Stencil?
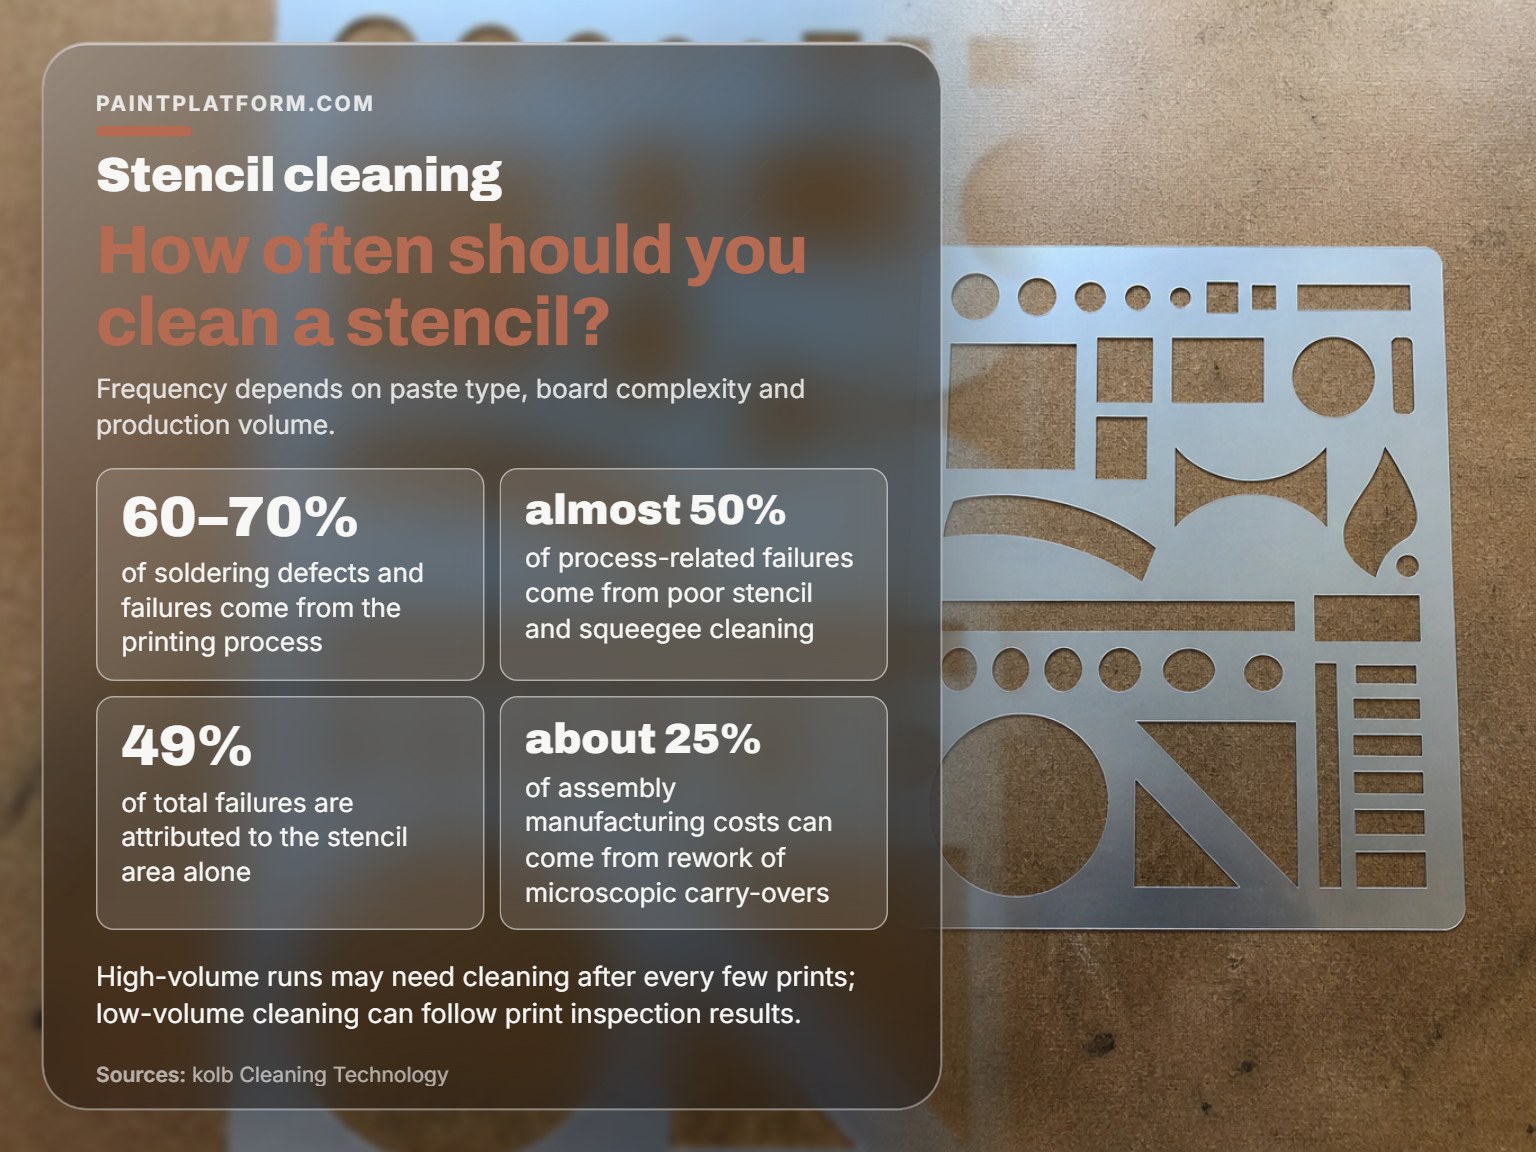
How often should you clean a stencil? After every print, if you’re using acrylic.
Cleaning frequency depends on the paint type, the design complexity, and how many prints you’re pulling. ZESTRON notes that in high-volume production, stencils may be cleaned after every few prints, while low-volume work can be cleaned based on inspection results. For art, the rule is simpler: acrylic dries in minutes, so wipe the stencil after every pass and do a full wash at the end of the session.
If you’re switching stencil paint types mid-project, clean between colors. The stencil is fine. The schedule is the problem.
| Symptom | Likely Cause | Fix |
|---|---|---|
| Paint bleeding under edges | Dirty aperture edges | Full wash with Dawn |
| Stencil won’t lie flat | Hot water or hanging to dry | Soak in cool water, dry flat |
| Apertures clogged solid | Dried acrylic | Soak, then soft brush |
| Film looks cloudy | Soap film or solvent haze | Rinse clear, skip IPA |
| Adhesive backing won’t stick | Water under the backing | Damp cloth only, air dry |
Where this goes sideways: Soaking a Mylar stencil overnight. The film absorbs water at the cut edges, curls, and never lies flat again.
If you’re layering stencils for a multi-color design, clean between every layer. A dirty stencil in the middle of a three-color job ruins the whole print, and you won’t see it until the last layer goes down.
Common Mistakes That Warp or Kill a Stencil
- Scrubbing the aperture edges with a stiff brush. Bends the land between apertures and tears the film at the corners.
- Letting acrylic dry before you wipe. Once it sets, it bonds to the film and needs a soak and a fingernail.
- Stacking wet stencils. They grow a crust and stick together.
- Using IPA or acetone as a shortcut. IPA can affect the next print; acetone eats Mylar.
Common mistake: Rinsing a heavily loaded stencil straight under the tap. The paint builds up in the corners of the apertures, hardens, and the next print bleeds at exactly those spots.
Don’t soak a Mylar stencil overnight. The film absorbs water at the cut edges, curls, and never lies flat again. If you need to loosen dried paint, soak briefly and check often.
If you’re cleaning an airbrush at the same time, the same principle applies: flush before the paint sets, and don’t let the nozzle dry out.
Frequently Asked Questions
Can I clean a stencil in the dishwasher?
No. The heat and the detergent are both too aggressive for Mylar and for adhesive backing. The film will curl, and the backing will lose its tack. Hand wash in lukewarm water with a drop of Dawn.
What if the paint has already dried?
Soak the stencil in lukewarm water, then work the softened paint out with a soft toothbrush. Don’t scrape with a fingernail or a blade; both will tear the film. If the paint has been set for weeks, the stencil may be past saving.
Is IPA okay for stencils?
KYZEN states that IPA is never recommended for understencil wiping, and ZESTRON says an incompatible cleaner such as IPA can affect the print result. IPC-7526 lists IPA as a VOC and fire hazard. For art stencils, Dawn and water do the job without the fumes.
How do I clean an adhesive stencil?
Wipe the face with a damp cloth and let it air dry. Never dunk the whole sheet; water loosens the backing and the stencil won’t stick again.
How should I store a stencil so it stays clean?
Dry it flat, then store it flat between two sheets of parchment paper or in a rigid sleeve. Don’t stack wet stencils, and don’t fold them. A stencil stored flat will last; one stored folded will crease along the fold and bleed at that line.
The Bottom Line
Here’s the one thing to try today: wipe your stencil with a dry corner of the rag before it ever touches water. That single habit saves more stencils than any cleaner on the shelf.
If you only remember one rule, make it this: the first few seconds after a print decide whether you’re cleaning a stencil or excavating one. Wet paint lifts. Dried paint fights back.
This all changes if you’re using oil-based stencil paint. Oil needs a solvent cut, and water alone won’t touch it. In that case, a dedicated stencil cleaner earns its keep, and the Dawn-and-water routine is just the prep step.
Start messy, refine later. The stencil only cares whether you cleaned it before the paint set.
