
How to Gesso a Canvas: Thin Coats, Dry Time, Sanding
This post contains affiliate links. As an Amazon Associate, we earn from qualifying purchases.
To gesso a canvas, brush on several thin coats instead of one thick one, work the first coat horizontally from the centre outwards, let each coat dry fully, and sand lightly after the second. Canvasi gives roughly one hour of drying time for a thin 0.13 mm coat when you compare a how to gesso a canvas, longer in cold or damp rooms.
Thick gesso is where the trouble starts. I laid a coat on heavy last month on a cheap panel, figuring one pass would save me a step, and three days later there was a wave in the surface I could see under a raking light. Canvasi explains the mechanism: thick gesso dries slowly, and while it dries the fabric shrinks unevenly, which pulls ripples into the weave. Thin coats keep the plane flat.
What follows is the order I actually work in, the two places where the sources flatly contradict each other, and the surface problems you can spot before you ever load a brush.
Key Takeaways
- Thin coats, always. A thick layer dries slowly while the fabric shrinks unevenly, and that mismatch is what puts ripples in a flat surface.
- About one hour is Canvasi’s drying figure for a 0.13 mm coat, and temperature plus humidity move that number around.
- Cross the directions. First coat horizontal from the centre outwards, second coat vertical across it.
- Sand after the second coat, not the first, using circular passes and progressively finer grit.
- Sizing is the step most manufacturer workflows skip and the conservation source insists on, because acrylic ground can leach colour out of the fabric underneath.
What Gesso Actually Is (and Why the Word Is Contested)
The University of Delaware conservation department refuses to use the word “gesso” for acrylic primer at all. In its technical resource on grounds and primers, the department points out that gesso literally means gypsum and traditionally describes an animal-glue ground bound with calcium sulfate.
Traditional gesso is an animal-glue ground bound with calcium sulfate or gypsum; the word itself means gypsum. Modern acrylic primers share the name but none of the chemistry. Acrylic dispersion grounds are the most common pre-primed ground among contemporary painters, dry within 24 hours, and sit between oil grounds and glue grounds on absorbency.
That distinction decides what you can put the stuff on. The same document is blunt about glue grounds: they turn brittle, they crack as humidity swings, and they belong on rigid panels only. Acrylic dispersion and oil grounds go on fabric or rigid supports without that restriction.
| Ground Type | Supports It Suits | Absorbency |
|---|---|---|
| Glue ground (traditional gesso) | Rigid panels only | Highest |
| Acrylic dispersion ground | Fabric or rigid | Middle |
| Oil or alkyd ground | Fabric or rigid | Lowest |
So what comes out of a tub labelled “gesso” today is almost certainly an acrylic dispersion ground, and the label is a marketing habit rather than a chemical description. Which types of canvas you’re coating matters here, because raw cotton and primed linen drink the first coat at completely different rates.
Check the Tension Before You Open the Tub
Loose canvas is the one problem you can’t sand out later, so check it before the how to gesso a canvas question.
Tap the back of the frame with a knuckle. A taut canvas gives a short, dry drum note. A slack one thuds, and you can feel it wobble under the pad of your finger.
Canvasi’s first instruction is to confirm the canvas is properly stretched before any gesso goes down. Adjusting tension afterwards can pull ripples back out, but you’re repairing something you could have caught in ten seconds.
Three things to check while the tub is still closed:
- The knuckle test. Tap the back panel. A dull thud means the weave is slack and the first coat will sag into it.
- Corner pressure. Press a thumb into the middle of the canvas. It should give slightly and spring back, not sink toward the stretcher.
- Your re-tension plan. Know how you’d tighten the frame from the back, because ripples that appear mid-prime get fixed there, not with more paint.
If the tension is bad, learn to stretch a canvas properly first. Priming over a sag is just burying the problem under white.
How to Gesso a Canvas, Step by Step
Seven steps, and only one of them is fussy.
Before you start: Sanding dried gesso throws a fine white dust that settles on everything in the room, so wear a mask and work over newspaper. Keep the lid on the tub between coats, because acrylic ground skins over and you’ll be fishing the film out with a stick. Never rinse brushes in the sink; wet ground sets hard in the trap and the clog shows up weeks later.
The First Coat: Horizontal, From the Centre Out
Canson’s oil workflow calls for a wide soft bristle brush and strips painted lengthwise. Canvasi’s version is the same idea with a direction: first layer horizontal, starting at the centre and working outwards, spread evenly across the whole surface so you don’t create tension differences between one end and the other.
A thin coat goes on looking almost wet-through, like a milky wash, and it flattens to a chalky matte as it dries. That colour shift is your clock.
The Second Coat, the Sanding, and When to Stop
Once the first coat is dry, the second goes on vertically, working across the direction of the first. Crossing the passes is what closes the gaps the first brush left behind.
- Check the tension before anything else. Skip it and ripples surface in the second coat, when you can’t reach them from the front.
- Load a wide soft bristle brush and lay the first coat horizontally from the centre outwards. Uneven coverage creates uneven tension across the surface.
- Keep the film thin. A thick coat dries slowly, and the fabric shrinks unevenly while it does, which is exactly how a wave gets into a flat plane.
- Let it dry completely. Canvasi’s figure is about an hour for a 0.13 mm coat, and temperature and humidity shift that considerably.
- Apply the second coat vertically, across the first. Two crossed passes seal the weave far better than two passes in the same direction.
- Sand after the second coat if the surface feels rough, working in circular movements with progressively finer paper. Sanding a wet or tacky film just tears it.
- Re-check tension and keep going with thin coats until the weave stops drinking. Canvasi notes that adjusting the canvas tension afterwards can smooth out ripples that have already appeared.
The University of Delaware resource adds a detail worth stealing: each ground layer can be applied with a brush or a spatula, and each one can be pumiced or finely sanded in between to build a smooth final surface. Brush for speed, spatula for a flatter plane.
How Many Coats Does Acrylic Gesso Actually Need?
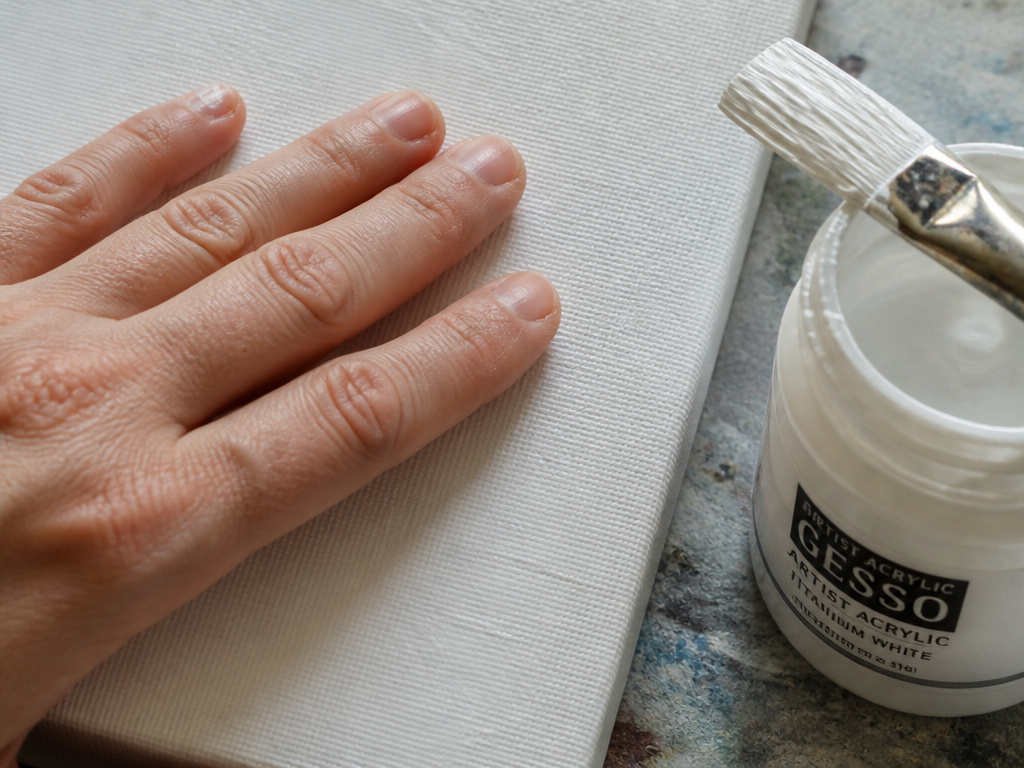
The University of Delaware conservation document gives four coats as the figure, while the anecdotal artstudiolife.com tutorial gives three. The sources don’t reconcile, and the split is worth understanding before you start counting.
The University of Delaware document states that four coats of acrylic dispersion ground are generally applied to create a ground layer, while noting the figure varies by manufacturer. It also explains why the count runs higher than oil or alkyd: acrylic grounds carry a large amount of water, and that water is the reason more coats are required during application.
The widely shared hobby tutorial lands on three layers, spaced 30 minutes apart, and then tells you to stop counting and use your hand instead. If the surface is rough enough that paint fights it, add another layer. If it’s glassy smooth, use less next time.
That touch test is the more useful instruction. The full canvas preparation sequence matters more than hitting an exact number, because a fourth coat on a fine weave just fills tooth you wanted to keep.
Common mistake: Counting coats instead of reading the surface. Four thin passes on a coarse cotton duck and four thin passes on a fine linen are not the same ground, and the linen one will feel like plastic if you keep going.
How Long Should You Wait Between Coats?
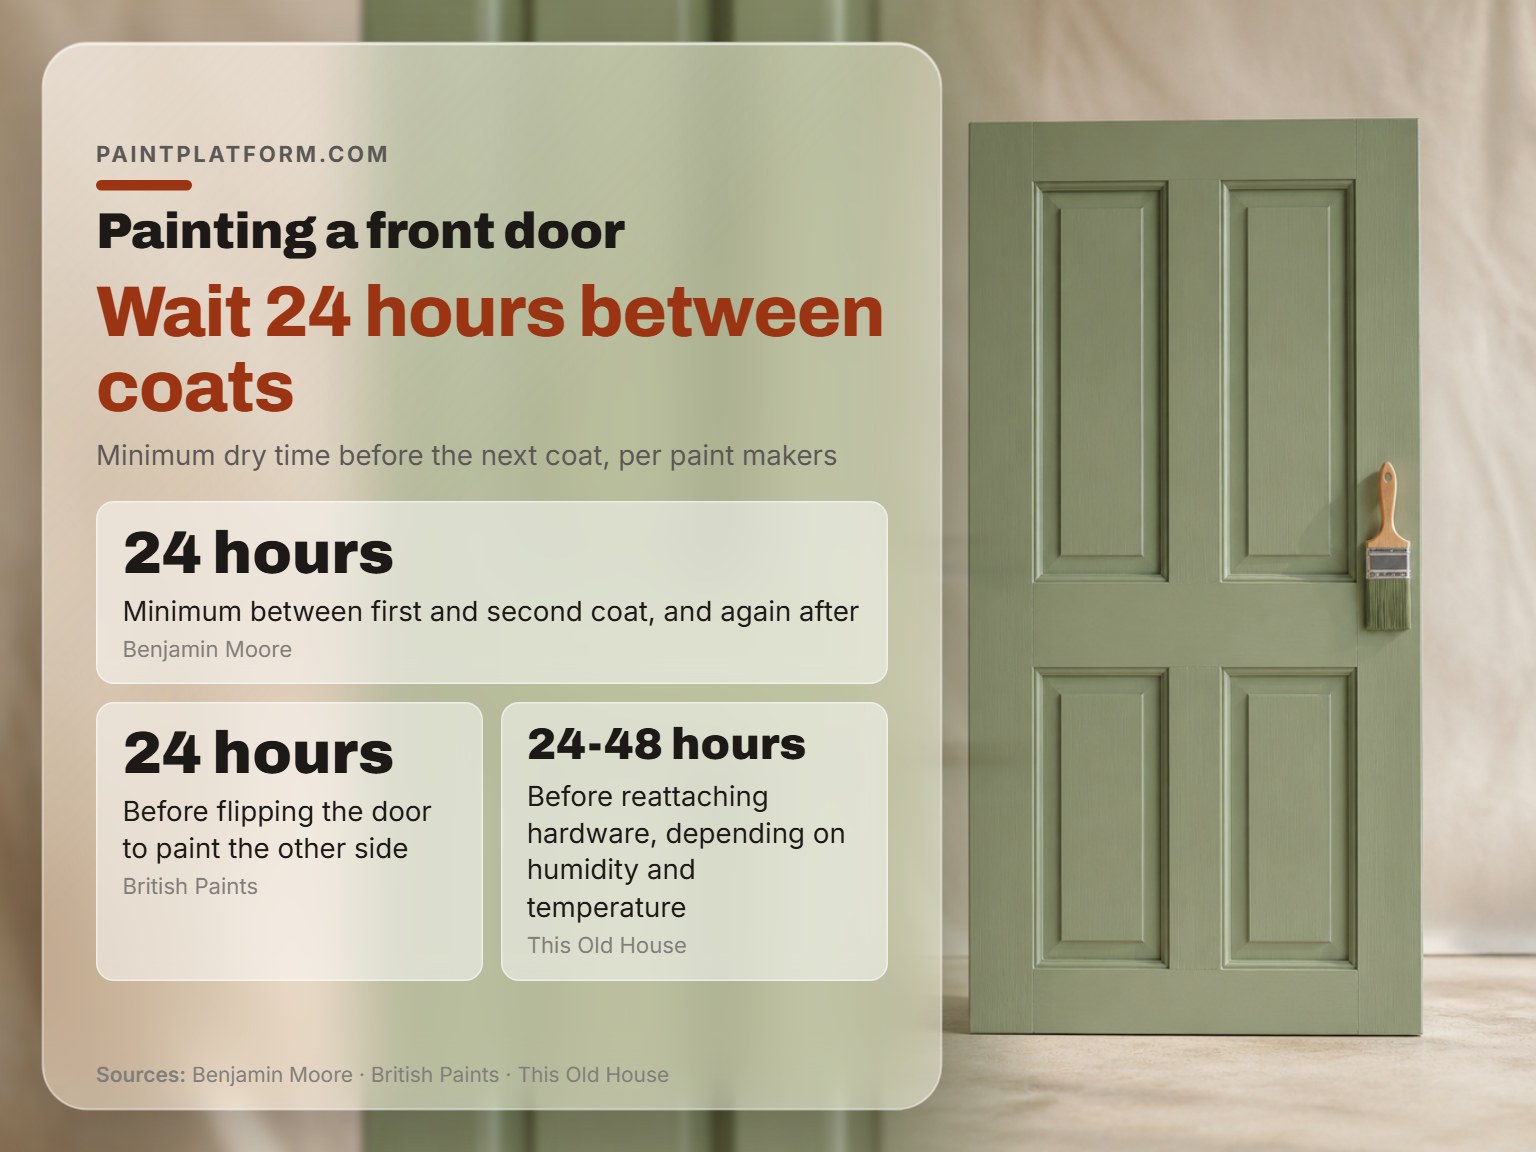
One hour is Canvasi’s figure for a thin 0.13 mm application, and that’s the only film-thickness spec any of these sources gives. The same page adds the caveat that actual drying time depends on temperature and humidity.
The anecdotal artstudiolife.com tutorial says 30 minutes between layers, while Canvasi gives approximately one hour for a thin 0.13 mm coat. Both numbers are honest; they’re just measuring different rooms.
I stopped counting minutes and started watching the sheen. A wet coat holds a soft gloss right across the surface. When it goes uniformly matte, with no darker patches near the edges where the film sits thicker, it’s ready, whether that took 40 minutes or two hours.
Don’t confuse recoat time with full cure. The University of Delaware document puts acrylic ground dry time at within 24 hours, which is a different question from whether you can lay the next coat.
When to Thin Gesso and When to Leave It Alone
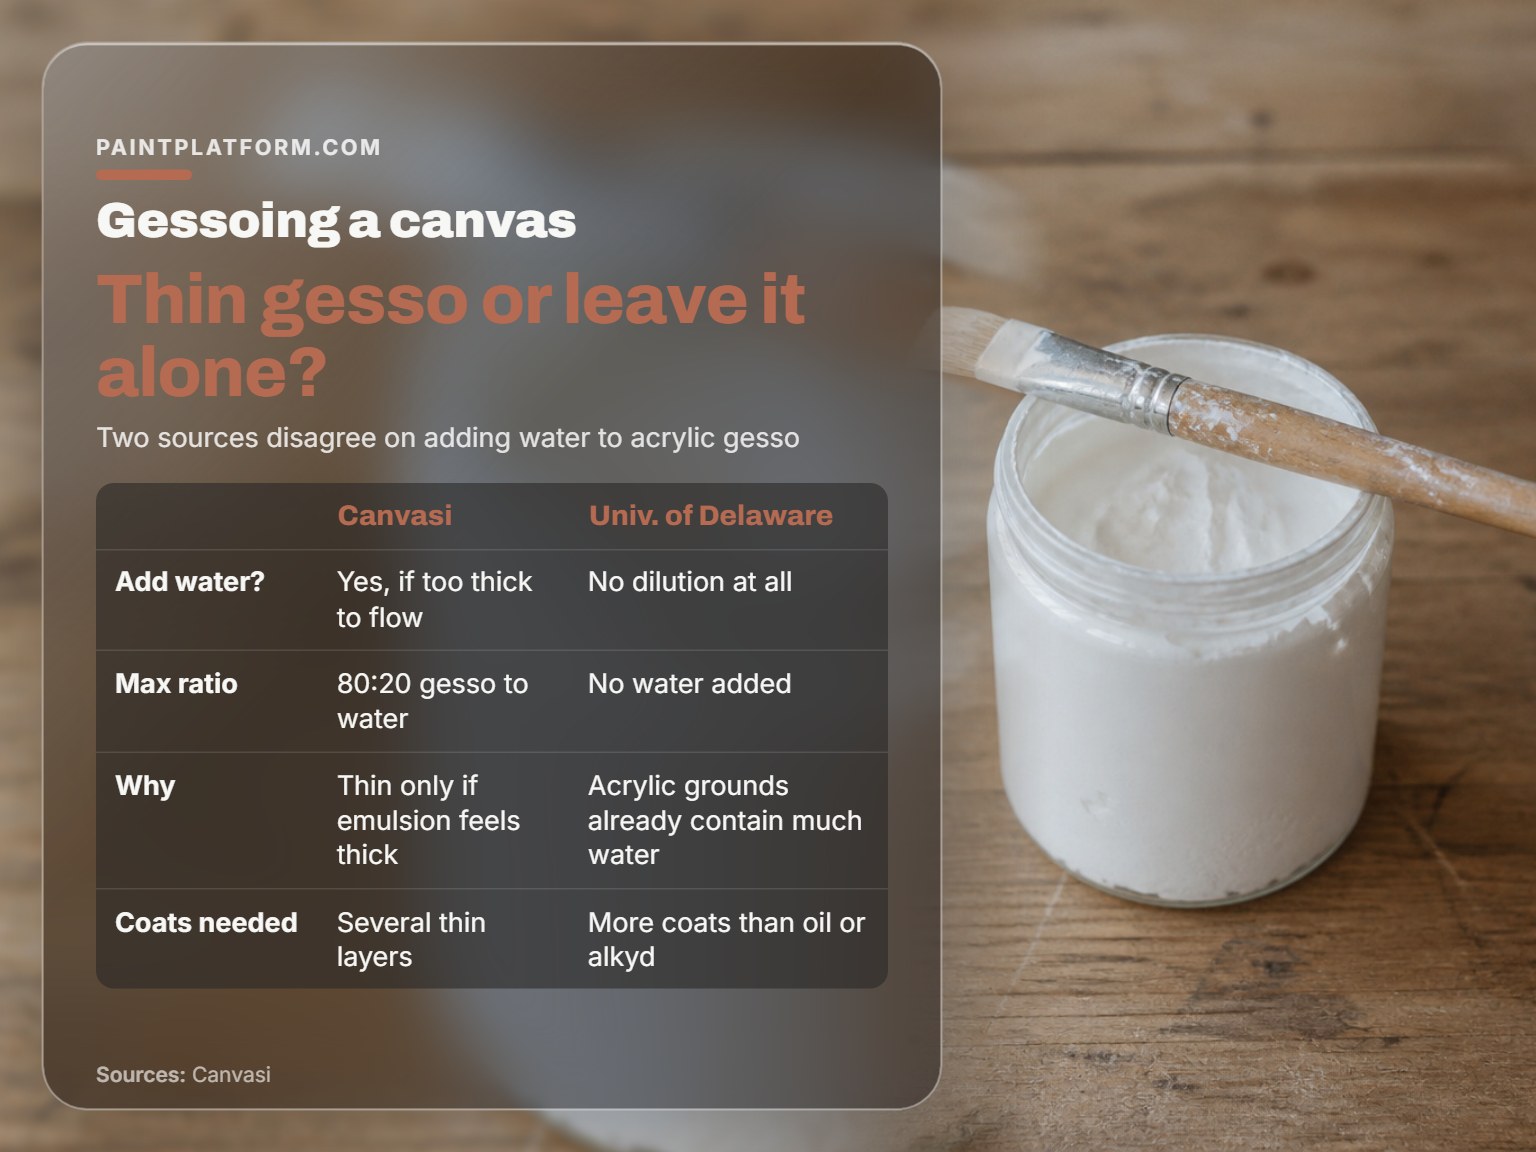
Thinning is the step where the sources point in opposite directions: Canvasi allows thinning with a little water up to a maximum ratio of 80:20 gesso to water, while the University of Delaware document recommends no dilution at all.
Canvasi’s position: thin with a little water only if the emulsion feels too thick to flow, at a maximum ratio of 80:20 gesso to water. That’s a 20% ceiling on added water, not a starting point.
The University of Delaware document takes the other view, noting that acrylic grounds already contain a large amount of water, which is precisely why more coats are needed compared to oil or alkyd grounds. It recommends no dilution at all.
Both positions make sense once you know what you’re fighting. Thinning helps the first coat sink into a coarse weave. Thinning a later coat just gives you a thinner film and a longer walk back to where you started.
Signs the tub wants a splash of water:
- The brush drags and leaves visible ridges that don’t level out.
- The ground has sat in a warm room and thickened at the surface.
- You’re coating a very open weave and want the first pass to penetrate rather than sit on top.
And signs to leave it alone: the ground flows off the brush in a smooth ribbon, the surface levels on its own, or you’re already past the first coat.
Where this goes sideways: Push past the 80:20 mark and the film gets thin enough that the weave shows back through, so you end up adding a fourth coat when you thought you were done at two.
If you want texture rather than a sealed surface, you’re shopping for a different product entirely, and gesso vs modeling paste is the fork in the road.
What Goes Wrong, and How to Read the Surface
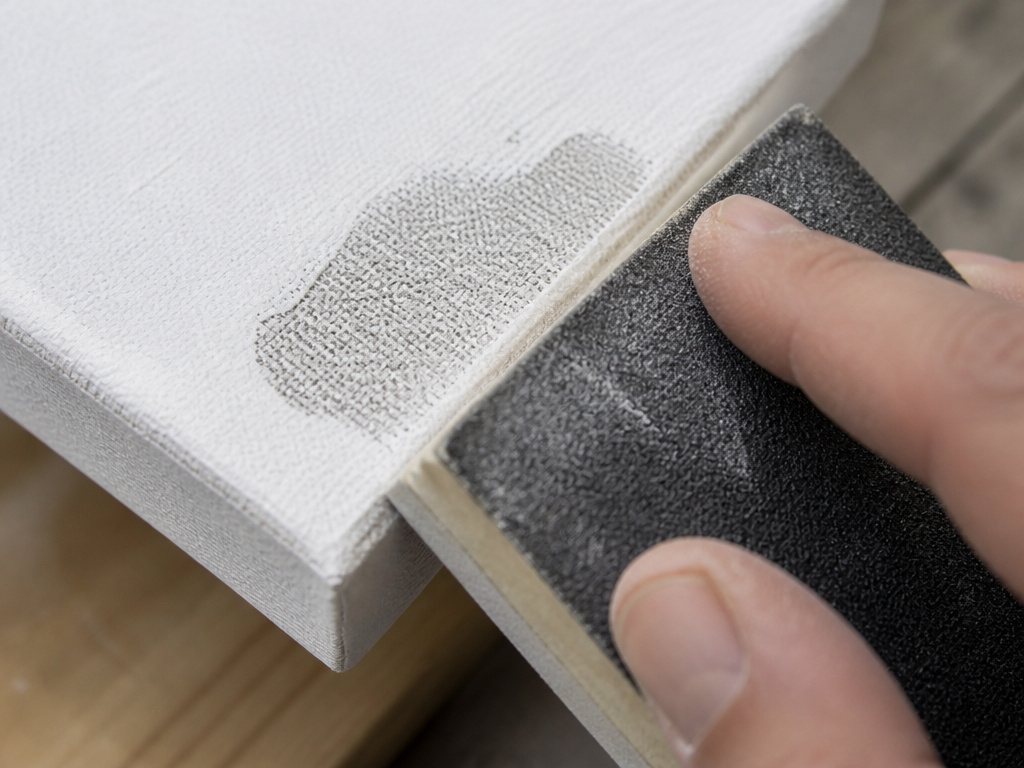
You sand a little too hard on one corner, the white goes translucent, and the grey weave stares back at you. That’s fabric, not ground.
Most gesso problems announce themselves before the painting starts. Read the surface and you’ll know what happened.
| What You See | Likely Cause | Fix |
|---|---|---|
| Ripples across the plane | Thick coat drying while fabric shrinks unevenly | Re-tension from the back, thin coats next time |
| Pinholes in the film | Coat brushed out too far or applied too thin | One more thin coat, crossed against the last |
| Patchy absorbency | Inconsistent ground on a pre-primed board | Extra coat, and ask the maker what’s on it |
| Grey or yellow under the white | Support induced discoloration | Size the support before priming next time |
| Ground lifting at an edge | Delamination on a cheap pre-primed surface | Return it, it won’t hold |
Discoloration From Underneath (SID)
The University of Delaware document names a failure most tutorials never mention. Acrylic grounds can leach organic material out of certain supports, a phenomenon called support induced discoloration, and properly sizing the support before applying the ground helps avoid it.
Here’s where the sources part company again. Canson’s oil preparation steps describe gesso going straight onto the support with a wide soft brush, no sizing stage at all, while the University of Delaware conservation document treats sizing as a required step.
My read: on a sealed, gessoed panel it rarely matters. On raw fabric headed for oil, size it.
Cheap Pre-Primed Canvas and What It Actually Is
Most pre-stretched canvases are already gessoed, and they tend to be scratchy and rough enough that an extra thin layer genuinely improves them. That’s the practical view from the tutorial side, and I’ve found it holds.
The conservation literature is harsher. Some commercially available pre-primed supports have been found to delaminate, to hold uneven levels of absorbency, and to behave inconsistently from one batch to another. The recommendation is to ask the manufacturer what’s in the ground.
The same logic carries over when you paint on canvas board, where the ground sits on a rigid core and the failure modes change completely.
Gesso Under Oil Paint: The Caveat the Vendors Leave Out
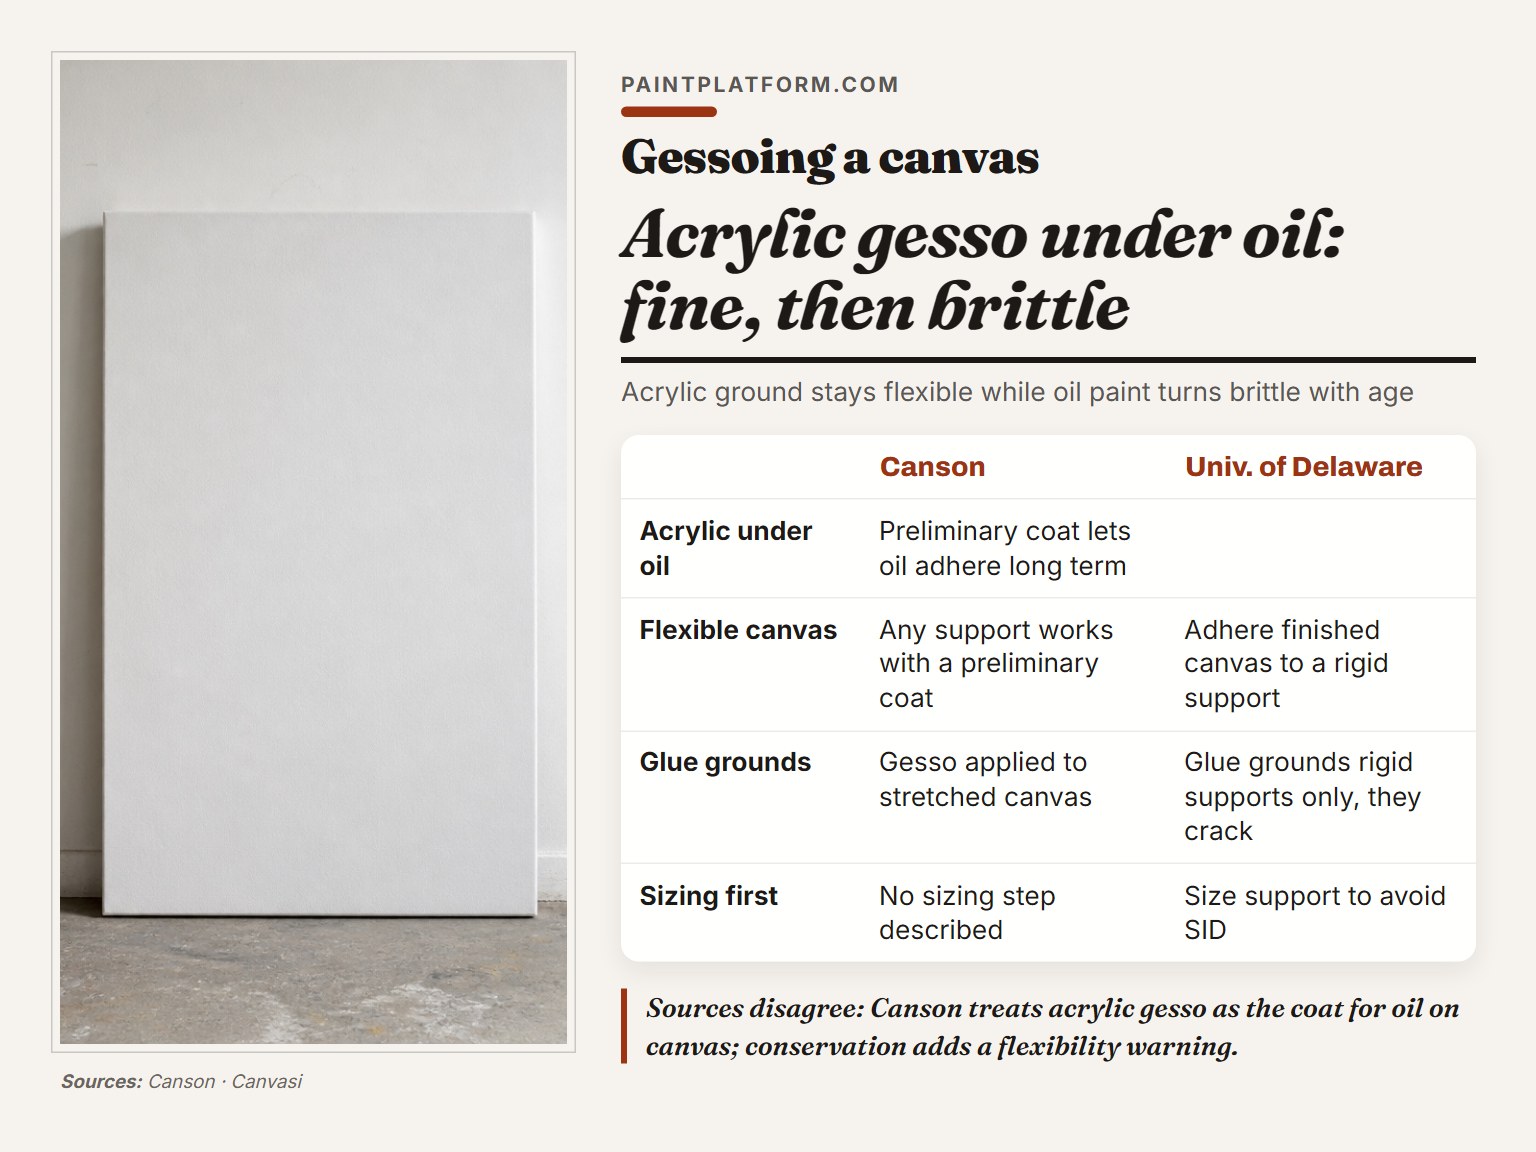
Every manufacturer workflow treats acrylic gesso as a perfectly good base for oil. The conservation literature adds a warning none of them print.
Canson’s position is straightforward: any support works with oil on one condition, that a preliminary coat goes down so the paint adheres over the long term. Acrylic gesso is that coat.
The University of Delaware document accepts acrylic grounds under oil and then complicates it. Acrylic grounds stay flexible while oil paint becomes brittle with age, so on a flexible support the two films stop moving together. The suggested remedy is to adhere the finished canvas to a rigid support.
Acrylic ground under oil on stretched canvas holds up fine for years. The mismatch shows later, when the oil film has gone brittle and the ground beneath it is still flexing. If a painting matters to you, mount the finished canvas to a rigid board.
That’s the whole acrylic vs oil question in miniature: the ground decides how the paint ages, not just how it applies.
Frequently Asked Questions
Can you gesso over an already primed canvas?
Yes, and on a scratchy pre-stretched canvas it’s worth doing. Most pre-primed surfaces are already coated but rough enough to fight your brush, so one extra thin coat smooths them without sealing the tooth completely. Sand lightly once dry.
Does gesso need sanding between every coat?
No. Canvasi’s sequence sands after the second coat, not after the first, and only if the surface needs it. Work in circular movements with progressively finer paper. The University of Delaware resource notes each layer can be pumiced or sanded in between, which is the same idea taken further.
Can you put oil paint over acrylic gesso?
Yes. Canson presents acrylic gesso as the preliminary coat that lets oil adhere over the long term, and the conservation source accepts acrylic grounds under oil. The caveat is flexibility: acrylic stays flexible while oil goes brittle, so a finished canvas on a stretcher benefits from being mounted to a rigid board.
How long should gesso dry before you paint on it?
For recoating, Canvasi’s figure is about an hour for a thin 0.13 mm coat, adjusted for temperature and humidity. For a full dry, the University of Delaware document puts acrylic grounds at within 24 hours. Those are two different questions, so don’t use one answer for the other.
What happens if you apply gesso too thick?
It dries slowly, and the fabric underneath shrinks unevenly while it does, which is the mechanism behind ripples in an otherwise flat surface. Thick coats also sand badly, because the film is soft underneath while the top feels dry.
Do you have to size a canvas before gesso?
The University of Delaware conservation literature says yes, to avoid support induced discoloration and, for oil, to keep acidic medium off the fabric, while Canson’s oil workflow describes no sizing step at all. On raw fabric headed for oil, size it. On a sealed panel, the risk is minimal.
The Bottom Line
Everything above assumes you’re priming raw fabric or fixing a rough pre-primed surface. If the canvas in front of you already feels smooth and slightly toothy under your palm, an extra coat is optional, and you can go paint.
Here’s the concession, though. Most people reading this are not priming raw linen for an archival commission. You’re on a cheap panel or a canvas pad, and the stakes are a Tuesday evening.
So buy a multi-pack of small panels and gesso three of them badly this week. One thick, one thin, one thinned with water past the 80:20 mark. Sand them, feel the difference under your hand, and you’ll never need to look up the ratio again.
Try it on a scrap first. The panel you ruin learning this is the cheapest lesson in the whole hobby.
