
How to Paint a Mural on Brick: Step-by-Step
This post contains affiliate links. As an Amazon Associate, we earn from qualifying purchases.
To paint a mural on brick, start with a wall that’s structurally sound, dry, and free of flaking paint, then apply a 100% acrylic water-borne primer that isn’t a vapor barrier and paint with 100% artist-grade acrylic when temperatures sit above 50 degrees Fahrenheit.
Vapor barrier is the phrase that decides most of these arguments. Brick moves water vapor constantly, and any film that blocks that movement traps moisture where freeze-thaw can split the face right off the brick. That’s why the primer coat carries so much weight, and it is also central to how to paint a mural on brick.
What follows is the order the decisions actually land in: surface check, weather window, prep, paint, primer, blocking in, and the sealing question at the end.
Key Takeaways
- Check the wall before you check the paint. Crumbling mortar, water stains, or a leaning wall means repair first, not a bigger can of primer.
- 100% acrylic water-borne primer, and on masonry it must not be a vapor barrier.
- Enamel and oil paints are out for exterior work because they trap moisture behind an impermeable film.
- Once brick is painted, it’s committed. BIA puts exterior masonry repainting at every three to five years.
What Surface Are You Actually Painting On?
The Canadian Conservation Institute ranks concrete block ahead of brick for mural work. The City of Frankfort puts raw, unpainted brick at the top of its list. Both are describing the same material, and both are right about different bricks.
Brick is porous and vapor-permeable by design. Water enters through the face and mortar joints, then leaves as vapor. Any coating that blocks vapor movement traps that water behind the film, where freeze-thaw cycles can flake the paint layer and spall the brick face. The wall has to keep breathing.
| Source | Verdict on brick | What it recommends instead |
|---|---|---|
| City of Frankfort, KY | Raw unpainted brick is the best surface | Prep it and paint directly |
| Canadian Conservation Institute | Older and red-clay brick are a poor choice | Concrete block, metal siding |
| City of Loveland, CO | Painting brick is a significant financial risk | Aluminum composite panels, media fabric |
Three sources, three verdicts. Frankfort’s guide treats brick as a normal substrate with a prep list attached. The Canadian Conservation Institute flags older brick and red-clay brick as particularly prone to flaking and spalling, and calls them a poor choice. Loveland, Colorado goes furthest, calling brick painting a significant financial risk and steering owners toward aluminum composite panels or non-woven media fabric instead.
You can’t average those three positions into one answer. The deciding variable is the brick itself.
Hard, dense brick from the late nineteenth century onward holds a coating differently than soft, porous brick from before the 1870s. Loveland notes that pre-1870s brick was often soft enough to need breathable mineral paint, while machine-made brick by the end of the 1800s was strong enough to face weather bare.
On a red-clay wall, the real risk is the brick face spalling off with the paint still attached to it.
A masonry wall that fails the soundness check won’t be saved by better paint, and prepping masonry walls for paint starts with the checks that decide whether you paint at all.
Brick is basically committed for life once it’s painted, and stripping it later is a nightmare.
The Weather Window Is Narrower Than You Think
Fifty degrees Fahrenheit is the floor. The Frankfort mural installation guide sets primer and paint application above 50 degrees, with an ideal range of 65 to 85 degrees, and it adds a second condition: dry weather, on a thoroughly dry wall.
Those two conditions stack. A warm day after two days of rain still fails the second test.
- Above 50 degrees, ideally 65 to 85. That’s the window Frankfort’s guide sets for both primer and paint.
- Dry weather, thoroughly dry wall. The guide’s exact words, and both conditions have to hold at once.
- Shade when it’s drying fast. NIST’s masonry guidance says to work in the shade as far as practicable when weather pushes paint to dry rapidly.
Where this goes sideways: Rolling acrylic onto a wall that’s still holding moisture. The Canadian Conservation Institute names moisture as the primary enemy of an outdoor mural, and freeze-thaw cycles in a northern winter turn it into flaking paint and spalling brick.
The same weather window applies to any flat exterior surface, and when you compare a how to paint a mural on brick, painting exterior brick covers the ones where the rules change.
How Do You Prep Brick So the Paint Stays?
Four things get checked before a brush touches the wall: structure, moisture, existing coatings, and access.
The city mural installation standards in Frankfort are the most concrete of the three sources, so start there.
- Bricks and mortar sound. Crumbling, powdery, cracked, or broken units mean repair first.
- Wall dry. Look for water seepage, stains, or rust.
- Existing paint sound. Peeling, chipping, or blistering paint has to come off. The Canadian Conservation Institute is blunt here: never paint over architectural paint that’s flaking or discontinuous.
- Structurally sound. Cracks and lean are disqualifying.
- Roof, parapets, and flashing in good shape. Frankfort ties the long-term viability of the wall to all three.
CCI adds removing loose material like dirt and flaking coatings, plus repellent surfaces such as release agents. BIA adds properly filled joints and no efflorescing materials anywhere in the wall, mortar, brick units, or backup. NIST recommends a wire brush for dust, loose mortar, and flaking paint.
Loveland warns that sandblasting can damage the brick itself and recommends a masonry paint removal expert instead.
Before you start: Overhead wires near the wall mean a call to a scaffold or lift contractor before anything else happens. The ground under your ladder or boom lift has to be stable, sound, and level. And in a historic district, painting unpainted masonry is generally not permitted without Architectural Review Board approval.
Brick doesn’t come back from a bad decision.
Picking Paint: Acrylic, Silicate, or Limewash
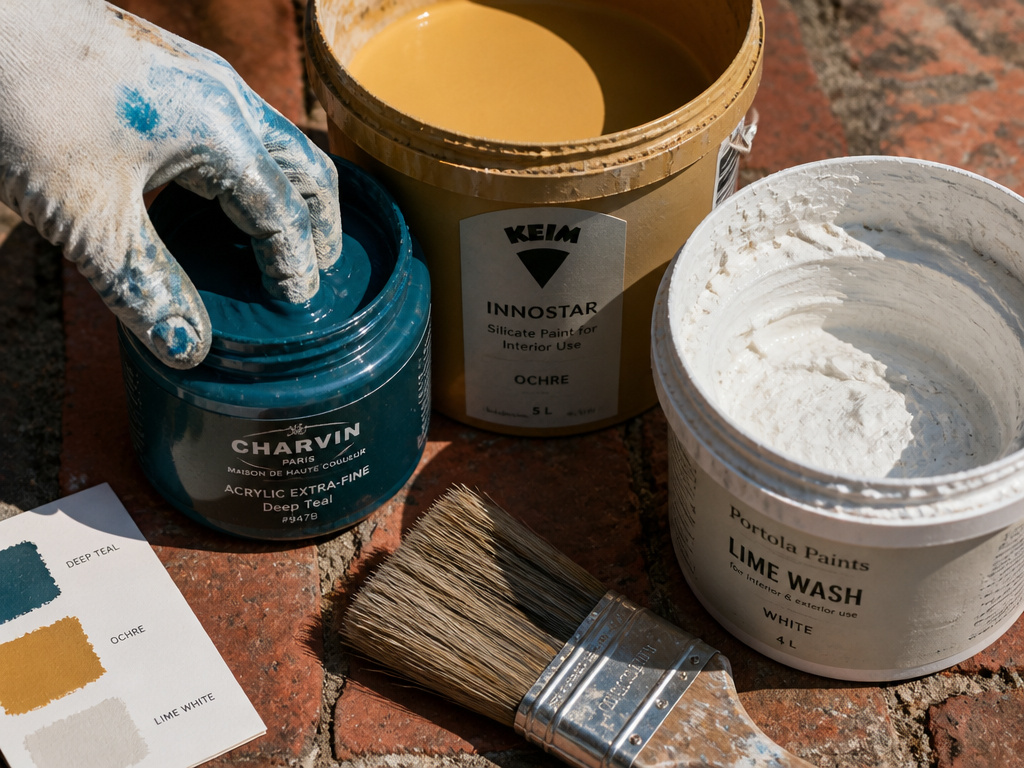
Frankfort’s guide names 100% artist-grade acrylic as the standard for mural work, and it’s specific about what to look for on the label.
Acrylic
Acrylic dispersion paints should state conformance to ASTM D5098, the standard specification for artists’ acrylic dispersion paints. Lightfastness matters too: ASTM I is ideal, ASTM II is acceptable.
Two exclusions come with it. Enamel and oil paints are out for exterior use because they’re moisture impermeable and don’t let the wall breathe. Retail-tinted commercial-grade house paint is also out, in favor of 100% artist-grade acrylic.
Silicate
CCI names silicate paints such as Keim Mineral Paints as suitable for outdoor murals. They combine a potassium silicate binder with inorganic fillers and natural earth oxide pigments, and they penetrate into mineral substrates like brick and concrete to form a permanent bond.
The trade-off is palette. Silicate ranges are smaller than acrylic ranges, but the inorganic pigments are durable and resistant to fading.
Limewash
BIA’s 2024 technical note covers limewash: naturally alkaline, fully compatible with brick, and it won’t change the wall’s vapor permeability. Service life runs five to ten years or more depending on environment and number of coats.
Mineral paint goes further. BIA reports warranties of 15 years or more, with some projects going 30 years or more without recoating.
Comparing a jar of Golden against a bucket of Keim is really a comparison of two binder systems, and the how to paint a mural on brick question is covered brand by brand in best mural paint. Walls that catch full afternoon sun put a premium on pigment stability, and paint for outdoor murals sorts the options by how they hold color.
Primer, Thinning, and the Breathability Fight
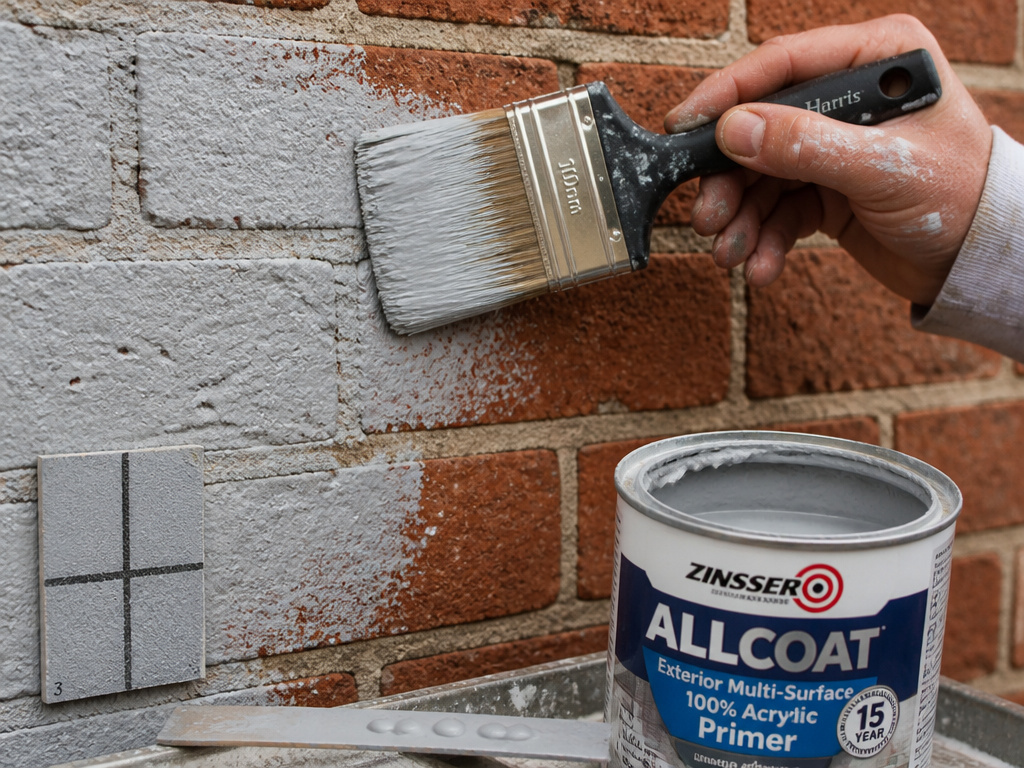
Primer is where a lot of brick murals get quietly ruined.
Frankfort’s guide prefers a 100% acrylic water-borne primer, and on masonry it adds a hard rule: the primer must not be a vapor barrier. Same logic as the paint. A primer that seals the wall fights everything above it.
Frankfort also suggests tinting the primer to a light neutral grey. CCI gives no color guidance at all, only the instruction not to dilute the primer and to test adhesion instead.
That’s the first real disagreement. The second is thinning.
- Frankfort allows no more than a few drops of water when thinning acrylic, and prefers a gloss or semi-gloss acrylic medium instead.
- CCI says don’t dilute the primer at all.
- NIST’s Letter Circular 747 masonry painting guidance for resin emulsion paste paint calls for roughly 2 parts paste to 1 part water, following manufacturer directions.
Three positions. The sources disagree: Frankfort allows no more than a few drops of water when thinning acrylic, CCI says don’t dilute the primer at all, and NIST calls for roughly 2 parts paste to 1 part water for resin emulsion paste paint, following manufacturer directions.
The part nobody mentions: A primer that dries to a hard, glossy film can pass every visual check and still fail an adhesion test. CCI’s advice is to test adhesion rather than thin the primer.
Porous walls have their own primer logic, and masonry primer covers the vapor-permeability question that decides it.
Blocking In Big Shapes Before You Touch a Detail
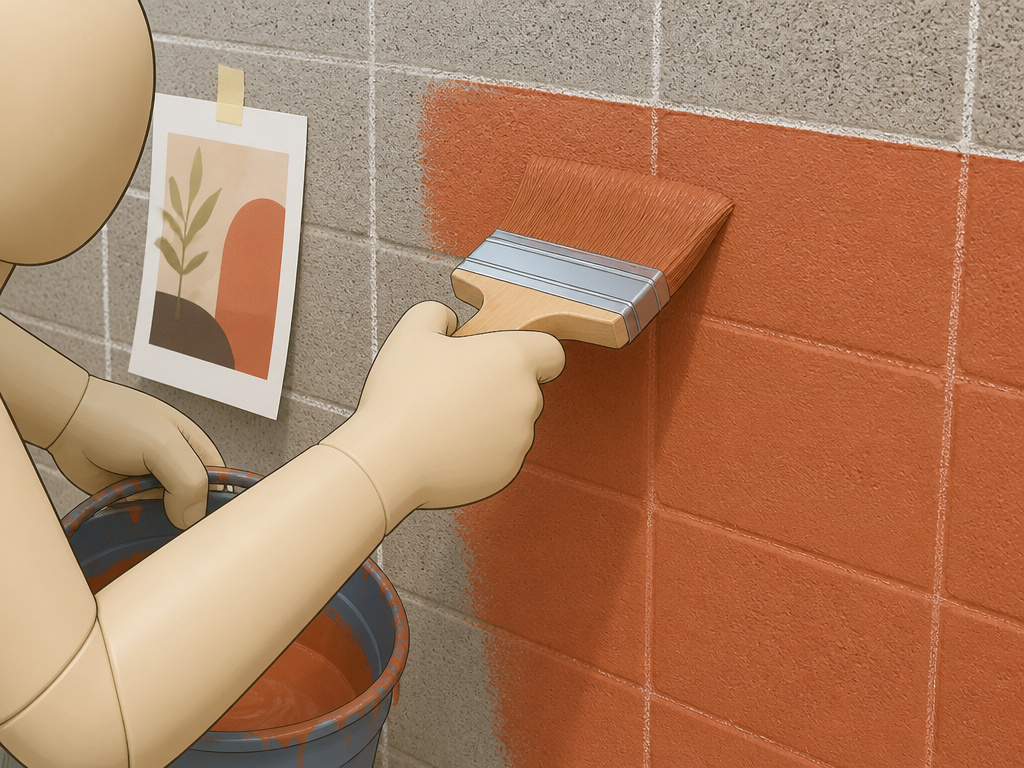
That’s the detail trap, and it’s the mistake I see most often on first murals. Starting with the face or the lettering feels productive. Then the light shifts, your energy drops, and the big background shapes never get the coverage they needed.
The first time I primed a cinder block wall for a mural, the first coat vanished into the pores.
Here’s the sequence that works.
- Sketch the whole thing small first.
- Scale up with a grid. Snap a chalk grid on the wall that matches the grid on your sketch, then transfer square by square.
- Or project it.
- Block the large shapes first. Background, sky, big color fields. Get full coverage before anything else.
- Add detail last. Lettering, faces, highlights. By then the wall already reads as a finished piece.
A limited palette forces the big shapes to carry the composition, and it keeps the whole wall reading as one piece instead of five.
Getting the grid right is most of the battle, and mural layout covers the scaling math from sketch to wall. If this is your first one, painting a mural covers the parts that come before the paint ever opens.
Sealing, Moisture, and the Failure Modes Nobody Warns You About
A clear coat can make a mural look finished and lock in the problem that eventually kills it.
Frankfort’s guide allows a clear coat sealer, and it pairs that with a paint choice. Use flat acrylic if you’re sealing, because flat dries with fewer ridges and the color pops under the clear coat. Use semi-gloss acrylic if you’re leaving it unsealed, for scratch resistance.
CCI is far more cautious. Its position is that it’s better not to apply a coating at all than to apply one with poor ageing properties. Documented failures include discoloration, uneven peeling, a white haze called blanching or bloom, and coatings that couldn’t be removed without damaging the paint underneath.
BIA adds a third constraint: sealing limewash isn’t recommended where permeability shouldn’t be reduced.
That’s an unresolved conflict, and the sources don’t hide it. Frankfort permits the sealer. CCI warns that a bad one is worse than none. BIA says don’t seal if breathability matters.
| What you see | Likely cause | What to do |
|---|---|---|
| Paint flaking in sheets | Moisture trapped behind the film | Check roof, flashing, and wall seepage |
| Brick face spalling | Freeze-thaw with water inside the brick | Repair first; consider a panel instead |
| White haze (blanching) | Coating with poor ageing properties | Test-remove before recoating anything |
| Efflorescence under paint | Soluble salts in brick, mortar, or backup | Fix the moisture source, not the paint |
CCI names moisture as the primary enemy of an outdoor mural, full stop. Moisture plus freeze-thaw cycles in a northern winter causes flaking paint layers and sometimes spalling of the wall surface.
An unpainted border around the mural helps a raw, unpainted brick wall breathe, but CCI is careful to say it won’t prevent flaking or spalling if there’s a moisture problem in the wall, or if interior humidity moves through the porous brick.
Whether to seal at all is a separate decision from which sealer to use, and sealing a mural covers both.
Frequently Asked Questions
Can you paint a mural directly on brick?
Yes, with conditions. Frankfort’s guide treats raw, unpainted brick as the best surface for paint as long as it’s free of defects. CCI is more cautious, calling older and red-clay brick a poor choice because they’re prone to flaking and spalling, while Loveland calls painting brick a significant financial risk. Check the brick’s age and condition before you commit.
What temperature is too cold for painting a brick mural?
Below 50 degrees Fahrenheit. Frankfort’s guide sets primer and paint application above 50 degrees, ideally between 65 and 85, and only in dry weather on a thoroughly dry wall.
Should you seal a mural on brick?
It depends which source you follow. Frankfort’s guide permits a clear coat and recommends flat acrylic underneath it. CCI warns that a coating with poor ageing properties is worse than no coating, citing discoloration, uneven peeling, and blanching. BIA says don’t seal limewash where permeability shouldn’t be reduced.
How often does a painted brick wall need repainting?
BIA’s 1985 technical note puts exterior masonry repainting at every three to five years. Mineral paints are a different story: BIA’s 2024 note reports warranties of 15 years or more, with some projects going 30 years or more without recoating.
Can you paint over brick that’s already painted?
Only if the existing coating is sound. CCI’s rule is never to paint over architectural paint that’s flaking or discontinuous, and Frankfort’s checklist asks the same question about peeling, chipping, or blistering. Mineral paints go further and require the existing coating to be removed entirely.
What paint should you avoid on exterior brick?
Enamel and oil paints. Frankfort’s guide rules them out for exterior use because they’re moisture impermeable and don’t let the wall breathe. Retail-tinted commercial-grade house paint is also discouraged in favor of 100% artist-grade acrylic.
The Bottom Line
Here’s the threshold I’d give anyone standing in front of a brick wall with a can of primer: if the wall is red clay brick and older than the twentieth century, stop and price out an aluminum composite panel before you buy anything. Loveland’s guidance exists because that decision is hard to reverse, and CCI’s caution about red clay is specific enough to take seriously.
If the wall passes, do this first.
Everything above assumes a dry, structurally sound wall. If water is coming through, none of the paint advice matters until that’s fixed.
And if you’re going to use a projector instead of freehanding the whole thing, use it. The purists aren’t the ones who have to finish the wall.
