
How to Plan a Mural Layout: Measure First, Paint Second
This post contains affiliate links. As an Amazon Associate, we earn from qualifying purchases.
To plan a mural layout, fix four things before you touch paint: the wall’s true measurements, the panel grid and seam method, the border clearance around windows and trim, and the order you’ll block in shapes. Get those wrong and no amount of painting skill saves the piece.
Border clearance redraws a composition before you mix a single color. The historic district guidelines I keep coming back to set it at 25% of the shortest mural dimension, measured off cornices, trim, and window frames. Run that math on a narrow wall and the sketch you made no longer fits, which is why how to plan a mural layout starts with these measurements.
What follows is the order I actually work in when I think about how to plan a mural layout: reading the wall, locking the print decisions, checking the local rules, handling corners, then blocking in. Four of those steps happen before a brush gets wet.
Key Takeaways
- Measure the wall, not the drawing. Uneven walls get trimmed and cropped, never stretched to fit.
- Lock panel count, seam method, and bleed before you order anything. Changing them after print means starting over.
- Block big shapes first, detail last. Running out of steam halfway is the mistake I see most in amateur murals.
- Budget maintenance from day one. The Canadian Conservation Institute is blunt that it belongs in the plan, not the cleanup.
Start With the Wall, Not the Picture
The wall decides how to plan a mural layout. Everything after that is negotiation.
The Canadian Conservation Institute’s mural planning guidance makes the primary support the single biggest factor in how long a mural lasts. That means the wall itself, or a separate panel attached to it. Not the paint brand. Not the design.
The primary support, whether a wall or a separate structure attached to an existing wall, is the predominant factor in a mural’s stability and longevity. Poor site selection accelerates deterioration through physical damage, water, and pollutants, and raises the likelihood of vandalism. Site selection also shapes how much maintenance the piece will demand.
Walk the site with a critical eye and write down what you find:
- Wind and abrasives. Grit blasting a wall at ground level will frost the paint within a season.
- Sun and shade. Constant sun fades; constant shade keeps moisture against the surface.
- Road spray. Water, salt, and gravel thrown off an adjacent road land on the lower third of the wall.
- Municipal work. Snowplows and sprinkler heads do more layout damage than vandals do.
- Pollutants and heavy dirt settling into the texture you’re about to paint over.
Two siting moves cost nothing. A high placement reduces vandalism, and a northern or western exposure slows light damage, per the CCI. You can also change the site itself: landscaping, parking barriers, or planters that steer foot traffic and bumpers away from the wall.
A wall that’s been taking sprinkler spray has a chalky bloom near the base that wipes off on your hand. That bloom is your warning that the surface is already shedding.
How Do You Measure a Wall for a Mural Layout?
Get the width and height off the actual wall, not off the drawing or the photo on your phone.
Take each measurement at the top, middle, and bottom of every face. Then take the shortest of each set. Walls bow, parapets sag, and a wall that reads flat from across the street can be off by enough to throw a panel seam into a window.
When the Wall Isn’t Square
Uneven walls get trimmed and cropped. That’s the whole answer.
Stretching a panel to force an image match creates distortion, tension, or movement later, according to the print-production guidance from Decords. Build the crop allowance into the layout from the start, and the wobble disappears into the trim line instead of showing up in the artwork.
Setting the Panel Grid
Panel decisions are print decisions. Once you’ve ordered, you live with them.
Lock these before anything goes to a printer:
- Finished width and height, taken from the shortest measurements on each face.
- Panel count and panel width, chosen so seams land on flat planar wall rather than on trim.
- Seam method, either a butt joint or an overlap that’s retained or trimmed.
- Bleed and trim allowance, sized to absorb the wall’s unevenness.
- Installation temperature, agreed with whoever is hanging the panels.
Don’t borrow a seam method from a different product because it looked tidy on another job. That’s how you end up forcing a match that shouldn’t be forced.
If you’re working the whole thing out on paper first, the process for how to scale a mural design to the wall is worth doing properly rather than eyeballing.
The Border Rule That Kills More Layouts Than Anything Else
Twenty-five percent. That’s the clearance the City of Port Townsend’s design guidelines require between a mural and any architectural feature.
The rule reads: a minimum border separation of 25% of the shortest mural dimension from cornices, beams, columns, trim, windows, doors, vents, and control joints in plaster. On a ten-foot-wide mural, that’s two and a half feet of empty wall on every side. It eats more composition than most people expect.
The same document bans overlapping those features entirely, and asks that murals sit parallel and orthogonal to columns, beams, trim, and parapets. Layouts that fight the building’s geometry read as stickers. Layouts that follow it read as part of the building.
Where this goes sideways: Painting tight to a window frame because the design “needed the room.” You lose the border separation, the historic review board sends it back, and you’re sanding a finished mural.
A chalk line snapped against brick leaves a faint white ghost you’ll still see after the paint goes on. Snap it, check it, then decide.
Once the border is set, the next job is getting your drawing onto the wall accurately, and the method for how to transfer a mural design to the wall matters more than the drawing itself.
Do the Size and Placement Rules Actually Agree?
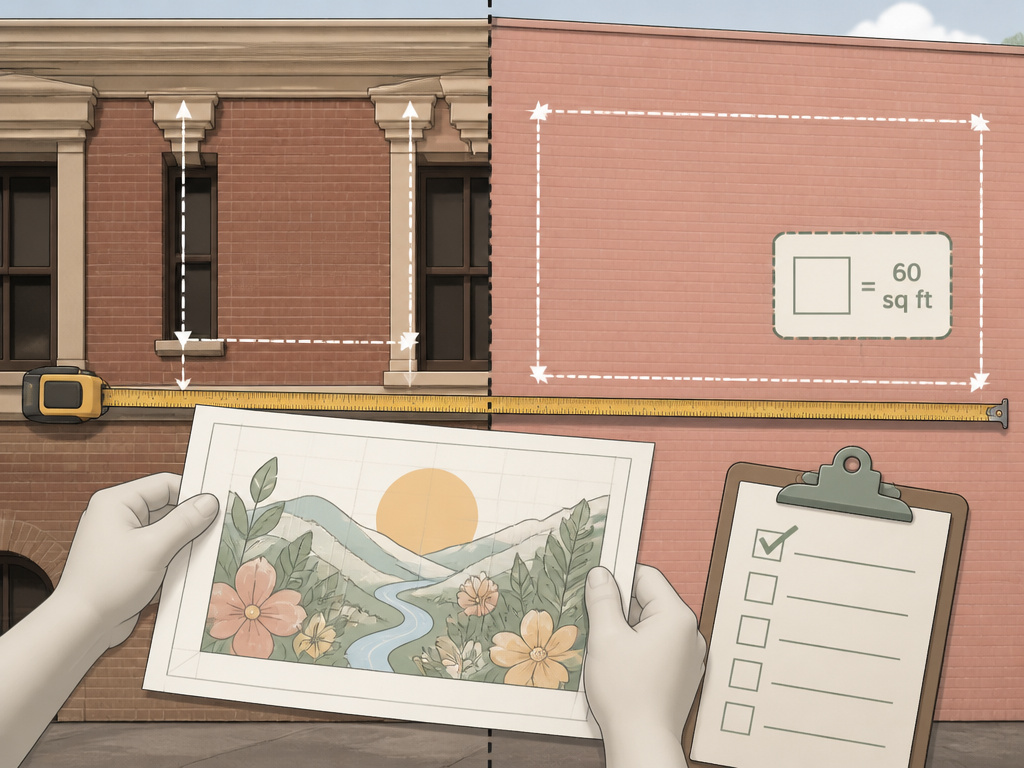
Two credible sources will tell you opposite things about the same wall.
This isn’t a case where one is wrong. It’s a case where a federal conservation agency and a local historic-district code are answering different questions. Here’s how they line up:
| Question | Canadian Conservation Institute | Port Townsend guidelines |
|---|---|---|
| Heritage buildings | Never; a mural can alter or damage heritage fabric | Permitted in the National Landmark Historic District under a color palette and border separation |
| Unpainted masonry | A prepared, assessed wall is acceptable as primary support | No new mural signs on unpainted brick or unpainted or painted stone |
| Primary street façade | No façade restriction; recommends north or west exposure | Not permitted; corner buildings may use the secondary façade |
| Size cap | No numeric cap; scale follows site and support assessment | 60 square feet, with larger murals allowed on walls over 2,000 square feet of uninterrupted plane |
Read the size row carefully, because it doesn’t scale linearly. Port Townsend caps mural signs at 60 square feet, then inverts that for large expansive planar walls over 2,000 square feet in uninterrupted area, where bigger murals may be permitted subject to Historic Preservation Commission review.
The practical takeaway: the local rule outranks the general advice every time. If you’re set on a mural on brick, check the municipal code before you fall in love with the design.
Local rules vary enough that the Virginia DHCD mural tech sheet and the Chicago mural resource guide are both worth pulling before you commit. Neither substitutes for the code that actually governs your wall.
Corners, Stairwells, and Other Places Layouts Fall Apart
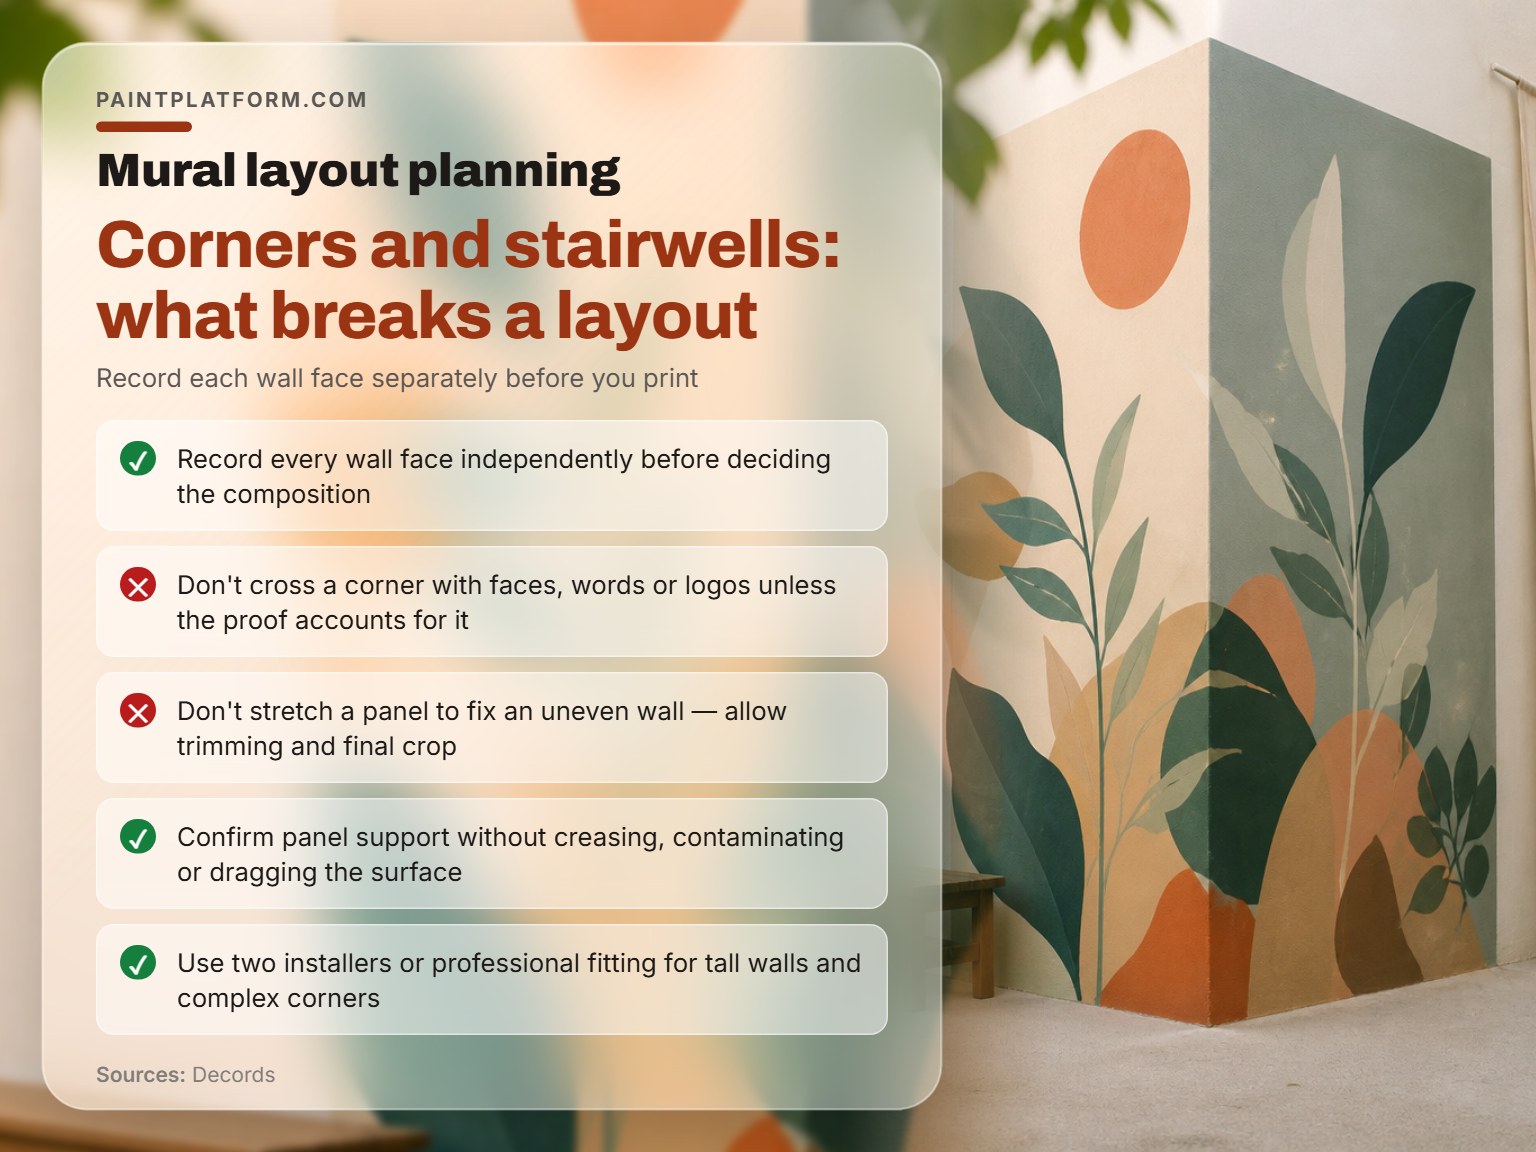
You sketch a design across a corner, stand back, and the face on the return wall looks stretched and wrong. That’s not a drawing error. It’s a viewing-angle error.
Record every wall face independently, then decide whether the image continues through the corner or becomes two separate compositions. Faces, words, and logos should not cross a corner unless the proof deliberately accounts for both the changed viewing angle and the physical fold.
Corner Buildings
Corner lots have one carve-out worth knowing. Port Townsend bans murals on the primary street façade but allows the secondary street façade on corner buildings, provided the other guidelines are met. That secondary face is often the better wall anyway.
A ceiling mural runs into the same geometry problem in a different plane, with the added joy of gravity.
Tall walls, wide panels, stairwells, complex corners, and high-value artwork can require two installers, stable access equipment, or professional fitting. Confirm how panels will be supported without creasing, contaminating, or dragging the printed surface. A dragged panel shows a permanent scuff where the ink sheared.
Easy to miss: A layout that’s perfect on the front face can be unusable on the return, because the return is a foot narrower and you measured it once, from the ground.
Block the Big Shapes First, Then Add Detail
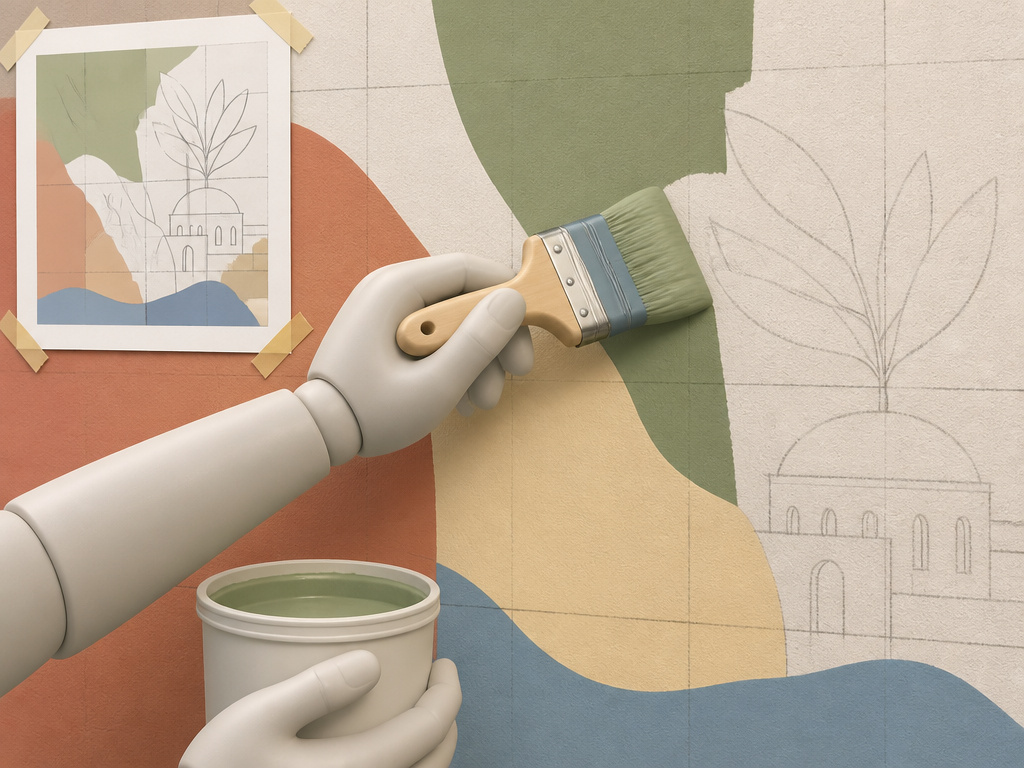
Detail is the last thing you touch. Not the first.
I sketch small, scale up with a grid, block in the large shapes, and only then start adding anything smaller than my hand. That order exists for a boring reason: energy. The painter who starts on the eyes runs out of steam with half the background still bare.
I once filled a thin-paper sketchbook with layout studies for a wall and watched even light washes buckle the pages into waves. Now I pick paper weight by how wet I plan to work, because a layout you can’t read is a layout you can’t trust.
I won’t argue that a projector is cheating. Tracing a grid or throwing a projection on the wall is how you get the proportions right before you commit. Freehand purism keeps beginners off walls they could absolutely handle.
Grid, Projector, or Both
Use both, depending on the wall. A grid handles flat planar surfaces and anything with architectural features you need to respect. A projector handles organic shapes and fast proportion checks.
If you’re shopping for one, the practical differences between the best art projector for murals come down to throw distance and how well the image holds in daylight.
Before you start: Spray cans off-gas in enclosed or low-airflow spaces, so work outdoors or ventilate hard before you start. A ladder on soft or uneven ground shifts the moment you reach sideways, so foot it properly or use a stable platform. Keep solvent-based product off your skin and out of your eyes, and read the can before the first pass, not after.
Keep the Palette Small
Three or four colors hold a mural together. That’s my honest read after watching busy walls turn to noise.
For exterior work I reach for Montana Cans MTN 94 for the flat, matte coverage it gives on large blocks. For brush work I use Golden Heavy Body Acrylics when the wall is sheltered and I want the pigment load. For a house-exterior job where the wall is already coated, Behr Premium Plus exterior is the practical choice because it’s built for the substrate it’s sitting on.
Whatever you pick, the process for how to paint a mural on a wall step by step is where the blocking order actually gets executed. And the best paint for a mural is the one matched to the wall’s exposure, not the one with the nicest label.
Exterior acrylic off a roller onto a hot wall drags and skips. It wants to tack before you’ve moved two feet, which is why big flat blocks go up early in the day.
Who Maintains the Mural in Year Five?
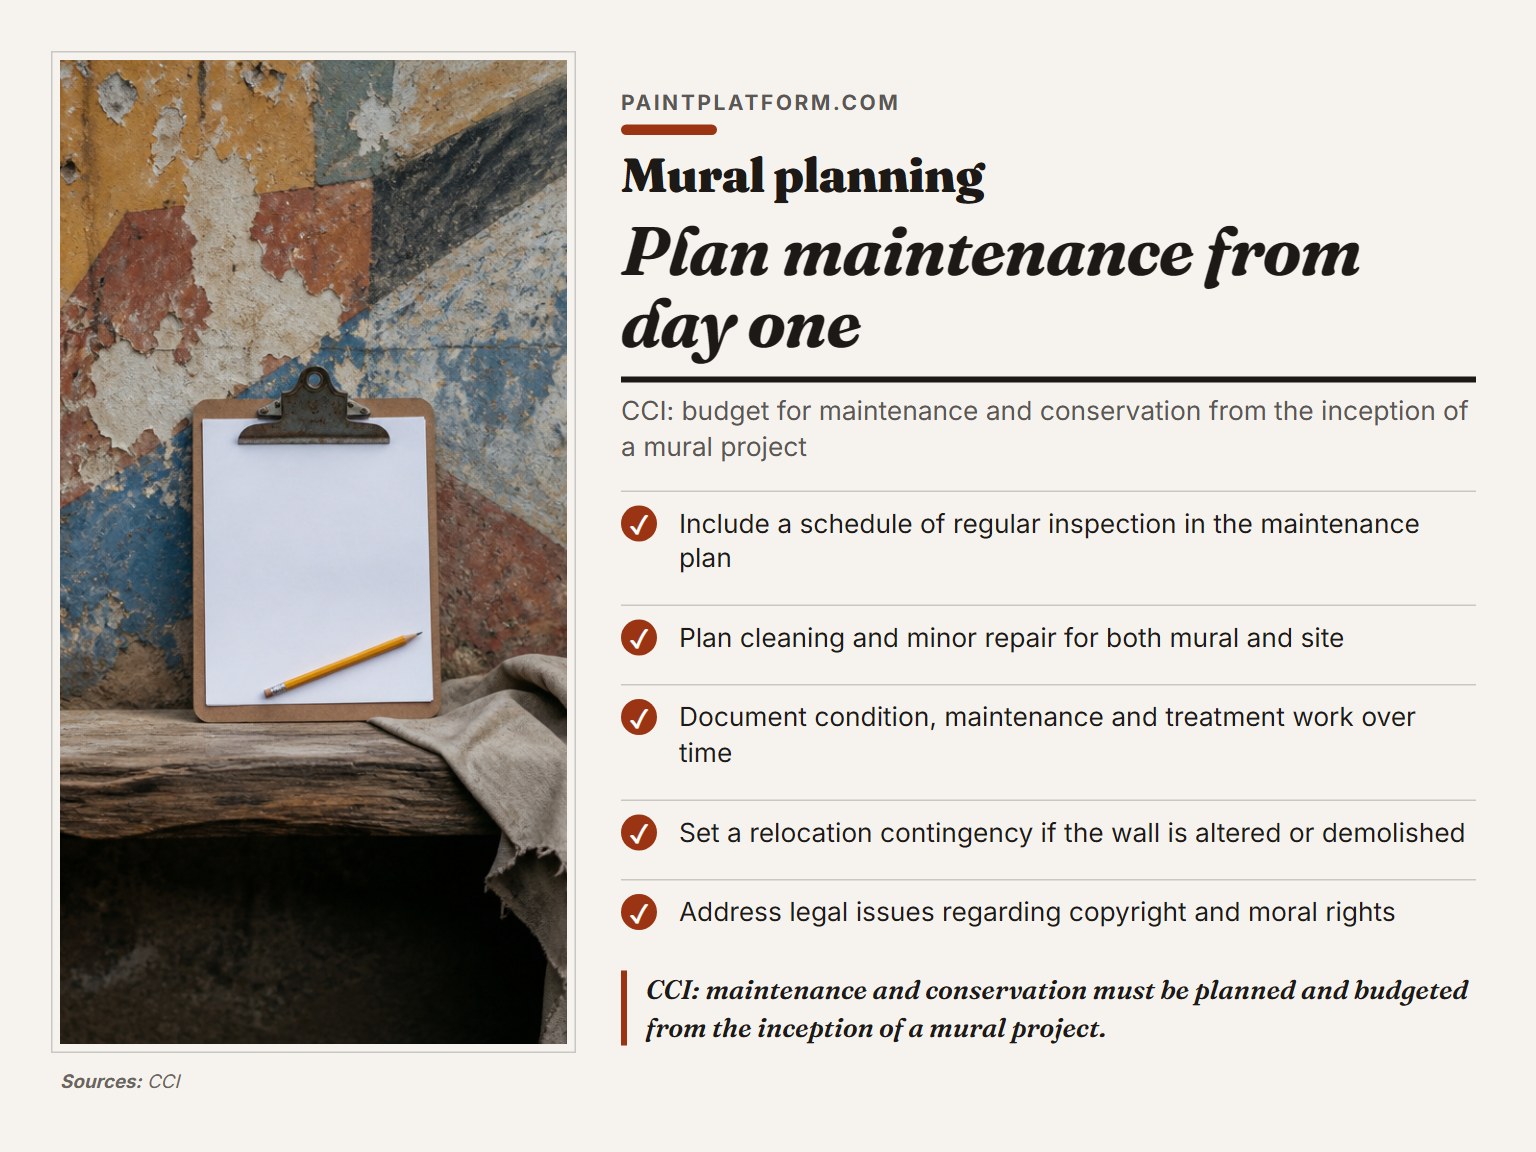
Maintenance is the part of a mural plan that gets cut first when the budget tightens, and it’s the part that decides whether the piece is still there.
The CCI asks planners to budget for maintenance and conservation from the inception of a project. Not after installation. At the start, alongside the paint order.
A workable plan covers:
- A schedule of regular inspection, so problems get caught while they’re small.
- Maintenance activities for both mural and site, including cleaning and minor repair.
- Who to consult when actual treatment is required.
- Documentation of condition, maintenance, and treatment work over time.
- A relocation contingency for a wall that gets altered or demolished.
- Copyright and moral rights, settled in writing before the first mark.
Signage and public programs belong in the plan too. The CCI frames education as a way to create public ownership of the mural, and a wall the neighborhood feels ownership of gets tagged less.
If you’re running this through a committee rather than a single client, the Small Town Center mural toolkit is worth a look. Either way, make sure the committee has access to specialists and professionals in the community, because layout decisions made in isolation are the ones that get reversed at review.
Frequently Asked Questions
How do you lay out a mural on an uneven wall?
Measure each face at the top, middle, and bottom, then build the layout around the shortest measurement. Allow for trimming and a final crop in the production plan rather than stretching a panel to force an image match. Stretching introduces distortion and tension that shows up later.
Can you put a mural on a historic building?
It depends entirely on the local code. The Canadian Conservation Institute advises against heritage buildings because a mural can alter or damage heritage fabric. Port Townsend, by contrast, permits murals in its National Landmark Historic District under a color palette and border-separation regime. Check the governing code for your wall before designing.
Do you need a projector to plan a mural layout?
No, but it helps on organic shapes and fast proportion checks. A chalk grid handles flat planar walls and anything with architectural features you need to respect. Many painters use both, projecting to check proportions and gridding to hold the layout steady across a full day of work.
How much of a wall can a mural cover?
There’s no universal figure. Some jurisdictions set a hard cap, such as Port Townsend’s 60 square feet for mural signs, with larger murals allowed on uninterrupted planar walls over 2,000 square feet. The CCI sets no numeric cap at all and ties scale to site and support assessment instead.
What should be in a mural maintenance plan?
At minimum: a regular inspection schedule, defined cleaning and minor repair activities, a named contact for treatment decisions, and documentation of condition and treatment over time. It should also address relocation if the wall is altered or demolished, plus copyright and moral rights.
The Bottom Line
Here’s the first thing to do this week: measure every face of the wall, photograph it in morning and afternoon light, and write the four numbers on the back of your sketch. Shortest width, shortest height, border clearance, usable area. If the usable area is smaller than the design, the design changes. Not the wall.
One concession worth stating plainly. Everything above assumes a wall you’re allowed to paint. If the building sits in a historic district, the local code outranks every conservation principle here, and the border separation and size cap become your actual brief.
Start small and stay curious. The layout is where a mural is won, and it’s the part nobody photographs.
