
How to Faux Marble a Surface: 3 Methods That Hold Up
This post contains affiliate links. As an Amazon Associate, we earn from qualifying purchases.
Learning how to faux marble a surface starts with picking a route: a two-step roll-on coating kit, a marble-effect spray over an existing color, or a painted base with glazed veins and a sealer. Each route has its own cure clock, and every one of them needs a surface that passes an adhesion test first.
That how to faux marble a surface adhesion test is a 3 inch by 3 inch patch, a 12 hour dry, an X cut down to the surface, and a 4 inch strip of duct tape pulled fast. Lift more than 10% of the coating and the whole countertop needs sanding with 60-80 grit before anything else goes on.
Three routes, three cure clocks, and one prep test that decides all of them. What follows covers the temperature windows, the spots where the manufacturers flatly disagree with each other, and the veining method that actually reads as stone.
Key Takeaways
- Test a 3 inch by 3 inch patch before you coat anything. A 12 hour dry, an X cut to the surface, and a 4 inch duct tape pull tell you whether the whole job will hold.
- The cure clock runs longer than the box suggests. Rust-Oleum lists normal use at 24 hours but full cure at 7 days, and Marble Dream asks for lighter than normal use across the first seven days.
- Montana MARBLE Effect is a net-like structure, not an opaque paint. It sits over an existing color, so the base coat does most of the visual work.
- None of these finishes is food safe. Rust-Oleum states it plainly on the technical sheet, and Marble Dream asks for a cutting board.
- Humidity is a factor for the roll-on kit. Rust-Oleum allows relative humidity up to 85%.
Three Routes to a Faux Marble Surface, and Which One Fits Your Project
Three how to faux marble a surface routes exist, and they are not interchangeable: a two-step roll-on coating kit, a marble-effect spray, and a painted base with glazed veins sealed on top. Each produces a different kind of surface.
The roll-on system applies a base coat at 1.5 to 2.0 mils dry film thickness, then a satin top coat four hours later. Coverage runs 75 to 100 square feet per quart at that thickness, and the top coat goes on in 2 foot by 2 foot sections with a wet edge maintained.
The Roll-On Kit Route
The Rust-Oleum HOME Countertop Coating Kit is the most forgiving of the three. It’s a 2-step system with no stripping, sanding, or priming, and it sticks to bare, stained, sealed, or previously coated surfaces including laminate, ceramic tile, porcelain tile, melamine, and wood.
It ships as a two-step system with a base coat and a satin top coat. Roller nap changes between steps: 3/8 inch for the base coat, 1/4 inch for the top coat. Painting a countertop this way is a genuinely different job from glazing one, and the prep is where the two split.
The Marble-Effect Spray Route
Montana Cans MARBLE Effect Spray is an aerosol you shake vigorously for 2 to 3 minutes. The base coat underneath needs at least 45 minutes of dry time but no more than 24 hours before the marble coat goes on.
Spray distance is at least 20cm/8in. The standard FLAT JET WIDE nozzle is the one designed for marble and web effects. FLAT JET MEDIUM and CALLIGRAPHY caps work too, and other caps may clog, spit, or simply refuse to produce the pattern.
The Painted-and-Glazed Route
This Old House lays out the brush-and-glaze version: three colors total, a semigloss base coat and two layer colors in eggshell or matte, with roughly half as much of the two layer shades as the base. The layer colors get cut with latex glaze to make them translucent.
Prep is 220-grit sandpaper, a damp cloth for dust, and a foam roller for the base. One gallon of latex glaze covers a large project area.
| Route | What It Is | Best For | First Cure Milestone |
|---|---|---|---|
| Roll-on kit | Two-step acrylic base plus satin top coat | Laminate, tile, melamine, wood | Normal use at 24 hours |
| Marble-effect spray | Net-like filament structure over existing color | Small panels, furniture, accents | Dust dry in 10 minutes |
| Painted and glazed | Primer, base coat, glazed veins, sealer | Full countertops on a budget | Seal, then 24-48 hours |
The same faux finish thinking carries over to walls, where the layering logic is identical even though the products aren’t. And if you want texture rather than veining, venetian plaster is a separate skill with a much longer learning curve.
What the Marble Layer Really Is: Net Structure or Opaque Paint
Montana Cans describes MARBLE Effect as a net-like surface structure rather than an opaque paint, applied over an already existing paint or colored surface. That single sentence changes what you should expect from it.
The spray emits paint in the form of fibres or filaments that don’t completely cover the substrate. Spray from further away and the filaments separate in the air, landing as a looser, more organic marble texture. Spray closer and they arrive as webbing.
Distance is the whole trick with the spray. Closer than 8 inches and the filaments land as webbing; further back and they separate into something that reads as stone.
Contrast matters as much as distance. Montana notes that spraying a white marble effect over a black substrate gives the greatest contrast, and that there’s no single best base color beyond what you’re trying to achieve.
This Old House describes the opposite approach: an opaque finish built from a base coat plus two layer colors cut with glaze. Both produce something people call faux marble. They are not the same object.
If you buy the spray expecting the painted look, you’ll spend an afternoon confused. The spray is closer to a translucent glaze than to paint, which is exactly why it responds so well to a strong base color underneath.
The 3×3 Adhesion Test That Decides If the Coating Will Hold
A 3 inch by 3 inch patch decides the whole job.
Before you start: Sanding or scraping old paint can release lead dust, which is toxic and especially dangerous to children and pregnant women. Wear a NIOSH approved respirator, clean up with a HEPA vacuum and a wet mop, and call the National Lead Information Hotline at 1-800-424-LEAD before you begin. The Marble Dream clear coat also needs a 15 minute potable water eye flush if it contacts your eyes.
The Rust-Oleum technical sheet is the only source in this set that gives a pass or fail number, so follow its sequence exactly:
- Clean a small 3 inch by 3 inch inconspicuous area and let it dry. Skip the drying and the test reads wet coating, not adhesion.
- Apply base coat over the patch and let it dry 12 hours. Shorter than 12 hours and you’re testing a film that hasn’t finished forming.
- Cut an X through the coating down to the surface with a utility knife. A shallow X tests the top coat only, which tells you nothing useful.
- Press a 4 inch piece of duct tape over the X and pull it off in one quick pull. A slow peel gives the coating a chance to hang on and flatters a bad bond.
- If more than 10% of the coating comes off, sand the entire countertop with 60-80 grit before coating. Coat over a failing bond and you’ll watch it lift in sheets later.
- After a successful test, lightly sand the test area before coating the whole surface. That patch is now a different texture from the rest of the counter.
When the tape comes away, look at it. A clean strip means you’re fine. A gray smear of coating on the adhesive means you’re sanding.
Two more exclusions from the same sheet: the kit isn’t for exterior spaces, and it isn’t for interior surfaces sealed with a superhydrophobic sealer. Existing caulk along backsplashes needs to come out before coating, because the new finish won’t bond to a flexible bead.
Temperature and Humidity Windows: Two Brands, Two Different Rules
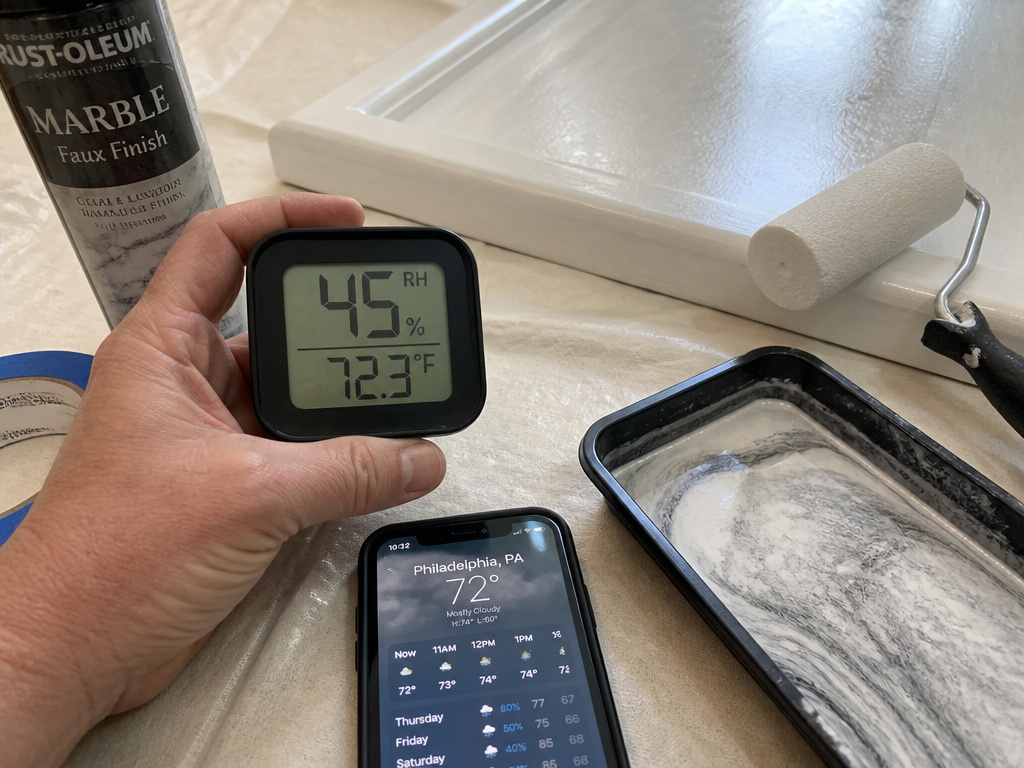
Weather decides this job.
Rust-Oleum wants air, material, and surface temperatures all between 50-90°F (10-32°C) with relative humidity below 85%. Montana’s instructions set an air floor of 10°C/50°F and constrain surface temperature separately to 5-40°C, which is a variable Rust-Oleum folds into one range without a separate floor.
The real split is humidity:
- Rust-Oleum permits up to 85% relative humidity.
If you’re running the spray, check the forecast before you tape anything off. For the roll-on kit, 85% is the stated limit, but a muggy kitchen is still a bad room to cure a coating in.
Roller choice splits too. Rust-Oleum specifies a 3/8 inch nap for the base coat and a 1/4 inch nap for the top coat. This Old House calls for a foam roller on the base and gives no nap spec at all. I’d follow the technical sheet, since the manufacturer is the one warranting the finish.
When Can You Actually Use It: Three Sources, Three Answers
So when can you put a coffee cup down on the thing?
| Source | What It States About Use |
|---|---|
| Rust-Oleum technical sheet | Normal use at 24 hours; full cure 7 days; no cleaning before day 7 |
| Marble Dream kit sheet | Cure 24 hours before use; lighter than normal use for the first seven days |
| This Old House | Cure at least 24-48 hours before use |
| Montana MARBLE Effect | Totally cured after 24 hours before sealing |
Three different answers to the same question, and the honest read is that 24 hours is the floor, not the finish line. Both product sheets that go into detail land on seven days for full hardness.
Marble Dream puts it plainly: after the initial 24 hour cure the surface keeps hardening over the next seven days, so go easy on it for that first week. Rust-Oleum’s schedule runs longer still, with full cure at 7 days and no cleaning before day 7.
Start small and stay curious about that first week. Move the toaster, don’t drag it.
Food Contact, Heat, and the Limits Stated Plainly
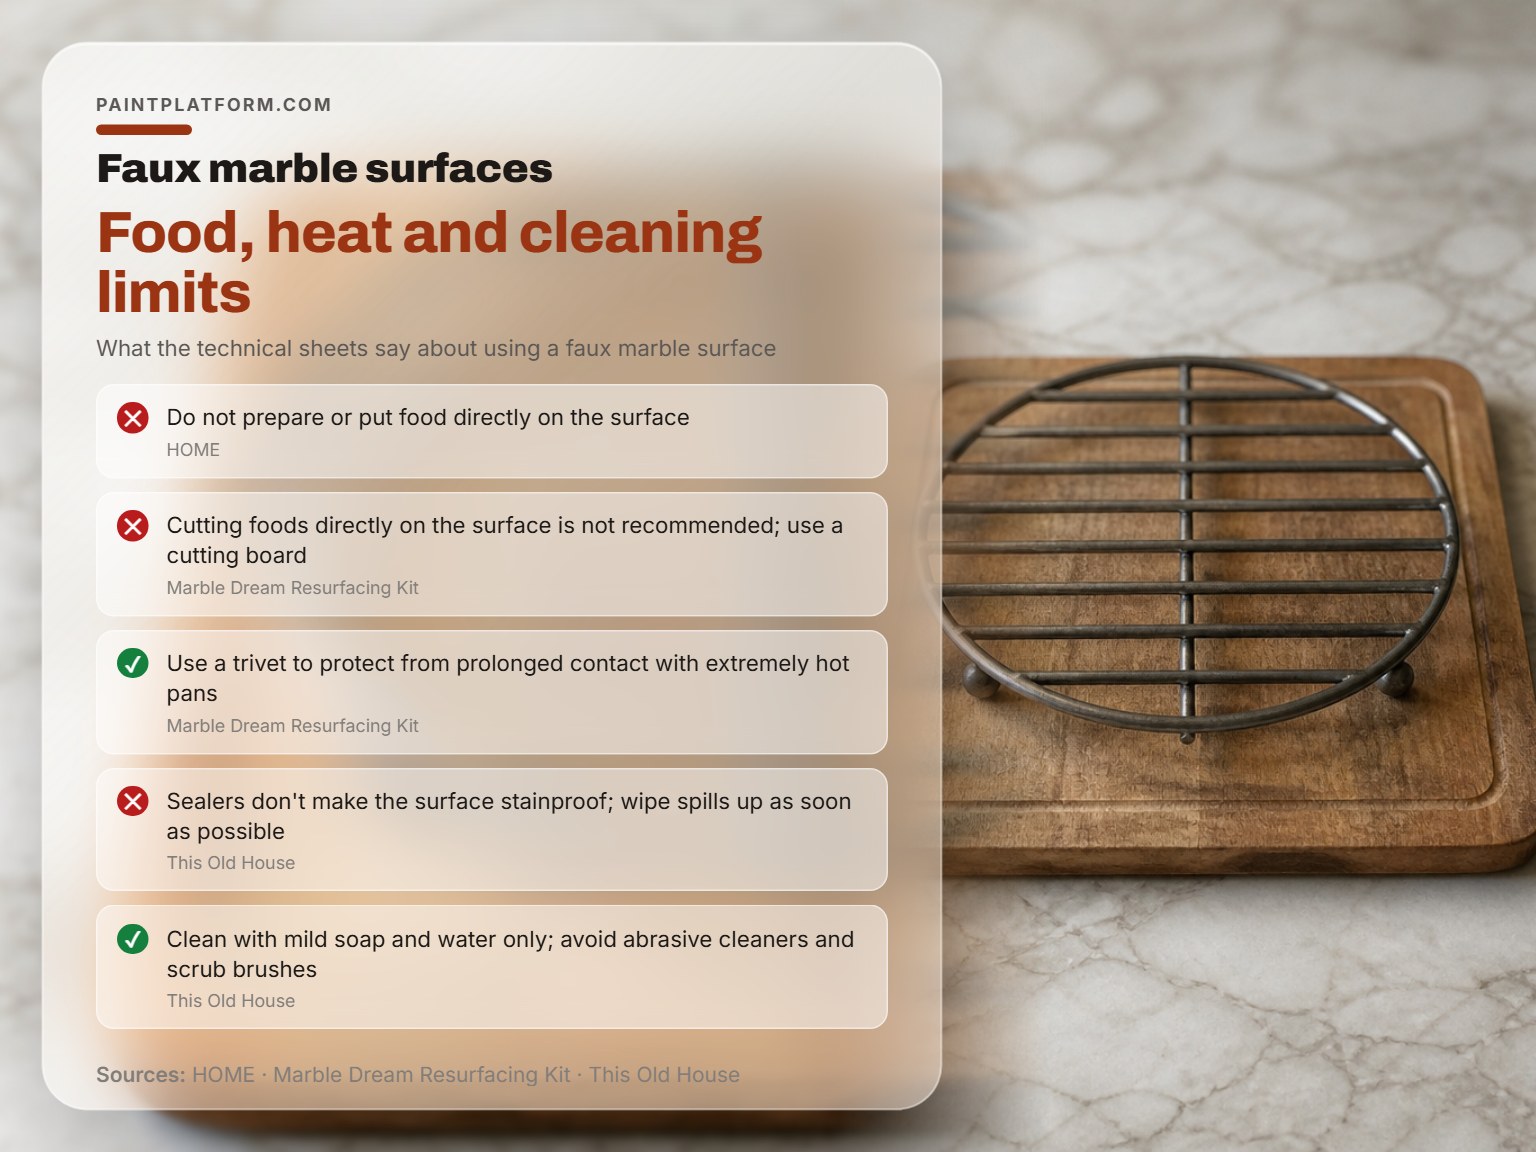
The technical sheet answers the food question in one line, and the answer is no.
Rust-Oleum states the coating is not food safe and that you should not prepare or put food directly on the surface. Marble Dream is softer in wording but lands in the same place: cutting foods directly on the surface isn’t recommended, and a cutting board should be used.
That’s a real difference in tone between the two, and it matters if you’re coating a surface where dough gets rolled out. Neither sheet gives you permission.
Heat is the other limit. Marble Dream asks for a trivet to protect the surface from prolonged contact with extremely hot pans. This Old House says the same thing for painted surfaces.
Easy to miss: A sealer isn’t a force field. This Old House is direct that sealers don’t make a surface stainproof, and spills still need wiping up right away.
Cleaning is mild soap and water only. Abrasive cleaners and scrub brushes will dull a painted finish, and on a glazed surface they’ll cut straight through the glaze layer.
To check whether the sealer is still working, spray a few drops of water on the surface. Water should bead up. If it soaks in or sits flat, it’s time to reseal.
Veining by Hand: Why Wobbly Beats Careful
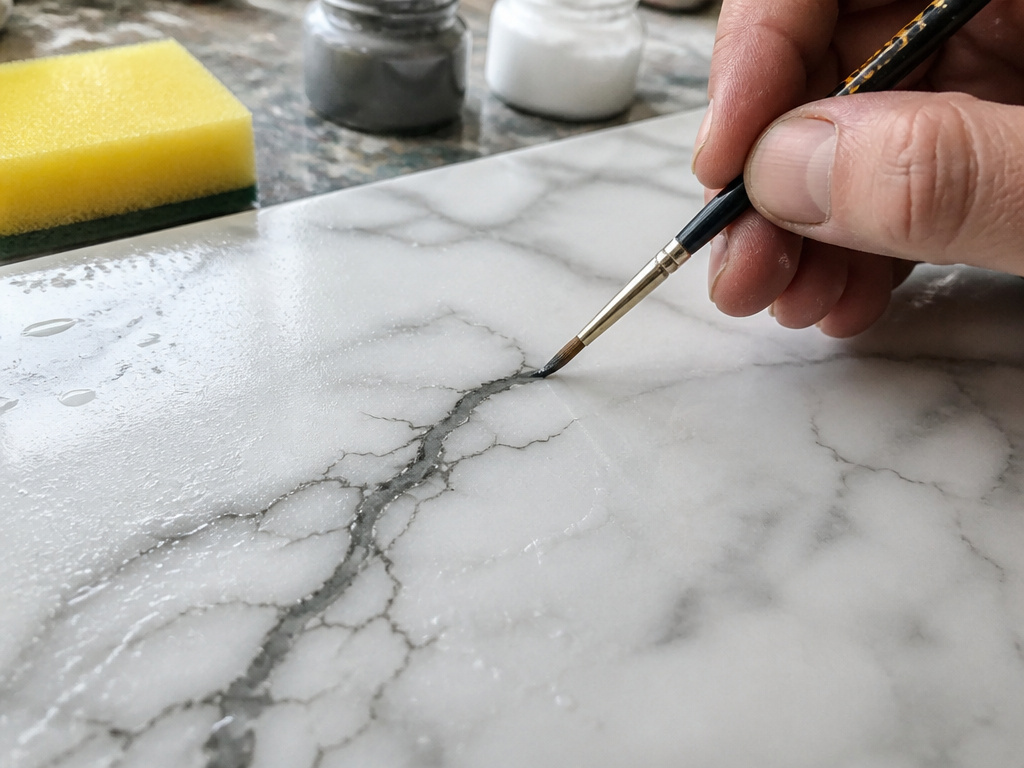
That’s the whole setup, and it beat every careful veining job I ever attempted.
The wobbly, imperfect ones look more convincing than the careful ones, every single time.
I stopped chasing Carrara about three countertops in. Real stone is irregular, and your careful hand is not. The vein you almost ruin is usually the one that sells the whole surface.
The Marble Dream kit runs a more structured version of the same idea. Mist the dry base-coated surface with water first, because the moisture helps the vein material flow. Mist the dry base-coated surface with water first, because the moisture helps the vein material flow.
Tap less for stronger veins, more for softer ones. Then soften with the flat sponge, let the veins dry 30 minutes, and apply a thin coat of Marble Glaze to lock them in.
After the glaze dries for an hour, sand back excessive texture with the enclosed pad and wear the dust mask while you do it.
Color works like seasoning a soup here. Add a little, look at it, add more. Most beginners dump the whole jar of pigment in and then wonder why the surface looks blotchy and heavy.
Common mistake: Loading glaze on in one thick pass. It skins over before you can blend it, dries heavy and patchy, and no amount of extra blending rescues a puddle that’s already set.
For a broader set of layering options, the same translucent glaze logic applies whether you’re on a countertop or a wall.
When It Goes Wrong: Bubbles, Cloudy Sealer, Lifting Tape
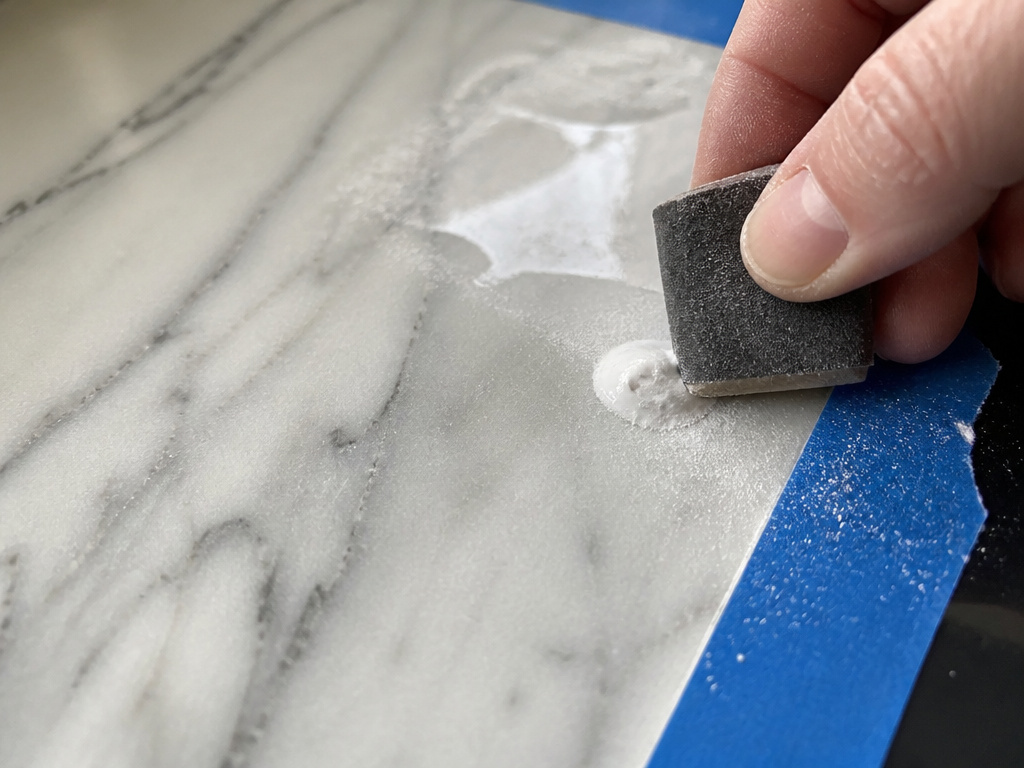
Bubbles, cloudy sealer, and lifting tape edges each have a known cause, and none of them require starting over.
- Bubbles in the paint usually mean trapped air or moisture. Sand the bubbled area once it’s dry, then reapply primer and paint, and make sure the surface is completely dry before you repaint.
- Cloudy or streaky sealer comes from uneven application. Sand the area lightly and reapply in thin, even coats, letting each layer dry fully.
- Bubbles in a clear coat come from overworking it. Marble Dream is explicit: don’t disturb the clear coat with extra roller passes as it dries, because that adds air bubbles and roughens the finish.
- Tape pulling up the finish happens when you skip the knife. Score every edge where painter’s tape meets the surface before removing it, and the tape comes away clean.
- Water creeping under a sink edge needs a bead of clear caulking along adjoining edges to stop intrusion beneath fixtures.
The Marble Dream clear coat has its own handling rule: stir it gently to avoid adding air bubbles, and don’t shake the container. Two coats, about four hours apart, then 24 hours of cure.
Frequently Asked Questions
Can you faux marble a surface without sanding?
The Rust-Oleum HOME kit is a 2-step system that requires no stripping, sanding, or priming, so on a sound surface you can go straight to coating. That said, if the 3 inch by 3 inch adhesion test lifts more than 10% of the coating, the technical sheet requires sanding the whole countertop with 60-80 grit first.
How long before you can use a faux marble countertop?
Rust-Oleum lists normal use at 24 hours with full cure at 7 days. Marble Dream says to cure 24 hours before use and keep to lighter than normal use for the first seven days. This Old House recommends curing at least 24-48 hours. Treat seven days as the real finish line.
Is a faux marble countertop food safe?
No. Rust-Oleum states the coating is not food safe and that food should not be prepared or placed directly on the surface. Marble Dream says cutting foods directly on the surface isn’t recommended and asks for a cutting board. Use a board either way.
What temperature should you apply faux marble in?
Rust-Oleum specifies air, material, and surface temperatures between 50-90°F (10-32°C) with relative humidity below 85%. Montana sets an air floor of 10°C/50°F and constrains surface temperature to 5-40°C.
Can you faux marble over tile?
Yes, with the roll-on kit. Rust-Oleum lists ceramic tile and porcelain tile among the surfaces the kit covers, alongside laminate, melamine, and wood. Run the adhesion test on a hidden tile first, because a failing bond on tile is a much bigger sanding job.
Why does my marble effect spray look like spider webs instead of marble?
You’re spraying too close. Montana states that the further away you spray, the more the effect looks like marble texture, and the closer you spray, the more it looks like webbing. Stay at least 20cm/8in back and experiment on scrap until you find the distance you want.
The Bottom Line
One rule outranks everything else here: if your duct tape pulls more than 10% of the coating off that 3 inch test patch, stop and sand with 60-80 grit. Coating over a failing bond is the only mistake on this list that costs you the whole job.
Your first move this week is small. Clean a hidden corner, coat it, wait 12 hours, and pull a strip of tape. That single test tells you more about your countertop than any tutorial can.
Fair warning: none of this gets you real marble. Mine reads as stone from a distance and reads as paint up close, and I’ve made peace with that. The wobbly vein you almost ruined is the one people will compliment.
