
How to Paint Cabinet Frames: Step-by-Step
This post contains affiliate links. As an Amazon Associate, we earn from qualifying purchases.
To paint cabinet frames, degrease every surface, scuff-sand with 100- to 150-grit paper, and prime before the first coat. Benjamin Moore specifies 24 hours of dry time between the primer, the first coat, and the second. Peeling around handles often traces back to grease the degreaser missed.
The grease layer is where cabinet paint jobs fail. Behr’s guidance lists dirt, grease, dust, moisture, and glossy residue as the causes of peeling and bubbling, and cooking oil is the one that hides. It builds up on the frame, because the frame is what hands and steam reach all day. Knowing how to paint cabinet frames starts with removing that grease.
What follows is the sequence the manufacturers agree on, the three points where they don’t, and the frame-specific moves that keep a roller from leaving a lip of paint in every corner.
Key Takeaways
- Degrease before you sand. Oil residue stops water-based paint from adhering at all, and sanding pushes it around instead of removing it.
- Grit depends on who you ask. Benjamin Moore says 100- to 150-grit. Behr says 150- to 220-grit. Both work.
- Plan for multiple days, not one. Benjamin Moore specifies 24 hours after primer, 24 after the first coat, and 24 after the second.
- Test the primer before committing to sandpaper. Sherwin-Williams’ own guide says a small test patch can tell you whether sanding is needed.
- Number the doors and the frames before anything comes off. Hinges don’t go back on the wrong door gracefully.
The Frame Is the Part You Actually Touch
The frame is the part of the cabinet you actually touch, and it’s the part that shows every shortcut when you compare a how to paint cabinet frames approach to a doors-only job. Doors come off and lie flat where you can see them. The frame stays bolted to the wall with its inside corners, its raised stiles, and the reveal around each opening.
Frame surfaces take paint differently than flat door panels. Inside corners hold a wet edge longer, raised stiles catch drips at the shoulder, and the reveal around each opening shows any puddle. A thin coat applied with a small roller and tipped off with a brush levels more evenly than either tool alone.
That difference matters most in the corners. A roller can’t reach the ninety-degree joint where a stile meets a rail. A brush loaded with too much paint will bridge that joint and dry with a sag in it.
Run a dry fingertip along a rail after degreasing. Clean laminate or sealed wood feels slightly tacky and squeaks faintly. A greasy rail feels slick and cool, and the rag comes away grey-brown instead of clean.
The frame also takes the most abuse. It’s what a hip bumps when you’re carrying groceries, and it’s what a sponge hits when someone wipes the counter down. I tape the interiors before I pick up a brush, and I’ve never once regretted it.
Where Benjamin Moore, Sherwin-Williams, and Behr Disagree
Benjamin Moore’s Advance cabinet how-to specifies 100- to 150-grit sandpaper as a mandatory step before primer. Sherwin-Williams’ cabinet refinishing guide takes a different route: test a small area with your primer of choice, and if it adheres well, sanding may not be necessary.
Behr lands closer to Benjamin Moore. Its cabinet painting guide says a cabinet previously painted with glossy paint needs a thorough scuff-sand or degloss before primer goes on.
| Source | Sanding before primer | Primer dry time |
|---|---|---|
| Benjamin Moore | 100- to 150-grit, mandatory | 24 hours for Advance Primer |
| Sherwin-Williams | Test patch first; may be skippable | “Once the primer has dried,” no fixed number |
| Behr | Degloss any glossy prior coating | Not specified |
| Martha Stewart, citing both brands | Follow the product’s own directions | 4 to 24 hours depending on product |
The dry-time row is the one that surprises people. Benjamin Moore gives Advance Primer a flat 24 hours. Martha Stewart’s cabinet piece, quoting spokespeople from both Benjamin Moore and Sherwin-Williams, reports a range from four hours to 24 depending on the product.
The grit conflict is smaller than it looks. 100-grit opens a surface aggressively. 220-grit polishes it. The 150- to 220-grit range Behr specifies overlaps with Benjamin Moore’s 100- to 150-grit at 150.
Sand for adhesion, not for smoothness. A 150-grit scratch gives primer something to bite into. 220-grit leaves a much shallower scratch, which is why it belongs on primer and between coats.
If you want the fuller argument for skipping sandpaper entirely, there’s a real case for painting cabinets without sanding that holds up on previously painted surfaces and falls apart on bare wood.
The Prep Sequence, in the Order That Actually Matters
Five steps, and the first one decides whether the rest holds.
Before any of them, the doors come off, and this is where people lose an evening. The first time I skipped labeling, I spent a whole night playing hinge-hole jigsaw with the doors, holding each one up to a different opening and guessing. Now it’s painter’s tape and a marker on the back of every door, plus the matching number written inside the frame it came from. Hinges and screws go into a zip bag, one per door, taped to the back. My studio is already a mess of jars and rags, so any system that survives a week is a win.
Before you start: Degreasers and oil-based primers both put fumes in a small kitchen, so open a window and run a box fan before the can comes open. Rags soaked with oil-based product can self-heat in a pile, so spread them flat to dry or drop them in a lidded metal can. Sanding dust is the third hazard, and a damp rag keeps it out of the air instead of in your lungs.
- Pull the hardware and bag it. Benjamin Moore’s guide removes doors, drawers, hinges, and pulls so you’re painting the flattest surface available. Number each bag to match its frame.
- Degrease every surface, then rinse. Frank Vega at Waldwick Paint and Wallpaper makes the case plainly: oil residue stops water-based paint from adhering at all. Wipe with a degreaser and a rag, then follow with a clean damp cloth.
- Scuff-sand. 100- to 150-grit if you’re following Benjamin Moore, 150- to 220-grit if you’re following Behr. Sand with the grain on wood. On laminate, scuff evenly in every direction.
- Clear the dust. Sherwin-Williams calls for a damp rag after sanding and a full dry before the next step. A vacuum with a brush attachment gets the corners first.
- Run an adhesion test. Brush primer on an inconspicuous spot and let it cure. If it scrapes off under a fingernail, you have more sanding to do.
If the old finish is glossy and you’d rather not sand at all, degloss cabinets with a chemical deglosser instead. It’s a legitimate route, and it’s the one Behr points to for glossy prior coatings.
Degreasing earns its place at the top of that list because of how paint bonds. A water-based coating has to mechanically grip the surface and chemically wet it out. An oil film sits between the two and does neither, so the paint skins over and lets go months later.
Which Grit Do You Actually Need on a Frame?
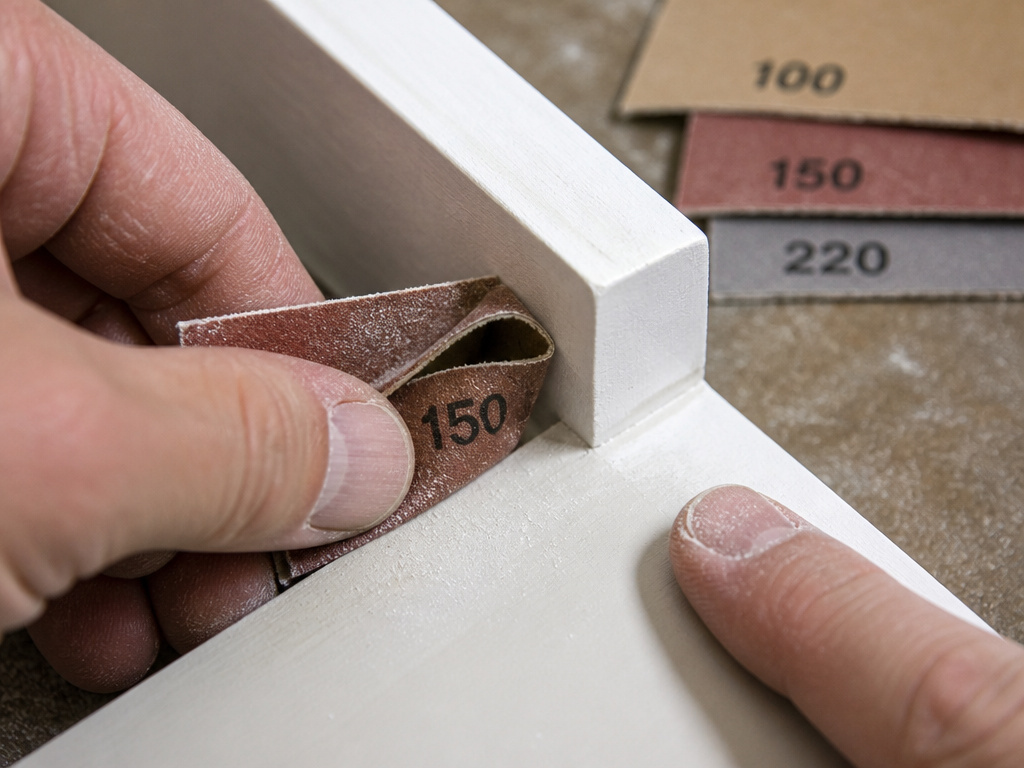
Two grit ranges, both published by paint companies, both defensible. The right one depends on what’s under the old finish.
| Grit | Stage | Job |
|---|---|---|
| 100-150 | Before primer, per Benjamin Moore | Roughens the surface so primer can grip |
| 150-220 | Before primer, per Behr | Same job, finer scratch, better on glossy prior paint |
| 220 | Primer and between coats, per Benjamin Moore | Smooths drips and pools without cutting through |
| Very fine | After primer, per Sherwin-Williams (no number given) | Removes bumps, grooves, lint, and dust |
On bare or previously painted wood, 100- to 150-grit is the Benjamin Moore number and it cuts fast. On a factory finish or a hard glossy enamel, Behr’s 150- to 220-grit range makes more sense, because coarse paper clogs and skates across a slick surface instead of cutting it.
Finer grit leaves a shallower scratch pattern, and a shallower scratch gives primer less to key into. That’s the trade. Coarse paper grips better and risks visible scratches under a thin coat. Fine paper leaves a cleaner surface and needs a test patch to confirm adhesion.
Drag a dry fingertip across a scuffed rail and you should feel a faint tooth, like the nap of a cheap towel. If it still feels glassy, keep going.
Easy to miss: The inside corners of a face frame. A sanding block won’t reach them. A folded strip of 150-grit will, and those corners are exactly where grease collects.
Bare wood, laminate, and previously painted surfaces each want a different primer, and priming kitchen cabinets is where that decision actually gets made.
Priming the Frame: Test First, or Sand First?
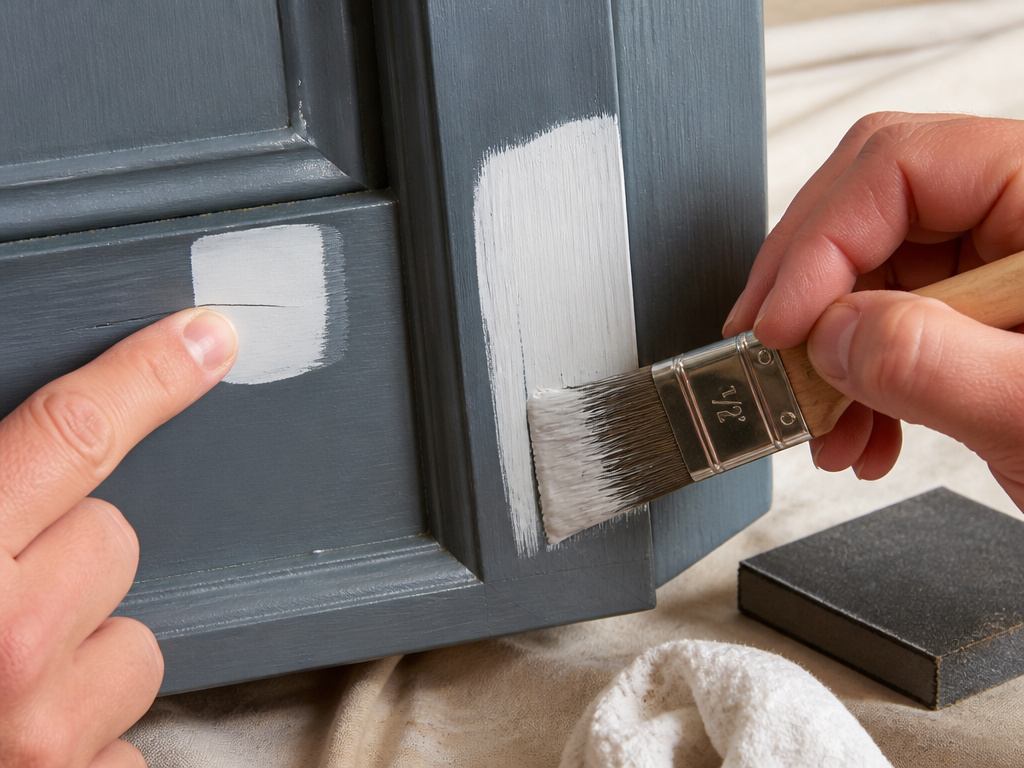
Two cabinet guides, two procedures, and both come from companies that make the primer they’re recommending.
Sherwin-Williams names its products. Extreme Bond is specified for laminate and previously painted wood. Premium Wall & Wood Primer is specified for unfinished wood. Benjamin Moore’s system is built around Advance Primer, and the 24-hour interval in its how-to is written around that specific product.
- Sherwin-Williams Extreme Bond for laminate, melamine, or anything already painted.
- Sherwin-Williams Premium Wall & Wood Primer for bare, unfinished wood.
- Benjamin Moore Advance Primer if you’re using Advance as the topcoat, since the dry times are matched to that system.
The test-first gate is worth stealing regardless of which brand you buy. Brush a patch, let it cure, and try to scrape it off with a fingernail. If it holds, you’ve answered the question the whole sanding debate is really about.
On a previously painted frame that passes the test patch, I don’t sand. On bare wood, I do. Every time. The degrease happens either way, because no primer on the shelf fixes an oil film.
Topcoat choice matters less than the prep, though it still matters. Sherwin-Williams positions Emerald Urethane Trim Enamel as its most durable option. Behr’s PREMIUM Cabinet, Door & Trim Enamel needs two coats for full durability, and the PREMIUM PLUS Interior Semi-Gloss is the Zero VOC alternative. There’s a wider comparison in best cabinet paint if you’re still deciding.
How Do You Paint a Frame Without Brush Marks?
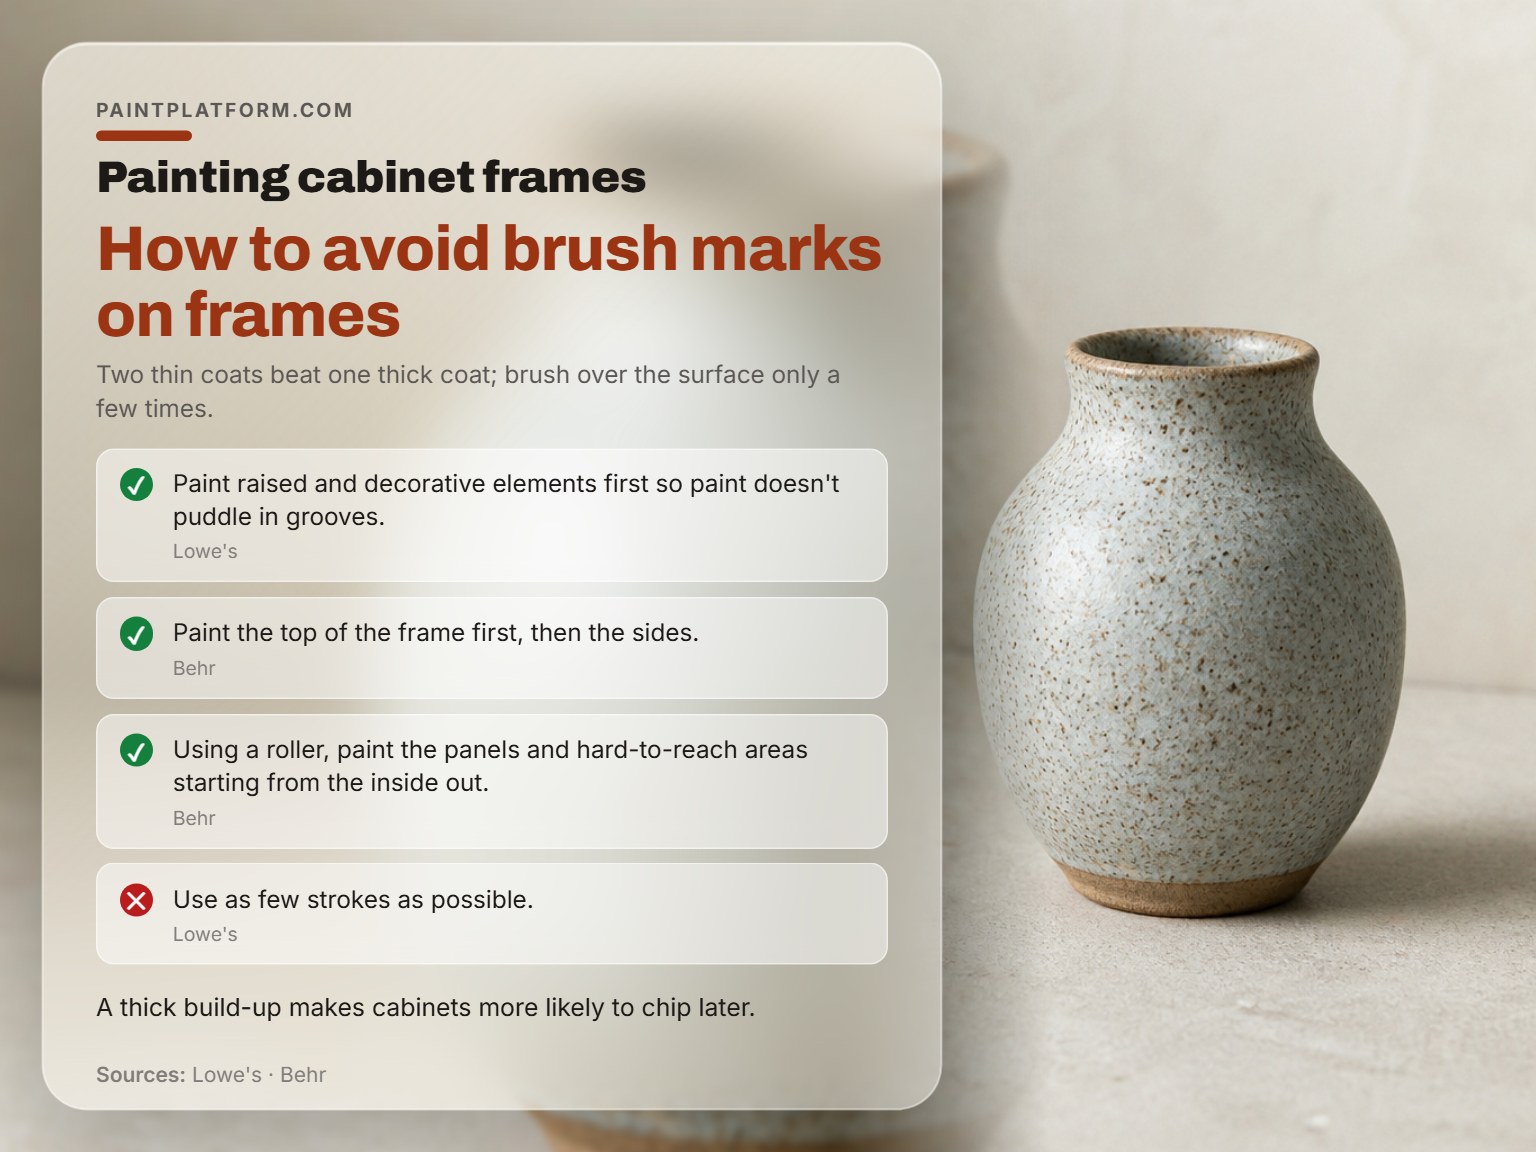
Heavy loading causes most brush marks on a frame.
Lowe’s puts it in one line: two thin coats beat one thick coat, and you should brush over the surface only a few times. Martha Stewart’s pros make the same point from the other direction, warning that a thick build-up makes cabinets more likely to chip later.
A thick coat skins over on the surface while the layer underneath is still soft. When something knocks it, the whole film chips instead of scuffing, because there’s more material to break away.
- Raised and decorative elements first. Lowe’s calls this out specifically, so paint doesn’t puddle in the grooves.
- Top of the frame, then the sides. That’s Behr’s order for a brush.
- Inside corners and panels with the brush, working from the inside out. Behr’s roller instruction, applied to a frame.
- Flat rails with a small foam or fine-nap roller, then tip off with the brush. Lowe’s recommends a fine-nap mini roller. Benjamin Moore specifies foam or microfiber on flat surfaces.
- Stop stroking. As few passes as possible. Brush marks level out as the paint dries.
Brush choice is worth matching to the product. Sherwin-Williams pairs Purdy Clearcut brushes with Emerald Urethane, Purdy XL with ProClassic Waterbased Acrylic-Alkyd, and Purdy Nylox with ProClassic Waterborne. There’s a longer list in paint brushes for cabinets if you want options beyond those three.
Loading the brush too heavily is the usual culprit, and avoid brush marks is a skill you can practice on a scrap of primed plywood before you touch the frame.
Boxes First or Doors First? What the Sources Actually Say
The order question has two published answers.
Lowe’s says paint the inside of the cabinets first, then the outer framework, for a more finished look. Martha Stewart’s pros say there’s no required order at all, and many of them start with the doors and move to the boxes.
Lowe’s says paint the inside first then the outer framework, while Martha Stewart’s pros say there is no required order. Dry space affects it, and most kitchens don’t have enough. A small kitchen with one table can hold only so many doors spaced apart.
Martha Stewart’s guide is the only one in this set that gives a spacing number: about 2 feet apart during sanding, so you’re not reaching over wet panels.
If you’re painting the doors too, painting cabinet doors covers the flat-panel side of the job, which brings a different set of problems than a frame does.
Where this goes sideways: Hanging a door at the 24-hour mark and closing it against the frame. The paint is dry to the touch but still curing, and a door pressed shut overnight can bond to the frame. Lowe’s answer is a bumper or a rub of paraffin wax on the contact points.
Three Days, Not One: What the Dry Times Actually Require
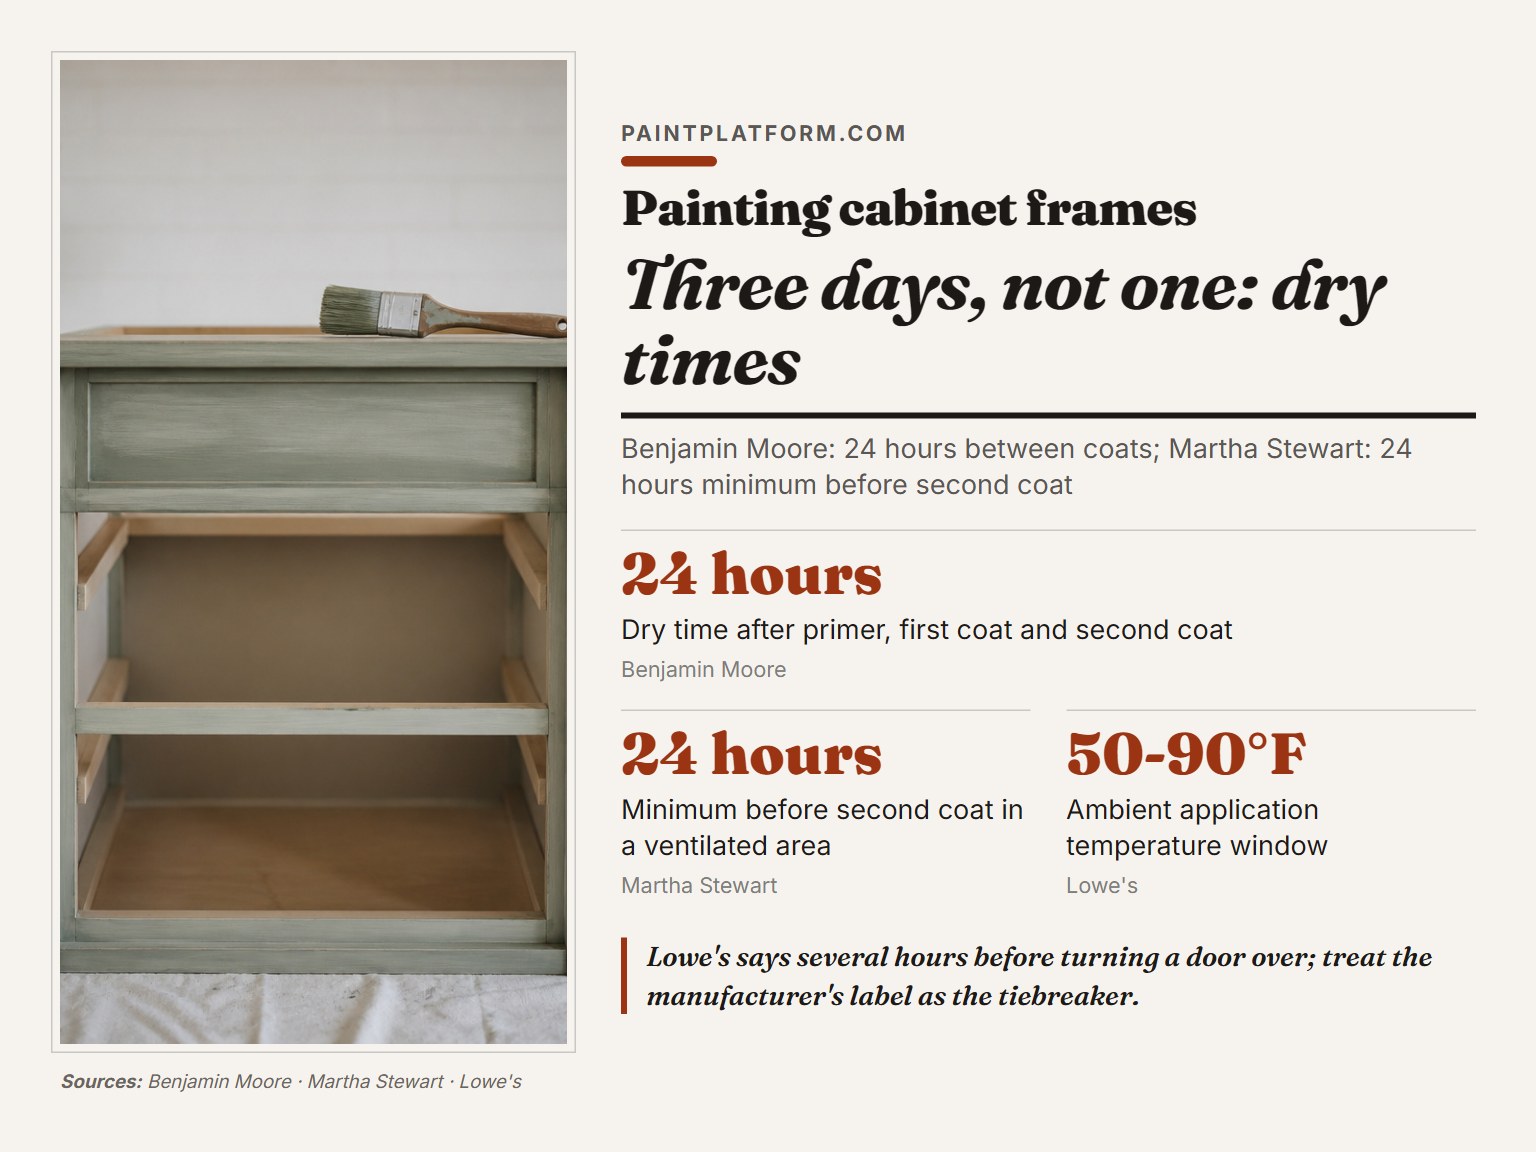
Benjamin Moore’s own how-to says it plainly: allowing paint to dry properly between steps makes this a multi-day job, and you should plan the schedule around it.
The intervals are specific. 24 hours after the primer. 24 hours after the first coat. 24 hours after the second. Sand with 220-grit between the primer and the first coat, and again between the two finish coats.
Not every source agrees on that middle number. Lowe’s says to let the paint dry several hours before turning a door over to paint the other side. Martha Stewart’s pros put the minimum at 24 hours in a well-ventilated area before the second coat.
Benjamin Moore and Martha Stewart put the minimum at 24 hours, while Lowe’s says several hours before turning a door over; treat the manufacturer’s label as the tiebreaker. A humid kitchen in July will push a 24-hour dry longer, and no chart accounts for that. Plan accordingly.
Temperature has a published window too. Lowe’s puts the ambient application range at 50 to 90 degrees Fahrenheit.
Fair warning: painted cabinets keep curing after they feel dry. Lowe’s notes it directly, which is why the rehang step is the one to leave for last.
Sealing is optional on a frame, but it adds a cleanable layer over the hardest-working surface in the kitchen. seal painted cabinets covers which topcoats are compatible with which finishes.
Frequently Asked Questions
Do I have to remove the cabinet doors to paint the frames?
No, but it makes the job easier and the finish cleaner. Benjamin Moore’s guide removes doors, drawers, hinges, and pulls specifically so you’re painting the flattest surface available. Working around a hanging door means reaching over wet paint and fighting gravity on every stroke.
Can I paint cabinet frames without sanding?
Sometimes. Sherwin-Williams’ guide says to test a small area with your primer first, and if it adheres well, sanding may not be necessary. Behr takes the harder line, requiring a thorough scuff-sand or degloss on a cabinet previously painted with glossy paint. The test patch settles it for your specific cabinet.
How long before I can put the doors back on?
At least 24 hours, and longer is better. Sherwin-Williams specifies a minimum of 24 hours of dry time before reattaching doors, drawers, and hardware. Lowe’s gives the same 24-hour figure or whatever the manufacturer recommends. Cabinets keep curing after that, so a bumper or a rub of paraffin wax on contact points prevents sticking.
What’s the best paint for cabinet frames?
Sherwin-Williams positions Emerald Urethane Trim Enamel as its most durable option, and Behr recommends its PREMIUM Cabinet, Door & Trim Enamel in Satin or Semi-Gloss with two coats for full durability. Martha Stewart’s pros reach for a hybrid water- and oil-based paint with a satin finish. Prep matters more than the badge on the can.
Can I paint just the frames and leave the doors alone?
You can, and it’s a common refresh when the doors are in good shape. The catch is color match. A fresh frame next to a door that’s been wiped down for years will read slightly different in the same paint, because the older surface has a different sheen and a film of kitchen residue on it.
Why is my cabinet paint peeling around the handles?
Grease. Behr’s guidance lists dirt, grease, dust, moisture, and glossy residue as the causes of peeling and bubbling, and the area around a handle is where hands deposit the most oil. A degreaser pass before sanding is the fix, and skipping it is the most common reason a repaint fails.
The Bottom Line
Here’s the threshold I’d give anyone starting this week. If your cabinets are bare wood, sand. If they’re previously painted and pass a primer test patch, you can skip the sanding and put those hours into degreasing instead. That’s the one place I’d spend extra time, and it’s the one place most guides spend the least.
The concession: none of this applies to thermofoil or PVC vinyl. Martha Stewart’s guide flags those as needing special paints and techniques, and a standard cabinet enamel will peel off them no matter how carefully you prep.
And if you only take one thing from this page, take the door map. Number the doors and the frames before a screwdriver comes out. Everything else here is recoverable. A missing door map costs you an evening.
