
How to Degloss Cabinets Before Painting: Step-by-Step
This post contains affiliate links. As an Amazon Associate, we earn from qualifying purchases.
To degloss cabinets before painting, scuff-sand every surface with #300 grit sandpaper, and on high-gloss factory finishes apply liquid deglosser first, then sand. Giani’s Nuvo instructions specify that sequence and state plainly that the existing finish does not have to come off.
That grit number is where the argument starts. Giani wants #300. This Old House’s painting contractor John Dee sands with 100-grit, with the grain. The site’s host Kevin O’Connor skips sanding on doors altogether and scrubs them with a scouring pad and liquid deglosser. Three professionals, one job, three different abrasives. Knowing how to degloss cabinets before painting is part of the debate.
What follows is the sequence the sources do agree on, the two places they split, and how to read your own cabinet finish before you touch it with anything.
Key Takeaways
- Cleaning comes before deglossing, and it decides whether the paint holds. Giani warns that cracking can follow a clean that wasn’t thorough enough.
- #300 grit is Giani’s number. 100-grit is John Dee’s. Match the abrasive to the finish in front of you, not to a forum post.
- Primer is conditional. Nuvo and Insl-X Cabinet Coat skip it on most wood and laminate. BEHR and Rust-Oleum call for it on new cabinets, bare wood, and dark colors.
- Wait 2 hours between Nuvo coats and 3-4 hours between Rust-Oleum coats. The can in your hand wins.
- Leave the doors open 8 hours after the last Nuvo coat, then wait at least 7 days before you scrub it with anything.
What Deglossing Actually Does to a Cabinet Door
BEHR’s guidance names the failure directly: cabinet paint peels or bubbles when the surface wasn’t properly prepared, and dirt, grease, dust, moisture, or glossy residue all interfere with adhesion. The prep glossy surfaces step exists to clear all four at once.
Giani’s Nuvo instructions add the part that surprises people. You do not have to strip the old finish off. A scuff is enough to give the new coat something to hold.
That’s the whole theory. The practice is where the sources split.
The Clean That Decides the Whole Job
This Old House calls cleaning the most important step in the entire process. The reason is plain: years of greasy fingerprints and cooking splatters leave a film that blocks adhesion. Giani says the same thing from the other direction, warning that cracking can follow a clean that wasn’t thorough enough.
Think of it like stock. Prep is the stock here.
Chemistry is where the two sources part. Giani insists on TSP specifically, plus a wipe-down with a clean cloth to lift the residue. This Old House gives you a choice: TSP substitute if the cabinets aren’t too dirty, a stronger degreaser if the grime is thick. Stronger degreasers for cabinets earn their keep on the film that builds up beside a stove.
Common mistake: Letting the deglosser flash off before you wipe the residue. Dee’s method runs a second rag dampened with fresh deglosser behind the first pad, catching the dissolved grime while it’s still wet. Once the solvent evaporates, that grime dries back onto the door.
Do You Have to Sand, or Is Deglosser Enough?
Here’s the messy truth: the sources below don’t agree, and the gap between them is wide enough to change your whole afternoon.
| Source | De-gloss method | Primer stance |
|---|---|---|
| Giani (Nuvo Cabinet Paint) | #300 grit scuff-sand; deglosser first on high-gloss | Paint and primer in one; no primer on wood or laminate |
| Rust-Oleum (Cabinet Transformations) | Heavy deglosser scrub, or prime the surface | Zinsser Bulls Eye 1-2-3 for bare wood and dark colors |
| Benjamin Moore (Insl-X Cabinet Coat) | Light sanding on all glossy areas | No primer, even over polyurethane and varnish |
| BEHR | Scuff-sand or degloss glossy surfaces | Primer on new cabinets; laminate and melamine must be primed |
| This Old House (John Dee) | 100-grit, sanded with the grain | Primer or brushing putty, one day to dry |
The grit gap is the loudest disagreement. Giani specifies #300 for de-glossing wood, laminate, vinyl, and previously painted surfaces. John Dee sands with 100-grit, working with the grain. The how to degloss cabinets before painting question splits them, so the two are working from different instincts about how much of the old finish should survive.
The method gap is just as real. O’Connor’s no-strip routine uses a scouring pad and liquid deglosser on the doors and never touches them with paper at all. Giani treats deglosser as a first step for high-gloss finishes only, then follows with sand. Rust-Oleum splits the difference, calling for a heavy deglosser scrub or a primer coat.
Match the abrasive to the finish, not to a forum post. A high-gloss factory surface needs the chemical step first, then the sand.
A liquid sandpaper product handles the chemical half of that job without the bucket and sponge routine. You can paint cabinets without sanding when the existing finish is already flat and sound, but a door that throws your kitchen window back at you isn’t that.
The Deglossing Sequence, Step by Step
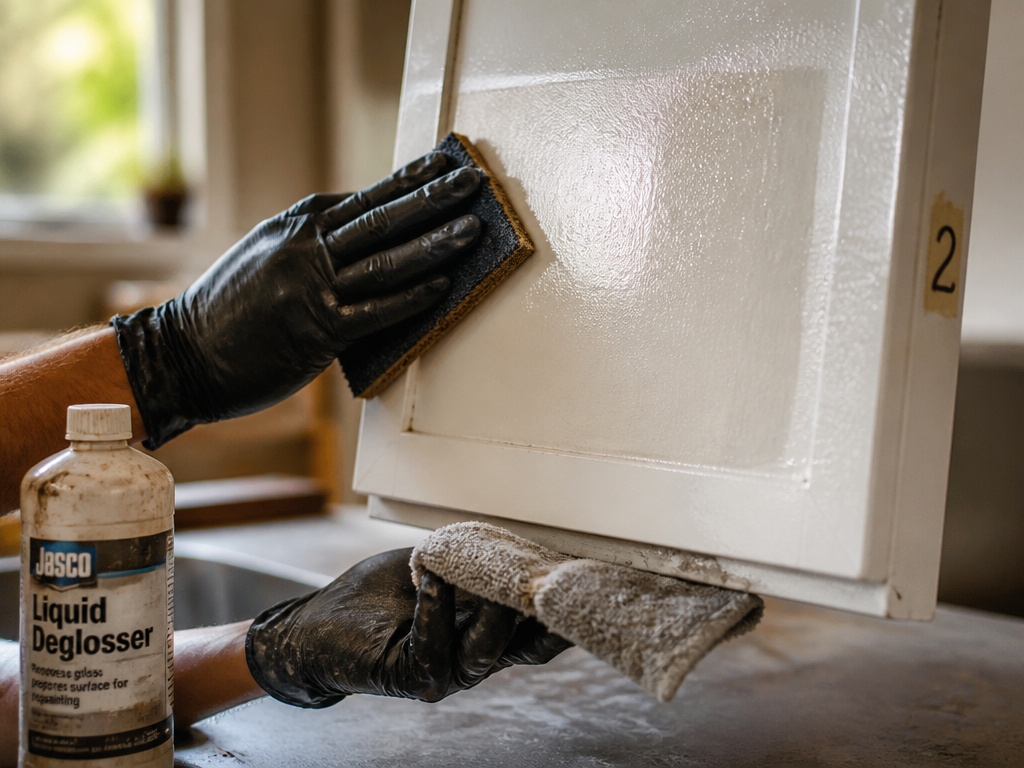
The order runs clean, repair, degloss, wipe, dry, paint. Every source here follows it, even the ones arguing about how to degloss cabinets before painting.
Before you start: Deglosser and TSP both need moving air. Dee wears safety goggles, a respirator fitted with organic vapor canisters, and chemical-resistant gloves, and opens the windows before the first scrub. Rust-Oleum’s label carries the same warning: do not breathe dust, vapors, or spray mist, and keep fresh air entering the room during application and drying.
- Label every door and drawer before it comes off. O’Connor numbers each piece with tape and marks a matching sketch of the kitchen. When you paint cabinet doors, the labels are what keep the job reversible.
- Wash greasy surfaces with hot soapy water first. O’Connor does this before any deglossing on doors and face frames with an oily residue.
- Scrub with deglosser and an abrasive pad. Dee holds a rag under the pad to catch drips, then wipes the residue with a clean deglosser-dampened rag before it evaporates.
- Sand with the grain. 100-grit for Dee, #300 for Giani. Skipping this on a glossy surface leaves the sheen intact, and the next coat slides instead of gripping.
- Vacuum, then tack-cloth.
- Wait one hour. O’Connor holds an hour after deglossing and washing the face frames before anything else happens.
- Spot-prime and sand the burned-through spots. Dee spot-primes burned-through areas, waits an hour, then sands lightly with 280-grit.
Paper-Covered and High-Gloss Cabinets Break the Routine
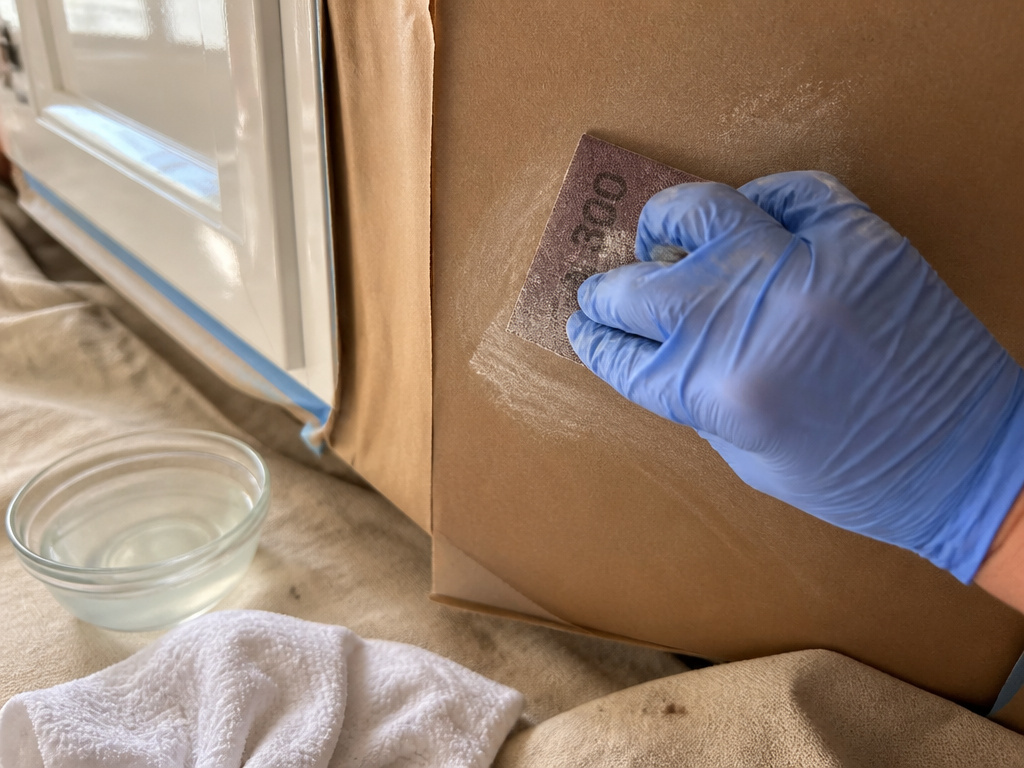
That’s a paper-wrapped end, and the standard degloss-and-paint routine won’t hold on it.
Paper-Covered Cabinet Ends
Giani’s sequence for these is longer than the standard one. Clean with TSP, including the papered portions, and wipe the residue with a clean cloth. Repair any tears with wood glue and let the repair dry. Scuff everything with #300 grit, smooth the raised areas, then clean again with TSP or a substitute degreaser and let it dry completely.
Then prime only the paper-covered sections with a single coat of Zinsser’s oil-based white Cover Stain Primer Bond. Give that primer at least 24 hours before the topcoat goes on.
High-Gloss Factory Finishes
Giani’s rule for a high-gloss finish is deglosser first, then #300 grit. Skipping the chemical step on a factory shine is the shortcut that shows up later as a coat that lifts at the edges.
BEHR lands in the same place from a different direction, calling for a thorough scuff-sand or degloss on any previously glossy paint. Painting over glossy paint works when the gloss is cut first, and fails when it isn’t.
Bare Wood and Dark Colors
Rust-Oleum recommends Zinsser Bulls Eye 1-2-3 for bare wood surfaces and when painting over dark colors. BEHR wants a primer coat on new cabinets, and states that laminate and melamine need cleaning, scuff sanding, and priming before anything else.
Easy to miss: Acrylic painter’s caulk needs 72 hours of full cure before Nuvo goes over it. Dry to the touch isn’t cured. Giani’s warning is specific: paint over half-cured caulk and the film cracks along the seam as the caulk finishes releasing its moisture.
Do You Need Primer After Deglossing?
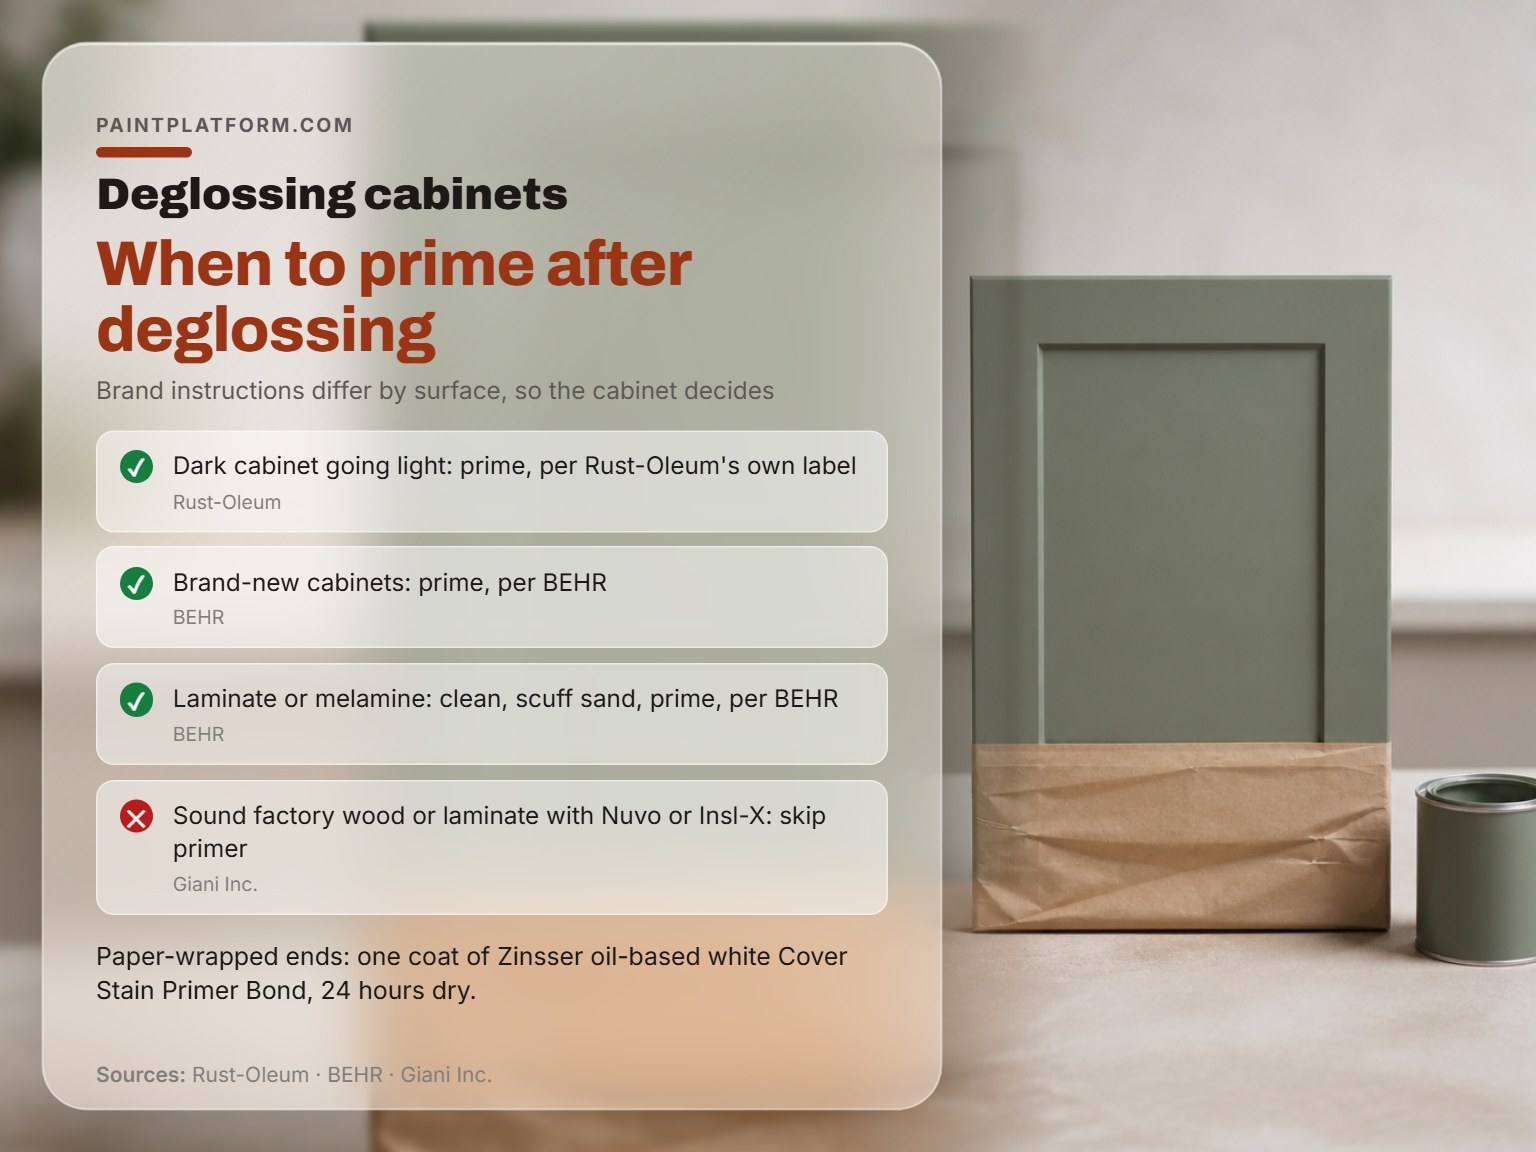
Primer is where the brand you bought starts making decisions for you.
Giani describes Nuvo as a paint and primer in one, and says most conventional wood and laminate cabinets need no primer at all. Insl-X Cabinet Coat goes further, claiming adhesion strong enough to paint polyurethane and varnish without a primer.
BEHR and Rust-Oleum both land on the other side for specific surfaces. BEHR calls for a primer coat on new cabinets and requires one on laminate and melamine. Rust-Oleum points to Zinsser Bulls Eye 1-2-3 for bare wood and dark colors.
The pattern that holds across all four:
- Bare wood or plywood: prime, because tannins bleed through a topcoat.
- A dark cabinet going light: prime, per Rust-Oleum’s own label.
- Brand-new cabinets: prime, per BEHR.
- Laminate or melamine: clean, scuff sand, prime, per BEHR.
- Paper-wrapped ends: one coat of Zinsser oil-based white Cover Stain Primer Bond, 24 hours dry.
- Sound factory wood or laminate with Nuvo or Insl-X: skip it.
A bonding primer earns its place on the first five situations and wastes an afternoon on the sixth.
I’d rather prime a cabinet I didn’t have to prime than skip one I did.
The Coat Schedule and the Cure Window
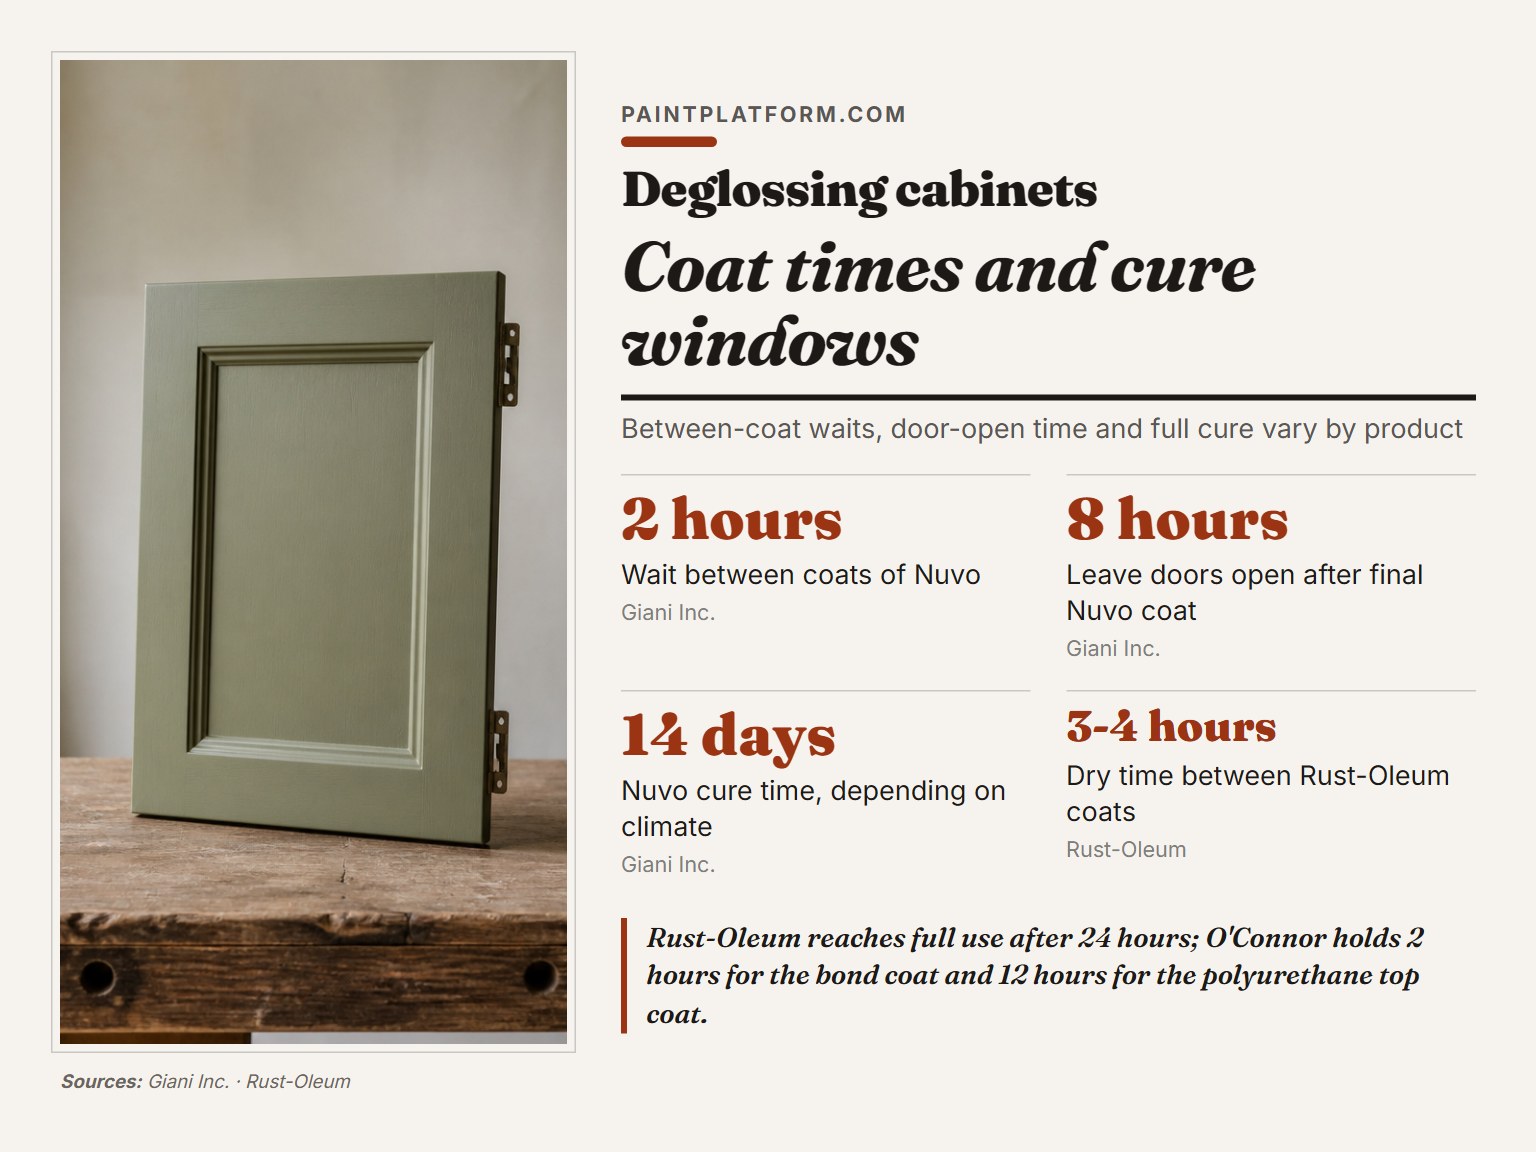
Three numbers govern the last half of this job: 2 hours, 8 hours, 14 days.
Giani wants 2 hours between coats of Nuvo, doors left open 8 hours after the final coat, and a 14-day cure. Rust-Oleum allows 3-4 hours of dry time between its coats and puts full use at 24 hours. O’Connor’s sequence holds 2 hours for the first bond coat and 12 hours for the polyurethane top coat.
Coverage differs too. Giani’s kits cover 100 square feet of cabinets. A gallon of Rust-Oleum Cabinet Transformations covers up to 200 square feet or 80 linear feet, depending on texture, porosity, and how you apply it.
| Symptom | Likely cause | Fix |
|---|---|---|
| Peeling around handles | Grease left under the coat | Strip back, clean with TSP, re-degloss |
| Cracking along a caulked seam | Caulk painted before 72 hours cure | Cut out, re-caulk, wait 72 hours |
| Bubbling or blistering | Dust, moisture, or glossy residue left on the surface | Sand back to sound coating, re-prep, re-coat |
| Grainy, slushy texture in the can | Paint froze in storage or transit | Sit at room temperature one week; do not apply if clumpy |
Rust-Oleum also sets an environmental ceiling that most guides skip: apply between 50 and 95 degrees Fahrenheit, with relative humidity below 60 percent.
Timing is the part that catches people. This Old House puts the no-strip degloss-and-paint method at 1 to 2 days. The pro brushing route runs 4 days to 2 weeks, and doing one side of a door at a time means 48 hours of drying per door.
Wait at least 7 days before you clean painted cabinets with anything wetter than a damp cloth, and skip harsh abrasives entirely during the cure.
Frequently Asked Questions
Do I have to sand cabinets before painting them?
Giani says yes for de-glossing, specifying #300 grit on wood, laminate, vinyl, and painted surfaces. Insl-X Cabinet Coat also asks for sanding, at minimum a light pass on every glossy area to dull the sheen. The exception in the sources is O’Connor’s no-strip method, which uses deglosser and a scouring pad on doors and skips sandpaper entirely.
Can I use a deglosser instead of sanding?
For a high-gloss finish, Giani actually wants both, deglosser first and then #300 grit. Rust-Oleum accepts a heavy deglosser scrub as an alternative to priming, which makes it the most deglosser-friendly of the manufacturer instructions here. The trade-off is that deglosser removes gloss and grime but doesn’t level surface defects.
What grit sandpaper should I use to degloss cabinets?
Giani specifies #300 grit. This Old House’s painting contractor John Dee uses 100-grit, sanded with the grain. Giani specifies #300 grit and John Dee uses 100-grit, so pick based on how much finish you want to leave behind. A light scuff preserves the old coating; a heavier pass removes more of it.
How long after deglossing can I paint?
O’Connor waits one hour after deglossing and washing the face frames before moving on. Dee’s sequence adds a vacuum and tack-cloth pass after sanding, plus spot-priming with an hour of dry time on any burned-through areas. Rushing this leaves solvent trapped under the first coat.
Will paint stick to glossy cabinets without any prep?
BEHR lists glossy residue as one of the specific things that interferes with adhesion and causes peeling or bubbling. Giani warns that cracking can follow a clean that wasn’t thorough enough. Every source I consulted treats some form of de-glossing as mandatory.
Do I need to prime after deglossing?
Only on certain surfaces. Nuvo and Insl-X Cabinet Coat skip primer on sound wood and laminate. BEHR requires it on new cabinets, laminate, and melamine. Rust-Oleum recommends Zinsser Bulls Eye 1-2-3 for bare wood and dark colors, and Giani requires Zinsser’s oil-based Cover Stain Primer Bond on paper-covered sections with 24 hours of dry time.
The Bottom Line
Here’s the trigger that decides your method. Hold a flashlight at a low angle across a door.
Start with one drawer front, not the whole kitchen.
And a limit worth stating plainly: none of this rescues a finish that’s already failing. Loose, chipping, cracking, or peeling coating has to come off first, by hand scraping, sanding, or wire brushing, before anything goes on top. Deglossing is for sound surfaces. On a cabinet that’s already shedding its skin, prep means removal.
