
How to Set up a Painting Station: Step-by-Step
This post contains affiliate links. As an Amazon Associate, we earn from qualifying purchases.
To set up a painting station, fix four things before you buy anything: light you can aim, a surface you’re allowed to ruin, air that moves, and a spot to park a wet brush. Get those four right and most of the gear on the shelf stops mattering. Knowing how to set up a painting station starts with these four basics.
That permission to wreck something is the part of how to set up a painting station that decides how fast you learn. A station built around protecting the furniture produces a painter who hesitates before every mark. A station built around a scrap board nobody will miss produces someone who actually puts paint down.
What follows is the order I’d work in: the four basics, the corner-sized version, and then the section where spray gear gets its own rules, because the manuals for those machines are stricter than anything else in the room.
Key Takeaways
- Light first, gear last. A lamp you can move does more for a painting than a bigger easel.
- A surface you’re allowed to ruin is the biggest single factor in how much paint you actually put down.
- Spray gear breaks the kitchen-first rule. Those manuals set hard limits and they don’t negotiate.
- 160 seconds through the Earlex viscosity cup is the thinning threshold; drain faster than that and you leave the can alone.
- Clean the gun immediately and the job takes under 5 minutes. Wait an hour and it’s a different afternoon.
The Four Things a Painting Station Needs, in Order
Four things, and the order matters more than the shopping list: light, surface, air, and somewhere to put a wet brush.
Light direction changes what the eye reads as form. A lamp placed to one side rakes across the surface and reveals ridges of paint and the weave of the paper. A lamp directly overhead flattens that same surface into an even, uninformative wash. The same painting can look finished under one arrangement and muddy under another.
Start with light because it’s the only item on the how to set up a painting station list that changes what you see while you work. Everything else changes what you can reach.
Good lighting for painting is mostly about being able to move the lamp, not about buying a bigger one. A cheap clamp lamp you can swing to the other side of the board beats a fixed ceiling fixture every time. Test it by holding your hand between the lamp and the paper: if the shadow has a hard edge, you’ll see your texture; if it has no edge at all, you’re painting blind.
Surface comes second. A scrap board or a cheap panel you’ve already written off does the job, and it does it better than a nice one, because you’ll actually use it. Tape the paper down if it curls. That’s the whole setup.
Air comes third, and it’s the one people skip. A window cracked open behind you pulls vapor and dust away from the work. If the station lives indoors and you work with solvents, ventilating a room while you paint matters more than any fan you bought for a spray gun.
Brush rest comes last, and it’s a yogurt cup. Wet brush goes in, handle up. Done.
- Light: something you can aim, not something you install.
- Surface: a board you’ve given up on.
- Air: a cross-draft, not a breeze across your wet paper.
- Brush rest: a cup, a jar, a paper plate with a folded paper towel.
That’s the station. Everything after this is refinement.
How Do You Set Up a Painting Station in a Corner You Already Have?
You claim a stretch of wall, put the table against it, and stop apologizing for the size. Here’s the order I’d do it in.
- Clear the wall, not the room. Move what’s against that stretch of wall and leave everything else alone. A station you can set up quickly gets used; a studio you have to build gets admired.
- Set the tallest thing at the back. Board or easel against the wall, supplies in front of it, chair in front of that. If the board is behind your supplies you’ll reach over wet paint all night.
- Put the light on the side you don’t write with. Right-handed painters want the lamp on the left, so your hand doesn’t cast a shadow into the area you’re working.
- Give the wet work somewhere to live. A shelf above head height, a second table, a drying rack. Somewhere that isn’t the chair.
If the table is a permanent fixture, an artist desk with a slight tilt does the same job as an easel for dry media and takes up less floor. The artist chair question is really a question about how long you sit. A short sit on a kitchen chair is fine. Three hours isn’t, and your lower back will file the complaint.
A shelf or a set of art supply storage drawers within arm’s reach beats a beautiful cabinet across the room. Reach matters more than order.
What most people get wrong: Buying the easel before deciding where the light goes. The easel gets placed against the only free wall, the lamp ends up behind the painter’s shoulder, and every session is spent working in their own shadow.
160 Seconds: The Thinning Test That Decides Everything
160 seconds is the number printed in the Earlex Spray Station 3500 manual, and it’s the only thinning rule here you can actually measure.
Here’s the test. Dip the supplied viscosity cup into the material, fill it to the top, and time how long the continuous flow takes to stop draining from the bottom. If the cup empties in less than 160 seconds, the material sprays as-is. If it takes longer, the material needs thinning.
When it does need thinning, the manual’s sequence is specific: start with a 10% dilution, stir, re-measure, and if it’s still thick add 5% increments until you’re there. Five percent equals half a viscosity cup, which is a handy conversion when you’re standing there with a partial container.
Every few weeks somebody asks me whether they can stretch a tube of acrylic by watering it down hard. Past a certain point the binder gives out, the paint dries chalky and streaky, and a medium does the job without the wreckage. That’s brush paint, though. Sprayers are a different argument, and the argument is about atomization, not about binder.
If You’re Thinning a Gallon Instead of a Quart
The cup math scales, and the manual gives you the shortcut. For a gallon batch, add four viscosity cups of thinner, which is roughly 10% of a gallon. If it’s still too thick, repeat with two viscosity cups, roughly 5%, and re-measure.
What the cup is actually telling you is whether the material will break into fine enough droplets at the gun. Thick material comes out in spatters and lands in a texture you’ll sand off later. Thin material runs. The cup sits between those two failures.
| Sprayer | Thinning rule | What it means at the bench |
|---|---|---|
| Earlex Spray Station 3500 | Cup drains slower than 160 seconds means thin it | Measure first, then add 10%, then 5% steps |
| Wagner Power Painter | Test unthinned first; thinning is not typically required | Spray a scrap panel before you touch the can |
| Wagner PaintREADY System | Thin only if absolutely necessary; the white gun handles thick material | Try the other gun before you reach for solvent |
Three manufacturers, three different answers to the same question. That’s not one of them being wrong. It’s three different machines with different tolerances, and it’s why the manual in your hand beats the advice on a forum.
I won’t thin a material just because a video told me to. I’ll run the cup test, write the number on a scrap of masking tape, and stick it to the can. Next time I use that can I already know.
Where the Wagner and Earlex Manuals Contradict Each Other
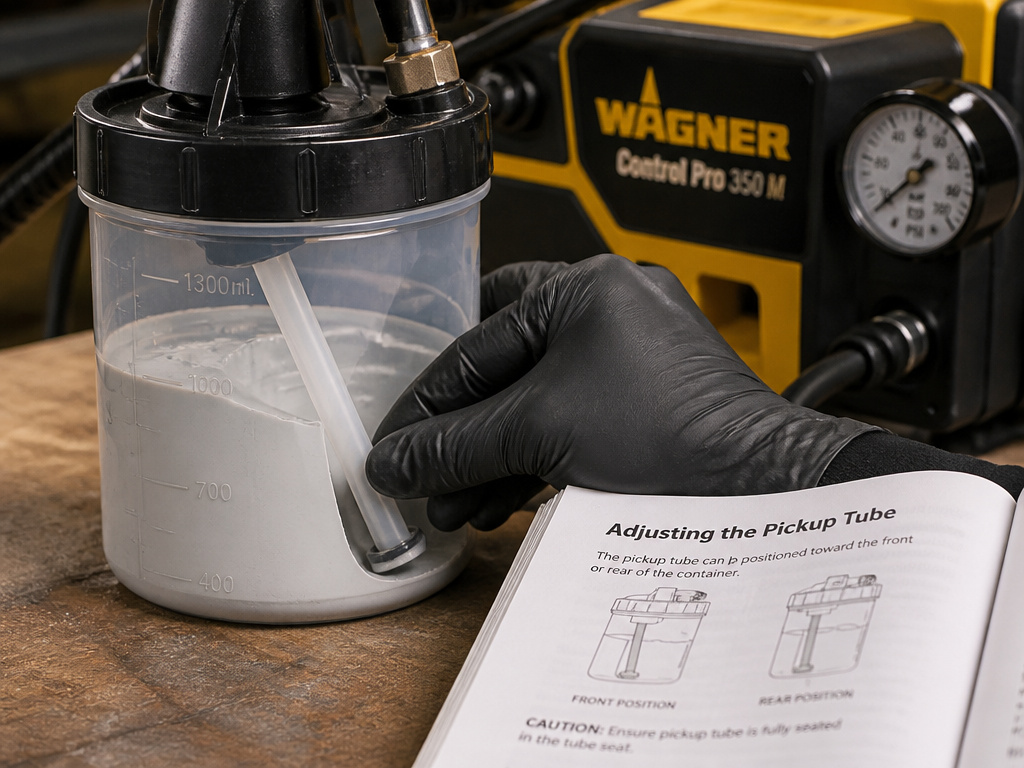
Two Wagner manuals give different minimum flash points for what you’re allowed to put through a sprayer, and the difference is real.
The Power Painter manual rules out any material with a flash point below 70 F (21 C). The PaintREADY manual rules out thinning with anything below 100 F (38 C). Read quickly, those look like the same rule with two numbers. They aren’t. One governs the material going into the cup; the other governs the solvent you’re adding to thin it. If you’re thinning, the stricter number is the one that applies.
The Earlex manual handles the same territory differently again, and it handles it by pointing outward: follow the paint or coating manufacturer’s own thinning guide, and if in doubt, call them. That’s the least satisfying sentence in any manual and probably the most useful.
The pickup tube has its own small confusion. Earlex says angle the tube to the rear of the container when spraying a ceiling and to the front when spraying a floor, so you can use up more of the material before refilling. Wagner’s PaintREADY manual describes the same two positions by spray direction rather than surface. Same tube, opposite vocabulary. If you’re switching between machines, trust the picture in the manual over the word.
Easy to miss: The PaintREADY air pressure dial ships set to maximum from the factory. If your first panel comes out with more overspray than coverage, check the air pressure dial. You’re running a factory setting on a material that wants less.
What Are the Real Limits on a Spray Day?
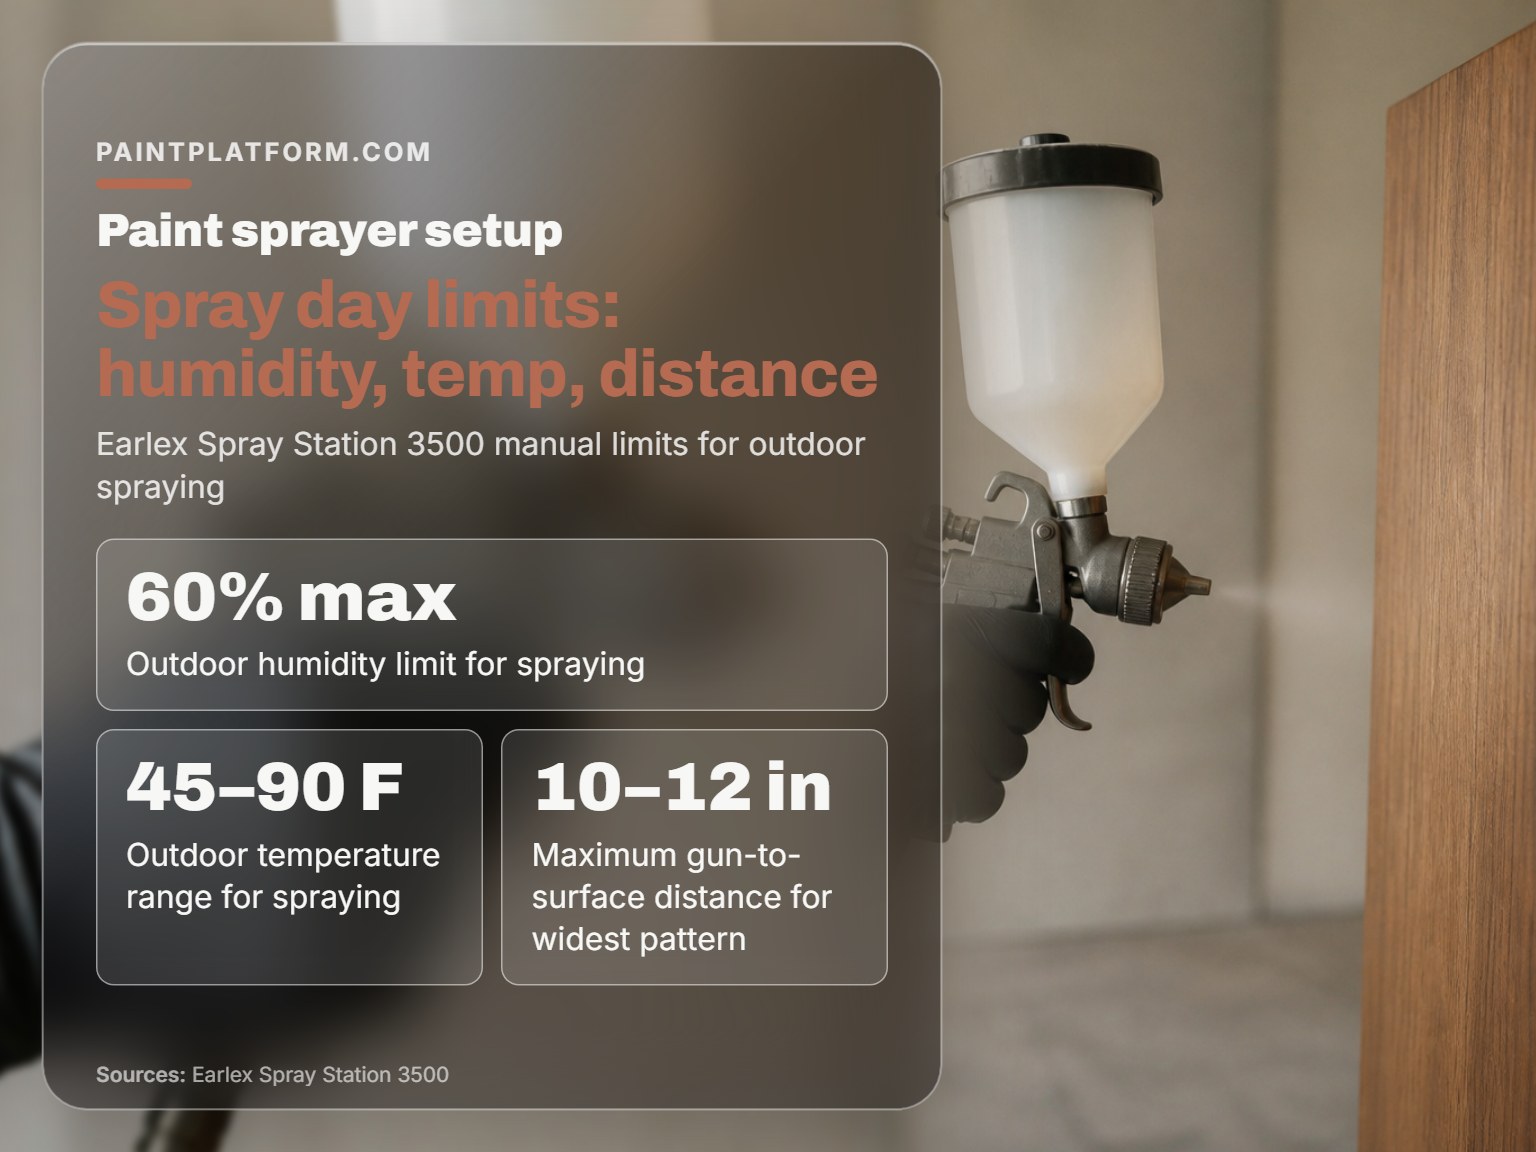
The Earlex manual sets a hard envelope: no outdoor spraying when humidity is above 60%, and nothing outside 45 F to 90 F.
Those aren’t suggestions. A garage station can sit inside that temperature range and blow past the humidity limit, and you’d never know without a gauge. If you’re spraying outdoors, buy a cheap hygrometer and check it before you mix anything.
The distance rule is easy to measure. Spray a maximum of 10 to 12 inches from the surface, which is where you get the widest pattern.
Before you start: The flash point printed on the can is the line you can’t cross. Wagner’s Power Painter manual rules out any material below 70 F (21 C), and the PaintREADY manual rules out thinning solvents below 100 F (38 C). Leftover paint and solvent go to your local waste collection site, never down a drain.
| Setting | Limit | Where it comes from |
|---|---|---|
| Outdoor humidity | 60% maximum | Earlex Spray Station 3500 manual |
| Outdoor temperature | 45 F to 90 F | Earlex Spray Station 3500 manual |
| Gun-to-surface distance | 10 to 12 inches maximum | Earlex Spray Station 3500 manual |
| Remote hose duty cycle | 15 seconds on, 5 seconds off | Wagner Power Painter manual |
| Remote hose duty cycle | 15 seconds on, 5 seconds off | Wagner Power Painter manual |
That last row is the one nobody reads. With the remote suction hoses fitted, Wagner recommends a 75% duty cycle: trigger for 15 seconds, then let the gun idle for 5. Run it flat out and you’re asking a turbine to do something it wasn’t built for.
Cup Mode, Remote Hose, or Backpack
Wagner splits the Power Painter into three setups by job size, and the split is worth knowing before you buy anything else. Cup mode covers small to medium jobs. Remote suction hose mode covers medium to large. Backpack mode covers large jobs where you need to move.
The failure mode that catches people is running the cup dry. An empty container lets air get sucked into the sprayer, and the manual is specific about what happens next: globbing and spitting, within a few passes. With the container emptying as you spray, that’s a real constraint on a big panel. Refill early.
You’ll hear the turbine running before you spray anything. You’ll hear the turbine running before you spray anything. Keep the turbine filter element clean at all times.
Cleanup Is the Whole Game, and It Takes Under 5 Minutes
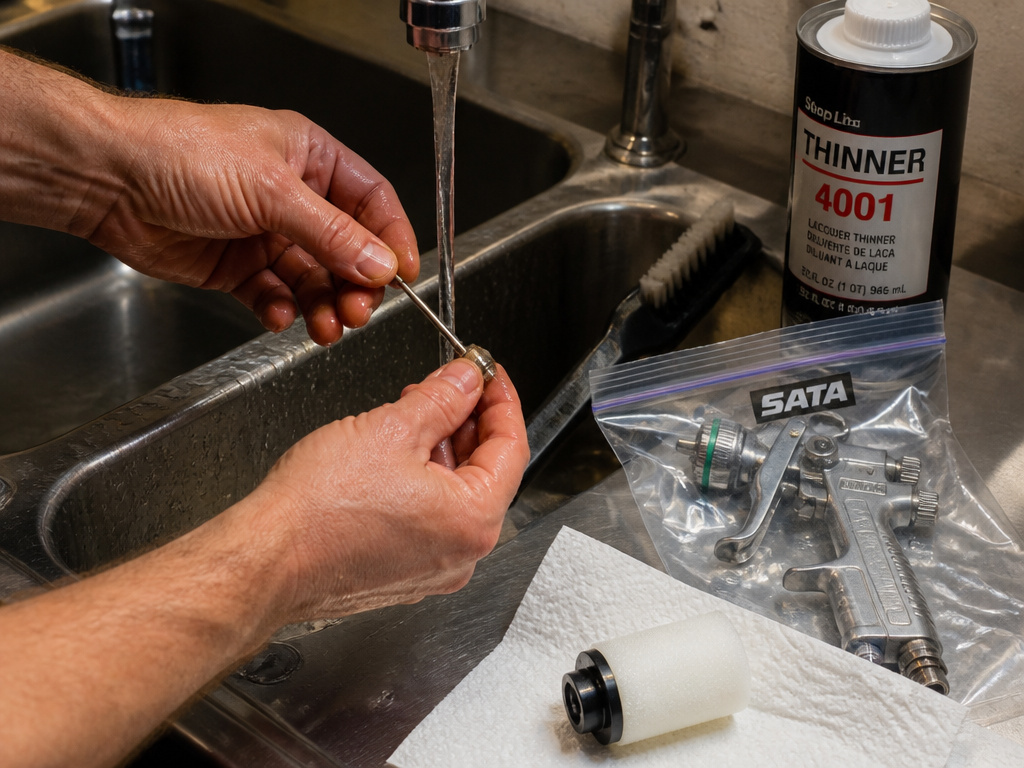
Clean the gun before you eat lunch.
The Earlex manual puts it plainly: done immediately, cleaning takes less than 5 minutes. Done later, it’s a needle-and-tip disassembly with a brush and the appropriate thinner, and you’ll be picking dried paint out of an air cap. If you’re taking a break mid-job, leave the spray gun in a plastic bag so the paint can’t dry in the works.
Where this goes sideways: Leaving the gun on the bench overnight “just this once.” The paint sets in the fluid tip and the needle seat, and the next session starts with a blocked gun instead of a quick rinse.
The Filter Under the Turbine
There’s a foam filter underneath the outlet body of the turbine, and it needs to stay clean. Disconnect the unit, turn it on its side, remove the foam, and wash it out. Let it dry completely before it goes back, and replace it from time to time.
The other half of turbine care is placement. Earlex says to keep the turbine as far away from the spraying area as possible so paint can’t contaminate the motor, and to stand it on a stable surface free from dust, debris, or liquids. Setting the unit on the bench beside you is the wrong move.
Wipe the needle and tip between sessions if you spray latex regularly. Keep the turbine filter element clean at all times; it can be washed out and replaced when dry.
The Accessories You Can Skip This Week
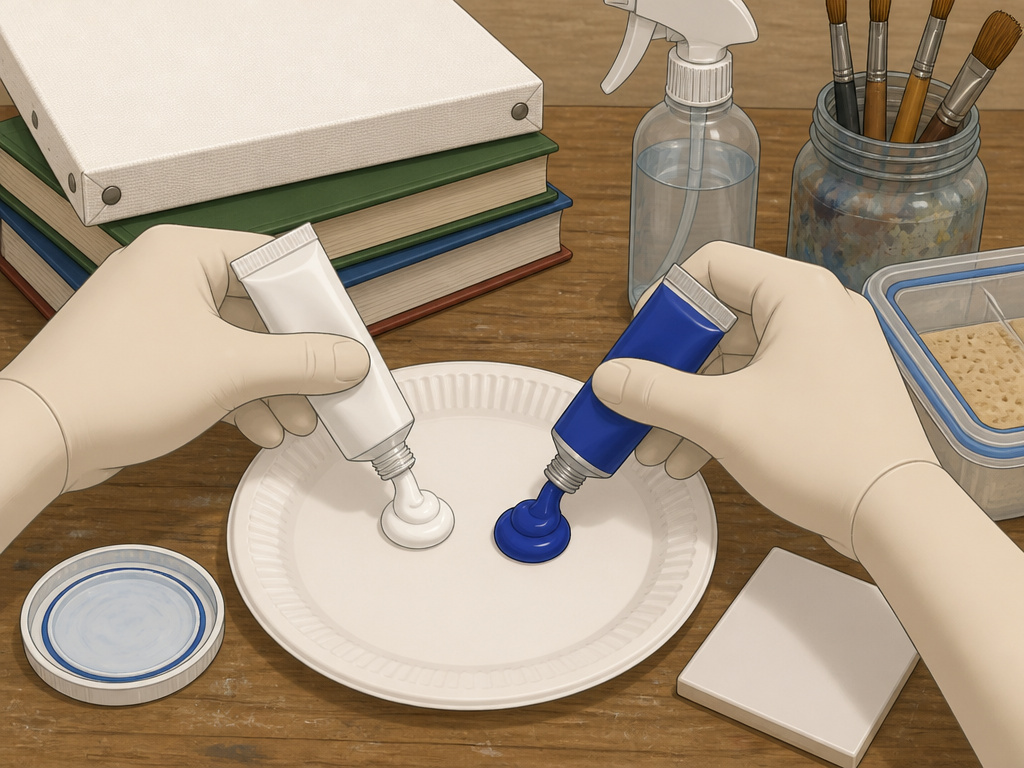
A paper plate is a palette.
So is a ceramic tile, a sheet of glass, or the lid of a yogurt cup. My palette is not a record of good decisions, and neither is yours. If you work in oils and need a surface that won’t pull the medium out of the paint, an oil paint palette earns its place. For everything else, the kitchen already has one.
The same logic applies to the rest of the accessory aisle. A beginner easel is a stand, and a stack of books is also a stand. If you’re working on a kitchen table and can’t leave anything out, a tabletop easel solves the small-space version of that problem and folds away when dinner happens.
- Skip the themed bundle. You’ll use a little of it and store the rest.
- Skip the studio easel until you’ve painted standing up for a while and know you’ll keep doing it.
- Buy the spray bottle. A plain water bottle keeps acrylics and watercolors workable.
- Buy a stay-wet palette if you work in acrylics and hate mixing the same colour twice. It’s the one accessory in this category I’d replace right away.
Fair warning: the moment you buy a specialty item for a problem you’ve only hit once, it joins the pile. Hit the same annoyance more than once first. Then buy.
Frequently Asked Questions
Do I need a dedicated room to set up a painting station?
No. A stretch of wall, a table, and a lamp you can move covers it. The constraint that actually matters is whether you can leave wet work out overnight, so prioritize a shelf or a drying surface over floor space.
How much light does a painting station need?
Enough that you can see the texture of the paint without leaning in. A single adjustable lamp placed to one side does more than overhead lighting, because side light rakes across the surface and shows you ridges and brush marks that flat light hides.
Can I thin acrylic paint with water for a sprayer?
Follow the coating manufacturer’s thinning advice first, then the sprayer manual. Earlex’s method is to measure with the viscosity cup and thin in 10% then 5% steps if the material drains slower than 160 seconds. Heavy water thinning for brushwork is a separate question, and past a point it breaks the binder.
Why does my sprayer spit and glob?
Air getting into the system is the usual cause. The Wagner Power Painter manual warns that running the container dry lets air get sucked in, which produces globbing and spitting. Refill before the cup empties; that means watching the level, not the clock.
Is it safe to spray paint in a garage?
Only with the door open and the humidity and temperature inside the manual’s range. Earlex prohibits outdoor spraying above 60% humidity or outside 45 F to 90 F, and those limits apply to a garage as much as a driveway. Solvent-based finishes also need the flash point checked against the can.
The Bottom Line
If you do one thing this week, do the light. Move a lamp to the side of your board and paint for twenty minutes. You’ll see texture you didn’t know you were making, and that single change will tell you more about your next purchase than any buying guide.
Here’s the threshold I’d actually hold you to: if you’ve hit the same annoyance repeatedly, buy the thing that fixes it. Once, and you’re guessing. Repeatedly, and you know.
And if you’re adding spray gear to the station, read the manual that came with your machine before you read anything else. The three manufacturers here disagree with each other on thinning, on flash points, and on which way the pickup tube points. None of them are wrong about their own equipment. Start before you feel ready, but start with the sheet that shipped in the box.
