
How to Spray Paint Cabinet Doors: Step-by-Step
This post contains affiliate links. As an Amazon Associate, we earn from qualifying purchases.
To spray paint cabinet doors, match three things: a coating rated for spray application, a clean and scuffed surface, and thin passes, Graco specifies about 12 inches from the door with 50% overlap, while AerosolsRus says to follow the label or TDS for distance and overlap. Miss the prep and the finish peels; rush the recoat window and the next coat lifts.
Coating choice decides everything downstream. Sherwin-Williams formulates its Gallery Series primer and topcoat for spray application only, which means the equipment list, the tip size, and even whether a run can be touched up with a brush all follow from what’s in the can.
What follows is the full sequence, from washing the doors to the moment the hinges go back on. It also flags the four places where the manufacturers flatly disagree, because you’ll hit those and you’ll need to pick a side.
Key Takeaways
- Spray-only coatings exist. Gallery Series primer and topcoat are formulated for sprayers and nothing else.
- Primer is optional for some systems and mandatory for others. Sherwin-Williams calls its topcoat self-sealing and recommends primer only for uniform appearance or tannin stains; Graco calls for a non-flammable oil-based primer on all surfaces, and Behr calls for a primer coat on new cabinets.
- Wait at least 24 hours before reattaching doors, drawers and hardware, per Sherwin-Williams.
- 50% overlap at roughly 12 inches is Graco’s spec for an airless pass on cabinet doors, while AerosolsRus says to follow the label or TDS for distance and overlap rather than a fixed number.
- Below 50F, stop. Rust-Oleum’s Cabinet Transformations system is out of spec under that ambient temperature.
What Spray Equipment Actually Works on Cabinet Doors
Sherwin-Williams lists four acceptable sprayers for its Gallery Series coatings: HVLP, airless, air-assisted airless, and conventional.
Gallery Series Waterborne Primer and Topcoat are formulated for spray application only. Acceptable equipment includes HVLP, airless, air-assisted airless, and conventional sprayers. Air-assisted airless units take a .008 or .010 orifice fine finish tip, 208 or 210. Specific tip choice depends on the substrate. Brush and roller are not approved application methods.
Equipment matters less than the tip. An air-assisted airless unit runs a .008 or .010 orifice fine finish tip, 208 or 210, and the choice between those two depends on what you’re spraying. For water-based enamel and satin on cabinet doors, Graco recommends a 311 tip that throws a 6-inch fan.
Sherwin-Williams names the Graco Ultimate QuickShot as an ideal match for Gallery Series topcoat, mostly because the pressure and flow controls sit right at the gun. That matters when you’re switching between a wide door face and a narrow edge stile.
- HVLP: slow, high transfer efficiency, best for one door at a time.
- Airless: fast and forgiving on large flat faces, but it lays material down quickly enough to run if you linger in one spot.
- Air-assisted airless: airless speed with finer atomization, which is why the .008/.010 fine finish tip spec shows up here.
- Conventional: cheapest entry point, thinnest coats, most overspray.
If you’re still picking a unit, the shortlist of paint sprayers for cabinets narrows fast once you decide between turbine and airless.
The how to spray paint cabinet doors prep sequence is identical whether you’re working in a garage booth or a basement corner, and it’s the same one you’d follow to spray paint kitchen cabinets in place.
Does a Primer Coat Actually Save You Anything?
Sherwin-Williams says no, not always, because its topcoat is self-sealing; Graco says prime everything with a non-flammable oil-based primer; and Behr calls for a primer coat on new cabinets.
| Source | Primer position | Covers |
|---|---|---|
| Sherwin-Williams Gallery Series | Optional; topcoat is self-sealing | Uniform appearance, tannin stains |
| Graco | Prime all surfaces | Non-flammable oil-based primer |
| Behr | Primer on new cabinets | New and laminate doors |
| Popular Mechanics test | One primer plus two topcoats | 23 doors, 18 drawer faces |
Gallery Series topcoat is self-sealing, so the primer earns its place only when you need a uniform topcoat appearance or you’re covering minor tannin stains. That’s Sherwin-Williams’ own wording, and it’s narrower than the blanket advice floating around.
Graco calls for a non-flammable oil-based primer on all surfaces, while Behr calls for primer specifically on new cabinets, and on laminate or melamine that’s been cleaned and scuffed.
The Popular Mechanics test landed on one primer coat plus two topcoats per door and drawer face, sprayed across 23 doors and 18 drawer faces, while Sherwin-Williams says its self-sealing topcoat doesn’t always need primer.
Pick your spray paint for cabinets first, then read the primer instruction on that specific product: Sherwin-Williams says its self-sealing topcoat doesn’t always need primer, while Graco and Behr call for a primer coat. The best paint for spraying a door is the one built for a gun, not the one you’ve diluted until it behaves.
Wash, Scuff, and the Grit Number Everyone Argues About
Three manufacturers publish three different grit numbers, Sherwin-Williams 80 for a profile, Behr 150-220 for general prep, and Popular Mechanics’ 320 by hand for de-glossing, and each one is correct for the coating it belongs to.
Before you start: Sanding or scraping old paint generates dust that can contain lead, so wear a NIOSH-approved respirator and contain the debris. Spraying requires ventilation, and any appliance in the vicinity should be switched off. Gloves, goggles and a spray sock are the minimum.
Cleaning splits the same way: Sherwin-Williams says wash with a cleaner, degreaser, or emulsifying dish soap, then rinse with clean water and dry; Graco says wipe everything down with TSP; and the Popular Mechanics test used a light spray degreaser, then a water wipe-down, then a dry wipe, with separate cloths for each step so you’re not smearing grease back on.
Here’s where the grit numbers land:
| Job | Grit | Source |
|---|---|---|
| Build a profile for primer | 80 medium grade | Sherwin-Williams |
| General cabinet prep | 150-220 | Behr |
| De-gloss before spraying | 320 by hand | Popular Mechanics test |
| Scuff between coats | 320 stearated | Sherwin-Williams |
The how to spray paint cabinet doors spread reflects a genuine disagreement. Sherwin-Williams specifies 80 grit to cut a profile into a factory finish so primer has something to bite, Behr recommends 150-220 for general cabinet prep, and the Popular Mechanics test settled on 320 by hand for de-glossing.
The test also flagged something worth stealing: a random-orbital sander was too aggressive and made too big a mess. A hand block and 320 paper won.
A properly scuffed door goes from a hard shine to a flat, chalky sheen under a raking light. If you can still see your reflection in it, keep going.
- Wash every surface with cleaner, degreaser or emulsifying dish soap, then rinse and dry. Skip it and the paint bridges over grease, then lifts in sheets.
- Scuff to create a profile with 80-grit medium paper or a sanding sponge. Sheen left on the door is adhesion left on the table.
- Patch holes and dings with wood putty and sand flush. Filler that sits proud telegraphs through two coats.
- Vacuum, then wipe with a damp rag. Dust under primer reads as grit under the topcoat.
- Mask the cabinet box so only the face and interior edges get coated. Overspray inside the box is permanent.
The Test Patch That Lets You Skip Sanding
Sherwin-Williams offers an out that most guides skip: after washing, test a small area with your primer, and if it adheres well, sanding may not be necessary, though Graco calls for lightly sanding with the grain and Behr calls for scuff-sanding or deglossing glossy surfaces.
That’s a real shortcut on doors with sound factory finish. It’s useless on a glossy surface or a door that’s been hit with furniture polish for a decade. I’ve stopped trusting the shortcut on anything that feels slick to the fingertip.
How to Spray Paint Cabinet Doors Without Runs or Tails
Graco’s numbers are worth taping to the sprayer: hold the tip about 12 inches from the surface, overlap each pass by 50%, and start at the lowest pressure that still sprays, though AerosolsRus says to follow the label or TDS for distance and overlap rather than a fixed number.
Pressure is the setting people get wrong. Begin low and increase in small increments until the spray tails soften. Tails are the stringy edges of the fan; when they blend into a smooth oval, you’re there.
You can hear the difference before you see it. A gun set too low spits instead of hissing, and that wet sputter hits the door a half-second before the blob shows up.
On cabinet edges, angle the gun so two to three passes blend in the center. Straight-on passes on a narrow stile leave a stripe.
Thinning is the one place the sources genuinely split: the Popular Mechanics test thinned topcoat to 80% paint and 20% water and shot primer at full thickness at near-full pressure, while Sherwin-Williams gives no thinning instruction for Gallery Series at all because a spray-only product is already formulated for a gun.
I’d rather run three thin passes than one wet one. A heavy pass looks perfect for about ninety seconds, then the runs show up along the bottom edge where you weren’t looking.
If the fan and the overlap still aren’t clicking, a few adjustments to spray painting technique fix more finishes than any change to the paint.
The Recoat Window Nobody Respects
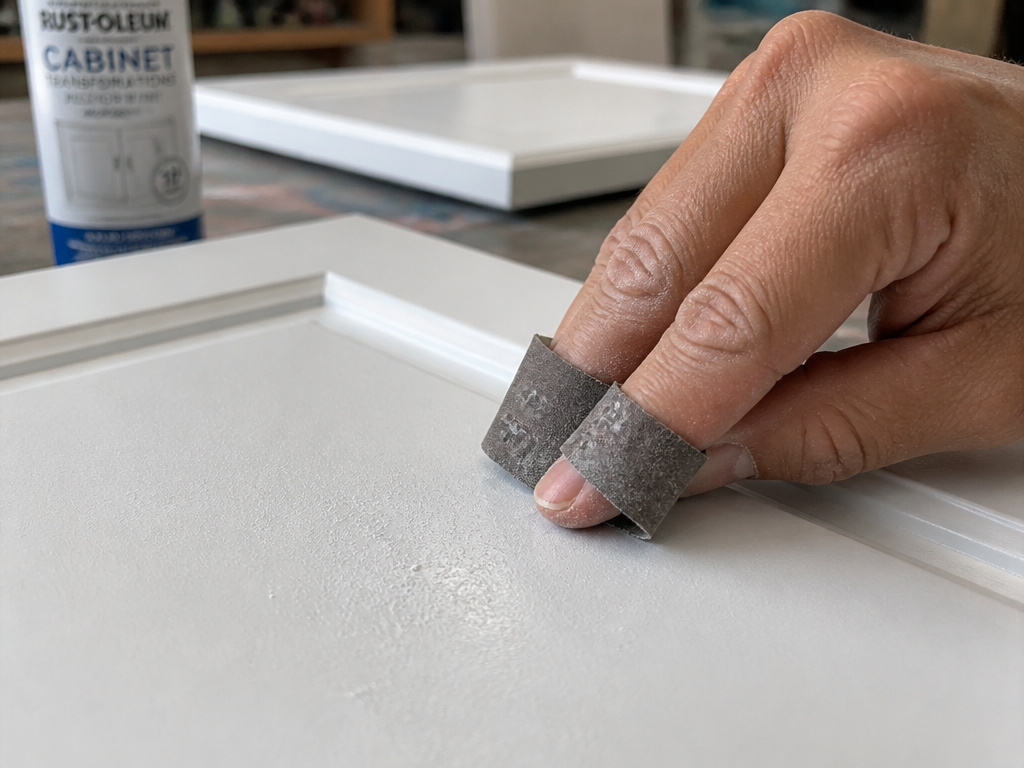
Thirty to forty-five minutes is the recoat window. Treat it as a hard number.
Sherwin-Williams says allow 30 to 45 minutes of dry time, then scuff with 320-grit sandpaper to knock down bumps, grooves, lint or dust that settled on the surface, while Behr specifies 150-220 grit and Graco says only to lightly sand with no grit given. Apply the final coat before that step and every imperfection gets magnified.
I learned the cost of skipping it the impatient way. I laid a second coat over paint that was still faintly tacky, and the top layer lifted into a gummy mess that took an afternoon of sanding to flatten. Now I touch a corner first, every time.
Where this goes sideways: Spraying the second coat while the first still smells of solvent. The fresh solvent re-wets the layer underneath and the wrinkle shows up along the door edges first, usually inside the first minute of the pass.
What “Touch Dry” Actually Means
Cured primer feels like a fingernail. Tacky primer feels like the back of a sticker. That’s the whole test, and it takes two seconds on a corner you’ll never see.
Sand with a light hand. The goal is knocking the texture off, not cutting back to bare wood.
Runs are a separate problem with a separate cause, and the fixes for paint runs start with distance and speed rather than with the paint itself.
How Long Before the Doors Go Back On?
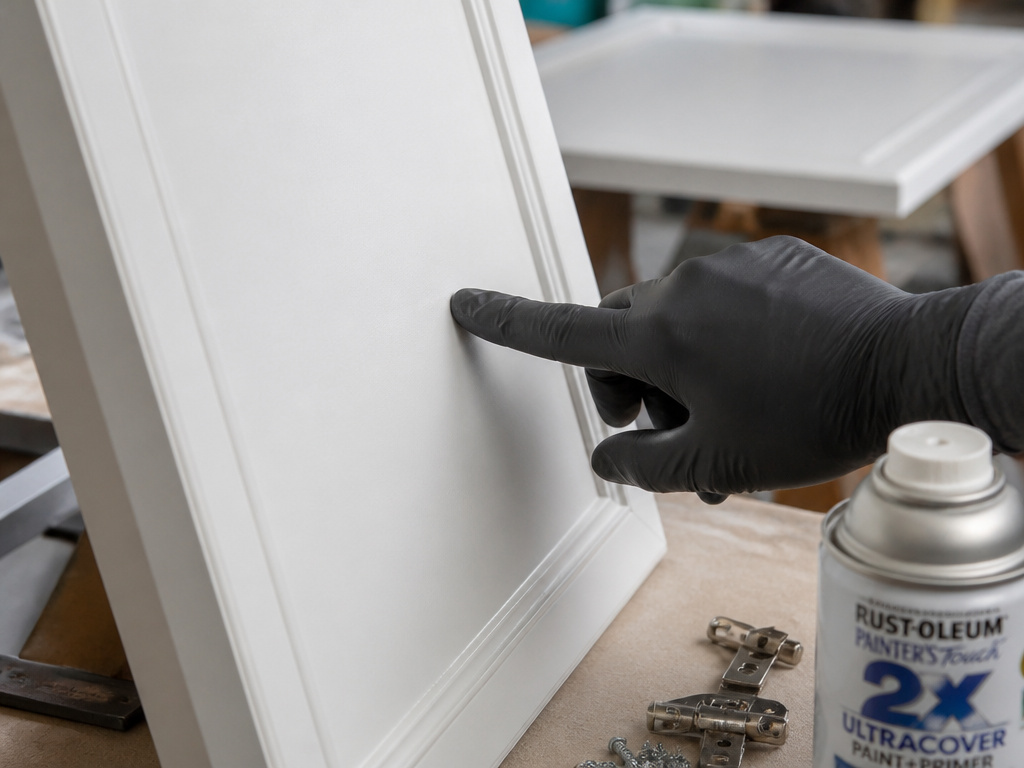
The sources disagree on rehang timing: Sherwin-Williams says at least 24 hours and adds that longer is better, Behr says wait until the paint is completely dry with no number attached, and AerosolsRus says hold off until the coating tolerates contact without sticking or marking.
Those three statements differ: Sherwin-Williams gives 24 hours as its figure, Behr says wait until completely dry with no number, and AerosolsRus says wait until the coating tolerates contact without sticking or marking.
Twenty-four hours is a floor, not a finish line. Rehang a door while the paint still prints a fingerprint and the hinge screws will press that print into the film permanently.
Rust-Oleum flags humidity as something that changes how a coating applies, and Sherwin-Williams’ 30-to-45-minute recoat window isn’t corrected for it. In a damp basement, add time instead of trusting the clock.
The same patience applies after rehang. A cabinet topcoat that hasn’t reached full cure will mark under a cleaning spray, so keep the mild soap and water routine for the first couple of weeks.
Labeling, Masking, and the Parts That Must Stay Paint-Free
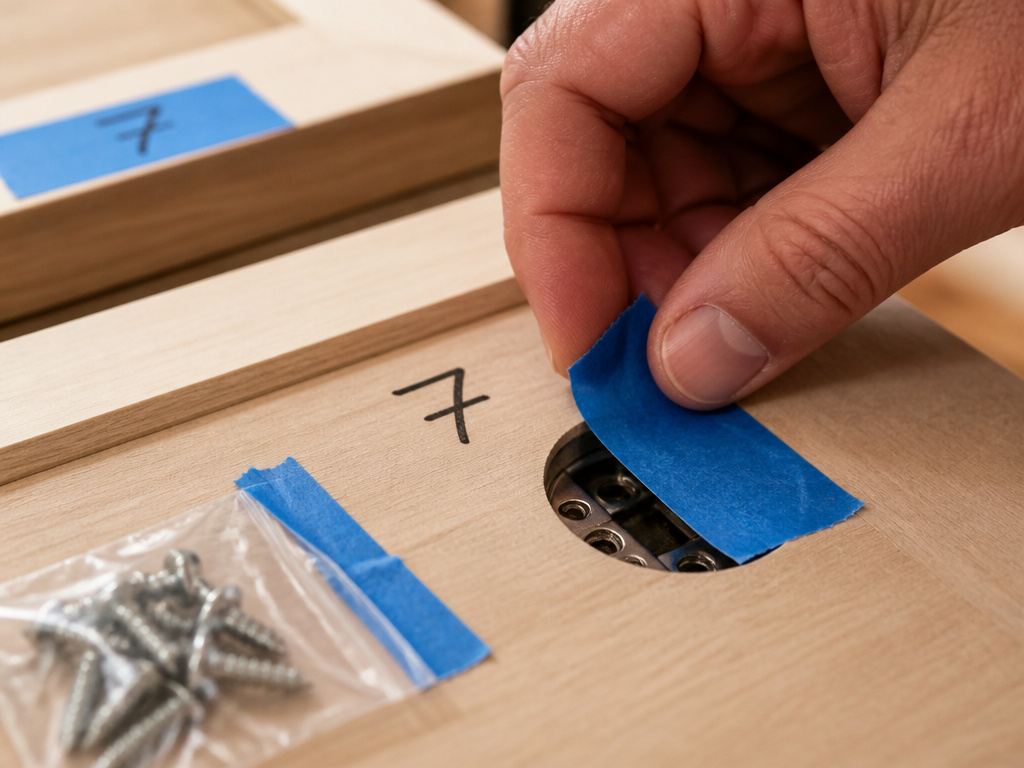
Twenty doors come off their hinges in an afternoon. Three weeks later you’re holding one that fits nowhere, comparing screw holes by eye while the kitchen sits in pieces.
Painter’s tape and a marker on the back of each door, plus a matching number inside the frame, solves it. The first time I skipped that step I spent an entire evening playing hinge-hole jigsaw with about twenty doors. Zip bags for hinges and screws, one per door, taped to the back, have survived my studio ever since.
AerosolsRus takes it further: photograph the kitchen before dismantling, number every door and drawer front, and record the cabinet and hinge position. That’s the version that survives a two-week job.
Some surfaces must stay bare:
- Hinge cups and fixing holes. Paint in the cup and the hinge won’t seat flush, so the door hangs crooked and you’ll blame the hinge.
- Drawer runners and any moving part.
- Cabinet box interiors, beyond the face and interior edges that Sherwin-Williams says are the only parts to coat.
- Silicone joints and fixed hardware, which masking tape handles better than a steady hand.
When you’re ready to put the boxes back together, the order for how to paint cabinet frames matters as much as the door work itself.
When a Sprayer Is the Wrong Tool
For one small kitchen’s worth of doors, a brush and a 2 to 2½ inch sash brush will beat a sprayer on total time once masking is counted.
Behr’s cabinet guide is built around that method, brush in the direction of the wood grain, two coats for durability, while Sherwin-Williams formulates Gallery Series for spray application only. It’s slower per door and faster per project when you factor in bagging the room and cleaning the gun.
Spray-only products remove the choice entirely. Gallery Series primer and topcoat can’t be brushed or rolled, so a run or a sag means re-spraying that door, not touching it in.
Laminate, Melamine, and Vinyl Wrap
Behr says laminate and melamine can be painted if the surface is cleaned, scuff sanded, and primed first, while Sherwin-Williams says to test a small area with primer after washing and that sanding may not be necessary if it adheres well; Sherwin-Williams also adds that on laminate you should apply the paint evenly and vertically rather than following the grain.
Vinyl wrap is the one to walk away from. AerosolsRus says lifting, bubbling, split or heat-damaged wrap should be repaired, removed or replaced rather than painted over, because the failure keeps going underneath the new coat.
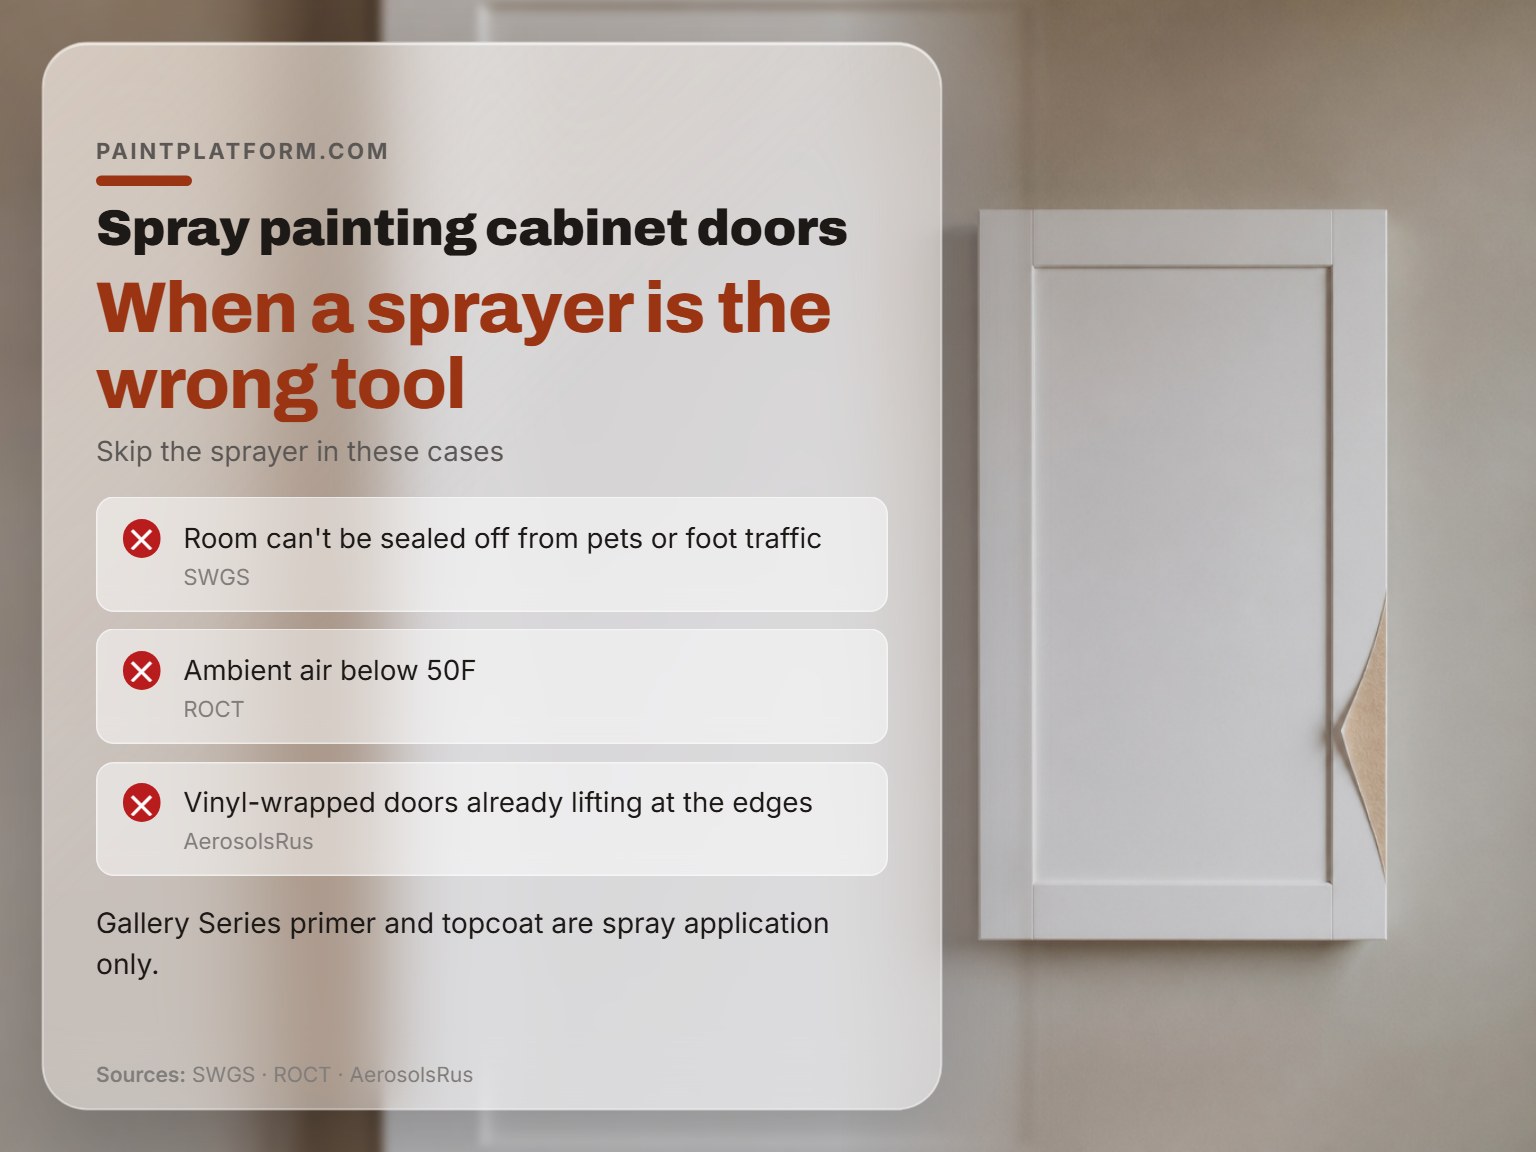
Skip the sprayer when:
- You’re doing fewer than a dozen doors and drawer faces.
- The room can’t be sealed off from pets or foot traffic, which is the first thing Sherwin-Williams asks for.
- Ambient air is below 50F, Rust-Oleum’s stated minimum for Cabinet Transformations.
- The doors are vinyl-wrapped and already lifting at the edges.
The honest spray paint vs brush comparison comes down to how many doors you’re doing and whether you can empty the room for a weekend. If you’re brushing, the sequence for how to paint cabinet doors by hand runs on different drying math.
Frequently Asked Questions
Do I have to sand cabinet doors before spraying?
Not always. Sherwin-Williams says to test a small area with primer after washing, and if it adheres well, sanding may not be necessary, while Graco calls for lightly sanding with the grain and Behr calls for scuff-sanding or deglossing glossy surfaces.
Can I spray cabinet doors with a handheld sprayer?
It depends on the coating. Gallery Series is formulated for HVLP, airless, air-assisted airless or conventional sprayers, and Sherwin-Williams names the Graco Ultimate QuickShot as an ideal match. A coating that specifies spray-only equipment won’t behave the same through a cheap handheld unit.
How long should cabinet doors dry before I hang them?
Sherwin-Williams specifies at least 24 hours before reattaching doors, drawers and hardware, and notes that longer is better. AerosolsRus frames the same idea as waiting until the coating tolerates contact without sticking or marking.
Why did my second coat lift the first?
The first coat was still soft when the second went on. Sherwin-Williams calls for 30 to 45 minutes of dry time plus a 320-grit scuff before the next coat, while Behr specifies 150-220 grit and Graco says only to lightly sand. Spray over a tacky layer and the fresh solvent re-wets it, and the wrinkle appears along the edges first.
Can I spray over laminate or vinyl-wrapped doors?
Laminate and melamine can be painted if they’re cleaned, scuff sanded and primed first, per Behr, though Sherwin-Williams says to test a small area with primer after washing and that sanding may not be necessary if it adheres well. Vinyl wrap is different: AerosolsRus says lifting, bubbling or heat-damaged wrap should be repaired, removed or replaced rather than coated over.
Do I need to thin cabinet paint to spray it?
It depends on the product: the Popular Mechanics test thinned topcoat to 80% paint and 20% water, while Sherwin-Williams gives no thinning instruction for Gallery Series because it’s already formulated for spray application.
The Bottom Line
Here’s the threshold that decides it: more than about a dozen doors and drawer faces, plus a room you can seal off for a weekend, and spraying wins on finish quality. Below that, a brush and a 2 to 2½ inch sash brush finish sooner once you count the masking.
None of this holds if the doors are vinyl-wrapped and already lifting, or if your workspace sits under 50F. In those cases the coating system is out of spec before you’ve opened the can, and no amount of technique rescues it.
Before you buy anything, wash one door and run a primer test patch on a hidden face. If it grabs, you’ve just learned what your substrate actually is and possibly skipped a sanding step. Start before you feel ready.
