
How to Choose a Paint Roller Cover: Match the Nap
This post contains affiliate links. As an Amazon Associate, we earn from qualifying purchases.
To choose a paint roller cover, match three things to the surface: roller length (9 in. For walls and ceilings, 4 in. For cabinets and trim), nap thickness (3/8 in. For smooth walls, 3/4 in. For stucco and masonry), and fabric (woven for a clean finish, knit for speed). Then check the core.
The core is the part the label rarely mentions, and it decides whether the cover survives a solvent bath or comes apart in your hand. A cardboard tube swells and separates after a few uses. Polypropylene and phenolic cores hold their shape through washing.
What follows walks those three decisions in order, then covers the places where the manufacturers genuinely disagree, the quality checks worth doing in the store aisle, and how to choose a paint roller cover so it lasts past one weekend.
Key Takeaways
- Match nap to texture first. A 3/8 in. Nap handles walls and most ceilings; step up to 3/4 in. For stucco, masonry, and rough surfaces, though the manufacturers draw the textured-ceiling line in different places.
- Woven for a clean finish, knit for speed. Benjamin Moore puts microfiber at up to three times the paint capacity of a standard cover, while Bob Vila warns microfiber picks up and releases more paint than the average cover, so practice on a throwaway surface first.
- Skip cardboard cores. Bob Vila’s testers found they come apart after just a few uses.
- Pre-wet a new cover and spin out the excess. A dry cover pulls moisture out of water-based paint on the first pass.
- Replace covers that shed. Quality covers last up to five uses before they start losing fibers.
How to Choose a Paint Roller Cover: Three Decisions, In Order
Size comes first because it’s the one how to choose a paint roller cover decision you can’t fix later.
A roller cover is specified by three numbers: length, nap thickness, and core diameter. Length sets the width of the painted band and the pace of the job. Nap thickness sets how much texture the cover leaves behind. Core diameter sets which frame the cover fits, so a cover and a frame are bought as a matched pair.
Here’s the order that saves you a second trip:
- Length. A standard 9 in. (230 mm) cover handles walls, ceilings, and flat doors; a 4 in. (100 mm) cover handles cabinets, trim, and edges. Put a 4 in. Cover on a full wall and you’ll be there all afternoon.
- Nap. Purdy’s selector puts 3/8 in. On walls and ceilings and 1 in. To 1-1/4 in. On brick and masonry block. Get this wrong and the wall shows it: too thick a nap leaves stipple you can feel with a fingertip.
- Fabric and core. Woven for a clean finish, knit for coverage, plastic or phenolic over cardboard. Skip the core check and the cover swells and separates partway through the second wash.
Sherwin-Williams sells its polyester knit covers in 9, 14, and 18 in. Lengths, plus 4 in. And 7 in. Sizes for smaller work. Long covers aren’t automatically better. Bob Vila’s testers found 12 in. Or longer rollers somewhat heavy and unwieldy, and noted they’re more often used by professionals than DIYers.
For a normal bedroom, a 9 in. Cover is the whole answer. The best rollers for interior walls are almost always 9 in. With a 3/8 in. Nap, and everything longer is a speed tool for a big flat ceiling.
Which Nap Length Matches Your Surface?
I rolled a smooth fiber cement wall with a 3/8-inch nap last spring and finished faster than brushing would have taken, with a more even coat than I expected. I still back-brushed the edges and the grooves where the roller skipped. Aluminum and steel siding behaved the same way: roll the field, brush the laps.
Nap is the fiber thickness on the cover, and the substrate decides it. The rougher the surface, the thicker the nap needs to be.
| Surface | Nap (Purdy selector) | What goes wrong if you miss |
|---|---|---|
| Metal doors, cabinets, trim | 1/4 in. | Visible stipple on a surface people touch |
| Walls and ceilings | 3/8 in. | Orange peel dimples on smooth drywall |
| Textured walls, decks, concrete | 1/2 in. | Thin nap skips the low spots |
| Textured ceilings, stucco, masonry | 3/4 in. | Bridging leaves bare patches |
| Brick, masonry block | 1 in. To 1-1/4 in. | Paint sits on the high points only |
Benjamin Moore’s ceiling advice lands in the same place for most rooms: a 3/8 inch nap is best for most ceilings. BEHR’s MAXIMUS line puts 1/2 in. Nap on semi-smooth to semi-rough surfaces like decks, fences, and walls, and reserves 3/4 in. For semi-rough to rough surfaces like stucco, masonry, and brick.
A paint roller nap guide that maps nap bands to substrates beats a single recommendation, because most houses contain several of those substrates.
The three charts don’t agree at the top end. Benjamin Moore assigns 1/2 inch nap to textured ceilings, walls, decks, and concrete as one band. Purdy reserves 3/4 inch for textured ceilings and drops 1/2 inch to textured walls, decks, and concrete. BEHR splits it a third way, with 1/2 in. For semi-smooth to semi-rough and 3/4 in. For semi-rough to rough.
On a genuinely rough popcorn ceiling, Purdy’s 3/4 inch is the safer read, since a 1/2 inch cover bridges the low spots and leaves bare patches, while Benjamin Moore assigns 1/2 inch to textured ceilings. Both are defensible; the surface in front of you settles it.
I’d rather own one 3/8 inch cover and one 3/4 inch cover than five covers in between. Those two handle walls, ceilings, and every rough exterior surface on a normal house, and the in-between sizes mostly sit in the tray.
If you’re covering block or a rough brick face, the guide to choosing covers for textured walls goes deeper on which band to pick.
Woven, Knit, or Microfiber: What the Fabric Actually Changes
Benjamin Moore splits fabric into two camps, and the split is honest: woven covers prevent lint and deliver a smooth result, while knitted covers hold more paint and cover larger areas.
| Fabric | Best for | What the source says | Named example |
|---|---|---|---|
| Woven | A flawless finish | Prevents lint, delivers a smooth result | Benjamin Moore Aura |
| Knit | Speed and coverage | Holds more paint, covers larger areas | Pro Roller Pro Painter |
| Microfiber | High capacity | Holds up to 3x more paint than standard | True Blue microfiber |
The knit camp has its own logic. Pro Roller’s Pro Painter uses a proprietary blend of knitted polyester built for maximum pickup and release, and the high-density fabric resists matting. BEHR’s MAXIMUS goes a different route with a corkscrew-style polyamide fabric that resists matting and cuts spatter. Purdy winds its fabric to the core with a thermal bond and a spiral seam, which is why the seam sits flat instead of ridging.
Microfiber is the one that surprises people. Benjamin Moore puts microfiber covers at up to three times the paint capacity of a standard cover. Bob Vila’s testers found the True Blue microfiber left no lint at all, but held so much paint that they had to run it over the tray ridges several times to redistribute before it stopped dripping.
The full sweep of roller cover types runs from woven fabric through knit polyester to microfiber, and each one loads differently enough to change your rhythm.
Give a microfiber cover some practice on a sheet of cardboard before it goes near a wall. It loads heavier and releases faster than a standard cover, and the first real pass is an expensive place to find that out.
The Lint Problem With Cheap Covers
The first sign of a cheap cover is fuzz in the wet paint. Sight down the wall at a low angle and you’ll see a fine halo of fibers standing up in the film, most of them from the cover rather than the brush.
Benjamin Moore’s fix takes two minutes: wrap painter’s tape around your palm sticky side out and rub it along a new cover to pull the loose lint off before the first dip.
If a clean film is the whole goal, a cover built for a smooth finish will be woven, have beveled edges, and show no visible seam where the fabric meets the core.
For cabinets and flat panels, the foam vs microfiber question matters more than nap does, because the two behave nothing alike on a hard, non-porous face.
The Core Fails Before the Fabric Does
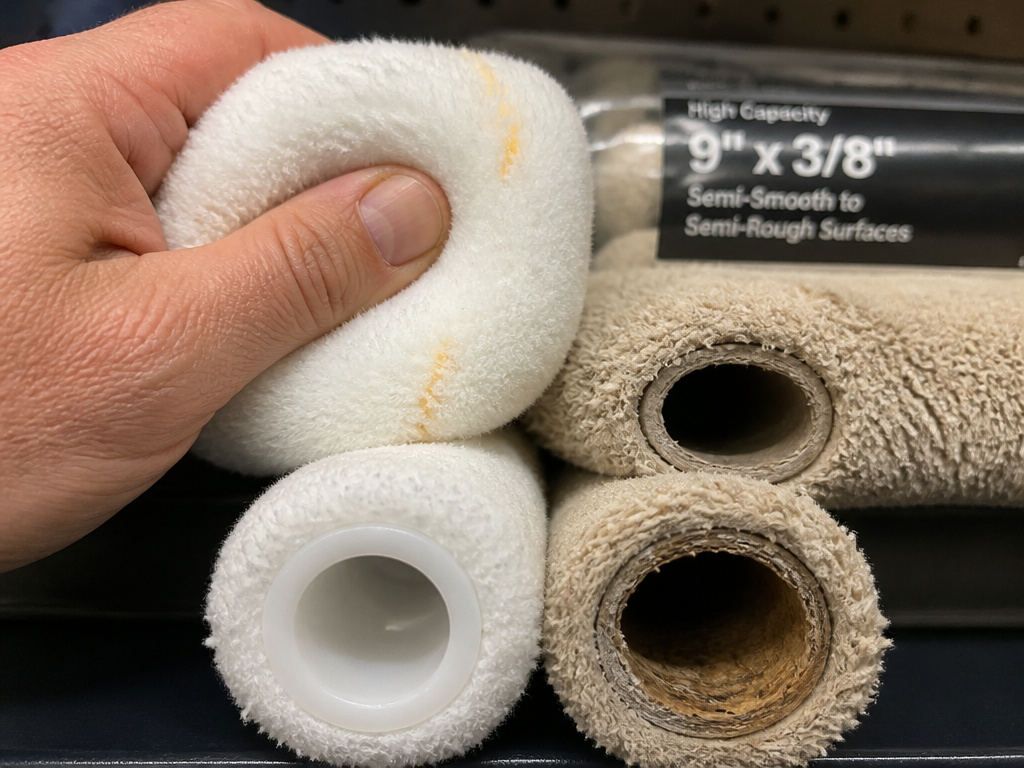
Cardboard cores are the cheapest part of a cheap cover and the first thing to go.
Bob Vila’s testers call cardboard cores a failure point outright, noting they come apart after just a few uses. None of the manufacturers in this category publish a cardboard-core product, which tells you where that tier sits.
Squeeze a candidate cover in the aisle. A cover that pushes back against your thumb like a new sponge is a good one; a matted one collapses and stays collapsed.
What to look for on the label and in your hand:
- Beveled edges on both ends, so the cover doesn’t leave a hard line where it meets trim.
- No visible seam where the fabric wraps the core.
- A plastic or polypropylene core, or phenolic if you’re running solvent-based coatings.
- Visible bounce-back when squeezed. A cover that stays flat has already matted.
- A stated reuse life. Benjamin Moore puts quality covers at up to five uses before shedding.
Pro Roller sells a solvent-resistant phenolic core as an alternate SKU to its standard heavy-duty plastic core. That’s the one place core choice genuinely changes with your paint. Benjamin Moore’s High Capacity cover takes the other route, using a heavy-duty polypropylene core that withstands both water and solvents, so a single cover spans both paint types.
I check the squeeze test on every cover before it goes in the cart. It takes only a moment.
Common mistake: Buying a six-pack of covers to avoid return trips. Inexpensive covers shed fibers and break down after repeated washing, so six cheap covers mean more sanding and more repainting than two good ones would.
The best roller covers tend to be the ones with a named fabric and a stated core, not the ones with the loudest packaging.
How Do You Load a Roller Cover Without Dripping?
Before you start: Oil-based paint and its solvent rinse both give off fumes, so open a window and run a fan pulling air out of the room. Ceilings mean ladder work, and a loaded roller adds weight at the top of your reach, so move the ladder rather than stretching for the last foot. Keep the drop cloth under the tray, not just under the wall.
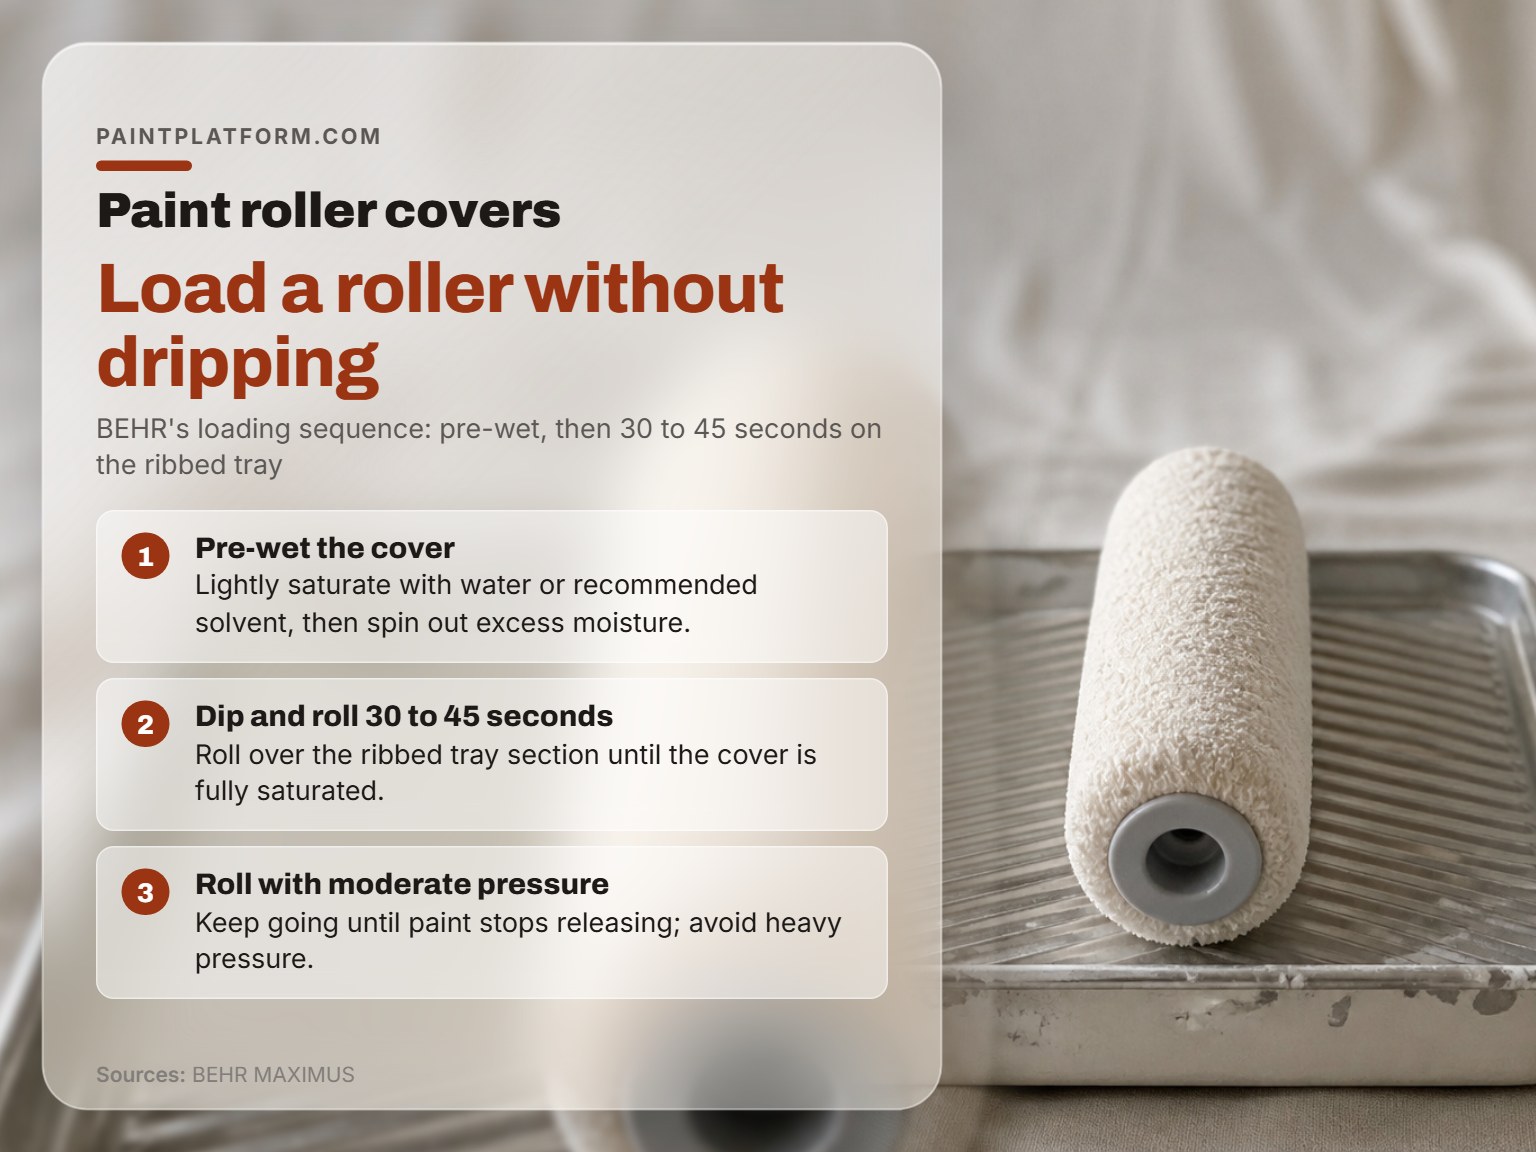
BEHR’s loading sequence is short and specific:
- Pre-wet the cover. Lightly saturate with water for water-based paints, or the manufacturer’s recommended solvent for oil-based paints, then spin out the excess moisture. Skip this and the dry fibers pull water out of the paint on the first pass, which leaves a flat, starved band.
- Dip and roll over the ribbed section of the tray or grid. BEHR’s instructions call for 30 to 45 seconds of this before the cover is fully saturated. Most people stop well short of that.
- Roll with moderate pressure until the paint stops releasing. Heavy pressure crushes the nap against the wall and drives paint into the base of the fibers, where it dries hard.
- Reload and overlap each new section with the previous one, so the wet edges stay wet.
BEHR’s 30-to-45-second window is the part that changes your day. A properly saturated cover lays a longer band before it needs another dip, and the wall stops showing lap marks.
A full walkthrough of the paint roller loading sequence covers the tray geometry and the angle of the first stroke.
A Floppy Frame Will Ruin a Good Cover
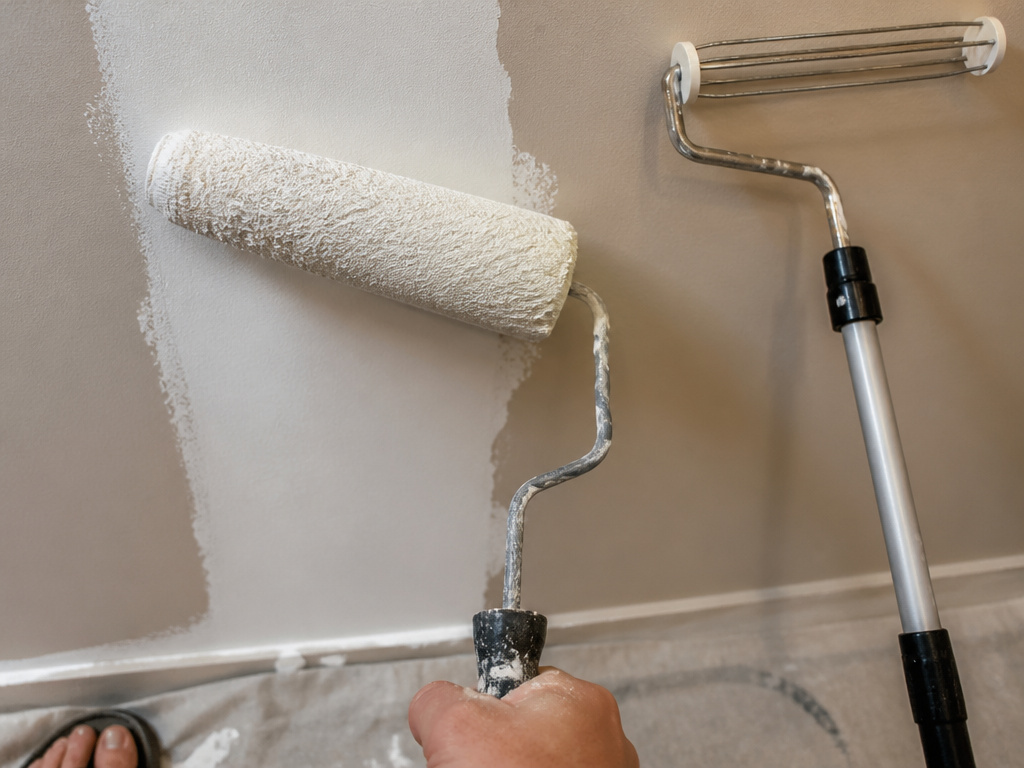
You’re three rungs up, the cover is heavy with paint, and the frame twists under your wrist. The cover walks sideways and lays a wobbly band down the wall.
Benjamin Moore’s frame checklist is short: rigid construction, a threaded handle that accepts an extension pole, and endcap springs that hold the cover in place. That’s the whole specification, and it’s the part people skip when they’re focused on nap.
I did a garage wall with a mid-priced cover on a rigid frame, and the only mess was me, the drop cloth, and one very confused sandal.
Mini vs Standard vs 18-Inch
Purdy builds two mini styles: a wire mini with a smaller wire core and a jumbo mini with a larger traditional core. Purdy also warns that fabric and nap have to match across mini and 18 in. Covers, or the stipple shows a visible seam on the same wall.
That warning is the one nobody repeats. Roll a cabinet face with a 4 in. Knit cover and the surrounding wall with an 18 in. Woven cover, and the two surfaces will read differently under raking light even with the same paint.
Mini rollers on a large wall are the overrated end of this category. They’re precise, but they tire your wrist out quickly.
How Long Should a Roller Cover Last?
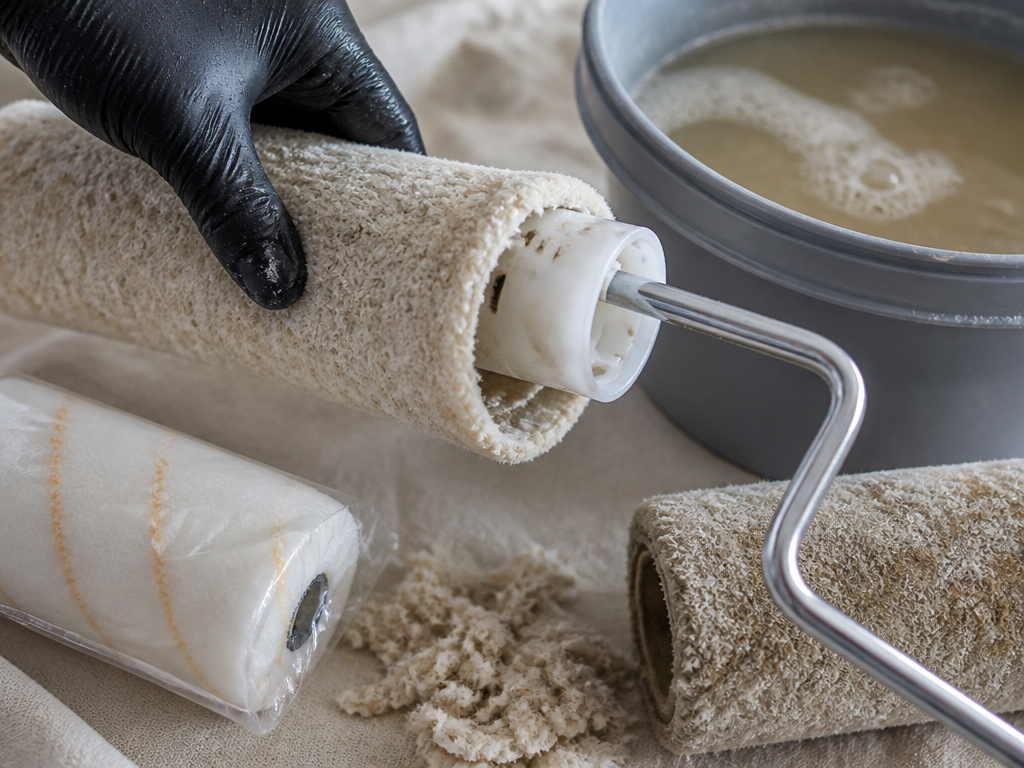
Benjamin Moore puts a quality cover at up to five uses before it starts shedding. Bob Vila’s testers found the Wooster Pro/Doo-Z dense enough to hold up to cleaning and reuse, though it was the most expensive cover in their test.
The variable is how you clean it. BEHR’s routine is specific: pull the cover off the frame immediately after use, wash water-based paint out in warm soapy water, rinse, and dry. For oil-based paint, rinse in the manufacturer’s recommended solvent first, then wash in warm soapy water.
Do not soak the cover in water or solvent. Soaking swells the fabric away from the core, and the cover never sits flat on the frame again.
Where this goes sideways: Leaving the cover on the frame overnight. The paint dries into the base of the fibers, the cover goes hard, and no amount of soaking brings the nap back.
For a short break, Bob Vila found plastic wrap keeps a roller from drying out for up to 2 days. For longer storage, clean it, dry it fully, and wrap it in plastic. The original sleeve works.
When to Throw the Cover Away
When the fuzz doesn’t stop after repeated washes, the cover is done. A shed fiber in a finish coat means sanding back and repainting that section, which costs more time than the cover ever saved.
Bob Vila’s testers found the Wooster Painter’s Choice did not leave a smooth finish on smooth surfaces and left a little lint. It’s built for masonry and ceilings, and using it on a wall is a mismatch rather than a defect.
Frequently Asked Questions
What nap do I need for a smooth wall?
3/8 in. Nap is the standard answer for walls and ceilings, and Purdy’s selector assigns it to both. If you see dimples forming while you roll, Benjamin Moore’s diagnostic is to drop to a thinner nap rather than change your technique.
Is a more expensive roller cover worth it?
Often, yes, but the reason is durability rather than finish. Benjamin Moore notes that inexpensive covers shed fibers and break down after repeated washing, while quality covers last up to five uses. A dense cover that survives cleaning beats a cheap one you throw away after a single room.
Can I use the same cover for primer and topcoat?
Only if the core can take it. Benjamin Moore’s High Capacity cover uses a heavy-duty polypropylene core rated for both water and solvents, which makes it a genuine crossover. A standard plastic core is fine for water-based products but a poor match for solvent coatings, where Pro Roller’s phenolic core is the safer pick.
How do I stop a new roller from shedding lint?
Tape first. Wrap painter’s tape around your palm sticky side out and rub it along the cover before the first dip, which is Benjamin Moore’s recommended method for pulling loose fibers off a new cover. Pre-wetting also helps, since it locks the surface fibers down before they reach the wall.
What size roller cover do I need for a ceiling?
9 in. Cover with a 3/8 in. Nap covers most ceilings, which is Benjamin Moore’s recommendation for standard-size ceiling work. Step up to 3/4 in. If the ceiling has a real texture to it, and expect the three manufacturers to draw that line in slightly different places.
The Bottom Line
If you own exactly one cover, make it a 9 in. Nap. That single cover handles walls, ceilings, and flat doors.
Here’s the threshold that matters more than any chart: run a fingernail across the wall. If you can feel ridges, treat the surface as textured and move up one nap band. If your nail slides, stay where you are.
One honest limit on all of this. The nap charts stop being useful on a surface you can’t classify, and old houses produce plenty of those. When you’re stuck between two bands, buy the thinner one and test a small square in a corner. Repainting a corner is cheap. Repainting a wall because you guessed thick is not.
And if a cover starts shedding after repeated washes, the frame isn’t the problem and your technique isn’t either. The cover was the wrong purchase. Replace it and move on.
