
How to Avoid Brush Marks When Painting: Step-by-Step
This post contains affiliate links. As an Amazon Associate, we earn from qualifying purchases.
To avoid brush marks when painting, load the brush lightly, keep a wet edge, and stop working the paint once it starts to set. Many marks come from too much paint on the brush or a brush run too far before re-dipping (Purdy), while Sherwin-Williams leads with re-stroking partially dried paint and Harwood Services points to unfinished filament, porous surfaces, excessive brushing, too little paint, wrong thinner and fast drying.
The “begun to dry” part is where the physics lives. Paint has an open time: the window after application where the film stays wet and workable, and pushing a brush through it after that window closes drags a permanent record of the bristles into the finish. The American Coatings Association ties poor open time directly to brush marks and visible roller pattern, which is central to how to avoid brush marks when painting.
What follows is the order I’d troubleshoot in: the causes worth checking first, how deep to dip, when thinning helps and when it bites, and what to do about marks that are already on the wall.
Key Takeaways
- Load thoughtfully. Purdy traces most brush marks to too much paint on the brush or a brush run too far before re-dipping, while Harwood Services lists too little paint as a cause.
- Dip depth is genuinely contested. Hempel says don’t dip deeply at all, Purdy says halfway, and one contractor blog says a third.
- Thin only when the product allows it. Hempel prescribes 5-10% thinner for manual application and warns it raises sag risk on verticals, while Sherwin-Williams lists the wrong type of thinner among the causes of brush and roller marks.
- Sand between coats. A light scuff with fine-grit sandpaper knocks down ridges before the next coat.
- Marks you can barely see are finished. Chasing glass-smooth usually makes the wall worse.
What Actually Causes Brush Marks
Ask three coating manufacturers what causes brush marks and you get three different answers.
Brush marks are a flow and leveling failure: the film fails to dry to a smooth surface and holds the applicator’s texture after curing. Sherwin-Williams lists three contributing causes: re-brushing or re-rolling partially dried paint, the wrong roller nap size, and the wrong brush type or size. Fast-drying films trap the pattern before it can level.
That’s not sloppiness on their part. Brush marks are a symptom with several independent triggers, and which one you hit depends on your paint, your tool, and your timing.
Purdy, the brush maker, puts the blame on loading. Its guidance says marks usually happen when too much paint goes on the brush to begin with, or when the brush has been run too far before being dipped again. Sherwin-Williams leads with re-brushing paint that has partially dried, plus wrong brush size or roller nap. Harwood Services goes after the applicator itself: unfinished polyester or nylon filament leaves ridges in the cured film.
| What you see | Most likely cause | First thing to try |
|---|---|---|
| Ridges that follow every stroke | Unfinished or low-grade filament | Swap to a tapered, tipped brush |
| Marks only in the second coat | First coat not dry enough, or re-stroking | Let it dry fully, roll forward fast |
| Marks on a bare, thirsty wall | Porous surface absorbing coating | Prime first |
| Marks that show up on hot days | Film drying faster than it can level | Work smaller areas, keep a wet edge |
Run a fingertip across a cured brush mark and you feel a ridge, not a texture. That ridge is physical height in the film, which is why sanding is part of the fix and technique alone isn’t.
Here’s the contradiction worth sitting with. Purdy says too much paint causes marks. Harwood Services lists too little paint as a cause in its own right. The sources disagree, and the target sits between them: enough load to carry a full stroke, not so much that the heel floods.
How Deep Should You Dip the Brush?
Halfway, one third, or barely at all. Those are the three dip depths the sources recommend, and they don’t agree with each other.
Before you start: Solvent-based and epoxy coatings need real ventilation, and Hempel warns that the strong solvents in epoxy products can physically damage brushes and rollers that aren’t rated for them. Check the tool against the product data sheet before you load it. Wear gloves matched to the solvent, not dish gloves.
| Source | Dip depth | Stated reason |
|---|---|---|
| Hempel | Not deep at all | Overloads bristles and fills the heel |
| Purdy | Halfway | Enough load to carry a full stroke |
| Contractor blog | One third | Less excess to tap off |
Hempel’s reasoning is the most mechanical of the three: dipping deep overloads the bristles and packs paint into the brush heel, where it’s genuinely difficult to clean out later, while Purdy recommends dipping halfway and the contractor blog recommends one third. That’s a tool-lifetime argument as much as a finish argument.
Purdy’s version is halfway into the paint, then a gentle tap on the inside of the bucket, while Hempel says don’t dip deeply at all and the contractor blog recommends one third. The contractor blog at petespropainters.com goes shallower still at one third, tapping both sides against the rim, while Hempel says don’t dip deeply at all and Purdy recommends halfway.
All three agree on the tap. None of them wipe the bristles clean, and wiping is the reflex worth unlearning. A wiped brush is a dry brush, and a dry brush drags.
Whatever depth you pick, the sources disagree on how deep to dip: Hempel says not deeply at all, Purdy says halfway, and the contractor blog says one third. Purdy notes that too much paint per dip is a common cause of runs and sags as well as marks, while Harwood Services lists too little paint as a cause of brush marks, so the dip is only half of how to avoid brush marks when painting. The other half is loading a brush consistently rather than by feel.
Thinning Helps Flow. On a Vertical Wall It Also Helps Gravity.
Hempel’s technical guideline is written for industrial coatings, and it gives an actual number: a product built for airless spray may need 5 to 10% thinning to reach optimum flow under a brush or roller, though Sherwin-Williams lists the wrong type of thinner among the causes of brush and roller marks.
That number comes with two costs the guideline states plainly. Thinning lowers volume solids, so you have to apply more paint to reach the specified film thickness. And it makes the paint run or sag more easily on vertical surfaces.
Where this goes sideways: Thinning for flow on a wall or a door casing. Hempel states the trade-off outright: the same thinner that fixes your brush drag also increases run and sag on verticals. Fix the loading before you open the thinner.
This is where the sources genuinely split, and it’s worth knowing which camp you’re in. Hempel prescribes thinning as the remedy for manual application. Sherwin-Williams lists the wrong type of thinner among the causes of brush and roller marks. Harwood Services sits in the middle: it names wrong-type thinner as a cause, but also says to use a recommended thinner if the coating is too thick.
The reconciliation is boring and contested. Hempel treats thinning as a controlled adjustment with a stated maximum, while Sherwin-Williams lists the wrong type of thinner among the causes of brush and roller marks. Hempel is explicit that for multi-component products the thinner goes into the mixed product, never into the individual components, and that the maximum percentage must not be exceeded.
When thinning is the wrong fix
Three situations where I’d leave the can closed. Vertical surfaces, where the sag risk climbs with every percent. Consumer wall paint that isn’t rated for thinning at all. And any situation where the real problem is that you’re brushing paint that has already started to set.
Hempel also sells purpose-built additives rather than plain thinner. Levelling of Hempathane and Hempaxane improves with Hempel’s brush and roller agent 99140 at typically up to 5% (v/v). Pinholes and bubbling in Hempathane and Hempadur during stripe-coating can be reduced with 2% (v/v) of Hempel’s Brush Agent 99840. Those are product-specific numbers from the data sheets, not general rules.
If you’re working with water-based paint rather than an industrial coating, the principles of thinning paint are different and the tolerances are looser.
Long Strokes Win on Walls, Short Strokes Win on a Door

Purdy splits its own advice in two, and the split is the useful part.
Longer, full strokes give smooth coverage with fewer brush marks and fewer breaks in the cut line, though Purdy says a shorter stroke is the only option and works well in bathrooms, on six-panel doors, in closets and similar tight areas. But in bathrooms, on six-panel doors, in closets and similar tight areas, Purdy says a shorter stroke is the only option and works well.
Hempel lands in the same place from a different direction. Distribute the paint into an even, uniform layer with long light strokes, then use as few strokes as possible to get a smooth surface. Several light strokes transfer most of the paint. Excessive pressure doesn’t help and does hurt.
The angle matters too. Hempel specifies holding the brush at about 45 degrees to the surface during stroking, and switching to 90 degrees for the final touch on an uneven surface, though other sources focus on how to avoid brush marks when painting through dip depth and stroke length instead.
I’d rather have a properly tapered, flagged and tipped brush in my hand than any technique trick. Purdy makes good ones, and the angled tip does the cut-in work that a square brush makes you fight for. Two thin coats beat one fat coat every time, and that single habit kills more marks than any amount of wrist adjustment.
The contractor blog adds a practical frame: work in manageable sections, typically four-foot-wide strips, so you can blend strokes before the paint sets. That’s the same idea as a wet edge, just expressed as a tape measure.
If your strokes are breaking up or the cut line is wandering, the problem is usually brush technique rather than the paint.
Why Your Second Coat Lifts the First
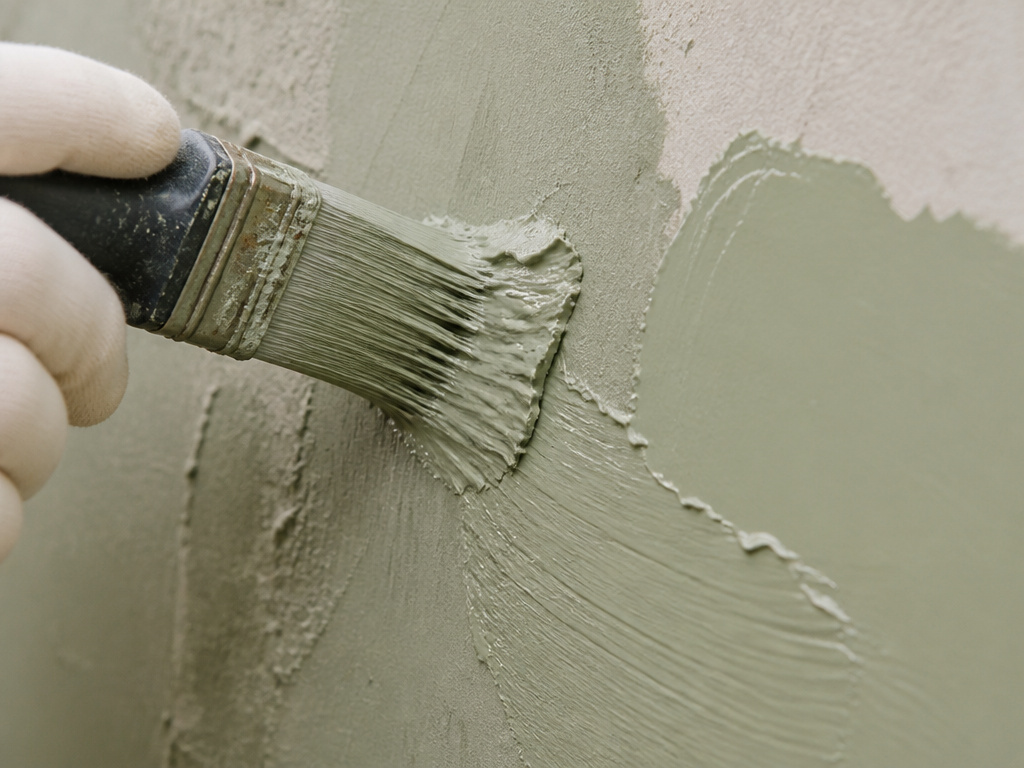
Open time is the term the coatings industry uses, and it explains more failures than any technique tip.
The American Coatings Association defines it as the time after applying a single coat where the film remains wet and workable, which is separate from full cure time or the time before a second coat goes on. Poor open time shows up as an inability to blend two areas of a coat smoothly, and it correlates with poor leveling that leaves brush marks or a visible roller pattern. Paints with poor open time can also show roller picking and poor drag between the drying film and the applicator.
The open time of architectural coatings is measured in a couple of established ways, and the paper describing them is worth reading if you want the underlying science rather than the folklore.
The wet-edge test, briefly
The wet-edge method in that paper adapts ASTM D7488, drawing two vertical parallel lines down a wet film on a Leneta BK chart instead of six independent X marks. The film goes down with a square bar at a 5-mil gap. Then at one-minute intervals the wet film gets brushed over with 15 strokes in one direction, with no fresh paint on the brush. The wet edge open time is the last point at which the vertical lines can no longer be seen.
The dry-to-touch test is adapted from ASTM D1640 and uses 3-mil drawdowns, with a gloved fingertip pressed at one-minute intervals. Dry to touch means no finger mark is left.
Worth knowing: the study authors themselves describe the ASTM wet-edge and dry-to-touch methods as possibly subjective and as not translating well to actual paint application. They proposed a new brush-workability method and validated it against real-world application with a double-blind contractor study. So the standards exist, and the people who use them are still arguing about them.
Hempel’s practical version of all this is blunt: the underlying layer has to be dry enough to overcoat, or it may roll off, while Sherwin-Williams lists re-brushing partially dried paint as a cause of marks. And with physically drying paints, roll quickly forward, because the preceding coat can soften and dissolve into the new one if you work it too extensively.
That’s one mechanism behind Sherwin-Williams listing re-brushing partially dried paint as a cause, alongside Purdy’s overloading and Harwood Services’ unfinished filament. You aren’t smoothing a mark at that point. You’re lifting a half-set film and folding it back over itself.
On temperature, the sources don’t line up neatly either. A contractor blog states ideal conditions as 65 to 75 degrees Fahrenheit with 40 to 50% humidity. The coatings paper ran its lab tests at 75 degrees Fahrenheit and 50% relative humidity, which is a test condition rather than a stated ideal. Treat the blog figure as a working rule and the lab figure as what it is.
Keeping a wet edge and knowing where your next stroke lands is the whole game here. The same logic governs lap marks, which are what happens when a wet edge dies mid-wall.
The Tools That Actually Matter
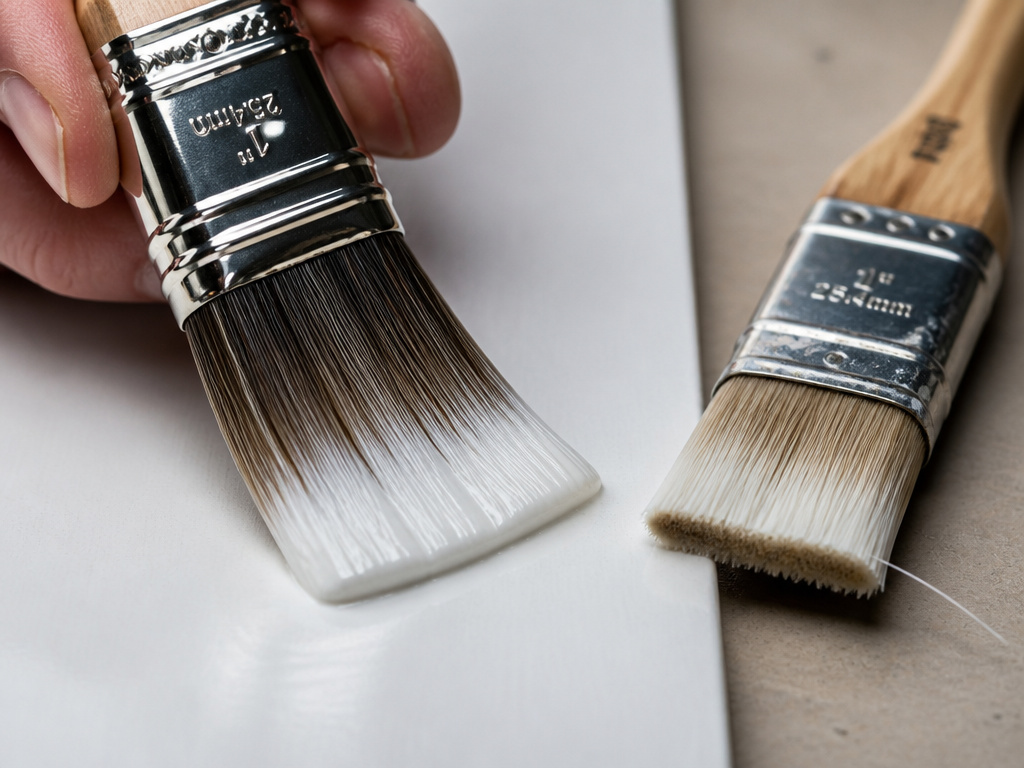
A cheap brush sheds a bristle into the first coat, and you find it three days later fossilised in the finish.
Purdy sells eleven different categories of brush, sorted by finish, surface and job. That’s more categories than most people need, and it tells you something useful: brush construction is specific enough that one brush doesn’t cover everything.
Harwood Services is the most specific source on filament quality, while Purdy focuses on dip depth and stroke length and Sherwin-Williams on brush type and size. Ridges in a dry film often come from poor-quality applicators, and if the polyester or nylon filament isn’t finished properly it will leave marks. Brushes should have tapered bristles, properly flagged and tipped. That’s a manufacturing detail you can check with your thumb before you buy.
Sherwin-Williams adds the other half: wrong brush type or size and wrong roller nap size are both listed causes of marks.
What to look for in the bristles
Tapered, flagged, tipped. Those three words cover it. A tapered bristle is thinner at the tip, and that thinness lets it release paint instead of holding it. Flagged means the tip is split into fine flags that carry paint. Tipped means the very end is rounded rather than cut flat.
A brush with flat-cut, untapered filament behaves like a squeegee with gaps in it. You’ll see the streaks in the first minute.
Hempel adds a compatibility note that catches people working with two-part coatings. Use only tools suited to the specific paint type and solvent, because some rollers and brushes are damaged by the strong solvents in epoxy coatings. A brush that survives latex may not survive an epoxy.
On primer, Hempel is unambiguous: use a brush rather than a roller, because a brush works the primer into the substrate, while Sherwin-Williams treats roller type and nap selection as a general fix with no primer-specific brush preference. Sherwin-Williams treats roller nap selection as a general fix with no primer-specific preference, so the two aren’t in conflict so much as talking about different jobs.
For choosing between brush styles and sizes, choosing a brush comes down to matching the tool to the finish rather than buying a set.
Rollers have their own failure modes, and roller marks follow a different set of rules. Purdy’s roller guidance is worth keeping: the tray should never be more than one-third full, the entire cover should be loaded with several slow passes, walls get painted top down with an N pattern inside a three-foot square, and you always work from the unpainted area into the painted one.
The part nobody mentions: Hempel states that once pot life has expired, brush and roller fleece must be discarded and replaced, or thoroughly cleaned, before you keep going. Continuing with spent applicators is a documented failure path, and it usually shows up as texture you can’t explain.
Fixing Brush Marks You Already Have
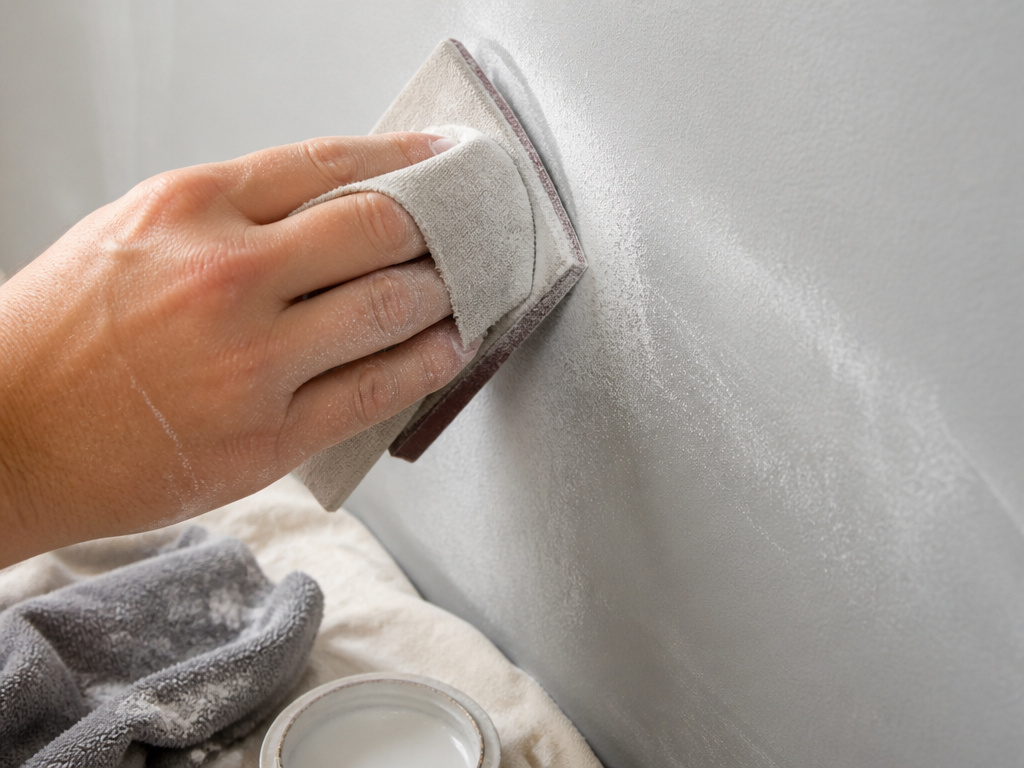
Adding more paint is the first thing to try and the last thing that works.
The light hits the wall at an angle and every stroke shows. That’s the moment the instinct is to flood the surface, which just buries the ridge under a wet coat that will sag in the same pattern.
Do it in this order instead.
- Let the coat cure fully before you touch it. Sanding a film that’s still soft smears it and clogs the paper in seconds.
- Scuff the marks back with fine-grit sandpaper. It knocks the ridge down without cutting through to the substrate.
- Wipe the dust off with a damp cloth. Sanding dust left in place gets trapped in the new coat and reads as grit, not as a smooth repair.
- Spot-prime anywhere you broke through. Harwood Services lists a too-porous surface as a cause in its own right, and an unprimed patch drinks the new coat at a different rate than the surrounding wall.
- Recoat thin, not heavy. Purdy’s touch-up guidance is to reduce the original paint by about 25 percent for the repair coat, applied with the same method as the original.
That last point about matching the original method is doing more work than it looks like. Purdy also says touch-up paint should come from the original batch and go on under similar temperature and humidity conditions as the original coat. Different batch, different conditions, different sheen, and the patch shows even when the texture is perfect.
Harwood’s version of the same advice: smooth the surface by sanding before repainting, or the brush marks will show through the new coat. A contractor blog adds that light sanding with fine-grit paper removes dried brush marks, which is the same operation with a different grit number.
Skip this if: The marks are only visible when you put your nose against the wall. From standing height, a slight brush texture disappears into the wall. I stopped chasing glass-smooth years ago, and the rooms didn’t get worse.
If the marks are under the topcoat
Sanding the topcoat won’t fix a ridge that lives in the primer. You’ll flatten the topcoat and leave the bump. The fix is to sand through, prime the bare spot, and rebuild. Annoying, but it’s the only version that holds.
For trim specifically, the tolerance is tighter than on a wall because the light rakes across it. Trim brush marks need a different approach to loading and stroke length than a flat wall does.
If what you’re actually fighting is a streaky, uneven film rather than distinct ridges, that’s a slightly different problem, and paint streaks come from a different set of causes.
Frequently Asked Questions
Does sanding really remove brush marks?
Yes, if the film has cured. Fine-grit paper knocks the ridge down and the texture levels out. If the paint is still soft, sanding smears it instead. Harwood Services also warns that sanding before repainting is essential, because unsanded marks will telegraph through the new coat.
Is it better to thin the paint or load less?
Load less first. Thinning changes the product’s solids content and, per Hempel, increases the risk of runs and sags on vertical surfaces. Adjusting how much paint sits on the brush costs nothing and fixes the most commonly cited cause.
Why do brush marks show up only in the second coat?
Usually because the first coat wasn’t dry enough to overcoat. Hempel notes the underlying layer can roll off if it’s still soft, and Sherwin-Williams lists re-brushing partially dried paint as a direct cause of marks. Give the first coat more time.
Do expensive brushes actually prevent brush marks?
Construction matters more than price. Harwood Services points to tapered, flagged and tipped bristles as the thing that prevents ridges, and to unfinished polyester or nylon filament as a cause of them. A well-finished inexpensive brush beats a badly finished expensive one.
Can I paint over brush marks instead of sanding them out?
You can, and they’ll still be there. Harwood Services states plainly that brush marks will show through the new coat unless the surface is sanded first. A heavy coat of paint doesn’t fill a ridge, it just makes it glossier.
The Bottom Line
One threshold worth carrying with you: if a mark survives a fine-grit scuff and a thin recoat, it was never a technique problem. It was a tool problem or a drying problem, and no amount of wrist adjustment will fix either.
The tool problem has a simple test. Run your thumb across the bristle tips. If they feel like a flat-cut broom, you’ve found your ridges.
The drying problem is harder, because it depends on your room, your paint and your timing rather than on anything you can buy. That’s why the wet edge matters more than the brush angle, and why the people who beat this consistently are the ones working in four-foot strips instead of trying to finish a wall in one heroic pass.
Start with the load. One stroke at a time, and let the first coat actually dry before you judge it.
