
How to Remove Paint From Metal: 6 Steps
This post contains affiliate links. As an Amazon Associate, we earn from qualifying purchases.
To remove paint from metal, strip the topcoat down to the electro-deposition (ED) primer and stop there. Toyota’s repair bulletin specifies 220-grit on a dual-action random orbital sander for the color coats, then 400-grit on the primer, leaving at least 0.5 mil (12 to 13 microns) of that primer intact.
That 0.5 mil figure is the whole job in one number. The ED primer is the panel’s factory corrosion barrier, applied in a charged bath before a single color coat exists. Sand through it and the task changes shape. Now you are rebuilding a corrosion barrier from bare steel: Toyota’s bulletin calls for a metal conditioner, then a conversion coating, then a two-part epoxy primer, while Fender Bender warns against metal conditioners on blasted surfaces and recommends going straight to epoxy or self-etch primer. Knowing how to remove paint from metal without cutting into that barrier is part of the same job.
What follows is the sequence I would hand someone standing in front of a panel with a sander in one hand and a can of stripper in the other: how to pick the method, what the grits actually are, where the published procedures contradict each other, and the window before bare metal starts to bloom orange.
Key Takeaways
- Stop at the ED primer. Toyota’s bulletin wants at least 0.5 mil (12 to 13 microns) left on the panel after sanding.
- 220 then 400 grit, both on a dual-action random orbital sander. Coarser is not faster, it just costs you primer.
- Chemical stripper has a temperature window of 65 to 90 degrees F (18 to 32 degrees C) and a maximum working area of 3 by 3 feet.
- Bare metal gets 30 minutes before Axalta’s procedure requires you to sand it again.
- Non-affected panels get blended, never stripped. Toyota does not authorize paint removal on panels outside the inspection report.
Which Paint Removal Method Fits Your Panel?
Three methods show up in the published procedures, and each one has its own way of ruining your afternoon. Pick by panel thickness and by how much of the factory coating has to survive when you weigh a how to remove paint from metal decision.
Chemical stripping, abrasive sanding, and media blasting all remove paint from a metal panel. Each carries a distinct failure mode: stripper attacks non-metal substrates, coarse abrasives cut base metal along with paint, and uncontrolled blasting deforms thin panels. The right choice depends on panel thickness, substrate, and how much factory coating must remain.
| Method | Best For | Main Risk | Named By |
|---|---|---|---|
| Chemical stripper | Full panels, weld zones | Caustic burns, eye damage | Axalta SOP |
| DA sanding, 220 grit | Topcoat down to ED primer | Sanding through the primer | NHTSA TSB |
| Media blasting | Flat areas, thick coatings | Panel deformation | Axalta, with warning |
Axalta’s strip panel procedure lists chemical stripper as the primary method and treats media blasting as an alternative that “can easily lead to deformation of the panel.” Toyota’s bulletin goes the other way entirely: it specifies mechanical removal with a dual-action sander at 220 grit and never mentions chemical stripper at all, while Axalta’s SOP lists chemical stripper as the primary method.
The trade press splits the difference. Fender Bender notes that chemical stripper is preferred for weld zones and to avoid removing metal, while a 5-inch high-speed grinder is the fastest route for large flat areas before filler.
If you are shopping the chemical route, the range of paint removers for metal splits into solvent-based and citrus-based families, and they behave nothing alike on a factory finish.
What the Toyota Bulletin Actually Requires
The NHTSA technical service bulletin behind this procedure is written for a paint delamination repair, and it is unusually specific about where the stripping stops. On an affected panel, the topcoat comes off 100 percent of the metal panel’s continuous surface area, down to the ED primer. Not 90 percent. Not “the bad part.”
That continuity requirement is where most people get ambushed. If any pillar is listed as affected, the entire continuous panel gets repaired. An affected A-pillar means stripping all the way back through the quarter panel. An affected quarter panel means stripping forward to the A-pillar.
Panels that are not on the inspection report are not authorized for repair at all. They can be blended, but the OEM paint stays put.
| Source | Coarse Step | Finish Step | ED Primer Rule |
|---|---|---|---|
| NHTSA TSB | 220 grit, DA sander | 400 grit, DA sander | At least 0.5 mil stays |
| Axalta SOP | P120 to P180 | P240 to P320 | Not stated |
| Fender Bender | 120 to 150 grit on factory primer-surfacer | Fine scratches, not coarse cuts | E-coat can be left |
The labor allowances in the same document tell you how big this gets. Stripping a rear hatch runs 1.0 hour. A trunk lid runs 1.5 hours. Those are book times for a full panel, not touch-up.
Chemical Stripper: What the Label Numbers Actually Mean
Twenty minutes is the first checkpoint on a Rust-Oleum Auto Stripper job, not the finish line. The technical data sheet says the finish has to blister or liquefy completely, and that takes anywhere from 20 to 45 minutes or longer depending on what is on the panel.
The full set of limits from that sheet:
- Temperature: apply between 65 and 90 degrees F (18 to 32 degrees C), out of direct sun and away from strong breezes.
- Area: no larger than 3 by 3 square feet per application.
- Direction: brush one way only, and start at the bottom on vertical surfaces.
- Removal: a flexible plastic scraper or steel wool takes the loosened finish off.
That bottom-up instruction is not fussiness. The vapors are heavier than air and can accumulate near the floor. You can watch the finish blister or liquefy as the bond lets go, which shows the chemistry has done its work.
Before you start: Chemical strippers are caustic and can cause severe skin burns, respiratory problems, and partial or complete blindness. Wear solvent-resistant gloves and chemical splash goggles, and work outdoors or in an open garage. If the panel may carry lead paint, use a NIOSH-approved respirator, clean with a HEPA vacuum and wet mop, and call 1-800-424-LEAD before you touch it.
Rust-Oleum is explicit that Auto Stripper (SKU 248875, one quart) is not for fiberglass, plastics, or any synthetic surface. Axalta’s procedure does not carry that caveat, which is a gap worth knowing about before you point a stripper at a bumper cover.
Common mistake: Slapping stripper on the whole panel at once. Mask the seams and trim openings first, because bleed-back stripping will lift the new finish you just sprayed along an edge.
Try it on scrap first. A spot test in an inconspicuous area tells you whether the substrate is going to fight back.
How Do You Strip a Panel Without Warping It?
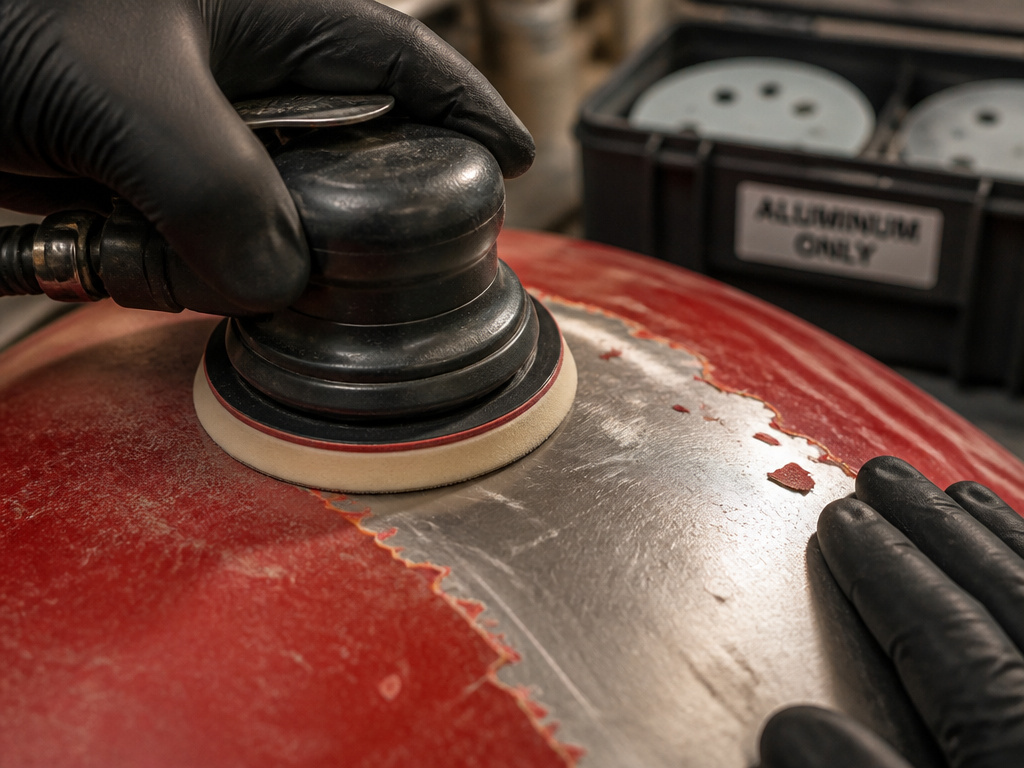
Heat is the enemy, and it comes from two directions: the abrasive and the blasting media. A 5-inch high-speed grinder removes metal as well as paint, which is why the trade press says the days of the old 9-inch grinder with a 16-grit disc are history. You can hear the note change when a sander stops cutting paint and starts cutting steel.
Closed-coat abrasive discs are another trap. They clog immediately and then you are just polishing a hot, gummed-up circle.
Blasting gets two very different assessments from the sources: Axalta treats media blasting as only an alternative that can easily lead to deformation of the panel, while Fender Bender holds that self-contained blasting with plastic, soda, or nutshell media removes very little base material and that air pressure lets a technician control how deep the cut goes.
The sources disagree: Axalta warns that media blasting can easily lead to deformation of the panel, while Fender Bender says self-contained blasting with plastic, soda, or nutshell media removes very little base material and that air pressure lets a technician control how deep the cut goes.
Aluminum Is a Separate Job
Never use an abrasive on aluminum that has previously touched steel. Steel particles embed in the aluminum surface and galvanic corrosion starts there.
The fix is a separate small toolbox holding aluminum-only abrasives, scrapers, discs, and cut-off wheels. Not a shared drawer. A separate box.
For aluminum repairs, Fender Bender recommends a vinyl wash primer, since the vinyl resin gives better adhesion to that substrate. A safe stripper for aluminum matters too, because the wrong chemistry will etch the surface you are trying to protect.
Blasting Leaves Pits, and Pits Change the Primer
Blasting leaves small pits in the metal, and that detail rewrites the next step. Fender Bender’s warning is blunt: never use metal conditioners on a blasted surface, because acid cannot be removed from those pits and the metal will rust soon after. Epoxy or self-etch primer instead.
Where this goes sideways: Self-etch primer contains acids, phosphates, or chromates. Apply it in a properly vented area, ideally a paint booth, with respiratory protection. A garage with the door cracked is not that.
Fair warning: this is the how to remove paint from metal step where a shortcut costs you the whole panel.
The 6-Step Sequence, Start to Finish
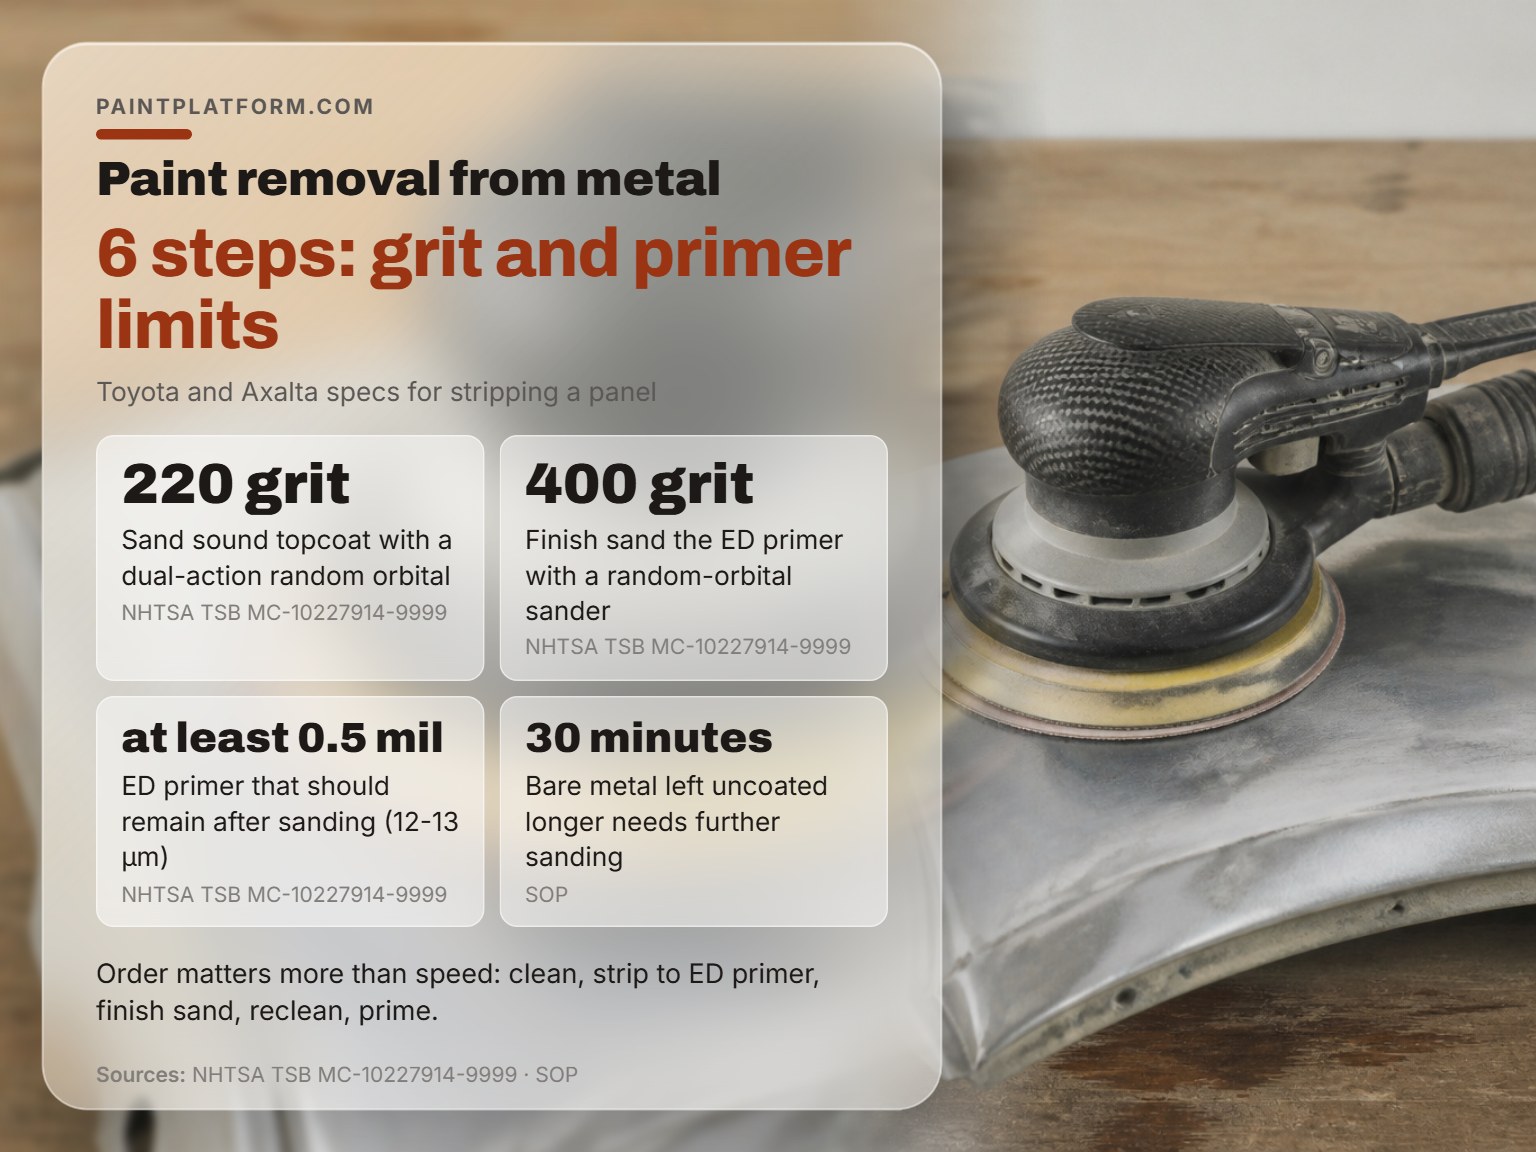
Six steps, in this order, and the order matters more than the speed. This sequence merges Axalta’s strip panel procedure with Toyota’s grit and primer specifications.
- Confirm which panels are affected and mask everything else. Stripping a panel that should have been blended means you now owe the owner a blend and a color match. Mask seams and trim openings before any stripper comes out of the can.
- Clean the surface with a silicone remover or degreaser. Axalta’s first step exists because stripper will not cut through wax, road film, or silicone residue evenly. Skip it and you get patchy lift and a stripper that stalls halfway.
- Remove the topcoat down to the ED primer. On a delaminated panel you can start with a pressure washer or compressed air aimed at a loose paint edge, and plastic straight-edge razor blades in a holder help lift topcoat. For sound adhesion, sand with 220 grit on a dual-action random orbital. Going coarser cuts into the primer you are trying to preserve.
- Finish sand the ED primer at 400 grit. Toyota specifies a random orbital here too. This step knocks down the 220 scratches without removing the primer film, and it is where a heavy hand does the most damage.
- Reclean, blow off, and tack the surface. Axalta calls for a second degrease followed by blowing and tacking. Dust left in a scratch can show up later under the new finish.
- Prime immediately and overcoat within the window. Axalta’s rule is that bare metal left uncoated more than 30 minutes needs further sanding. Handle bare areas with gloves, and get the etch or epoxy primer on while the surface is still clean.
Where the Sources Disagree
Two of the three procedures I trust most flatly contradict each other on bare-metal prep, and pretending otherwise would be dishonest. Here is who says what.
Metal conditioner before priming. Toyota’s bulletin instructs technicians to treat bare metal with a metal conditioner, follow it with a conversion coating, then prime with a two-part epoxy primer. Fender Bender says the opposite for blasted surfaces: skip the conditioner, because acid trapped in the blast pits causes rust, and go straight to epoxy or self-etch primer. Note the qualifier. The trade-press warning is specifically about post-blasting texture, which is a narrower claim than “never use conditioner.”
How much panel to strip. Toyota wants 100 percent of the continuous surface area, pillar to quarter panel. Fender Bender’s closing line is “only remove the minimum amount of coating to properly conduct the repair,” and it notes that selective removal has become common with E-coat and galvanized panels. Both positions are defensible. Toyota’s is written to satisfy a warranty auditor. Fender Bender’s is written for a shop trying not to create new corrosion.
Whether chemical stripper belongs on a metal panel at all. Axalta lists it as the primary method. Fender Bender describes the same products as caustic materials that cause severe skin burns, respiratory problems, and partial or complete blindness. Those are not incompatible statements. The hazard is real and the method still works.
How long to leave it on. Rust-Oleum says 20 to 45 minutes or longer, with a test at the 20-minute mark. Fender Bender says most products come off more easily if left until almost dry, and that multiple applications may be needed over a factory finish. Test at 20 minutes, then judge.
I have a scraper story that fits here. A sharp carbide scraper cleared a flaking window sill faster than I ever managed with a gooey stripper and a plastic putty knife. Pull it toward you, though, because the wrong angle leaves marks you then have to sand out anyway. On metal, the same tool earns its keep on already-loose edges, and the TSB’s plastic razor blades do similar work. Fender Bender notes that loosened finish may be removed with a flexible plastic scraper or steel wool, which tells you how much the answer depends on what the paint is already doing.
For wood trim, the logic runs closer to a heat gun for paint removal than to anything in the metal playbook, because you are protecting a soft substrate instead of a primer film.
Priming Before the Metal Flash-Rusts
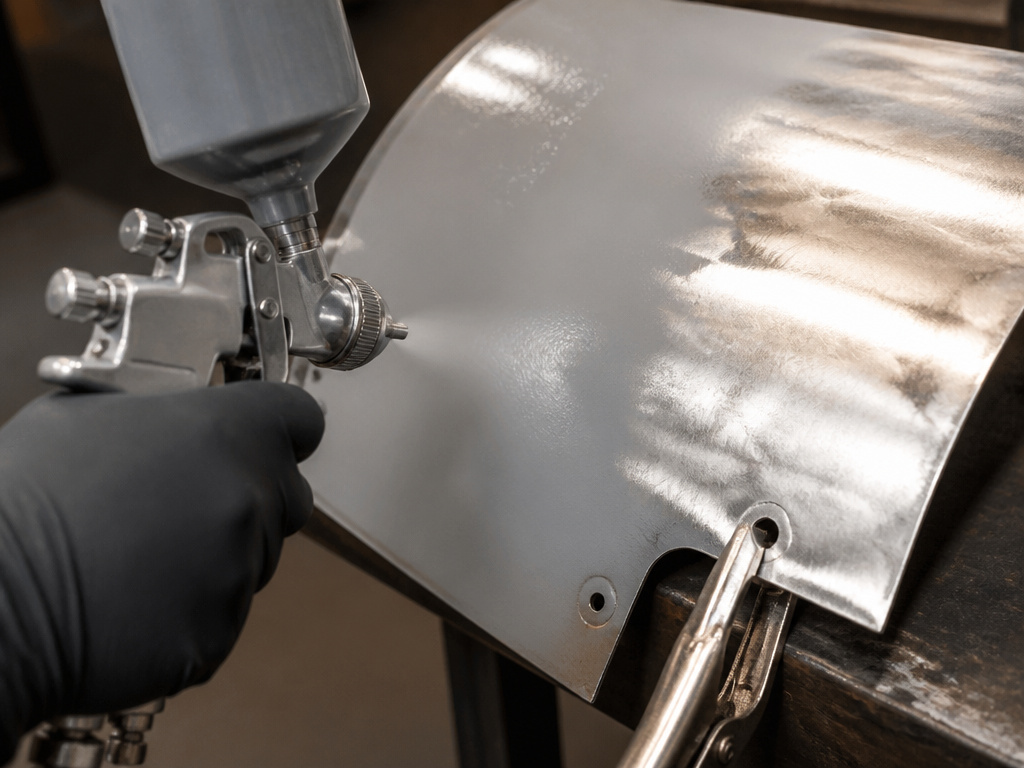
Bare metal starts working against you the moment the sander stops. Axalta’s 30-minute rule is the tightest published number I found, and it is not generous. Blow past it and the procedure requires you to sand the surface again before primer.
The primer choice depends on the substrate and the topcoat system. Rust-Oleum lists 249319 Clean Metal Primer, 249321 Primer Sealer, and 249410 Engine Primer as compatible options under Auto Stripper, plus the Stops Rust line. Axalta specifies an etch primer or epoxy primer surfacer, mixed and applied immediately.
Think of it like building a sauce. You add the primer coat while the pan is still hot, not after it has cooled. Once etch primer has flashed off, it has to be overcoated within the recommended window with a surfacer or filler, or the adhesion chain breaks.
If you are dealing with a rattle-can layer rather than a factory finish, the approach shifts, and removing spray paint from metal covers the solvent choices that actually cut an aerosol film. Same for the water-based case: removing latex paint from metal behaves differently again, because latex skins over instead of dissolving.
The part nobody mentions: Flash rust does not announce itself. It shows up as a dull orange bloom in the low spots and pinholes first, and it will sit under your primer looking like nothing until the topcoat fails.
Rule of thumb: If the panel is going to sit overnight, prime it tonight. Sanding it again in the morning costs more than the primer did.
A quick word on the chemical-versus-citrus question, since it comes up constantly: a citrus-based stripper behaves differently from a solvent-based product, so match the product to the coating. Match the product to the coating, not to your mood.
If you are deciding between a dedicated metal product and a general one, paint stripper for steel is a different formulation question than aluminum.
Frequently Asked Questions
Can you remove paint from metal without sanding?
Yes, with chemical stripper or media blasting. Axalta lists chemical stripper as the primary removal method, and Rust-Oleum Auto Stripper handles acrylics, lacquers, polyurethane, and baked enamel on common metals. Toyota’s bulletin takes the mechanical route instead, using a dual-action sander at 220 grit. Both paths end at the same place: a clean surface ready for primer.
How do you know when to stop sanding?
Stop when you reach the ED primer and keep at least 0.5 mil (12 to 13 microns) of it on the panel. The primer reads as a uniform dull layer under the color coat. Once you see bare steel, you have gone too far and the panel now needs conditioner, conversion coating, and a two-part epoxy primer.
Does paint stripper damage aluminum?
It depends on the product. Rust-Oleum Auto Stripper is described as non-corrosive to common metals under normal exposure time, but the same sheet says it is not for fiberglass, plastics, or synthetics. Aluminum also needs its own abrasives, kept separate from anything that has touched steel, because embedded steel particles cause galvanic corrosion.
How long can bare metal sit before priming?
Thirty minutes per Axalta’s strip panel procedure. Past that, the surface needs further sanding before primer goes on. Rust-Oleum’s guidance is simpler: prime as soon as possible to prevent flash rust.
Why does the whole panel need stripping if only one spot is bad?
Toyota’s bulletin requires removal of the topcoat from 100 percent of the affected panel’s continuous surface area, and if a pillar is affected, the entire continuous panel gets repaired. Shops that follow the minimum-removal approach disagree, and both positions are documented.
The Bottom Line
Here is the trigger I would give anyone: if a fingernail cannot lift the paint edge and it is not peeling in sheets, do not strip the panel. Scrape the loose bits, sand, prime, and move on. I spent far longer than I expected stripping a dresser that had only a few flaky spots, and the second one I did went much faster.
Save the full strip for panels that are actually on an affected list, or for paint that is coming off in sheets rather than patches.
The other thing worth saying out loud: the sources do not agree, and anyone who tells you there is one correct procedure is selling something. Toyota writes for a warranty auditor. Axalta writes for a refinish system. The trade press writes for a shop trying to finish by Friday. Read all three, then look at the panel in front of you.
Go scrape something. Badly.
