
How to Paint Rocks for Beginners: Step-by-Step
This post contains affiliate links. As an Amazon Associate, we earn from qualifying purchases.
Here’s how to paint rocks for beginners: pick a flat, smooth stone 1.5 to 3 inches across, scrub it with warm soapy water, and let it dry overnight. Paint one or two thin acrylic base coats, add the design with paint pens, then seal with two or three light coats of clear spray.
The overnight dry is the step that quietly decides whether the rest survives. A rock that’s still damp under the paint bubbles and peels, and the damage shows up after you’ve already given it away.
What follows is the full how to paint rocks for beginners sequence, plus the four spots where the published guides genuinely disagree and you have to pick a side for yourself.
Key Takeaways
- Dry overnight, not damp. Paint over a rock that’s still wet underneath and it bubbles and peels, sometimes a week later.
- 1.5 to 3 inches is the size the Kindness Rocks Project recommends for message rocks.
- Two thin coats beat one thick one. A thick base that’s still soft will lift when you draw on it.
- Seal outdoors or by an open window. Two or three light coats, more if the rock lives outside.
- The first step is contested. UNC seals before painting, acrylicmarkers.com brushes a base coat, Artistro skips primer on smooth stone.
Which Rocks Actually Take Paint?
Smooth, flat, dense, and pale. Those four words decide whether the paint goes on clean or fights you the whole way.
A smooth stone feels cool and slightly heavy in the palm. A bad one sheds grit on your thumb before you’ve picked up a brush. Artistro’s guide says the same thing in plainer terms: smooth stones paint better, dense stones resist absorbing the acrylic, and light stones keep colors from going muddy.
Flat, smooth river rock holds paint because the surface has few pores for pigment to sink into. Dense stone resists absorption. Porous stone drinks the acrylic and dulls the color. Crumbly, sandy or rough stone rejects paint entirely, and dark stone shifts every color painted over it, which is why pale stones are the safer default.
Size matters more than most beginners expect for how to paint rocks for beginners. The Kindness Rocks Project suggests 1.5 to 3 inch stones for message rocks, which is roughly palm-sized and big enough for a short word.
Where they come from is the one place the sources actually argue. The Kindness Rocks Project suggests buying smooth river rocks from a craft store, garden center, or landscape supplier for city painters. UNC’s guide is blunt about the alternative: do not take rocks from public parks.
Things to leave in the bin:
- Crumbly, sandy, or very rough stones, which reject paint (acrylicmarkers.com)
- Very dark rock, which distorts the color of the paints (Artistro)
- Anything you’d have to dig out of a park bed (UNC Alumni Association)
Buy the rocks. A bag of smooth river stone costs less than the afternoon you’d spend hunting for one.
If smooth stones aren’t available, acrylicmarkers.com suggests casting your own from concrete or shaping them from air-dry clay, then letting them cure completely before painting. Artistro adds that cement suits outdoor pieces while gypsum suits indoor work.
The Prep Step Everyone Rushes (and What It Costs You)
Prep happens a day or two before you paint, not the morning of. UNC’s handout says to wash and dry your rocks even if they look clean, and to start that prep a day or two ahead of the project.
Warm soapy water and a brush, then a rinse. Then wait. Acrylicmarkers.com is specific about the reason: paint on a damp rock bubbles and peels. Damp stone also looks darker than dry stone, and it feels cool against the back of your hand until the moisture is gone.
Before you start: Clear spray sealer goes on outdoors or in a ventilated room, and the mist travels farther than you think. Exacto knives slip off wet painter’s tape, so cut away from your fingers on a cardboard mat. Aerosol cans stay well away from anything hot.
While the rocks dry, sketch the design on paper first. UNC recommends testing or drawing designs on paper before committing them to stone, and it saves you from ruining a rock on a bad idea.
Base Coat: Seal First, Paint First, or Skip the Primer?
Ask three people how to start a rock and you’ll get three different first steps. All three work. They solve the same problem from different angles.
| Source | First step | Why |
|---|---|---|
| UNC Alumni Association | Seal with Mod Podge, clear glaze spray, or a coat of neutral paint | Rock is porous and would otherwise absorb lots of paint |
| acrylicmarkers.com | Brush on one or two thin coats of acrylic paint | A solid base stops dark or porous rock from dulling colors |
| Artistro | No primer on smooth, even stone; prime chipped stone only | A smooth surface takes paint without help |
UNC’s version is the most flexible. For the initial sealer you can use a coat of paint in a neutral color (black, white, or gray), or the same color as the intended design. That single coat does double duty as sealer and background.
Acrylicmarkers.com matches the base to the design instead: white or pale under bright work, black under Halloween and night designs. Any water-based acrylic works, which is why the best paint for rocks list for this job stays short.
Making a Homemade Primer
Artistro’s recipe for a chipped stone is glue and water added to acrylic paint in equal proportions, stirred until it’s even, then brushed on like any other primer.
Whichever route you take, watch the thickness. Acrylicmarkers.com warns that a thick base coat still soft underneath will lift when you draw on it. Two thin coats cover better than one thick coat, every time.
My take: seal first on a rough, thirsty rock, and go straight to a base coat on smooth river stone. Both roads reach the same place.
One Hour or Five Minutes: Why Drying Times Don’t Agree

About an hour, says acrylicmarkers.com. A few minutes, says Artistro.
Both are describing acrylic paint, and both are right about their own conditions. Acrylicmarkers.com is timing a brushed base coat that has to be dry enough to draw on. Artistro is timing a thin coat going over a previous one that’s already set.
The practical rule: follow the slower number when you’re layering paint pens on top, and the faster one when you’re adding another thin wash of the same color. Test with a fingertip. If the surface feels tacky, it isn’t ready.
Then comes the long wait. Acrylicmarkers.com says to let the rock dry for a full day before sealing, which is the interval most beginners skip.
The Oven Shortcut, and Why I’d Skip It
Trapped moisture inside a river rock turns to steam in an oven, and a rock that spalls throws fragments across the kitchen. Acrylicmarkers.com’s overnight dry costs you nothing but time.
I’ve watched a beginner try to rush a thick layer with a hair dryer. The surface set, the layer underneath stayed soft, and the whole thing cracked and bubbled within the hour. Heat moves faster than the paint can release its water. Wait, or work thinner.
Big Shapes First, Details Last: The Painting Order That Works
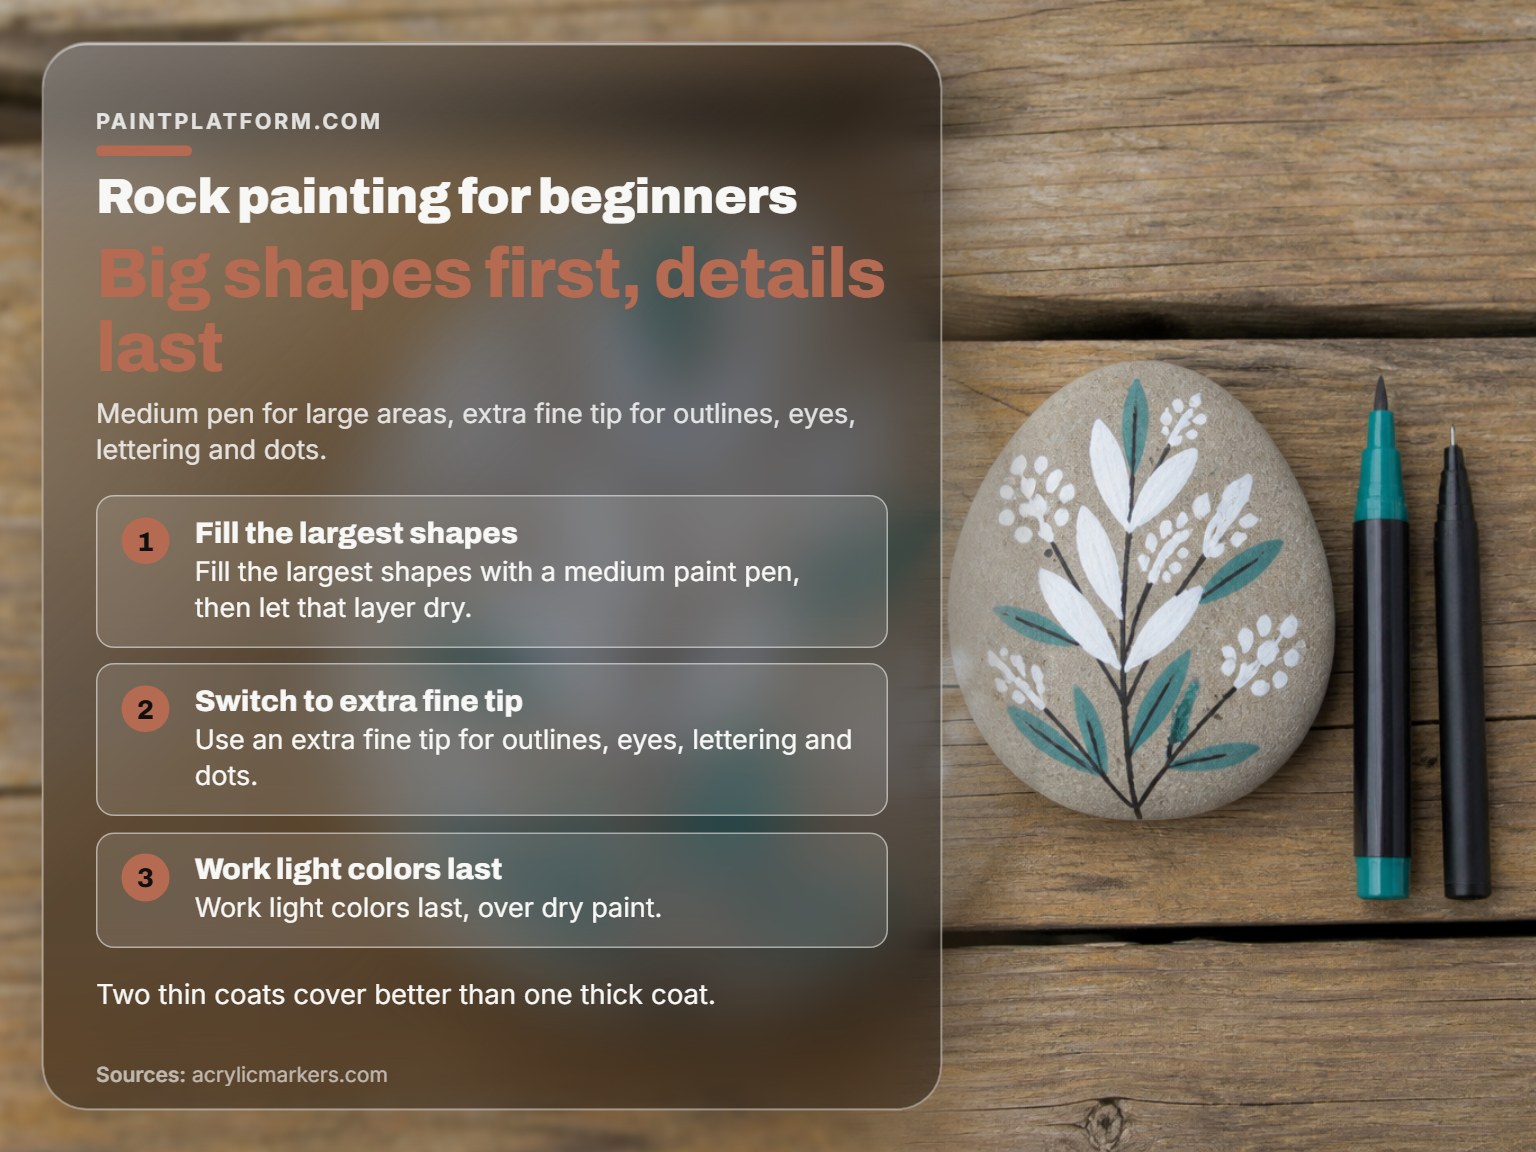
Fill the biggest area first with a medium paint pen, then switch to an extra fine tip for outlines, eyes, lettering, and dots. That’s acrylicmarkers.com’s order, and it holds up because a fine tip dragged over a two-inch shape takes forever and leaves ridges.
Medium paint markers for rocks fill a large shape in a few passes. A fine tip handles everything after that.
Here’s the sequence in order:
- Pencil or chalk the outline lightly, big and simple for your first rocks.
- Fill the largest shapes with a medium paint pen, then let that layer dry.
- Switch to an extra fine tip for outlines, eyes, lettering, and dots.
- Work light colors last, over dry paint.
Some pigments fight you. UNC notes that some paints, especially yellow, look transparent on bare rock. The fix is a dab of white the size of a Q-tip head mixed into the yellow so the color shows up better.
Watch your brush loading. A brush that’s too wet leaves a puddle that creeps across the stone and dries with a hard dark edge you can’t paint over cleanly.
Two thin coats will always beat one thick coat. The thick one skins over, stays soft underneath, and lifts the moment a pen touches it.
Tape-Resist Accent Rocks
UNC’s accent-wall method is the one project here that suits kids and adults equally. Cut painter’s tape strips roughly twice as long as the rock’s widest point, then cut them lengthwise to a width of 1/8 inch or smaller.
- Wrap 4-5 strips around the rock in an asymmetric crisscross so 8-10 sections appear, with every tape end on the bottom.
- Fold the ends over so you can find them later.
- Paint the sections, using a palette of 1-10 colors.
- Leave the tape in place and apply a second coat.
- Pull the tape off slowly, one strip at a time. If paint lifts, slide an Exacto-knife under it gently.
- Clean stray paint out of the gaps with a toothpick.
Cheap paint for rock art is fine here, because the tape does most of the design work. UNC’s instructions finish with glitter paint as a final layer. I skip that step, and I’d tell you to skip it too. Specialty effects are the one place craft paint gets expensive for no gain.
How Do You Seal Painted Rocks So They Survive Outdoors?
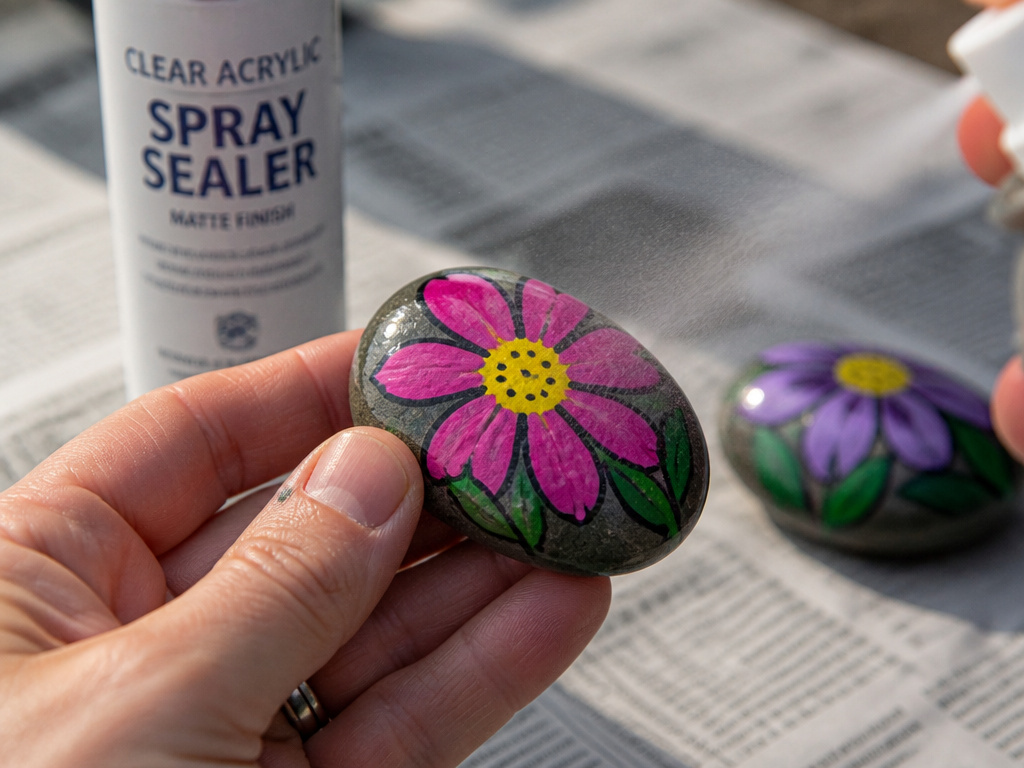
Two or three light coats of clear spray, each one dry before the next, keeps a rock alive outdoors. Acrylicmarkers.com adds that rocks living outside need more coats than indoor rocks.
Mist the sealer outdoors or in a ventilated room. The smell of aerosol in a closed kitchen is your warning that you got that part wrong.
The Kindness Rocks Project suggests light coats of a clear sealant such as a Krylon clear acrylic spray for a quick finish. That’s the simplest version and it works.
The sealing method is the second real disagreement in the sources:
- acrylicmarkers.com: clear spray sealer alone, two or three light coats.
- PaintedROX: a two-step process, Mod Podge first and outdoor clear spray after, though others use one step.
- UNC Alumni Association: Mod Podge, spray glaze, or paint-as-sealer as alternatives, not layers.
The finish trade-off gets described two opposite ways. UNC says clear glaze looks sharper than Mod Podge but is harder to control precisely. PaintedROX says Mod Podge looks awful while wet and dries clear. Both are describing the same jar.
Whatever you choose, follow the sealer’s own instructions for drying time, ventilation, and number of coats. And seal it at all: UNC points out that an unsealed rock shows every fingerprint when someone picks it up.
Whichever product you pick, sealing painted rocks for outdoors means more coats than an indoor piece gets. The full sealers for painted rocks comparison matters less than the number of coats you’re willing to apply.
I’d rather do three thin coats of one sealer than two products layered. Every extra layer is another chance to trap a dust speck or a fingerprint under the finish.
If the rock is going into a garden bed, paint for rocks outdoors has to survive sun and rain before the sealer even goes on.
My stance: skip the two-step unless the rock lives outside year round. One product, three light coats, done.
When It Goes Wrong: Five Symptoms and Their Fixes
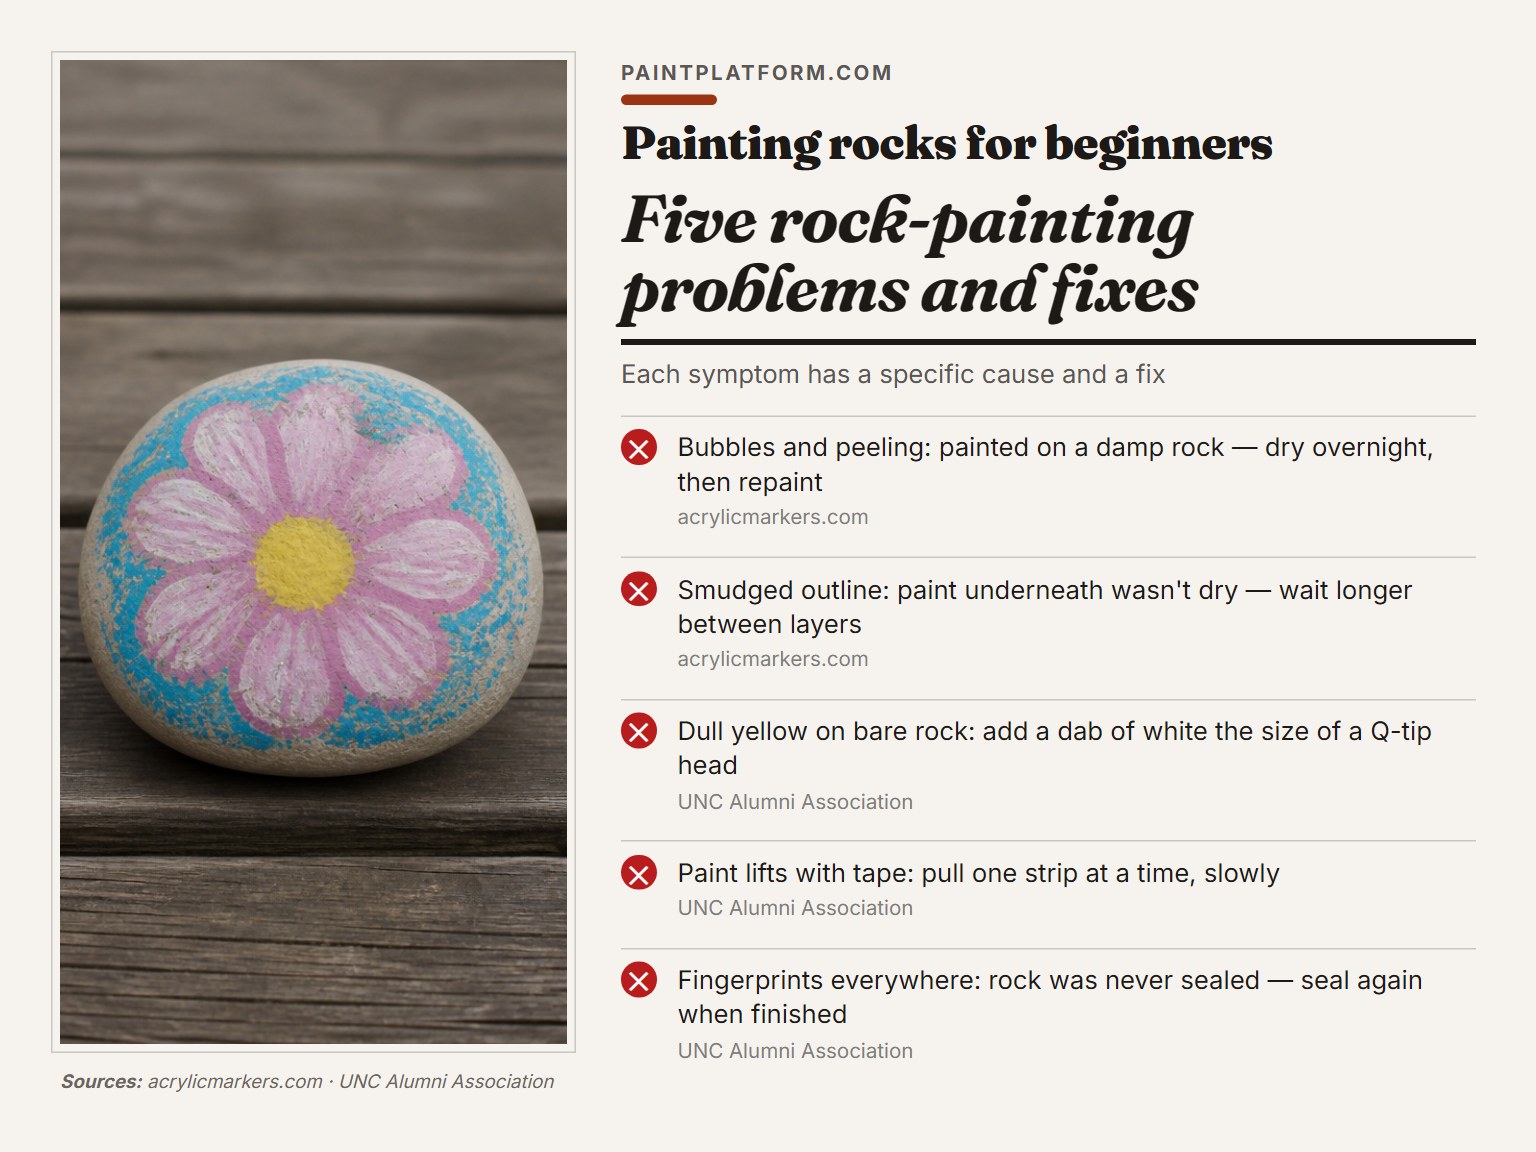
Bubbles, smudges, dull yellow, and paint that lifts with the tape. Each one has a specific cause, and none of them mean you ruined the rock.
| Symptom | Likely cause | Fix |
|---|---|---|
| Bubbles and peeling | Painted on a damp rock | Dry overnight, then repaint |
| Smudged outline | Paint underneath wasn’t dry | Wait longer between layers |
| Dull yellow | Yellow is transparent on bare rock | Add a dab of white the size of a Q-tip head |
| Paint lifts with tape | Tape pulled too fast | Pull one strip at a time, slowly |
| Fingerprints everywhere | Rock was never sealed | Two or three light coats of clear spray |
Fading is the slow failure nobody notices until month three. Acrylicmarkers.com says paint pens and craft paint are water resistant once dry, but rain, sun, and handling wear them down. Sealing is what makes a rock last outdoors.
Easy to miss: A rock can look dry and still be soft underneath. Press a clean fingertip into a thick patch before you draw on top of it.
Paint pens for rocks with a fine tip show every smudge, so let the layer below dry first. And remember that paint for painted rocks sitting in direct sun without a sealer loses its color long before the stone shows any wear.
Frequently Asked Questions
Do I have to seal a painted rock?
Sealing is what keeps the paint from fading, chipping, and wearing off under handling. UNC’s guide notes that an unsealed rock shows every fingerprint when picked up. For a rock that stays indoors, two or three light coats of clear spray is enough.
Can I use a hair dryer to dry the paint faster?
I wouldn’t, especially on a thick layer. Heat sets the surface skin while the paint underneath stays soft, and the cracks and bubbles show up later. Thin the coat with a little water instead, or just wait.
What kind of paint works on rocks?
Acrylic. UNC’s handout says acrylic paint works best, acrylicmarkers.com builds its whole tutorial around water-based acrylics and paint pens, and Artistro uses acrylic throughout. Acrylic paint works best for a first rock.
How long should a painted rock dry before sealing?
Acrylicmarkers.com says a full day. That’s longer than the hour a base coat needs, and it’s the interval people cut short. If the surface feels cool or tacky, give it more time.
Can I paint rocks I found in a park?
UNC’s instructions say plainly not to take rocks from public parks. Buy smooth river rocks from a craft store, garden center, or landscape supplier instead, which is what the Kindness Rocks Project suggests for city painters.
Why does my yellow paint disappear on the rock?
Yellow reads as transparent over bare grey stone. UNC’s fix is a dab of white the size of a Q-tip head stirred into the yellow. It gives the pigment something opaque to sit on.
The Bottom Line
If your rock still feels cool to the touch, it isn’t dry. That single check prevents more ruined rocks than any other habit in this whole process.
Your first move this week: buy a small bag of smooth river rocks, pick five that fit in your palm, and wash them tonight so they’re ready tomorrow. Nothing else on this page matters until you’ve done that once.
One concession. Everything above assumes a smooth, flat stone. If you find a lumpy rock with a shape you love, skip the background entirely and let the shape do the work. That’s where the good rocks come from anyway.
