
How to Paint Bathroom Tiles: Step-by-Step (No Peeling)
This post contains affiliate links. As an Amazon Associate, we earn from qualifying purchases.
To paint bathroom tiles, you scuff the gloss off, prime with a bonding primer, and roll on two coats of a two-component tile paint. Skip the sanding and the primer and the finish peels off in sheets. Most failures trace back to those first two steps, not the topcoat.
That peel is a bonding problem, and it starts at the glaze. A fired ceramic tile wears a glassy skin that gives paint almost nothing to grip, which is why every manufacturer in this space opens their instructions with abrasion and a primer. This is the core of how to paint bathroom tiles.
What follows is the order that holds: the grit that keys the glaze, which primer earns its place, how to mix a two-part paint without wasting a batch, and the surfaces where tile paint genuinely fails no matter how careful you are.
Key Takeaways
- Scuff the gloss, don’t just clean it. Sherwin-Williams states plainly that a chemical deglosser won’t do the job on tile.
- A bonding primer does the heavy lifting. A bonding primer is what makes the topcoat hold on a keyed tile surface.
- Two-component paints are chemistry, not preference. XIM Tile DOC mixes 1 part A to 1 part B; Inchem mixes 100 g of A to 15 g of B.
- Keep water off longer than the tin says. Dulux Singapore says 24 hours, XIM says 3 to 4 days, and Inchem says full resistance takes 15 days.
- Floors are the one place the sources split. Three of four manufacturers say no, and Inchem sells a floor-specific product anyway.
Why Glossy Tile Fights Paint, and What Actually Makes It Stick
I painted a glossy tile backsplash sample with regular wall paint and no primer. Two weeks later I peeled the whole film off in one piece, like fruit leather. Same tile, same topcoat, with a bonding primer underneath, survived a thumbnail scratch test without lifting a fleck.
Fired ceramic tile carries a vitrified glaze that resists mechanical keying, so coating adhesion depends on abrasion plus a bonding primer. Two-component polyurethane then cures into a crosslinked film that bonds chemically instead of drying by solvent loss alone, which is why mix ratio and pot life matter.
That difference is mechanical. Norglass, who publish a full tile refurbishment system, name adhesion as the biggest issue in the entire job, because most tiles have a hard glossy exterior surface. Nothing about a premium topcoat fixes a surface that never got keyed.
The same logic runs through any how to paint bathroom tiles project, whether it’s a backsplash or a whole bathroom wall. Prep carries the result. The paint just decides the color and the sheen.
The Sanding Grit Question: 240, 400, or Something Else?
Three manufacturers publish three different grits for the same job, and each one will key a glazed tile.
| Source | Recommendation | Detail |
|---|---|---|
| Norglass | 240-grit | Non-clogging dry paper, removes gloss and creates a key |
| Inchem | P180 to P240 | Selected to suit the tile texture |
| Benjamin Moore | 400-grit | Dulls the surface, then dust, rinse and dry |
| Sherwin-Williams | Sanding required | A chemical deglosser won’t remove the shine |
Sand a glazed tile and the surface turns from glassy to a chalky matte that grabs your fingertip like a clean blackboard, which is the how to paint bathroom tiles step that matters most. That grab is the whole point. If your hand slides across it, you haven’t gone far enough.
Inchem recommends P180 to P240 sandpaper selected to suit the tile texture. Dust left in the key blocks the primer from reaching the surface.
The Repair Step Nobody Budgets For
Cracks and chips have to be filled before coating, not after. XIM specifies a top quality epoxy filler. Norglass sells NORFILL and wants 24 hours of cure before priming.
Benjamin Moore handles hairline cracks with a small amount of clear epoxy worked in on a narrow brush or toothpick. Broken grout is different: pull the loose pieces and plan on re-grouting.
Silicone is its own problem. Inchem states the paint isn’t intended for silicone seals, so the old bead comes out and a fresh one goes on after the paint dries.
What About Grout Lines?
Dulux Singapore recommends brushing the grout lines first, then rolling the flat tile faces. That order gets full coverage without dragging a roller through wet joints.
Here’s the part nobody mentions: repainting covers the grout lines and makes individual tiles less defined. Benjamin Moore raises it as an expectations issue, and they’re right. If the grout contrast is what you like about the room, painting over it changes the look more than you expect.
If you want the grout to stay visible, applying grout paint in a contrasting tone after the tile cures is the cleaner route. Tape edges before you start, and pull painter’s tape while the paint is still wet for a clean line, per Sherwin-Williams.
Which Primer, and Do You Even Need One?
Dulux Singapore says skip the primer entirely when the topcoat is a specialist tile paint, while Norglass says two coats of Shipshape Primer Undercoat, always; Sherwin-Williams and Benjamin Moore also recommend a primer.
The positions, side by side:
- Dulux Singapore: one coat of tile primer, four hours to dry, unless you’re using a specialist tile paint, in which case no primer at all.
- Norglass: two coats of Shipshape Primer Undercoat, minimum 16 hours at 25 C between coats, then 24 hours of cure before the Northane finish.
- Sherwin-Williams: Extreme Bond primer for maximum adhesion on slick surfaces. On floors, skip the primer and use Porch & Floor enamel.
- Benjamin Moore: INSL-X STIX Waterborne Bonding Primer on glossy tile, then two coats of Aura Bath & Spa.
- My one-off pick: a water-based bonding primer, because it is easy to find and held on my test tile.
I won’t argue with anyone who primes twice. A second coat of a water-based bonding primer costs you an overnight wait and one extra hour of work, and the scratch test is the only vote that counts.
If you want the full comparison of what’s on the shelf, this roundup of bonding primer options covers the water-based and shellac-based choices.
Spray, Roll, or Brush?
XIM recommends spray application for the smoothest tile-like appearance, using conventional air, HVLP, or airless equipment. Multiple light mist coats beat heavy coats that sag.
Norglass gives the low-tech version: a 4 mm microfibre roller for flat surfaces, a synthetic brush for edges. If you’re spraying their system, thin up to 33% with Northane Spraying Thinners at 50 to 70 PSI through a 1.4 mm nozzle.
Rolling is fine for a bathroom wall. Spraying earns its keep on a whole tub surround where roller stipple would show under the light.
Mixing Two-Component Tile Paint Without Wasting a Batch
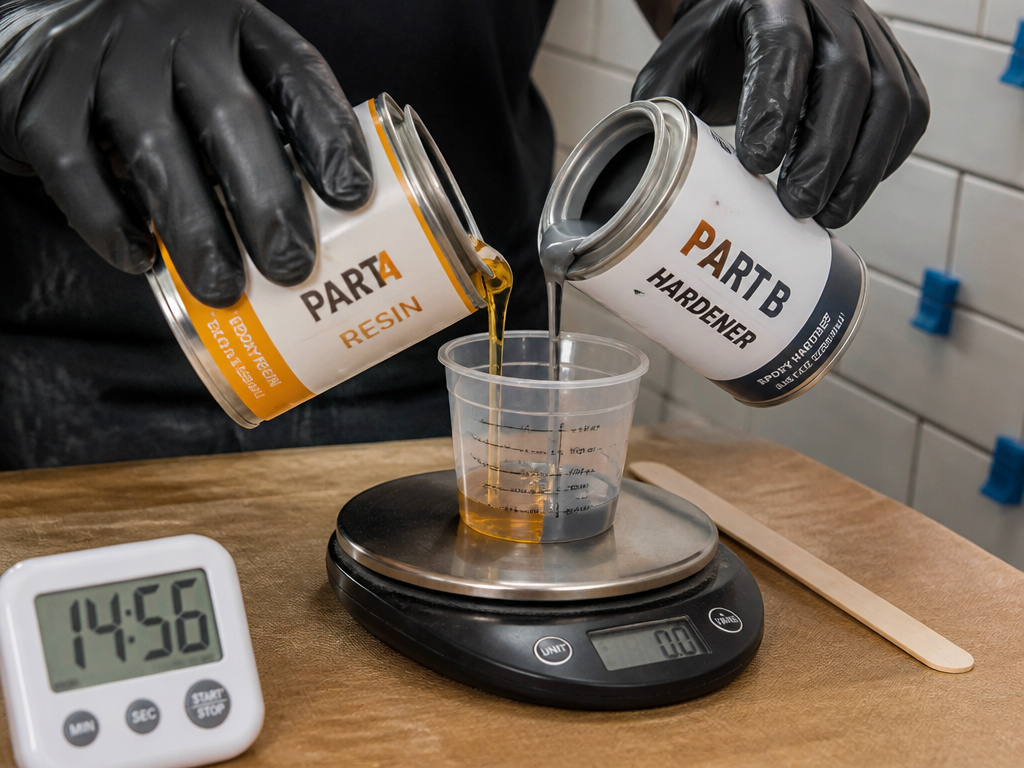
Mix only what you can apply today, and check the pot life before you open Part B.
XIM Tile DOC runs about 14 to 18 hours of pot life depending on temperature and humidity. Inchem’s two-component paint is max 2 hours, and leftover mixture past that point is no longer suitable for use. Those are wildly different working windows, and confusing them ruins a batch.
Before you start: Two-part tile paints give off flammable vapour. XIM warns that vapours build up and can cause flash fire, so work only where moving air carries them outside and ground all spray equipment. Inchem calls for gloves and safety goggles during mixing and application.
- Clean and degrease first. Inchem warns not to dilute the components, and XIM specifies XIM GON Cleaner or xylene for solvent-wiping.
- Solvent-wipe with the right product. XIM specifies XIM GON Cleaner or xylene, and explicitly rules out mineral spirits, turpentine, or any solvent that leaves an oily residue.
- Measure the ratio exactly. XIM is 1 part A to 1 part B, stirred and not shaken. Too much A gives a brittle film, too much B gives a soft film that mars. Inchem is 100 g of A to 15 g of B.
- Don’t thin unless the data sheet allows it. Inchem says do not dilute the components at all. XIM permits XIM Reducto, xylene, or lacquer thinner for spraying at no more than 1/2 ounce per gallon.
- Apply the first coat and let it dry properly. Inchem wants roughly 8 hours between coats. Dulux Singapore says at least 4 hours. Norglass wants a minimum of 16 hours at 25 C between primer coats.
- Watch the tint ceiling. XIM caps universal tint at 2 ounces per mixed gallon, and notes that over dark colors full block-out may not happen in one or two coats.
Coverage math matters more than people expect. Inchem rates its paint at up to 12 square meters per liter per coat, and an 800 ml pack covers roughly 9 to 10 square meters in one coat. Measure the wall before you buy, or you’ll be mixing a second batch mid-job.
For a straight product comparison before you commit, this look at bathroom tile paint covers the two-component systems against the one-part options.
Where Tile Paint Fails: Floors, Shower Walls, and Countertops
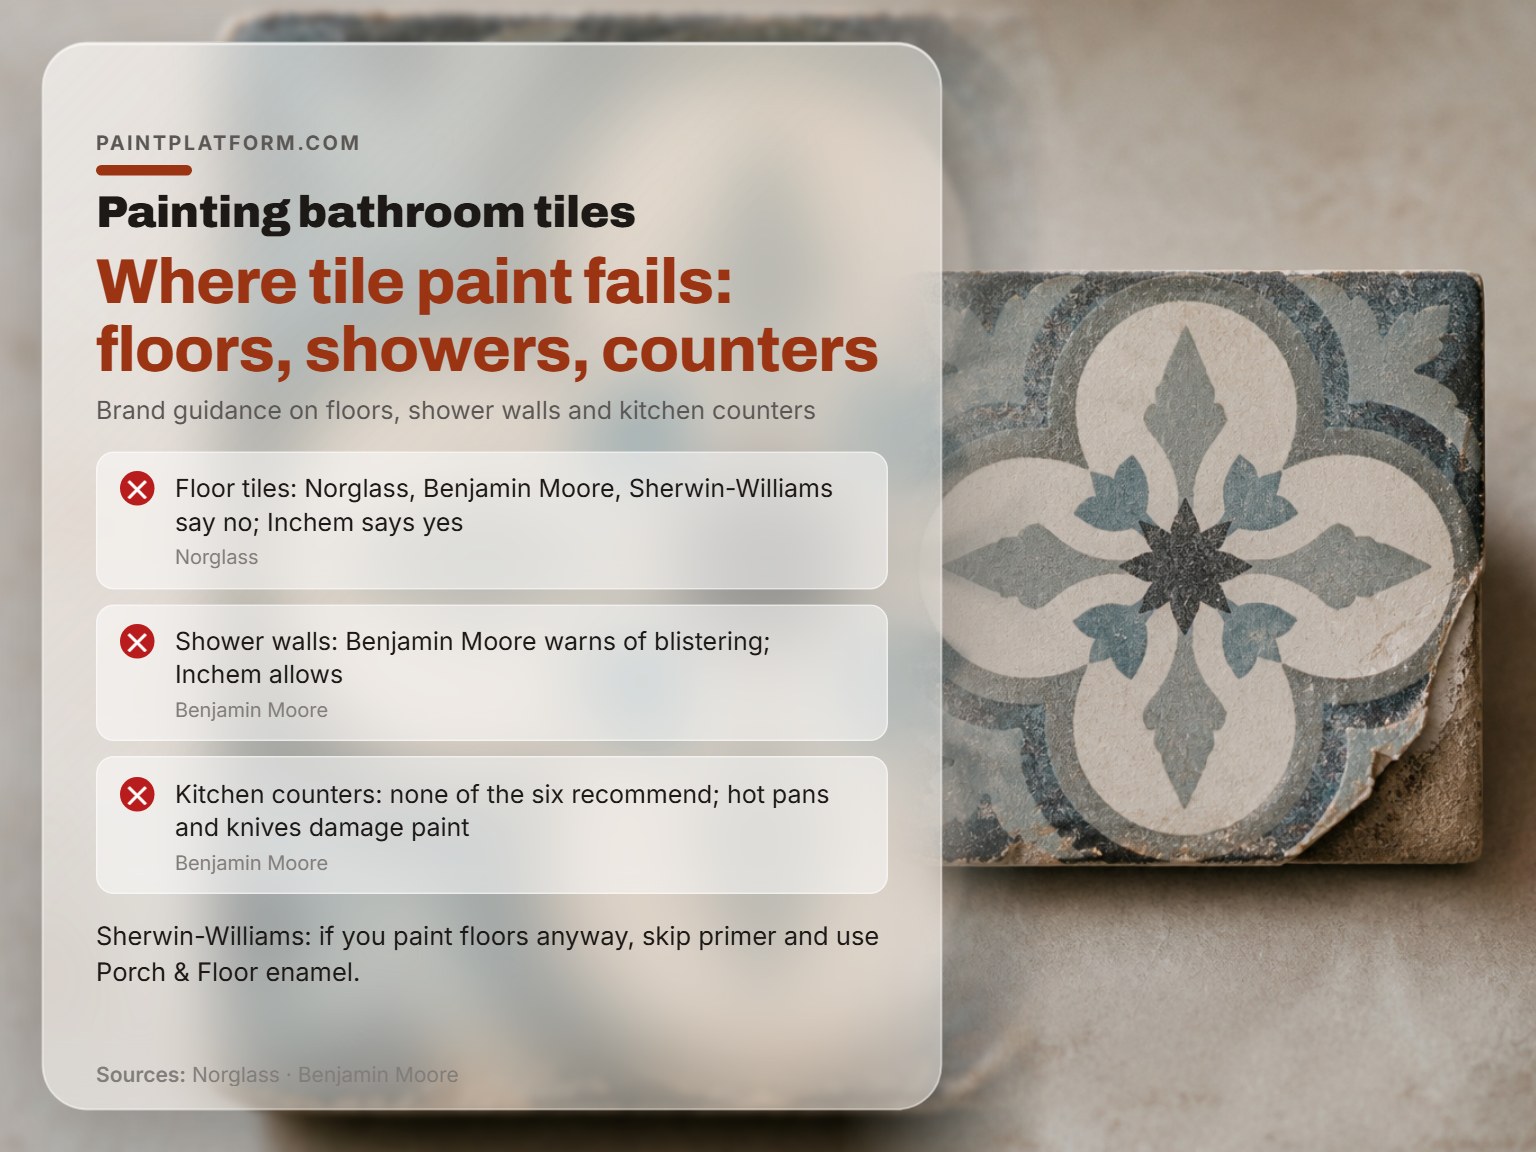
Norglass, Benjamin Moore, and Sherwin-Williams do not recommend painting floor tiles, while Inchem lists floors as a valid application area for its Floor Tile and Shower Enclosure Paint.
| Surface | Who says go | Who says no |
|---|---|---|
| Floor tiles | Inchem, with a floor and shower-specific paint | Norglass, Benjamin Moore, Sherwin-Williams |
| Shower walls | Inchem | Benjamin Moore, Sherwin-Williams |
| Kitchen counters | None of the six | Benjamin Moore, on hot pans and knives |
| Dry wall tile | All six | None |
Norglass explains the floor problem in mechanical terms: adhesion is weaker at the edge of tiles, so heavy foot traffic causes the paint to peel and lift off. Benjamin Moore points at constant friction wearing the film prematurely. Sherwin-Williams says skip the primer and use Porch & Floor enamel if you insist.
Shower walls split the same way: Inchem lists walls in shower enclosures as valid for its paint for shower tile range, while Benjamin Moore warns that frequent water exposure causes blistering and peeling and Sherwin-Williams says avoid locations in frequent contact with moisture.
Kitchen counters are the one place nobody argues. Benjamin Moore states that painted tiles there can’t take a hot pan and get scratched by knives and utensils.
Fair warning: it’s fussier to apply and less forgiving of a bad mix.
Cure Times and the Water-Exposure Window
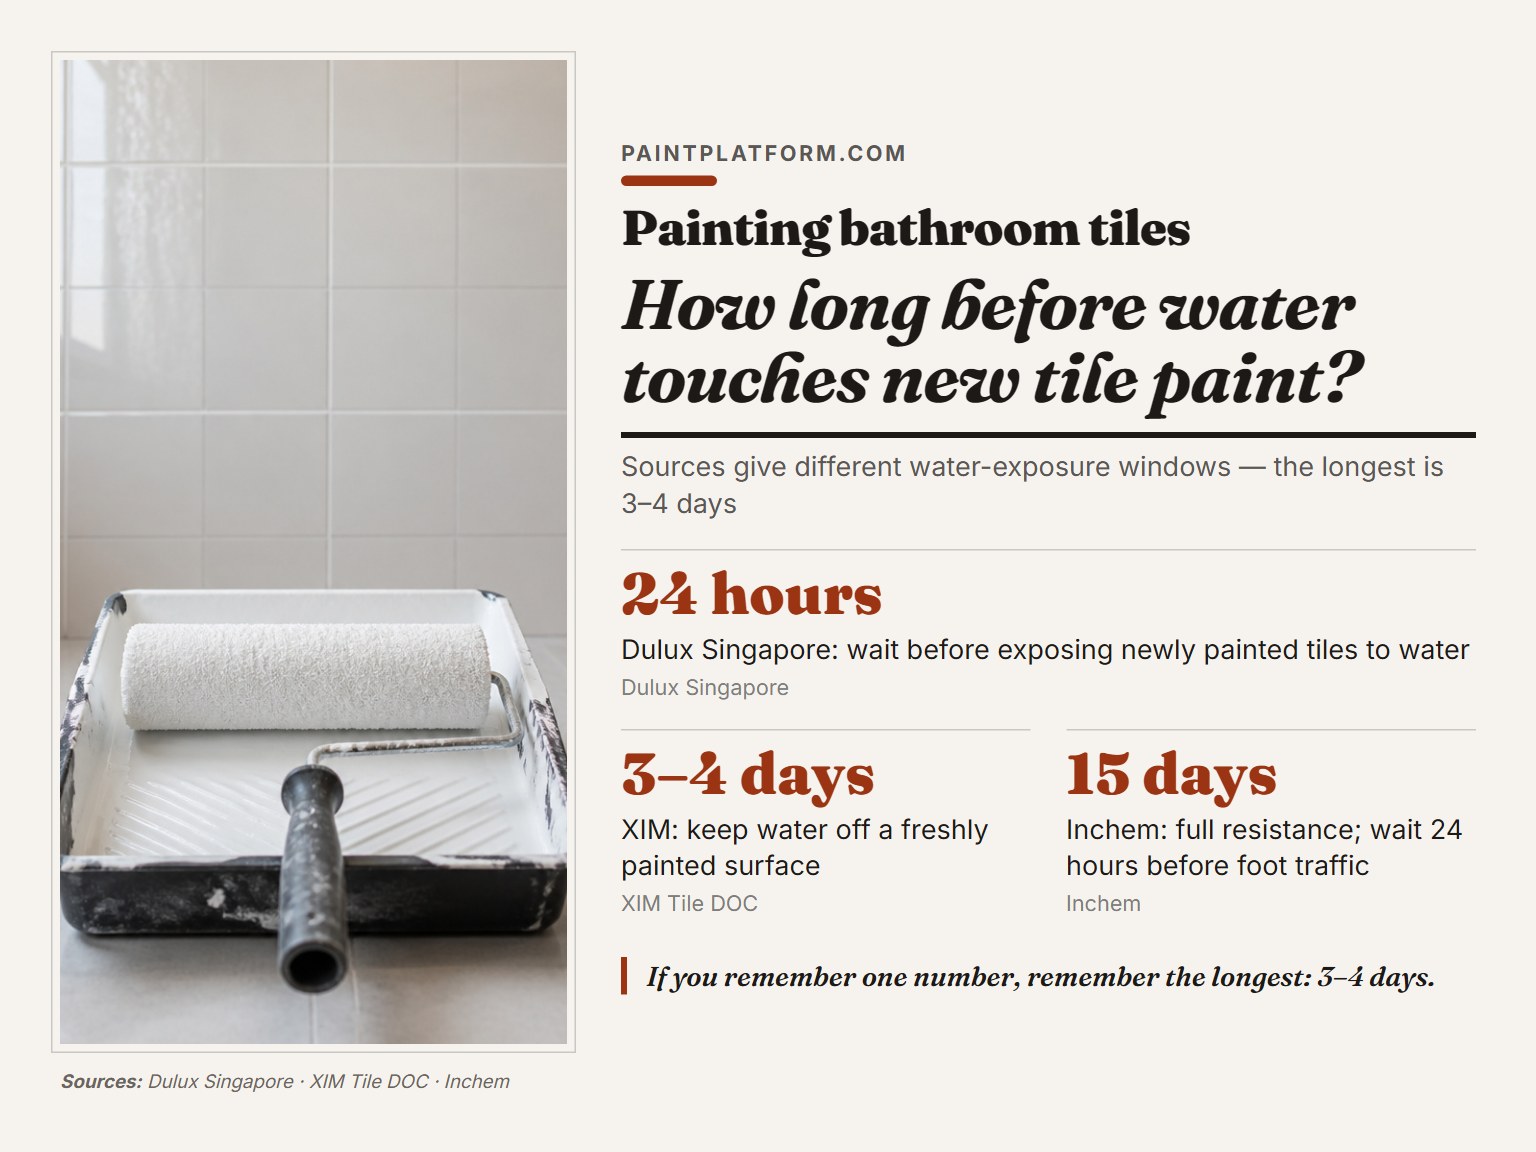
The tin gives you a recoat time. It also gives you a water-exposure window, and those are two different numbers.
Dulux Singapore says wait 24 hours before exposing newly painted tiles to water, while XIM says keep water off a freshly painted surface for 3 to 4 days; Inchem splits it further: 24 hours before foot traffic, but full resistance only after 15 days.
If you can only remember one number from this whole page, remember the longest one. Waiting 3 to 4 days costs you a few days. Repainting a shower wall costs you a weekend and a second batch of paint.
A tacky second coat is its own failure mode, and it feels wrong before it looks wrong. It’s cool and slightly sticky under the back of your hand. XIM warns that vapours can build up and cause flash fire, so use only where moving air carries vapours outside.
Cold Bathrooms and the Temperature Window
A cold bathroom in January falls outside both. So does a steamy one right after someone showers. Ventilate the room before you start and keep air moving while the coating dries, per Inchem.
Clean the finished surface with a soft cloth and a mild non-abrasive cleaner. Dulux Singapore specifically warns off harsh chemicals and scouring pads, which scratch the film and dull the sheen.
Frequently Asked Questions
Can you paint bathroom tiles without sanding?
Not on glazed ceramic. Sherwin-Williams states that sanding is required to remove the shine, and that a chemical deglosser won’t do the trick on tile surfaces. Norglass takes the same position, calling for 240-grit paper to create a keyed surface for mechanical adhesion.
How long before you can shower after painting tiles?
Sources disagree: Dulux Singapore says 24 hours before water exposure, XIM says 3 to 4 days, and Inchem says the coating reaches full resistance after 15 days.
Does painted bathroom tile actually last?
It depends on where it is. Dulux Singapore says wait 24 hours before exposing newly painted tiles to water. Benjamin Moore is blunter: painting tile is not necessarily a long-term solution, and there’s no substitute for regular ceramic tile durability.
Can you paint over grout lines?
Yes, and most systems expect it. Dulux Singapore recommends brushing the grout lines first, then rolling the flat tile faces for even coverage. Just know that repainting covers the grout lines and makes individual tiles less defined, per Benjamin Moore.
Will regular wall paint work on bathroom tiles?
No. Regular wall paint needs a keyed surface and a bonding primer before any topcoat has a chance. Tile needs a keyed surface and a bonding primer before any topcoat has a chance.
How many coats of tile paint do you need?
Two, across every source that specifies a count. Dulux Singapore, Norglass, and Benjamin Moore all call for two coats. XIM adds a caveat: over dark colors, complete block-out may not be achieved in one or two coats.
The Bottom Line
Here’s the threshold I’d give a friend: Norglass, Benjamin Moore, and Sherwin-Williams do not recommend painting floor tiles or wet zones, while Inchem lists floors and shower-enclosure walls as valid application areas for its tile paint.
Your first move this week is small. Buy a sheet of 240-grit paper and a small can of bonding primer, then test one tile behind the toilet. Sand it, prime it, topcoat it, and scratch it with your thumbnail in a week.
That test tells you more than any product page will. It shows whether the primer is doing the work.
And if the tile is cracked, chipped, or sitting under a leaky shower valve, fix that first. Paint hides a lot of things. It doesn’t hide water getting behind it.
