
How to Blend Paint on Canvas: Step-by-Step
This post contains affiliate links. As an Amazon Associate, we earn from qualifying purchases.
To blend paint on canvas, lay two colors side by side while both are workable, then stroke across the seam with a clean soft brush using light pressure and wipe the brush often. Match the paint consistency first, because blending a thick color into a thin one leaves ridges.
Consistency is the one variable you can control before the brush touches anything, and it decides whether a how to blend paint on canvas transition reads as a soft shift or a smear. Oil holds that window open far longer than acrylic. Acrylic closes it quickly unless you’re working with a rehydratable formula.
What follows walks through the three mediums most beginners meet first, the wet-to-dry color shift that wrecks more blends than bad brushwork, and the one place where two paint manufacturers flatly contradict each other.
Key Takeaways
- Wait for tack, not wet, on any thick layer. Chroma’s technical sheet warns that blending into a heavy wet film makes mud highly likely, though PaintingProGuide instead treats wet-into-wet blending with a clean filbert as the classic method.
- Escalate the oil, layer by layer. Canson starts the first layer near 60 percent linseed oil and 40 percent spirits of turpentine, then works toward 100 percent linseed by the final pass.
- “Dry” is a long word with acrylic. Interactive acrylic cures in about 7 to 14 days, and the surface can be reopened with the Unlocking Formula during that window.
- Keep a few edges crisp. A canvas where every boundary is soft reads as blur, not as atmosphere.
What You Need Before the First Stroke
A couple of brushes and two colors will get you through your first blend. The rest of the supply list is optional, no matter what the starter kit says. What isn’t optional is understanding how the film under your brush actually sets, because that sets your working window too.
Oil paint dries by oxidation rather than evaporation: the binder hardens as oxygen bonds with the oil. A first layer mixed at roughly 60 percent linseed oil and 40 percent spirits of turpentine stays lean. Each later layer carries more oil, and the final layer is mixed with 100 percent linseed oil.
Here’s the short kit that actually earns its space on the table:
- Two colors at the same consistency, plus a scrap panel for testing
- One soft blending brush, a filbert or fan for oil, a soft synthetic flat for acrylic
- A clean dry brush for softening edges, kept well away from the wet paint
- Water in a spray bottle for acrylic, or a small dish of medium for oil
- Masking tape and paper offcuts if you’re working a taped border
For acrylic work, the best brushes for blending acrylic on canvas are soft synthetics with a springy belly. A stiff bristle drags the paint along instead of easing it into the seam.
If your acrylic is too stiff to move at all, thin acrylic paint with a drop of water rather than a flood. Stop before it behaves like watercolor, because over-thinned paint loses the body that makes a blend hold.
Before you start: Oil solvents, including spirits of turpentine, are flammable and need real ventilation, not a window cracked into a closed room. Keep brush cleaner off the paint and off the canvas entirely, because it strips oil binder and will damage the film it touches.
Sessions College treats studio setup as part of the lesson in its painting materials and canvas guide, and the ventilation warning there is the one beginners skip.
Why Wet Paint Lies to You About Color
The swatch looked right on the palette. Later, on the canvas, it had dropped in value and gone slightly grey.
Acrylic shifts value as the film dries, and the shift is big enough to wreck a blend you built around the wet color. I’ve been caught by this more than once, most memorably on a sky I’d eased into a soft blue-grey that dried closer to slate. Now I paint a scrap, let it dry, and compare before I commit a large area.
Chroma’s own technical sheet gives a cleaner version of that habit. Mix 80 percent Crimson with 20 percent Titanium White, paint a swatch on a surface prepared with Binder Medium or Gesso, and note the wet color. Wait 10 to 20 minutes or until touch-dry, then mist it with a fine water sprayer. The mixture returns to its light, wet value.
That return is the whole point. You get to see both versions of the same color in one sitting, which is the only honest way to plan a blend.
Winsor & Newton notes a similar trick with sheen. The work looks glossy while wet and should settle into a satin-matte finish once dry, so a passage that seems too shiny at the start usually evens out on its own.
I won’t build a large blend on a fresh mix anymore. I test it on a scrap, let the scrap dry, and hold it next to the canvas. It costs one scrap of canvas and saves a whole repaint.
The same logic applies when you mix paint colors for a transition: judge the mix dry, not wet.
Try it on a scrap first.
How to Blend Paint on Canvas in Oil Without Making Mud
Ever pushed two wet colors together and watched them turn flat grey-brown?
You’re not doing it wrong. Two credible sources simply disagree about whether that move is the method or the mistake.
Chroma’s sheet is blunt. When you have a thick application of wet paint on the canvas and you blend into it, the likelihood of producing mud is high, because you’re mixing into a whole layer of wet paint. The fix is timing. Wait until the paint tacks up, then moisten the surface enough to blend what you want without disturbing the layer underneath.
PaintingProGuide prescribes the opposite as the classic method: lay two colors side by side while both are wet, then stroke across the boundary with a clean filbert or fan using light pressure.
| Point of disagreement | One position | The other position |
|---|---|---|
| Blending into thick wet paint | Chroma: mud is highly likely, so wait for tack and moisten | PaintingProGuide: wet-into-wet with a clean filbert is the classic method |
| Brush marks | Winsor & Newton: a coarse Synthetic Hog keeps marks visible on purpose | PaintingProGuide: finish with a soft fan or mop to remove them |
| Acrylic working time | WikiHow: work quickly, acrylic dries fast | Chroma: Interactive reopens and re-fuses after touch-dry |
| Oil surface blending | Chroma: oil painters can’t surface-blend without mud | PaintingProGuide: oil’s long open time makes large wet blends possible |
Where the mud actually comes from
My read is that both sources are describing different film thicknesses. A thin, even passage blends fine wet-into-wet. A heavy, loaded passage is where the mud shows up, and that’s the case Chroma is warning about.
So thin your early layers and save the wet-into-wet heroics for a film you can still see the weave through.
The fat-over-lean recipe
Canson handles the other half of the problem with a numeric medium recipe. Dilute the first layer with a medium of about 60 percent linseed oil and 40 percent spirits of turpentine, increase the oil proportion with each layer, and mix the final layer with 100 percent linseed oil.
That’s the fat-over-lean rule, and it’s what keeps a built-up passage from cracking as it cures. The first layer should be thin and well diluted so it adheres and lets the covering paints glow through.
Acrylic painters meet the same layering problem, and the answer there is how to layer acrylic paint with medium rather than oil.
Common mistake: Adding medium to the mix while you’re still preparing the color. Canson is specific that medium goes in during application, not while you’re building the mixture.
How Long Can You Actually Keep Acrylic Workable?
About seven to fourteen days, depending on how thickly you paint, your surface, the humidity and the mediums used. That’s the cure window Chroma publishes for Interactive acrylic, and it changes what the word dry means for your whole session.
Standard acrylic gives you minutes. WikiHow’s wet-on-wet method says to work quickly because the paint dries fast, and suggests pre-wetting the canvas with a bit of water if you’re worried about it setting before you finish.
Standard acrylic versus rehydratable acrylic
Chroma’s Interactive line behaves differently. During the curing cycle you may need the Unlocking Formula to reopen touch-dry paint, and edges can be re-fused after the surface has gone past workable.
So which is it? Both, depending on the tube in your hand. That’s the honest answer, and it’s the one the label won’t give you.
Whichever acrylic you’re using, WikiHow’s band width is a good constraint: cover 1 to 2 inches (2.5 to 5.1 cm) per color band before you blend the seam.
Three approaches worth knowing:
- Wet-on-wet, worked fast, with the canvas pre-wetted so it doesn’t skin over mid-stroke
- Wet-on-dry, where you paint a base color, let it dry completely, then lay thin layers of the next color on top so the base shows through
- Glazing liquid applied with the blending color, swept from the edge toward the middle of the base coat
If acrylic is your medium, the fuller walkthrough lives in how to blend acrylic paint on canvas, including the timing tricks that buy you extra minutes.
Where this goes sideways: Treating a rehydratable acrylic like a standard one. You plan a fast wet-on-wet pass, the surface goes touch-dry mid-blend, and the brush starts dragging clumps across the seam instead of easing color through it.
The Gradient Method That Survives a Long Edge
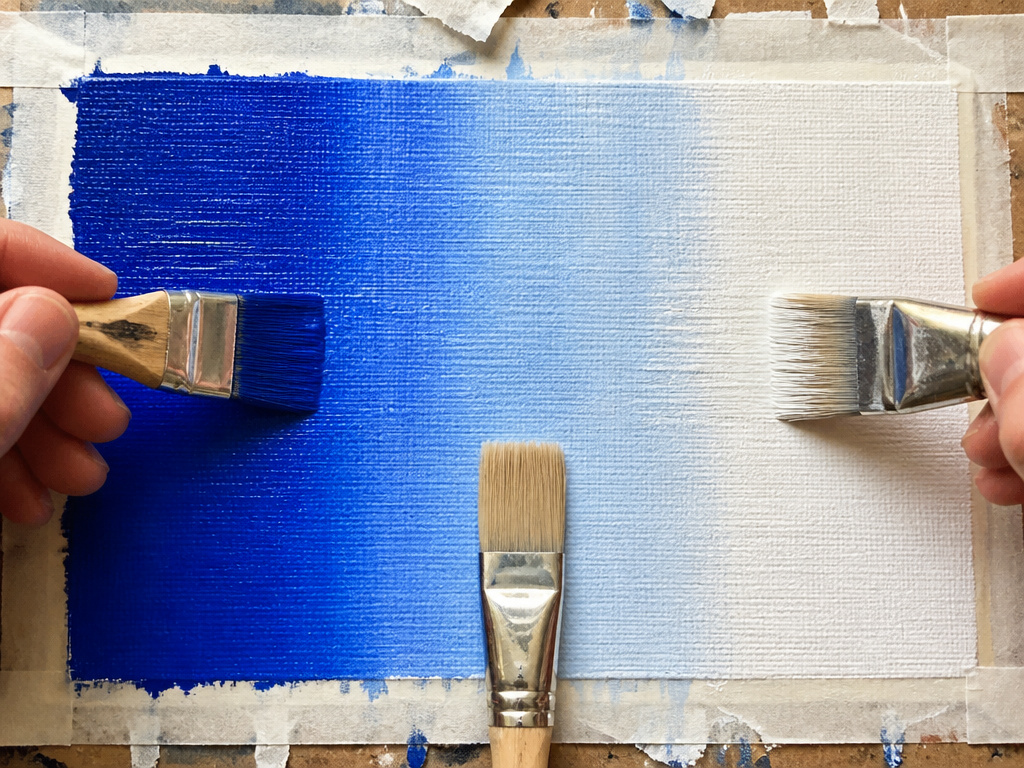
A single sweep across the whole canvas is the fastest route to a muddy middle.
Winsor & Newton’s gradient demo does the opposite of what most tutorials show. Instead of blending the whole span at once, it puts the pure version of each color at either edge and works inward with two separate brushes, applying slightly less paint as you get closer to the centre.
PaintingProGuide solves the same problem from the palette side: mix three to five intermediate steps between the two end colors, paint them in bands, then blend only the narrow seams between neighbors.
Here’s the sequence that holds up:
- Tape the border and add paper offcuts around the taped area. Skip this and paint seeps through to the canvas below, leaving a hard ghost line under your gradient.
- Block the pure color at each edge, one brush per color. Sharing a single brush drags the first color into the second and pre-mixes your middle before you’ve started.
- Work inward with both brushes and ease off the paint load as you approach the centre. Equal paint all the way across gives you a flat band, not a transition.
- Switch to a clean brush at the centre and blend side to side. Winsor & Newton uses a coarse Synthetic Hog here specifically because the bristles keep brush marks visible.
- Pull the tape with a scalpel and tweezers while the paint is still wet. Waiting lets the film skin over, and the tape lifts paint from inside the border.
That last point is where the sources part company again. Winsor & Newton’s artist wants visible brush marks and picks a coarse brush to get them. PaintingProGuide finishes with a soft fan or mop to remove them. Neither is wrong. They’re different pictures.
I’d rather see a gradient with a few honest bands than one smeared into fog. Visible strokes read as paint. Fog reads as a mistake you kept going.
Gradients do most of their work in value, which is why paint shadows and highlights and blending are really the same skill taught twice.
If you can see the seam from arm’s length, it needs another step. If you can’t see it from across the room, stop blending.
Where Blending Goes Wrong, and the Fix for Each
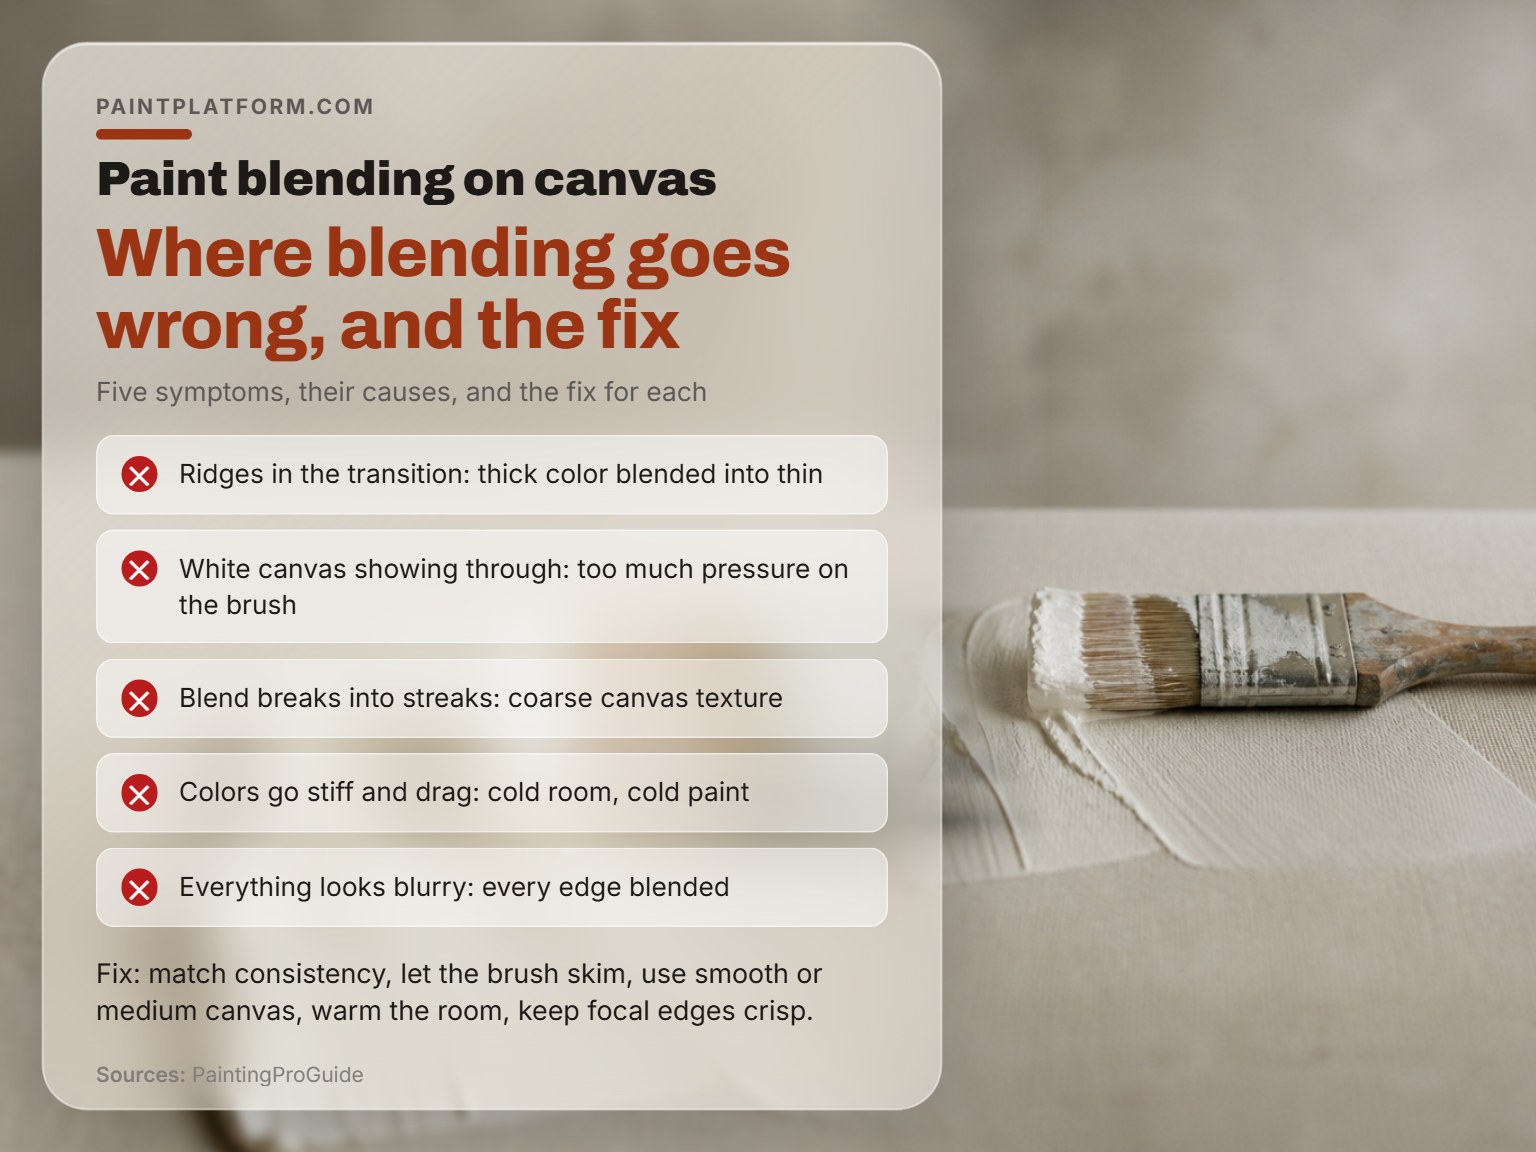
Heavy pressure ruins more blends than bad color mixing.
PaintingProGuide puts it plainly: heavy pressure plows paint aside and exposes the canvas. The brush should skim, not scrub.
| Symptom | What’s causing it | The fix |
|---|---|---|
| Ridges in the transition | Thick color blended into thin | Match consistency before you start |
| White canvas showing through | Too much pressure on the brush | Let the brush skim, reload lightly |
| Blend breaks into streaks | Coarse or absorbent canvas | Switch to a smooth or medium texture |
| Colors go stiff and drag | Cold room, cold paint | Warm the room before you start |
| Everything looks blurry | Every edge blended | Keep focal edges crisp |
Cold paint is the one people blame on technique. It’s stiffer, it drags under the brush, and it feels like the paint is fighting you when the room is just cold.
The palette rule
The palette is where I’ve lost the most paint. I’ve pulled tubes out of a drawer with the caps glued shut by dried residue on the threads, and wiping the threads before the cap goes back on has kept them usable longer than the ones I didn’t bother with.
Sessions College puts a clock on the rest of it. Don’t leave paint on the palette for more than a day or so, because colors start to dry out and become hard to remove. Paint that’s already too dry leaves little clumps on the surface, and those read as grit under a finished blend.
Some of that grit is worth keeping on purpose, which is a separate conversation about creating texture with paint.
Four signs it’s time to stop:
- The seam has disappeared at arm’s length
- The paint starts to feel grabby under the brush
- You’ve wiped the brush more than you’ve painted
- The color you’re blending has gone matte and stopped moving
Stop there.
Frequently Asked Questions
Can you blend acrylic paint on canvas without a medium?
Yes. Water and a pre-wetted canvas are enough for a wet-on-wet blend. A glazing liquid helps if you want a longer open time, and it’s applied together with the blending color rather than mixed in ahead of time.
Why does my blend look muddy?
Usually because you’re mixing into a thick wet layer instead of the seam between two colors. Chroma’s technical sheet notes that blending into a heavy application of wet paint makes mud highly likely, since you’re stirring a whole layer rather than a boundary.
How long should I wait between layers?
For oil, until the layer is thoroughly dry. Canson is specific about this: letting each layer dry keeps the colors from mixing with the next one and going dirty. Acrylic moves faster, but a rehydratable formula can be reopened during its cure cycle.
Do I need different brushes for oil and acrylic?
Different fibers, yes. Oil work benefits from a filbert or fan with enough spring to move heavy paint. Acrylic work is easier with soft synthetics that don’t scuff a fast-drying film.
Can you blend oil paint after it dries?
Not by wet blending. Once the film is dry, you soften transitions with a glaze, which is a thin transparent layer, or a scumble, which is a thin semi-opaque layer, brushed over the dried paint.
The Bottom Line
If your blend has already gone matte and the brush is skipping, stop. That’s the point where more work makes it worse, and no amount of medium brings a skinned-over film back to a soft edge.
This week, do one thing: mix two colors, paint a scrap, and let it dry before you judge it. That single habit catches the wet-to-dry shift before it costs you a canvas.
And if you’re still deciding whether any of this applies to you, scale down. A small study doesn’t give a gradient room to fail, and a few of those will teach you more about how to blend paint on canvas than one large panel you’re afraid to touch.
