
How to Paint Wood Shingles: Moisture, Primer, Timing
This post contains affiliate links. As an Amazon Associate, we earn from qualifying purchases.
To paint wood shingles so the coating stays put, three conditions decide the outcome: moisture content below 20%, a stain-blocking primer on every surface including the back, and air and surface temperature above the manufacturer’s minimum, above 40°-50°F per the USDA Forest Service, or a hard 50°F floor per California Paints, during application and for the next 24 hours.
Back-priming is the step that gets cut when the sun is out and the ladder is already up. Cedar pulls moisture through an unsealed backside, and a face sealed with acrylic traps that moisture against the wood. The film blisters, then peels off. Knowing how to paint wood shingles means sealing the backside first.
What follows is the order I’d actually work in: test the moisture, watch the thermometer, prep, prime, topcoat, and then decide whether paint or stain belongs on that wall at all. Two of the sources below disagree with each other, and I’ll show you exactly where.
Key Takeaways
- Below 20% moisture or don’t start. The USDA Forest Service sets 20% as the ceiling for any finish, and the Cedar Bureau puts the working target at 12 to 14%.
- California Paints sets a hard 50 degrees F floor, while the Forest Service allows a 40 to 50 degree range depending on the manufacturer.
- Prime all surfaces, including the back, with the primer extending about half to two thirds up the back side of each shingle.
- An acrylic latex topcoat over a stain-blocking primer is the Cedar Bureau’s preferred system. An oil or alkyd topcoat is listed as the less durable option.
- Semi-transparent stain runs 4 to 5 years on a south wall and more than 10 on a north wall, which is longer than most film-forming clear finishes manage.
The 20% Moisture Ceiling and How to Test for It
Twenty percent is the ceiling. The USDA Forest Service shingle siding installation report states that finishes should not be applied to wood with a moisture content above 20%, and that figure is not a suggestion.
The Cedar Shake & Shingle Bureau specifies that a base coat or primer be applied only after sidewall shingles reach equilibrium moisture content of 12 to 14 percent in most of North America. Equilibrium is the point at which wood stops gaining or losing moisture to the surrounding air. Coating green wood produces premature coating failure or poor stain penetration.
Twelve to fourteen percent is the working target. Twenty percent is the line you never cross.
When you compare a how to paint wood shingles job to other siding, cedar holds water longer than it looks like it should. A wall that feels dry to the back of your hand can still be too wet to finish, and the surface feel tells you almost nothing about what’s happening deeper in the wood.
I keep a cheap pin moisture meter in the truck. It reads below the 20% ceiling before I open a can, and it has saved me from my own optimism more than once.
No meter? Tape a square of plastic wrap flat against the wall and leave it overnight. If there’s fog on the underside of the film in the morning, the wood is still giving off moisture.
That fog is the entire test. It’s condensation from wood that’s still drying, and it costs you a square of cling film.
Common mistake: Painting after a wash and one sunny afternoon. I did exactly that on a section of cedar, and blisters showed up. Now I wait until the wood reads below 20% moisture content and run the plastic test before the first brush stroke.
What Temperature Range Actually Lets the Coating Cure?
Two numbers govern this, and they don’t agree.
The Forest Service report gives a range: above 40 to 50 degrees F during application and for 24 hours afterward, depending on the manufacturer. California Paints is stricter on its own product. The technical data sheet for Ultra 2010 says not to paint when temperatures are expected to be below 50 degrees F in the next 24 hours.
| Source | Minimum temperature | How long it applies |
|---|---|---|
| USDA Forest Service, FPL-GTR-202 | 40 to 50 degrees F, manufacturer-dependent | Application plus 24 hours after |
| California Paints Ultra 2010, semi-gloss | 50 degrees F, air and surface | Application and full drying time |
| California Paints Velvet Flat and Low Luster | 35 degrees F, air and surface | Application and full drying time |
The data sheet names air temperature and surface temperature separately, so check both. A wall in deep shade is not the same reading as the air at the top of the ladder.
The practical read is simple. California Paints sets a hard 50 degrees F floor, while the Forest Service allows a 40 to 50 degree range depending on the manufacturer. If you’re at 44 and the label says 50, the label wins.
One more from the same sheet: do not paint when rain or dew is imminent. A wash of dew landing on a half-cured acrylic film will leave you with a chalky, uneven surface that no amount of sanding fixes cheaply.
How Do You Prep Wood Shingles Before Painting?
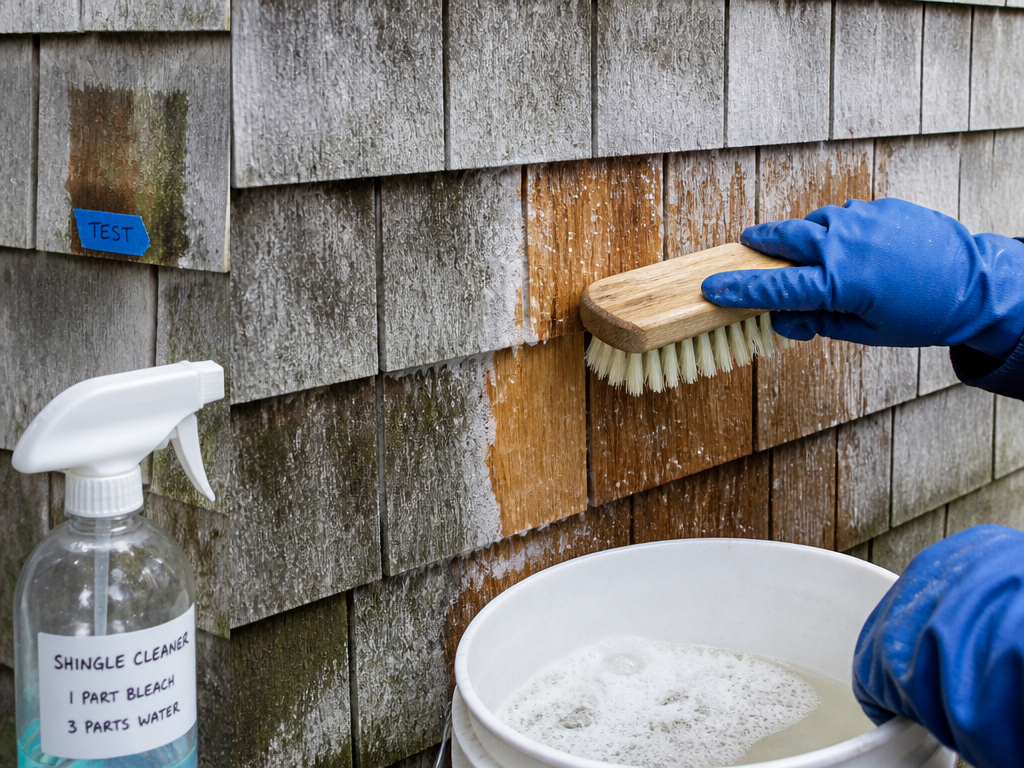
Four things happen before a brush touches the shingle, and the order matters.
Before you start: The cleaning recipe below uses 5% sodium hypochlorite bleach, so wear rubber gloves, goggles, an apron, and boots, and rinse splashes off plants right away. Do not sand paint applied before about 1985, because lead dust is extremely toxic and the debris has to be handled as hazardous waste under federal, state, and local rules. If the wall genuinely needs pressure washing, hire a contractor who has cleaned cedar before. High pressure strips wood fiber and shortens the life of the shingles.
- Wash the wall. Oregon State University Extension’s OSU Extension wood shingle roof care guide gives the mix: 3 ounces trisodium phosphate, 1 ounce laundry detergent, 1 quart of 5% bleach, and 3 quarts of warm water. Scrub lightly, let it stand 10 to 30 minutes, then rinse with fresh water. Skip this and the primer bonds to chalk, salt, and dust instead of wood.
- Test the solution first on a small, inconspicuous spot. Some cleaners discolor cedar, and you find out on a hidden corner or you find out on the front of the house.
- Leave the phosphate out if your gutters run straight into a storm drain. Phosphates feed algal blooms downstream, and the detergent and bleach still do the cleaning work.
- Remove loose and scaly paint by sanding or scraping until what’s left is tightly adhered. Spot-prime the bare spots with a latex or oil primer before you prime the full wall.
- Treat mildew with an EPA-registered mildew solution, wearing gloves and goggles, then rinse clean and let it dry completely.
That’s the whole prep sequence, and it’s the same discipline as painting wood siding anywhere else on the house. If sanding is off the table for you, the paint wood without sanding approach still starts with a real wash and a degreaser.
Fair warning: a shingle wall that’s been under trees for a decade takes two wash passes. The first lifts the grey film, the second gets the dirt underneath it. Stop after one and your primer is holding dust.
Primer Does the Work the Topcoat Gets Credit For
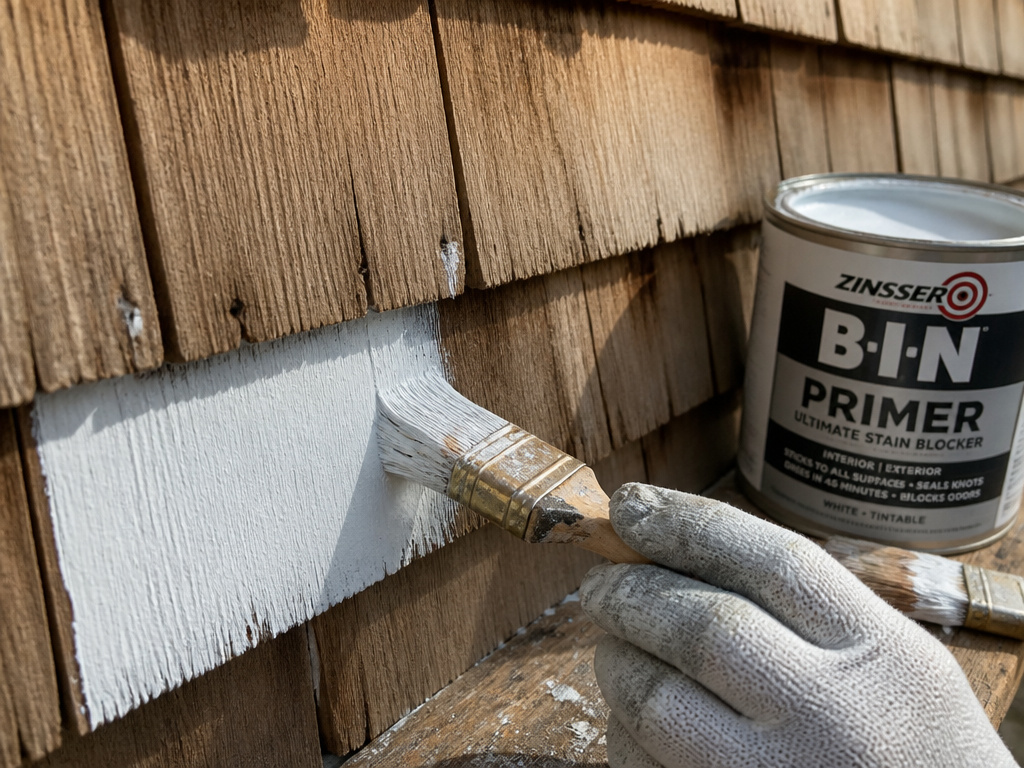
The topcoat argument gets all the attention. The primer is where the job is won or lost.
The Cedar Bureau’s Cedar Bureau sidewall shingle finishes bulletin is direct about it: coat all product surfaces for the best results, and use a stain-blocking primer to minimize extractive bleeding when you’re applying an opaque color.
Back-Priming: Half to Two Thirds, Not the Whole Face
The Forest Service puts a number on the back side. Primer should extend about half to two thirds up the back of each shingle, which is enough to stop the wood wicking moisture from the cavity without sealing the whole back into a trap.
That’s the detail almost nobody does on a repaint, and it’s the one that buys you years.
Where the Primer Guidance Splits
The two authorities don’t say the same thing here, and it’s worth knowing which one you’re following.
- Oil-based stain-blocking primer is what the Cedar Bureau calls the best protection against extractive bleeding.
- Latex stain-blocking primer is acceptable to the Forest Service, which calls for a stain-blocking primer without specifying oil or latex.
- Spot-priming knots and resin areas happens before the full prime, and if brown tannin stains appear afterward, those areas get re-primed.
If you’re coating a light color over western red cedar and you want one answer, the Cedar Bureau calls oil-based the best protection against extractive bleeding, while the Forest Service accepts a stain-blocking primer without specifying oil or latex.
Why Acrylic Latex Wins the Topcoat Argument
The Cedar Bureau’s Cedar Bureau sidewall finishing manual names a 100% acrylic latex topcoat as the preferred paint system, because it’s more flexible and more resistant to blistering and cracking. An oil or alkyd topcoat sits in the same manual under “less durable paint system.”
California Paints doesn’t rank them. Its Ultra 2010 system for new shingles is one coat of Troubleshooter Universal Oil 22700 or Latex Primer 45100, followed by two coats of Ultra 2010 acrylic semi-gloss 402XX. It simply doesn’t offer an oil topcoat in that system, so the comparison never comes up.
For a primer on which product goes under which, the best exterior wood primer breakdown covers the same ground. And if you’re still deciding on chemistry, this exterior wood paint comparison is the longer version.
I reach for a 100% acrylic latex topcoat when I want one I don’t have to think about, since it’s flexible enough to move with cedar.
Knots, Tannin Bleed, and the Weathered Surface That Won’t Hold Paint
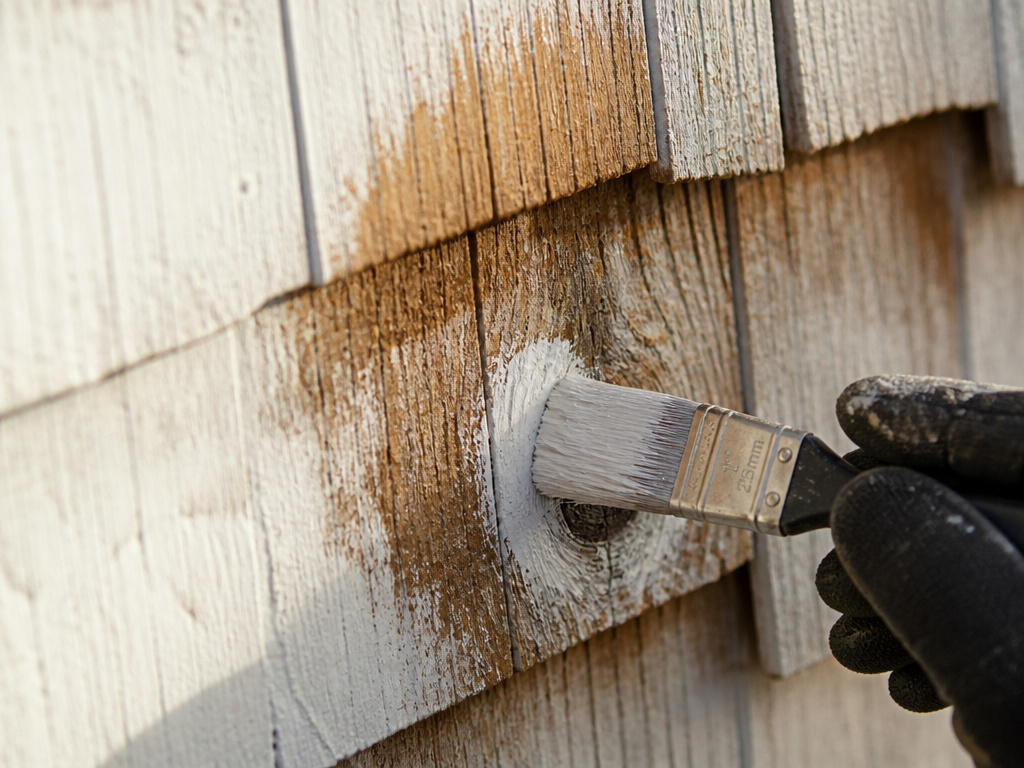
You prime a fresh shingle, come back the next morning, and there’s a brown stain sitting on top of the white.
That’s tannin, and the fix is upstream. California Paints calls for spot-priming knots and resin areas before priming the whole surface, then re-priming any area where brown tannin stains show through after the first prime. Skipping the re-prime means the stain keeps migrating into your topcoat for years.
Weathered wood is a harder problem. The Forest Service states that paints will not adhere to weathered surfaces, and that cedar exposed to sunlight for as little as 2 to 3 weeks won’t hold film-forming finishes as well as an unweathered surface. The weathered layer has to come off before you re-prime.
Here’s where the sources genuinely contradict each other, and I’m not going to pretend otherwise.
The Cedar Bureau says never allow wood to weather before applying the finish. A 1930 USDA Forest Products Laboratory bulletin says it is entirely practicable to let shingles weather naturally with no surface treatment at all, and that the wood turns a pleasing gray in a few months. The Cedar Bureau’s own wall manual even describes applying a bleaching oil finish to hasten the weathering process.
Both are describing real practice. The difference is what you plan to do next. If a film-forming coating is going on, the weathered surface is the enemy and it comes off. If you’re leaving the wall bare or going to a penetrating stain on rough-sawn shakes, weathering is a finish in itself.
Where this goes sideways: Switching from a semi-transparent stain to paint without stripping. The Forest Service is clear that it isn’t an option unless the old finish and the weathered surface come off, and the surface then needs scuff-sanding, priming, and finishing. Budget at least two coats to hide the residual stain.
If the wall has already failed somewhere, the fix peeling paint sequence is the same job with a smaller footprint. Scrape, remove the weathered wood, prime, topcoat.
Brush Choice Is a Chemistry Decision
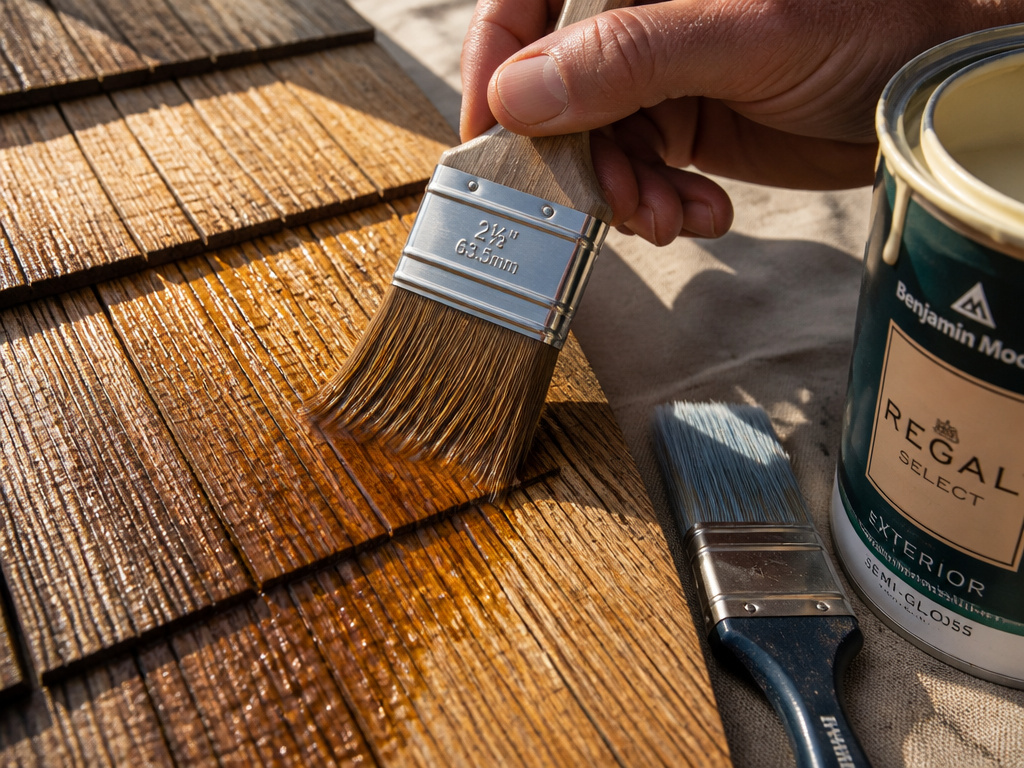
Synthetic bristle for latex, natural bristle for oil, and long bristles over short ones.
That’s the Forest Service’s spec, and it isn’t aesthetic. Natural bristle absorbs the solvent in an oil product and keeps the film flowing. A synthetic brush in the same can loads and drags, and you get a stippled surface that never levels out.
Spray, Roll, or Brush: What Each One Costs You
Spraying is fast on a big wall, but the Forest Service says to back-brush immediately after spraying or rolling. Without that pass, the coating sits on the surface instead of working into the split texture, and the texture is the whole reason the shingle sheds water.
California Paints allows reducing the material with up to 1 pint of water per gallon for spray application. More than that and the film thins out past its rated coverage.
Two more details from the same sources that separate a clean job from a mess:
- Do not brush out excessively. Overworking acrylic in warm weather flashes the solvent and leaves brush texture that won’t flow out.
- Work the shady side of the building when it’s hot, so the film has time to level before it skins over.
- Dip tinted stains piece by piece and brush them, never in bundles. Bundling keeps pigment from flowing between shingles and you get a blotchy wall.
- Touch up cut surfaces on pre-finished shingles, or the finish fails right at the cut.
You can hear the difference before you can see it. A properly loaded brush drags with a low, wet hiss across the wood. A dry one rasps, and every place it rasped will show as a lighter streak once the film sets.
If brush texture is your recurring problem, the avoid brush marks technique is worth ten minutes before you start. Honestly? Load less and lay it off once.
Paint or Stain on Wood Shingles: Which One Wins
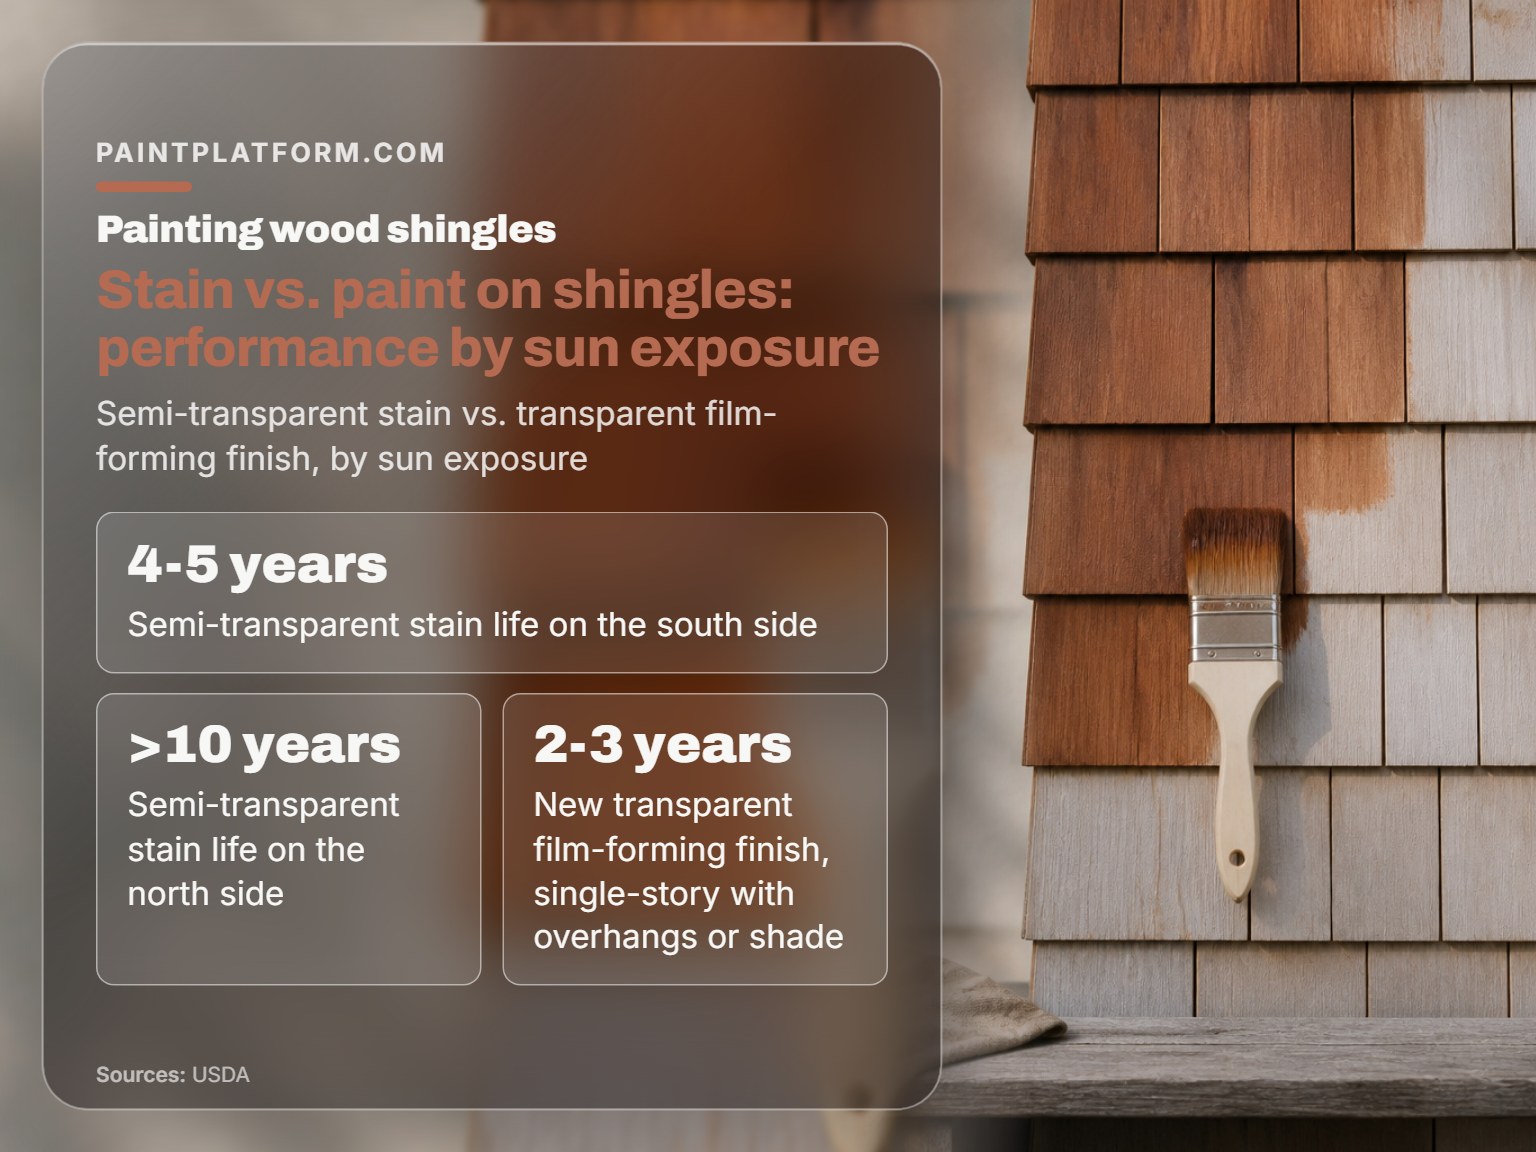
The how to paint wood shingles answer is that semi-transparent stain outlasts paint on shingles, and it fails politely instead of loudly.
The Forest Service gives the numbers. Semi-transparent stains last 4 to 5 years on the south side and more than 10 years on the north side. New transparent film-forming finishes may give 2 to 3 years of good performance, and only on single-story structures with wide overhangs or tree shade.
That’s the gap in one line. A penetrating stain soaks in and fades. A film sits on top and eventually peels, and peeling on cedar means scraping, sanding, and re-priming.
The chemistry question is where the sources split again. The Cedar Bureau says use oil-based stains only. Its finishes bulletin acknowledges that new latex stain formulations are being developed and show better penetration than older latex formulations, which is a softer position than the wall manual takes.
My own experience lines up with the practical middle. Solid stain on rough cedar hid less of the grain than paint did and touched up far easier, because there’s no hard edge to catch and lift. On log siding I’d pick a penetrating stain most days, two coats, with the brush worked into the checks.
If you want one rule: the Cedar Bureau’s wall manual says use oil-based stains only, while its finishes bulletin notes new latex stain formulations are being developed and show better penetration than older latex formulations; smooth pre-primed shingles get acrylic latex over a stain-blocking primer, and you don’t switch between the two without stripping.
For the wider product picture, this best paint for exterior wood roundup covers the acrylic lines that hold up on vertical cedar.
Frequently Asked Questions
Can you paint over stained wood shingles?
Only if the existing stain is a film-forming solid-color stain in sound condition. The Forest Service states that changing colors or switching to paint over a semi-transparent stain isn’t an option unless the old finish and the weathered surface are removed first. After stripping, the surface needs scuff-sanding, priming, and finishing, and at least two coats may be required to hide the residual stain.
How long should you wait after washing shingles before painting?
Wait until the wood reads below 20% moisture content, which the Cedar Bureau translates to 12 to 14% equilibrium for most of North America. In practice that means waiting until the wood reads below 20% moisture content, plus an overnight plastic-wrap test. If fog forms under the plastic, keep waiting.
Do wood shingles need to be primed on the back?
Yes, and the back-priming extent is specific. The Forest Service says primer should extend about half to two thirds up the back side of the shingle. Coating all surfaces is the Cedar Bureau’s recommendation for best results, and an unprimed back is where moisture wicks in.
What is the best temperature to paint wood shingles?
It depends on the source: the Forest Service allows a 40 to 50 degree range depending on the manufacturer, while California Paints sets a hard 50 degree floor for its Ultra 2010 semi-gloss and warns against painting when temperatures are expected below that in the next 24 hours.
How often do painted wood shingles need recoating?
It depends on the coating and the exposure. The Forest Service puts semi-transparent stain at 4 to 5 years on a south-facing wall and more than 10 years on the north side, while transparent film-forming finishes may only manage 2 to 3 years.
The Bottom Line
Here’s the trigger I’d give you: if your moisture meter still reads above 20% after drying, stop and wait. That’s not a judgment call. The wood is telling you it isn’t ready, and painting over it is how you end up scraping blisters off a wall in three weeks.
The first thing to do this week costs about a square of cling film. Tape it to the shadiest part of the wall, leave it overnight, and look at it in the morning before you buy anything.
One concession, because it matters. Everything above assumes shingles that are bare or soundly coated. If the wall has already failed and the wood underneath is grey and fuzzy, none of this applies until that weathered layer comes off. Primer over a weathered surface is money in the bin.
And if you take one thing from all of this: the topcoat is the part people admire, and the moisture reading is the part that decides whether they’re still admiring it in five years. Let it be messy. Just don’t let it be wet.
