
Impasto Technique Explained: Why Thick Paint Holds
This post contains affiliate links. As an Amazon Associate, we earn from qualifying purchases.
The impasto technique explained in one line: you load a stiff brush or palette knife with paint thick enough that the marks stay raised after drying. Oil is the traditional medium, acrylic needs a gel to thicken it, and the paint has to sit on a support strong enough to hold the weight.
That weight is the impasto technique explained part beginners underestimate. A heavy passage swallows far more paint than a flat one, and everything underneath it has to carry that load without flexing. Get the support wrong and the ridges you spent an afternoon building crack along the canvas weave months later.
What follows walks the medium choice, the ratio question, the support question, and the drying timeline. Where the manufacturers disagree, I’ve left the disagreement visible instead of smoothing it into one tidy rule.
Key Takeaways
- Oil is the traditional impasto medium because its slow drying lets you blend, but thick oil passages over a broad area can crack.
- Acrylic holds a peak with less fuss, though even flexible acrylic can pull a stretched canvas out of shape when piled on thick, while oil may crack across broad surfaces.
- Canson gives two paste ratios for oil: a 1:1 minimum and a 3:1 ideal, and a higher paste fraction shortens drying time.
- Heavy oil impasto may take a year or more to dry through, per Utrecht, so plan varnishing and shipping around that.
- Rigid panels carry more paint than stretched canvas: hardboard, MDO plywood, and honeycomb aluminum sandwich board.
The Impasto Technique Explained: Why the Paint Holds Its Shape
Impasto comes from impastare, the Italian verb for kneading or pasting, and that’s the right mental picture. You’re pushing a soft solid around until it stands up on its own.
Impasto describes paint applied thickly enough that the brush or knife marks stay visible after drying. The word derives from the Italian impastare, meaning to knead or to paste. Venetian Renaissance painters Titian and Tintoretto are the first artists in whom the technique becomes noticeable. Oil remains the traditional medium, since its slow drying allows blending.
Tate carries the thread forward from there: Baroque painting, then nineteenth-century landscape and naturalist work, then modern art, where the surface of a painting started claiming its own reality instead of acting as a window. By the mid-twentieth century, Frank Auerbach, Jean Dubuffet, and Leon Kossoff had pushed the thickness about as far as it goes. Tate also notes matter painting, where sand, mud, or cement gets mixed into the thick paint.
A peak holds because the paint has body. That means pigment and binder with very little solvent left to evaporate away. Push a knife through a stiff ridge and the ridge stays where you left it. Push a knife through a loose mixture and it slumps back into a puddle.
A finished passage catches light along the ridge and drops it into the trough beside it. That’s why impasto photographs badly and reads so well in a room.
If you want the ridge without all the weight, you can build texture in the ground layer with paint first. Utrecht suggests exactly that, using acrylic-based products like modeling paste before any paint goes down.
Which Medium Actually Holds a Peak?
Oil is the traditional impasto medium, and the reason is simple: it stays workable long enough to push around.
The Fort Wayne Museum of Art puts oil first for its thick consistency and slow drying time, which makes blending easier. The same source notes that acrylics need an added gel to thicken them, and that watercolor is simply too fluid for the build-up required.
Here’s the short version of the field:
- Oil paint. Traditional, thick, slow to dry, easy to blend. Also the one most likely to crack when a thick passage covers a broad, flexible surface.
- Heavy-body acrylic plus a gel. Add Atelier Interactive Impasto Gel when you want real height.
- Watercolor and tempera. The Fort Wayne Museum of Art says you won’t see an impasto watercolor because the medium is too fluid, while the Chalkola guide allows watercolor and tempera if you add a thickener.
- Soft pastel. Pressed hard against paper, it gives a limited raised effect. Limited is the word.
The palette knife vs brush decision matters more here than which brand of paint you bought. A knife builds a ridge in one confident stroke. A stiff brush leaves a hundred smaller ones.
| Question | Oil paint | Acrylic |
|---|---|---|
| Flexibility over time | Loses it; may crack across broad areas | Retains it; can be piled fairly heavily |
| Drying speed | Slow; heavy passages may take a year or more | Fast on the surface, slow through the core |
| Best support for heavy work | Rigid panel | Rigid panel once the paint weight climbs |
| Fix when cracking starts | Add alkyd medium | Thin the passage or change the support |
Utrecht is clear that acrylic keeps its flexibility as it ages and can be piled on fairly heavily, while oil doesn’t offer the same flexibility and may crack if thick passages cover a broad surface. Adding an alkyd medium raises oil’s flexibility and cuts the cracking risk.
For silky, thick and fast drying properties, add Liquin Impasto medium to oil paint.
Watch your acrylic paint consistency before you blame the medium. Paint that’s too loose won’t hold a peak no matter how expensive it was.
How Much Medium Goes Into the Paint?
Canson publishes two ratios for the same mixture, and both are worth knowing.
The minimum is 1 part painting paste to 1 part oil paint. The ideal, in the same source’s words, is 3 parts paste to 1 part paint. Canson also notes that a higher paste fraction shortens drying time, which is the whole reason to bother.
Other sources land elsewhere. Chroma’s Atelier guide mixes 4 parts Impasto Gel to 1 part Quinacridone Magenta for an impasto layer. The Chalkola guide uses a 1:1 gel-to-acrylic mix and reports that peaks hold for weeks. That last one is a hobby blog, so treat it as a starting point rather than a specification.
Two things about Chroma’s mediums are worth knowing before you commit:
- Impasto Gel is a thick, water-based clear acrylic gel. It goes on milky and dries clear with a gloss finish.
- Modelling Compound is white and dries white, so mixing it into your paint shifts your values lighter.
Where this goes sideways: Stir Impasto Gel or Modelling Compound into Atelier Interactive and those layers stop reopening. Paint you could rehydrate an hour ago now sits there permanently, and you’ll be painting over it instead of into it.
If you’re working in acrylic and want the full menu, this rundown of acrylic mediums covers which ones build height and which ones only change the finish.
Stretched Canvas or a Rigid Panel?
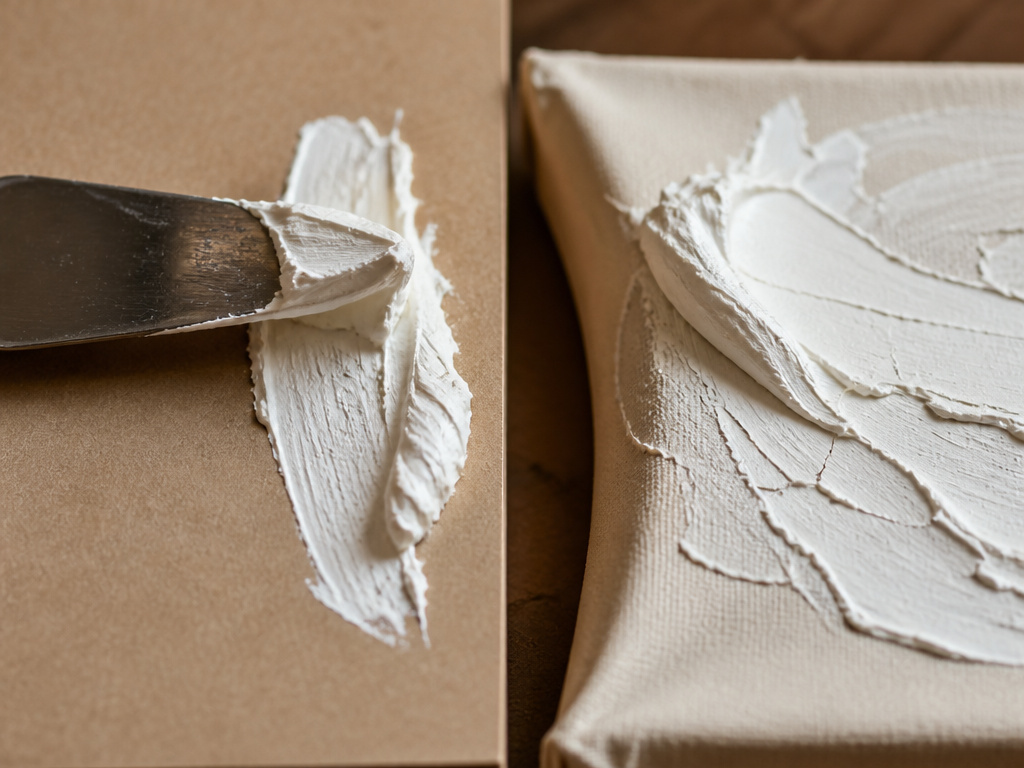
You finish a heavy passage, step back, and the canvas has a belly in it that wasn’t there an hour ago.
That belly is the problem. Utrecht explains the mechanism: shrinkage, expansion, and sagging in a stretched canvas stress the paint film, thick passages crack, and weakly bonded pieces may detach over time if the damage gets bad enough. A rigid panel doesn’t move, so the paint doesn’t have to.
The panel options Utrecht names:
- Hardboard, cheap and smooth, and it needs sealing before anything else.
- MDO plywood, which is a resin-coated plywood that stays flat.
- Honeycomb aluminum sandwich board, the stiffest and lightest of the three.
Canson agrees on the principle from a different angle, stating that modeling paste requires a rigid, non-warping support. Where the two sources part ways is on how to handle a canvas you’re already committed to. Utrecht’s advice is to limit the broadness of the application, keeping thick passages in small isolated spots surrounded by thinner paint. Canson’s advice is to apply the mixture thickly to the support, while Utrecht advises limiting broadness and keeping thick passages in small isolated spots surrounded by thinner paint.
Once you’re building peaks you can see from across the room, move to a panel.
How Long Does Thick Impasto Take to Dry?
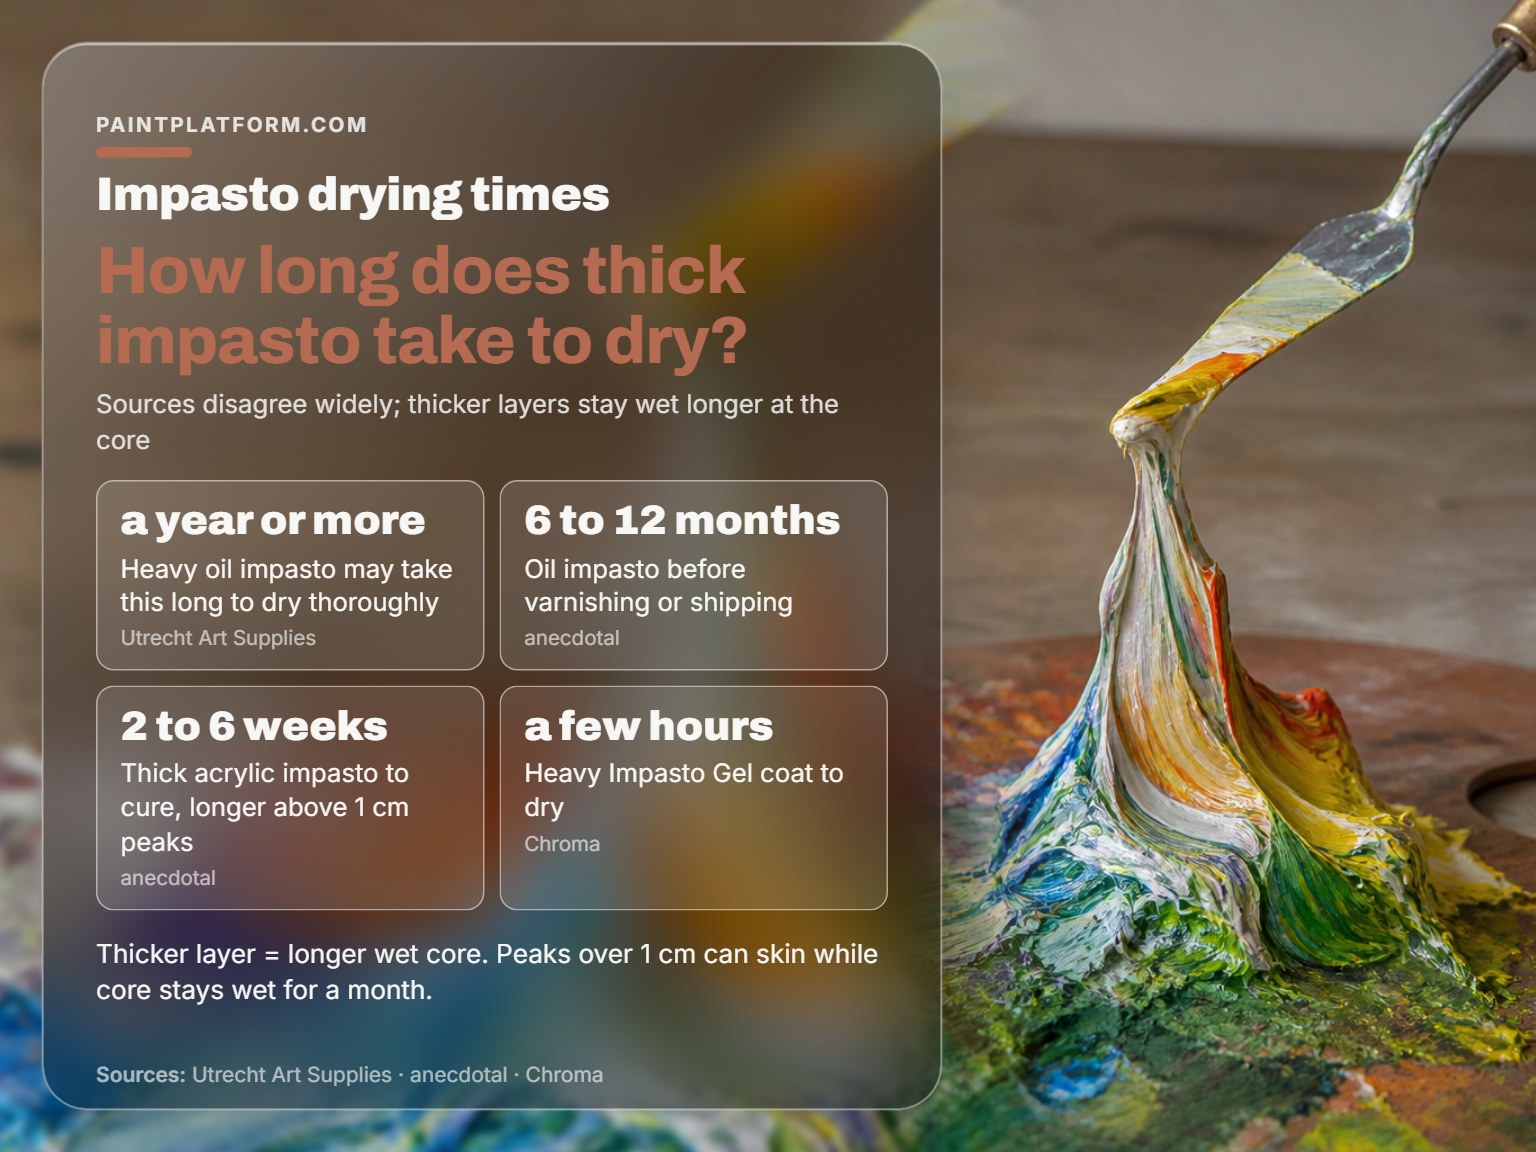
Drying is where impasto stops being fun.
The published numbers don’t agree, and the gap between them is enormous. Utrecht says heavy impasto in oil paint may take as long as a year or more to dry thoroughly. The Chalkola guide puts oil impasto at 6 to 12 months before varnishing or shipping. Chroma says a heavy coat of Impasto Gel could take a few hours. Canson puts modeling paste anywhere from a few minutes to a few hours depending on layer thickness.
| Medium | What the source says | Source |
|---|---|---|
| Heavy oil impasto | May take a year or more to dry through | Utrecht Art Supplies |
| Oil impasto, general | 6 to 12 months before varnishing or shipping | Chalkola guide |
| Thick acrylic impasto | 24 to 72 hours surface-dry, up to 2 weeks full cure throughout | Chalkola guide |
| Thick acrylic impasto | 2 to 6 weeks to cure, longer above 1 cm peaks | Chalkola guide |
| Heavy Impasto Gel coat | A few hours | Chroma (Atelier) |
| Modeling paste | A few minutes to a few hours, by layer thickness | Canson |
The pattern underneath the disagreement is consistent: the thicker the layer, the longer the core stays wet. Acrylic skins over fast and fools you. Peaks over 1 cm can skin while the core stays wet for a month, per the Chalkola guide.
Test with your thumb, not your eyes. Press gently on the highest peak. If it dents, it isn’t cured, no matter how dry the surface feels.
The part nobody mentions: The Chalkola guide warns that varnishing too early cracks the surface as the interior finishes drying, so wait until the whole passage is cured through, not just touch-dry.
Thick Over Thin: The Layering Rules That Keep Peaks Attached
I once tried an unfamiliar method on a piece I’d already decided was the finished one. It went wrong, and I spent the rest of the evening scraping. Now every new technique gets tested in a scrap sketchbook first, on a surface I don’t care about.
The rules that would have saved that piece are not complicated.
Fine Art Tutorials states the first one flatly: layer thick over thin, regardless of which layering technique you use. Thin paint underneath, thick paint on top. Reverse it and the top layer dries faster than the base, shrinks, and pulls itself apart.
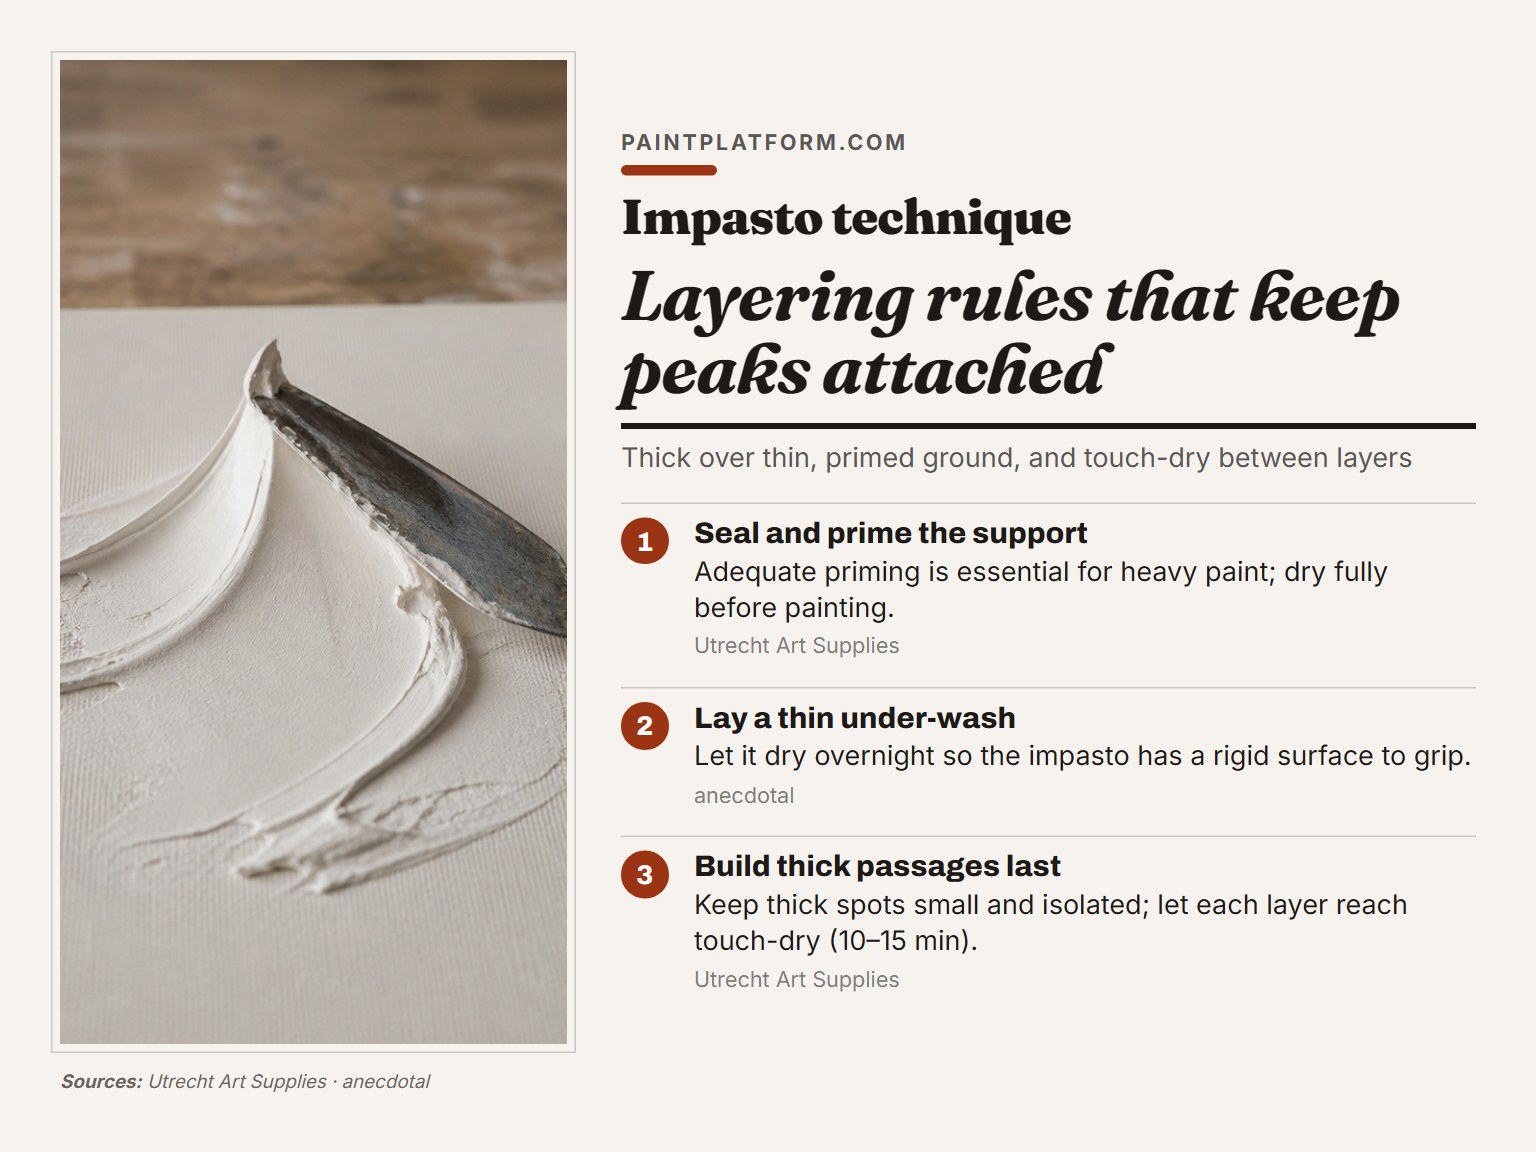
The second rule is priming. Utrecht calls adequate priming essential when paint is heavy, because a properly prepared ground gives the paint something to grip. With good priming, paint stays in place even if cracks develop. Without it, a crack becomes a place where a chip lifts off.
Here’s the order I use now:
- Seal and prime the support. Dry it fully before any paint touches it.
- Lay a thin under-wash. The Chalkola guide lets it dry overnight, which gives the impasto something rigid to grip.
- Block the big shapes in thin paint. Get the composition working before you add weight.
- Build the thick passages last, in isolated spots rather than one broad slab.
- Let each layer reach touch-dry before the next. Chroma suggests 10 to 15 minutes.
For the medium itself, add Liquin Impasto medium to oil paint for silky, thick and fast drying properties. For acrylic, Catalyst blades, wedges and Polytip brushes are made from flexible silicone and designed for use with the impasto technique. If you’re new to the tool, start with a palette knife technique you can repeat before you chase speed.
Drag a knife through a stiff peak and you feel the resistance travel up into the handle. That resistance is the whole signal. If the knife slides through with no drag at all, the paint is too loose to hold.
Easy to miss: A thin glaze over a cured impasto ridge settles into the troughs and leaves the peaks clean. That’s the cheapest way to make texture read from across a room. The glazing technique only works on a fully cured surface, though, or you’ll trap solvent under the skin.
The fat over lean rule is the oil-painting version of the same idea, and it matters more, not less, once the layers get thick.
Frequently Asked Questions
Is impasto only for oil paint?
No. Oil is the traditional medium because of its thick consistency and slow drying, but acrylic works well once you add a gel to thicken it. Utrecht notes that acrylic keeps its flexibility as it ages and can be piled fairly heavily. Soft pastels pressed hard give a limited raised effect.
How thick should impasto paint be?
Thick enough that the brush or knife mark stays visible after drying. Practically, that means paint straight from the tube, or paint mixed with a medium like Impasto Gel or painting paste. If the ridge slumps after you pull the knife away, it’s too loose.
Can you do impasto with watercolor?
The Fort Wayne Museum of Art says you won’t see one, because watercolor is too fluid for the build-up required, while the Chalkola guide allows watercolor with a thickening agent. Either way, the texture you get is a shadow of what oil or acrylic will do.
Does impasto crack?
It can. Utrecht warns that oil paint may crack when thick passages cover a broad surface, and that canvas movement stresses the paint film further. Acrylic is more forgiving, but even flexible acrylic can sag a stretched canvas when applied too thickly. Rigid panels and good priming are the two fixes that actually work.
How long before I can varnish an impasto painting?
Until it’s cured through, not just touch-dry. The Chalkola guide puts thick acrylic at 2 to 6 weeks and oil at 6 to 12 months, while Utrecht notes heavy oil impasto may take a year or more to dry thoroughly. Press a peak with your thumb. If it dents, keep waiting.
The Bottom Line
Here’s the test I’d give anyone starting out: press your thumb into the support before you load a single knife. If the surface flexes at all, don’t build heavy impasto on it. Move to hardboard, MDO plywood, or a honeycomb aluminum panel and the cracking conversation mostly ends before it starts.
The rest is patience with a schedule attached. Oil gives you a year of drying and a long working window. Acrylic gives you a short working window and weeks of curing. Neither is faster overall, they just front-load the difficulty in different places.
One concession, because I’d rather be honest than tidy: everything above assumes you’re working on a surface you can actually control. If you’re painting on a cheap pre-stretched canvas that arrived warped in the mail, none of the ratio advice will save you. Start messy, refine later, and test the new thing on scrap before it goes anywhere near the piece you care about.
