
How to Paint a Countertop: Step-by-Step (With Tape Test)
This post contains affiliate links. As an Amazon Associate, we earn from qualifying purchases.
To paint a countertop, clean and degrease the surface, run a small adhesion test, then apply a countertop-rated paint and a sealer. Sources disagree on primer: Rust-Oleum Specialty says no primer on laminate, while Sherwin-Williams recommends epoxy or water-based acrylic primer. Rust-Oleum HOME skips sanding and priming; Sherwin-Williams and This Old House say sand first.
That split is the how to paint a countertop question in miniature. Rust-Oleum’s no-prep claim works because the kit includes a heavy-duty degreaser and a base coat built to grip a clean surface. The same data sheet reinstates sanding if a tape test fails, though. So the prep step that matters most is a five-minute test on a hidden corner.
What follows: the substrate check, the tape test, the seven-step application, and the cure schedule that decides when you can put the coffee maker back. Plus the one surface where every manufacturer agrees you should walk away.
Key Takeaways
- Run the tape test first. Rust-Oleum HOME’s protocol: 3″x3″ spot, base coat, 12 hours, utility-knife X, 4″ duct tape. More than 10% lift means sand with 60-80 grit, per Rust-Oleum HOME; This Old House and Sherwin-Williams say to sand regardless.
- Cure time varies by product. Rust-Oleum HOME: 24 hours light use, 7 days full cure. Beyond Paint: 5-7 days initial, 30 days before washing. Angi cites up to 14 days for some sealers.
- Food safety is not guaranteed. Rust-Oleum HOME says directly: not food safe, do not prepare food on the surface. Use a cutting board.
- Granite and quartz are a no. Sherwin-Williams says painting stone lowers home value and needs costly special coatings.
What Surface Are You Actually Painting?
Laminate and tile get different prep, and granite gets a warning label. The substrate decides almost everything that follows for how to paint a countertop: which primer, how much sanding, and whether the job is worth starting at all. My rule: identify the substrate before you buy anything.
Laminate and Formica
Laminate is the easy case. Sherwin-Williams notes that Formica is a brand name for laminate, not a separate material. Both are layers of paper or fabric pressed with resin, and both take paint well with the right prep. This Old House adds one pro detail: Tom Silva prefers particleboard over MDF as a substrate because MDF expands and contracts with water.
For a Formica-specific walkthrough, see Formica paint.
Tile
Tile is harder. Sherwin-Williams says tile needs a primer made for ceramic and porcelain, brushed into the grout lines first and then rolled across the surface. Liquid sandpaper and deglosser will not work on tile. That shortcut fails on the one surface where prep matters most. If you’re set on tile, painting over tile covers the primer and grout prep in more detail.
Granite and Quartz
Stone is the walk-away case. Sherwin-Williams is direct: painting granite and quartz is generally not a good idea. It needs costly special coatings and lowers your home’s value. Rust-Oleum Specialty Countertop Quart excludes granite and marble from its data sheet entirely.
Rust-Oleum Specialty Countertop Quart is an epoxy-acrylic coating rated at 1.5 to 2.0 mils dry film thickness per coat. Coverage runs roughly 25 linear feet of average countertop at that thickness, assumes 15 percent material loss, and the can carries a 5-year shelf life. The data sheet excludes floors, granite, marble, ceramic tile, and concrete.
Do You Really Need to Sand and Prime?
Three manufacturers give three different answers, and all three are published. Most guides pick a side and pretend the other doesn’t exist. The honest version: it depends on the product, and the product’s own data sheet is the final word.
What the manufacturers say
| Source | Sanding | Primer on laminate |
|---|---|---|
| Rust-Oleum HOME | None unless tape test fails | None needed |
| Rust-Oleum Specialty | Light sand on gloss | No primer needed |
| Sherwin-Williams | Sand or degloss | Epoxy or water-based acrylic |
| This Old House | 220-grit full surface | Latex-based primer |
| Angi | 100-150 then 220 | Water-based acrylic or oil-based |
Rust-Oleum HOME markets itself as a coating you can apply “without stripping, sanding or priming.” That claim is real, and it works because the kit includes a heavy-duty degreaser and a base coat formulated to grip a clean surface. But the same Rust-Oleum HOME application data sheet includes an adhesion test, and if the test fails, you sand with 60-80 grit before coating the whole counter.
Sherwin-Williams and This Old House both prescribe sanding. Sherwin-Williams says skipping sanding may shorten the job’s life. This Old House recommends 220-grit across the entire laminate surface. Angi splits the difference: 100-150 grit first, then 220.
Common mistake: Trusting the no-sand label without running the tape test. The label is a marketing claim; the tape test is the manufacturer’s own verification step. Skip it and you’ll find out which one was true the hard way.
What I’d actually do
I’d run the tape test before I bought a single can. It tells you more about your counter than any product page will. If the coating lifts, you sand. If it holds, you save a weekend.
For a laminate counter in decent shape, I’d reach for Rust-Oleum HOME and follow its own protocol. For a glossy surface that’s been waxed or polished, I’d scuff it with 220-grit first, then prime with a primer made for non-porous surfaces. The primer costs an extra hour and buys you a surface the topcoat can actually grab. If you want to compare paint for laminate before you commit, that comparison covers the products that hold up.
The Adhesion Test That Decides Everything
The test takes 12 hours, a utility knife, and a 4-inch strip of duct tape. It is the single most useful step in the entire project, and almost nobody does it.
The 12-hour tape test
Clean a 3″x3″ spot in an inconspicuous corner. Let it dry. Apply base coat over the spot and wait 12 hours. Score an X through the coating down to the surface with a utility knife. Press a 4″ piece of duct tape over the X and press firmly. Pull once, quickly.
If more than 10 percent of the coating comes off, Rust-Oleum HOME says the counter needs sanding with 60-80 grit before you coat the whole surface; This Old House and Sherwin-Williams recommend sanding regardless. If less than 10 percent lifts, you’re clear to proceed. Lightly sand the test area anyway before full coating, per the data sheet.
What to do if it fails
Sand with 60-80 grit, clean the dust with a tack cloth or a rag dampened with mineral spirits, and re-test. I’d re-test before I gave up on the surface. If the second test also fails, the surface is probably sealed with something the coating can’t bond to. Rust-Oleum HOME specifically excludes counters sealed with a superhydrophobic sealer. No amount of sanding fixes a surface that repels everything.
Skip this if: Your counter has a superhydrophobic sealer on it. Rust-Oleum HOME won’t bond to it, and the tape test will tell you so before you waste a kit.
How to Paint a Countertop, Step by Step
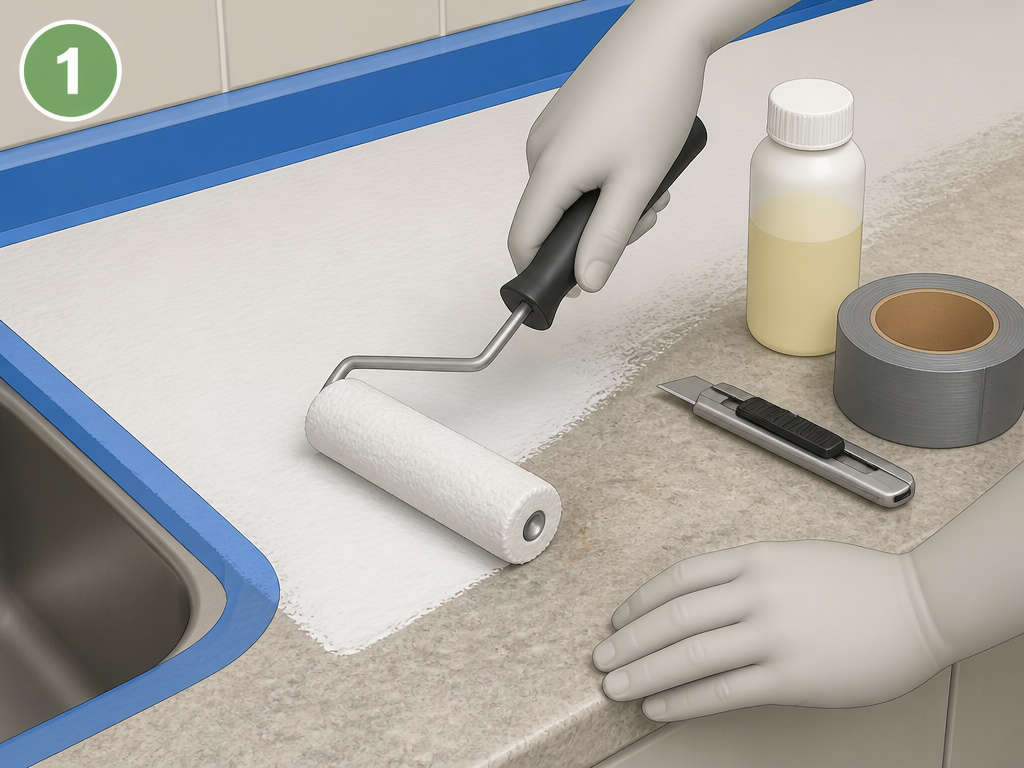
Seven steps, one weekend, and a lot of waiting. The waiting is the part most guides undersell.
What you need
- A 3/8″ nap roller sleeve for the base coat and a 1/4″ nap sleeve for the top coat
- Blue painter’s tape, not tan masking tape
- A utility knife and a roll of 4″ duct tape for the adhesion test
- A degreaser (Original Krud Kutter is included in the Rust-Oleum HOME kit)
- A NIOSH-approved respirator if you’re sanding old paint
Before you start: Sanding or scraping old paint can release lead dust, which is toxic, especially to children and pregnant women. Wear a NIOSH-approved respirator and clean up with a HEPA vacuum and a wet mop. Call 1-800-424-LEAD if you don’t know what’s under the old coating.
- Clear and protect the workspace. Tape the sink, backsplash, and cabinet edges with blue painter’s tape. Tan masking tape leaves adhesive residue that the primer won’t bond to.
- Clean with a degreaser. Rust-Oleum HOME includes a 4-ounce bottle of Original Krud Kutter. Rinse thoroughly and let it dry completely. Rinse thoroughly and let it dry completely.
- Remove the caulk. Every manufacturer that mentions caulk says remove it. Leave it in place and the coating fails along the seam.
- Run the tape test. See the section above. More than 10 percent lift means sand with 60-80 grit before you go further.
- Apply the base coat. Use a 3/8″ nap roller in 2’x2′ sections, maintaining a wet edge. White tint base needs two coats, four hours apart. Deep tint base must be tinted before use.
- Apply the top coat. Switch to a 1/4″ nap roller. One coat on horizontal surfaces, two thin coats on vertical. If you want a second coat, apply it within 24 hours of the first.
- Wait. 24 hours for light use, 72 hours before replacing heavy items, 7 days for full cure. Do not clean the counter before day 7.
How Long Before You Can Actually Use It?
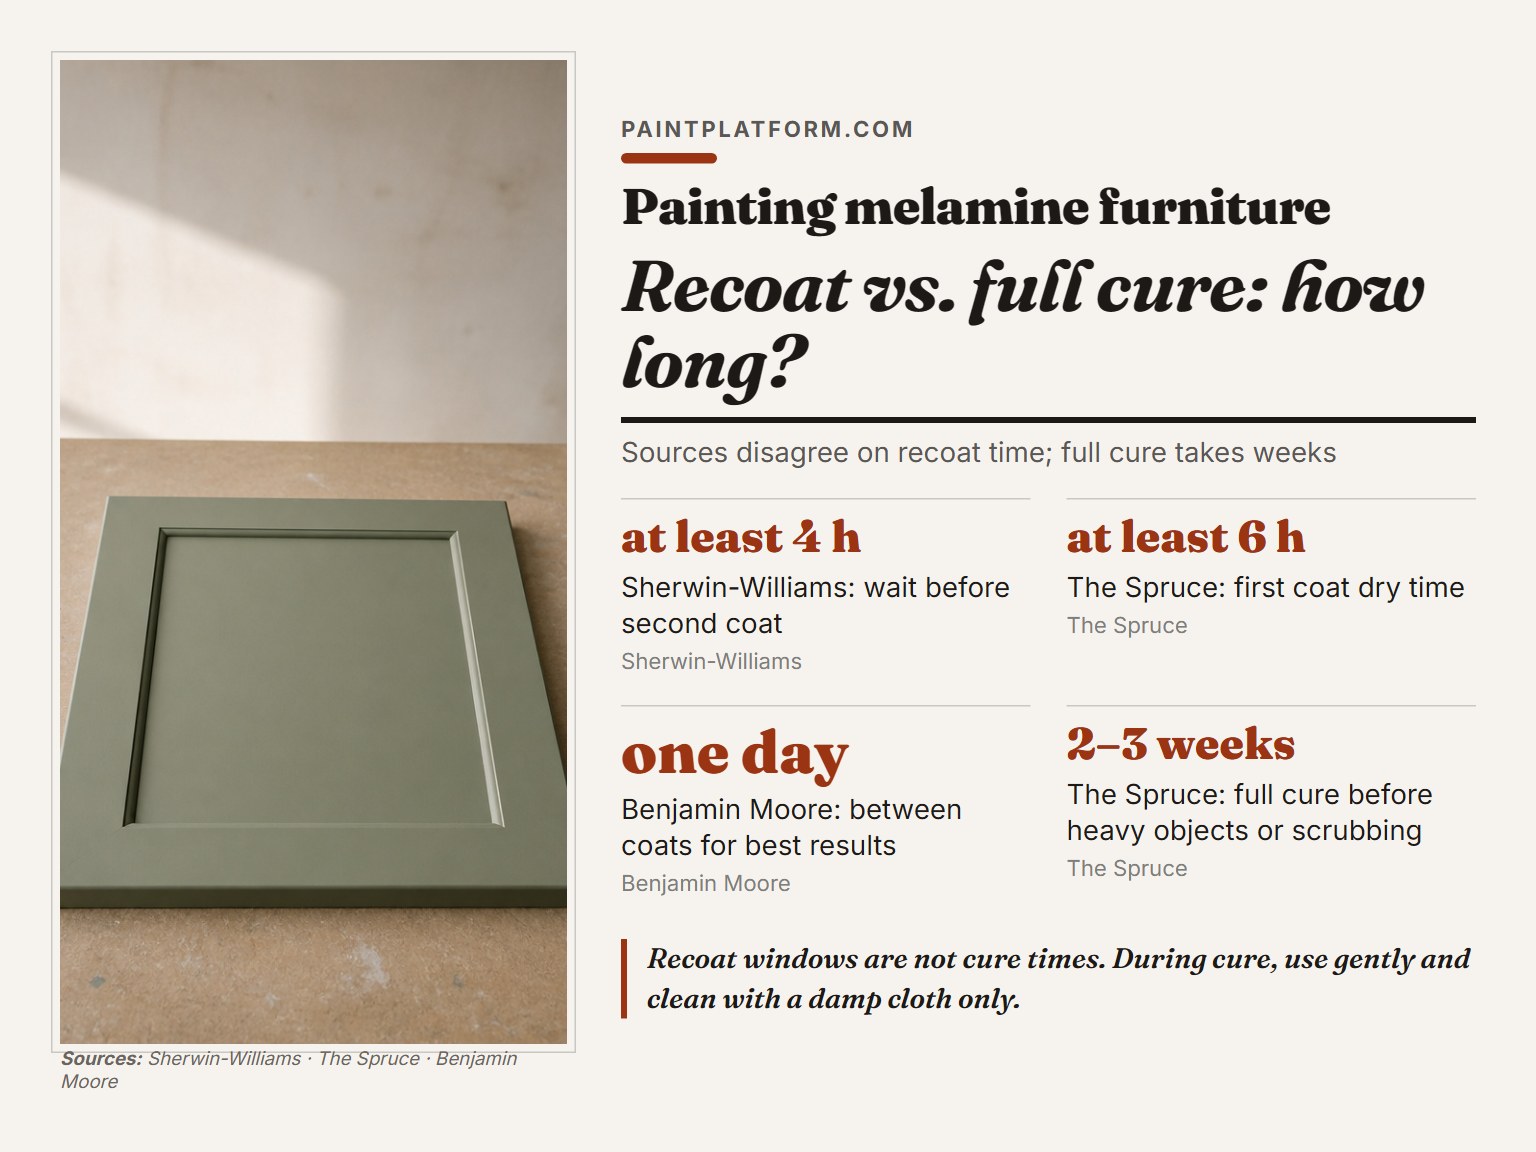
You’ve painted the last coat. The kitchen still smells like solvent, and every dish you own is stacked on the dining table. The cure schedule is where the sources disagree most, and the disagreement matters.
| Product | Recoat window | Light use | Full cure |
|---|---|---|---|
| Rust-Oleum HOME | 4 hours | 24 hours | 7 days |
| Rust-Oleum Specialty | 1 hour or after 24 hours | Handle 4-6 hours | Not stated |
| Beyond Paint | 2 hours | Dry to touch 2-4 hours | 30 days before washing |
| Angi (sealer) | Not stated | Not stated | Up to 14 days |
Rust-Oleum HOME is the most specific: 24 hours for light use, 72 hours before replacing large or heavy items, and 7 days for full cure. It also says do not clean the counter before day 7. After that, use mild soap and water or a general purpose cleaner, never an abrasive.
Beyond Paint gives a longer window: 5-7 days initial cure, and 30 days before routinely washing with soap. Angi cites up to 14 days for some sealers. The pattern is consistent: the lighter the use, the sooner you can get back to normal. The heavier the use, the longer you wait. I’d wait the full 7 days before I put the coffee maker back.
Easy to miss: Recoat timing and cure timing are two different clocks. Rust-Oleum Specialty says recoat within 1 hour or after 24 hours, not in between. Miss the window and you wait a full day for the next coat.
Where This Goes Wrong
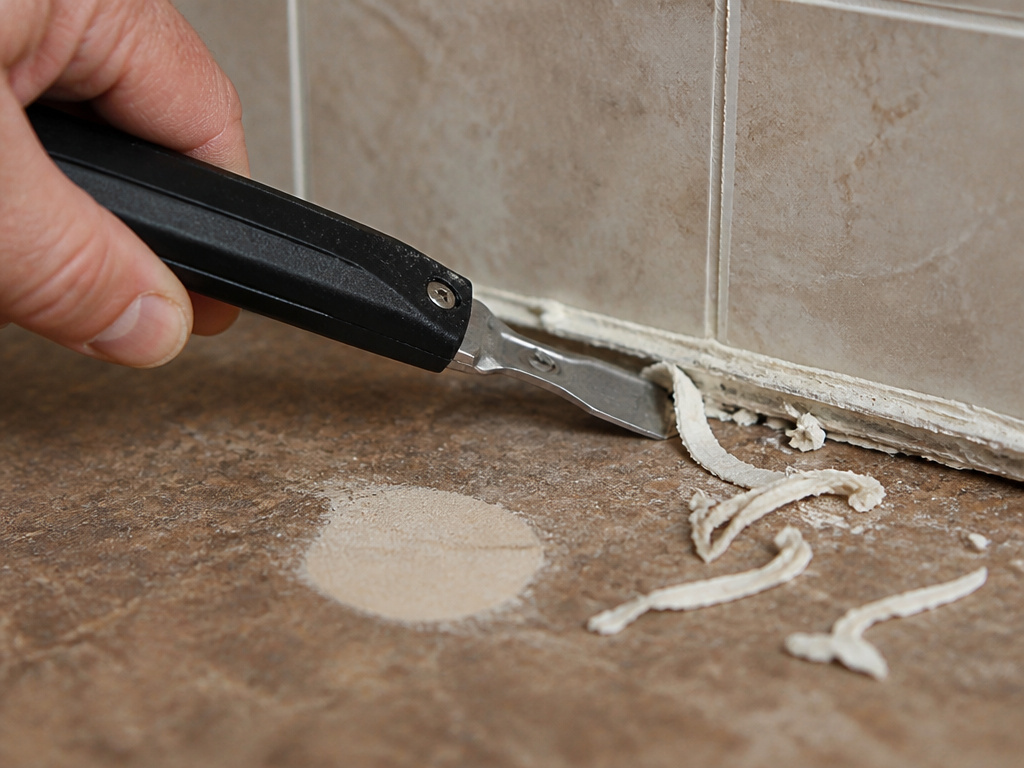
Caulk is the first thing that fails. Rust-Oleum HOME requires caulk be removed before coating, and it’s the step most people skip because it looks like prep work rather than part of the job. I’d pull the caulk before I opened the kit, because it’s the step that decides whether the coating fails along the seam.
The second failure is water. Rust-Oleum HOME says do not let water pool for extended periods. Around the sink, that means wiping up splashes rather than letting them sit. The third is heat. Rust-Oleum Specialty Countertop Quart has a flash point above 200°F, so keep it away from open flame and store it accordingly.
Humidity is the fourth. All Rust-Oleum products cap at relative humidity below 85 percent and temperatures between 50-90°F. Above that, cure and adhesion are unreliable, and the coating may look fine for a week before it fails.
What most people get wrong: Painting over a waxed or polished laminate without scuffing. The coating bonds to the wax, not the counter, and the finish fails.
Which Paint Should You Actually Buy?
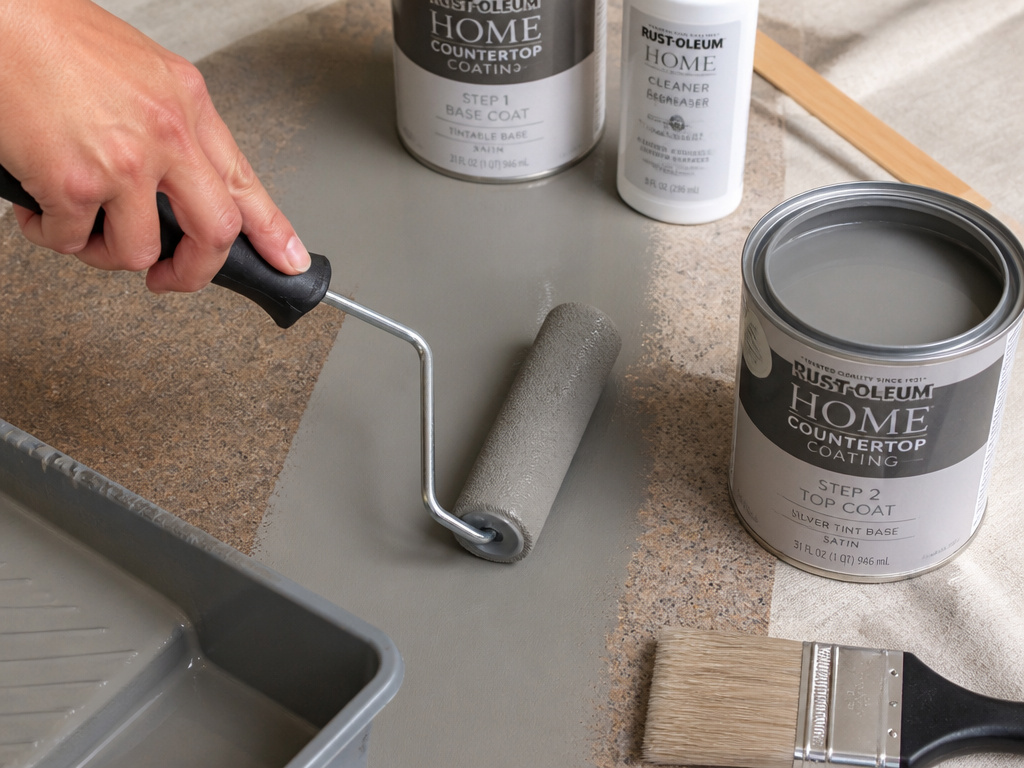
Rust-Oleum HOME is the kit I’d start with for a laminate counter. It includes the base coat, top coat, and a 4-ounce bottle of Original Krud Kutter, and the two-step system is about as forgiving as countertop coatings get. For a smaller job or a single counter, Rust-Oleum Specialty Countertop Quart is the smaller can, and it’s tintable to 26 Colortrend 888 colors with a maximum of 3 fluid ounces of colorant per quart.
Beyond Paint is the option if you want a matte or eggshell finish and a one-product system. It applies with a 3/8″ nap microfiber or woven roller, covers about 50 square feet per 16-ounce jar with two coats, and cleans up with soap and water while wet.
For primer, I’d reach for an epoxy or water-based acrylic primer on a clean laminate surface. Neither is in the Rust-Oleum data sheets, so treat that as a personal preference, not a manufacturer recommendation.
If you want the full breakdown of counter paint options on this site, that comparison goes deeper. For a laminate-specific walkthrough, see how to paint a laminate countertop. And if you’re weighing a full countertop paint kits buy versus components, that comparison is worth a look. For a stone look without the stone, faux marble is a technique worth practicing on scrap first.
Frequently Asked Questions
Can you paint countertops without sanding?
Yes, if the product allows it and the tape test passes. Rust-Oleum HOME is marketed as a no-sand, no-prime coating, and its own adhesion test is the gate. If more than 10 percent of the coating lifts, Rust-Oleum HOME says you sand with 60-80 grit before coating the whole surface; This Old House and Sherwin-Williams recommend sanding regardless.
How long does a painted countertop last?
Sherwin-Williams says painted counters should look good for 2-3 years before needing touch-ups, and up to 5 years before a complete refinish. That assumes proper prep and a sealer. Skipping sanding or primer shortens the interval.
Can you paint granite or quartz countertops?
You can, but Sherwin-Williams advises against it. Painting stone requires costly special coatings and lowers your home’s value. Rust-Oleum Specialty Countertop Quart excludes granite and marble from its data sheet entirely.
What kind of paint do you use on countertops?
Epoxy-acrylic coatings like Rust-Oleum Specialty Countertop Quart, two-part kits like Rust-Oleum HOME, and one-product systems like Beyond Paint all work. Sherwin-Williams notes that epoxy, acrylic, chalk, and oil-based paints all adhere well to Formica with a good primer.
Do you have to remove caulk before painting a countertop?
Yes. Rust-Oleum HOME requires caulk be removed before applying the coating. Leave it in place and the coating fails along the seam.
Is a painted countertop food safe?
Not according to Rust-Oleum. The HOME data sheet says directly: not food safe, do not prepare or put food directly on the surface. Sherwin-Williams recommends a food-safe polyurethane or epoxy sealer, which implies food contact is acceptable with the right topcoat. Use a cutting board either way.
The Bottom Line
The tape test is the whole decision. If the coating lifts more than 10 percent, Rust-Oleum HOME says sand with 60-80 grit and try again; This Old House and Sherwin-Williams recommend sanding regardless. If it holds, you’ve earned the right to skip the sanding pass everyone argues about.
One concession most guides skip: none of these coatings is food safe in the strict sense. Rust-Oleum HOME says so directly on the data sheet. If you cut on the counter, use a board. If you set a hot pan down, use a trivet. The finish will last longer and you’ll stop worrying about the wrong thing.
One last thing. If your countertop is granite or quartz, put the paint down and walk away. Sherwin-Williams is blunt about it: painting stone lowers your home value and needs costly special coatings. The refinish you want is a professional polish, not a roller.
