
How to Transfer a Design to a Wall: Step-by-Step
This post contains affiliate links. As an Amazon Associate, we earn from qualifying purchases.
Transfer a design to a wall with one of three methods: a grid for accuracy on a budget, a projector for speed on large or detailed work, or a pounce pattern for repeatability. All three need a clean, dry, primed wall first.
The method gets the design onto the wall. The prep decides whether it stays there. A wall that’s still curing, still damp, or coated in an easy-clean paint will lift a perfectly traced design within days. Knowing how to transfer a design to a wall is only half the job.
Below: what each method costs you in time and accuracy, plus the wall-prep numbers the manufacturers don’t agree on. By the end you’ll know which one to reach for based on wall size, detail level, and whether you’re painting over the design or applying vinyl.
Key Takeaways
- Grid method wins on accuracy per dollar; a projector wins on speed for anything bigger than a doorway.
- Wait the full cure time on new paint: 5 days per Avery Dennison, 30 per Arlon, and the paint maker’s stated cure per 3M.
- Test adhesion before you commit: 24 hours for Arlon, and 2-3 days for Avery Dennison (which also states 24 hours for a sample).
- Prime matters more than you think. Wolf-Gordon calls it mandatory, Arlon calls it optional, and both are right for different jobs.
- Keep the wall above 65°F for 48 hours before any transfer, per Wolf-Gordon.
What method should you use to transfer a design to a wall?
The right method depends on three things: wall size, detail level, and whether you’re painting over the design or applying vinyl. A grid is often the most accurate and the cheapest. A projector is often the fastest for anything with curves or lettering. A pounce pattern is often a good compromise for repeatable work on big walls.
A grid transfer divides the source image and the wall into matching squares. Scaling stays proportional because each wall square is the same multiple of its sketch counterpart. Drift is caught square by square, so small errors stay local instead of compounding across the surface. The method needs no power and no equipment beyond a pencil and a straightedge.
The trade-off is time. Gridding a large sketch can take a long time before you’ve touched a brush. That hour buys you accuracy no other method gives you without a projector when you compare a how to transfer a design to a wall.
For vinyl wallcoverings, the “transfer” is the installation itself. The design is already printed. What you’re transferring is the panel layout, and that’s where manufacturers diverge on overlap, primer, and temperature.
The tools for each method
- Grid: a long straightedge, a measuring tape, a spirit level, and a 2H pencil. Nothing else.
- Projector: a digital projector, a stable tripod, an extension cord, and something to dim the windows. Blackout cloth works fine.
- Pounce: a pounce bag (charcoal or chalk), a pricking tool, and masking tape. A wheel with a small spike is faster than a needle.
- Vinyl install: a felt-tip squeegee, a RollePro for texture, a heat gun for edges and seams, and 9mm snap-off blades for trimming.
| Method | Best for | Weakness | Setup effort |
|---|---|---|---|
| Grid | Accuracy on a budget | Slow on detailed work | Moderate, all manual |
| Projector | Speed, large walls | Needs power and dim light | Low once aligned |
| Pounce | Repeatability, big walls | Outlines only | Moderate, needs pounce bag |
The Grid Method: Slow, Cheap, and Still the Most Accurate
Gridding is the method most muralists learn first and go back to when a projector fails. It works because proportional scaling is simple math: every square on the sketch maps to one square on the wall, and the ratio stays constant.
The pencil line on a primed wall is faint and easy to lose. Use a 2H pencil and don’t press hard. A soft pencil smears under your hand and turns into a gray haze you’ll paint over anyway, so the how to transfer a design to a wall question starts here.
How to set up the grid
- Number the sketch squares so you can work in order and check your progress.
- Draw the same number of squares on the wall with a pencil and a long straightedge.
- Sketch the contents of each square on the wall, one at a time.
- Step back every few squares to check the whole thing still reads correctly.
Skipping step 4 is how you end up with a mural that looks right up close and wrong from across the room. I’ve done it. The fix is annoying.
Where the grid fails
The grid fails on very large walls with tight curves. The squares get too big to control, and you lose the line where the curve should be smooth. That’s when a projector or a pounce pattern wins.
The Projector Method: Fast, But Not a Shortcut
I once transferred a mural onto a garage wall using a projector and started painting the trees first because trees are fun. By the time I got to the sky my arm was shot, and the top half looked like it belonged to a different painting than the bottom half. That’s the mistake I see most: details first, energy gone by the time you reach the big shapes.
A projector doesn’t fix that. It just makes it faster to trace the wrong thing first.
A projector fan whines in a quiet room. If you can hear it from the doorway, you’ll hear it for the whole session.
Projector setup that actually works
- Align the projector before you trace anything. A bumped tripod mid-mural means re-aligning from scratch.
- Trace only the major outlines. You don’t need every detail; you need the big shapes.
- Work in sections from large to small, the same order you’d use with a grid.
- Check alignment at the corners before you start painting, not after.
Treat the projector as a grid that draws itself. Same discipline, faster setup.
I won’t start a wall over a doorway without a grid on the sketch. Projectors drift when the tripod gets bumped, and re-aligning mid-mural is worse than the hour it takes to draw the grid up front.
The Pounce Pattern: For Big Walls and Small Budgets
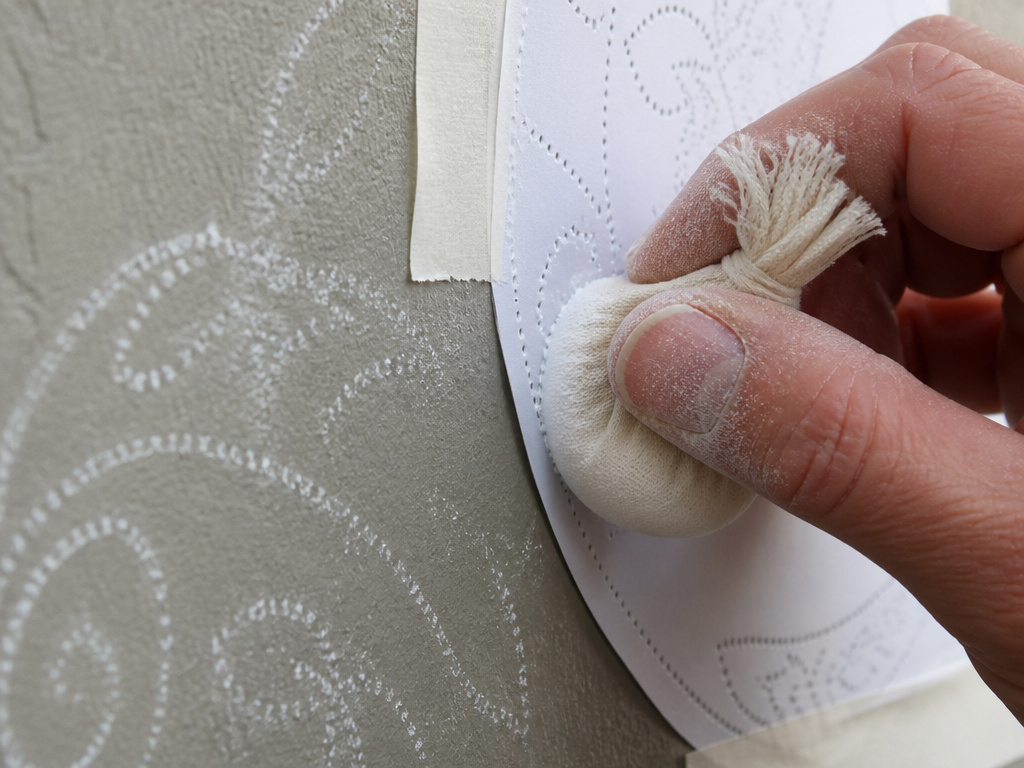
Pounce patterns are the oldest transfer method still in daily use. You prick holes along the lines of your sketch, tape the sketch to the wall, and dab charcoal or chalk through the holes with a pounce bag. The result is a dotted outline you connect with paint.
It’s slow. It’s dusty. It works when nothing else does.
The pounce bag leaves a fine chalk dust on your fingers and a dotted outline on the wall. If your hands stay clean, you’re not pouncing hard enough.
Grid the sketch in squares you can count at a glance. If you have to squint to find square 47, your squares are too small and your lines are already drifting.
Pounce wins on repeatability. If you’re painting the same design on three walls, you prick once and pounce three times.
Wall Prep Before Any Transfer: The Numbers That Actually Matter
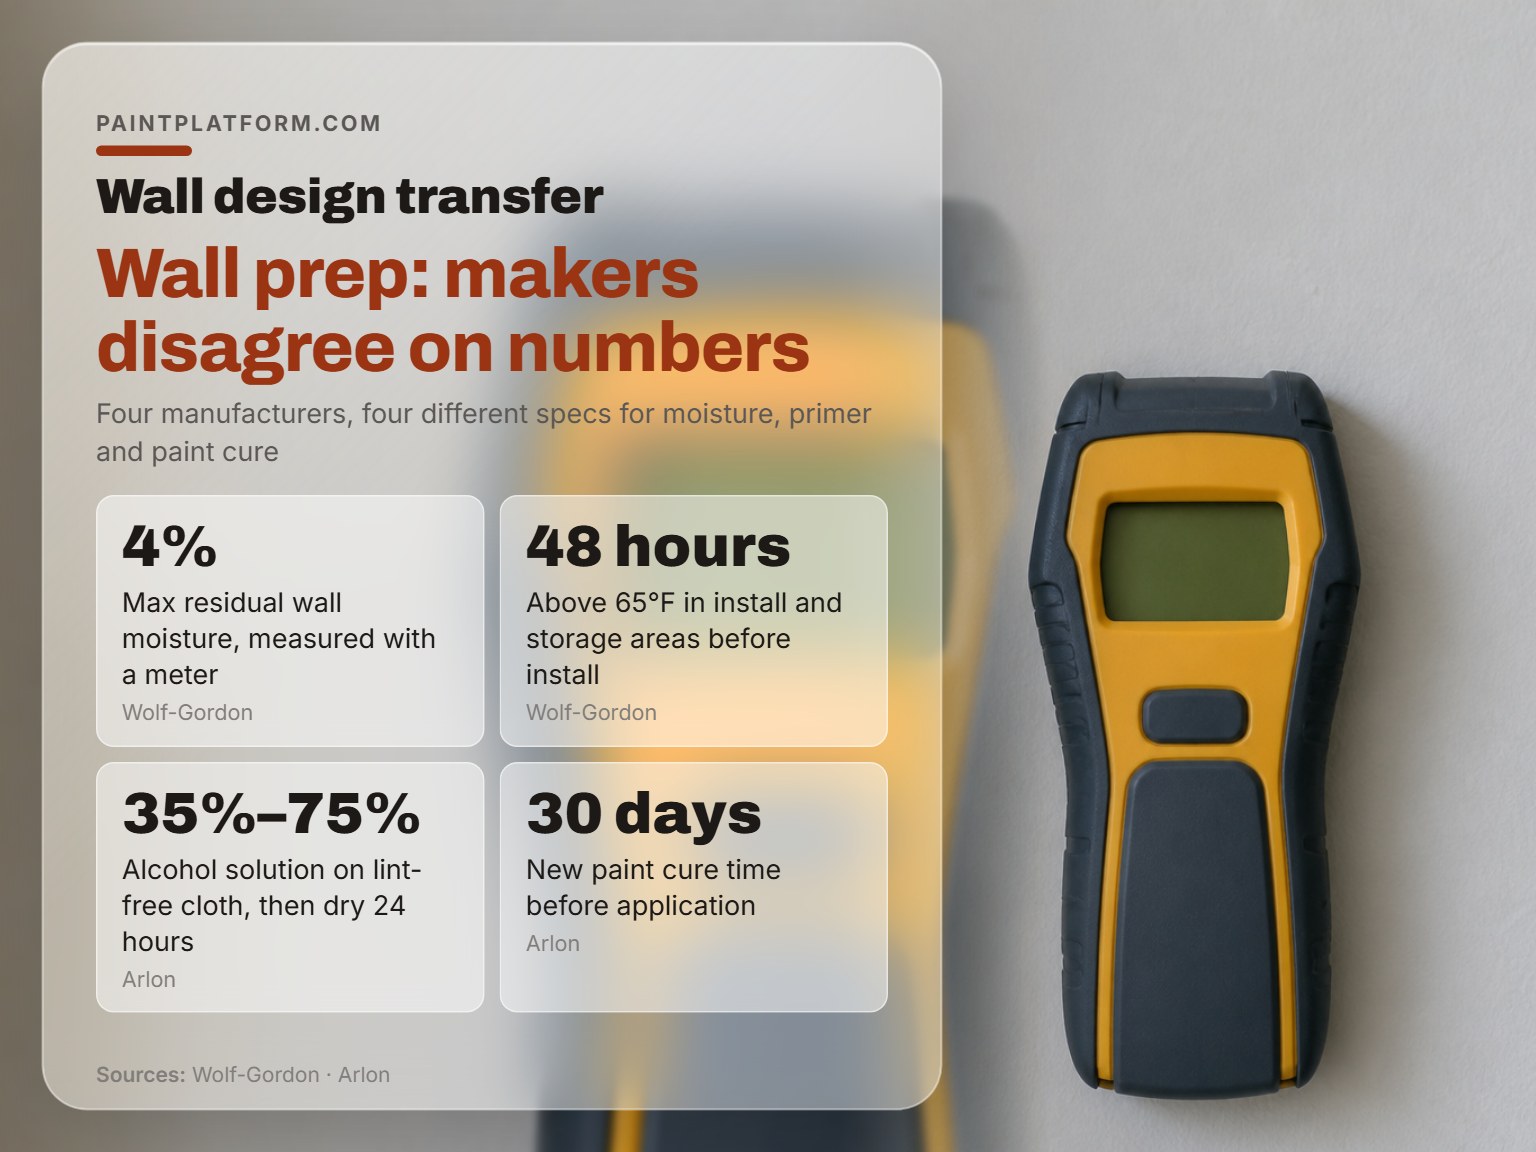
Every manufacturer agrees the wall has to be clean, dry, and structurally sound. They disagree on almost everything else.
Before you start: Solvent-based primers and adhesives need ventilation, and a ladder on a painted floor needs a drop cloth under every foot. Wear nitrile gloves when you handle adhesive; it doesn’t wash off with soap and water.
Here’s where the specs diverge:
| Manufacturer | Moisture limit | Primer stance | Paint cure time |
|---|---|---|---|
| Wolf-Gordon | 4% residual | Mandatory | Not stated |
| Arlon | Check for moisture | Optional | 30 days |
| Avery Dennison | Watch condensation zones | Compatible with topcoat | 5 days |
| 3M | Not stated | Not stated | Follow paint maker, up to 30 days |
Three of the four sources give a different paint cure time. That’s not a rounding error. Each source is writing for a different paint, and the manufacturer who makes the paint is the one who actually knows.
Wolf-Gordon’s number is the strictest: 4% residual moisture measured with a moisture meter, and above 65°F in both the installation and storage areas for at least 48 hours before install.
Arlon’s cleaning spec is the most specific: a 35% to 75% alcohol solution on a lint-free cloth, then 24 hours to dry before you touch the wall again. Arlon also warns that a higher concentration of alcohol may react badly with some paints.
Avery Dennison is the most lenient on cleaning: a clean lint-free towel is enough for most interior painted drywall. Save the commercial synthetic cleaner for surfaces that aren’t drywall.
3M’s bulletin is the most honest about the limits: paint formulations are protected by trade secrets, so no film maker can guarantee a universal prep rule. Test every wall.
How long should you wait before transferring to a freshly painted wall?
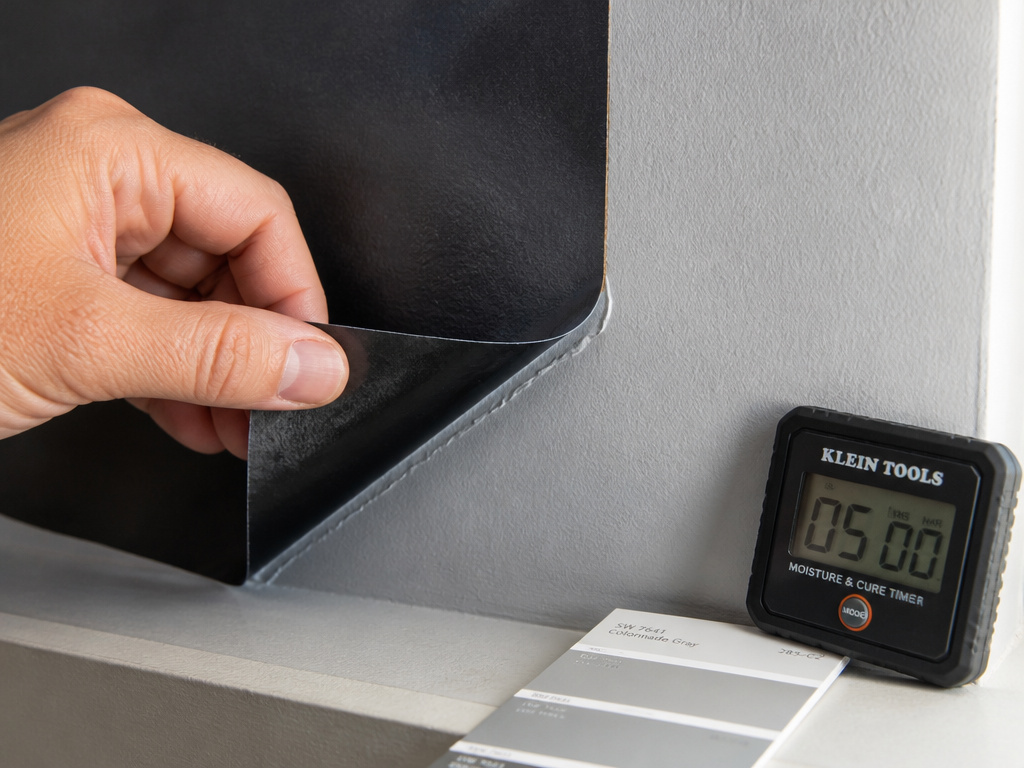
The short answer: longer than you want to. Avery Dennison says at least 5 days. Arlon says 30 days. 3M says follow the paint manufacturer’s stated cure time, which can run as long as 30 days.
Common mistake: Applying vinyl or paint over a wall that’s still curing. 3M’s bulletin says cure time can run as long as 30 days, and film applied early lifts, bubbles, and fails before it ever fully bonds.
The reason is outgassing. Paint releases gas as it cures, and if you seal it under a film or a heavy coat of paint, the gas has nowhere to go. It pushes up, and the film lifts.
Fair warning: I’ve waited 30 days exactly once, and the wall was fine. I’ve also rushed it at 5 days on a low-VOC paint and watched the bottom edge of a panel curl inside a week.
Where the manufacturers disagree (and why it matters)
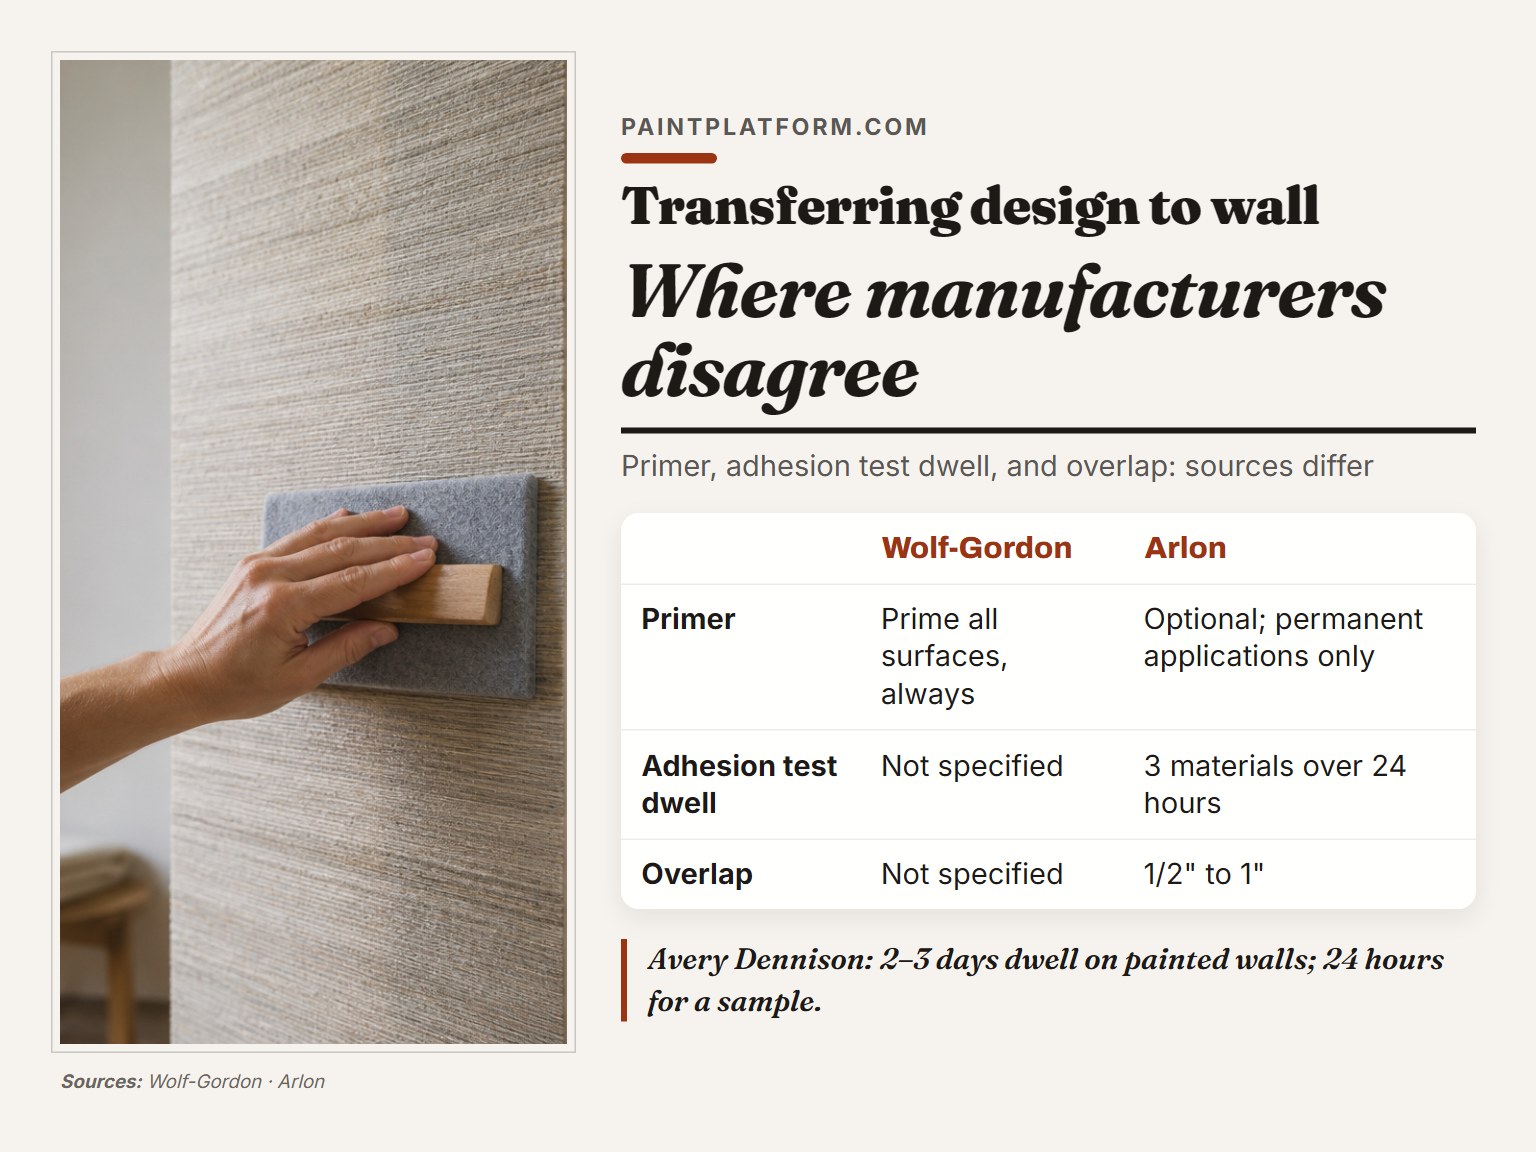
Each manufacturer is writing for a different job, and their numbers show it. The stricter the source, the more likely it’s writing for a permanent installation. The more lenient the source, the more likely it’s writing for a removable graphic.
- Primer: Wolf-Gordon says prime everything, always. Arlon says primer is optional and only worth it in permanent applications where removal damage is a concern. Both are right for their products.
- Adhesion test dwell: Arlon says test 3 materials simultaneously over 24 hours. Avery Dennison says 2-3 days for a painted wall, but also says 24 hours for a sample. Split the difference and check at 24 hours, then again at day 3.
- Overlap: Wolf-Gordon specifies 5/8″ on joining edges. Arlon recommends 1/2″ to 1″. Follow the manufacturer whose material you’re actually using.
- Matte paint: Avery Dennison says don’t use matte. 3M says films historically adhered best to semi-gloss but now require testing on every painted wall, which doesn’t rule out matte.
Where this goes sideways: Assuming one manufacturer’s numbers apply to another’s material. Wolf-Gordon’s 4% moisture ceiling and Arlon’s 35-75% alcohol wipe come from different product lines, and mixing them is how installers get blamed for a failure that wasn’t theirs.
Wolf-Gordon’s panel geometry is the most specific of the four: each panel overlaps 5/8″ on joining edges, with 3″ added to the left edge of the first panel and 2″ added top and bottom. Pattern drift allowance is 1/4″ up or down. Seams stay at least 6″ from any corner.
For vinyl on smooth walls, 3M recommends a film with overlaminate 8519 (luster) or 8520 (matte). For textured walls, IJ8624 with overlaminate 8524, or 480Cv3 with overlaminate 8548G.
Frequently Asked Questions
Can I transfer a design to a wall without a projector or a grid?
Yes, but you’ll need a pounce pattern or a stencil. Pounce patterns work for outlines; stencils work for repeated shapes. Both are slower than a grid for one-off work but faster for repeatable designs.
Do I need to prime the wall before transferring a design?
Wolf-Gordon says yes, always. Arlon says it’s optional. Wolf-Gordon says prime all surfaces, while Arlon says primer is optional and only worth it in permanent applications where removal damage is a concern. Arlon treats primer as optional for removable graphics on a clean, painted wall, while Wolf-Gordon still calls for priming all surfaces.
How do I know if my wall is too damp for a transfer?
Use a moisture meter. Wolf-Gordon’s threshold is 4% residual moisture content. If you don’t have a meter, look for condensation near AC units, water pipes, or overhead windows, and check for soft spots or bubbling paint.
What’s the best way to transfer a design to a ceiling?
The same methods work, but gravity changes the setup. A projector needs to be mounted low and angled up, which distorts the image. A grid is more reliable for ceilings. A pounce pattern works if you can tape the sketch up without it falling.
Can I use a wall stencil instead of a full transfer?
Yes, for repeated shapes or simple designs. A custom wall stencil is faster than a full grid for borders, patterns, and lettering. For a one-off mural with curves, a grid or projector is still faster.
The Bottom Line
The method you pick matters less than the prep you do before it. A perfectly gridded design on a damp wall will fail. A sloppy pounce pattern on a properly cured wall will hold.
If you want one rule: test the wall before you commit to anything. Tape a small strip of your material to an inconspicuous spot and leave it for 24 hours per Arlon, or 2-3 days per Avery Dennison. If it lifts, you have a prep problem, not a transfer problem.
Start small and stay curious. The wall will tell you what it needs.
