
How to Choose Paint for Concrete Floors: Step-by-Step
This post contains affiliate links. As an Amazon Associate, we earn from qualifying purchases.
To choose paint for concrete floors, test the slab for moisture before you shop, then match the coating to the traffic and chemicals that floor will see. New concrete needs a minimum 28-day cure, and Rust-Oleum’s EpoxyShield 1-Part only applies between 60-85 F with humidity at or below 85 percent.
The moisture part is the one that gets skipped, and it’s the reason a floor coating peels in sheets after it looked perfect for a while. Concrete is an alkali sponge. Water moves up through it from below, and a film that can’t handle that vapor blisters from the inside out. Everything else here sits on top of that one fact, which is why how to choose paint for concrete floors starts with the moisture.
What follows is the order I’d actually work in: slab test, coating choice, prep, then the weather window. Plus the two places where the published standards flat-out disagree with each other, because you’ll walk straight into both of them.
Key Takeaways
- Tape a plastic square to the slab first. If condensation forms under it, no coating goes down until the moisture question is answered.
- New concrete needs 28 days of cure before Rust-Oleum EpoxyShield 1-Part or any comparable film-forming coating.
- 60-85 F, humidity at or below 85 percent, and a surface at least 5 F above the dew point. Outside that window the cure goes wrong.
- Exterior floors want an aliphatic urethane topcoat, not a second epoxy coat, according to UFC 3-190-06.
What Kind of Floor Are You Actually Coating?
Answer that before you look at a single can, because how to choose paint for concrete floors depends on it. A basement slab and a garage slab are two different problems wearing the same gray surface.
A concrete slab is an alkaline substrate. Acids attack it, and most foods and juices are acidic, so a coating specification has to name the chemical, its concentration, how long it sits, and at what temperature. SSPC Guide 26 treats those four values as the minimum basis for resin selection.
Run through the list honestly and half the product shelf eliminates itself:
- Will tires park on it? Hot rubber pulls at a weak film in a way foot traffic never does.
- Does it see daylight? UV exposure changes what the topcoat should be, not just what color you pick.
- What actually spills there? Road salt, brake fluid, wine, and citrus each need a different answer, per the chemical tables in SSPC Guide 26.
- Is it heated? A cold slab holds moisture longer and slows every cure.
- Will anything heavy hit it? Impact is its own category, and it’s the one people forget.
That last point matters more than it sounds. SSPC Guide 26 §5.2.4 notes that in high-impact areas, thin, highly crosslinked rigid coatings chip and can powder the concrete beneath them, causing delamination even where there’s no visible chip. The fix is a high-build aggregate system, which is a different product class entirely.
So the question isn’t “what’s the best concrete floor paint.” It’s “what does this slab do all day.” Answer that and the rest narrows fast.
The Moisture Test That Decides Everything
Two tests tell you whether the slab is safe to coat, and both cost less than the paint you’d waste guessing.
The cheap one is a plastic sheet, and it’s an actual standard: ASTM D4263, the test method for indicating moisture in concrete by the plastic sheet method. The numeric one is ASTM F1869, which measures moisture vapor emission rate using anhydrous calcium chloride. Both are referenced in UFC 3-190-06 Appendix C as the methods to use before you coat.
Here’s the low-tech version I use first, because it’s quick and tells you whether to bother with the sheet at all. Splash a little water on the slab. If it beads up and sits there, the surface is sealed or saturated and it isn’t ready. If it soaks in quickly, you’re in business. That one trick has saved me more grief than any product I’ve bought.
The Plastic Sheet Test, Step by Step
- Clean and dry a test patch in the open middle of the floor, away from walls and doors. Skip the cleaning and you’re testing dust, not the slab.
- Tape a square of clear plastic down on all four edges. Any gap lets room air move under it, and the reading means nothing.
- Leave it sealed and check the next morning. A quick peek tells you nothing, because vapor moves slowly.
- Look at the underside and the concrete beneath it. Beads of water or a dark damp patch mean vapor is pushing up through the slab.
- If it’s dry, run the calcium chloride test (ASTM F1869) for a number you can hand to a coating rep. A number settles arguments that a plastic square can’t.
SSPC Guide 26 §5.1 adds the piece most homeowners never hear: new slabs that will receive low-permeance coatings should have a vapor retarder installed below slab-on-grade. Existing slabs without one have to be moisture-tested before any moisture-sensitive system goes on.
If water beads on the slab and sits there, stop. No can on the shelf fixes a slab that’s still pushing vapor.
This is also where the sources disagree, and it’s worth knowing both positions. UFC 3-190-06 describes waterborne latex as a “breathing film” that is normally less affected by moisture in the concrete than non-breathing systems. SSPC Guide 26 takes the harder line: low-permeance systems may not tolerate high vapor emissions at all, and existing slabs without a vapor retarder must be tested first. Same risk, two different postures. Test either way.
Matching the Coating to the Job
Rust-Oleum EpoxyShield 1-Part Concrete Paint is a common choice for garage floors, and its technical data sheet lists MPI #127 certification. That’s worth knowing, because the name says epoxy and the chemistry says water-based acrylic.
Here’s the landscape in one place:
| Coating | Best for | Main weakness |
|---|---|---|
| Two-part epoxy | Garages, shops, harsh service | Low permeance, needs a dry slab |
| Waterborne acrylic (EpoxyShield 1-Part) | Basements, patios, light traffic | Thin build, not for moisture problems |
| Alkyd / oil-based | Contested on concrete (see below) | Alkalinity can break down the binder |
| Penetrating stain | Driveways, walks, no film to peel | No build, shows every patch |
| Aliphatic urethane | Exterior topcoat over epoxy | Topcoat only, never a standalone floor |
More film means more protection and less breathability.
EpoxyShield 1-Part carries MPI #127 certification and covers 200-240 square feet per gallon at the recommended 3.0-3.5 mils dry film thickness. It’s not intended for unsound previous coatings or floors with a moisture problem, which is exactly why the test above comes first. If you want the deeper epoxy concrete paint comparison, that’s a separate rabbit hole.
For a basement where the traffic is feet rather than tires, I’d reach for a waterborne acrylic before I’d open a two-part kit. A one-part waterborne acrylic sits in the same lane if you want a second option to price against. Neither one is the right call on a slab that failed the plastic sheet test.
Epoxy vs. Waterborne Acrylic: Which Wins Where
Epoxy wins on a garage floor that sees hot tires and dropped tools. Waterborne acrylic wins on a basement, a covered porch, or a patio where the slab is dry and the traffic is soft. If the slab has any moisture question hanging over it, neither one wins until you’ve tested.
The concrete sealer vs paint question is a different fork in the road entirely, and worth settling before you commit to a film-forming product at all.
Now the disagreement. Oil-based and alkyd floor paint is where published guidance splits cleanly. UFC 3-190-06 §A-2.2.1 states it plainly: do not apply alkyd and other oil-based coatings directly to concrete or masonry surfaces, because the alkalinity in the concrete will hydrolyze the binder and cause the coating to peel. §A-2.3.1 repeats the ban, while retail how-to pages from the big home centers still recommend oil-based paint for concrete floors. Retail how-to pages from the big home centers still recommend oil-based paint for concrete floors, usually to cover surface imperfections.
Both positions exist in print, and I’m not going to pretend one of them doesn’t. My read: the UFC position is the one with a mechanism attached. Alkalinity breaking down a binder is chemistry, not a preference. That doesn’t make retail advice wrong on every slab, but it does mean an oil-based coat is a bet rather than a default. The American Concrete Institute coating selection guide is where I’d go before making that bet on anything larger than a porch.
Prep Is Where the Job Is Won
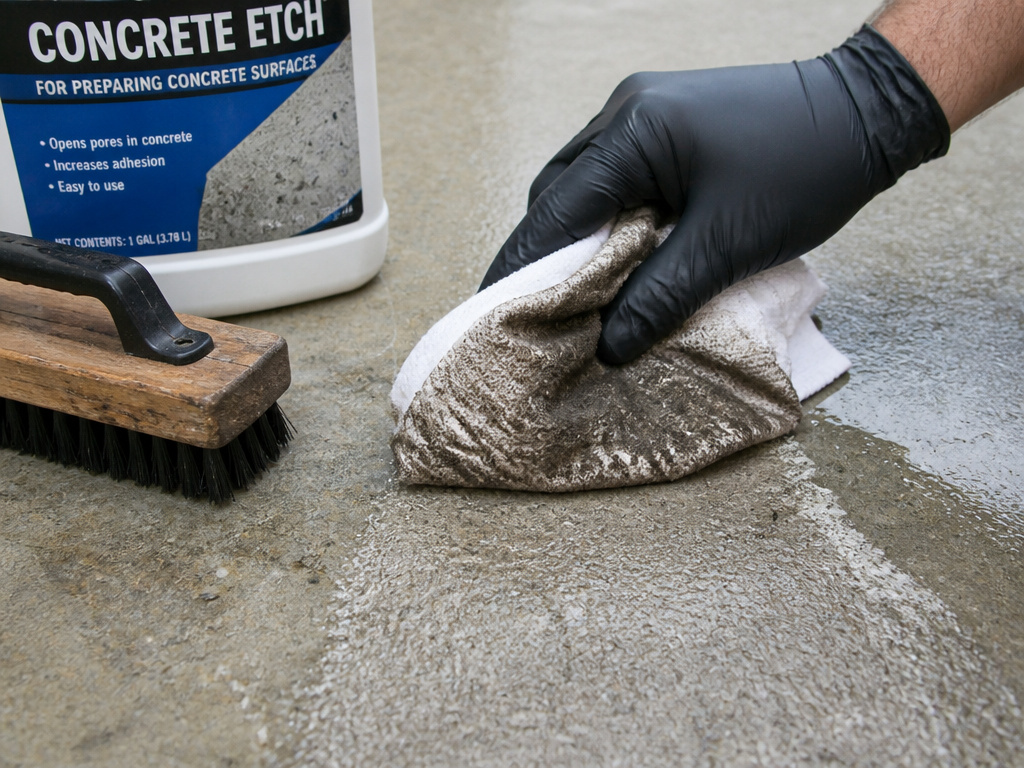
A garage floor looks clean until you drag a rag across it and the rag comes up gray-black, which is why how to choose paint for concrete floors starts with prep. That film is what your coating has to stick to.
Muriatic acid scared me, so the first floor I ever etched got Rust-Oleum Concrete Etch instead. Two rounds of scrubbing with a stiff brush, and the surface finally felt like sandpaper under my palm. That texture is the whole point. A slick slab gives paint nothing to grab, and you can feel the difference with your hand before you ever open the can.
Rust-Oleum’s own instructions put the etch after cleaning and rinsing, using Rust-Oleum Concrete Etch specifically. If the floor is already sealed, the sealer has to come off by grinding or shot blasting, and the whole surface gets scuff sanded for adhesion. There’s no chemical shortcut around a sealer.
Before you start: Scraping, sanding, or removing old paint can release lead dust, which is toxic and especially dangerous to children and pregnant women. Wear a NIOSH-approved respirator and clean up with a HEPA vacuum and a wet mop rather than a broom. Etch is acid, so gloves and eye protection go on before the jug opens.
The working checklist, in order:
- Sweep, then degrease. Oil spots that survive the wash show up as fisheyes in the finish, and no amount of topcoat hides them.
- Rinse until the water runs clear. Detergent residue kills adhesion as fast as grease does.
- Etch, then rinse again. Etch goes on after cleaning and rinsing, never before.
- Test any old coating on a small patch first. I tried a wire brush on a patch of painted brick once and it left scratches and shiny marks I couldn’t undo. Glad it was a patch.
- Let it dry completely. Damp concrete will fail a first coat faster than anything else on this list.
Small confession: I’ve rushed the dry time exactly once, and the finish clouded in patches that never cleared. Try the rag test on your own slab before you commit.
Why Does the Dew Point Matter More Than Air Temperature?
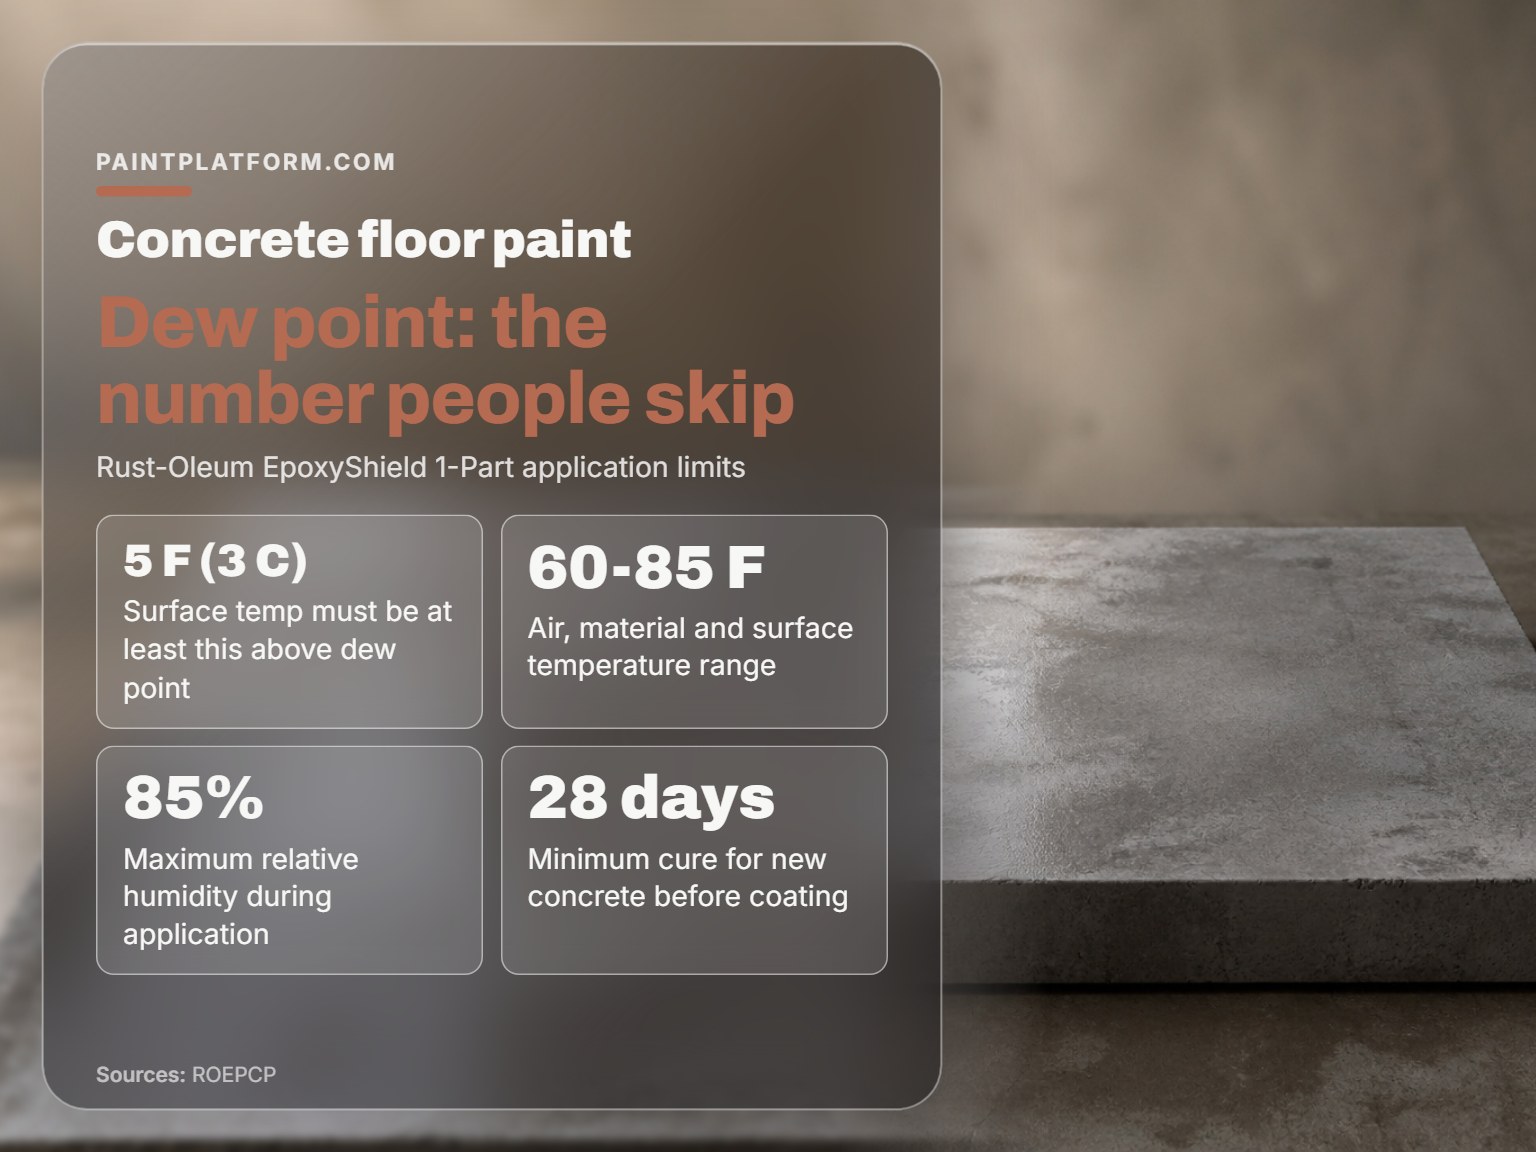
The weather window kills more floor coatings than bad paint does.
| Condition | EpoxyShield 1-Part spec | What goes wrong outside it |
|---|---|---|
| Air, material, surface temp | 60-85 F (15-29 C) | Film won’t coalesce and stays soft or powders |
| Surface temp vs. Dew point | At least 5 F (3 C) above | Condensation forms under the film |
| Relative humidity | 85 percent or below | Cure slows and the finish blushes |
| New concrete cure | Minimum 28 days | Trapped moisture pushes the film off |
| Dry film thickness | 3.0-3.5 mils per coat | Too thin wears through, too thick skins over |
The dew point line is the one people skip, so here’s the mechanism. If the slab surface is at or near the dew point, moisture condenses on it while you’re rolling. The coating then bonds to a film of water instead of to concrete, and the whole layer sits there waiting to lift. Air temperature can be perfectly fine while the slab is sweating.
Dry times at 70-80 F and 50 percent relative humidity run 12-16 hours for light foot traffic, 24 hours for regular foot traffic, and a full 7 days before a vehicle parks on it. That last number surprises people every time.
The 4×4 Rule and Why Roller Choice Matters
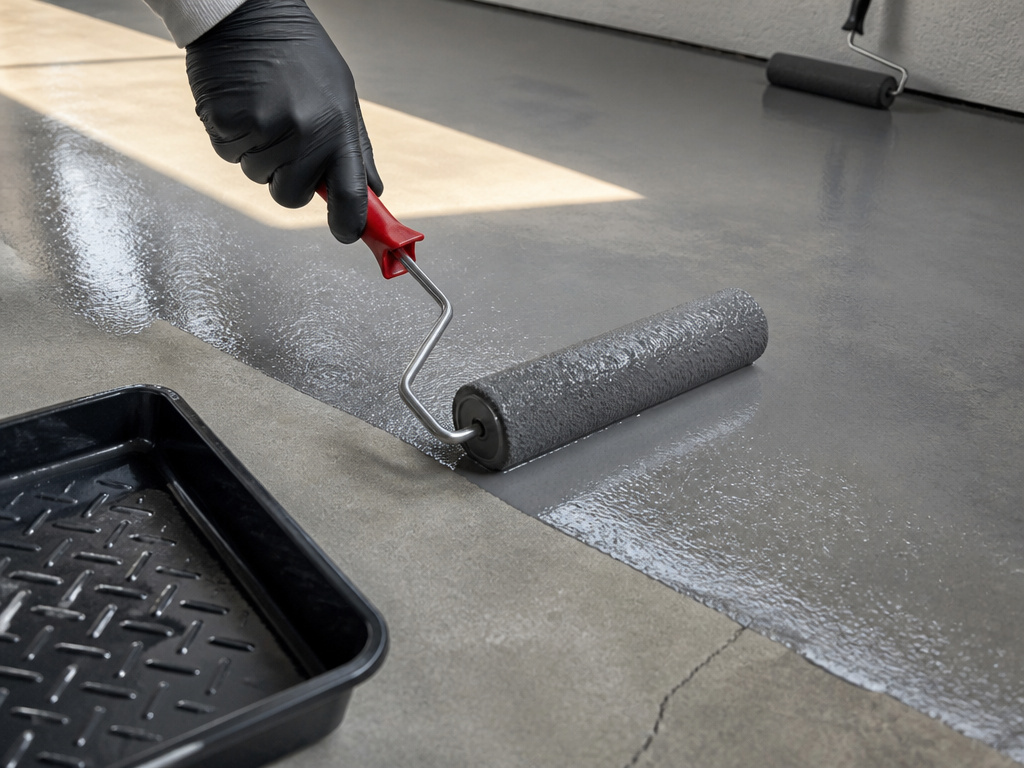
Rust-Oleum specifies a synthetic 1/2 inch nap roller cover on a 9 inch frame, and caps application at 4×4 foot sections at a time. That’s not fussiness. Past 4×4, the wet edge skins over before you get back to it, and you get lap marks and gloss differences you can’t roll out.
The paint rollers for concrete floors question matters less than the section size, honestly. A cheap roller with the right nap beats a premium roller with the wrong one.
Common mistake: Rolling the whole garage in one continuous pass. The wet edge dries behind you, the next pass grabs, and the lap marks are permanent once the film cures.
Do You Need a Primer and a Topcoat?
Aliphatic urethane is the phrase to remember if the floor sees sky.
UFC 3-190-06 §A-2.2.4 is direct about exterior work: use an aliphatic urethane finish coat in place of the third epoxy coat to get greater resistance to UV deterioration. §A-2.3.2 notes that a three-coat epoxy system gives good interior service in harsh and moderate environments, which is the interior case. SSPC Guide 26 §5.4 explains why: in general, the higher the degree of aromaticity in the polymer chemistry, the lower the UV stability.
So the generic “two coats of epoxy” advice you’ll read everywhere is an interior answer being applied to an exterior problem. The UFC 3-190-06 protective coatings manual is the document that overrides it.
When You Need a Primer and When You Don’t
A primer earns its place on a porous, broom-finished slab, on a floor with patches and repairs, or when you’re going from a dark existing color to a light one. A bonding primer is the one I’d start with in those cases.
On a sound, well-etched slab with EpoxyShield 1-Part, the data sheet says only one coat is necessary under most circumstances. Doubling up by default adds thickness, not protection. The concrete floor primer question is really a question about your slab, not about primers in general.
Slip, Chemicals, and the Details That Bite Later
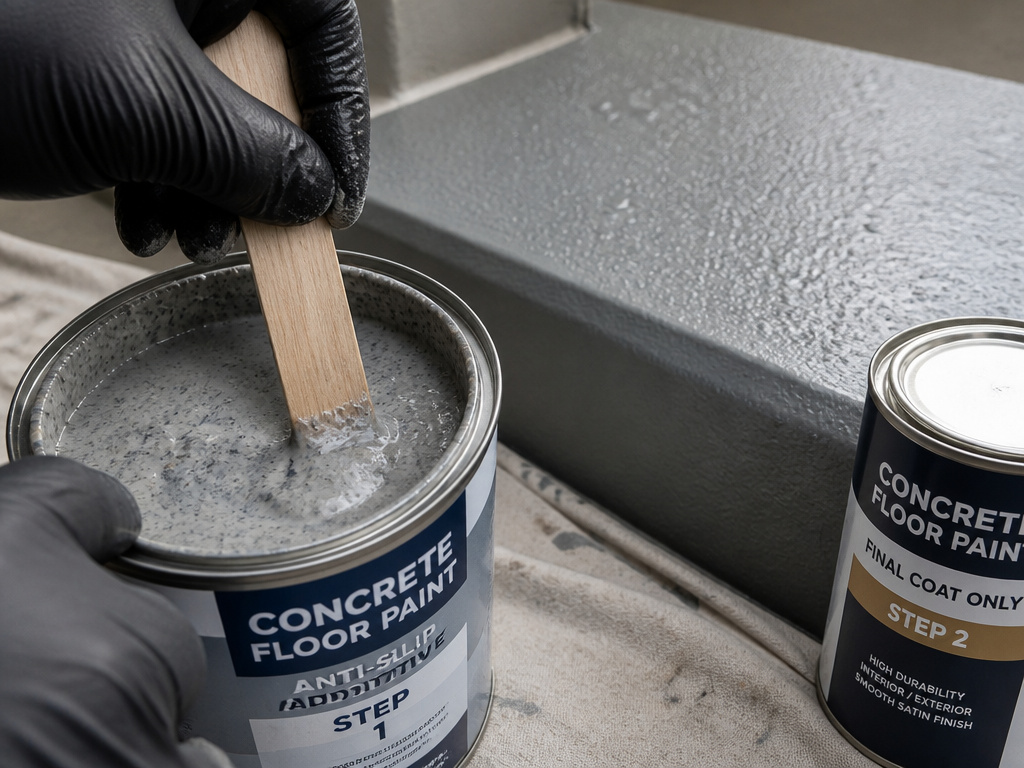
Three things wreck a finished floor: water on a slick film, the wrong chemical, and a coating that powders the concrete underneath it.
Start with slip. I mixed a little fine sand and grit additive into the final coat on a set of concrete steps, and without it the first rainy morning would have been a skating rink. I nearly became a cautionary tale on my own porch. If you’d rather buy the additive pre-blended, anti-slip paint is the shortcut.
Where this goes sideways: Stirring grit additive into the whole can instead of just the final coat. You get a floor that feels like sandpaper in July and traps dirt in every pass, and there’s no sanding it back to smooth.
Chemicals are next. SSPC Guide 26 §5.2.2 makes the point that concrete is an alkali substrate eroded by acids, and most foods and juices are acidic. A kitchen floor and a garage floor need different resin answers even though both are gray concrete. Antimicrobial versions exist too, but §5.2.7.4 is clear that the system has to be tested and certified to make that claim, and an effective cleaning routine still has to be in place. The best cleaners for painted concrete floors rundown covers what actually preserves a finish.
Two more details worth knowing before you buy. Where building codes require it, resinous flooring has to meet Class 1 flame and smoke development ratings per ASTM E648, per SSPC Guide 26 §5.2.7.2. And if the floor is an elevated slab over occupied space that stays wet, like a shower room or a parking garage, §5.2.7.3 calls for a waterproofing membrane under the flooring system, not just a coating on top.
The AMPP protective polymer flooring standard covers design, installation, and maintenance of these systems if you want the industry-level version of everything above.
One underrated option before you close the tab: a penetrating stain has no film to peel, and on a driveway or a walkway that’s a genuine advantage. UFC 3-190-06 §A-2.2.5 makes a similar case for linseed oil, which it lists as effective for sealing, waterproofing, and anti-spall protection where freezing temperatures cause damage.
Frequently Asked Questions
Can you paint concrete floors without etching?
You can, and it’s the most common reason a coating fails early. Etching opens the surface so a film-forming product has something to grip. Rust-Oleum’s instructions for EpoxyShield 1-Part call for etching with Rust-Oleum Concrete Etch after cleaning and rinsing. A sealed floor is a different problem entirely: the sealer has to come off by grinding or shot blasting.
How long should concrete cure before painting?
Minimum of 28 days for new concrete, per the Rust-Oleum EpoxyShield 1-Part technical data sheet. That’s the cure time before coating, not the dry time after. Coating a slab that’s still curing traps moisture under the film, and the film loses.
Is epoxy or latex paint better for a basement floor?
Latex and other waterborne acrylics are the more forgiving choice on a basement slab, because they form a thinner film and handle minor moisture movement better. Epoxy gives you more build and more chemical resistance. UFC 3-190-06 describes waterborne latex as a breathing film that is normally less affected by moisture in the concrete than non-breathing systems. Either way, test the slab first.
Why did my concrete floor paint peel?
Almost always moisture or prep, and usually both. Water vapor moving up through the slab lifts a low-permeance film from underneath, and grease or detergent residue stops the coating from bonding at all. SSPC Guide 26 §5.1 requires moisture testing on existing slabs that don’t have a vapor retarder below them.
Do you need a primer on a concrete floor?
Not always. On a sound, etched slab, EpoxyShield 1-Part’s data sheet says one coat is necessary under most circumstances. A primer earns its keep on porous or broom-finished concrete, on patched areas, or when you’re covering a dark floor with a light color.
The Bottom Line
Here’s the threshold I’d actually use: if the plastic sheet test comes up wet, stop shopping for paint. You have a moisture problem, and no product on the shelf solves it. Everything above assumes a dry slab.
The honest limitation on all of this is scale. This approach is built for a residential slab you can see and touch. If you’re coating a commercial kitchen floor, a washdown bay, or anything with a floor drain and daily chemical exposure, the chemical-resistance tables in ACI 515.2-24 matter more than anything here, and you want a coating rep on the phone rather than a paint aisle.
One stroke at a time, though. This week: tape down a square of plastic in the middle of the floor and check it tomorrow morning. That’s the entire first step, and it decides everything after it.
